Ever find yourself endlessly scrolling through landscape designs, saving hundreds of pins but feeling no closer to a decision? You’re not alone. That’s why we did the heavy lifting, filtering through countless options from high-end nurseries, big-box stores like Home Depot, and custom fabricators to bring you only what’s truly spectacular for 2026. Inside, you’ll find 27 curated ideas covering today’s most sought-after styles: modern desert oases, lush formal gardens, and cozy backyard retreats, with projects ranging from a few thousand dollars to well over $100,000. In 2026, the focus is on creating a genuine extension of your living space, where integrated kitchens and thoughtful lighting are the new standard. And stay until the end—we break down the most common mistakes that can ruin these looks. 📌 Save this to Pinterest for later—you’ll want to revisit these ideas.
1. Create a Resort Feel with a Multi-Level Pool and Patios
The magic here is in the masterful use of levels. Instead of one flat, sprawling space, the design creates distinct ‘rooms’ with different purposes. The upper covered patio is for shaded lounging, the lower patio is for sun-soaked conversation around the fire pit, and the pool is the active centerpiece. This zoning makes a large space feel both expansive and intimate. The repetition of the light-colored stone on retaining walls, steps, and patios unifies the entire multi-level design, preventing it from feeling chaotic despite the various zones.
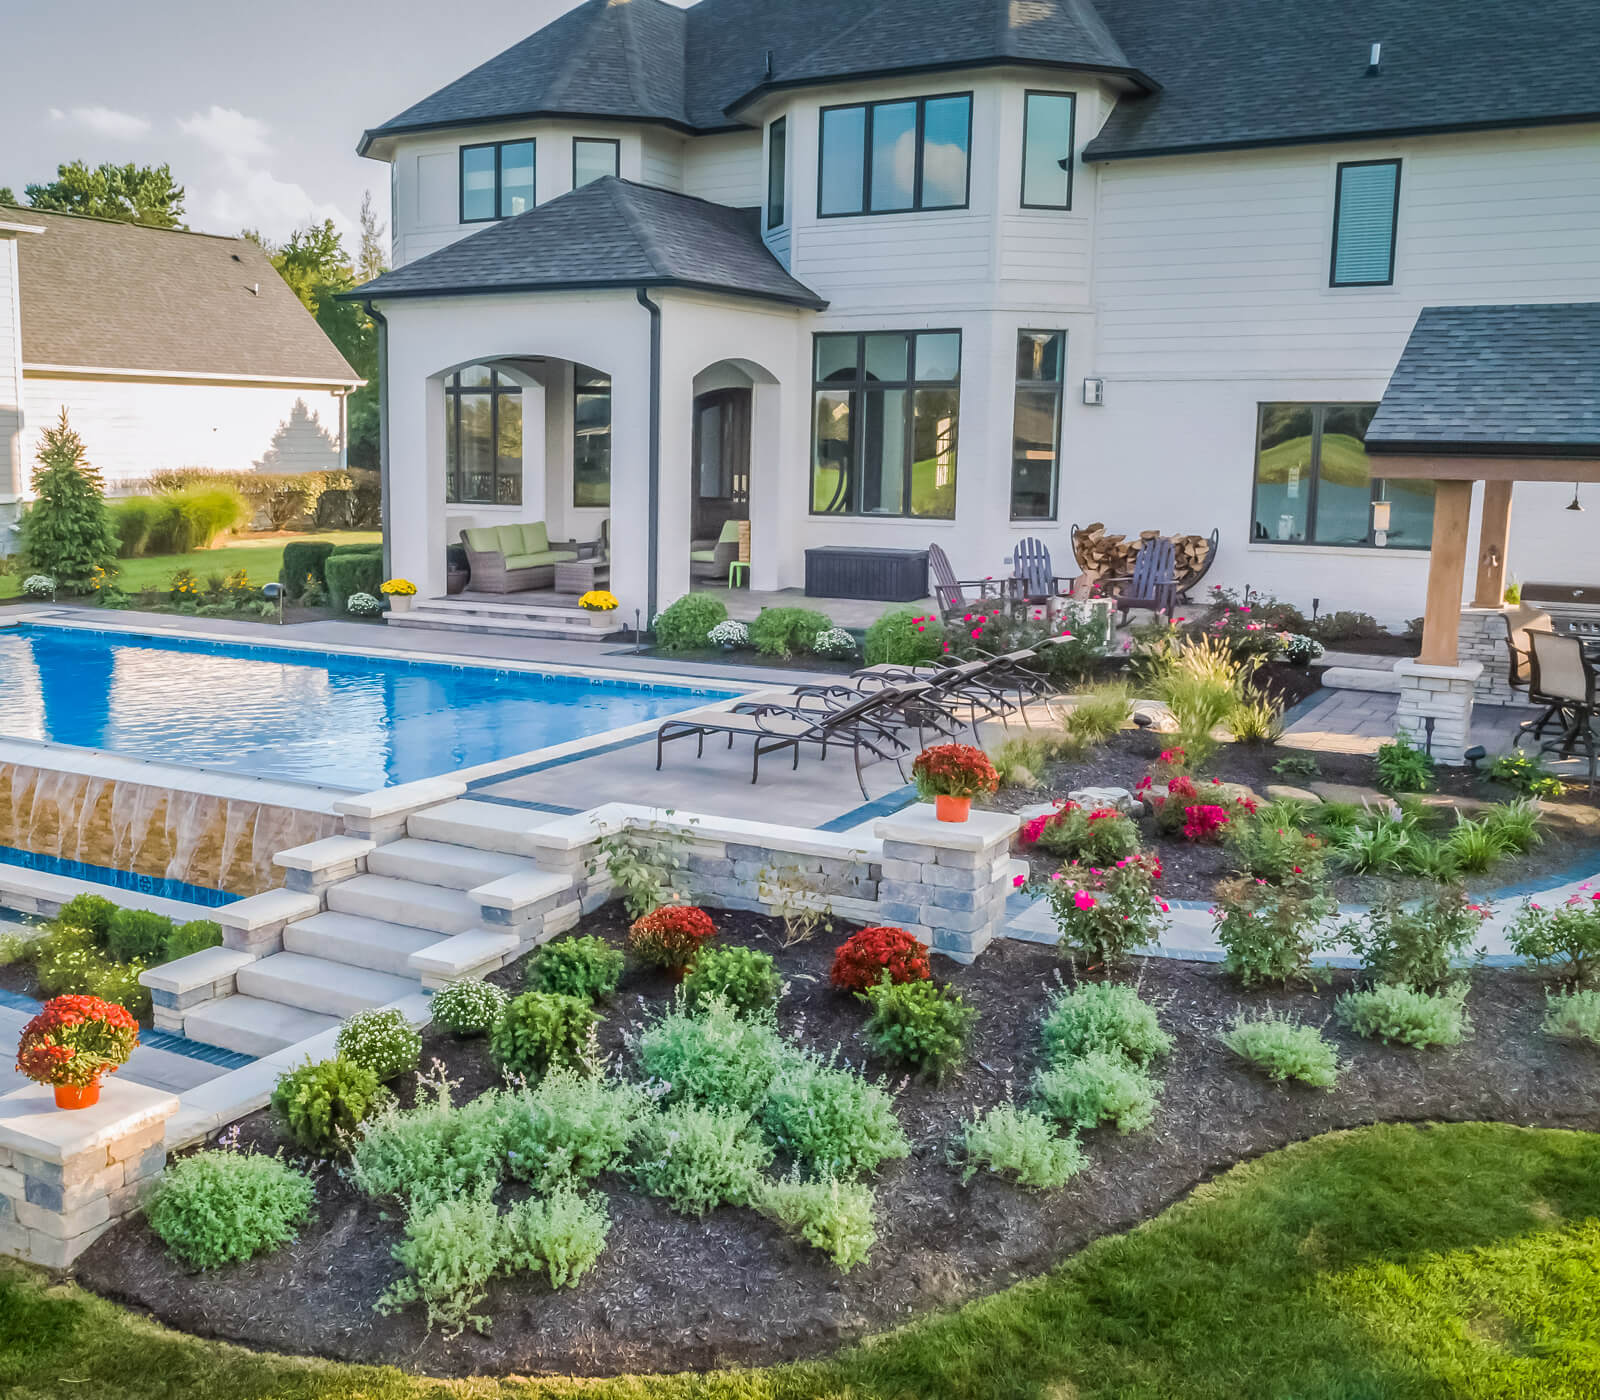
A design of this scale requires a significant amount of space. You’ll need a backyard of at least 5,000-7,000 square feet with a natural or man-made slope to achieve a similar multi-level effect without it feeling forced. A minimum width of 60-70 feet is ideal to accommodate a pool, generous patio space, and lush surrounding garden beds. The height difference between the top and bottom levels should be at least 4-6 feet to make the terracing feel intentional and impactful. This is a high-investment, large-scale project.
2. Embrace Serenity with a Modern Desert Pool and Mountain Views
When you have a stunning natural backdrop like these blue mountains, don’t compete with it—frame it. The key to this design is the low, horizontal profile of the house, pool, and hardscaping. To replicate this, ensure the top of your pool coping, patio edge, and any low walls create clean, uninterrupted horizontal lines. For the pop of color, choose one—and only one—vibrant accent. Here, the turquoise cushions are effective because they echo the pool water and stand out against the neutral tans without being distracting.
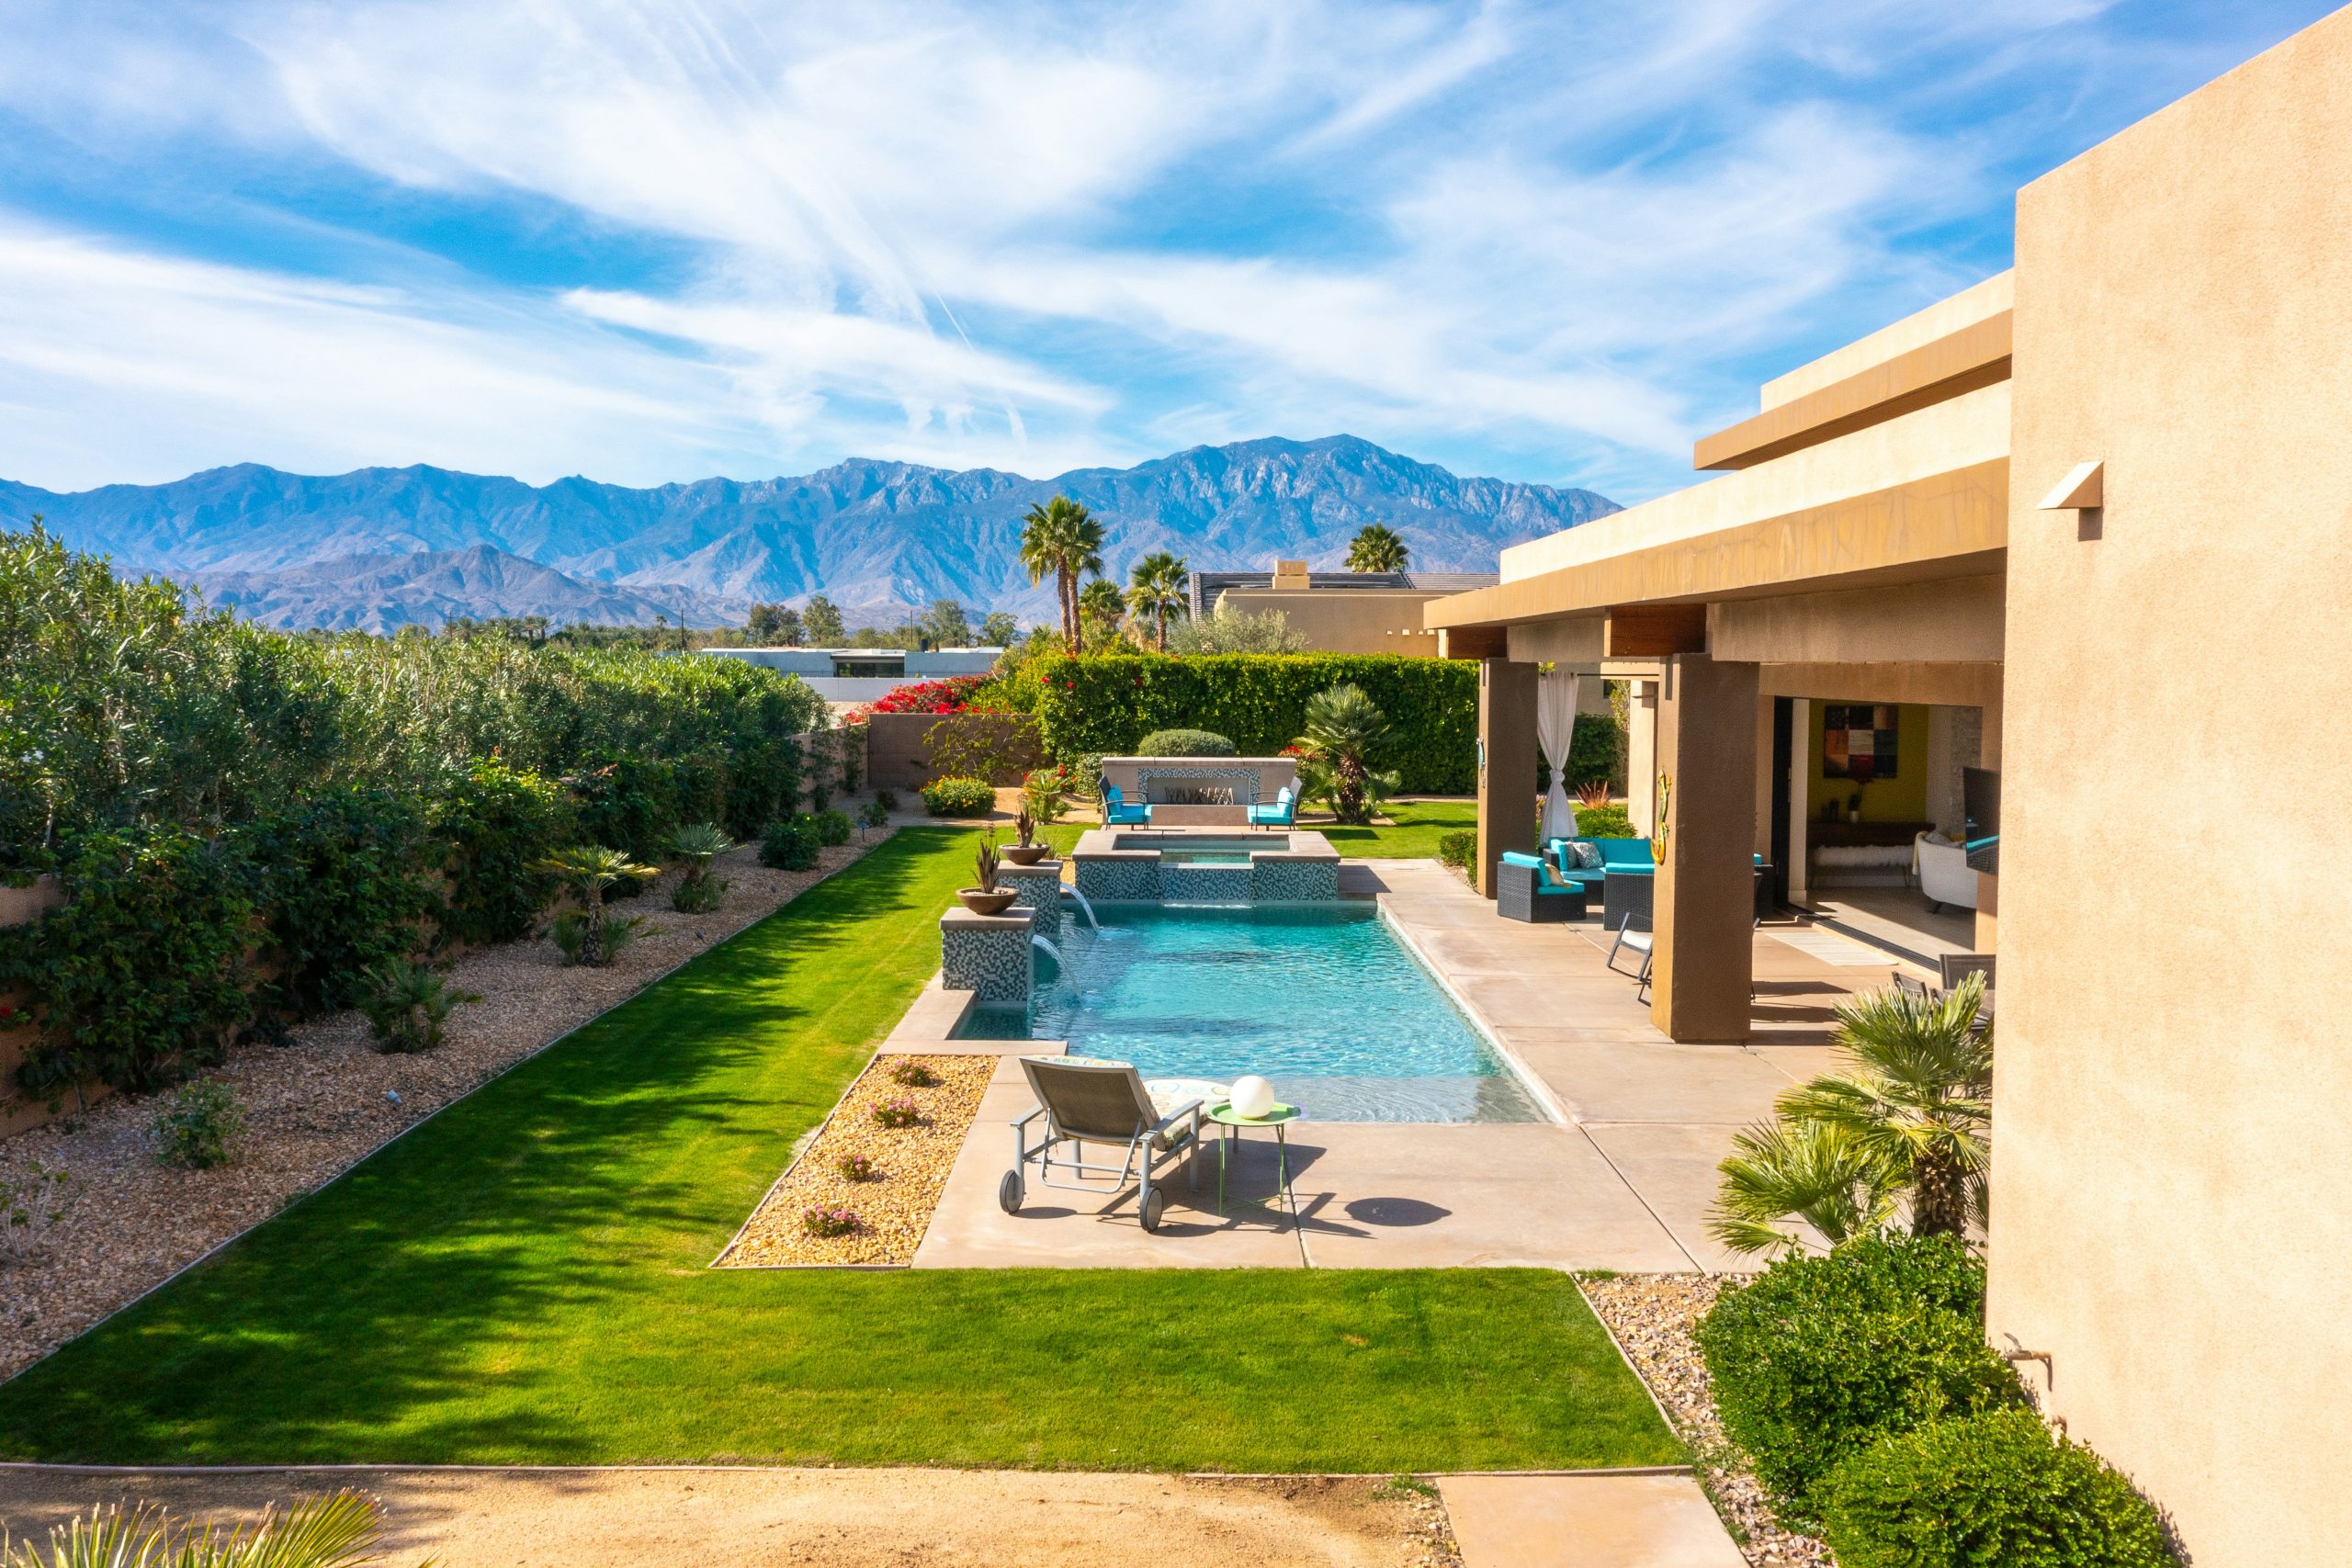
This look follows a clear formula: 60% neutral base (the tan stucco house, light concrete patio, and gravel), 30% natural blues and greens (the sky, pool water, and manicured lawn), and 10% high-impact accent (the vibrant turquoise cushions). You could easily swap the color palette while keeping the ratio. Imagine replacing the tan with a dark charcoal grey, the lawn with a darker native grass, and the turquoise with a fiery orange for a more dramatic, moody take on the same modern desert vibe.
3. Mix Gravel and Pavers for a Structured, Modern Pathway
The single element that makes this design work is the color and texture blocking. It’s not just a path; it’s a graphic composition. The smooth, light grey pavers create the walkway, the dark grey gravel provides a deep, textured border, and the light brown gravel offers a warmer, softer contrast. If this were all one material, it would be a simple backyard. The deliberate separation of materials turns a functional path into a piece of art. The spherical black planter acts as a perfect focal point, anchoring the entire scene.
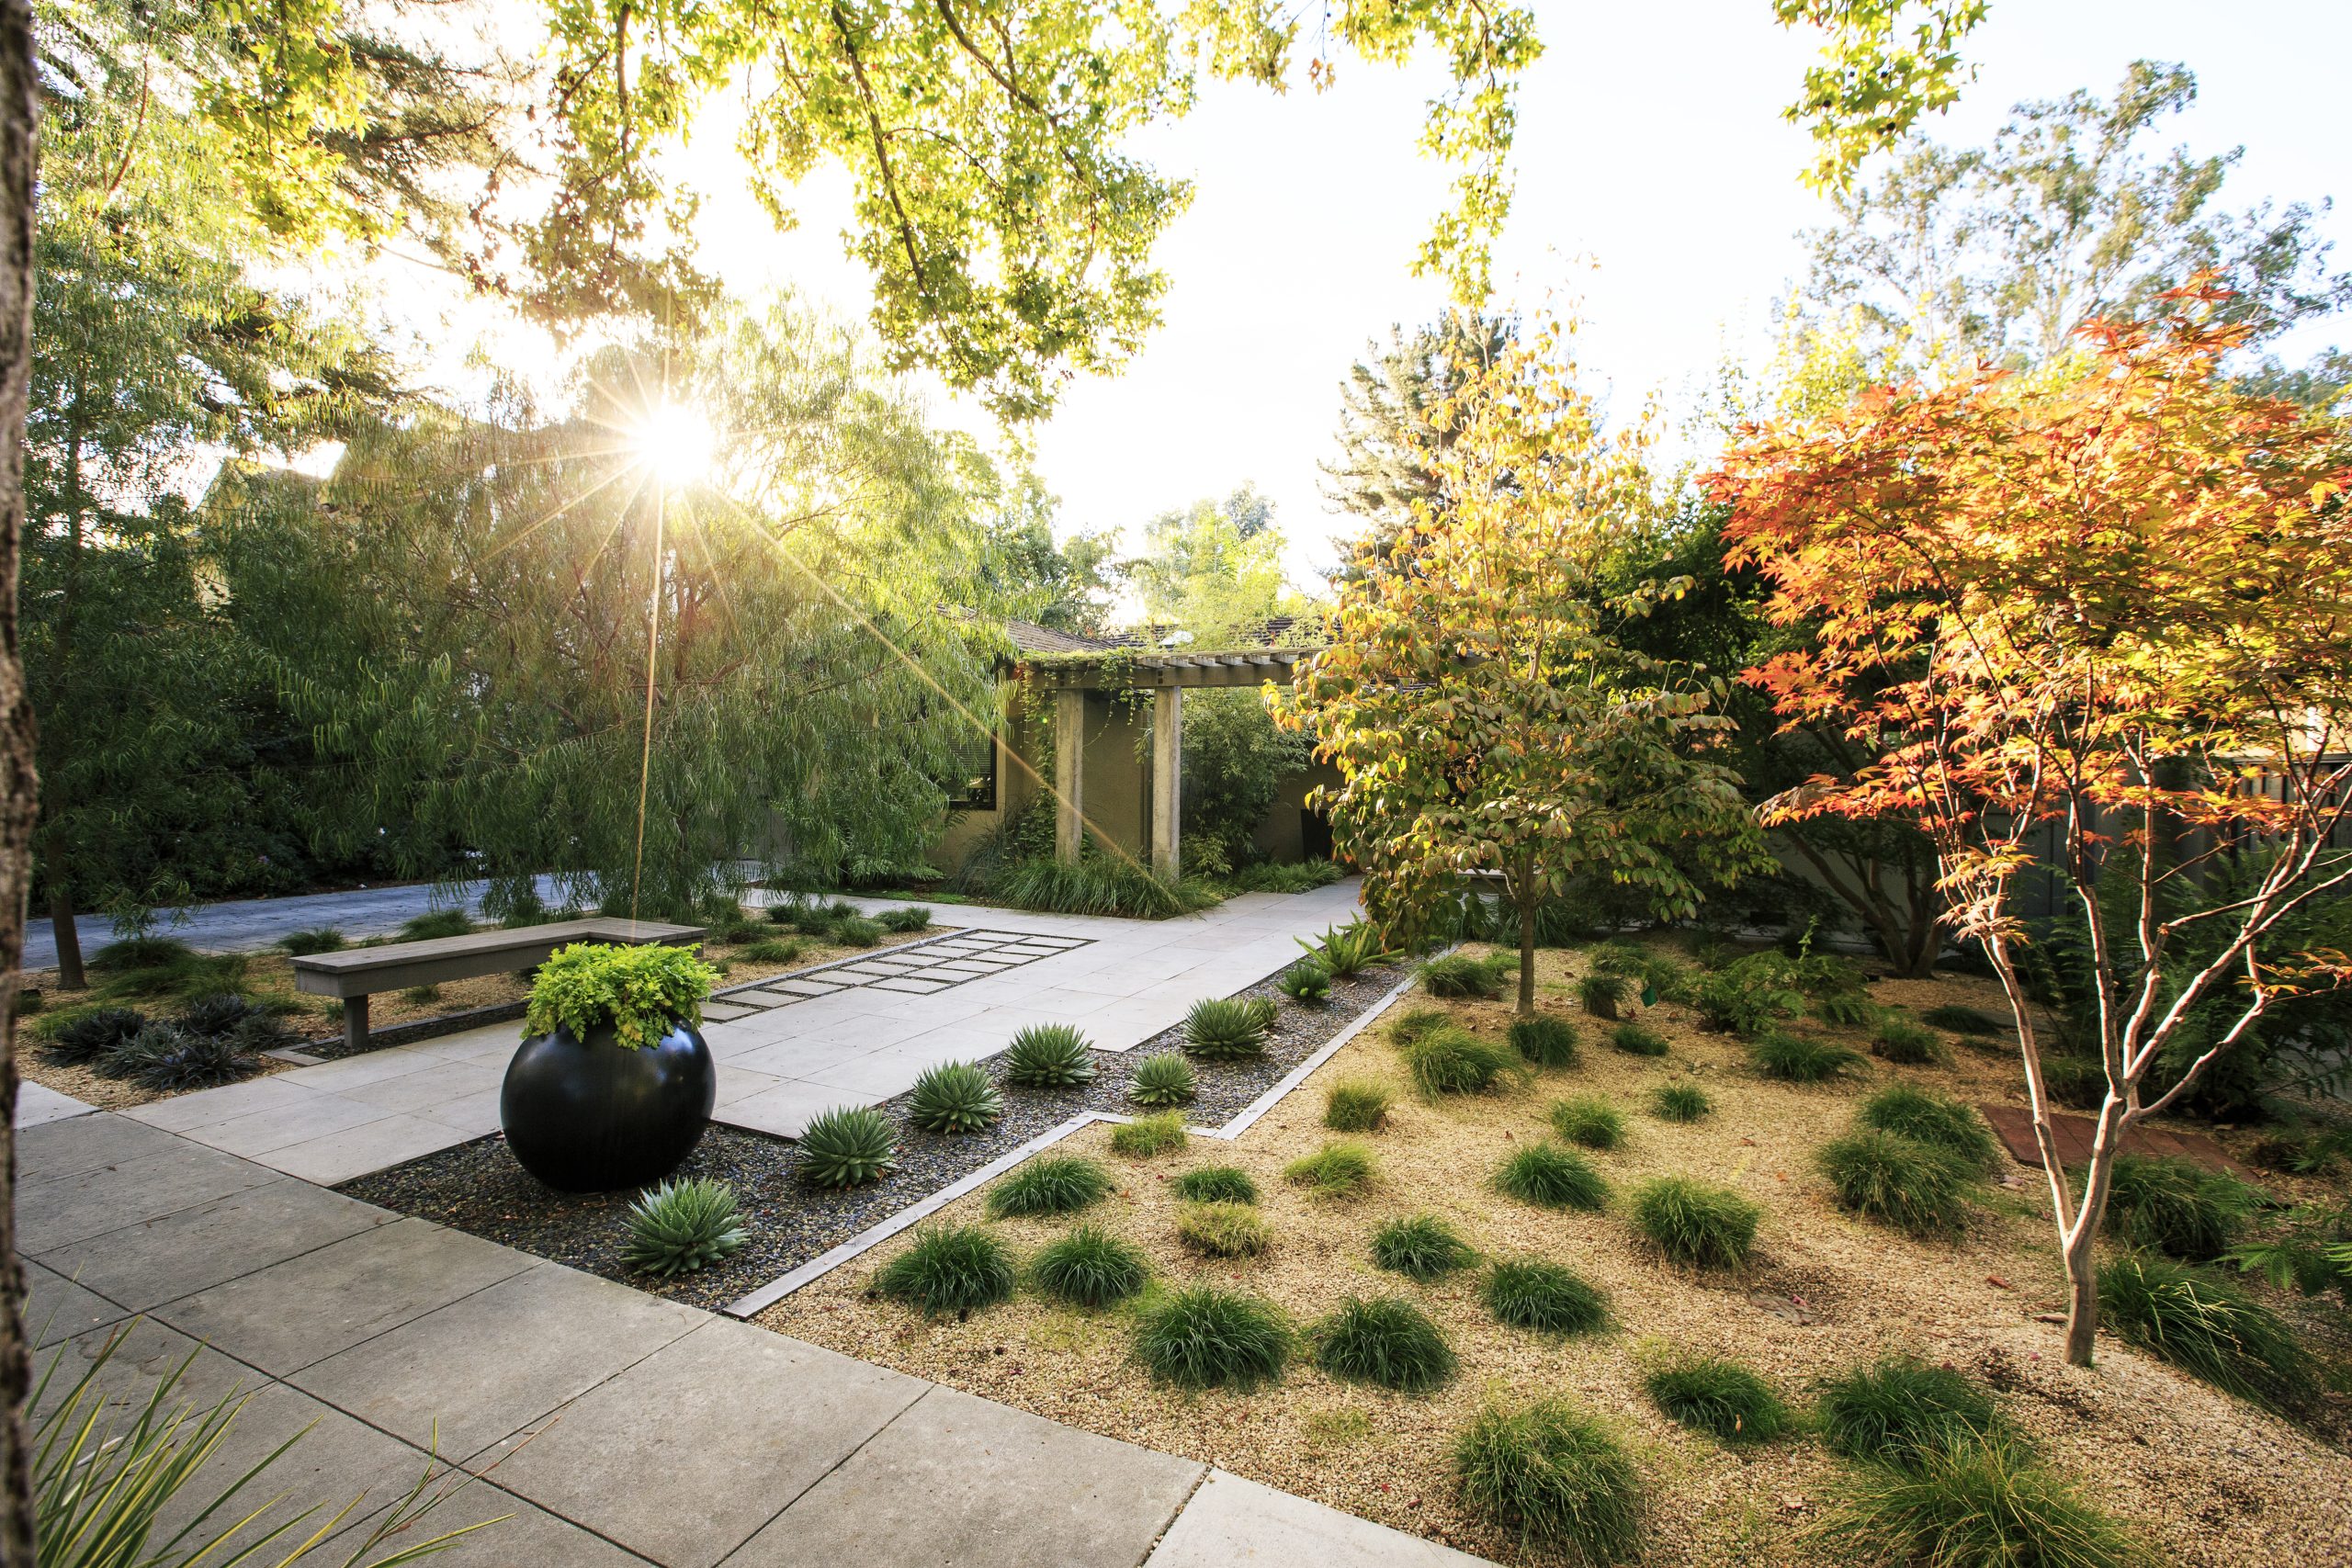
While beautiful, a multi-gravel landscape isn’t zero-maintenance. The biggest challenge is keeping the different colored gravels separate and free of debris. Leaves and twigs are highly visible on light gravel and must be removed regularly with a leaf blower on a low setting. Over time, the gravel can mix at the edges, requiring occasional tidying. You’ll also need to install a high-quality landscape fabric underneath to prevent weeds, though some persistent ones might still poke through the paver gaps or gravel edges, requiring hand-pulling.
4. Build a Tranquil Escape with a Tiered Stream and Wooden Bridge
A custom-built tiered stream with a pump system can be expensive, but you can get this vibe for much less. Look for pre-fabricated waterfall kits at stores like Lowe’s or online for $300-$800. For the bridge, instead of a custom-built structure, you can find decorative garden bridges at Wayfair or Amazon for $150-$400. The key is to nestle these elements within lush plantings. Use inexpensive, fast-growing groundcovers and ornamental grasses from a local nursery to soften the edges and make the feature look integrated and natural rather than just placed on top of the lawn.
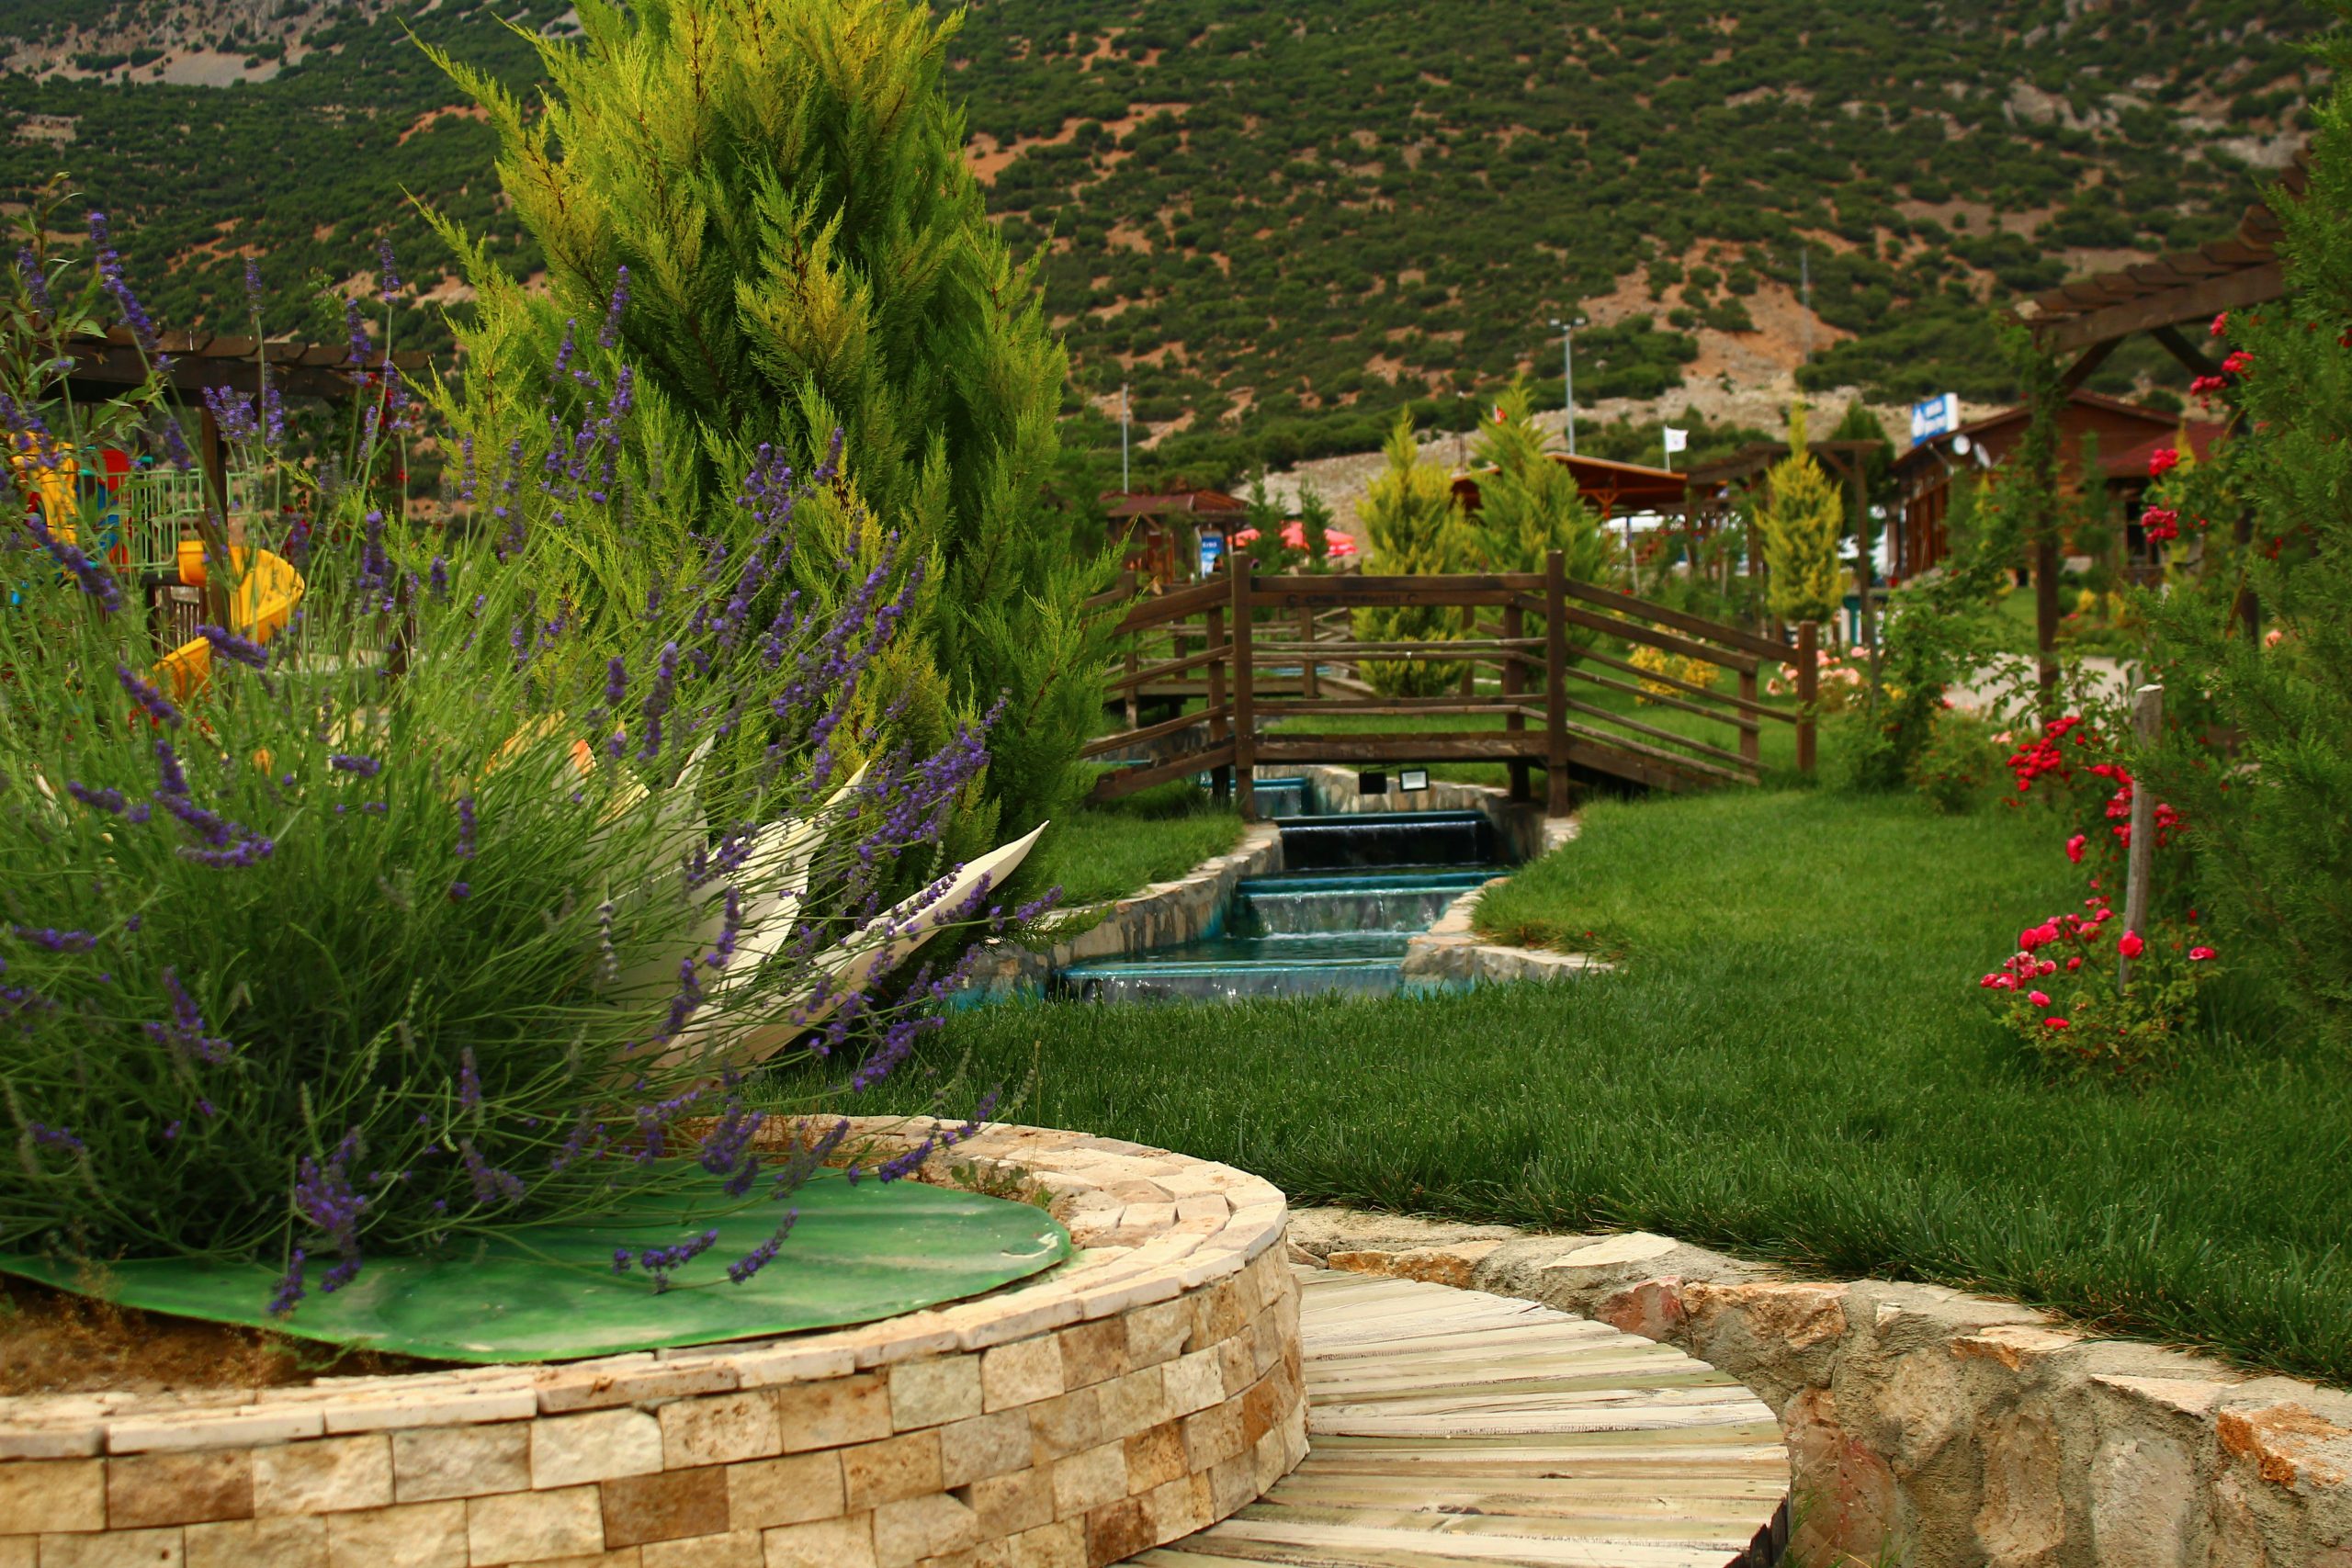
A water feature like this is a commitment. It requires a pump, which uses electricity and needs to be maintained. You’ll need to clean filters and periodically add water to account for evaporation. In colder climates, you must winterize the system to prevent pipes from freezing and cracking. Also, be honest about your property’s sounds. If you live near a busy road, the gentle sound of a small stream might be completely lost. This feature is most impactful in a relatively quiet setting where its tranquil sounds can be appreciated.
5. Define Garden Beds with a Curved Stone Border and Evening Light
The secret to a professional-looking garden edge like this is to bury the first course of your stone blocks. For stability and a clean line against the lawn, excavate a trench about 4-6 inches deep. Fill the bottom 2 inches with a paver base or crushed stone and tamp it down. Set the first layer of your stone border blocks into this trench so that about half of the block is below ground level. This prevents the blocks from shifting over time and makes it much easier to run a lawn mower or edger right along the stone for a perpetually crisp edge.
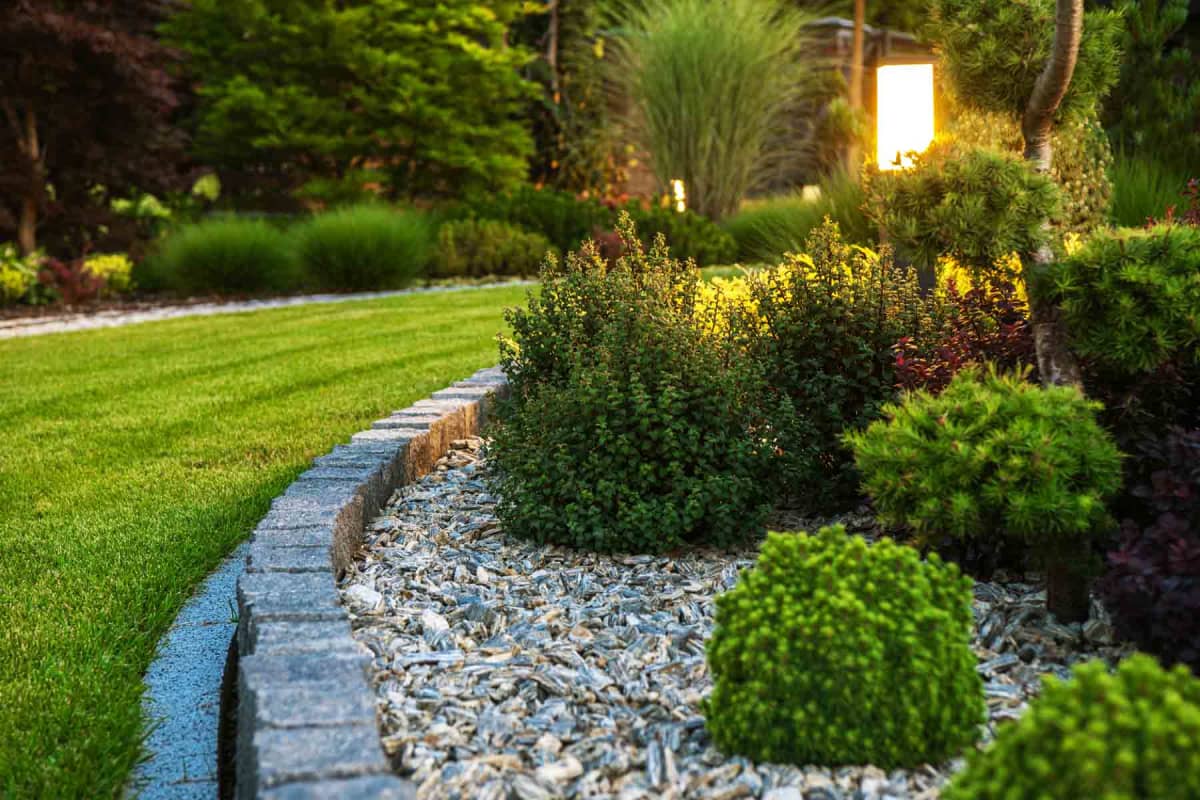
This design is so pleasing because it masters the art of the curve. The gentle, sweeping arc of the stone border creates a sense of flow and movement, guiding the eye along the path. This is a direct contrast to the straight, rigid lines we often see in yards. The warm glow of the garden lantern adds another layer of sophistication by creating a focal point and highlighting the texture of the surrounding foliage at night. It’s the combination of the graceful curve, the texture of the mulch and plants, and the strategic lighting that makes it feel serene and polished.
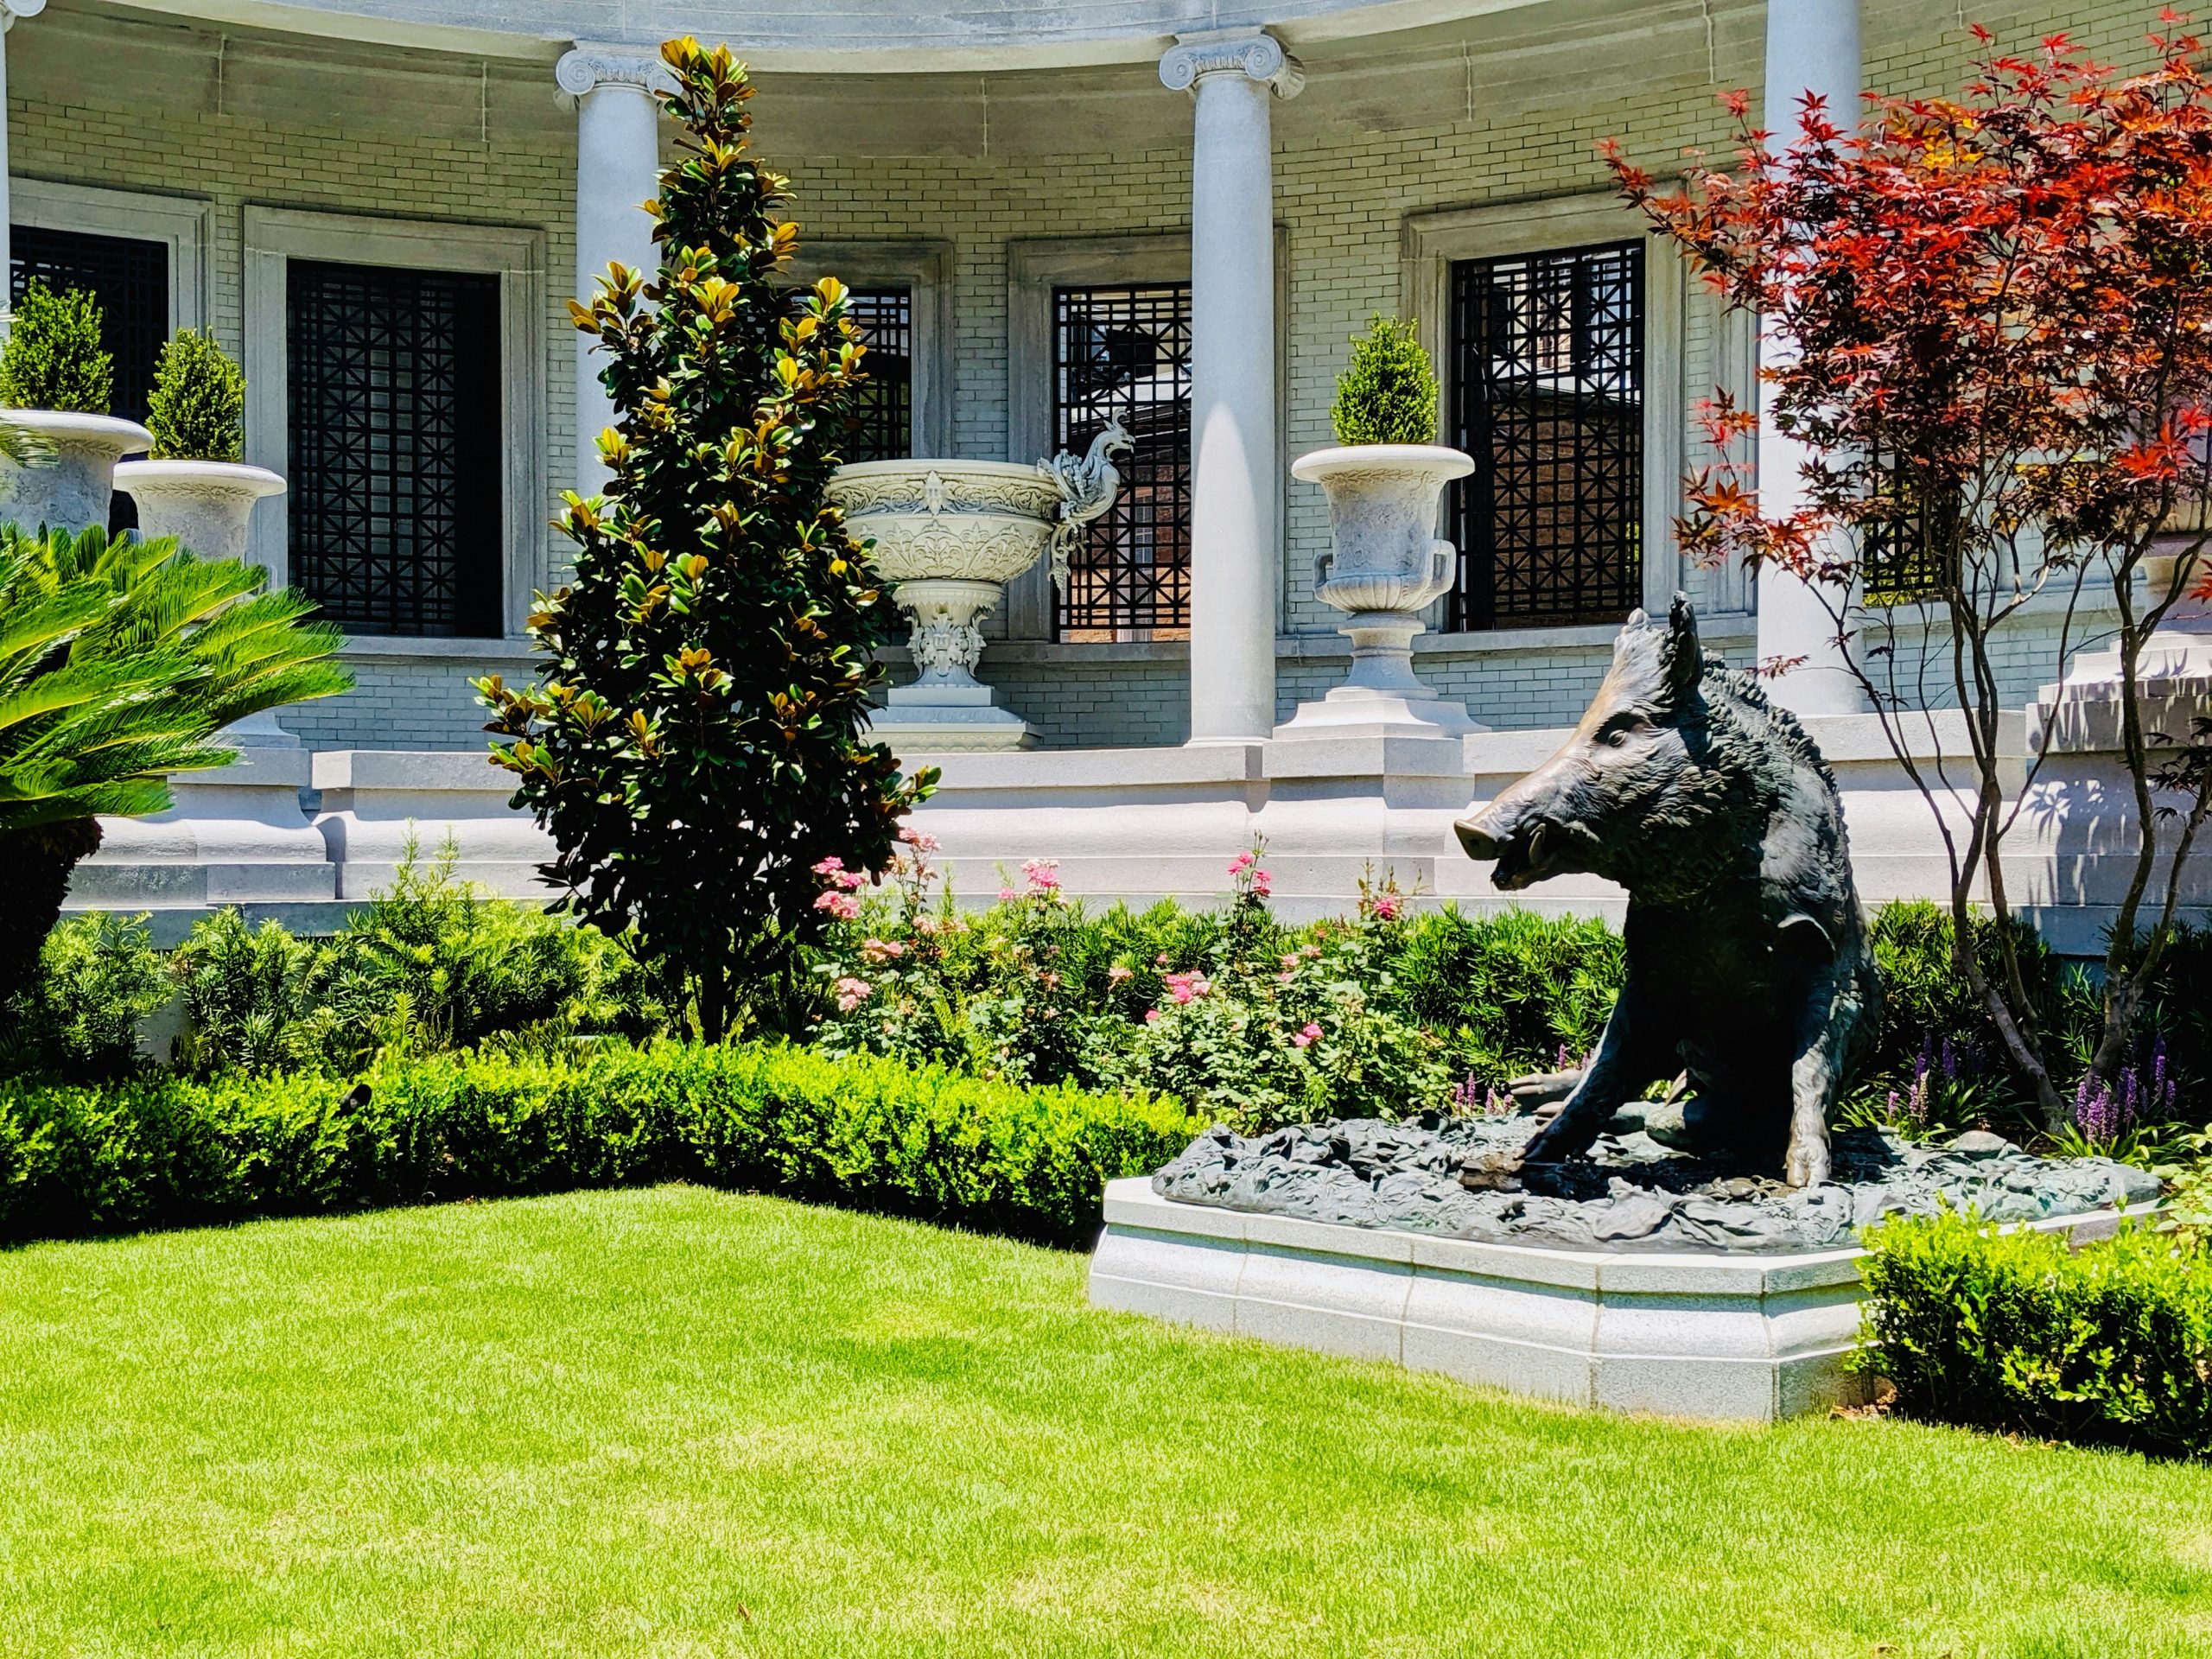
6. Channel Grandeur with a Classical Facade and Formal Garden
In an era of minimalist and modern design, there’s a growing counter-trend towards romantic, maximalist aesthetics, often dubbed ‘Grandmillennial’ or ‘Old World’ style. This landscape is a prime example. It’s a rejection of stark simplicity in favor of history, ornamentation, and classic structure. Homeowners are increasingly looking to create spaces with a sense of permanence and timeless elegance, and a formal garden like this, with its classical references, manicured hedges, and statement pieces, perfectly captures that desire for enduring beauty.
|
📋 Copy HEX 🔗 Share |
Remove the bronze wild boar statue, and the entire feeling of the garden changes. The manicured lawn and classical facade are beautiful, but they could belong to a courthouse or a university building. The boar, however, injects a sense of personality, story, and even a touch of wildness into the otherwise perfectly controlled environment. It’s the single element that says, “This is a home, not just a building.” It provides a necessary focal point and a hint of narrative that makes the formal space feel personal and intriguing.
7. Frame a View with Tall Green Hedges and an Ornate Iron Gate
This ‘secret garden’ effect works best when you have a long, relatively narrow space to work with. To achieve this look, you need a minimum length of 30-40 feet from the viewpoint to the gate. The path itself can be narrow, around 3-4 feet wide. The real key is the height of the hedges. They should be at least 8 feet tall, and ideally 10-12 feet, to create that immersive, enclosed feeling. Anything shorter will feel more like a simple border and less like a grand, green hallway leading to a hidden destination.
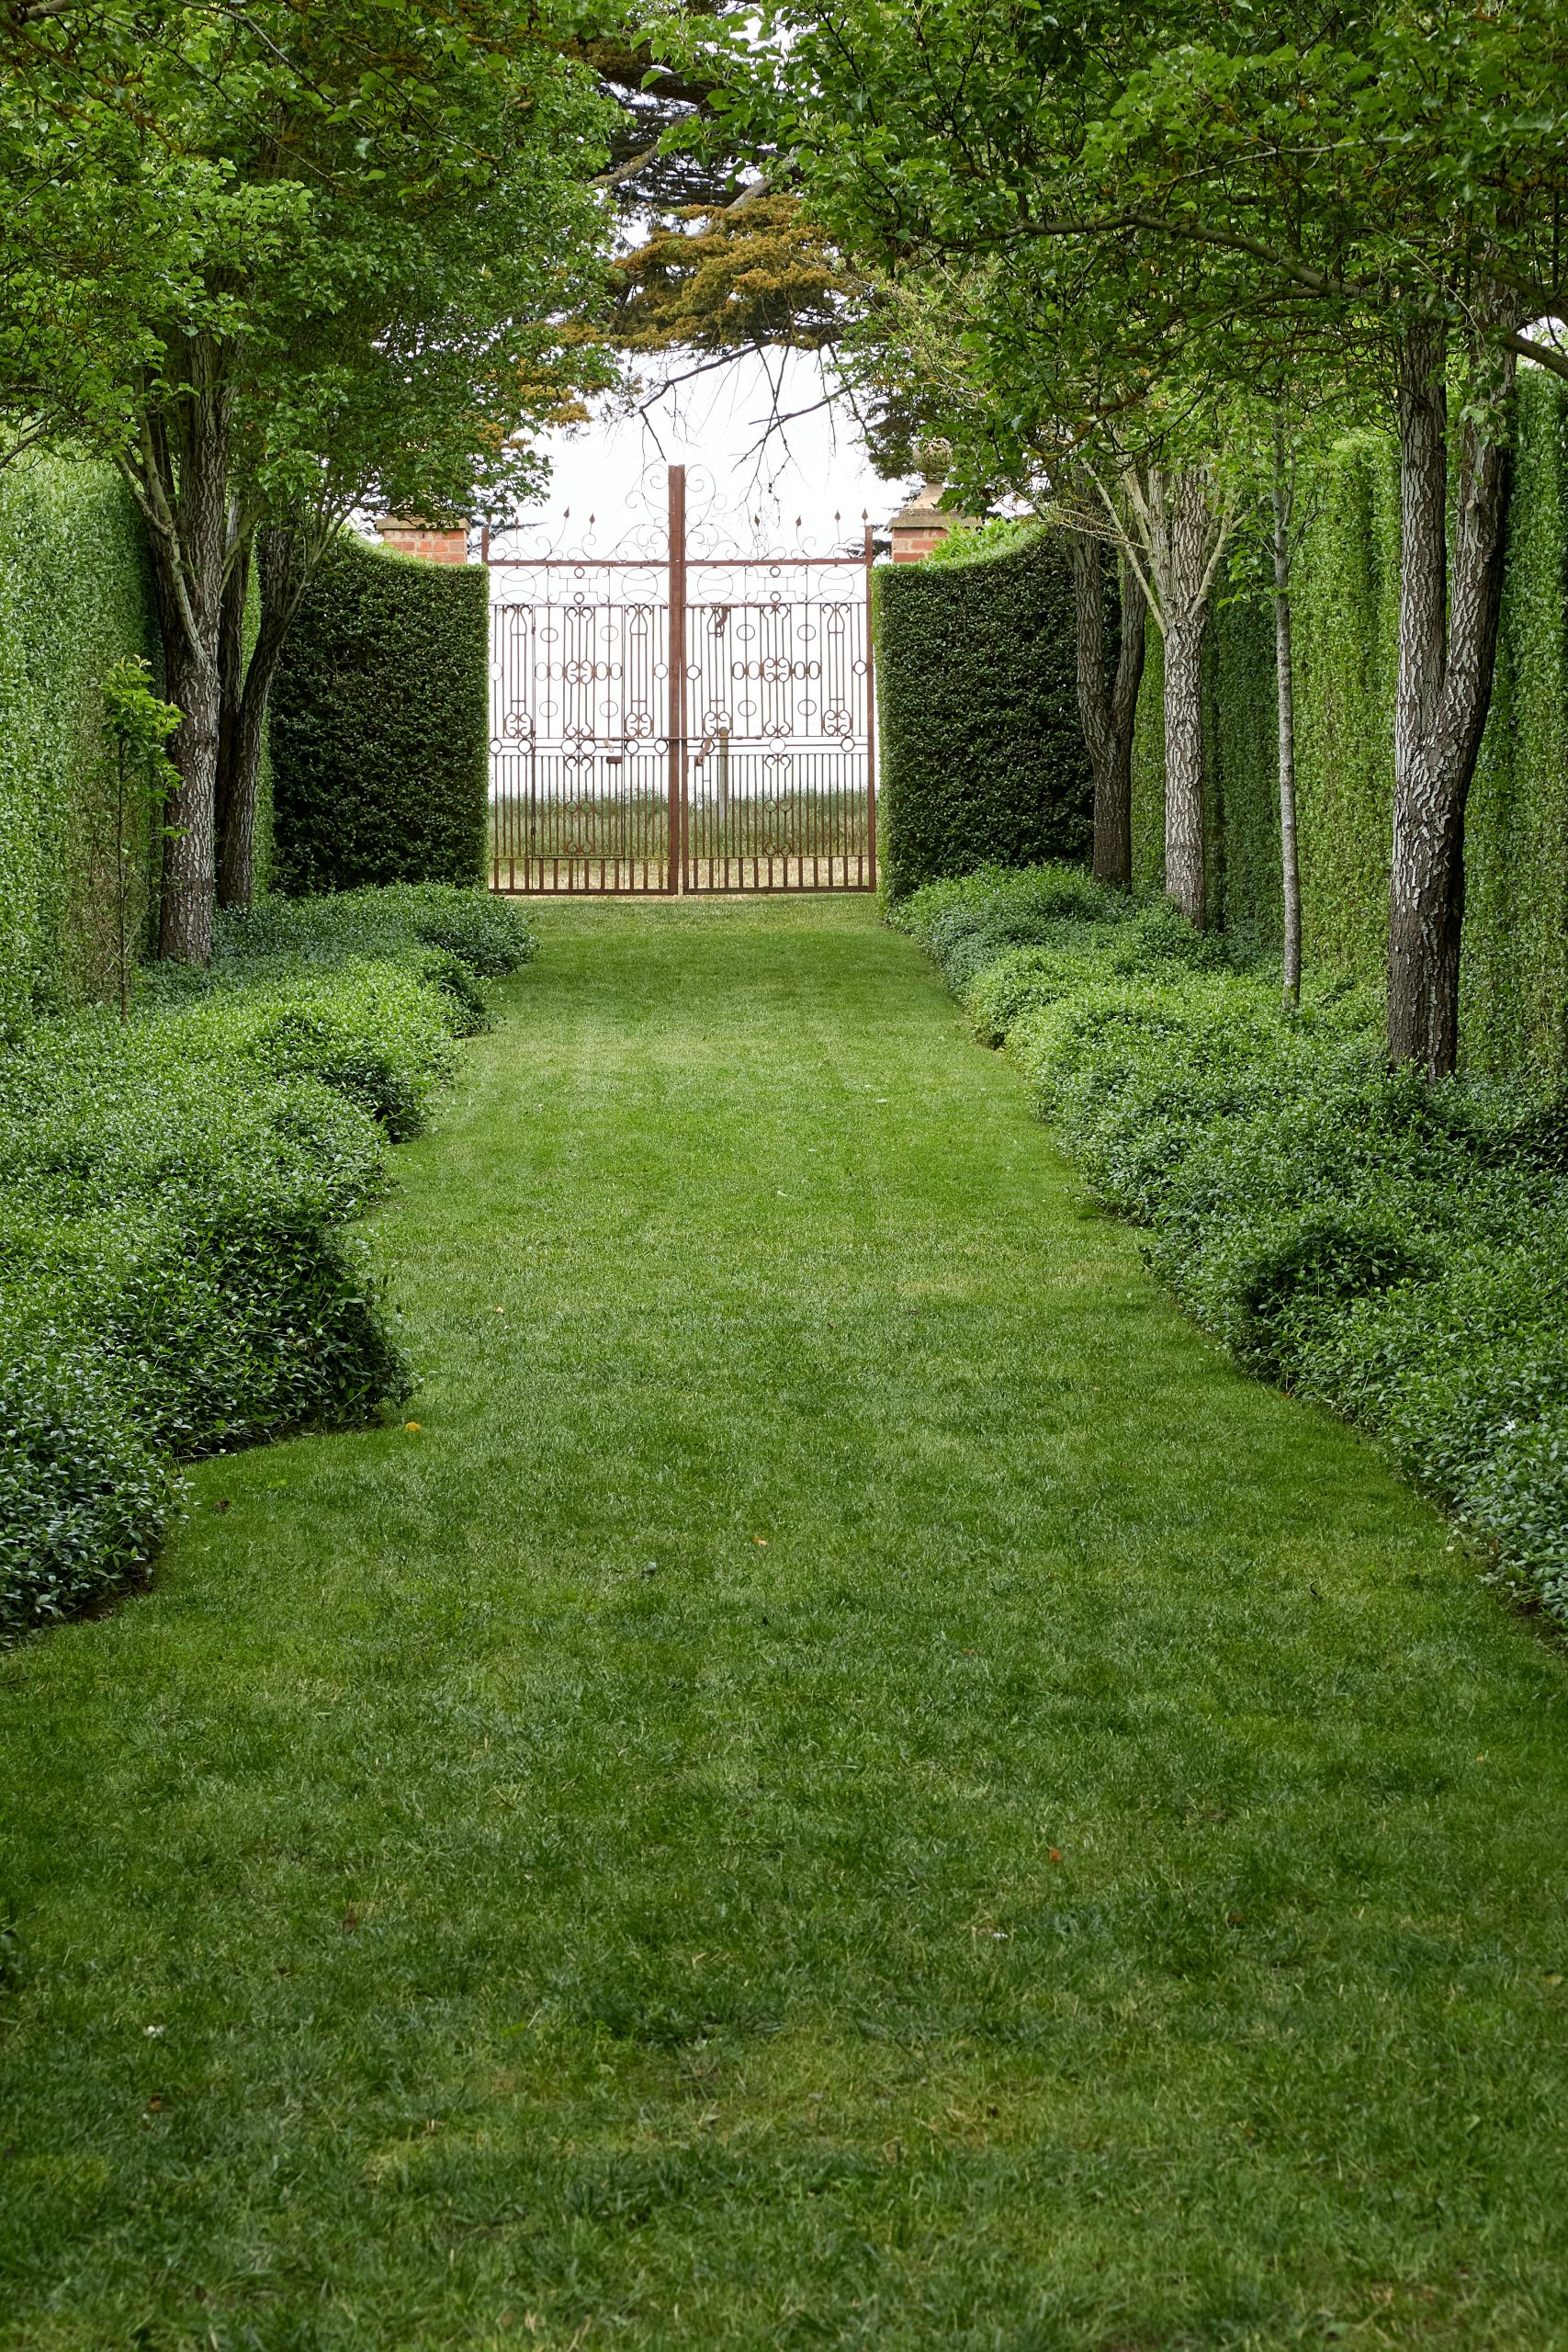
Don’t be afraid to let your materials show their age. The appeal of the ornate iron gate here is heightened by its weathered, rust-colored patina. It suggests history and permanence. If you’re installing a new iron gate, you can either let it weather naturally over a few years or speed up the process with a salt and vinegar spray solution. This bit of imperfection adds character and keeps the formal garden from feeling too sterile or brand new. It’s the wabi-sabi touch that makes it feel authentic.
8. Start Fresh with a Paver Patio and Integrated Fire Pit
Here’s a realistic look at the cost for a professionally installed project like this. Prices can vary significantly based on your location and the specific materials chosen.
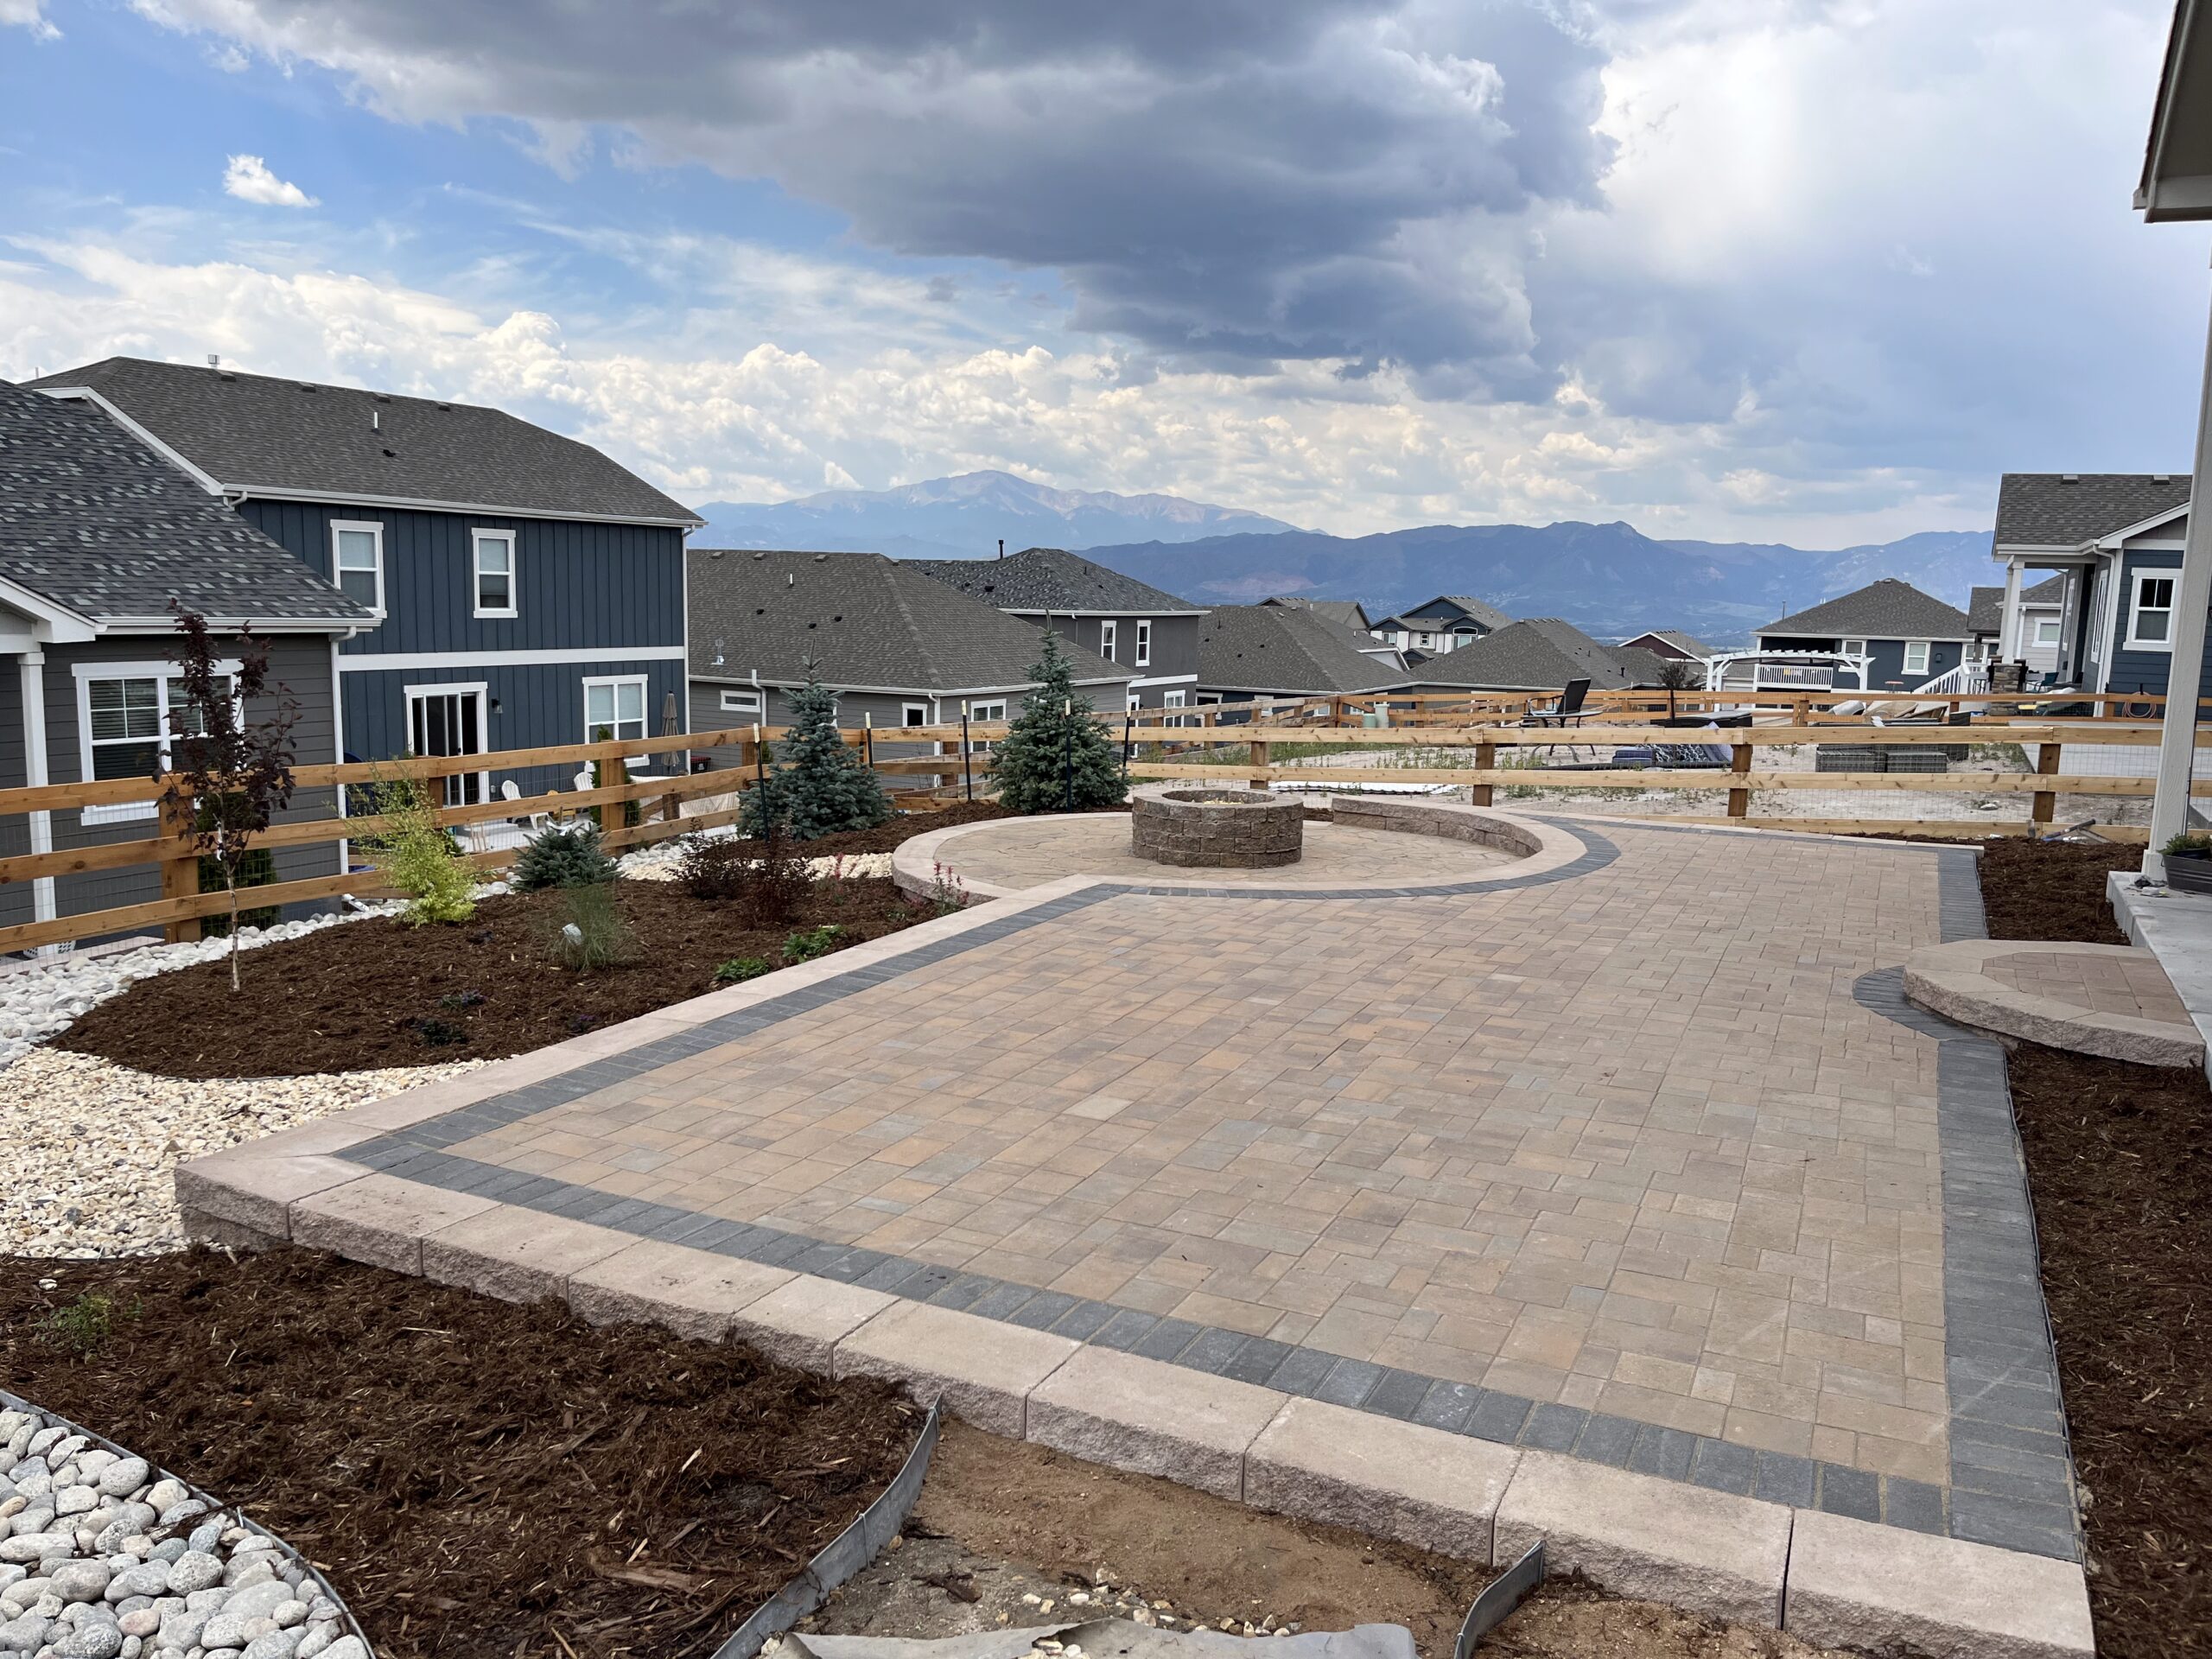
- Pavers (materials & installation): $12,000 – $22,000
- Stone Fire Pit & Curved Wall: $5,000 – $9,000
- Mulch, Plants & Young Trees: $2,500 – $5,000
- Wood Fence & River Rock Border: $3,000 – $6,000
- TOTAL: $22,500 – $42,000
Budget alternative: Use pre-cast concrete pavers from a big-box store, a metal fire pit insert instead of custom stonework, and install smaller, younger plants that will fill in over time. This could bring the total cost down to the $9,000 – $15,000 range if you do some of the labor yourself.
Before you commit to a large-scale hardscaping project like this paver patio, which is a great contrast to the terraced look in Idea #9, run through this checklist:
- Have you confirmed property lines and checked for any underground utilities in the project area?
- Does the area have proper drainage, or will the new hardscape cause water to pool or run towards your foundation?
- Is your budget based on actual quotes from at least three licensed contractors?
- Have you ordered samples of the pavers, border stones, and wall caps to see how they look in the light of your own backyard?
9. Layer Your Landscape with Terraced Stone Retaining Walls
This landscape is a masterclass in turning a challenge—a sloped yard—into a stunning feature. The terraced design works because it breaks a single, difficult-to-use slope into multiple, manageable, and visually interesting levels. The repetition of the stacked natural stone in both the retaining walls and the steps creates a powerful sense of cohesion. Furthermore, the diverse plantings, with their varied textures and colors (agave, grasses, and flowering shrubs), soften the hard stone lines and make the entire structure feel lush and integrated with nature.
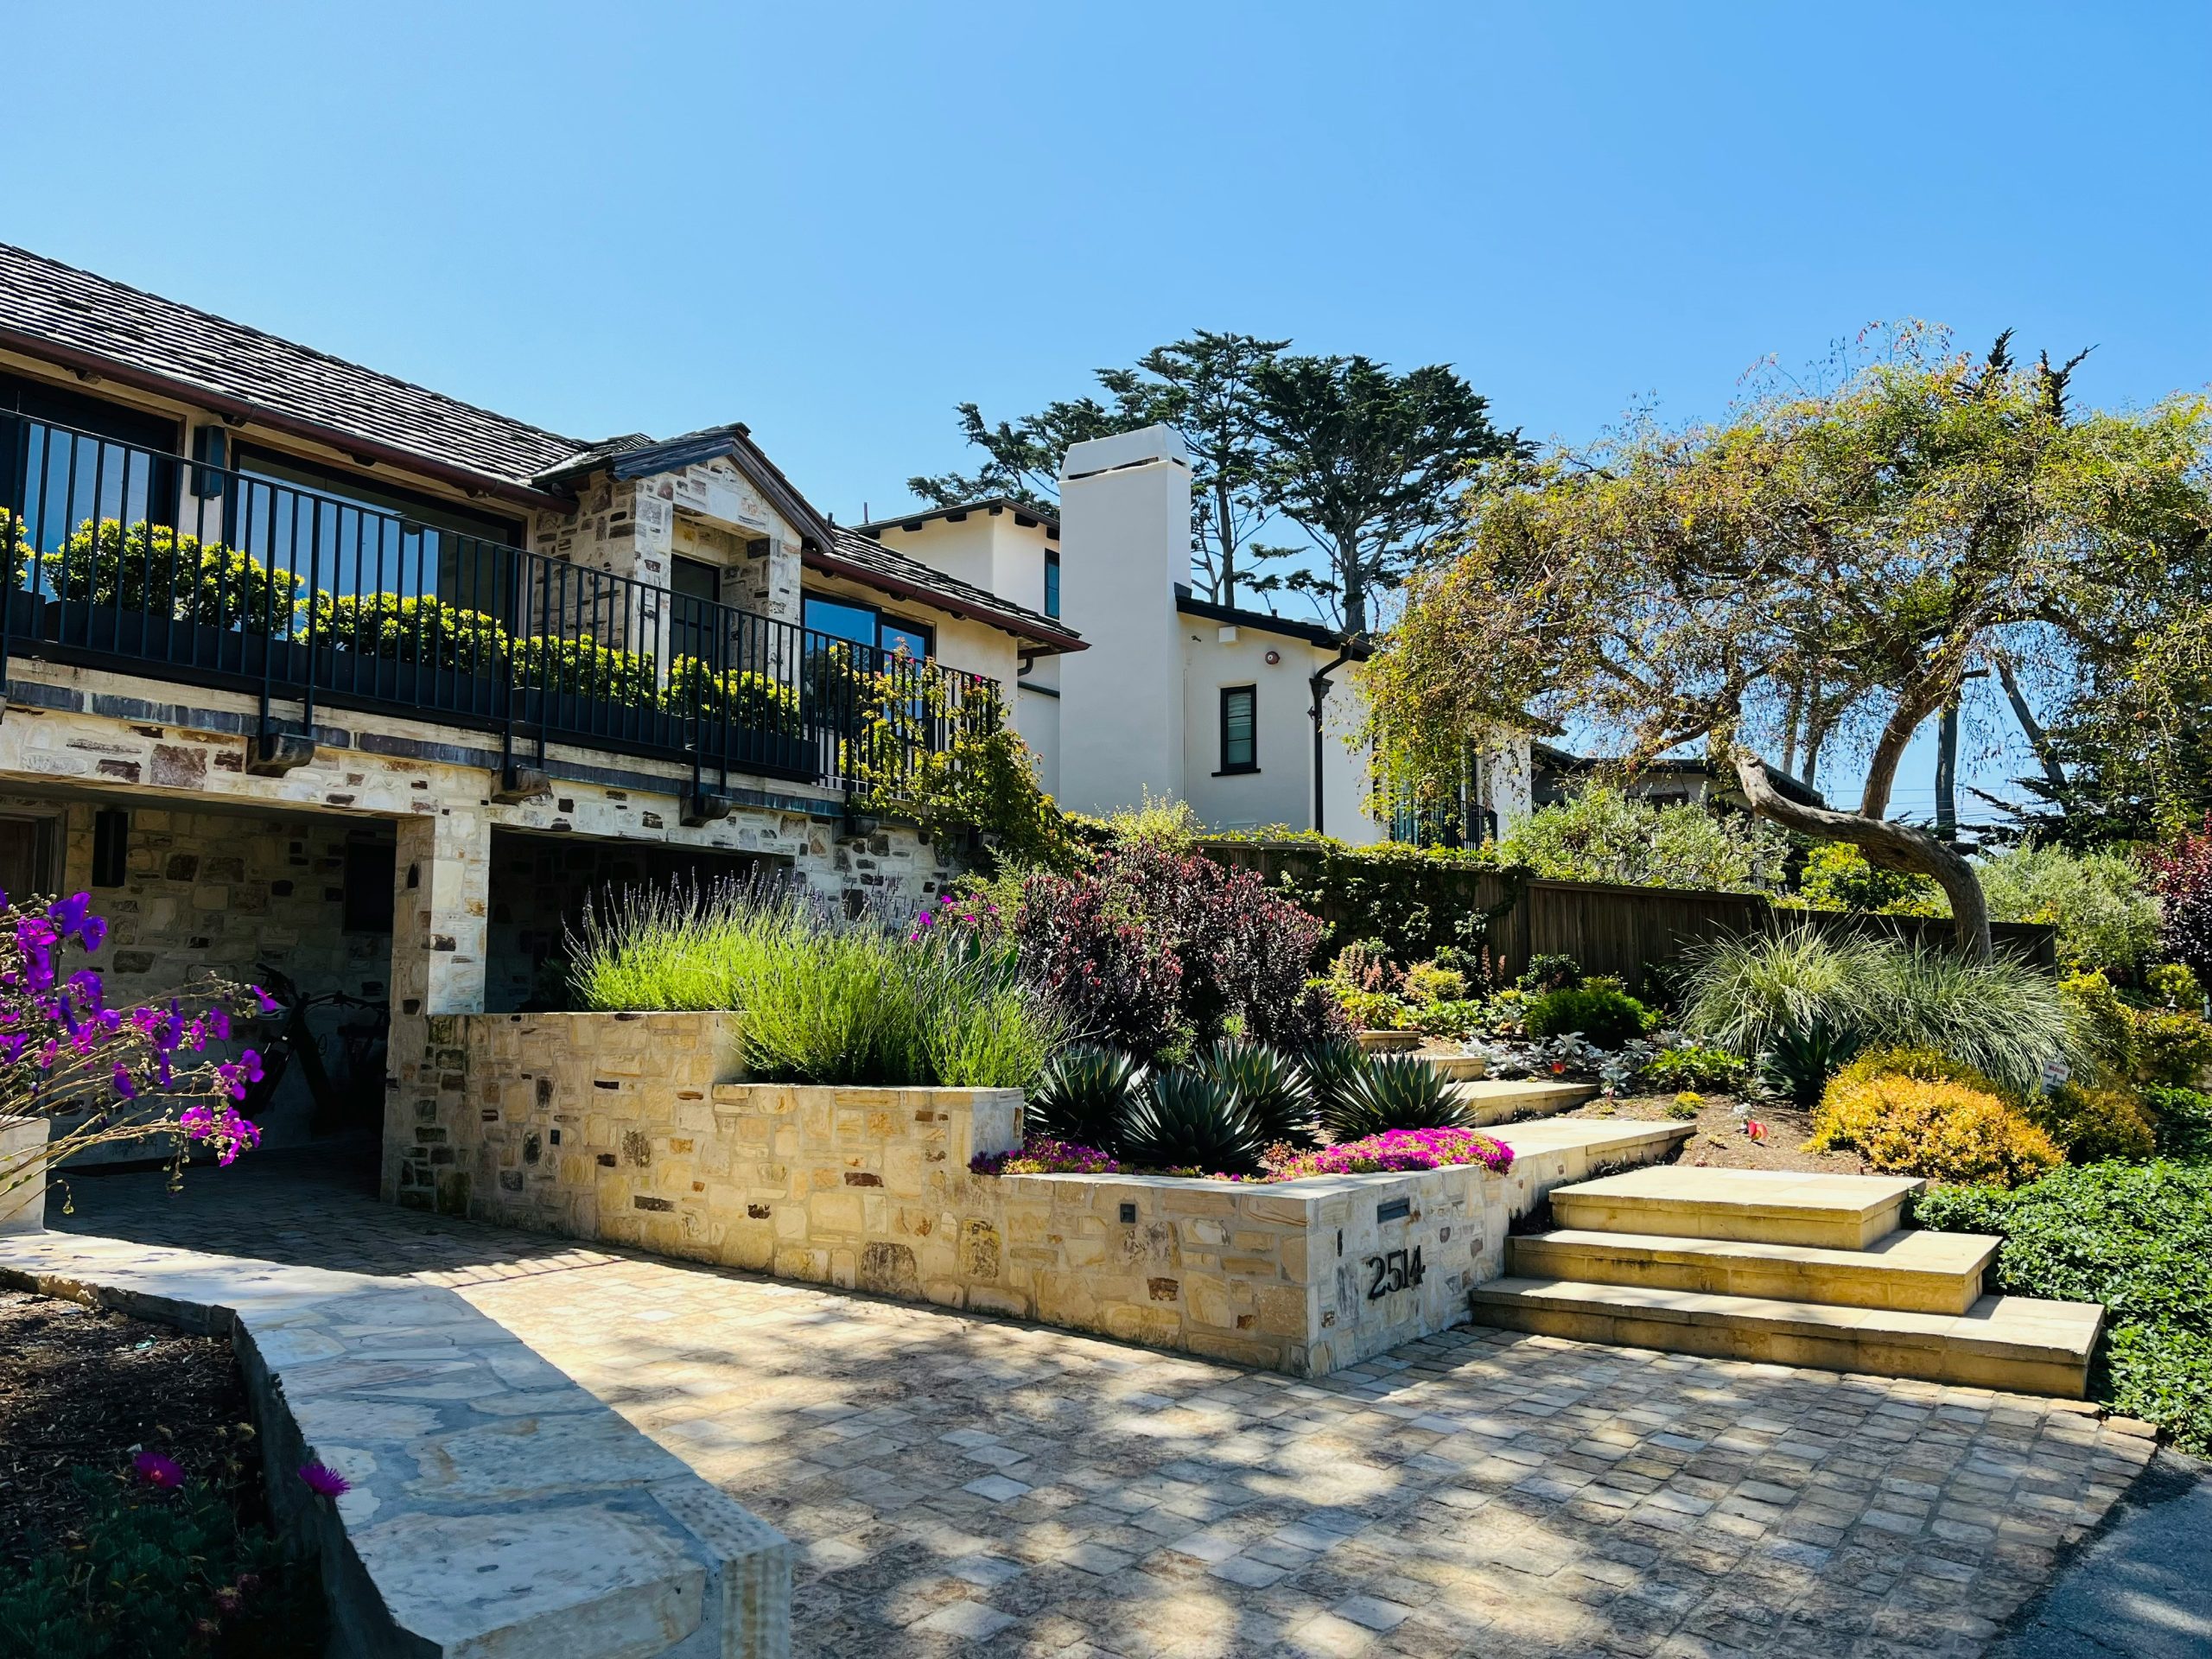
While incredibly beautiful, stone retaining walls require some upkeep. The main task is managing the plants within them. You’ll need to weed the beds regularly, especially in the first few years as the intended plants fill in. Some plants may become overgrown and require pruning to maintain the layered look. Also, inspect the walls annually for any signs of shifting or cracking, especially after heavy rains or freeze-thaw cycles. Ensure the ‘weep holes’ (small gaps at the base of the wall for drainage) remain clear of debris to prevent water pressure from building up behind the wall.
10. Design a Naturalistic Haven Around a Large Pond and Pergola
When designing with natural stone walls, avoid using a single type and size of stone. The beauty of this design comes from the mix of multi-toned stones in various shapes and sizes. For the walls, ask your supplier for a blend that includes larger, structural stones and smaller, filler stones. For the pond edge, incorporate a mix of jagged rocks and smooth river pebbles. This variation is what mimics a natural landscape and prevents your yard from looking like a pre-packaged kit. The light-colored wall caps provide a clean, finished edge that contrasts nicely with the rustic stone faces.
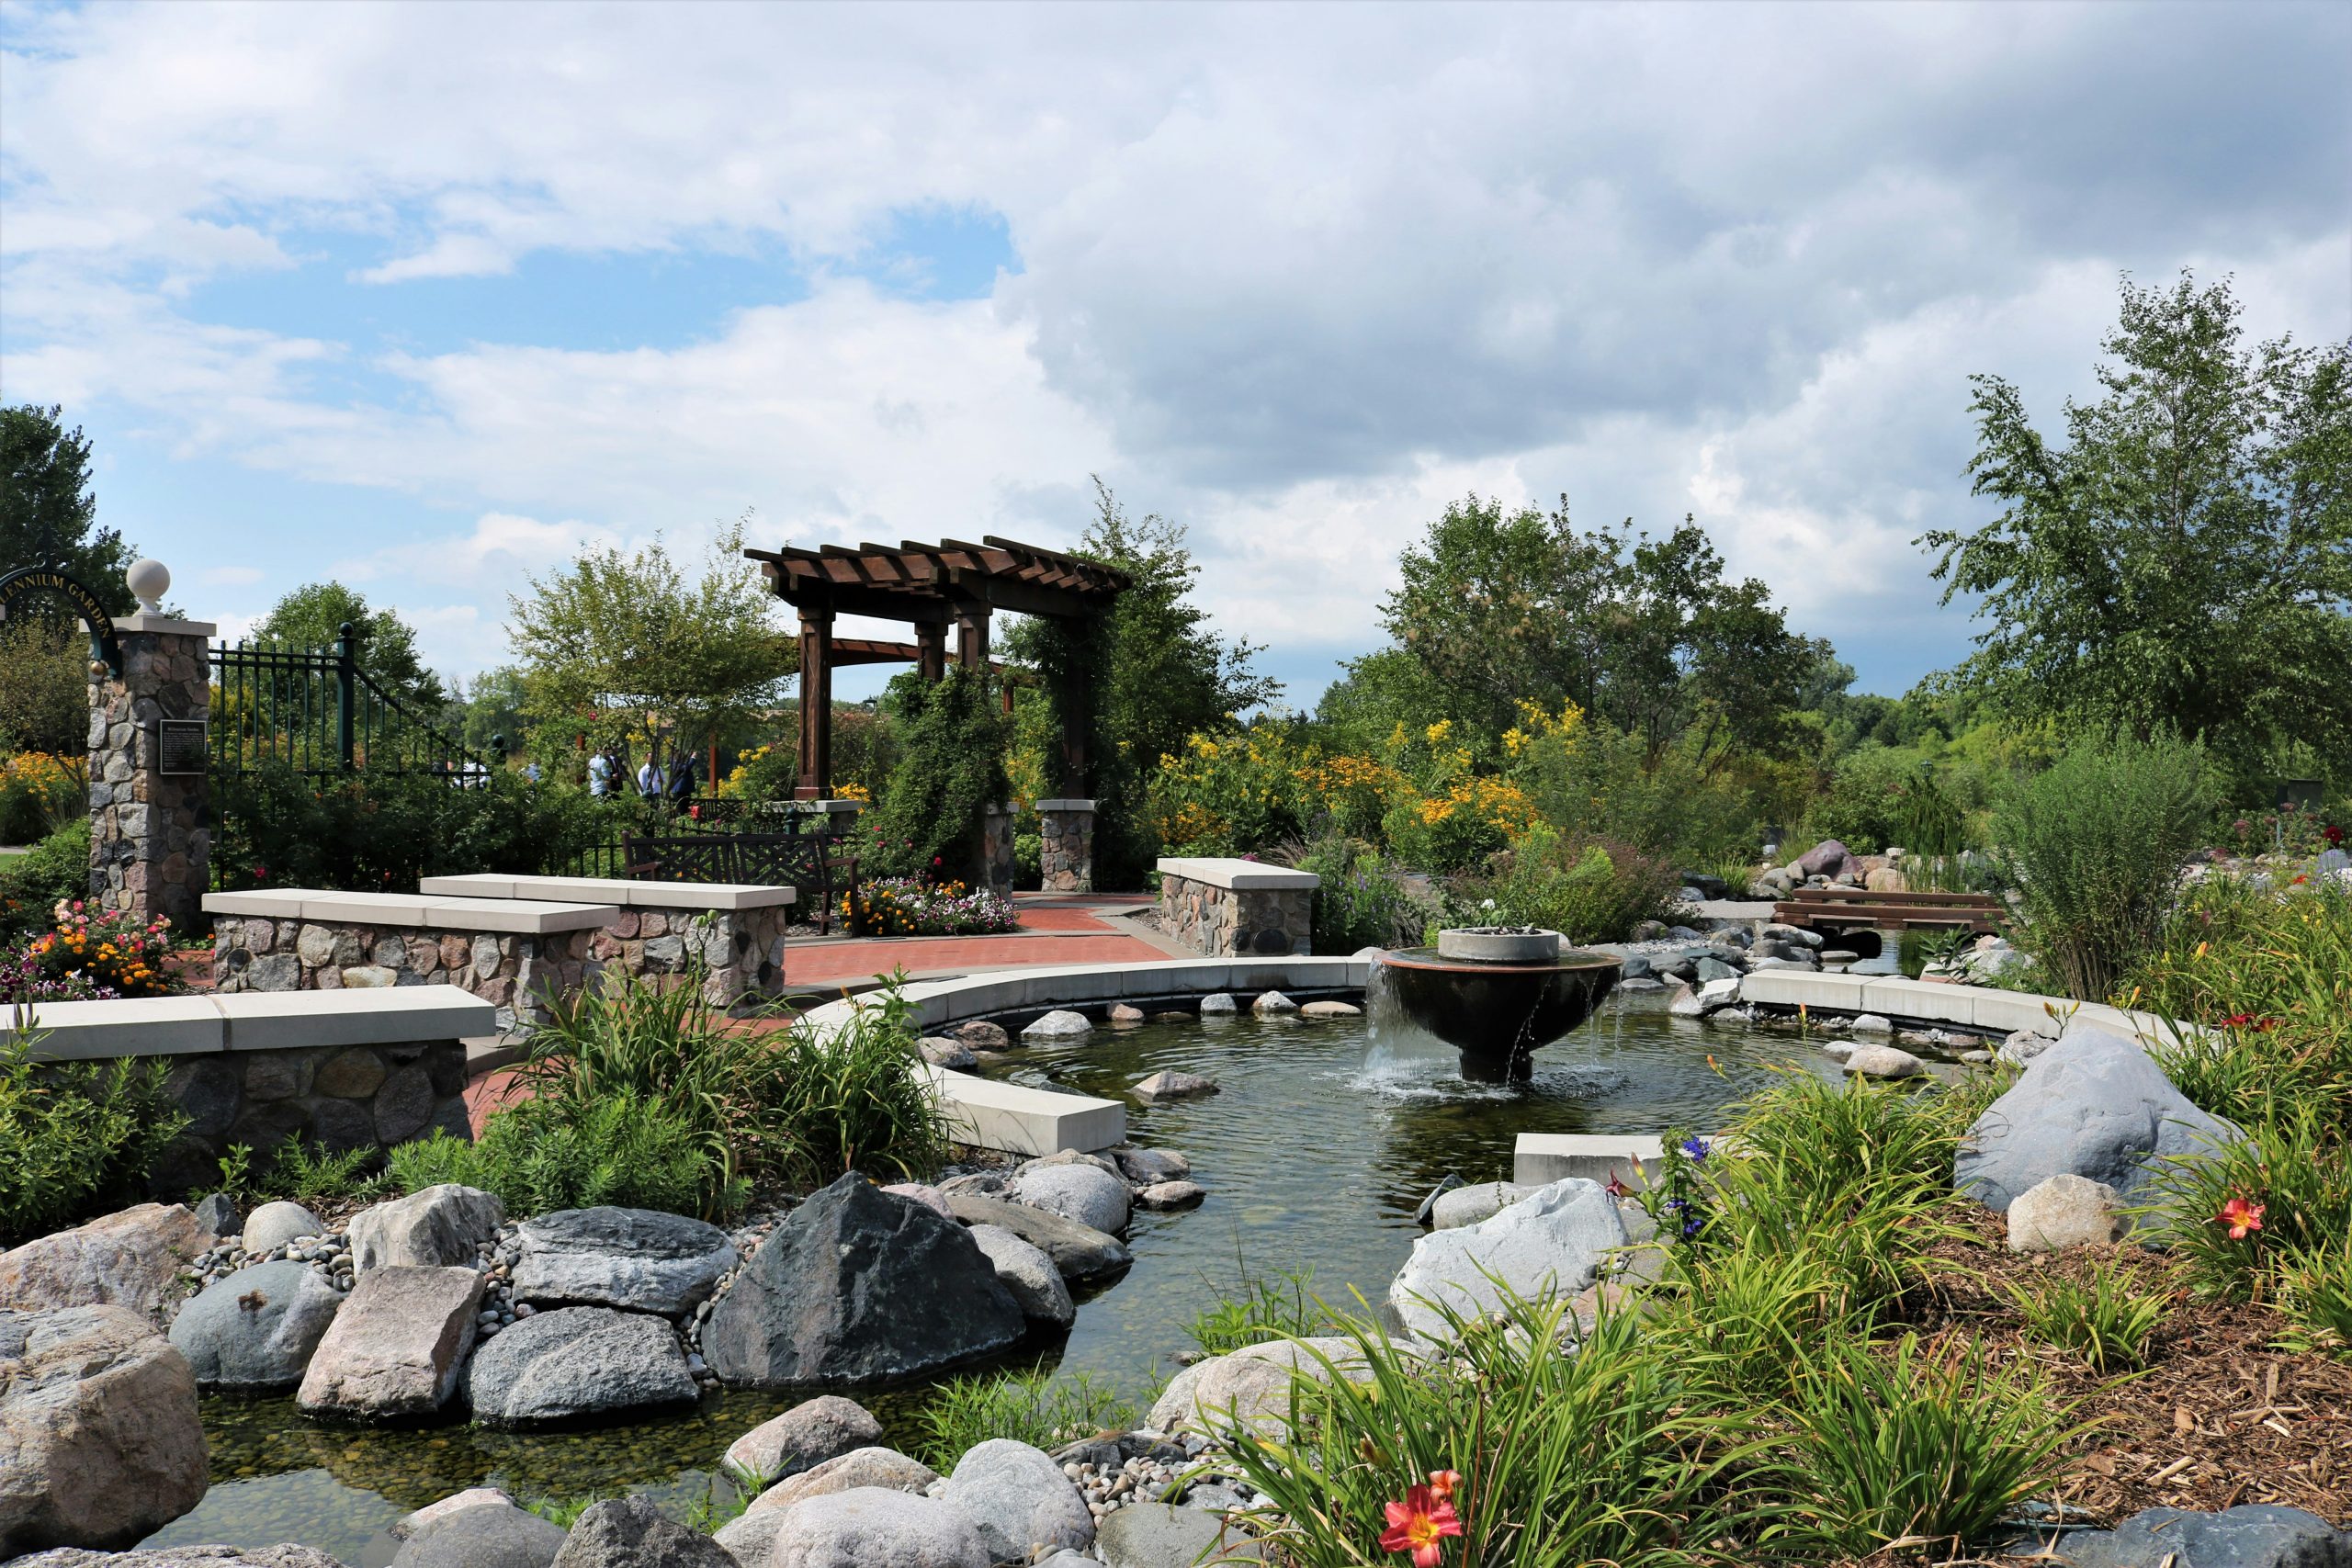
A pond is a living ecosystem, not just a water feature. Be prepared for wildlife to visit, which can be both a delight and a challenge. Frogs, dragonflies, and birds will be drawn to it. However, so might herons looking for a fish snack or raccoons looking for a place to wash their food. Also, a pond of this size can be a safety concern if you have small children or pets who can’t swim. Proper fencing or a safety net might be necessary, which can alter the naturalistic aesthetic. It’s a beautiful feature, but one that requires responsible planning.
11. Maximize an Expansive Lawn with a Freeform Pool and Vista
The formula for this breathtaking view is about balance: 70% serene green and blue (the expansive lawn and sky-reflecting pool), 20% natural texture (the rock borders and distant mountains), and 10% curated color (the reddish-brown pool coping and pops of pink and red flowers). The vastness of the lawn acts as a ‘negative space,’ allowing the pool and the mountain vista to be the undisputed stars. If you had less lawn, the rock borders and flowers would need to be scaled back to maintain this feeling of open, uncluttered serenity. Contrast this with the very different pool style in Idea #2.
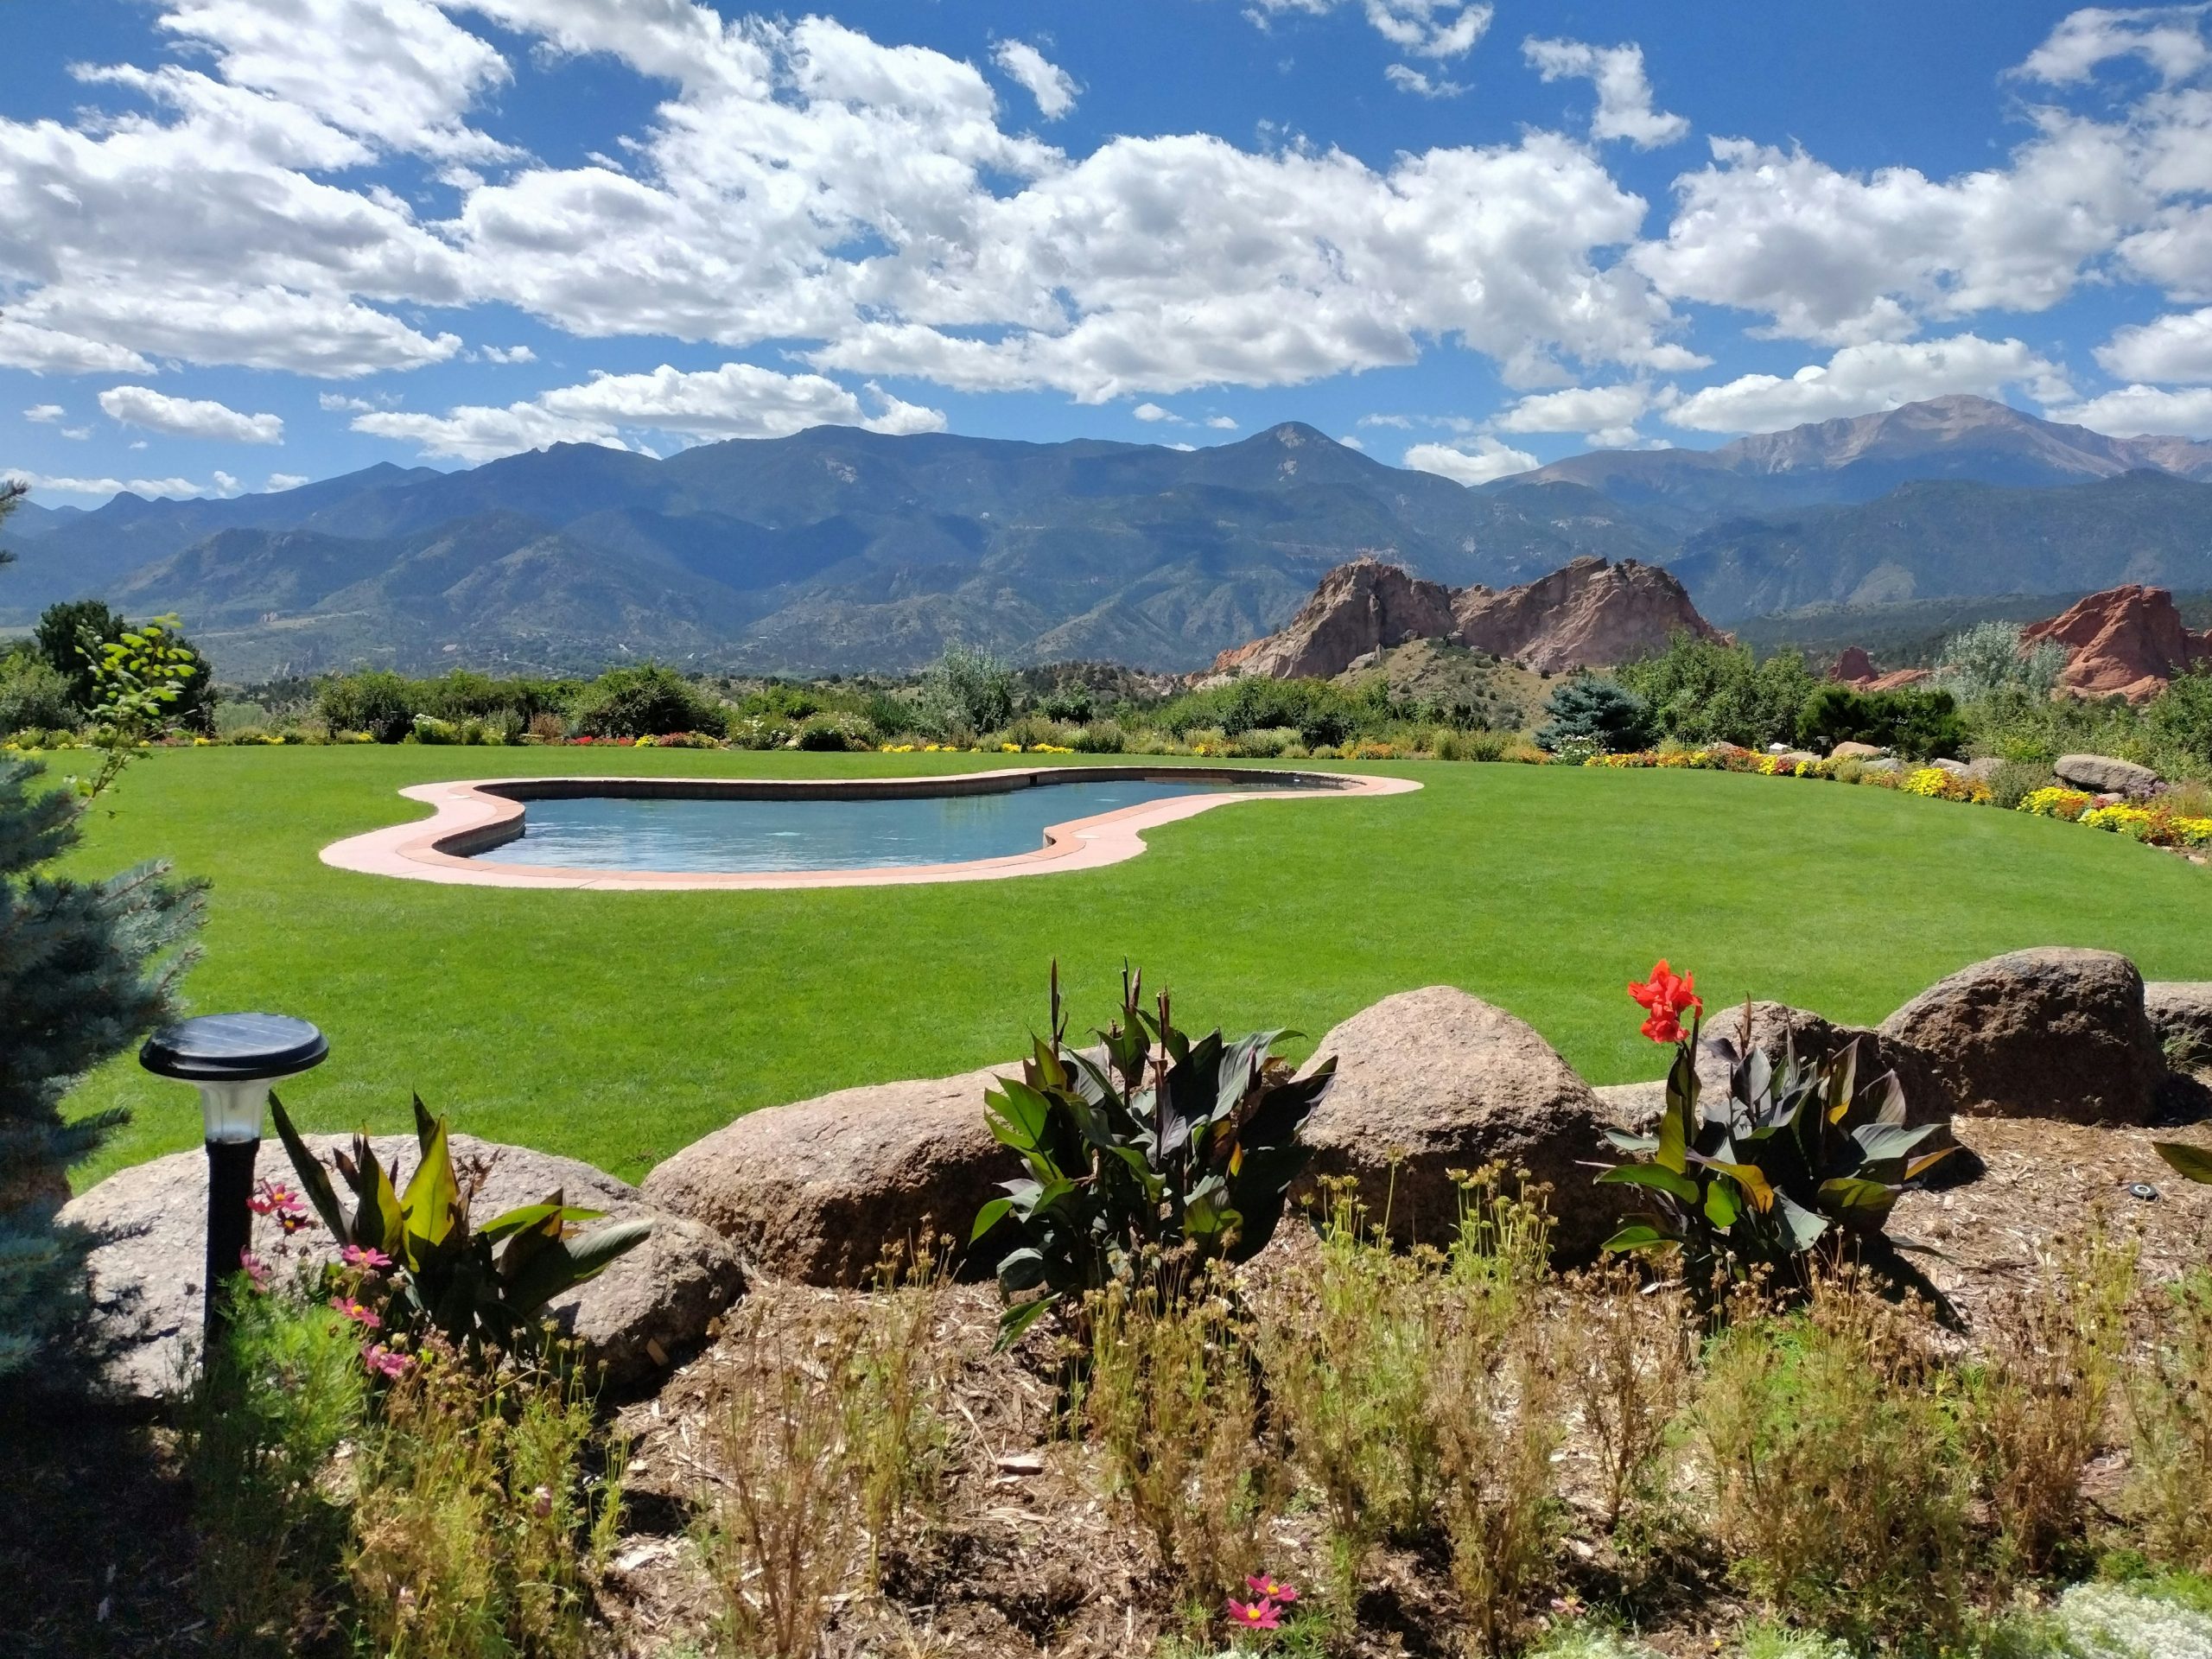
A custom gunite freeform pool is a major investment, often starting at $70,000+. To get a similar look for less, consider an above-ground pool. Brands like Intex or Bestway offer large models for under $2,000. The trick is to landscape around it to make it feel integrated. Use Facebook Marketplace to find free or cheap natural rocks to create a border. Plant fast-growing ornamental grasses and perennial flowers ($100-$300 from a local nursery) around the base. It won’t be the same, but you can capture the essence of a private water oasis for a fraction of the cost.
12. Combine a Hot Tub, Deck, and Pavers for a Multi-Zone Retreat
This type of multi-zone design is surprisingly adaptable and works well in medium-sized backyards, typically in the 1,000-2,000 square foot range. You don’t need a massive lot. The key is efficient space planning. A standard hot tub is about 7×7 feet. Plan for at least 80-100 square feet of decking to accommodate the hot tub surround and loungers. The paver patio section for dining should be a minimum of 10×10 feet (100 sq ft) to comfortably fit a table and chairs. This leaves plenty of room for lush, mounding plants in the surrounding beds to soften the hardscaping.
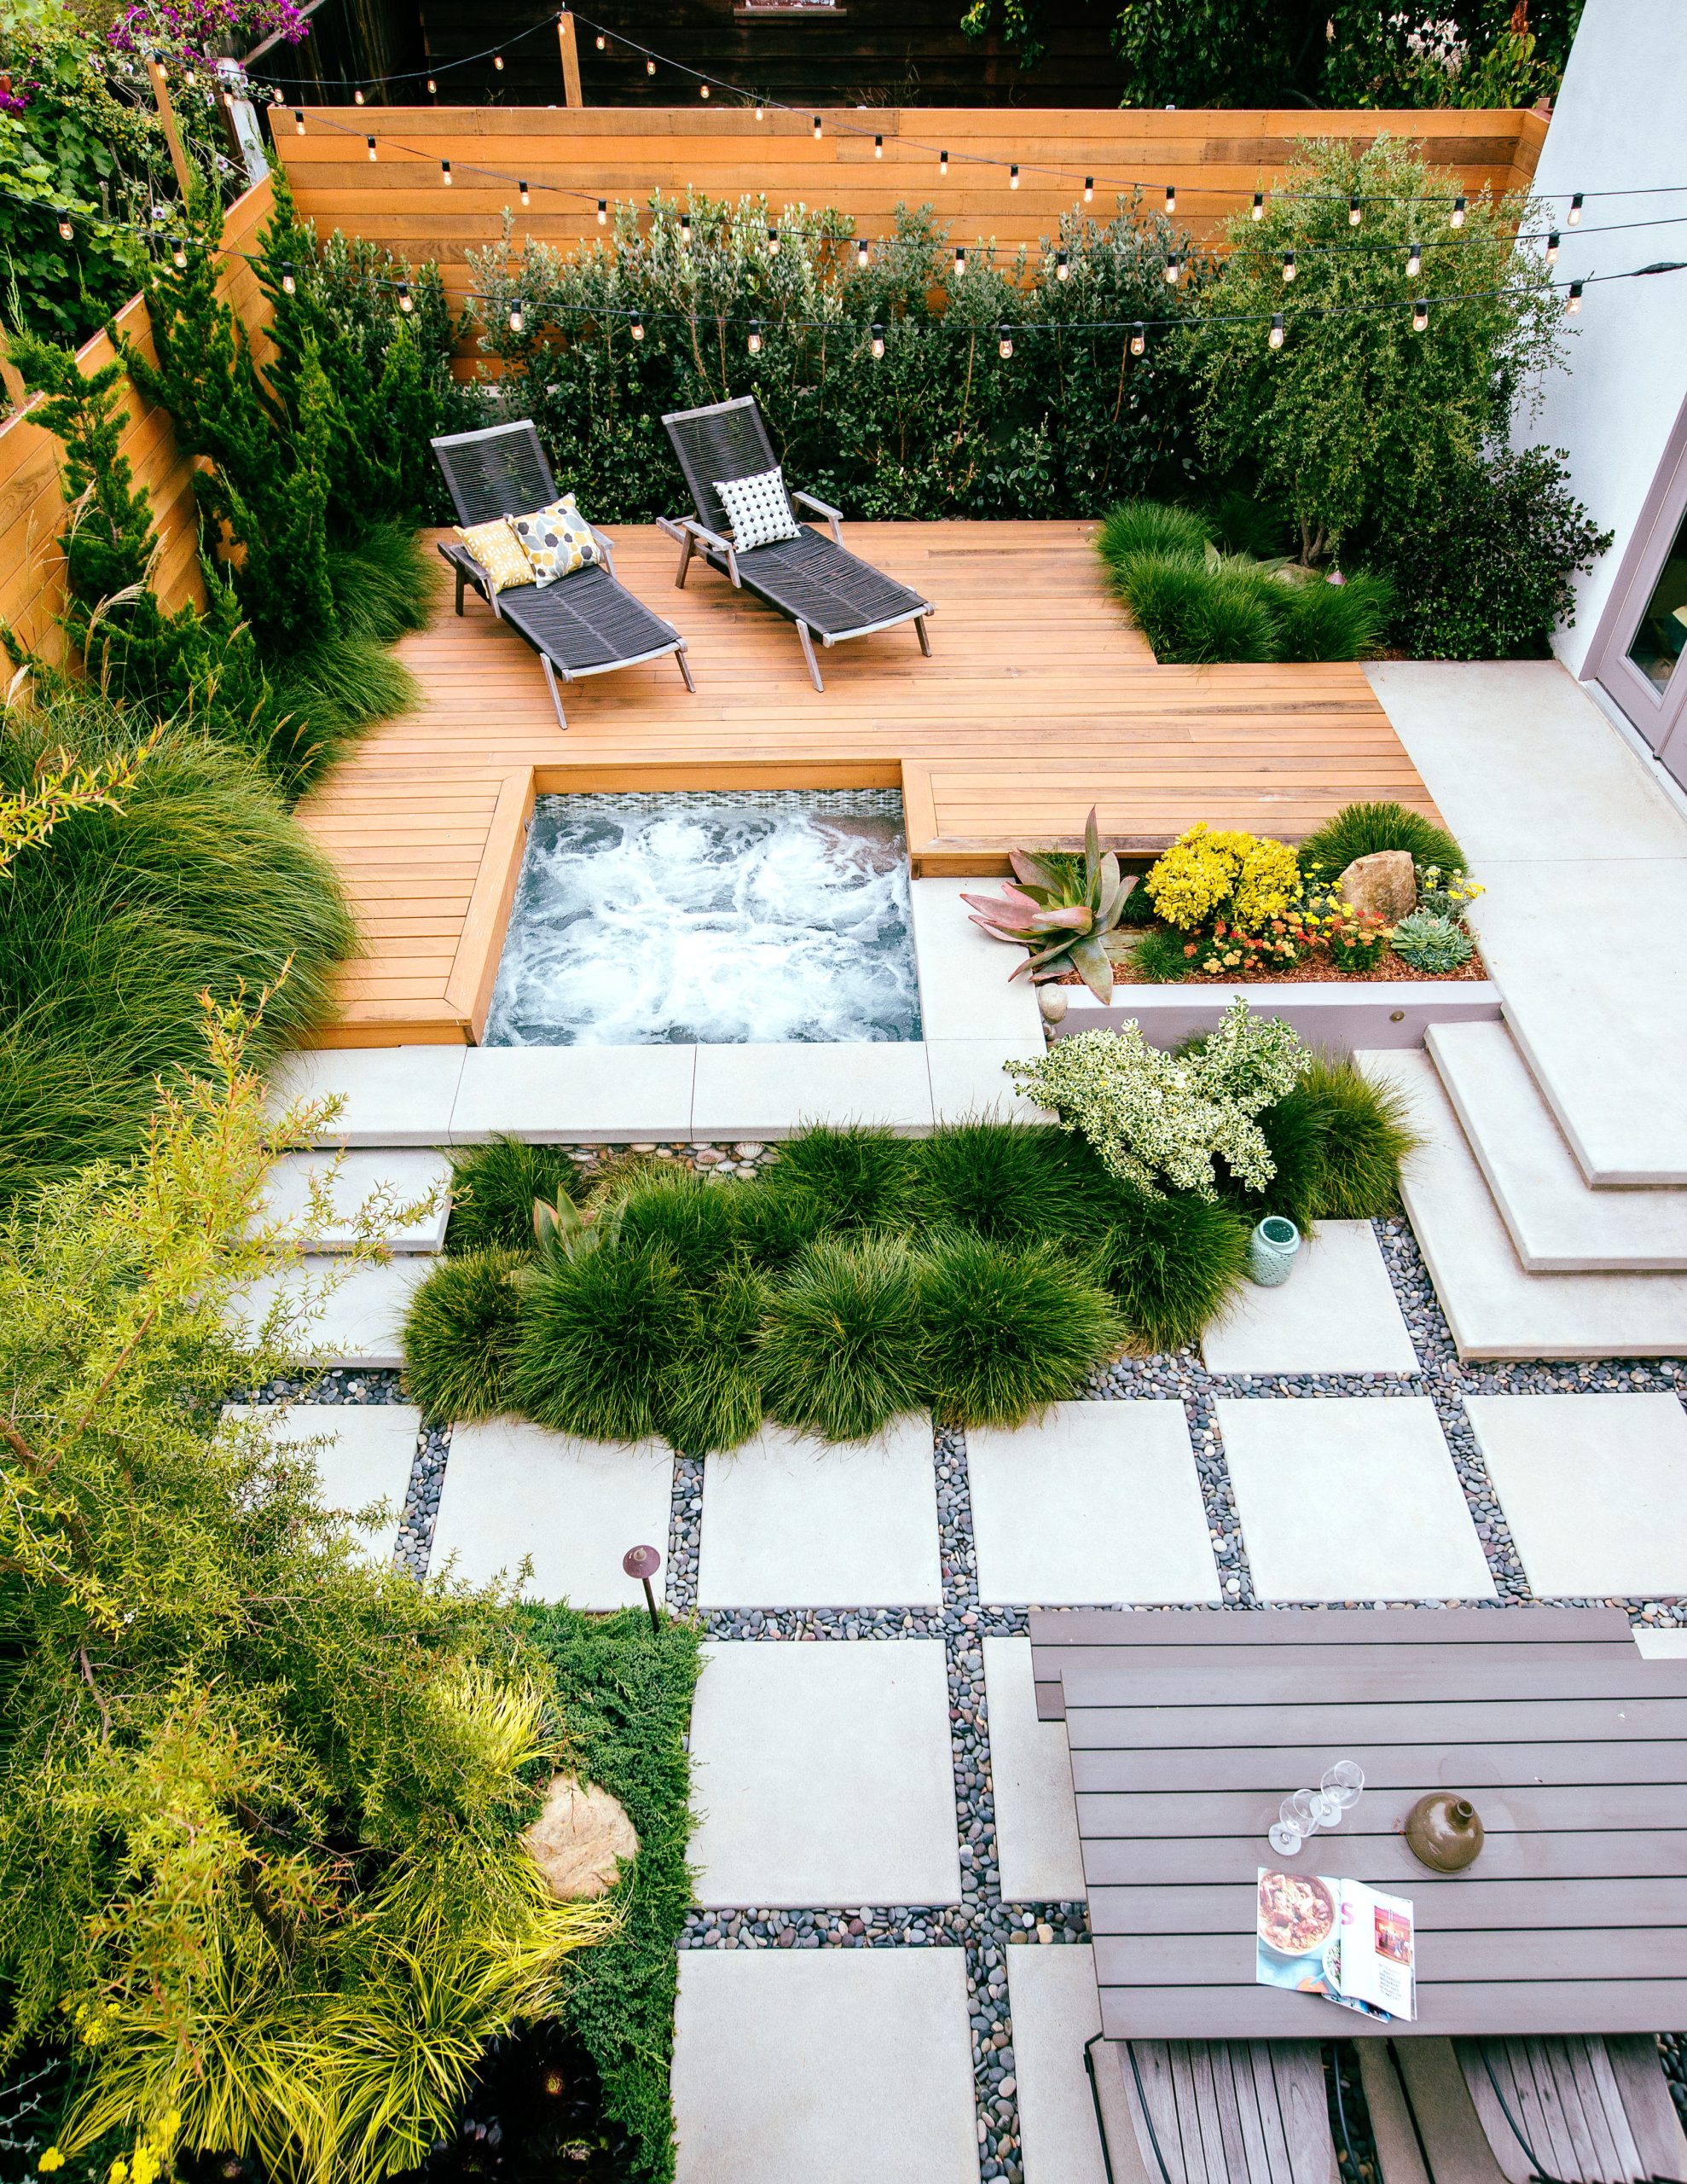
The string lights are the single element that transforms this from a collection of nice outdoor features into a cohesive, magical space. During the day, it’s a functional area with a deck, patio, and hot tub. But at night, the warm glow of the string lights overhead casts a unifying canopy over everything. They define the entire area as one large ‘room,’ creating an intimate, inviting ambiance that encourages you to stay outside long after the sun has set. Without them, it’s just a backyard; with them, it’s an experience.
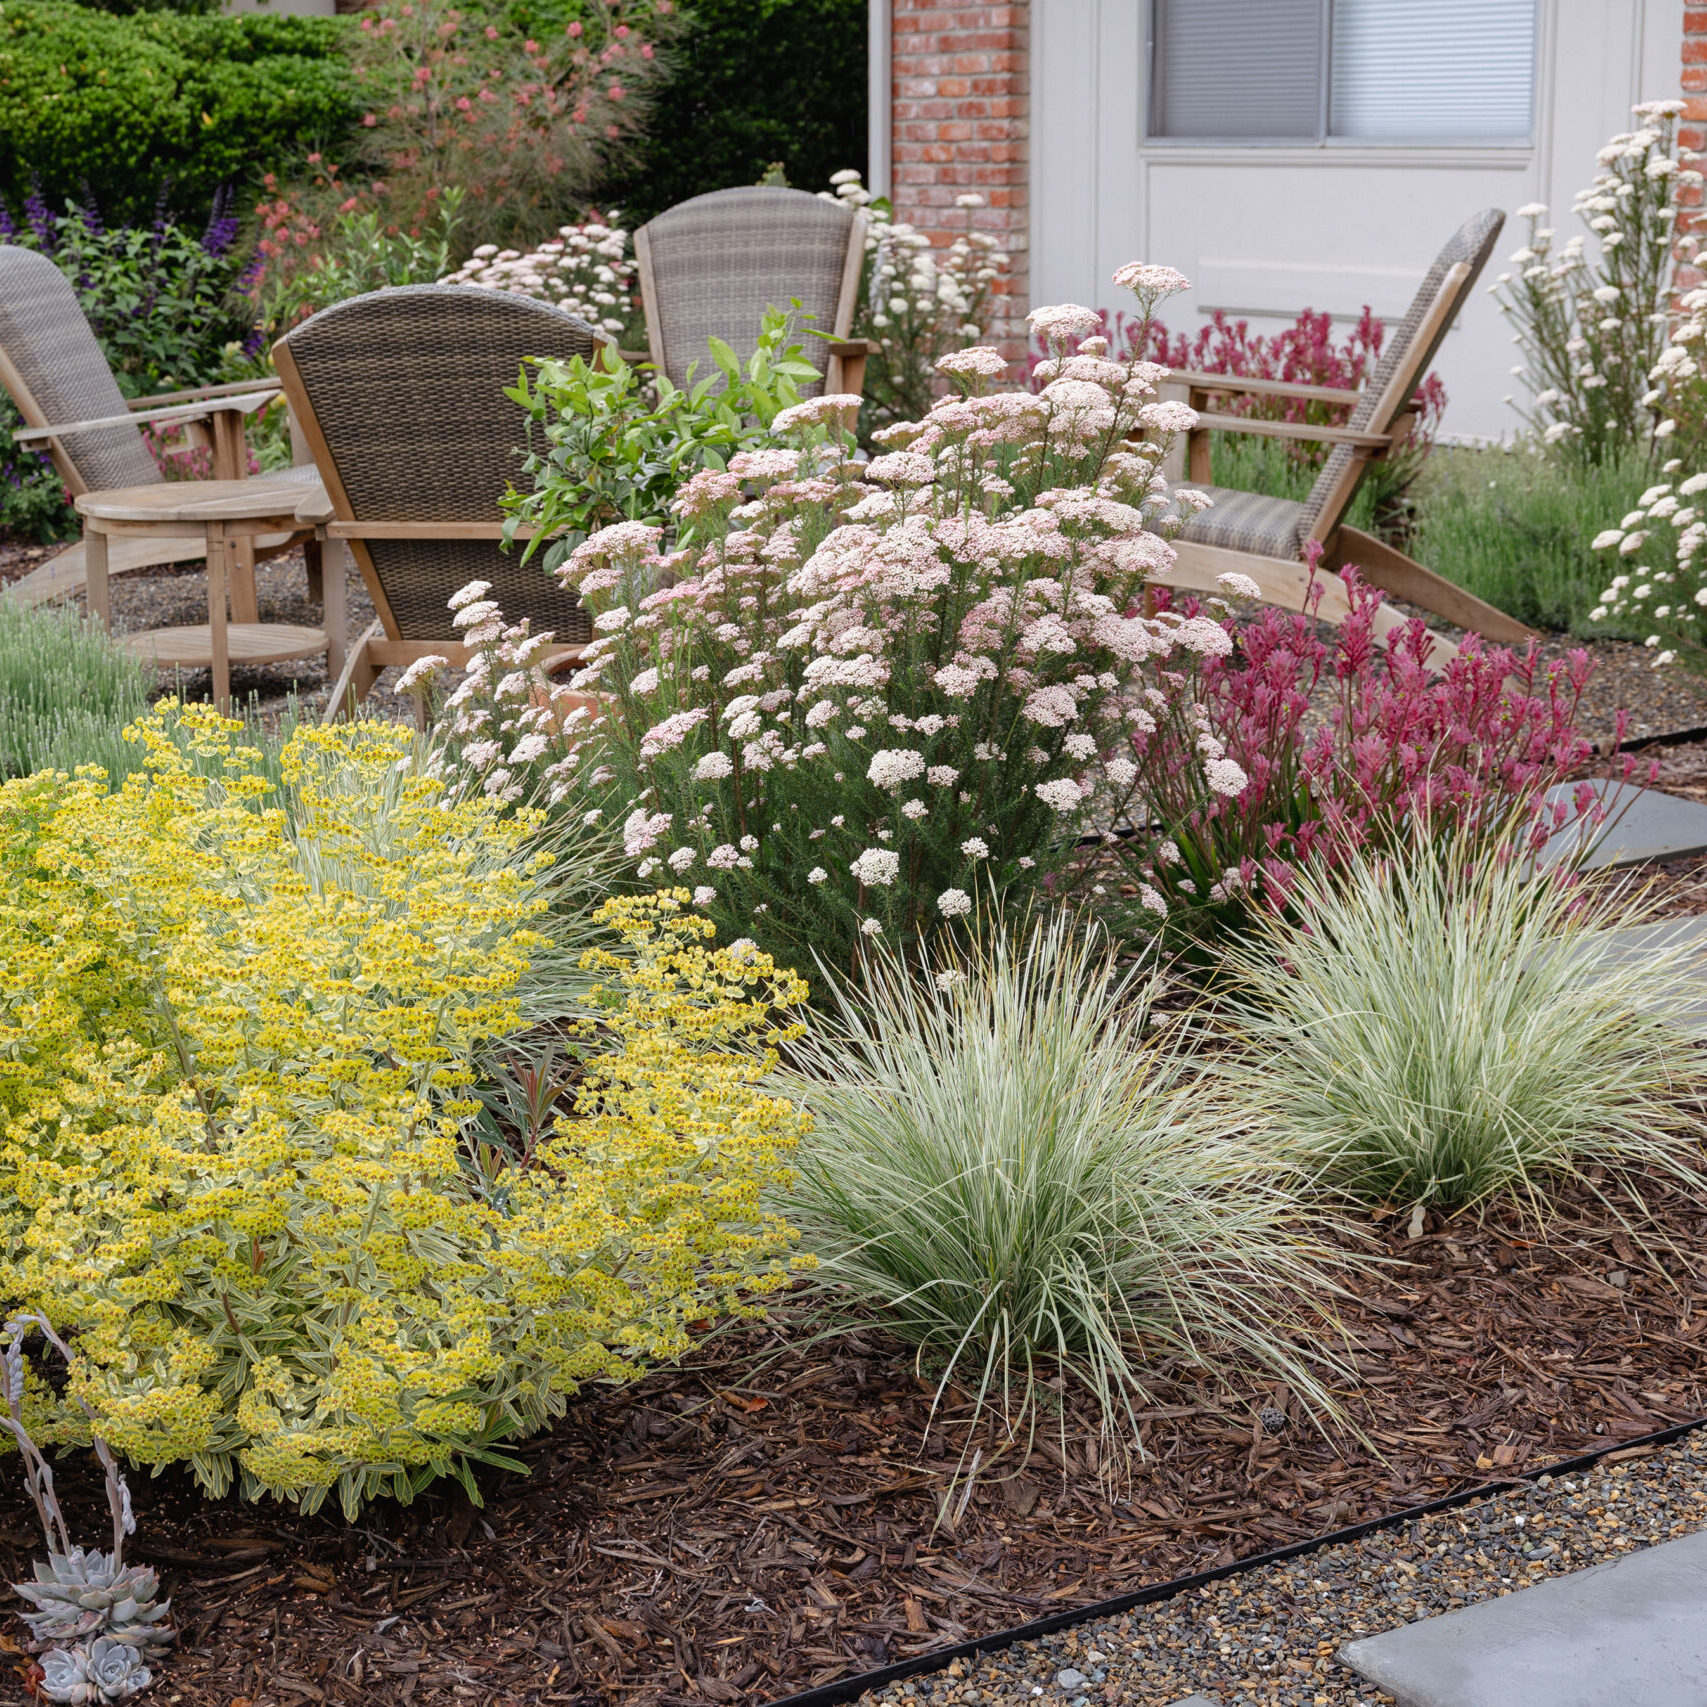
13. Go Minimalist with a Circular Patio and Integrated Concrete Bench
This design is a study in the power of simple geometry. The use of circles—the patio, the fire pit, and the dining table—creates a soft, communal, and modern feel. There are no sharp corners, which makes the space feel inherently more relaxed and inviting. The integrated concrete bench is brilliant because it provides massive amounts of seating without the visual clutter of individual chairs. It defines the edge of the patio while being part of the structure itself. The result is exceptionally clean, functional, and uncluttered, a strong contrast to the rustic feel of Idea #14.
|
📋 Copy HEX 🔗 Share |
A poured concrete feature like this bench is beautiful but unforgiving. Once it’s poured, it’s permanent. You can’t decide to move the bench to the other side of the patio next year. It also requires a highly skilled contractor to get the formwork for the curve just right. Any imperfections in the form will be immortalized in the concrete. Furthermore, while durable, light-colored concrete can show stains from leaves, spills, or bird droppings and may require periodic pressure washing and sealing to maintain its clean, minimalist look.
14. Gather Around a Stone Fire Pit with a Lit, Curved Bench
The hidden lighting under the cap of the stone bench is the key to this design’s elevated feel. To achieve this, use LED hardscape strip lighting. These lights are specifically designed to be installed during construction, fitting discreetly under the overhang of a wall cap or stair tread. Plan for this from the beginning. You’ll need to run low-voltage wiring before the final capstones are mortared in place. A warm white light (around 2700K) will give you that cozy, inviting glow rather than a harsh, blue-white light.
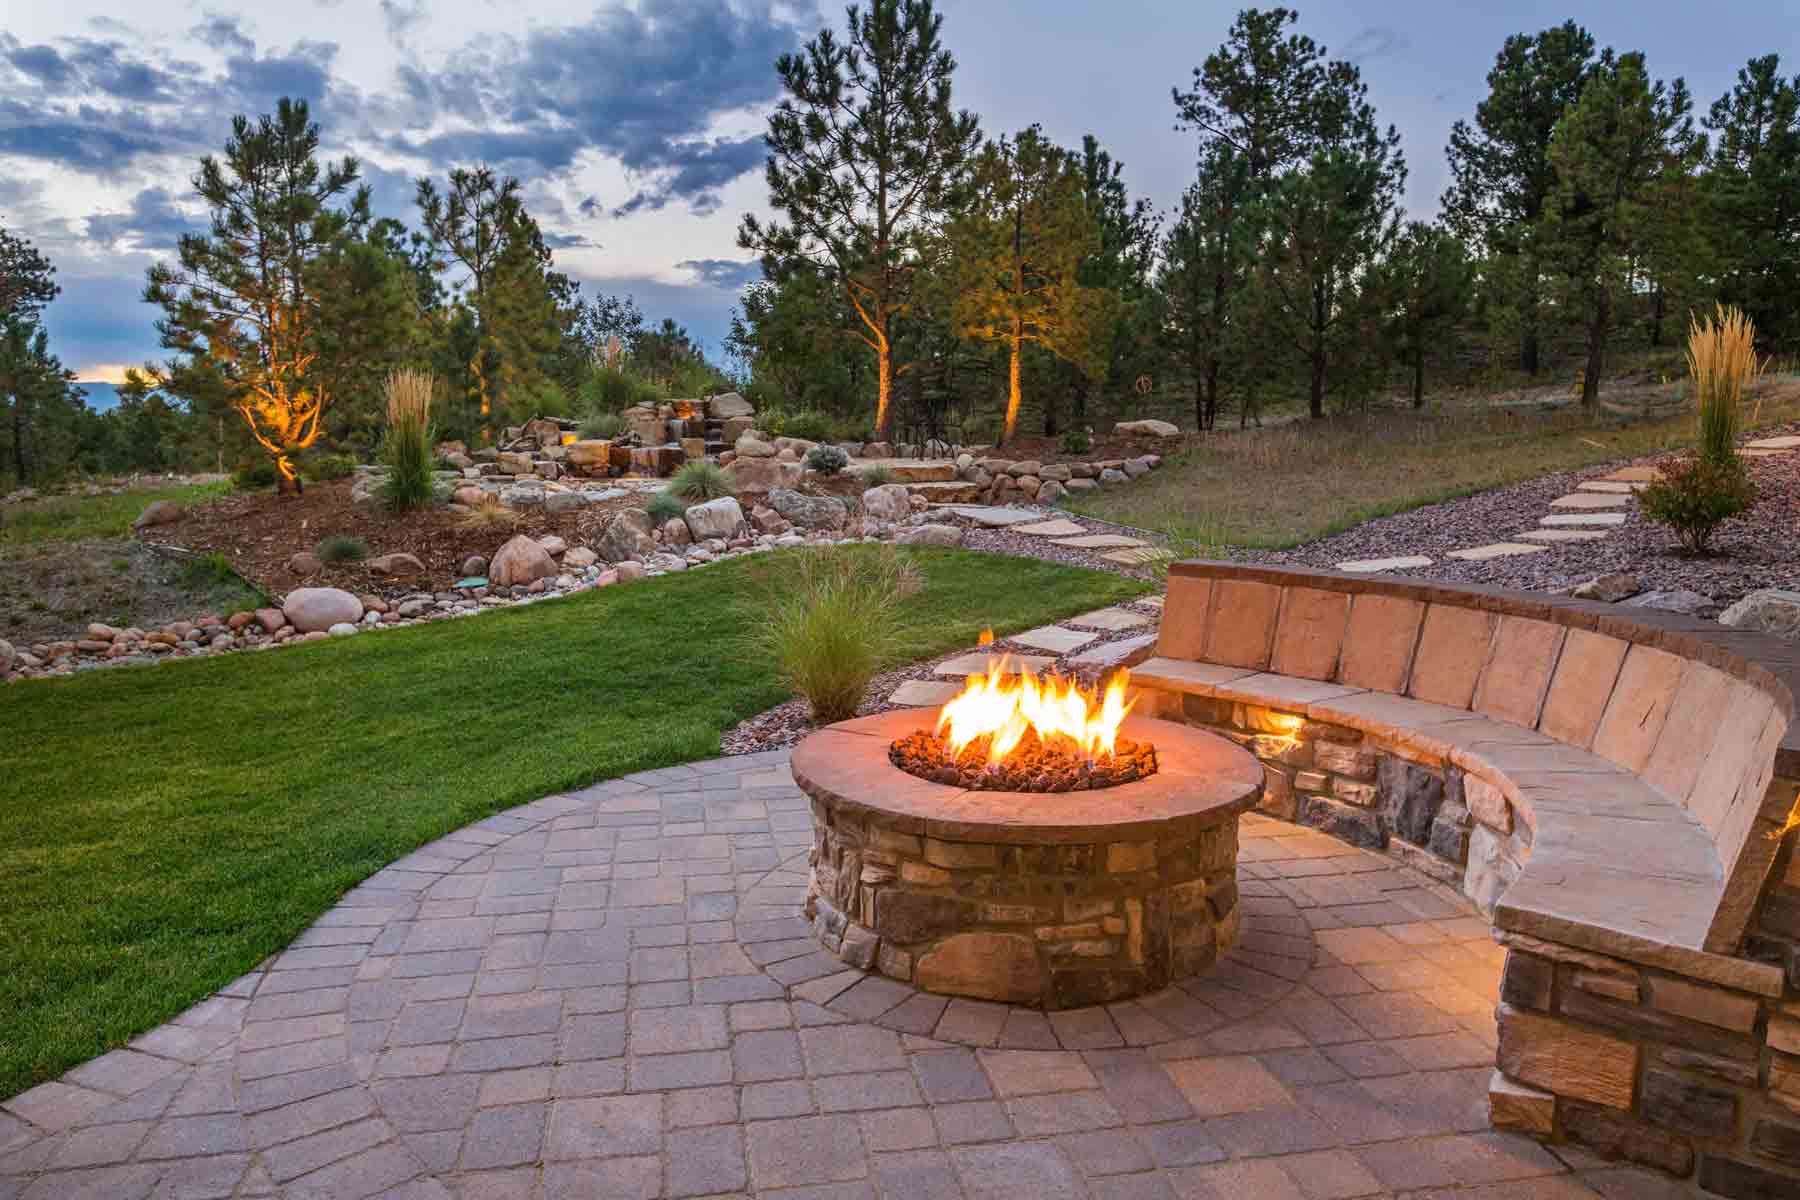
This look taps directly into the ‘third space’ trend, where homeowners are creating outdoor rooms that are just as comfortable and functional as their indoor living rooms. The combination of a fire feature (the ‘fireplace’), ample built-in seating (the ‘sofa’), and ambient lighting creates a magnetic gathering spot. It’s not just a patio; it’s an outdoor den. This desire to maximize usable living space and create cozy, communal experiences is a major driver in landscape design right now, and this fire pit setup is the perfect embodiment of that trend.
15. Contrast Textures with Carved Stone, Light Gravel, and Lush Plants
This garden’s visual interest comes from a carefully balanced textural equation: 40% soft, lush foliage (the groundcover and shrubs), 30% hard, solid mass (the large carved stone blocks), 20% fine, loose texture (the light gravel), and 10% vibrant color (the pink flowering bush). If you change one element, you must adjust the others. For example, if you used a larger gravel, you might need bolder plants to keep the balance. This formula ensures that no single texture dominates, creating a rich, layered, and harmonious composition.
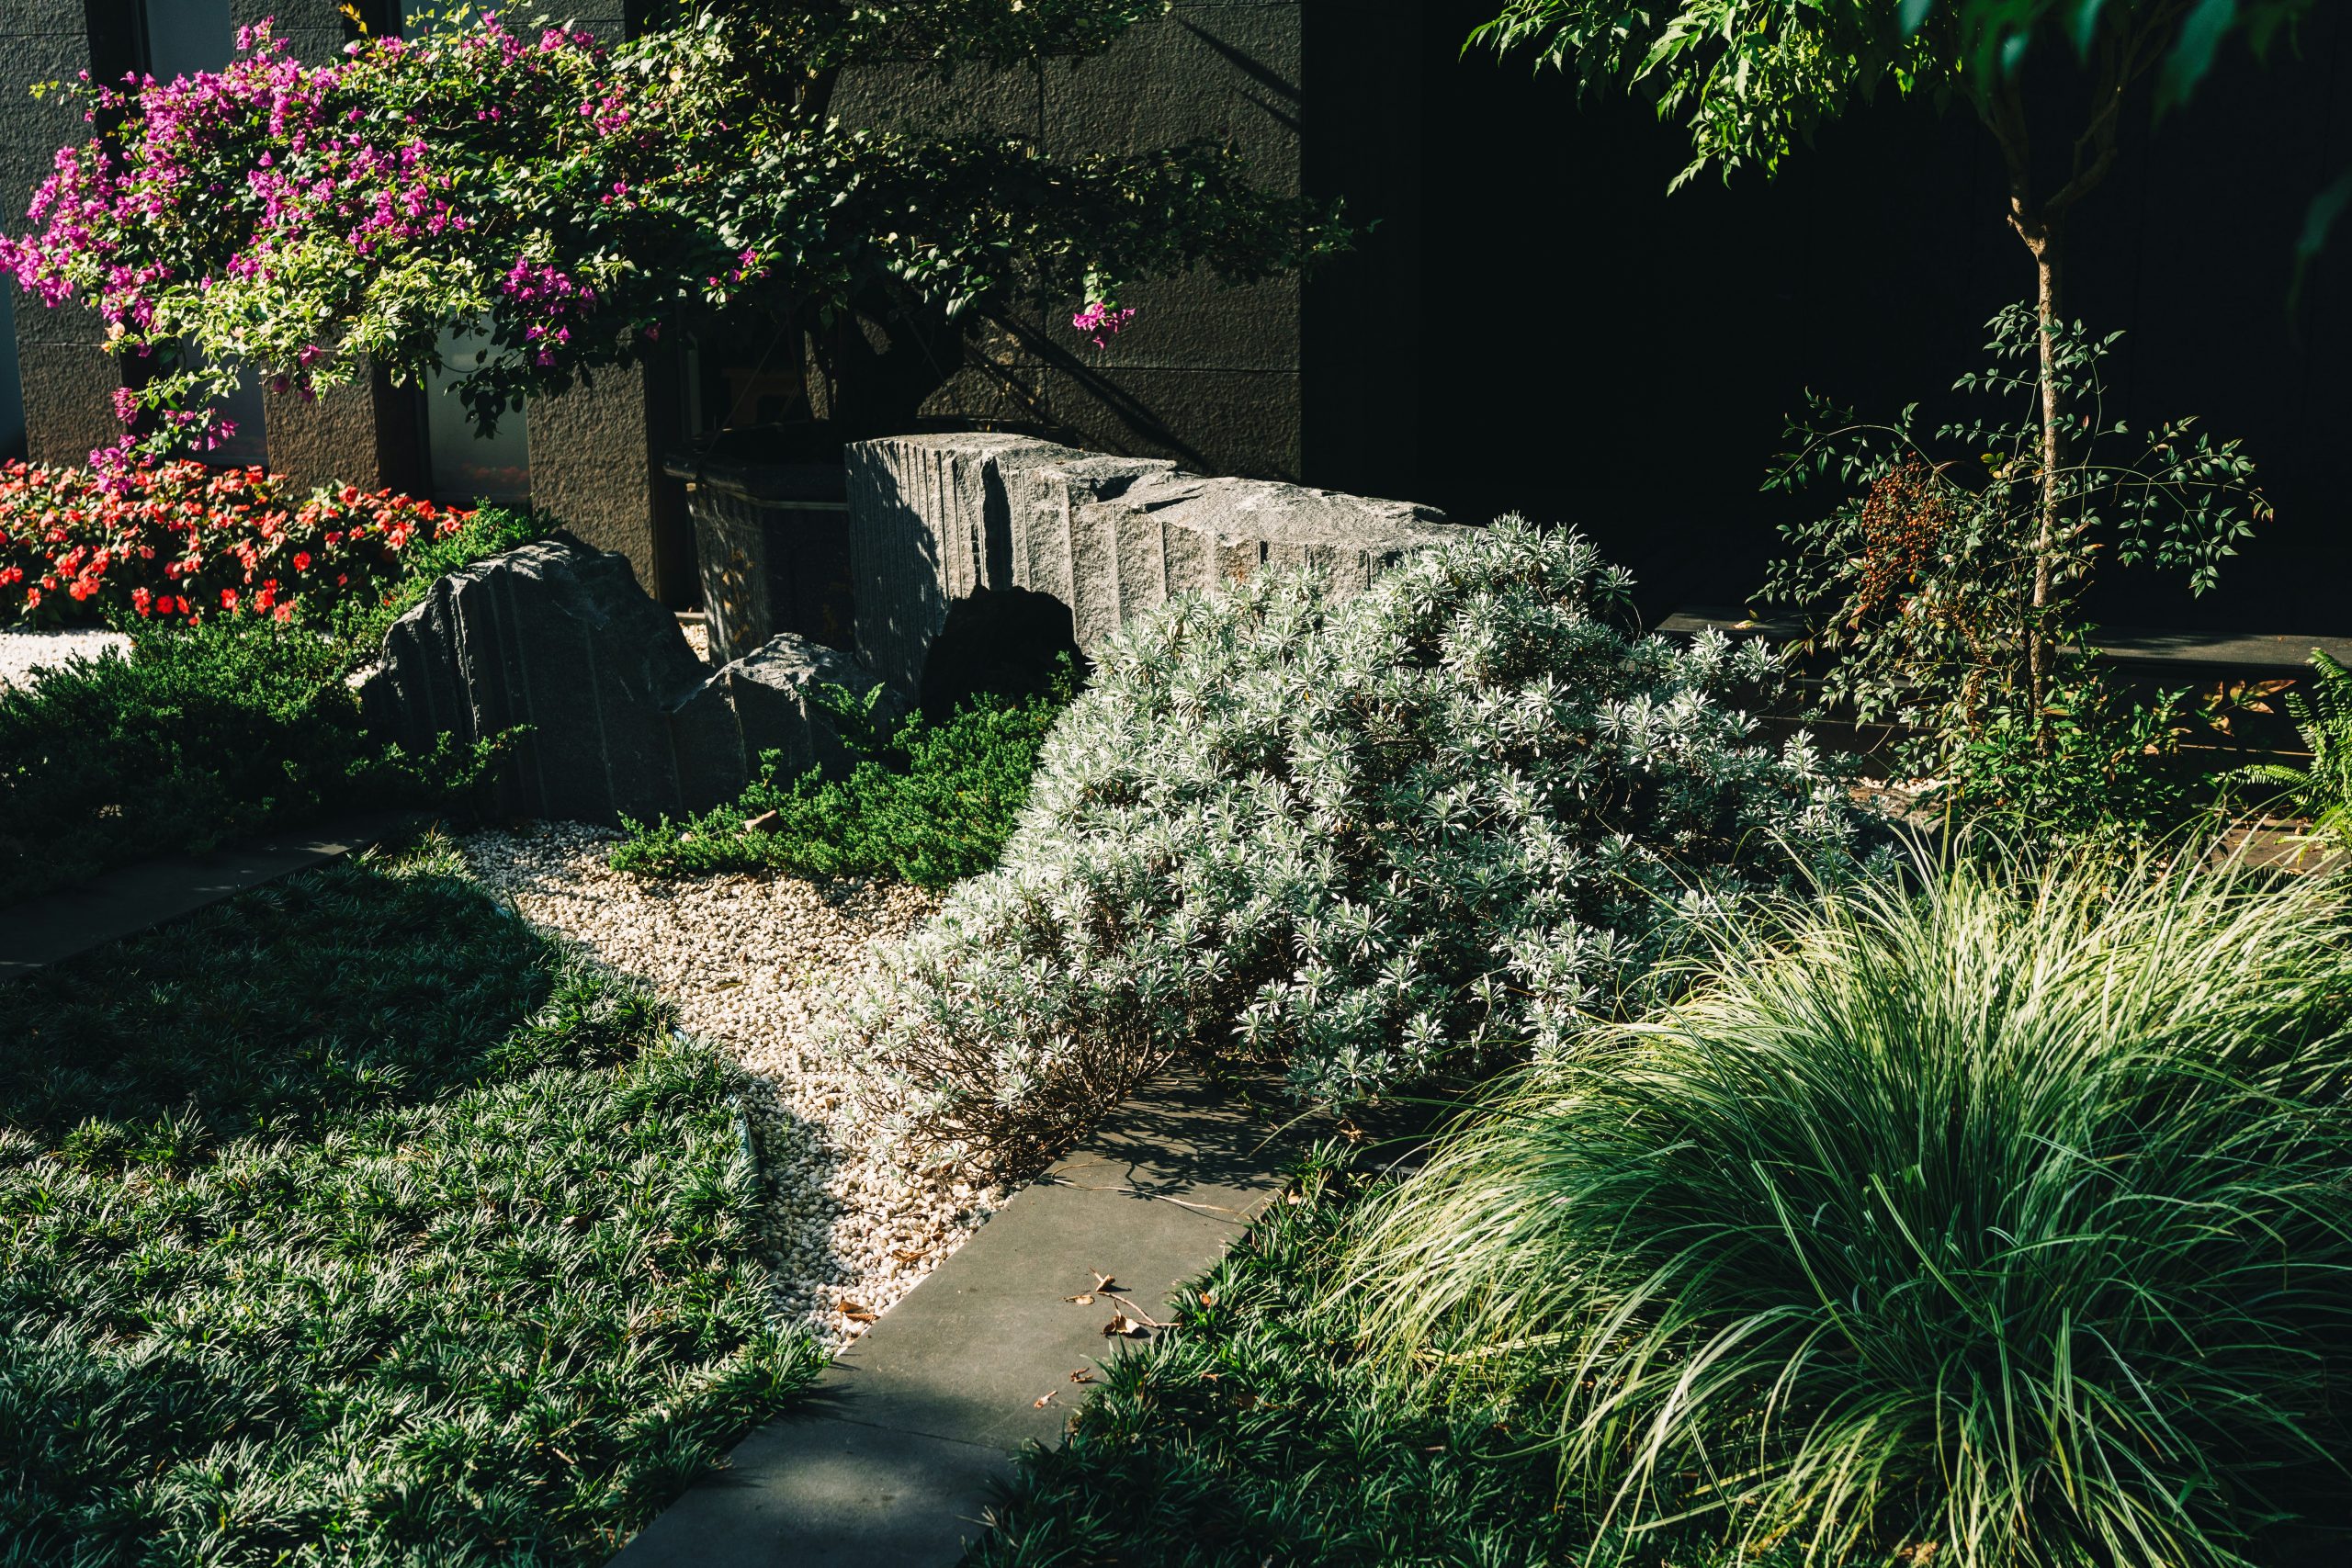
The single most important element here is the contrast in scale. You have the tiny, individual pieces of gravel, the medium-sized leaves of the shrubs, and then the massive, solid carved stone blocks. Without the large stones, the garden would be pleasant but forgettable. The stones act as anchors, providing weight, permanence, and a focal point for the eye. They create the visual tension that makes the composition exciting. Everything else—the gravel, the path, the plants—is arranged in service to these monumental, sculptural elements.
16. Create a Modern Oasis with a Daybed and Wicker Hanging Chair
You don’t need a custom-built deck and a high-end daybed to get this relaxed vibe. Check Target or Walmart for outdoor daybeds, which can range from $500 to $1,200. For an even cheaper alternative, find a simple outdoor loveseat or even a sturdy wood pallet frame on Facebook Marketplace for under $200 and top it with a comfortable outdoor mattress or cushions. Wicker hanging chairs are widely available from stores like IKEA and Wayfair for $150-$400. The key is creating a designated ‘lounge zone’ and surrounding it with lots of potted plants to get that lush, private feel.
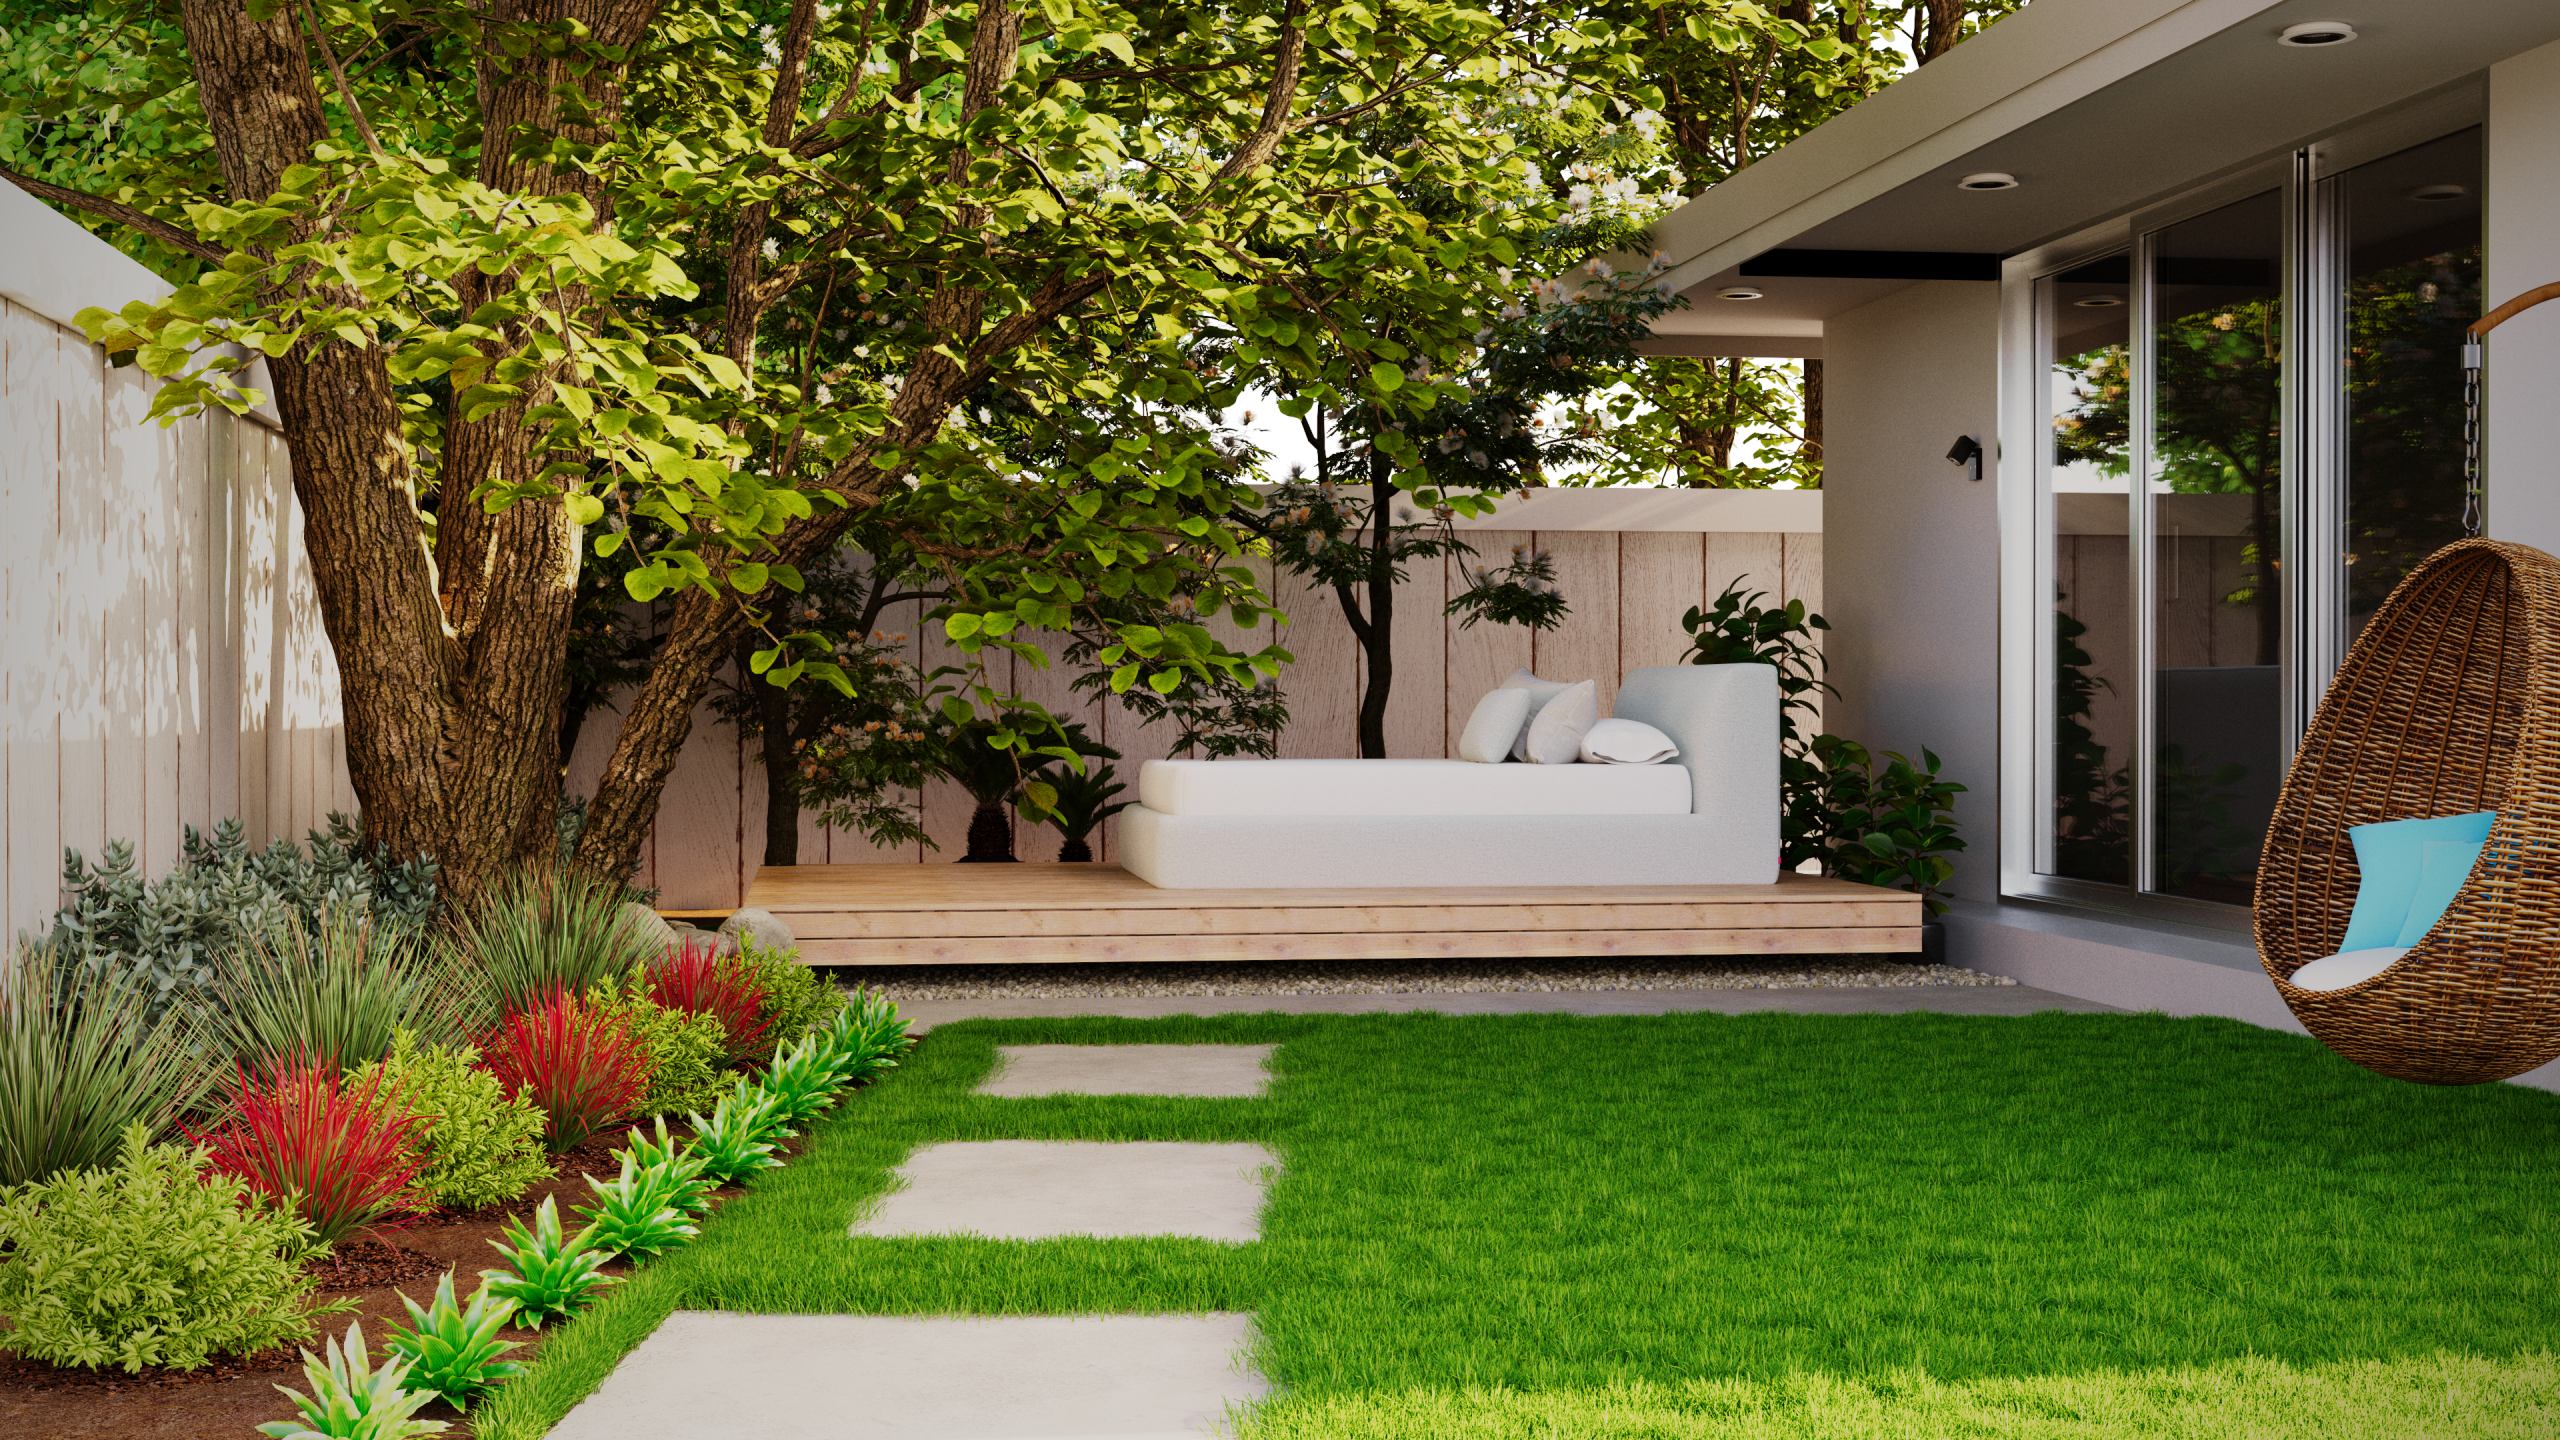
This design is perfect for a small to medium-sized backyard, especially a narrow urban or suburban lot. The ‘lounge deck’ area only needs to be about 10×12 feet to comfortably house the daybed. The hanging chair can be hung from a sturdy tree branch or from a stand, requiring only about a 5-foot-diameter circle of space. The use of large rectangular stepping stones over grass is a great space-saving trick, as it creates a functional path without the expense and visual weight of a full patio, making the lawn area feel larger.
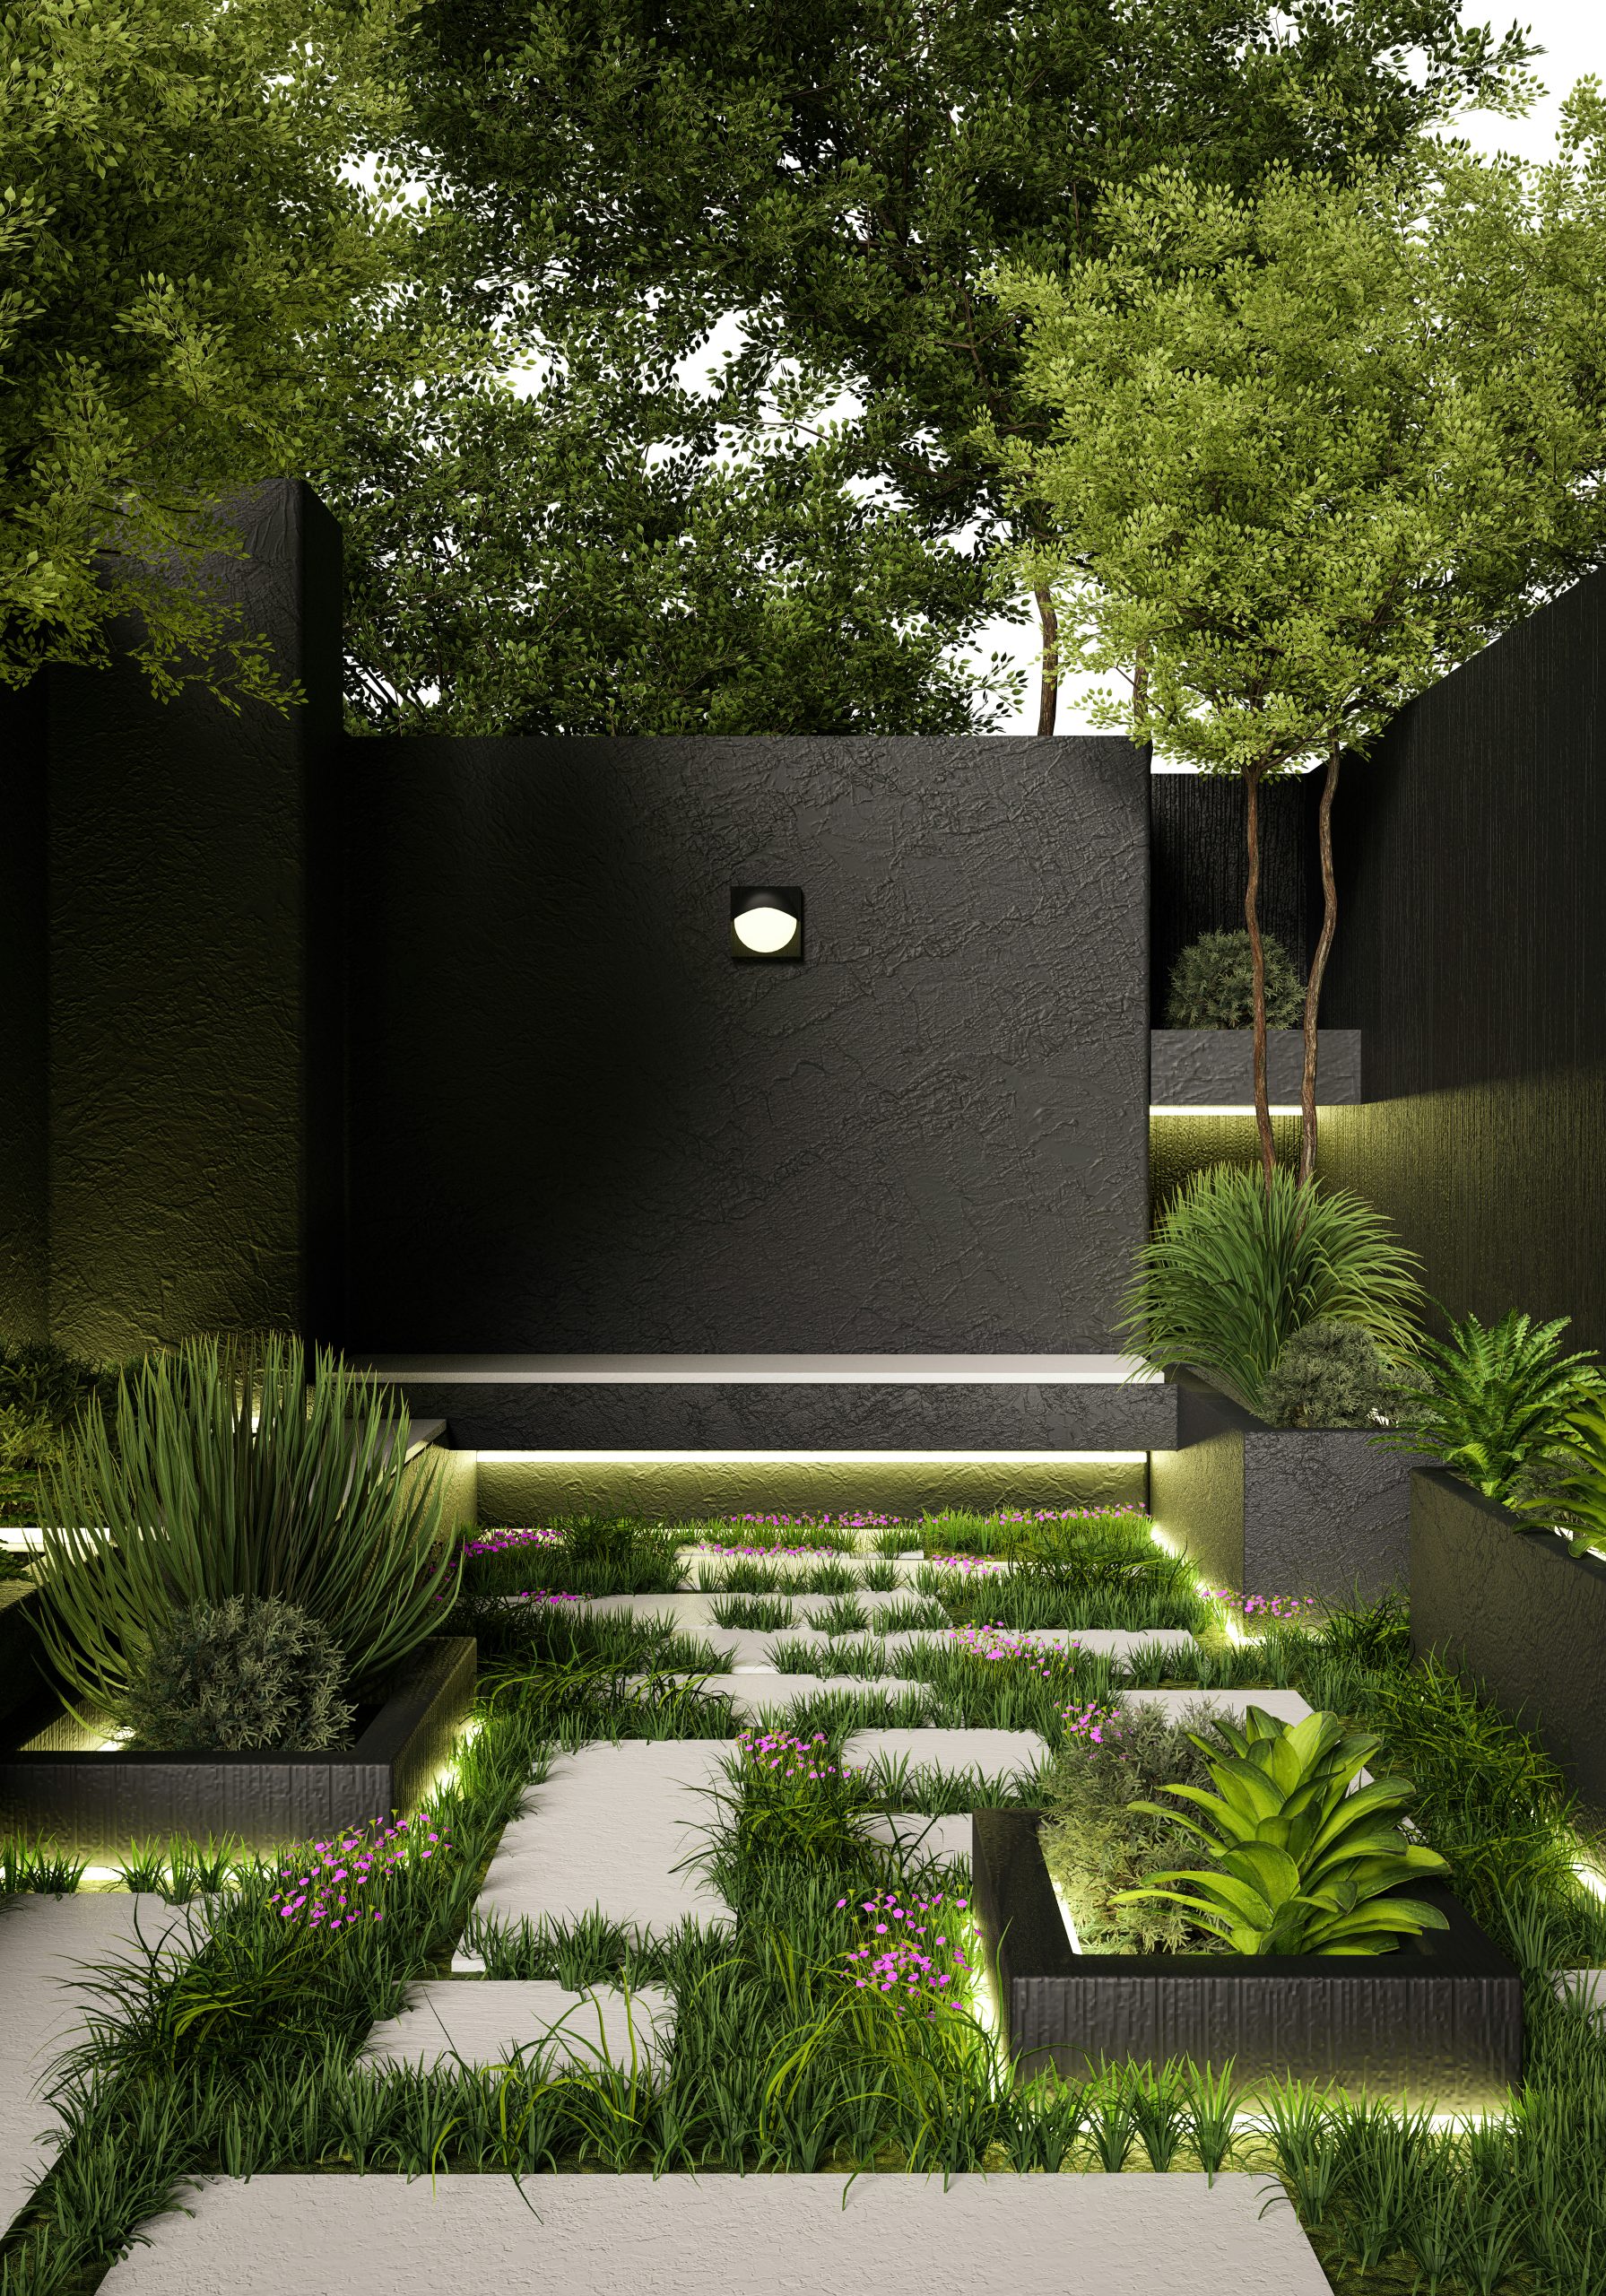
17. Add Drama with an Illuminated Path and Dark Textured Walls
Installing hidden LED strip lighting under a ledge or step can elevate your design. Here’s a brief guide:
|
📋 Copy HEX 🔗 Share |
- Plan & Measure: Before construction, decide exactly where you want the lights. Measure the lengths needed and plan the route for the low-voltage wiring back to the transformer.
- Install the Channel: Attach a metal or plastic mounting channel for the LED strip to the underside of your ledge. This protects the strip and diffuses the light.
- Run the Wires: Run the low-voltage cable from the transformer location to the start of each lighting run, leaving some slack.
- Adhere the Strip: Clean the channel, then stick the adhesive-backed LED strip light inside it. Snap on the diffuser cover.
- Connect & Test: Connect the strip to the low-voltage cable using waterproof connectors. Connect the cable to the transformer and test the lights before permanently hiding any wires.
Time estimate: 2-4 hours, plus planning. Cost: $150-$500 for a quality kit.
This landscape works because it’s a masterclass in ‘chiaroscuro’—the use of strong contrasts between light and dark. The dark, textured walls and planters absorb light, creating a dramatic, moody backdrop. The warm strip lighting doesn’t illuminate the whole space; instead, it selectively highlights architectural lines, pathways, and plant textures. This selective illumination creates depth, mystery, and a sense of sophisticated drama. The vibrant green of the grass and foliage pops intensely against the dark surfaces, making the natural elements appear even more lush.
18. Craft a Cozy Nighttime Vibe with String Lights and Poolside Dining
When hanging string lights for a cozy effect, always aim for a warm color temperature, around 2200K to 2700K. This mimics the glow of a candle or firelight. Anything higher (3000K+) starts to feel like an office or garage and will ruin the intimate mood. Secondly, resist the urge to pull them perfectly taut. A gentle scallop or drape is more relaxed and visually pleasing. For a 20-foot span, aim for a droop of about 18-24 inches in the center. This casual drape is key to achieving that effortlessly romantic, bistro-like atmosphere.
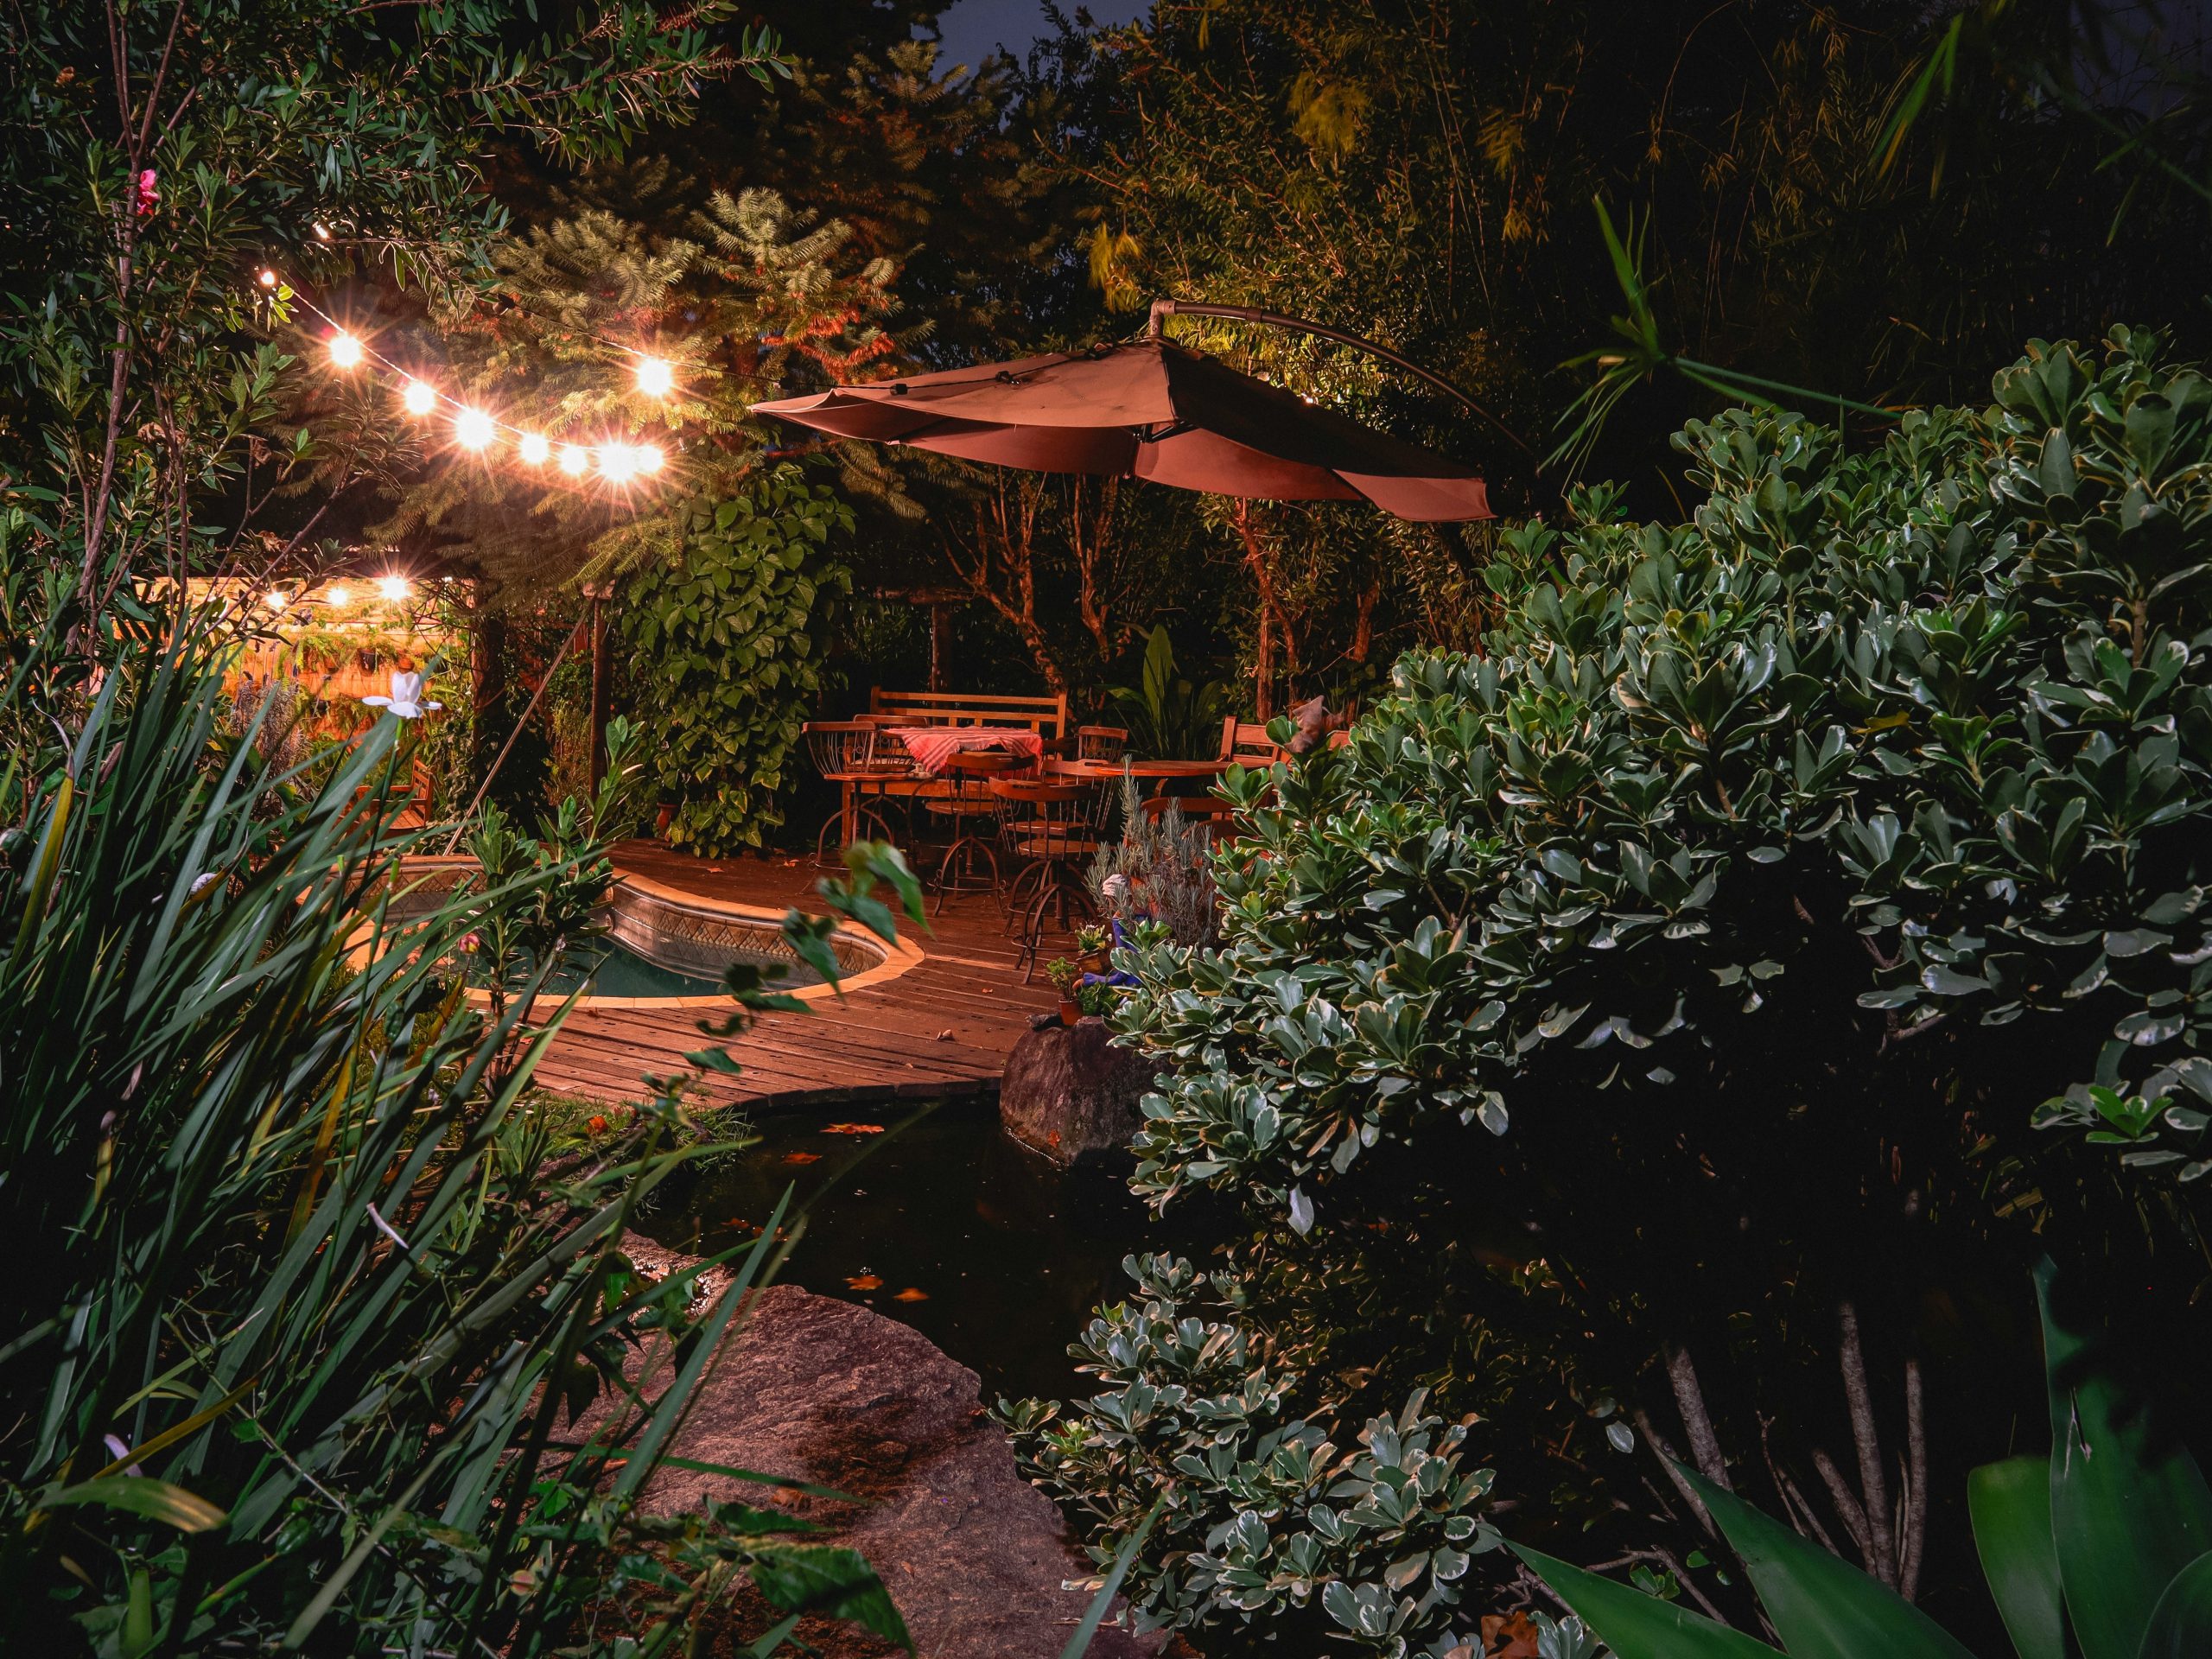
The entire vibe of this scene can be recreated on a shoestring budget. You don’t need a pool or a custom deck. Find a corner of your yard or patio. Buy two or three sets of commercial-grade outdoor string lights ($40-$60 per set). Source a used wooden dining set from Facebook Marketplace or a thrift store ($100-$250). The ‘pond’ can be a simple, large, dark-colored planter bowl filled with water, with a few large rocks placed around it ($50). The lushness comes from cramming lots of potted plants of varying sizes around the area. It’s all about creating a dense, green, well-lit corner.
19. Boost Curb Appeal with a Curved Path and Well-Defined Garden Beds
A landscape with this much dark mulch has one big, messy secret: mulch splash. During a heavy rain, soil and dark mulch particles will splash up onto the clean concrete path and the base of your home’s facade, creating a muddy, spotted mess. While a natural stone edging helps contain the mulch bed, it can’t stop the splash. Be prepared for some post-rain cleanup, sweeping the path and occasionally hosing down the bottom few inches of your siding or foundation to keep things looking as neat and tidy as they do in this picture.
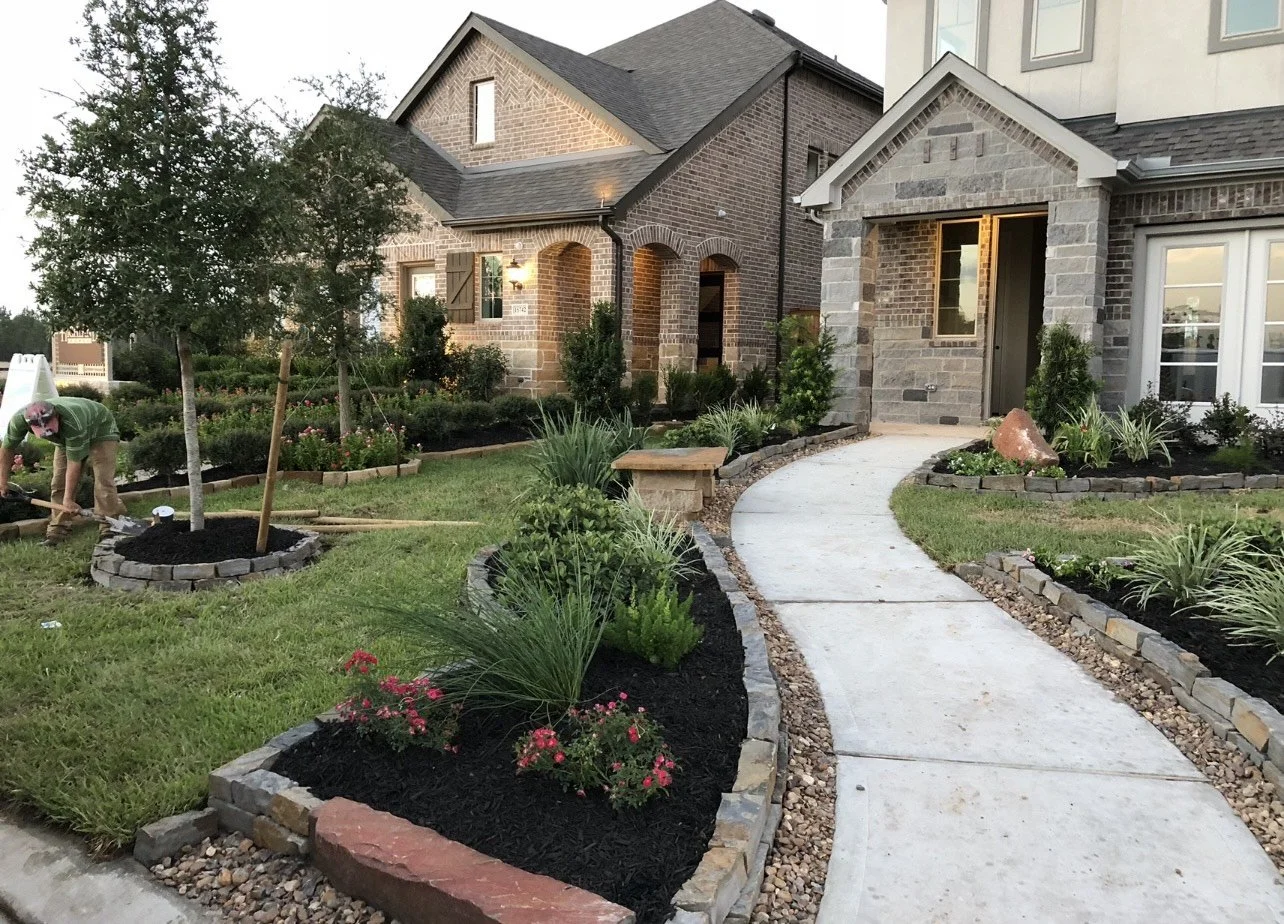
This classic, pleasing curb appeal follows a simple formula: 50% lush green lawn, 30% deep, dark mulch beds, and 20% hardscape and structure (the concrete path and house facade). The color is used sparingly, with maybe 5% of the total area dedicated to the pops of pink flowers. The curve of the path is crucial; it breaks up the rigid geometry of the house and lawn, creating a more organic, welcoming entry. The dark mulch provides a high-contrast background that makes the green of the shrubs pop.
20. Guide the Eye with a Tiered Path of Pavers and Stepping Stones
This design is effective because it creates a journey. By changing the paving material—from broad grey pavers to stepping stones in black gravel to a solid curving path—it signals transitions between different ‘rooms’ in the garden. This variation in texture and form slows down the journey and makes the space feel larger and more complex than it actually is. The tall vertical elements, like the bamboo and columnar trees, reinforce the path’s direction and add another layer of structural interest against the dense, horizontal hedges.
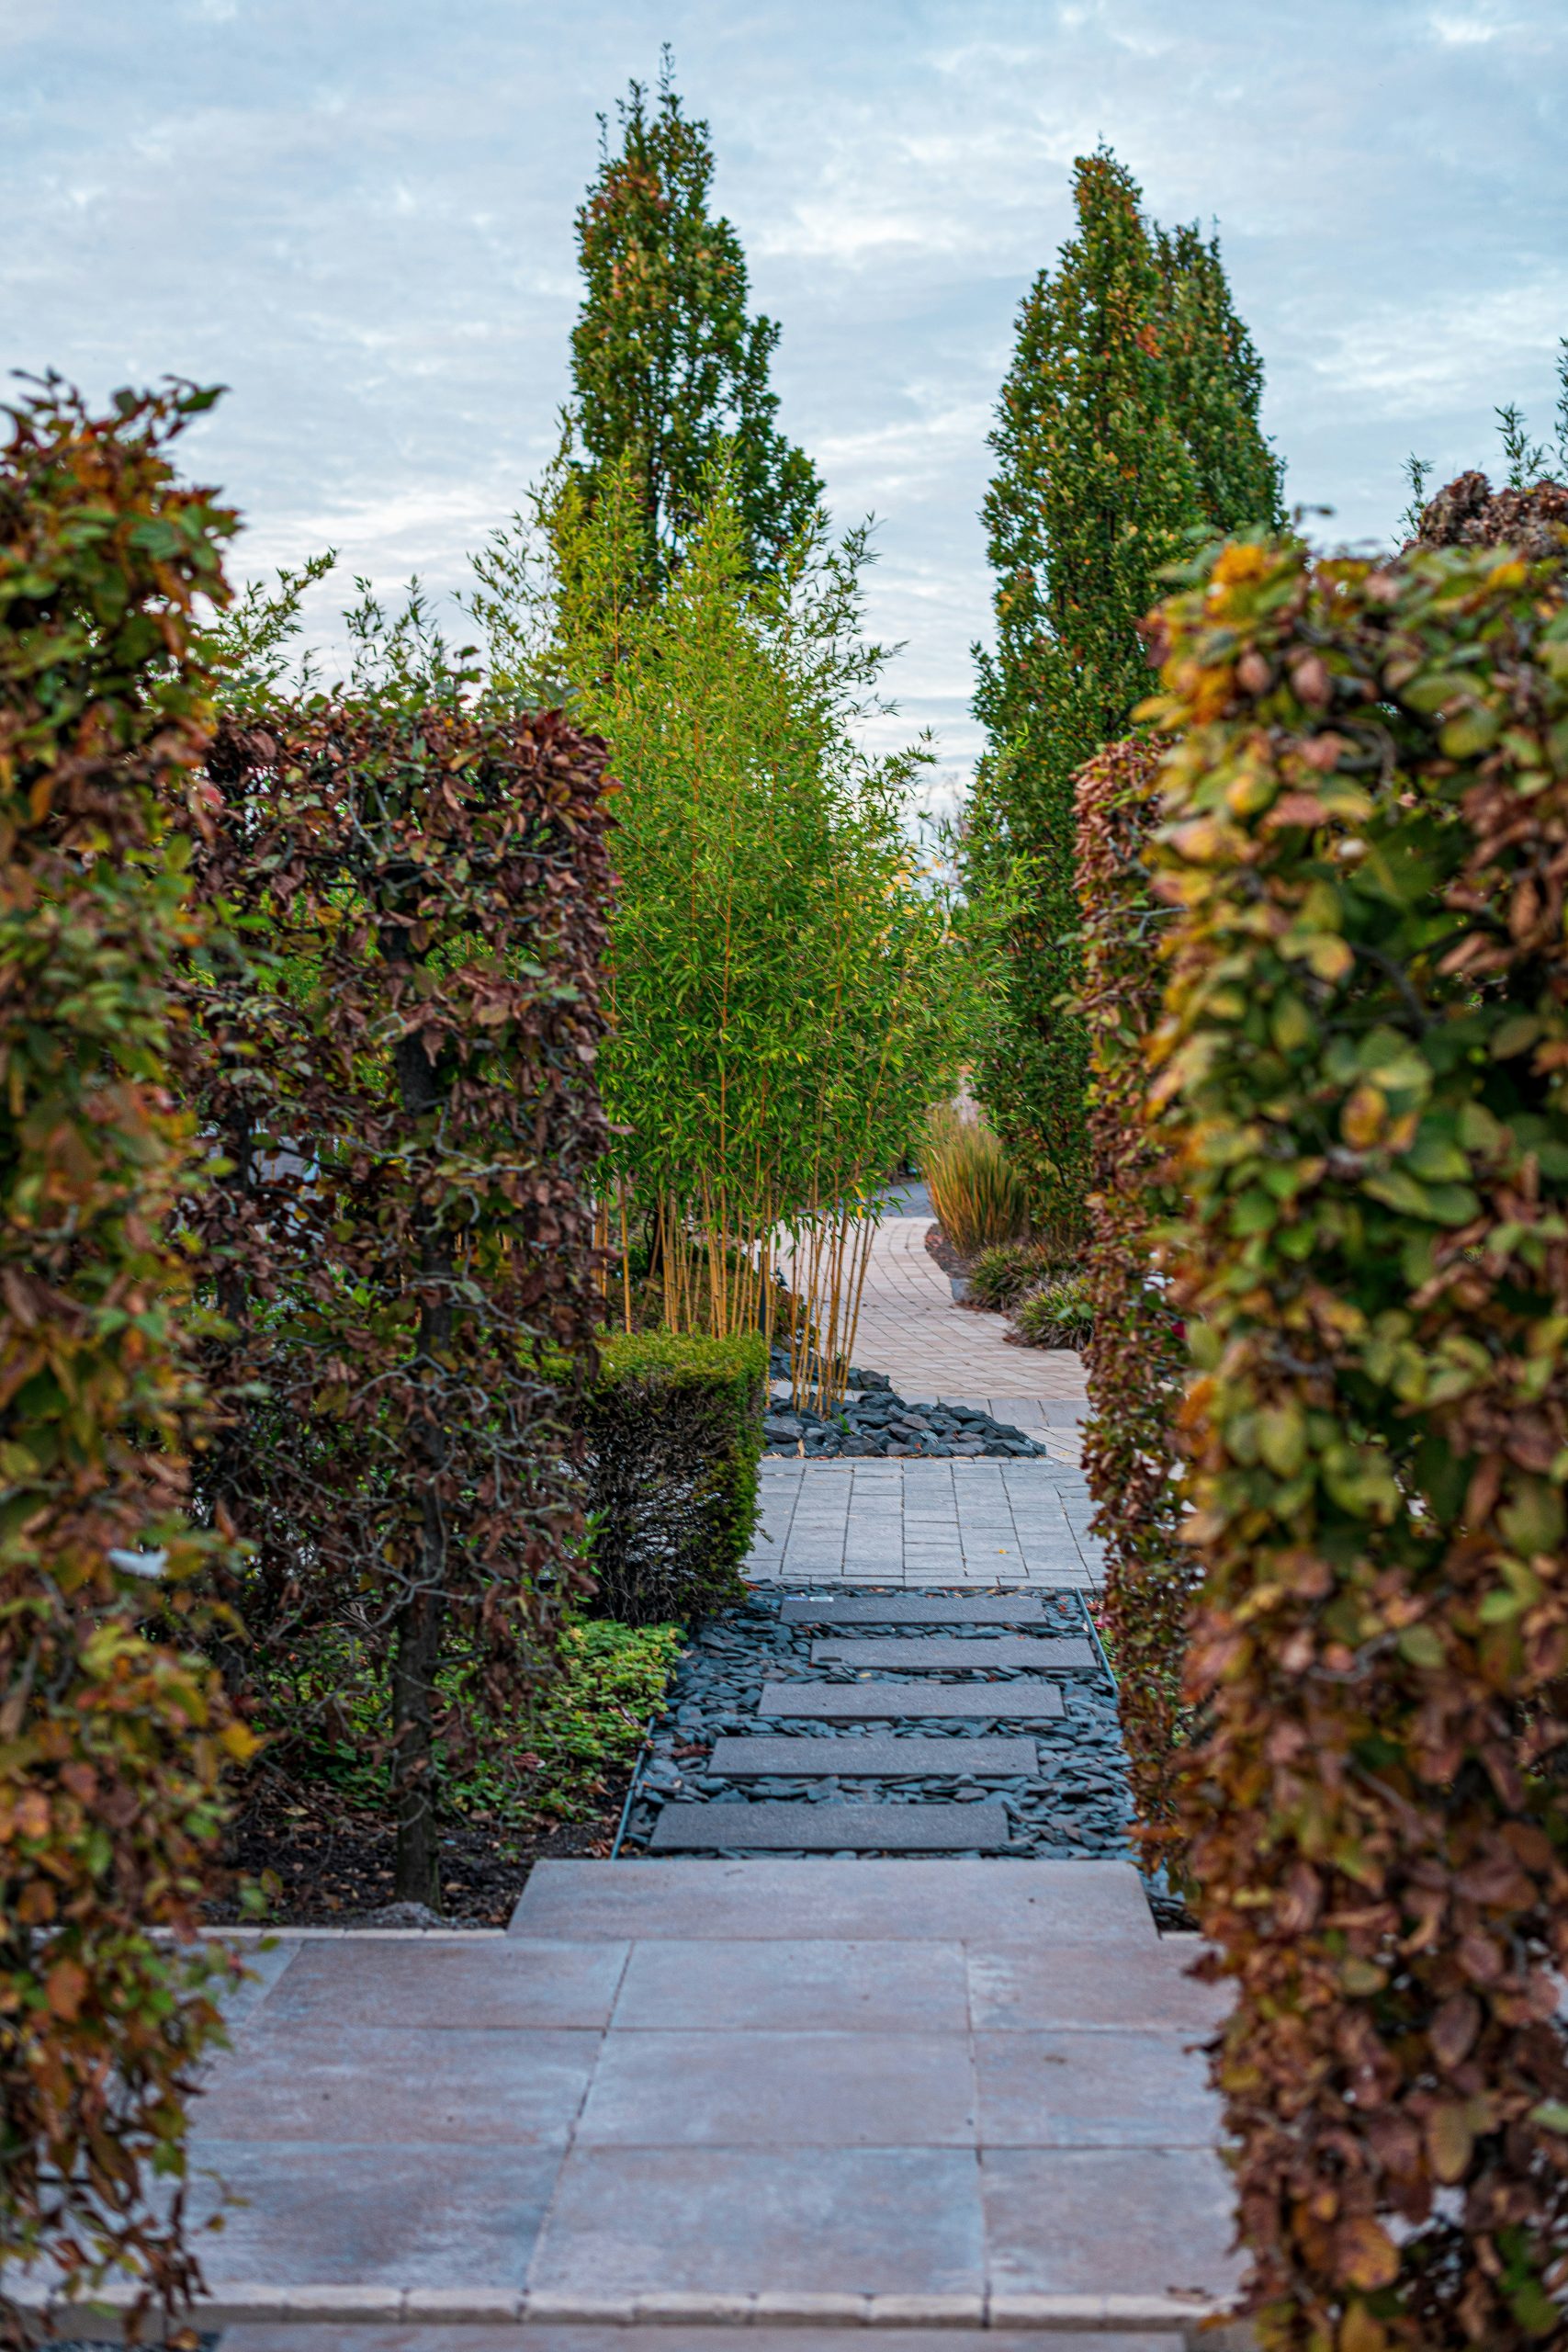
The single element holding this entire composition together is the tall, dense hedge. It acts as the canvas upon which all other elements are painted. It provides a uniform, textured backdrop that makes the different path materials and plant forms stand out. It creates privacy and a sense of enclosure, focusing your attention inward on the garden’s design. If you removed the hedge, the pathway and plantings would feel disconnected and exposed, floating in an undefined space. The hedge is the frame, the walls, and the foundation of the entire scene.
21. Achieve Formal Elegance with a Symmetrical Garden and Fountain
Symmetry requires space to be appreciated. For a formal design like this to work, the central pathway should be at least 4-5 feet wide to feel grand rather than cramped. The total width of the scene, including the path and flanking garden beds, should be a minimum of 20-25 feet. The length of the path leading to the focal point (the fountain) needs to be at least 30-40 feet to create a sense of procession and allow the pattern of the repeating shrubs to establish itself. This isn’t a style for a small or irregularly shaped yard. For a more naturalistic look, compare with Idea #22.
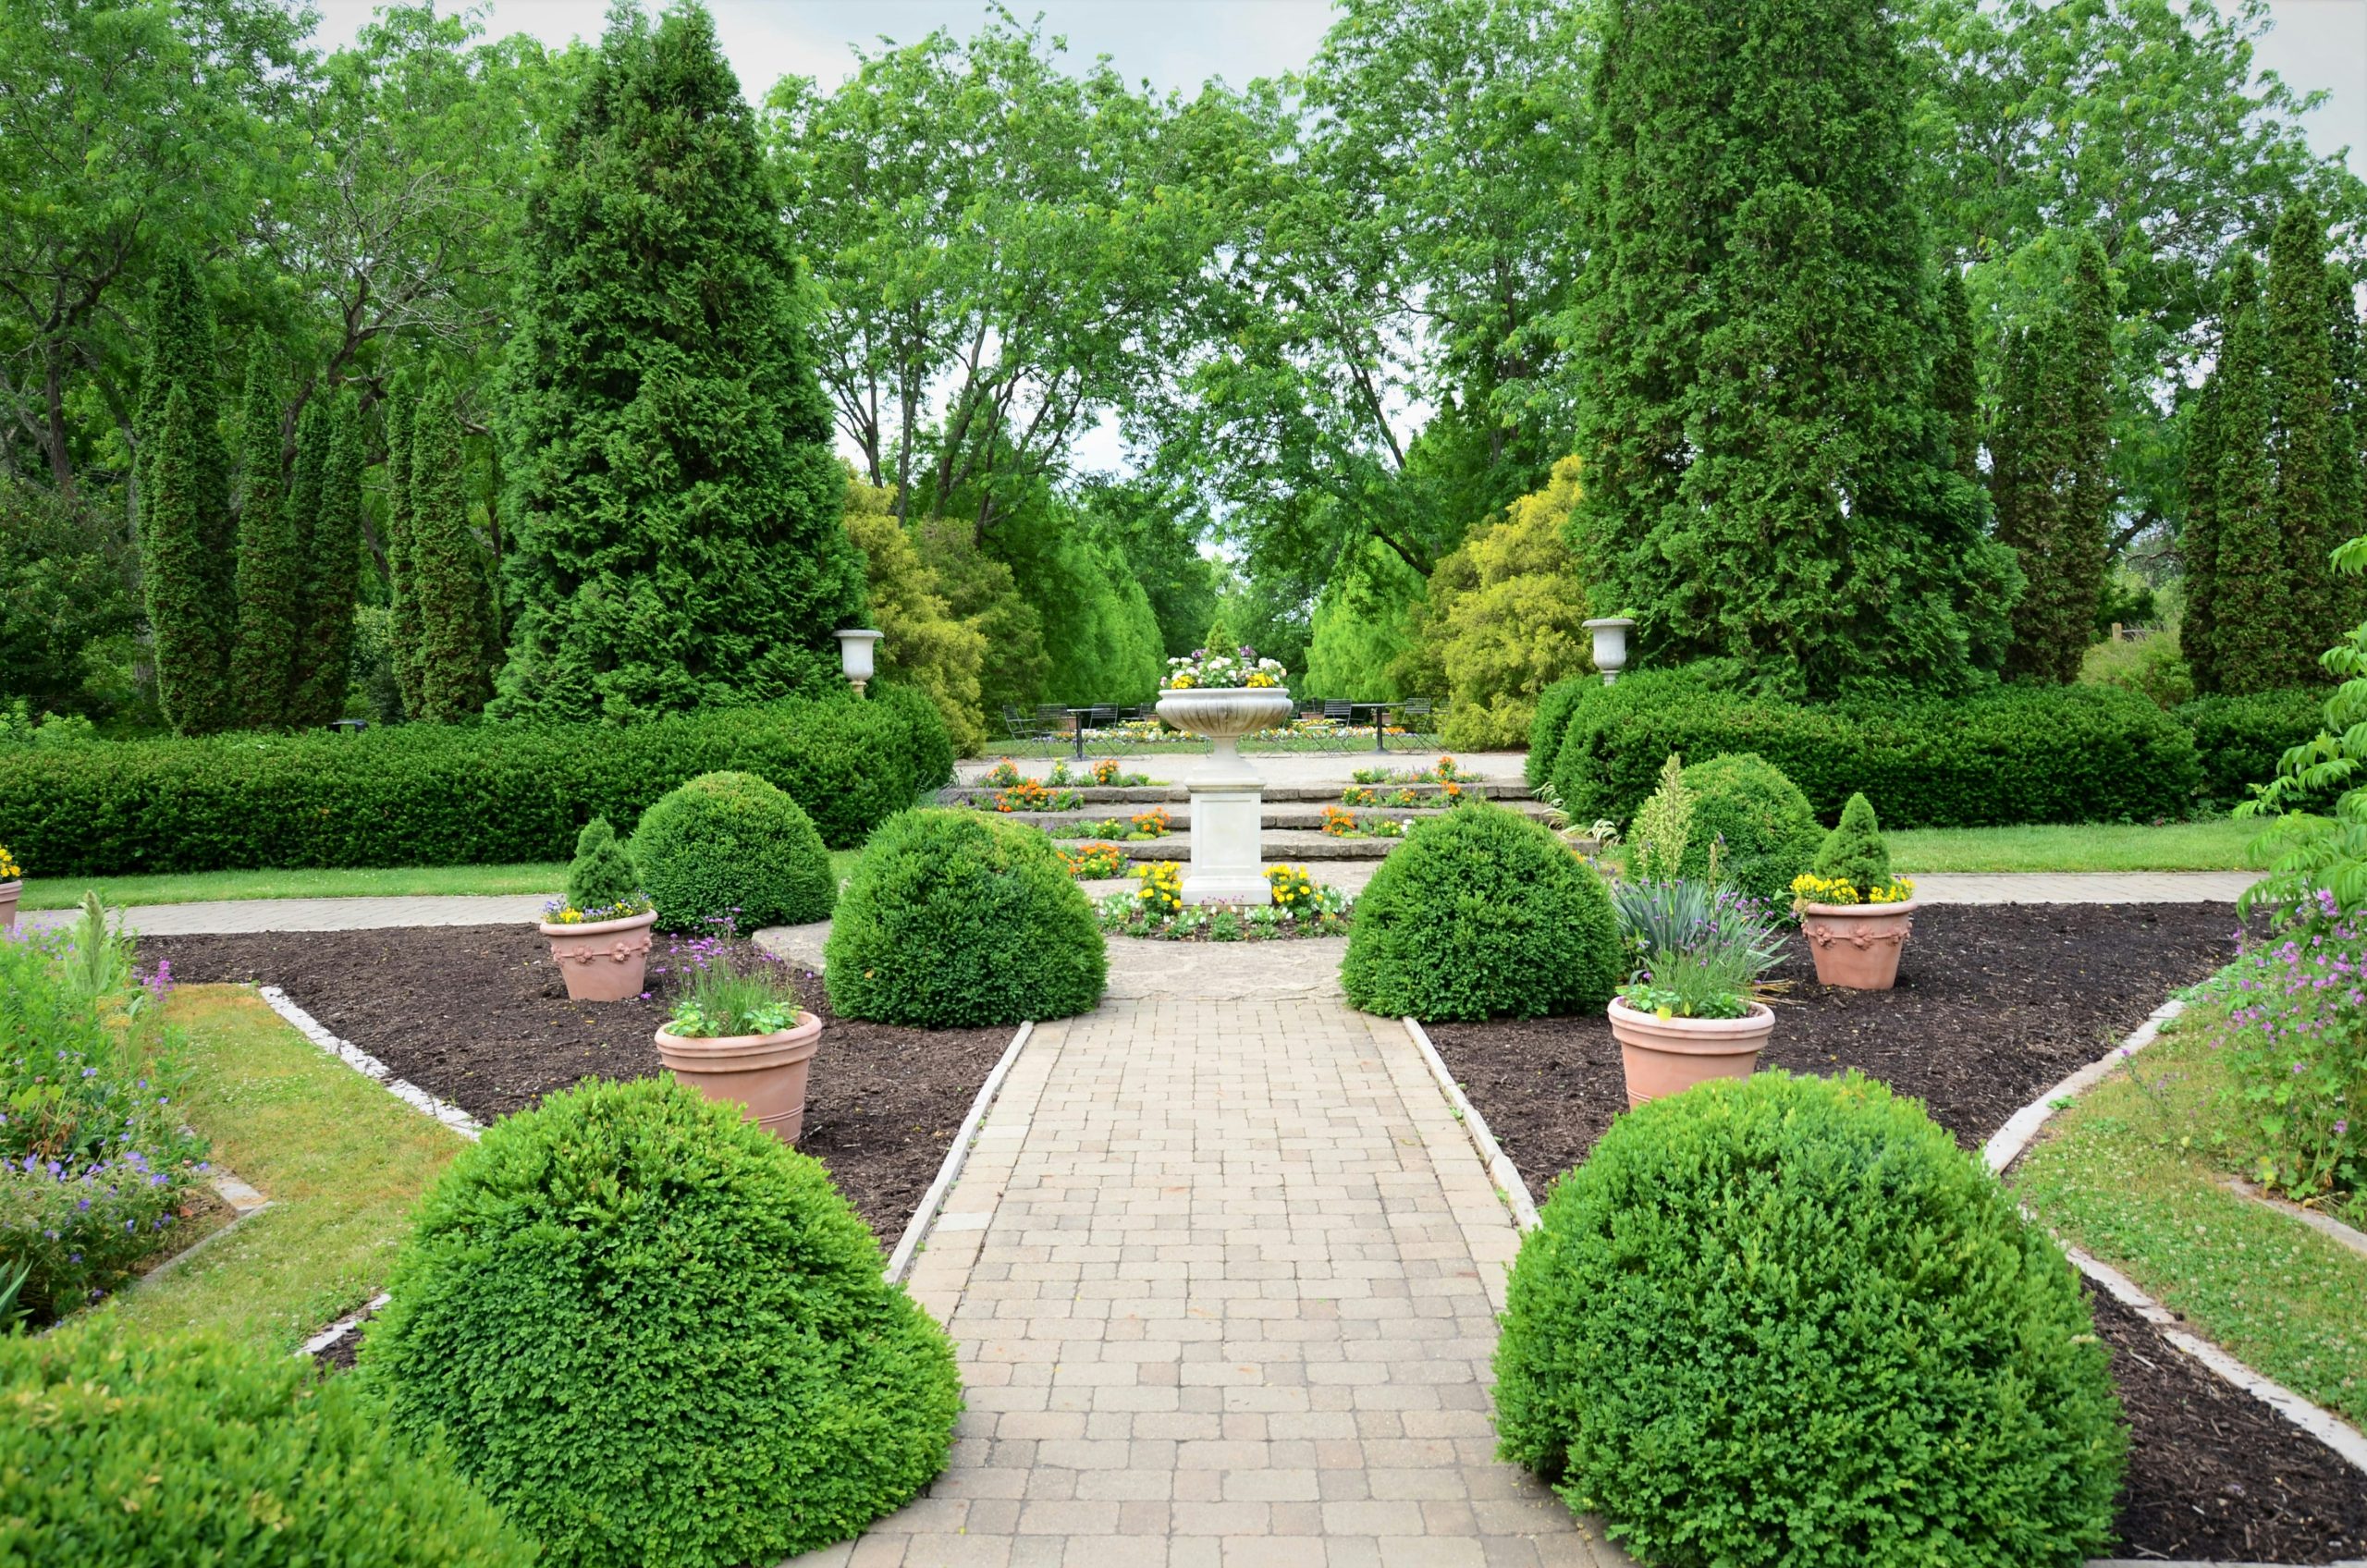
To maintain the sharp, clean lines of a formal garden, use a ‘cheater board’ when trimming your rounded shrubs. Place a large piece of plywood or cardboard against the base of the shrub, angled to match the desired curve. Then, use your hedge trimmers or shears, following the edge of the board. This simple trick helps you maintain a consistent shape and prevents you from accidentally cutting into the shrub too deeply, ensuring all your boxwoods or similar plants have a uniform, professionally manicured appearance.
22. Cultivate a Lush, Secluded Garden with a Stone Path and Bench
Creating a garden this lush and layered doesn’t happen overnight. This is the result of years of growth and careful editing. When you first plant a landscape like this, it will look sparse. You have to buy smaller plants and have the patience to let them mature and fill in. You will also have plants that die or don’t perform well in a certain spot. A truly naturalistic garden is a process of trial and error, moving things, and editing out what doesn’t work. Don’t be discouraged if your new garden doesn’t look like this in its first, or even third, year.
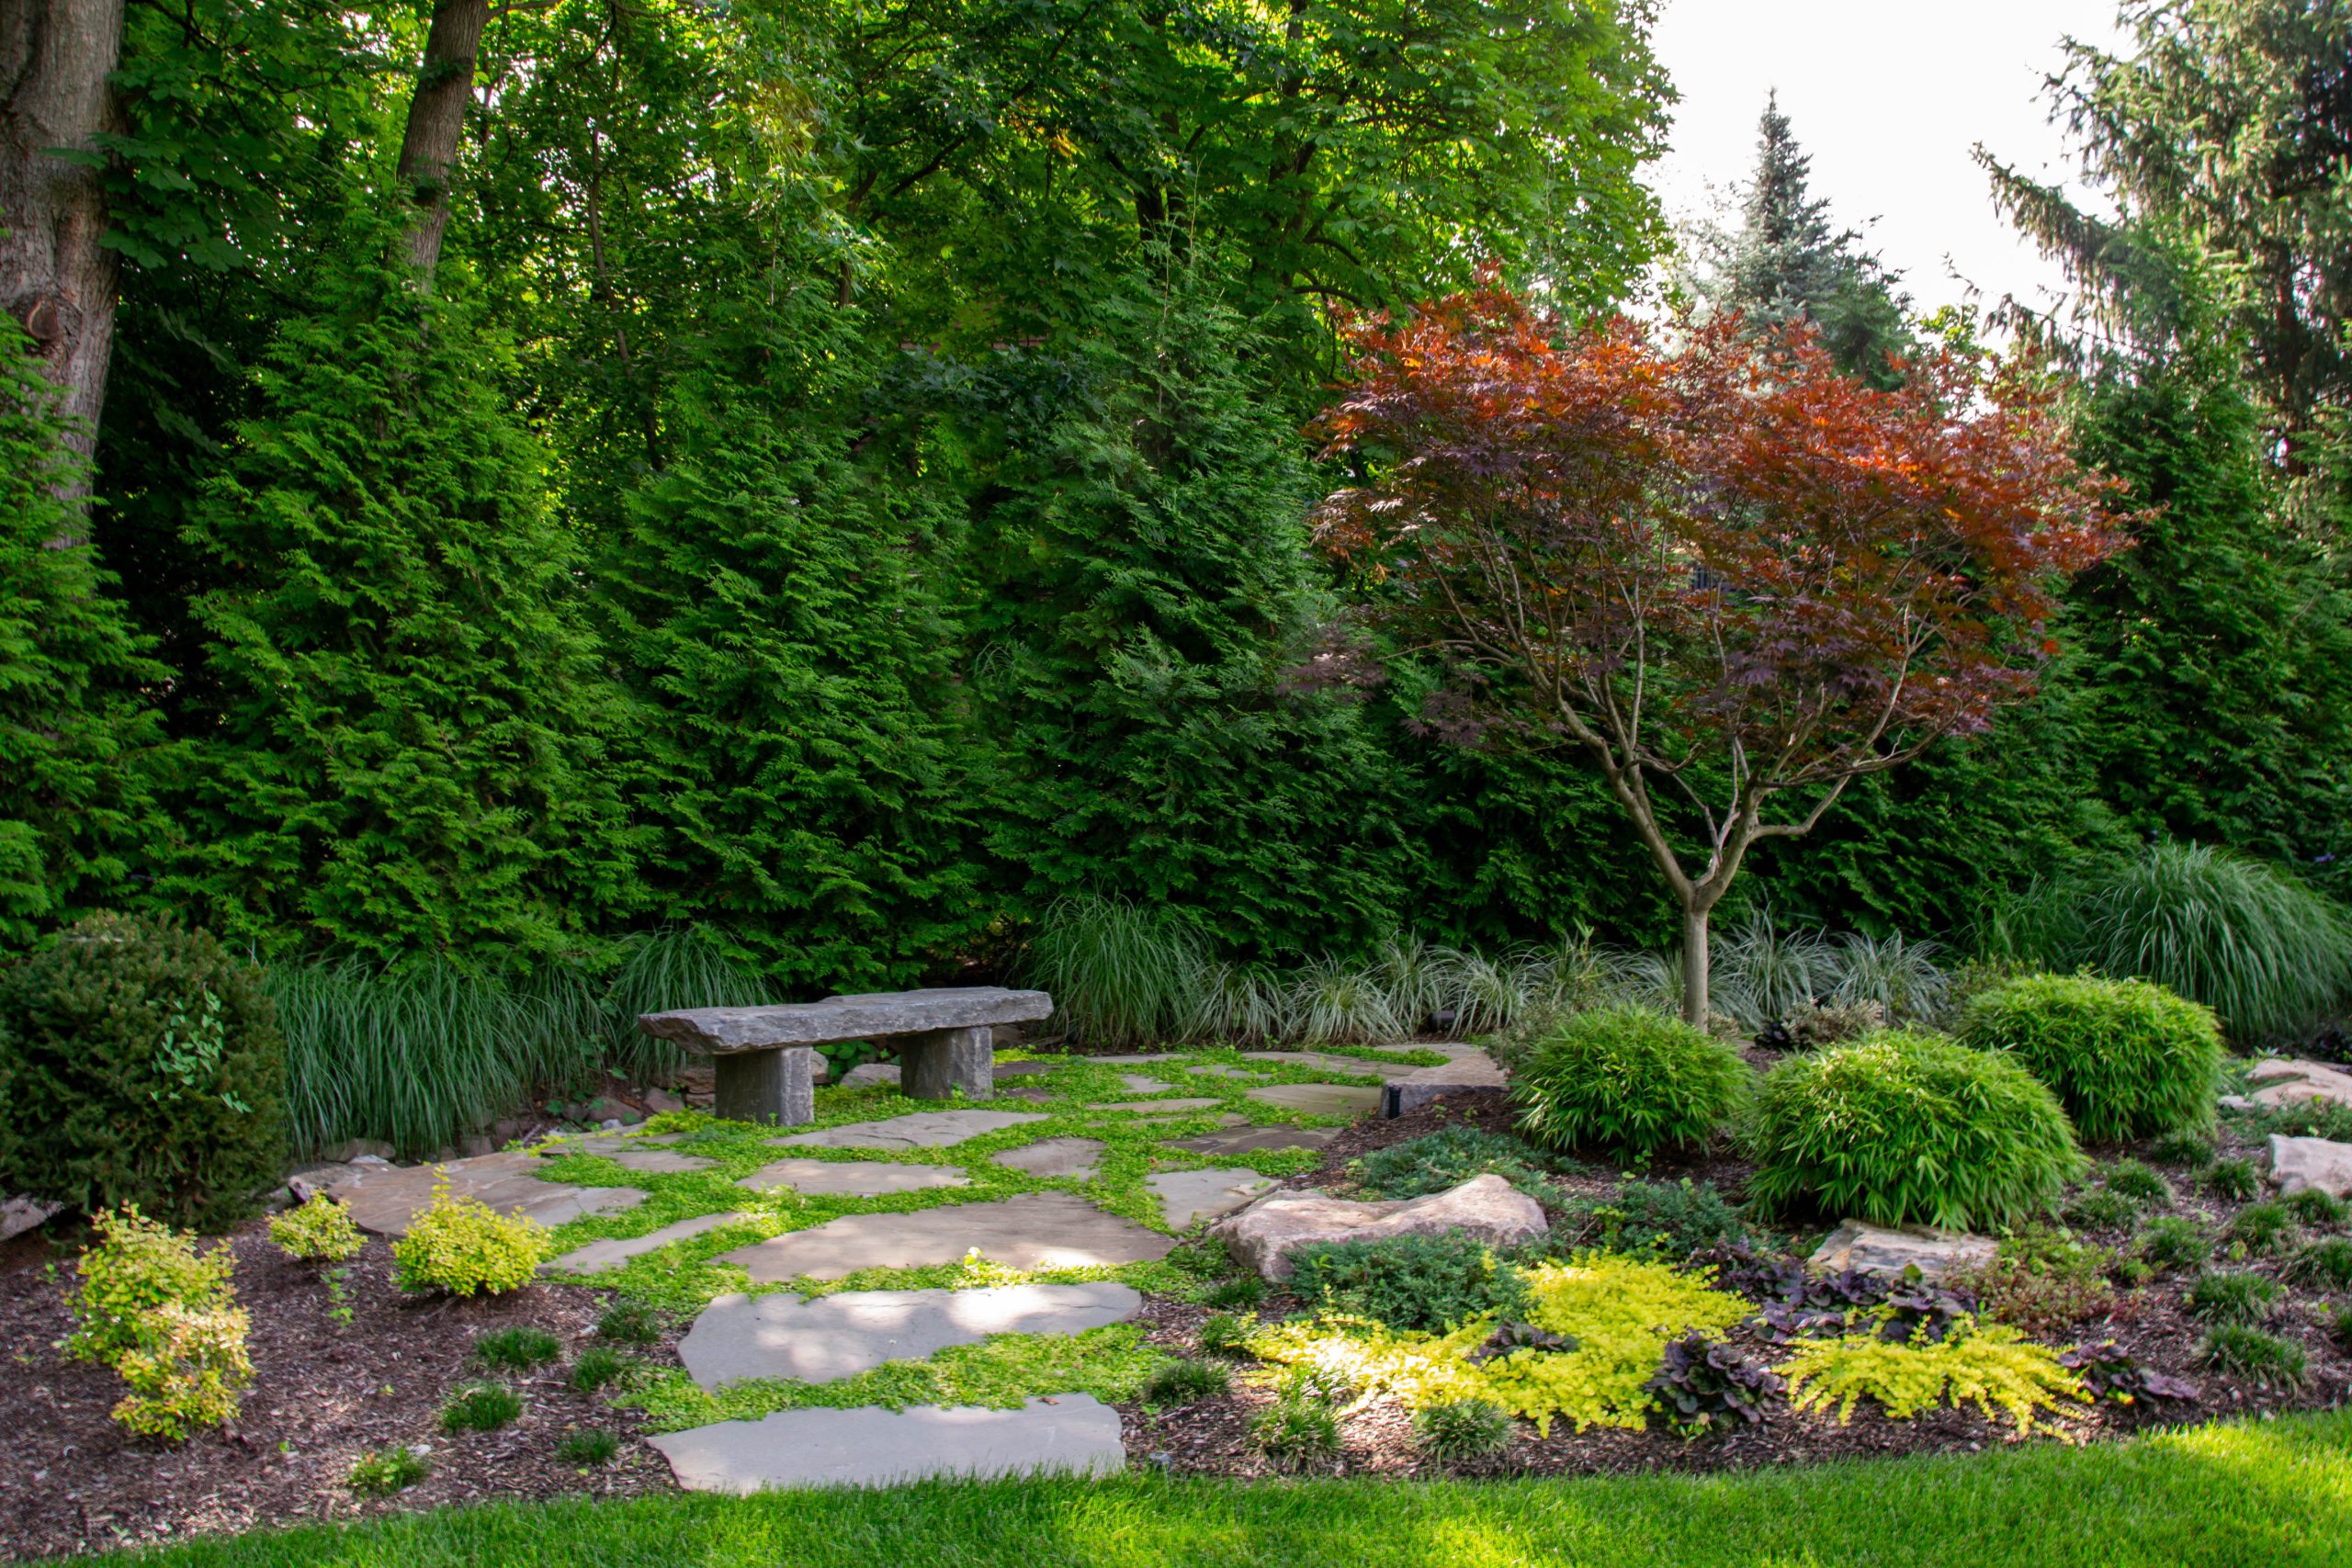
A dense, naturalistic garden requires a different kind of maintenance than a lawn. You’ll trade mowing for weeding and pruning. The dense evergreen hedge will need to be sheared at least once or twice a year to maintain its shape and density, which can be a significant job. The Japanese maple will need selective pruning to enhance its graceful shape. The biggest task will be managing the groundcover and mulched beds, keeping weeds at bay, and ensuring more aggressive plants don’t swallow up their neighbors. Expect to spend a few hours each week during the growing season tending to the details.
23. Design a Modern Waterfront Patio with Distinct Living Zones
A complex, multi-zone project like this requires careful planning. Before you even call a designer, check these boxes:
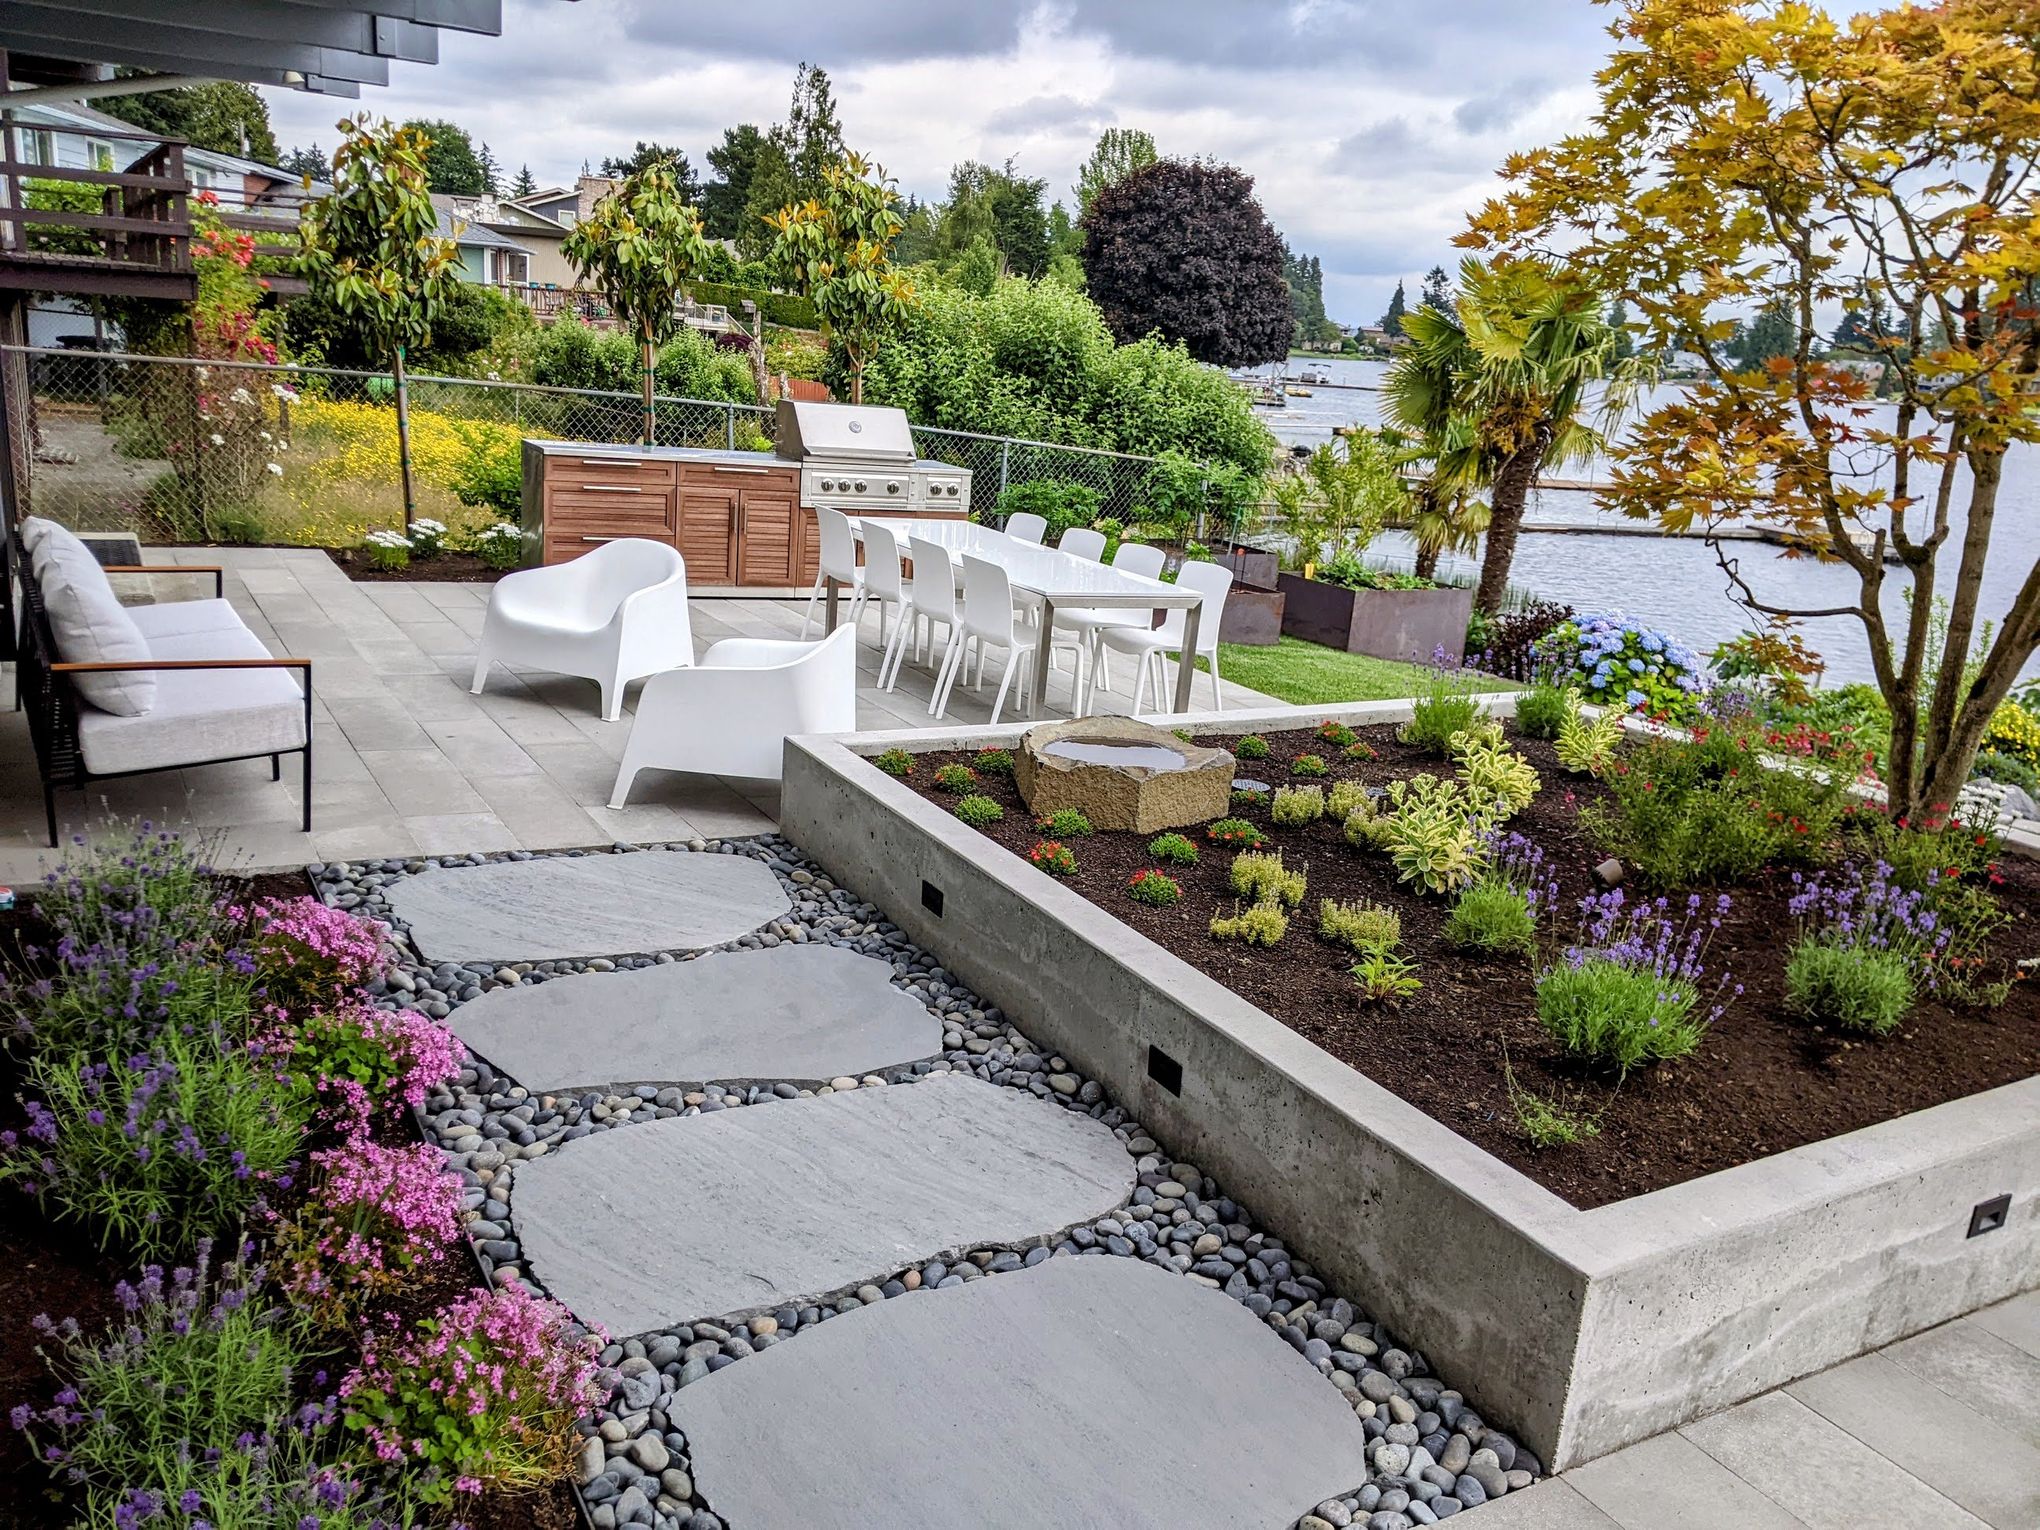
- Confirm Regulations: If you’re on a waterfront, what are the specific local and environmental regulations regarding setbacks, impervious surfaces (like patios), and shoreline planting?
- Map Your Utilities: Do you have easy access to gas, water, and electrical lines for the outdoor kitchen and integrated lighting? Planning this upfront saves thousands in trenching and retrofitting costs.
- Live With the Space: Spend time in the area at different times of day. Where is the sun? Where is the shade? Where does the wind come from? Let the natural patterns of your space inform where you place the dining vs. lounging zones.
The visual success of this patio is rooted in a balanced formula: 50% hardscape (the light gray pavers), 30% softscape (the lush green and flowering plants), and 20% furniture and features (the white sofas, dining set, and dark pebble accents). The color palette is equally disciplined: a base of gray and white allows the vibrant greens, purples, and pinks of the plants to take center stage without creating visual chaos. The warm wood of the outdoor kitchen provides a single, organic counterpoint to the cool tones of the stone and furniture.
24. Go Grand with a Symmetrical Lawn and a Focal Point Gazebo
The single element that gives this entire landscape its purpose is the grey gazebo. Everything else in the design—the long, straight pathways, the perfectly manicured central lawn, the small fountain—is designed to do one thing: lead your eye directly to it. If you removed the gazebo, you would have a beautifully maintained but pointless space. The gazebo provides a destination, a focal point, and a sense of romantic grandeur that anchors the entire symmetrical composition.
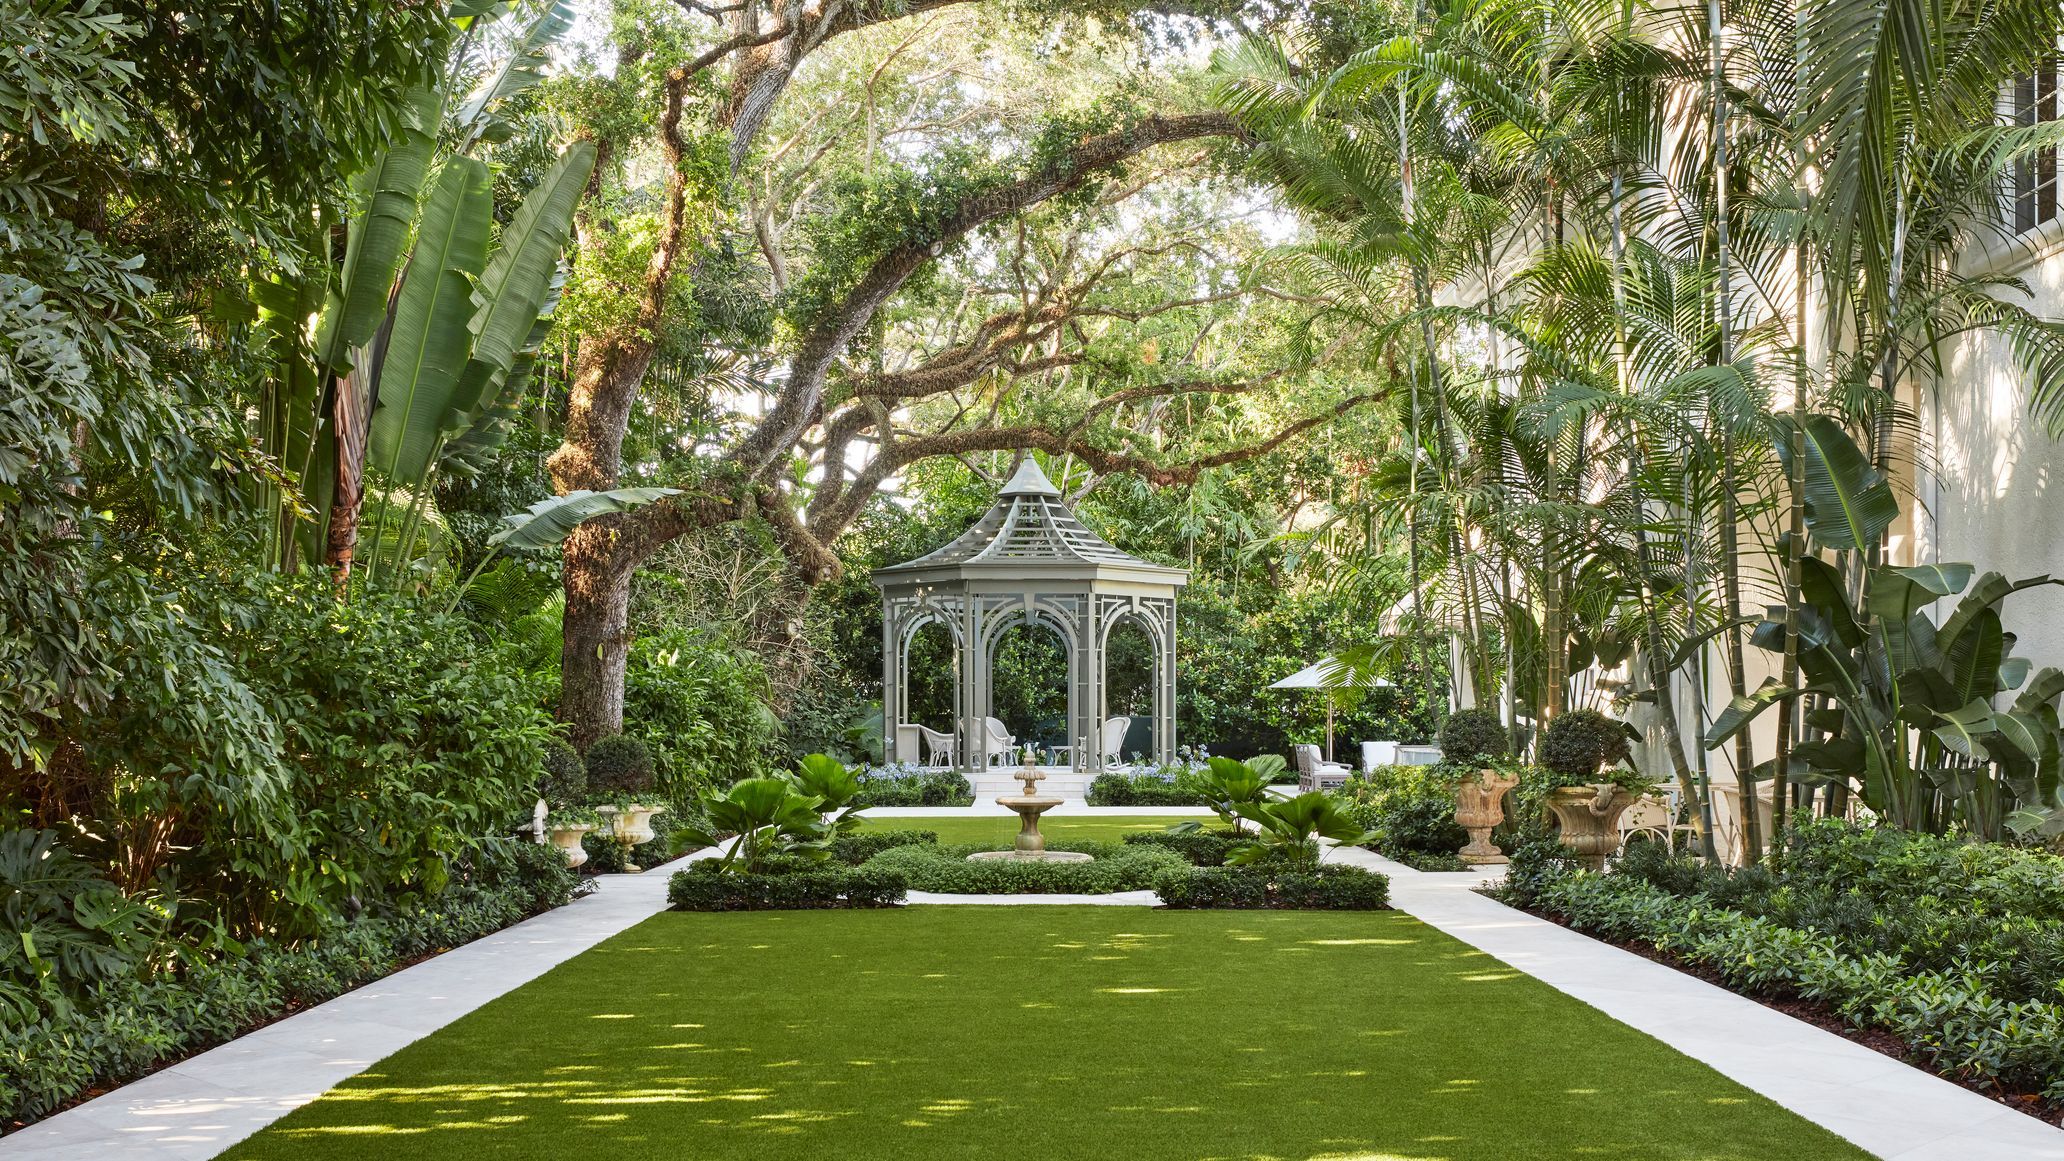
This design is a textbook example of using a strong focal point and leading lines. The white paved pathways act as powerful leading lines, converging in the distance and directing the viewer’s gaze right to the gazebo. The perfect symmetry of the layout, with the lawn and trees mirrored on both sides of the central axis, creates a feeling of order, stability, and formal elegance. The vibrant green of the lawn provides a simple, uncluttered canvas that makes the white paths and grey gazebo stand out even more dramatically.
25. Design a Family-Friendly Poolscape with a Rock Feature and Lawn
A custom gunite pool with a rock water feature is a huge expense. For a family-friendly vibe on a budget, start with a quality above-ground pool ($1,500 – $5,000). The key is making it feel permanent. Build a simple wooden deck that comes right up to the pool’s edge, making it easy to get in and out. For the ‘rock feature,’ look for pre-fabricated waterfall kits that can be integrated into your deck or placed poolside. Plant fast-growing, non-messy evergreen shrubs around the perimeter to soften the look and add privacy. You’ll get 80% of the fun for 20% of the cost.
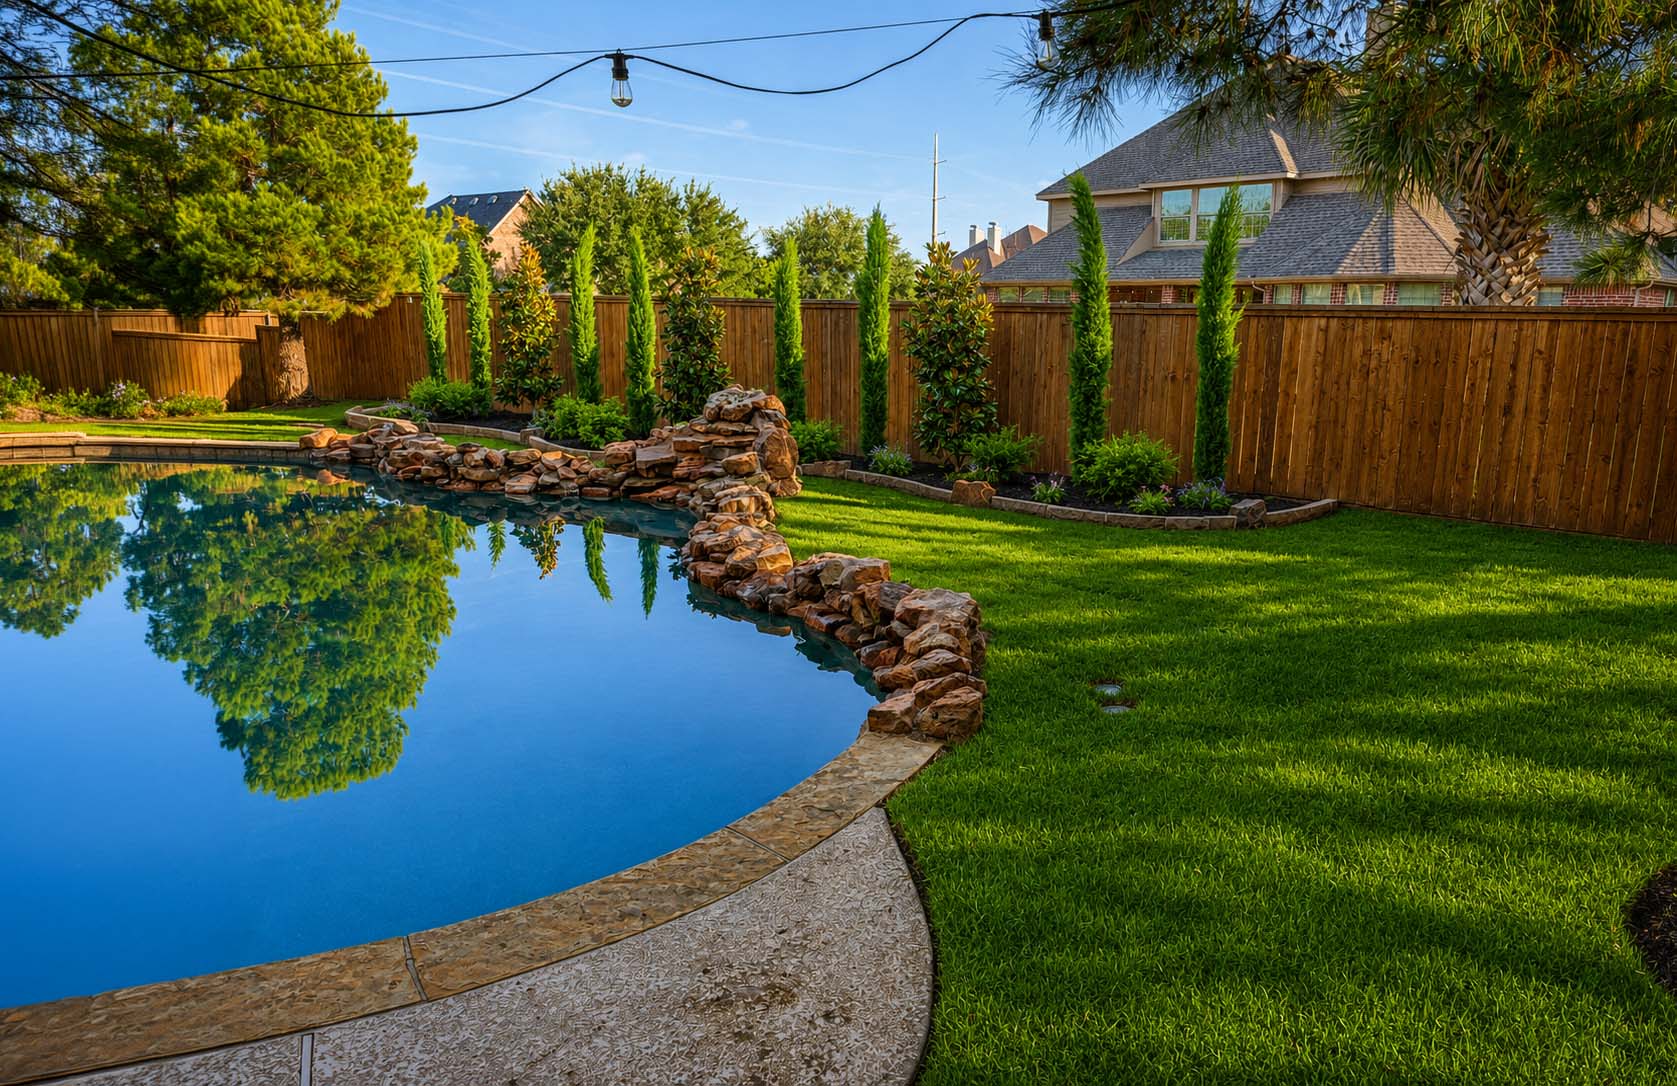
A lush lawn right up to the pool’s edge looks beautiful, but it’s a maintenance headache. Grass clippings will constantly blow into the pool, requiring more frequent skimming and putting extra strain on your filter system. Kids and adults running from the grass to the pool will track dirt and clippings into the water. As one of our common mistakes points out, not having a proper transition zone is a classic error. A better (though more expensive) solution is a wide, non-slip pool deck made of concrete, pavers, or composite decking, at least 4-5 feet wide, to create a buffer zone.
26. Pair a Dark-Bottom Pool with a Light Wood Deck for Modern Contrast
If you opt for a dark-bottom pool, your lighting strategy is critical. A dark surface absorbs light, so the pool will look like a black mirror at night without proper illumination. Plan for at least two or three underwater LED lights, even in a moderately sized pool. Position them to highlight features like steps or benches and to cast a general glow. Also, consider lighting the surrounding landscape. Uplighting the mature shade tree and the slender evergreens, as seen here, reflects in the dark water surface, creating a stunning, multi-layered effect after sundown. Contrast this with the bright, daytime feel of the pool in Idea #2.
Dark-bottom pools are a major trend, driven by a desire for a more natural, lagoon-like aesthetic compared to the traditional bright blue ‘Windex’ look. They are perceived as more sophisticated and serene. The dark surface creates a beautiful, reflective quality, mirroring the sky and surrounding landscape. It also has a practical benefit: the dark surface absorbs more sunlight, which can help to naturally heat the pool water by a few degrees, potentially reducing heating costs. This blend of high-end aesthetics and subtle practicality is why they’re so popular in modern landscape design.
27. Use Corten Steel Planters for a Modern, Industrial Pop of Color
Corten steel, or weathering steel, is designed to form a stable, rust-like protective layer. However, during the first 6-12 months of weathering, this rust layer will ‘bleed’ and can stain adjacent surfaces like light-colored pavers or concrete. Here’s how to manage it:
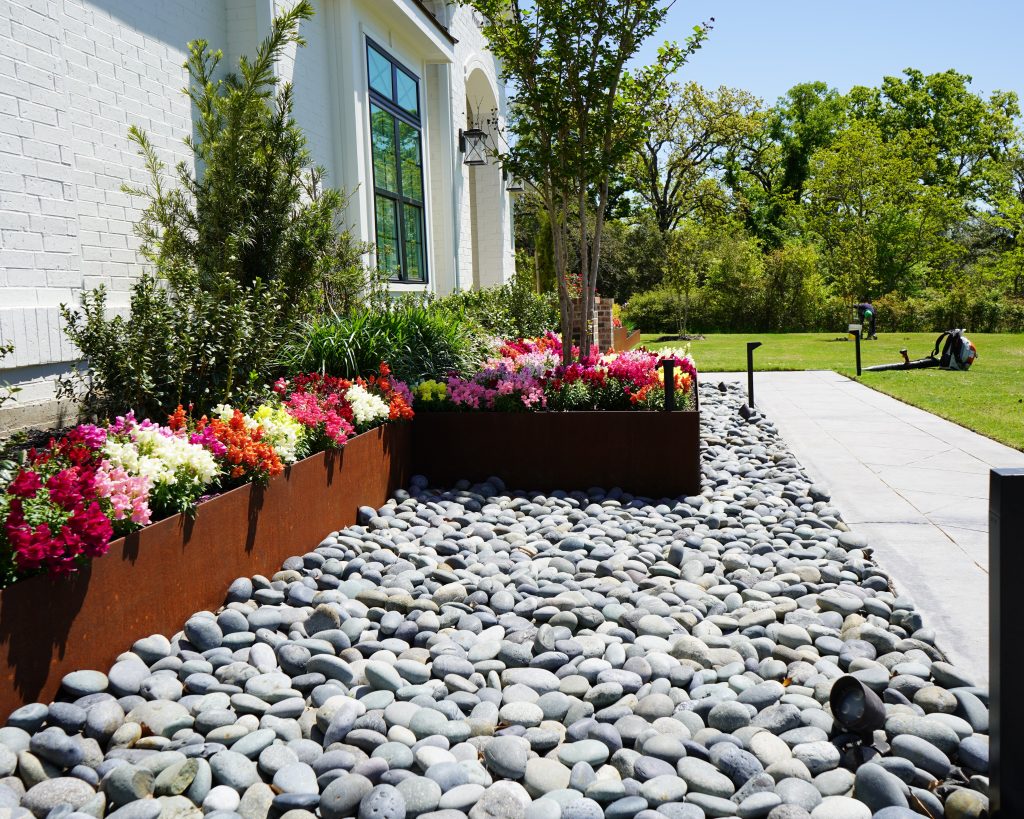
- Pre-Weather It: If possible, place the new planters on a non-staining surface like grass or a gravel bed for several months.
- Encourage the Patina: Regularly spray the planters with water, and even a mix of water, salt, and vinegar, to speed up the rusting process.
- Install a Barrier: Place a strip of black landscape plastic or a thin metal flashing under the edge of the planter to catch runoff.
- Seal Your Pavers: Apply a high-quality sealant to your pavers before installing the planters to make any rust stains easier to clean.
Time to a stable patina: 6-24 months. Cost of materials: Minimal.
The beautiful rust-colored patina of Corten steel is its main draw, but it comes with a reality check. That rust is, well, rust. As mentioned, it will bleed and stain porous surfaces like concrete or light-colored stone pavers for the first year or two until the patina fully stabilizes. While these stains can often be removed with oxalic acid or other cleaners, it’s a recurring chore. The steel itself is incredibly durable, but you must plan for this initial messy phase by either pre-weathering the planters or protecting the surfaces around them. Don’t place new Corten directly on a brand-new, light-colored patio unless you’re prepared for the cleanup.
Your Backyard’s Next Chapter Starts Now
These designs are more than just pretty pictures—they’re blueprints for creating an outdoor space that truly feels like an extension of your home. Whether you start small with a single well-placed planter or go all-in on a full renovation, the most important step is the first one. Now go, find your favorite looks on Pinterest and start planning the backyard you’ve always dreamed of.