
You know that feeling when you finally find the walk-in closet idea that looks exactly right for your space? It’s that perfect blend of beauty and function that makes getting dressed feel less like a chore and more like a ritual. After filtering through hundreds of options from places like The Container Store, IKEA, and California Closets, we narrowed it down to 27 ideas that actually deliver. Inside, you’ll find everything from glamorous, boutique-inspired spaces to warm, natural wood layouts and clever budget-friendly systems, with options ranging from a few hundred dollars to well over $20,000. These aren’t just pretty pictures; they’re real, achievable starting points for the closet you’ve been dreaming of. And stay until the end—we break down the most common mistakes that can ruin these looks. 📌 Save this to Pinterest for later—you’ll want to revisit these ideas.
1. A Bright White Closet with a Central Wood Island
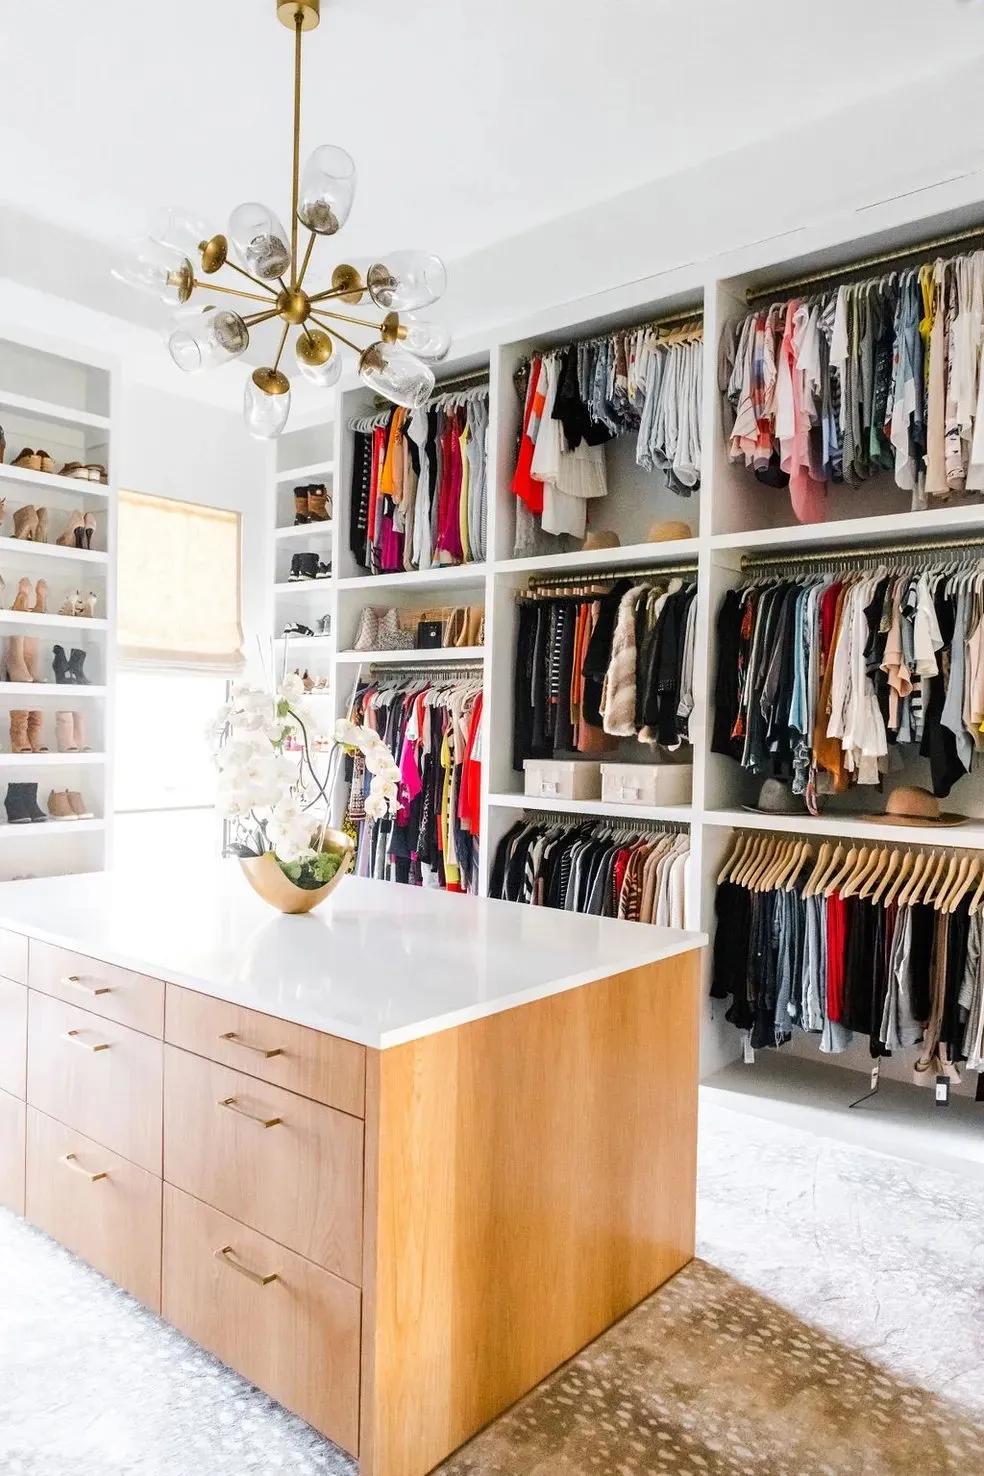
This closet feels so fresh and airy because of the smart use of contrast. The crisp white of the extensive open shelving provides a clean, gallery-like backdrop for the clothing, making everything feel organized and easy to see. The central island, in a warm, light wood, acts as a grounding element. It prevents the all-white scheme from feeling sterile and adds a touch of organic warmth. This balance between modern clean lines and natural materials is what makes the design feel both high-end and approachable.
|
📋 Copy HEX 🔗 Share |
When hanging a statement chandelier in a closet, aim for the bottom of the fixture to be at least 7 feet (84 inches) above the floor. If you have a central island like this one, ensure there’s a minimum of 30-36 inches of clearance between the top of the island and the bottom of the light. This prevents the fixture from feeling like it’s crowding the workspace while still being low enough to feel integrated into the design rather than just stuck on the ceiling.
2. Luxury Layout with a Dark Island and Integrated Vanity Nook
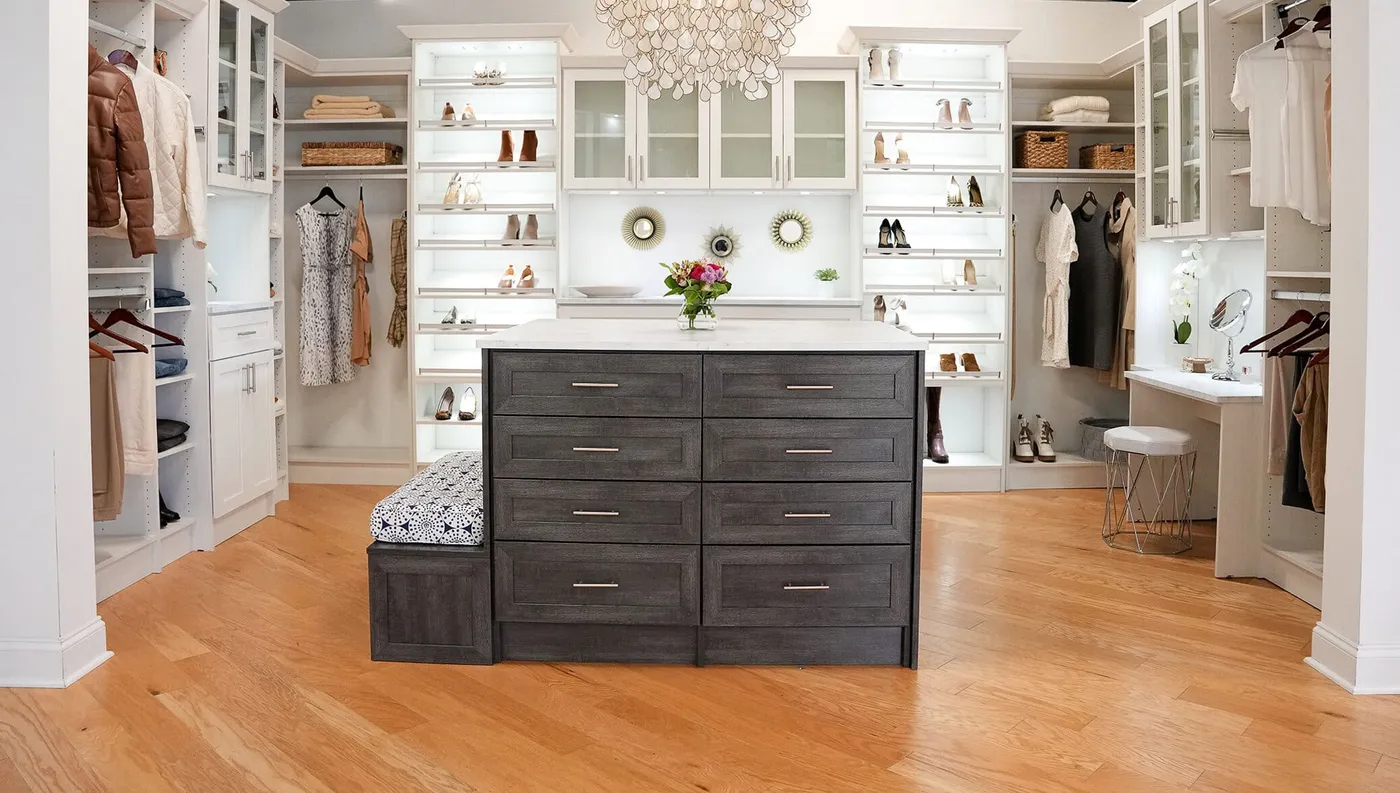
The single element that elevates this closet from merely ‘large’ to truly ‘luxurious’ is the integrated upholstered bench and vanity area. While the ample storage and central island are fantastic, creating a dedicated spot to sit, put on shoes, or apply makeup transforms the room’s purpose. It’s no longer just a storage space; it’s a personal dressing room. Removing that bench would leave a functional closet, but you’d lose the sense of it being a comfortable, private retreat.
|
📋 Copy HEX 🔗 Share |
A design this grand requires significant square footage. To comfortably accommodate a large central island, a vanity, an integrated bench, and adequate walkway clearance, you’re looking at a room that’s at least 12 feet by 15 feet. Anything smaller and the island will feel cramped, defeating the purpose of a spacious layout. The ceiling should be at least 9 feet high to handle a large chandelier and floor-to-ceiling cabinetry without feeling overwhelming.
3. Go Full Glam with a Marble-Topped Island and Crystal Chandelier
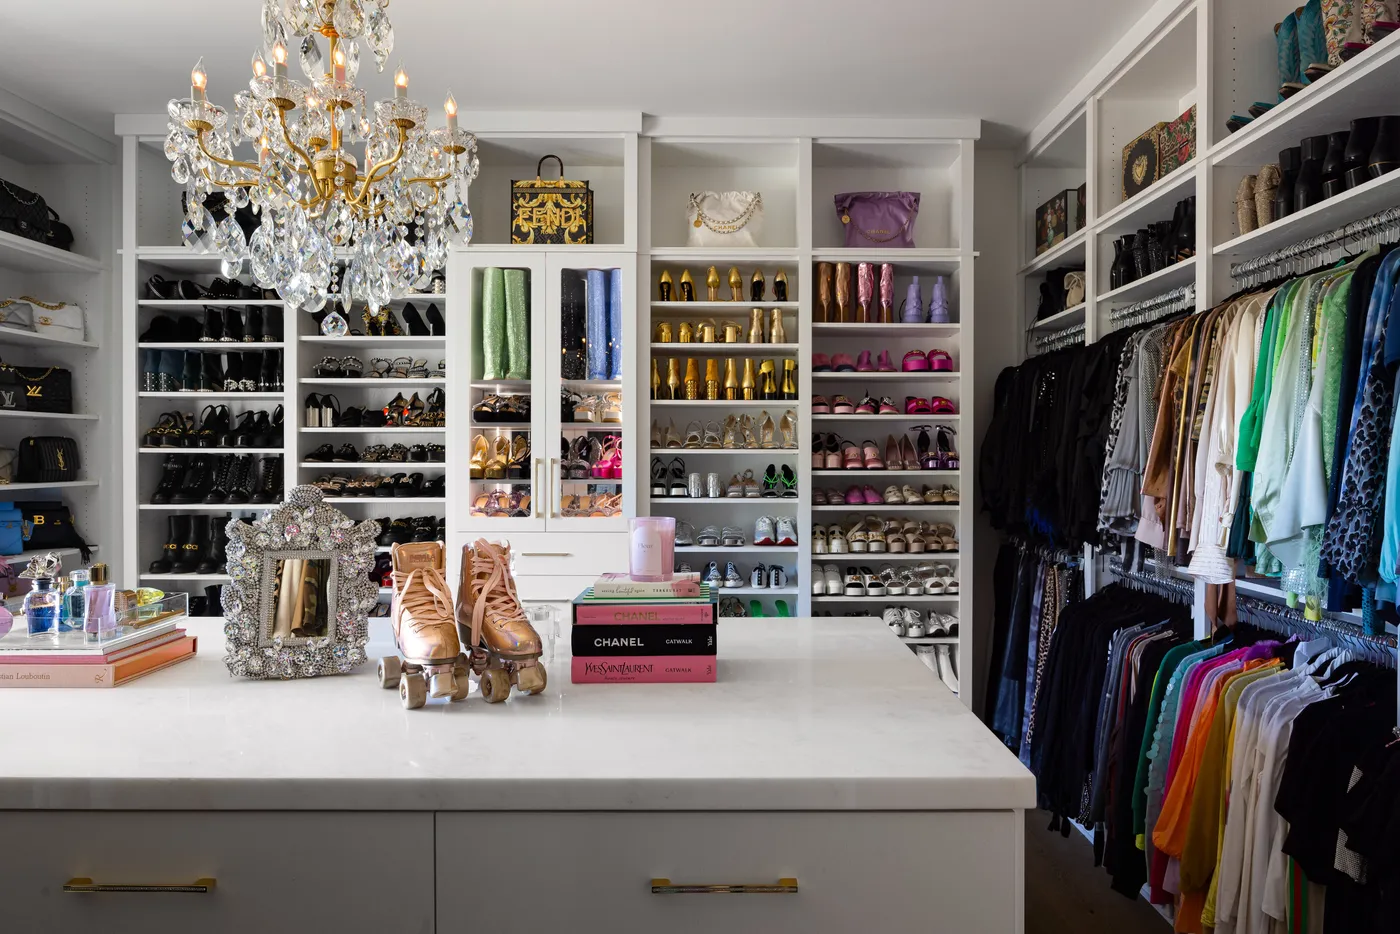
Achieving this level of glamour is an investment. The custom cabinetry and oversized island are the main event, but the details add up quickly. Expect a breakdown something like this:
|
📋 Copy HEX 🔗 Share |
- Custom Cabinetry: $15,000 – $30,000
- Marble Countertop for Island: $3,000 – $7,000
- Crystal Chandelier: $1,500 – $5,000
- Hardware (Gold Pulls): $500 – $1,500
- Professional Installation: $2,000 – $5,000
- TOTAL: $22,000 – $48,500
- Budget alternative: Use IKEA PAX cabinets, a butcher block top painted white, and a vintage chandelier for a similar vibe around $5,000 – $9,000.
An all-white, open-concept closet is stunning, but let’s be honest about the upkeep. Dust is more visible on white surfaces, so regular dusting (weekly, at least) is non-negotiable. If you have open shelving for shoes, you’ll be constantly tidying them to maintain the pristine look. And that beautiful white marble top? It’s porous. A spilled coffee or makeup mishap could lead to a permanent stain if not cleaned up immediately. This is a high-maintenance look that requires diligence to keep it looking photo-ready.
4. Showcase a Shoe Collection with Floor-to-Ceiling Shelving
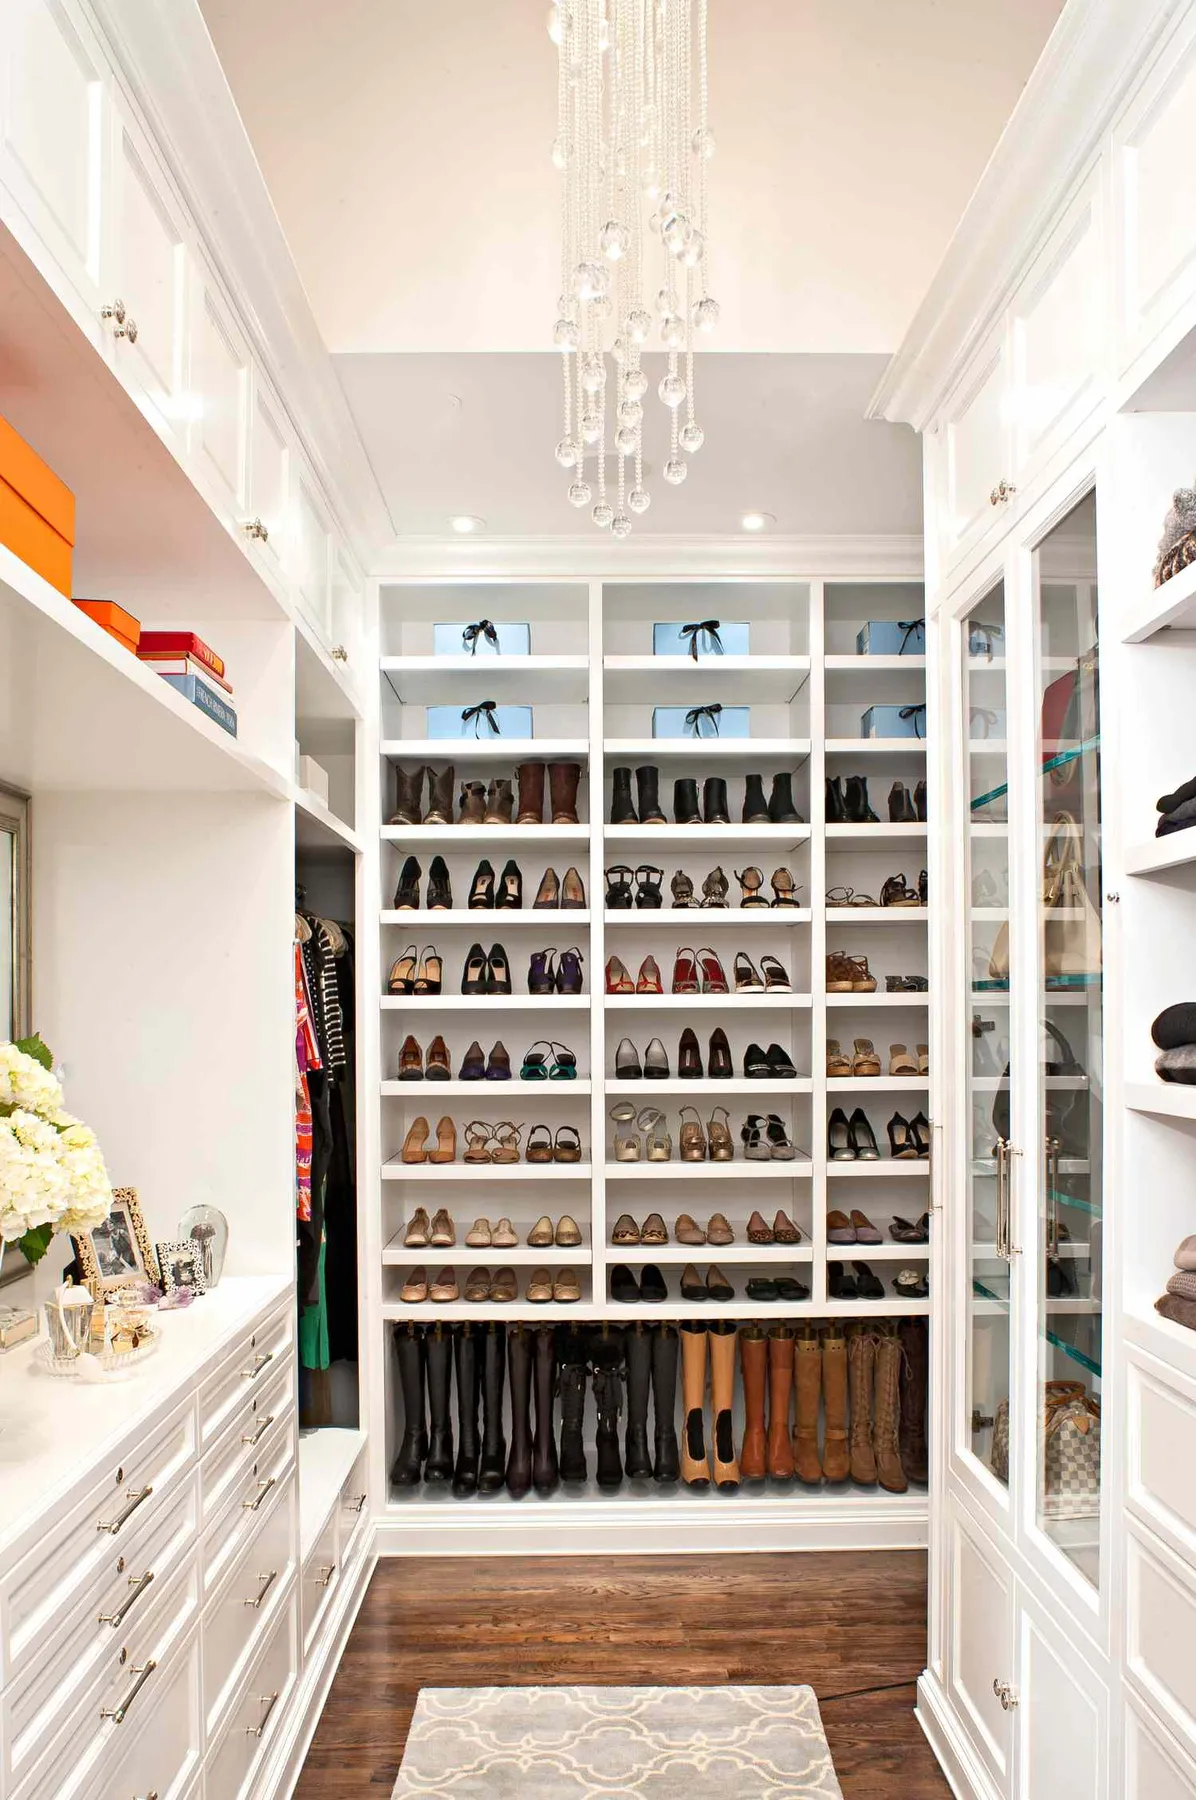
Dark wood flooring is undeniably elegant, but it’s a magnet for dust, lint, and pet hair. Unlike lighter floors that can camouflage debris, every speck will be visible. To keep these floors looking their best, you’ll need to sweep or vacuum every 1-2 days, especially in a high-traffic area like a closet where fibers from clothing are constantly shedding. A robotic vacuum can be a lifesaver here. Also, be mindful of scuffs from shoes, which will show up more prominently than on a lighter or more varied wood grain.
|
📋 Copy HEX 🔗 Share |
This closet design works so well because of two key principles: repetition and balance. The repetition of the shoe cubbies creates a powerful visual rhythm, turning the shoe collection into an intentional design element, like a wallpaper pattern. This is balanced by the use of both open storage (for the shoes) and closed storage (the glass-front cabinets and drawers). This mix prevents the room from feeling too chaotic or cluttered, giving the eye places to rest while still allowing prized items to be on display.
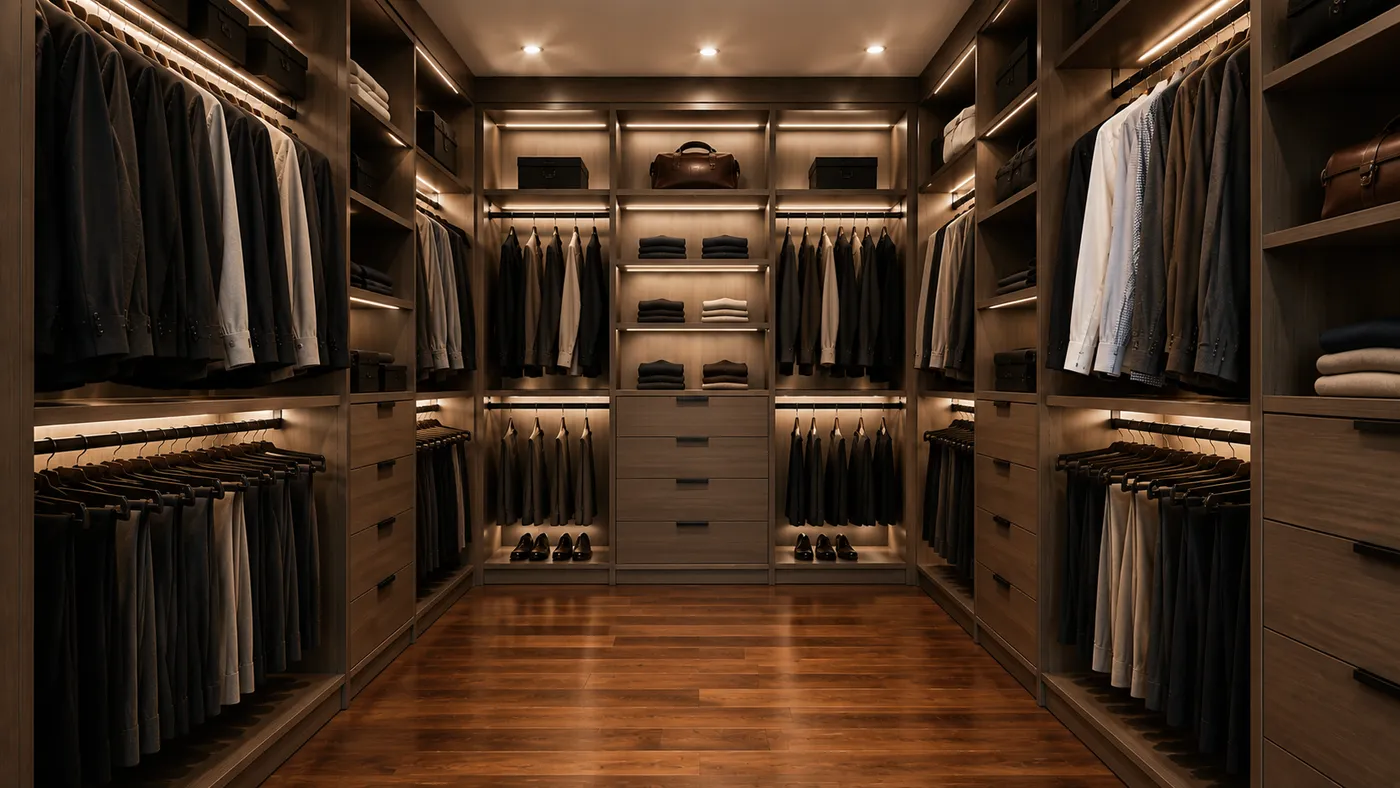
5. Create a Moody Boutique Vibe with Integrated LED Lighting
The integrated LED lighting is, without a doubt, the single element that defines this closet. Without it, you’d have a very nice, well-organized wooden closet. With it, you have a moody, sophisticated, high-end retail experience. The lighting turns simple stacks of clothes and rows of shoes into curated displays. It highlights textures, makes colors pop, and eliminates dark corners, making it easier to find exactly what you’re looking for. It’s a feature that is both dramatically beautiful and incredibly practical.
|
📋 Copy HEX 🔗 Share |
Installing LED strip lighting inside cabinetry is a transformative DIY project. Here’s a quick guide:
- Plan & Measure: Decide which shelves and hanging areas need light. Measure the total length to buy the right amount of LED tape and channel diffusers. (Cost: $50-$200)
- Install Channels: Cut the aluminum channels to length and screw or tape them to the underside of shelves, near the front edge.
- Apply LED Tape: Peel the backing off the LED tape and press it firmly inside the channels.
- Connect Wiring: Run low-voltage wires from the strips to a central point, hiding them in corners or behind panels. Connect them to the power driver.
- Add Diffusers: Snap the frosted plastic diffusers onto the channels for a smooth, dot-free glow.
- Plug In: Connect the driver to a switch or outlet. (Time: 4-6 hours)
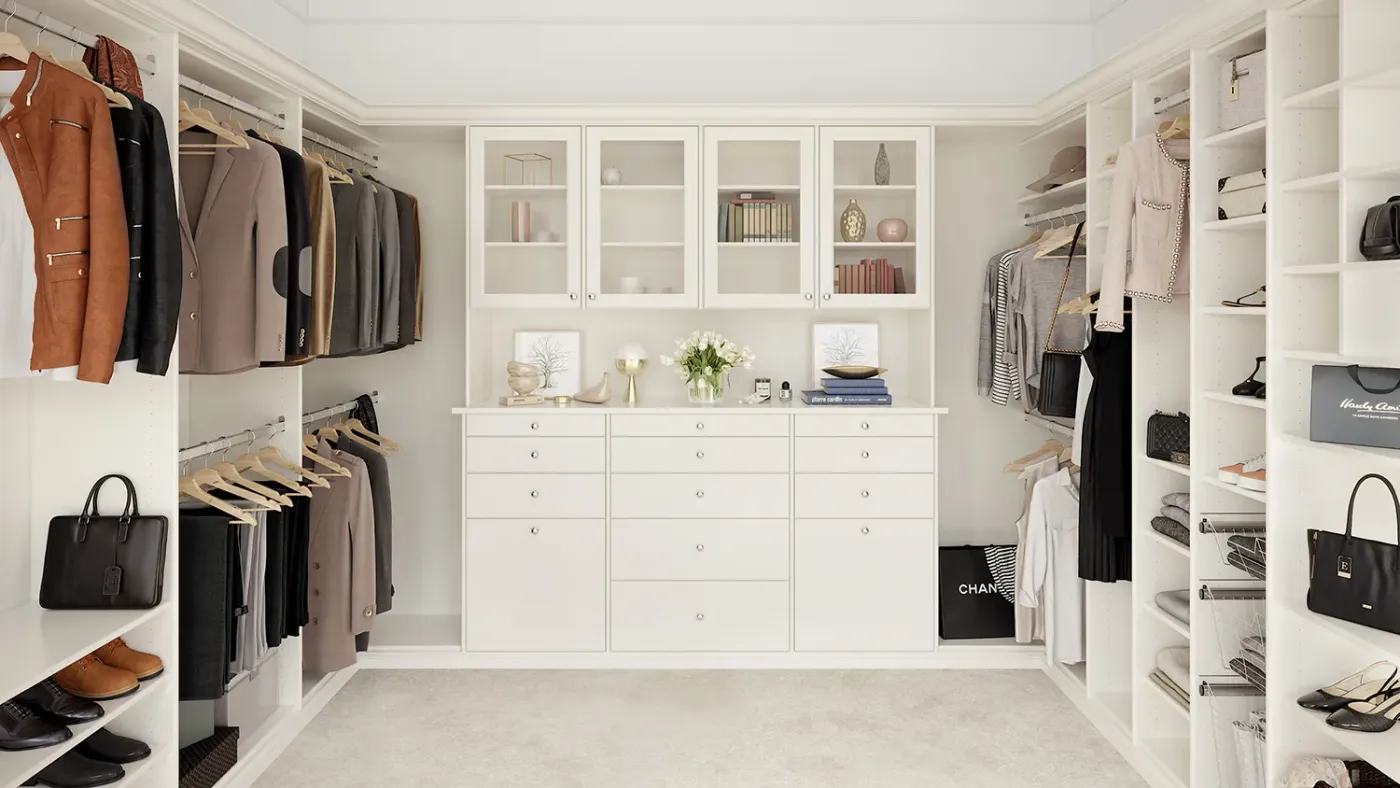
6. Maximize a Square Room with a U-Shaped Closet Layout
A U-shaped layout is incredibly efficient, but it requires a certain amount of space to work without feeling claustrophobic. The ideal room is squarish. For this layout to be comfortable, the room should be at least 8 feet wide. This allows for standard 24-inch deep cabinets on both sides and a 4-foot walkway in the middle. You could squeeze it into a 7-foot-wide room, but your center walkway would shrink to 3 feet, which is the bare minimum for comfortable movement. Any narrower, and you’re better off with an L-shaped or galley layout.
|
📋 Copy HEX 🔗 Share |
This closet’s success lies in a simple, functional formula that you can adapt to your own wardrobe. It’s roughly 50% hanging space + 30% open shelving + 20% closed storage. The hanging space is split between long-hang and double-hang areas. The open shelves are perfect for shoes and bags, while the glass-front cabinets offer dust-free display. The central dresser provides drawers for folded items and accessories. You can adjust these percentages based on your needs—more shoes? Less hanging? Just keep the mix of open, closed, and hanging storage for maximum utility.
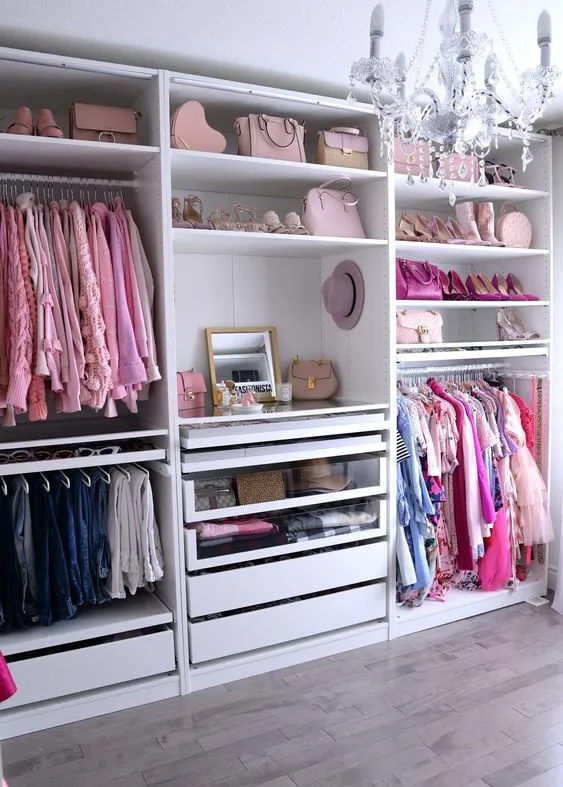
7. Organize by Color with a Pink-Themed Wardrobe Display
This closet is a perfect example of “dopamine dressing” extending to home organization. This trend, which is huge on Pinterest and TikTok, is all about surrounding yourself with colors and items that bring you joy. Instead of hiding everything away, the closet becomes a curated display of a personal aesthetic. It’s less about minimalist perfection and more about maximalist self-expression. By color-coding and displaying her favorite pink items, the owner has turned a functional space into a vibrant, mood-boosting extension of her personal style.
|
📋 Copy HEX 🔗 Share |
A closet organized by a single color theme looks amazing in photos, but it requires serious discipline. What happens when you buy a blue purse? Or a green pair of shoes? Does it go in another, less-seen part of the closet, or does it ruin the aesthetic? This approach works best if your wardrobe genuinely skews heavily toward one color palette. If you have a diverse, multi-colored wardrobe, forcing a single-color scheme might make your closet harder to use, not easier. For a similar effect with less commitment, try organizing in rainbow color order instead.
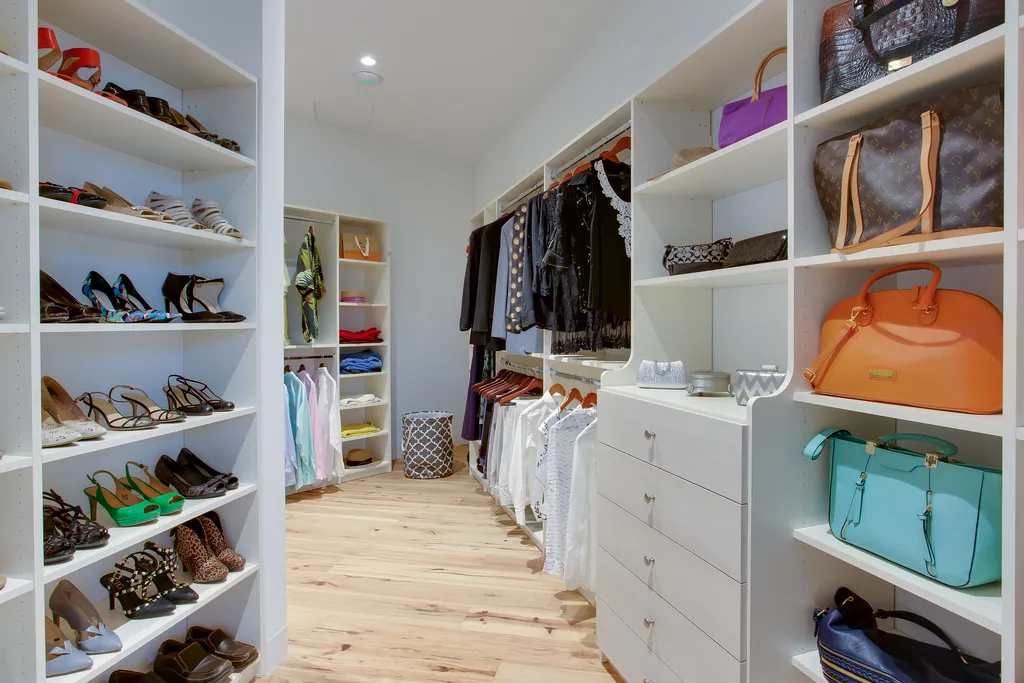
8. Get a Classic Look with White Built-Ins on Light Hardwood
Before committing to a full built-in system like this, run through this quick checklist to ensure you’re prepared:
|
📋 Copy HEX 🔗 Share |
- Measure Everything: Get precise measurements of the room’s width, depth, and height. Note the location of any outlets, light switches, or vents that need to be accessible.
- Inventory Your Wardrobe: How much hanging space (long and short) do you need? How many pairs of shoes? How many drawers for folded items? Design for what you own, not a generic template.
- Set a Realistic Budget: Custom built-ins are expensive. Get at least two quotes. Modular systems are cheaper but may require more assembly and compromise on a perfect fit.
- Check for Level: Are your floors and walls perfectly straight? Older homes often have quirks that a custom installer can work around but can complicate a DIY modular install.
A fully custom closet can cost tens of thousands, but you can get 90% of this look for a fraction of the price. The IKEA PAX system is the go-to for a reason. You can use their online planner to design a layout that perfectly fits your space and needs, choosing your own combination of shelves, drawers, and rods. To elevate the look, add your own high-end hardware (like the silver pulls seen here) and have a carpenter add baseboards and crown molding to make the modular units look truly built-in. It’s more work, but it can save you thousands.
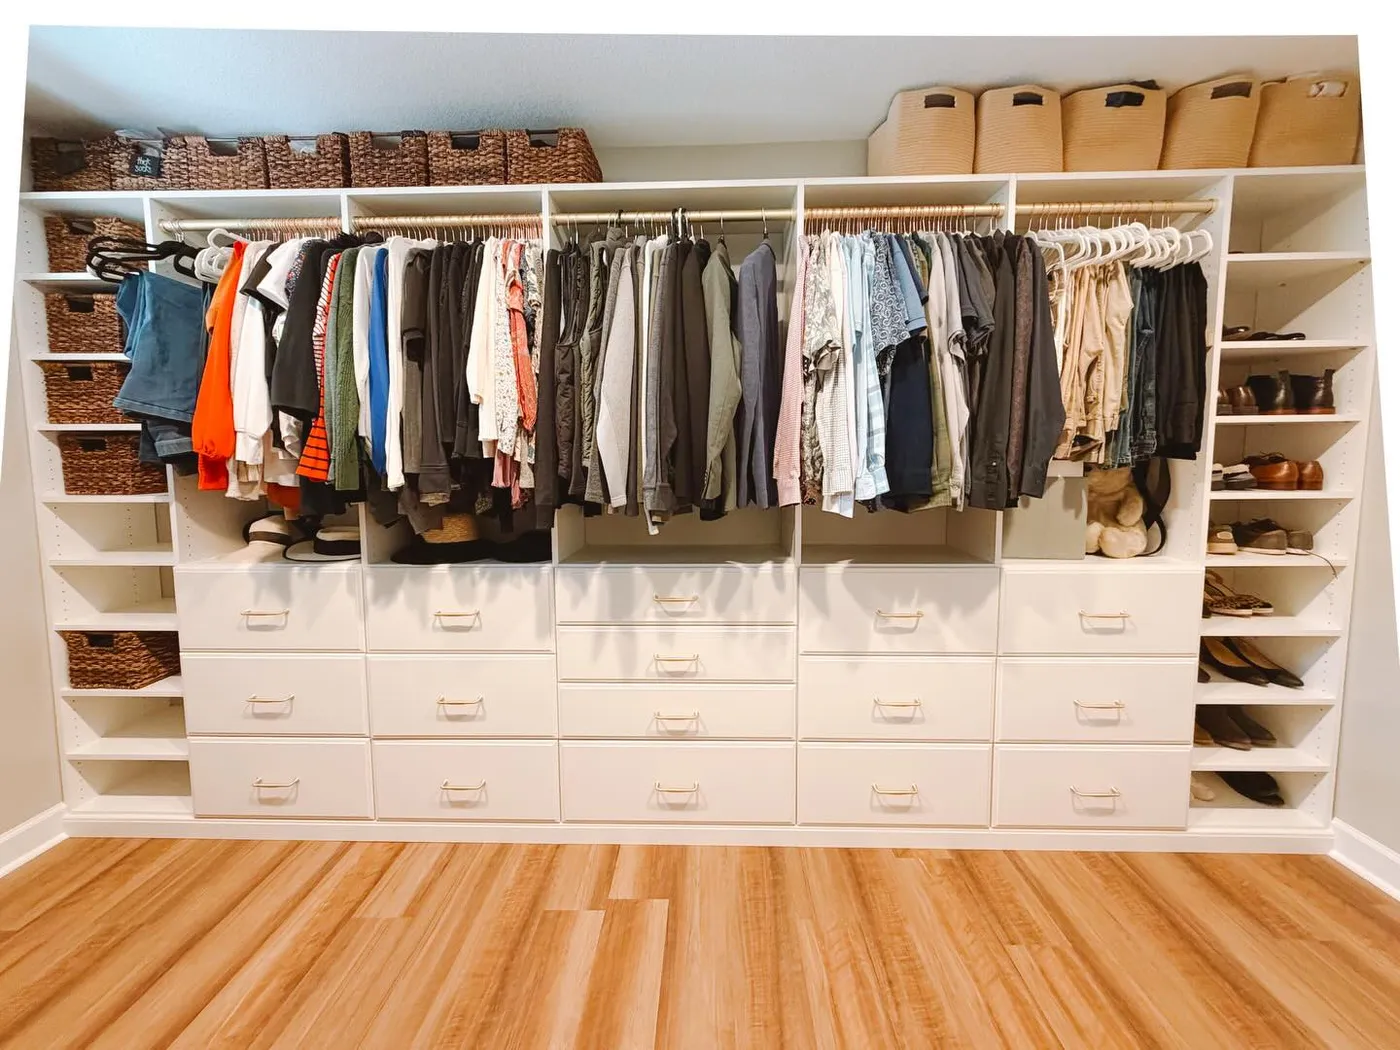
9. Add Warmth to a White Closet with Gold Hardware and Wicker
This all-white closet avoids feeling cold or clinical thanks to the careful layering of warm textures and materials. The wicker baskets introduce a natural, rustic element that contrasts beautifully with the clean lines of the white cabinetry. The gold drawer pulls add another layer of warmth and a touch of sophisticated gleam. These small details break up the monotony of the white and create a space that feels more collected, personal, and inviting. The light wood flooring underneath reinforces this warmth from the ground up.
|
📋 Copy HEX 🔗 Share |
When selecting hardware for closet drawers and cabinets, consider both aesthetics and function. For a cohesive look, use the same finish (in this case, gold) throughout. You can mix knobs and pulls, but keep the style consistent. A great rule of thumb for placing pulls on drawers is to center them on the drawer front. For drawers wider than 24 inches, consider using two pulls for better balance and easier opening. This small detail makes a huge difference in the final look.
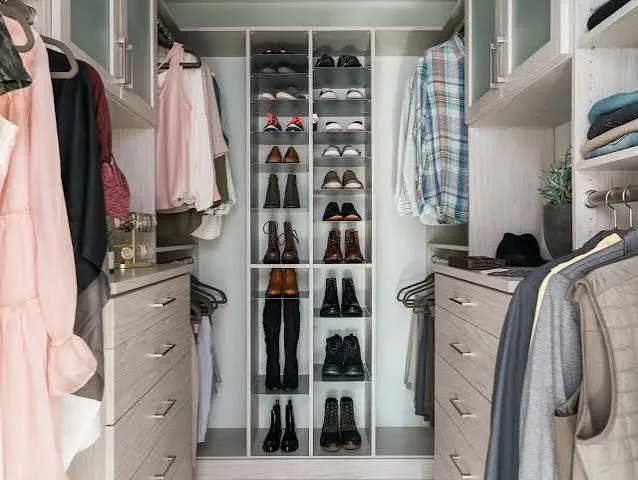
10. The Foundational Blocks of Walk-In Closet Organization
One of the most effective closet organization principles is the one-in, one-out rule. It’s simple: every time you bring a new piece of clothing or pair of shoes into your closet, an old one must leave. This prevents the slow accumulation of clutter and forces you to regularly evaluate what you actually wear and love. It keeps your inventory in check and ensures your closet system doesn’t become overwhelmed. Pair this with a seasonal declutter, and you’ll maintain an organized space year-round.
|
📋 Copy HEX 🔗 Share |
Before you buy a single bin or hanger, you need a plan. First, take everything out of your closet. Everything. Second, sort all items into three piles: Keep, Donate/Sell, and Trash. Be ruthless. If you haven’t worn it in a year, it’s time for it to go. Third, group your ‘Keep’ items by category (e.g., shirts, pants, sweaters). This will give you a clear picture of what you actually need to store, allowing you to design a system that truly works for your wardrobe, not just a generic idea of one.
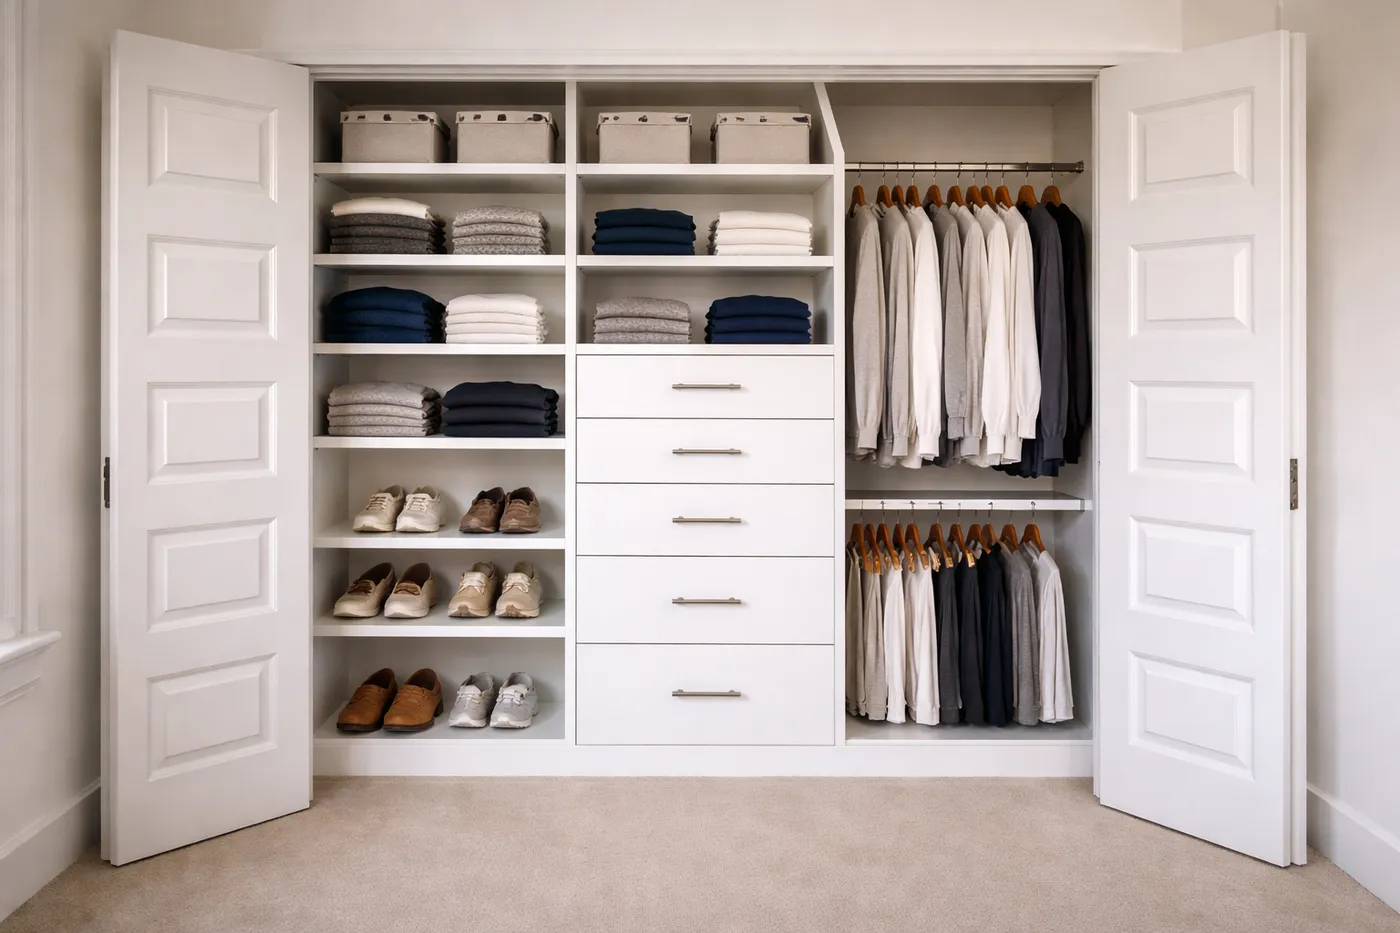
11. Double Your Hanging Space with a Two-Tier Rod System
A double-hang rod system is a game-changer for maximizing space, but it has specific height requirements. You’ll need a ceiling height of at least 8 feet. The top rod is typically installed at 80-82 inches from the floor, and the bottom rod at 40-42 inches. This provides enough vertical space for shirts, skirts, and folded trousers on both levels without them dragging. For a single rod to hang long coats and dresses, it should be installed at 65-70 inches from the floor.
|
📋 Copy HEX 🔗 Share |
The most impactful element here is, without a doubt, the use of two levels of hanging rods. For most people’s wardrobes, the vast majority of clothes are shirts, blouses, skirts, or pants that can be folded over a hanger. A single long rod is incredibly inefficient, wasting all the vertical space below these shorter items. By implementing a double-hang system, you instantly double your capacity for the most common types of clothing, making it the single most effective space-saving strategy in closet design.
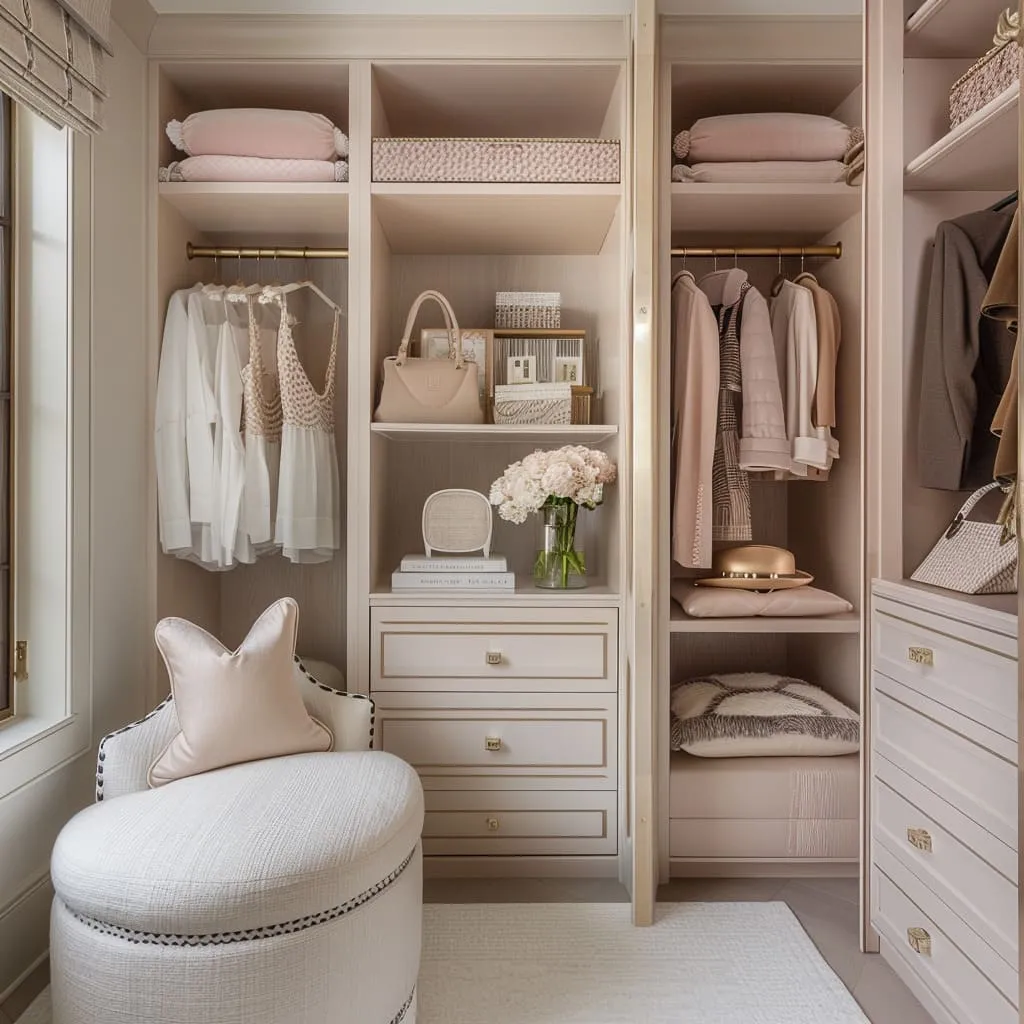
12. Sophisticated Serenity with Beige Cabinetry and Gold Trim
The elegance of this space comes from a carefully balanced formula: 70% soft neutral base + 20% plush texture + 10% metallic accent. The light beige cabinetry and creamy white rug create a serene, enveloping backdrop. The texture comes from the upholstered ottoman, which adds a layer of comfort and luxury. Finally, the slim gold trim and hardware provide just enough sparkle and contrast to keep the monochromatic palette from feeling flat. You could swap the beige for a soft gray and the gold for polished nickel to get a cooler but equally sophisticated feel.
|
📋 Copy HEX 🔗 Share |
A textured white ottoman looks incredibly chic, but it can be a magnet for stains in a dressing area. Makeup powder, a drop of lotion, or dye transfer from new dark jeans can quickly mar the fabric. To keep it looking pristine, consider treating it with a fabric protector like Scotchgard right away. For regular upkeep, vacuum it weekly with an upholstery attachment. Keep a dedicated fabric spot cleaner on hand for any immediate spills. If you have pets or kids, a darker color or a performance fabric might be a more practical choice.
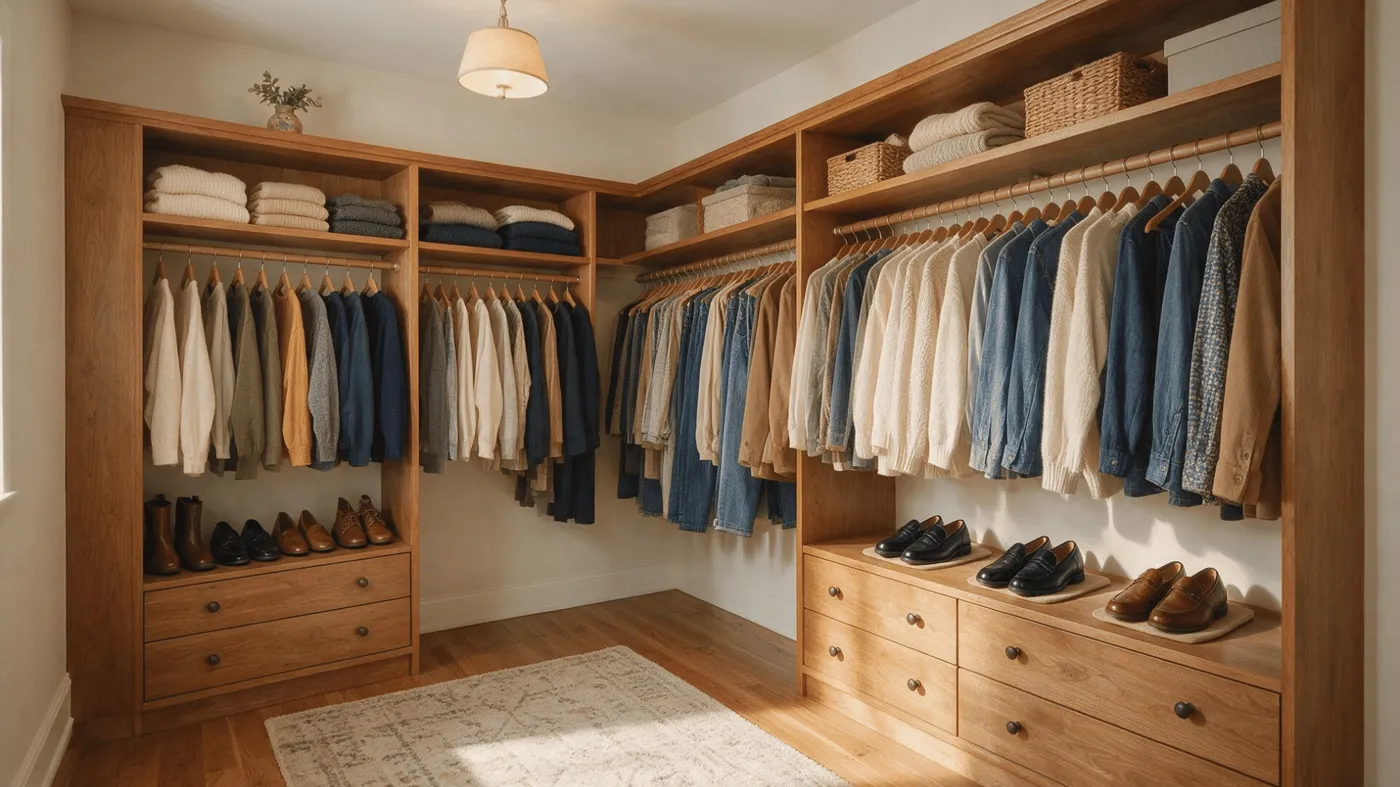
13. Achieve a Warm, Inviting Feel with Custom Wood Cabinetry
Custom wood cabinetry offers a beautiful, warm finish, but it comes at a premium compared to standard white laminate or melamine options. Here’s a rough idea of the cost difference for a mid-sized walk-in:
|
📋 Copy HEX 🔗 Share |
- Custom Wood Cabinetry (e.g., Oak, Maple): $12,000 – $25,000
- High-Quality Laminate/Melamine System: $6,000 – $12,000
- Pendant Light: $200 – $600
- Area Rug: $150 – $400
- Hardware & Accessories: $300 – $700
- TOTAL (Wood): $12,650 – $26,700
- The same layout in a quality laminate could save you 40-50% on the main cabinetry cost.
While the warmth of wood is undeniable, a floor-to-ceiling application in a medium or dark tone can feel very heavy and visually shrink a smaller space. This look works best in a closet that has good lighting, both natural and artificial. If your walk-in is small or lacks a window, consider using wood for a single accent wall or just the lower cabinets, pairing it with white or a lighter color on the upper sections to keep the space feeling open and bright. Compare this to the airy feel of the lighter wood in Idea #5.
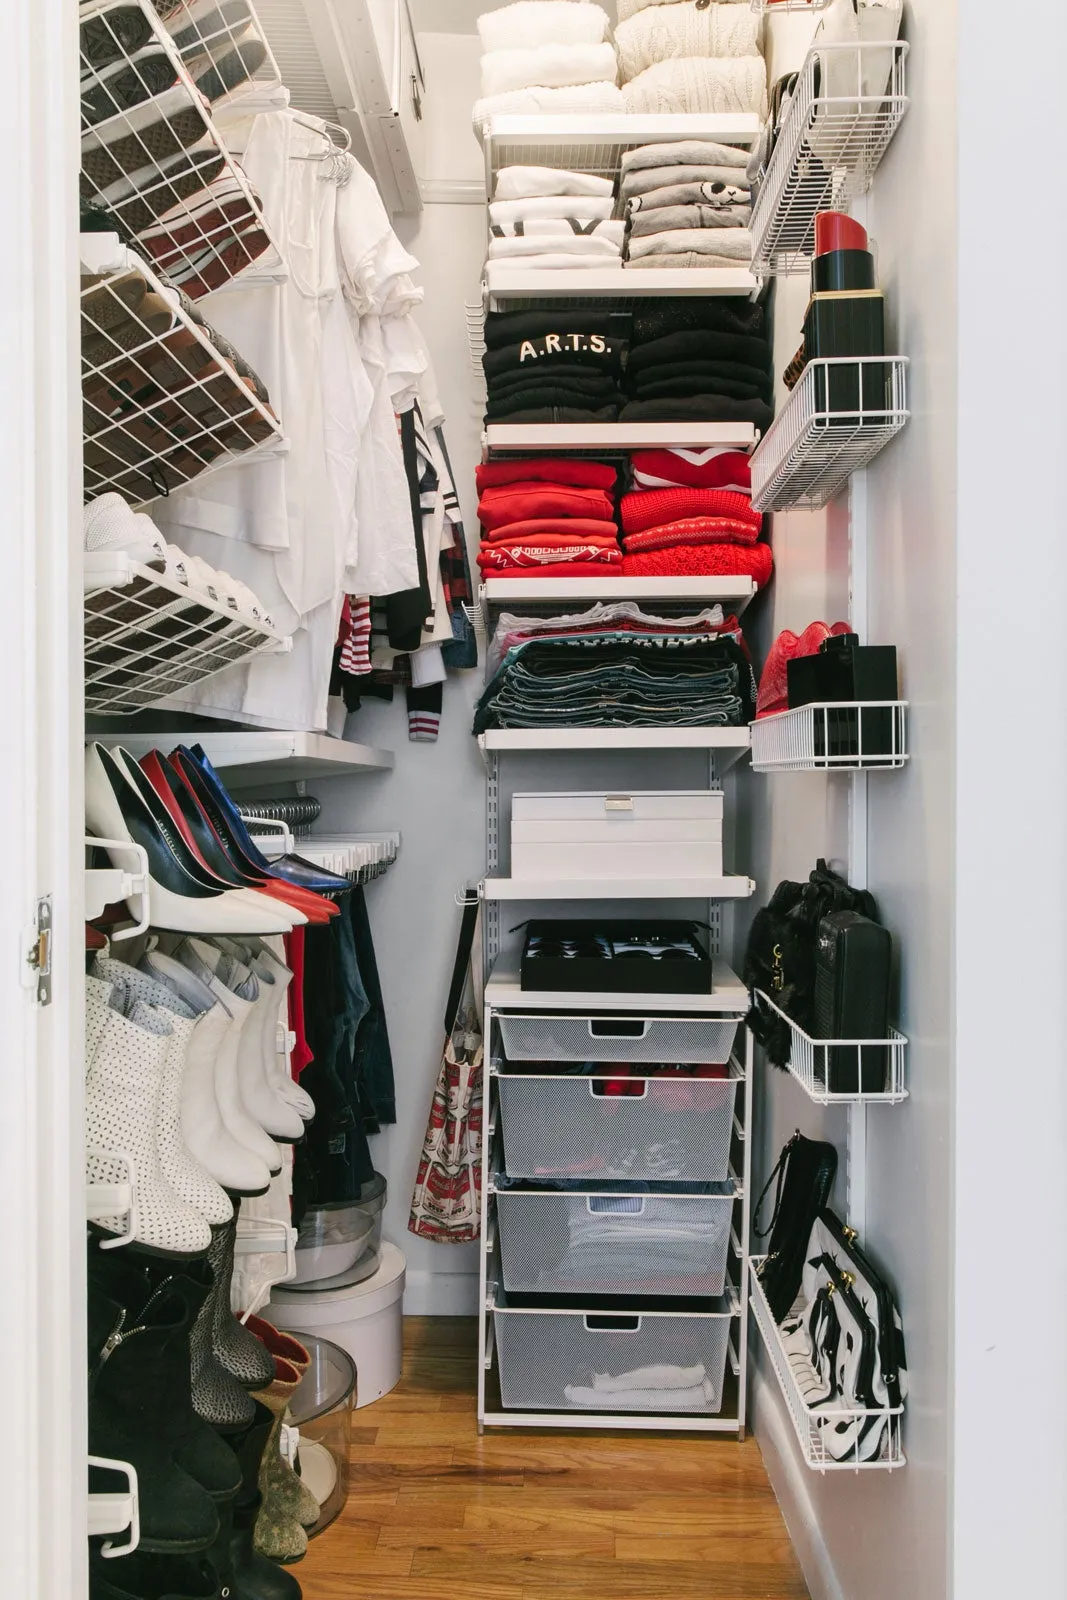
14. An Efficient and Budget-Friendly Wire Shelving System
This entire look is the definition of getting organized on a budget, and you can recreate it for a surprisingly low cost. A system like the ClosetMaid ShelfTrack or Elfa from The Container Store allows you to customize your layout with adjustable shelves, drawers, and rods. For a standard walk-in closet, you could likely purchase all the necessary components for $300 – $600. It’s a DIY-friendly project that offers incredible flexibility as your needs change—you can add, move, or remove components at any time.
|
📋 Copy HEX 🔗 Share |
Wire shelving is incredibly practical but can look visually cluttered. The secret to making it look polished is to use coordinating bins and baskets. Instead of having messy stacks of t-shirts or a jumble of accessories directly on the shelves, contain them. Use fabric bins for folded clothes and smaller baskets for things like socks, belts, or scarves. This not only looks much neater but also prevents smaller items from falling through the gaps in the wire. Choose baskets in a single color or material for the most cohesive look.
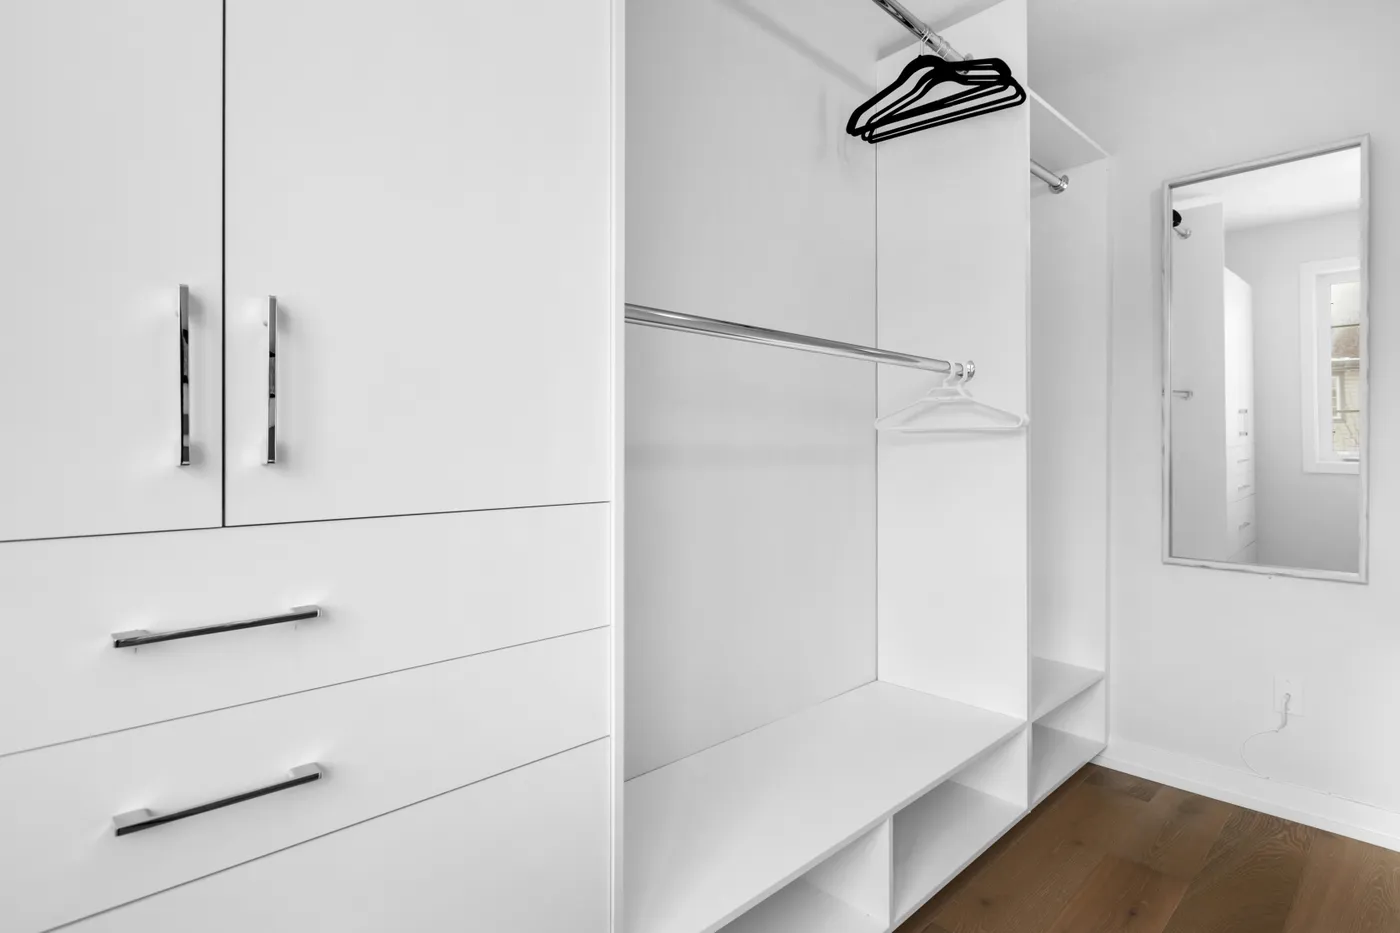
15. Keep It Clean and Minimalist with White Cabinetry and a Framed Mirror
The success of this clean, modern design hinges on the strategic use of the full-length mirror. In a relatively simple space, the mirror serves multiple functions. Practically, it’s essential for a dressing area. Aesthetically, it breaks up the wall of white cabinetry, adding a point of interest. Most importantly, it reflects light and the space opposite it, creating an illusion of depth that makes the closet feel larger and more open than it actually is. The warm wood frame adds a necessary touch of organic texture to the otherwise stark white and chrome palette.
|
📋 Copy HEX 🔗 Share |
This minimalist approach is particularly effective in small to medium-sized walk-in closets, typically in the range of 5×7 to 8×10 feet. The all-white color scheme and the light-reflecting properties of the chrome and mirror work together to maximize the sense of space. In a very large closet, this look might feel a bit too sterile unless warmed up with more texture, art, or a substantial rug. It’s a perfect solution for anyone wanting a bright, organized feel in a more compact footprint.
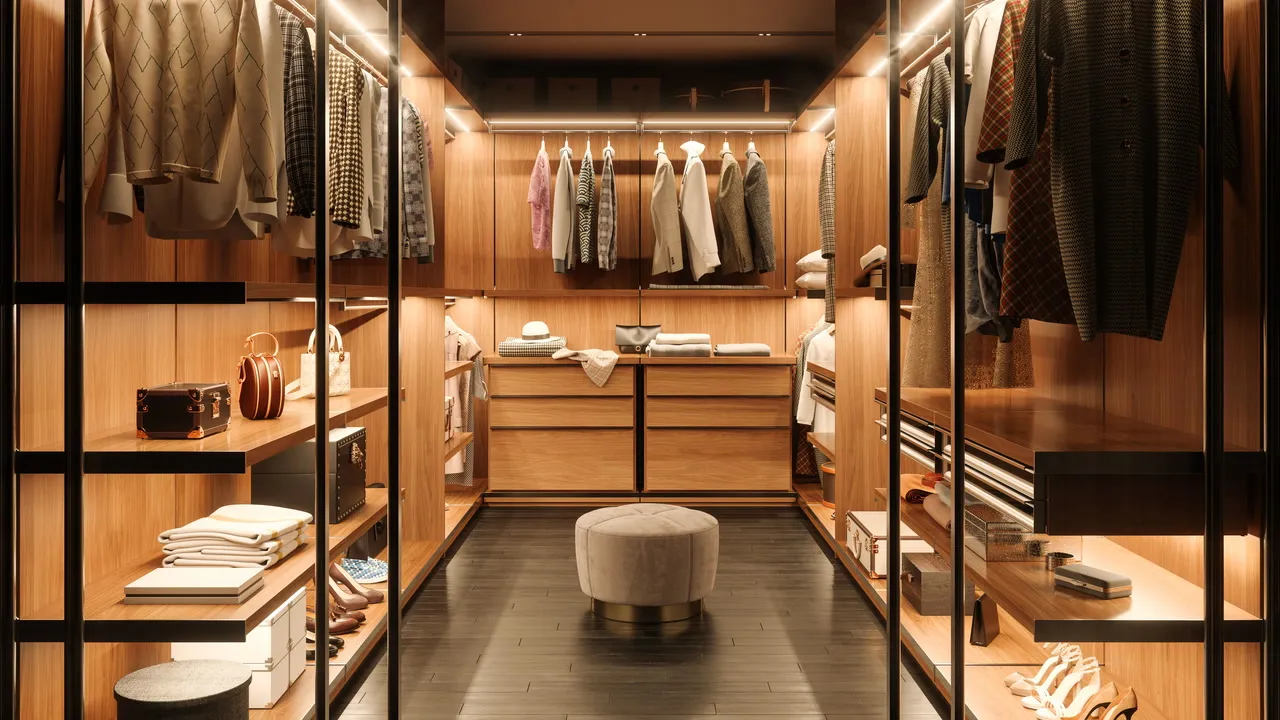
16. Rich Contrast: Light Wood Cabinetry on a Dark Floor
The single most dramatic choice in this room is the dark wood floor. It provides a deep, rich foundation that makes the light wood cabinetry pop. If the floor were a matching light wood, the room would be pleasant but monolithic. The high contrast between the floor and the walls creates visual tension and a sense of sophisticated drama. It grounds the space and adds a layer of unexpected depth, elevating the entire design from simply nice to truly memorable. This is a bold move that pays off in spades.
|
📋 Copy HEX 🔗 Share |
We’re seeing a major shift towards moody luxury in interior design, and this closet is a perfect example. For years, the default for high-end closets was bright, white, and airy. Now, designers and homeowners are embracing darker, richer tones to create spaces that feel more like a private, exclusive lounge or a high-end menswear boutique. The combination of warm, illuminated wood and dark, dramatic flooring seen here captures this trend perfectly. It feels personal, intimate, and incredibly sophisticated. Compare the lighting here to the even brighter style in Idea #6.
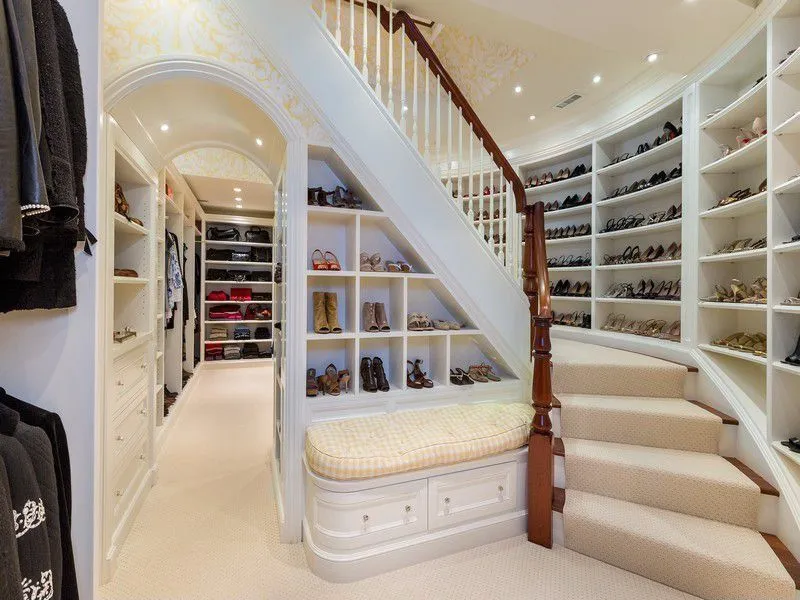
17. A One-of-a-Kind Closet Built Around a Grand Staircase
This is a showstopper, but it’s crucial to understand that this is not a simple closet system installation; it’s a major custom carpentry and construction project. Integrating storage seamlessly into the architecture of a staircase requires a skilled architect and master carpenter. The angled cuts for the shoe shelves, the integrated bench, and the curved archways all demand a high level of precision and craftsmanship. This is a dream feature that comes with a significant five-figure price tag and weeks (if not months) of construction.
|
📋 Copy HEX 🔗 Share |
What makes this design so brilliant is how it transforms what is typically awkward, underutilized space into a stunning and highly functional feature. The area under and alongside a staircase is often relegated to a simple, dark storage closet. Here, it’s been opened up and turned into the main event. The shoe shelves, following the exact angle of the stairs, are a work of art in themselves. It’s a masterclass in seeing the hidden potential in a home’s architecture and turning a challenge into a triumph.
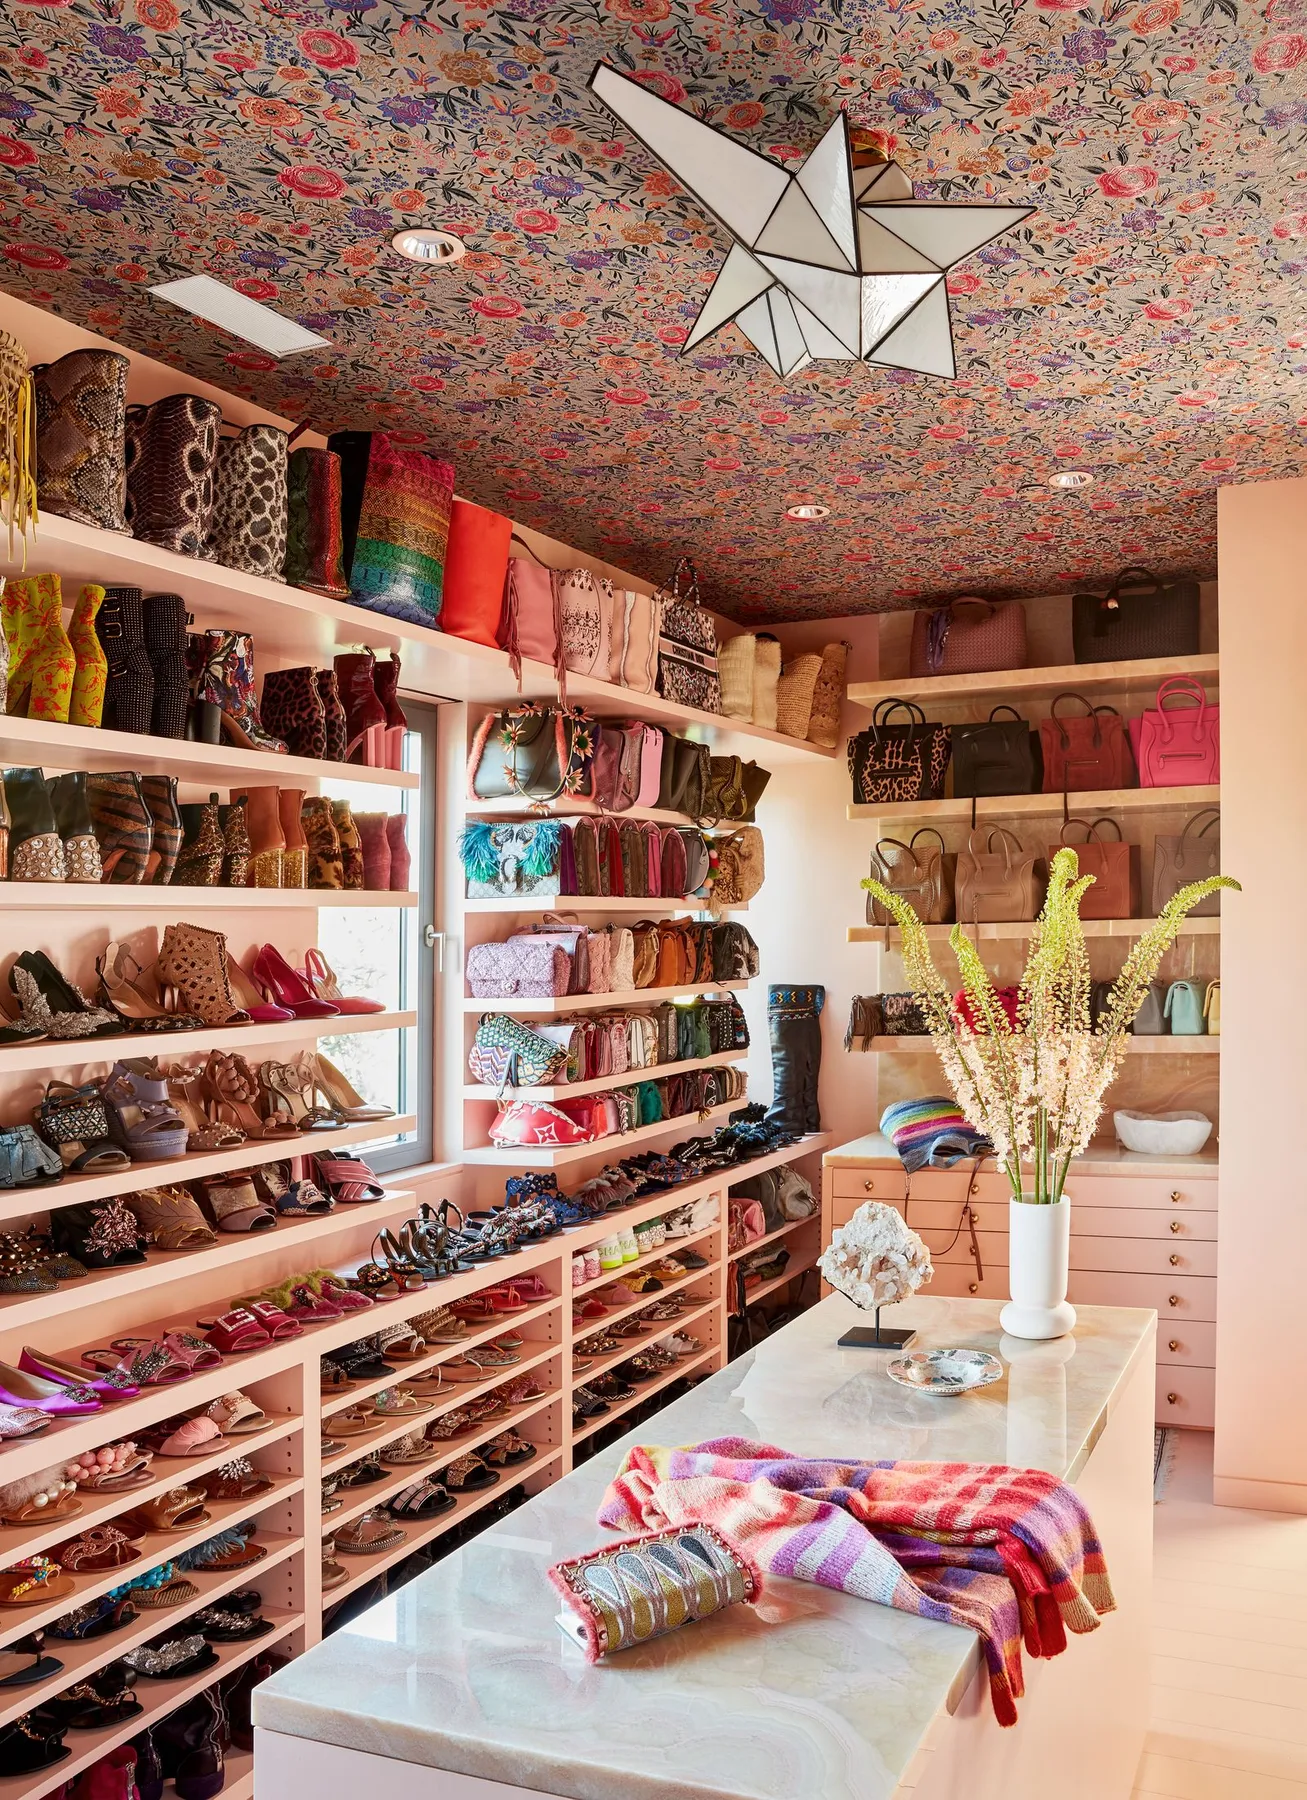
18. Make a Statement with a Blush Pink Closet and a Floral Ceiling
Adding a bold wallpaper to the ceiling is a fantastic way to make a statement. Using modern peel-and-stick wallpaper makes it a manageable DIY project.
|
📋 Copy HEX 🔗 Share |
- Prep the Ceiling: Clean the ceiling thoroughly and let it dry. A smooth, clean surface is key for good adhesion.
- Measure and Cut: Measure your ceiling and cut your first panel of wallpaper, leaving a few inches of excess on the ends.
- Start in a Corner: Peel back the first foot of backing and press the wallpaper into the corner where the ceiling meets the wall. Use a smoothing tool to eliminate air bubbles.
- Work in Sections: Slowly pull away more backing while smoothing the paper onto the ceiling. Overlap subsequent panels slightly, matching the pattern carefully.
- Trim the Edges: Once all panels are up, use a sharp utility knife to trim the excess wallpaper along the edges for a clean line. (Time: 3-5 hours, Cost: $100-$300)
When you have a fifth wall as dramatic as this floral ceiling, the key is to let it be the star. The designer wisely chose a single, solid color—the blush pink—for all the surrounding cabinetry. If the shelves were white, or another pattern was introduced, the room would feel chaotic. By pulling a color from the wallpaper and using it monochromatically on the walls and shelves, the ceiling is highlighted, and the whole space feels cohesive and intentional rather than busy.
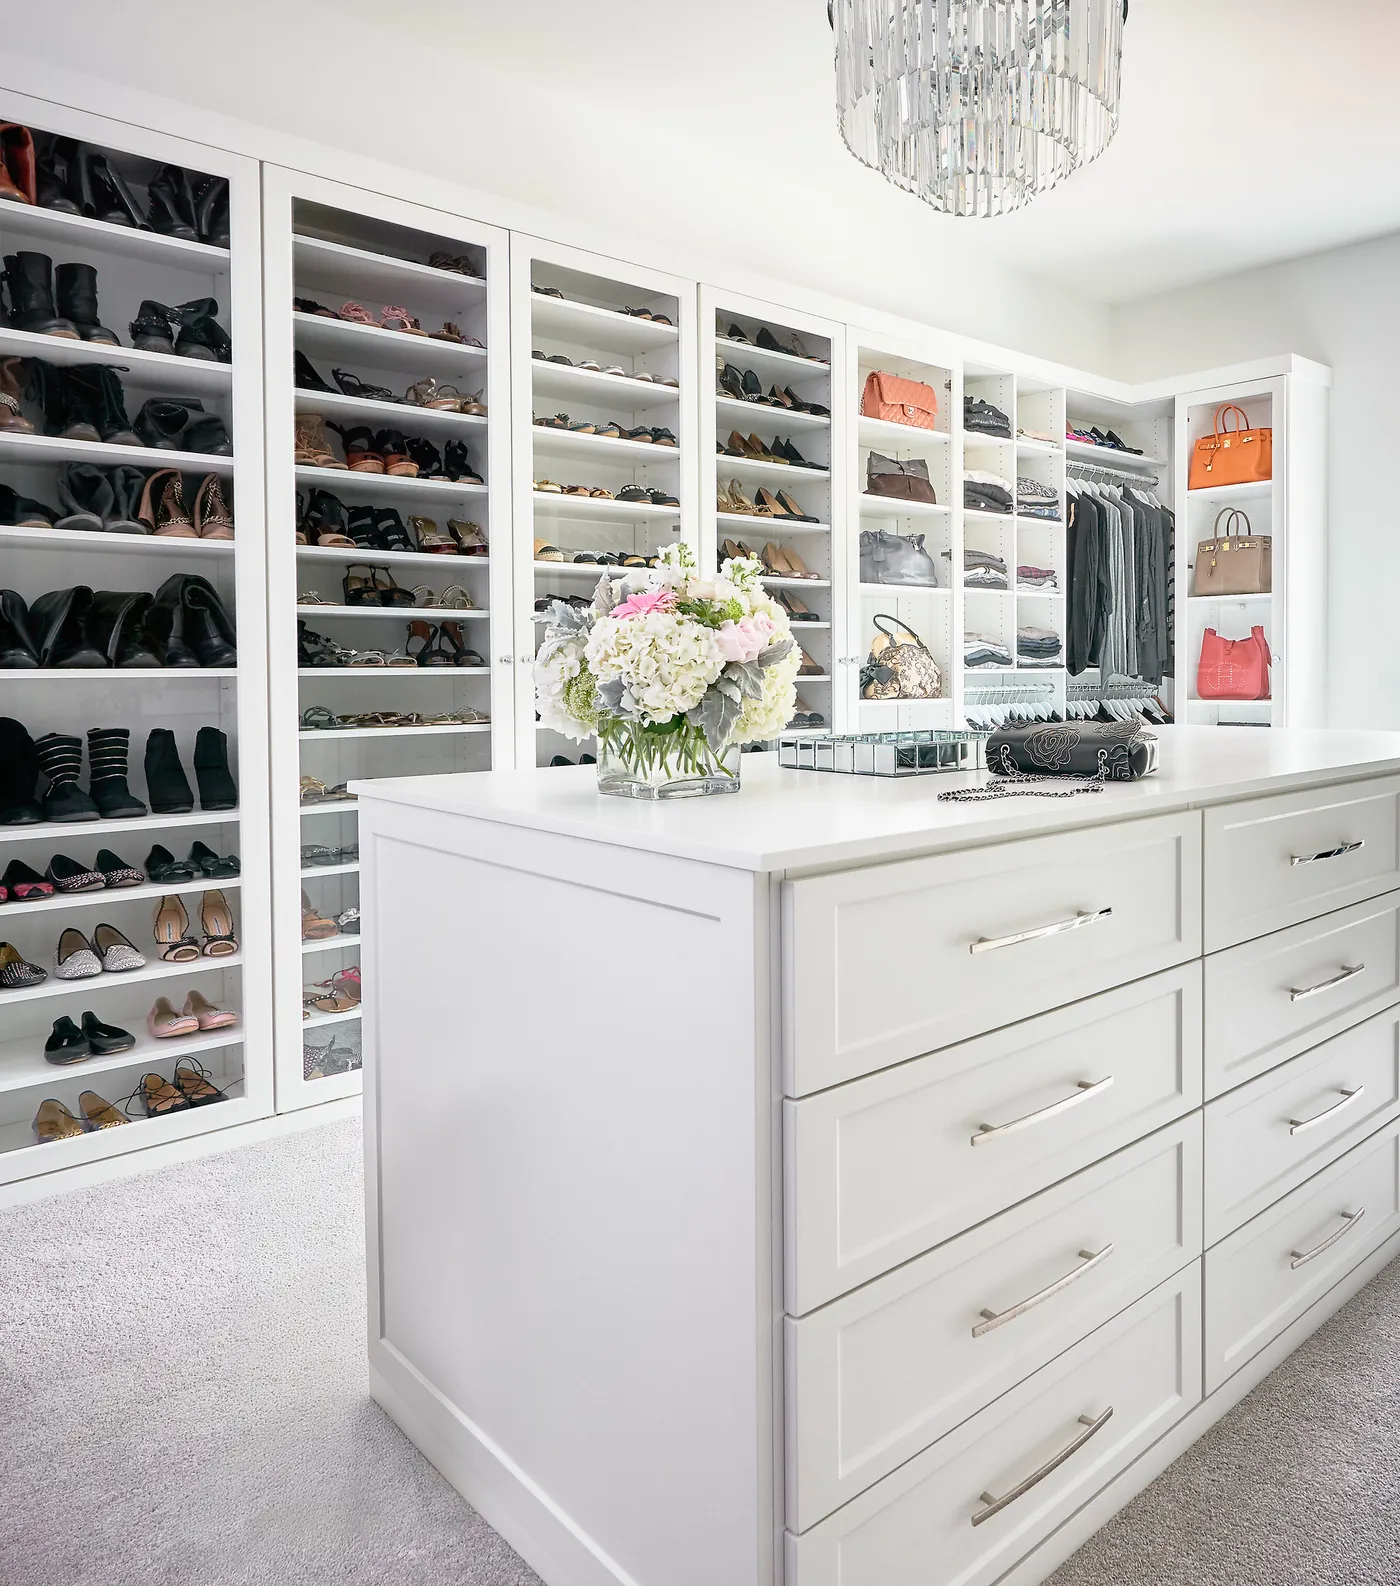
19. Classic Elegance with a White Central Island and Crystal Chandelier
Placing an island in your walk-in closet is a dream feature, but you need the right amount of clearance. The golden rule is to have a minimum of 36 inches of clear walkway on all sides of the island. This allows you to open drawers and cabinet doors fully without being blocked, and gives you enough room to move around comfortably, even with an armful of clothes. If your room is less than 10 feet wide, you’ll likely be better off with a peninsula coming off one wall or forgoing an island altogether to avoid a cramped space.
|
📋 Copy HEX 🔗 Share |
This room’s serene and classic feel comes from a simple but effective design recipe: 80% soft white + 15% cool gray + 5% silver sparkle. The white cabinetry and island create a bright, expansive canvas. The light gray carpet grounds the space and adds a touch of softness, preventing the white from feeling too stark. The final 5% comes from the crystal chandelier and curved silver handles, which act like jewelry, adding just enough sparkle and shine to make the room feel elegant and finished.
20. High-Contrast Luxury with Dark Wood, White Marble, and Gold
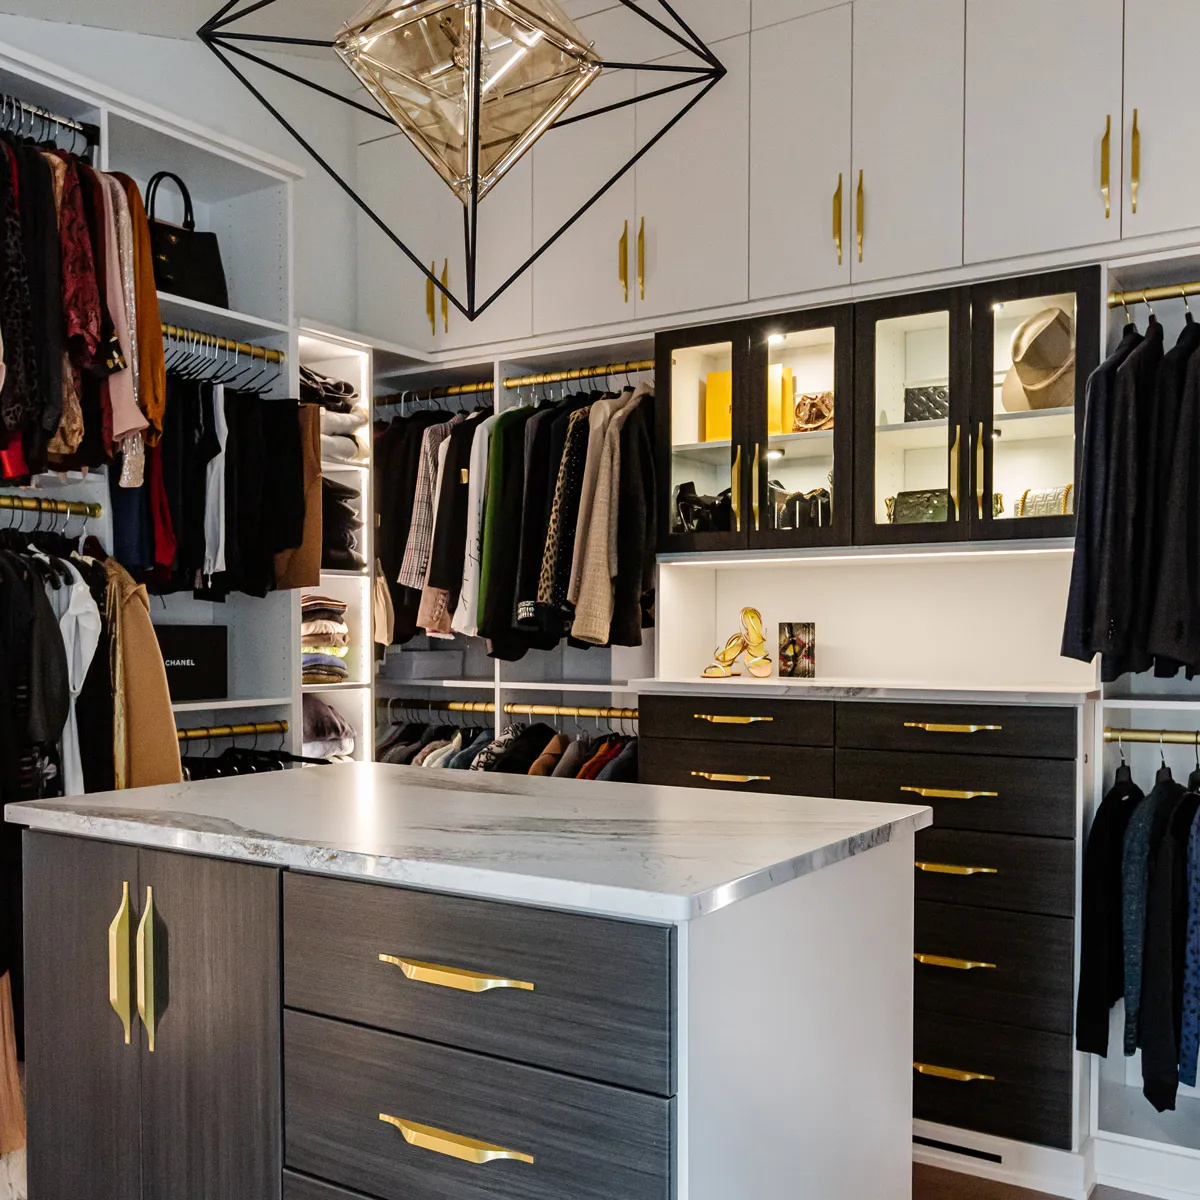
This is a no-holds-barred luxury look, and the price tag reflects the high-end materials and custom details. The combination of different finishes and integrated lighting adds to the complexity and cost.
|
📋 Copy HEX 🔗 Share |
- Custom Two-Tone Cabinetry: $20,000 – $40,000
- Marble-Topped Island: $5,000 – $9,000
- Gold Hardware & Rods: $2,000 – $4,000
- Geometric Chandelier: $1,000 – $3,000
- Integrated LED Lighting: $1,500 – $3,500
- TOTAL: $29,500 – $59,500
- Budget alternative: Use dark IKEA PAX frames with white door fronts, a laminate marble-look countertop, and spray paint standard rods and pulls gold for a look under $8,000.
This design is a masterclass in using contrast to create drama and sophistication. It’s like a perfectly tailored tuxedo. The dark wood drawers provide a strong, grounding base, while the white upper cabinets and marble top keep the space feeling bright and open. The gold hardware and rods are the perfect jewelry, bridging the gap between the dark and light elements. This high-contrast palette feels confident, deliberate, and undeniably luxurious. Compare this mixed approach to the more uniform dark grey closet in Idea #21.
21. Industrial Chic with Open Racks and a Painted Brick Wall
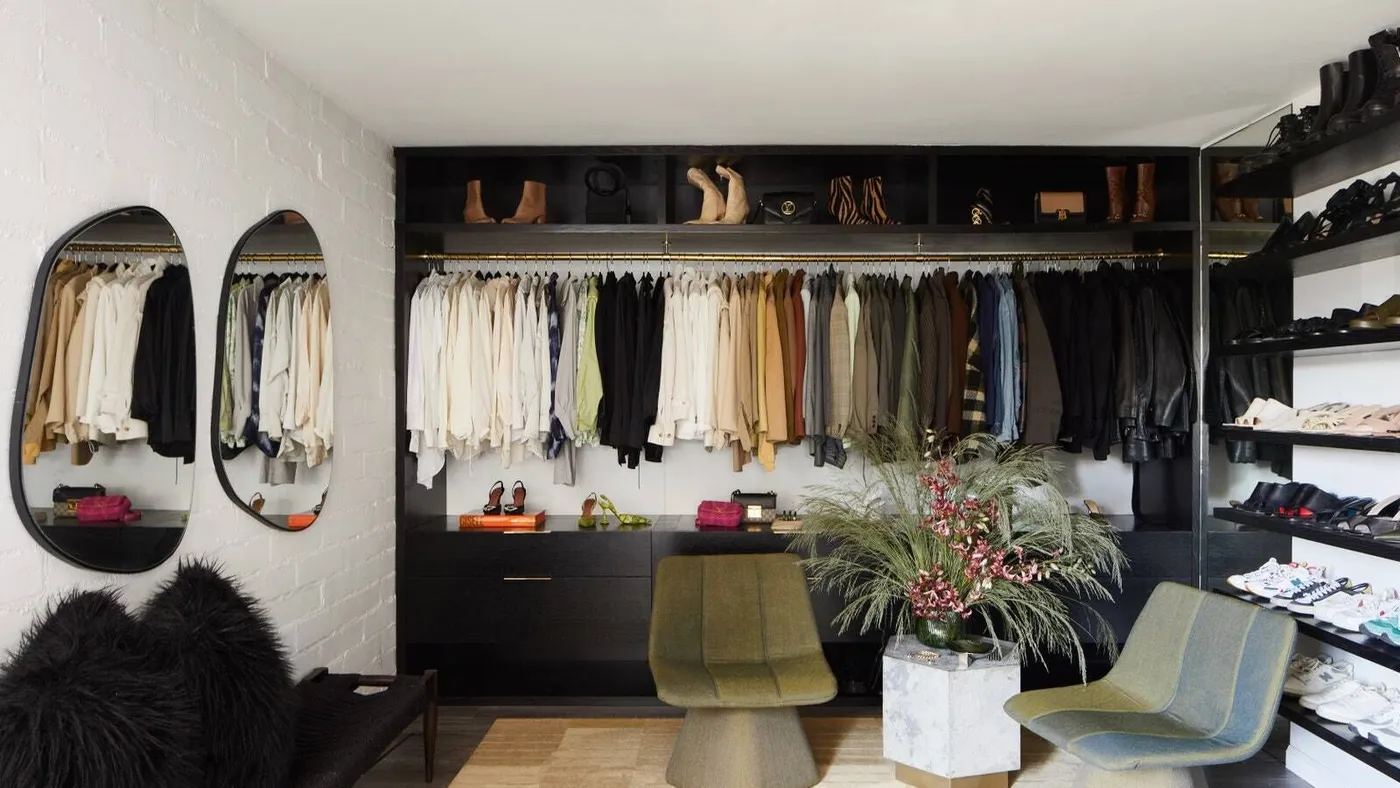
This closet taps into the growing trend of the unfitted or deconstructed wardrobe. Instead of hiding clothes behind solid doors, this approach embraces a more open, retail-inspired look. It’s popular in lofts and more modern homes where the closet might be part of a larger open-plan bedroom or dressing area. It feels less like a traditional storage space and more like a curated fashion installation, reflecting a desire for our homes to be more personal and expressive of our style.
|
📋 Copy HEX 🔗 Share |
Let’s be very clear: an open wardrobe system means there is nowhere to hide your mess. Every item is on display, all the time. This system only works if you are a naturally neat person or are willing to become one. You’ll need to commit to using matching hangers, keeping clothes perfectly spaced, and ensuring folded items are always in tidy stacks. If you’re someone who prefers to shut the door on a bit of chaos, a system with more closed storage is a much more realistic choice.
22. Create a Bright Boutique Feel with Glass Doors and Mirrors
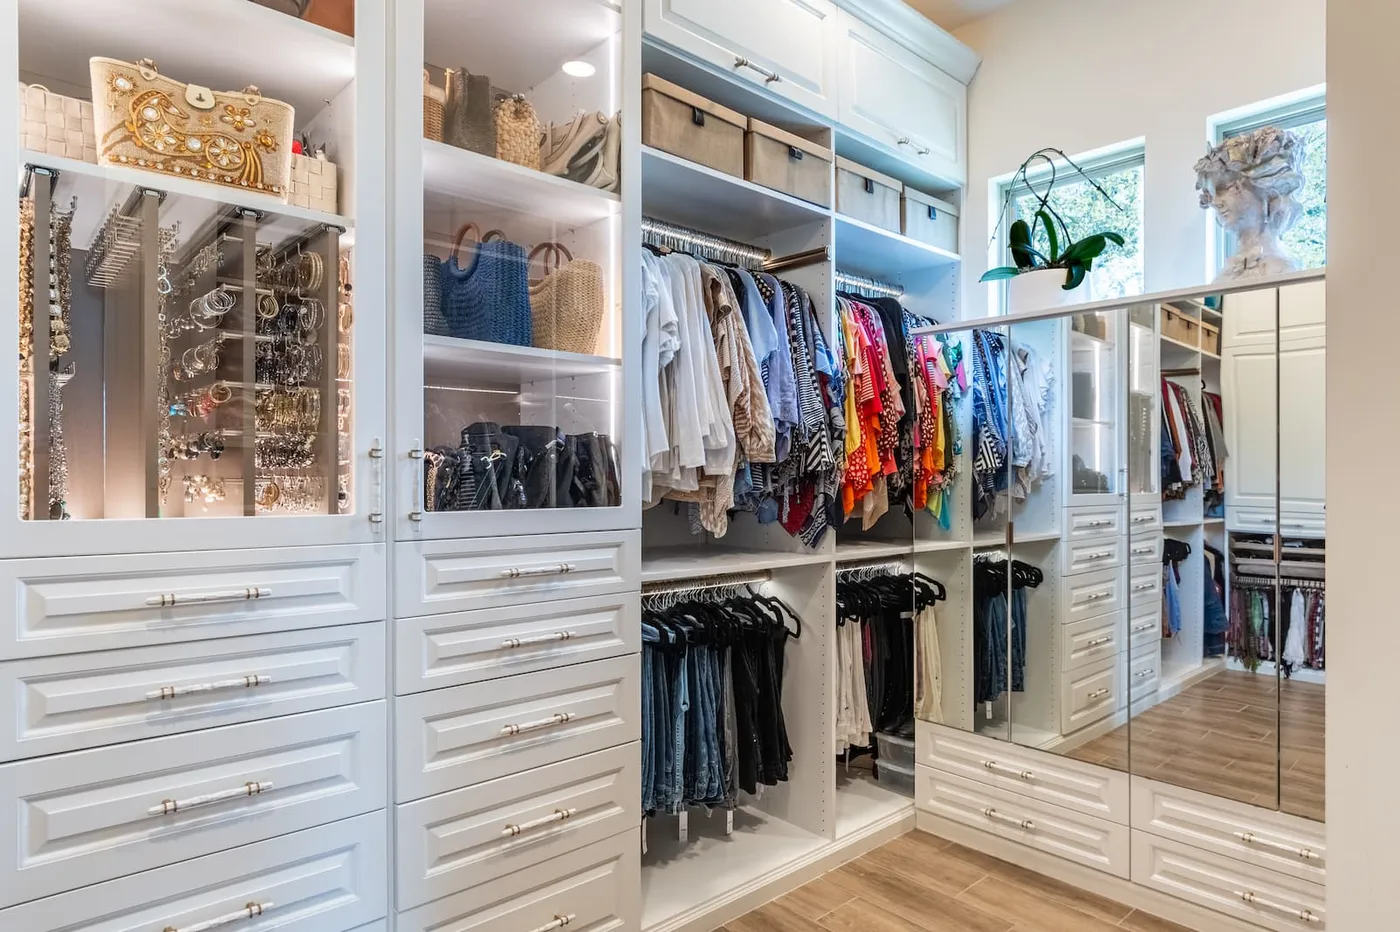
The mirrored wall in this closet is a brilliant move. Placing a large mirror directly opposite your main light source or window is the fastest way to double the amount of light in the room. It bounces the light around the space, eliminating shadows and making the whole closet feel brighter and more expansive. In a walk-in closet, which can often feel enclosed, using a full wall of mirrors is the most effective trick to create an illusion of depth and openness, making the space feel twice its actual size.
|
📋 Copy HEX 🔗 Share |
Adding integrated lighting to your cabinets can make your closet feel incredibly high-end. Here’s a quick guide for installing puck lights or strip lighting in a glass-front cabinet:
- Choose Your Light: For cabinets, low-profile LED puck lights or thin LED strips work best. Battery-operated options are easiest; hardwired gives a cleaner look.
- Plan Placement: Position lights at the top front of the cabinet, angled slightly back to illuminate the contents without creating glare.
- Drill for Wires: If hardwiring, drill small holes in the corners or back of the cabinet to run the low-voltage wires.
- Install Lights: Mount the puck lights with small screws or use the adhesive backing on LED strips.
- Connect to Power: Group all wires and connect them to an LED driver, which then plugs into an outlet or is wired to a switch. (Time: 2-3 hours, Cost: $60-$150)
23. Planning Your Perfect Custom Closet Features
A custom closet is all about the details. Before you meet with a designer, think about which of these special features would truly improve your daily routine:
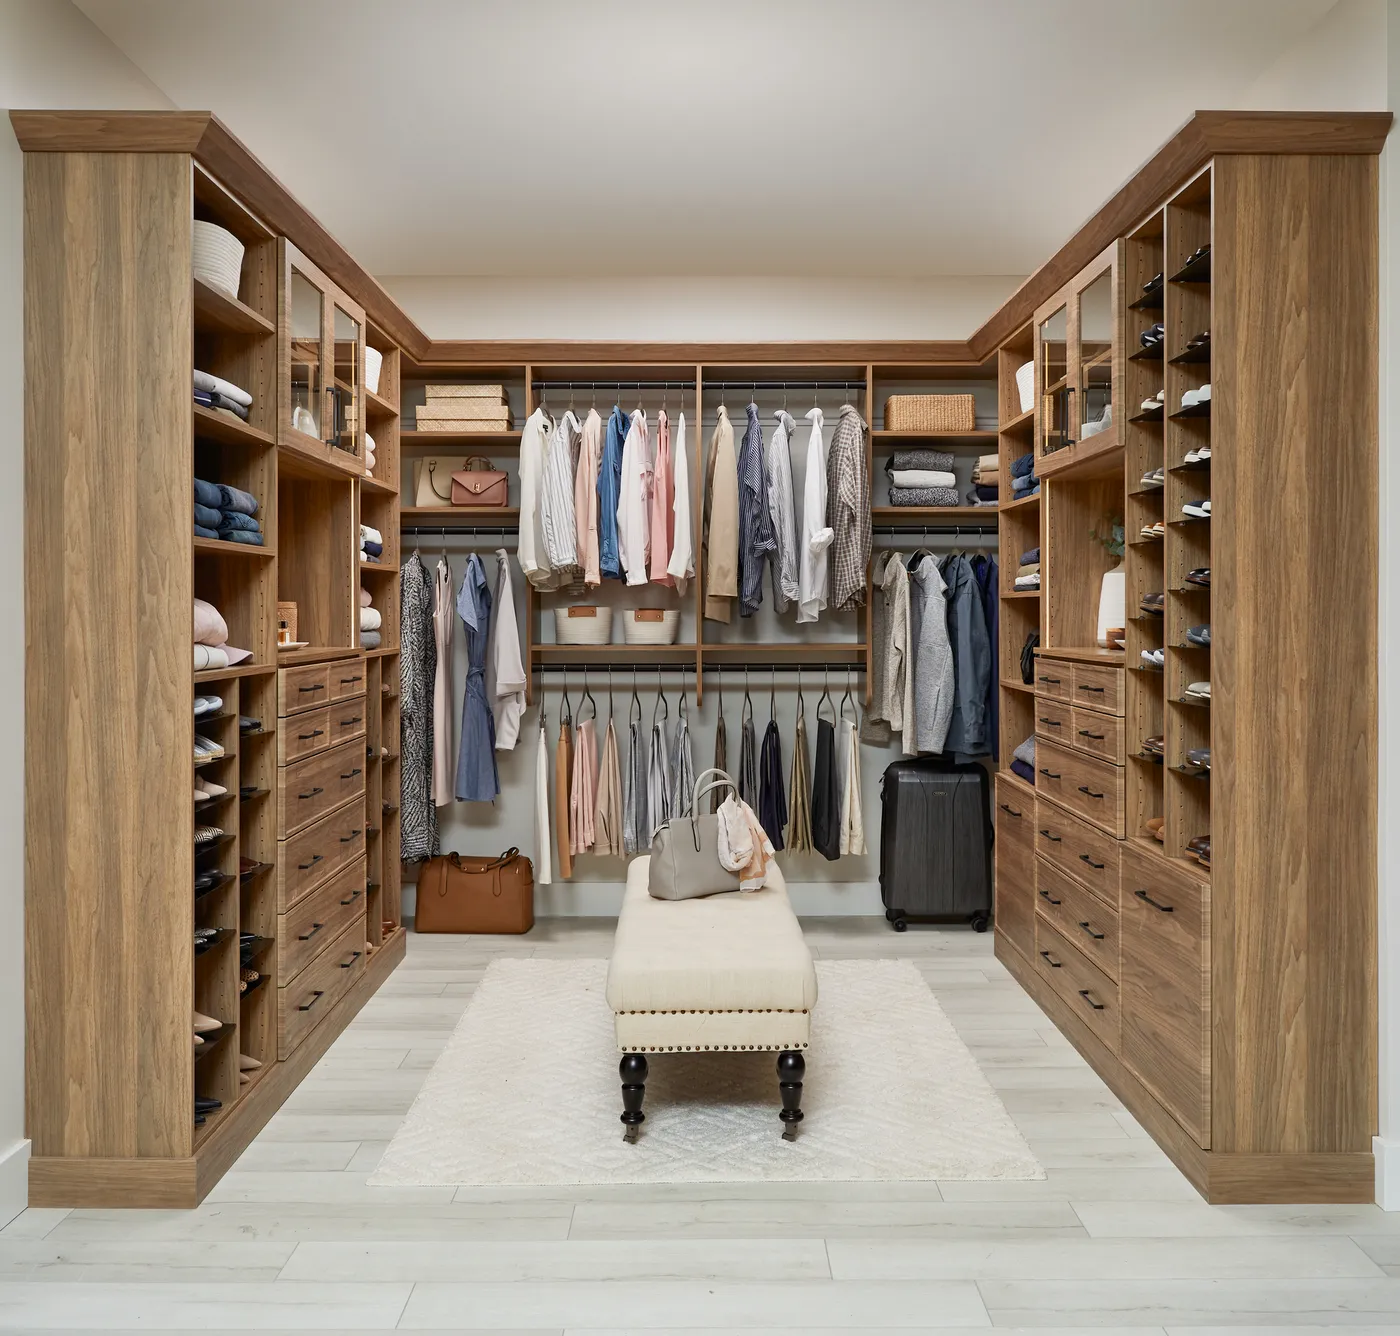
|
📋 Copy HEX 🔗 Share |
- Valet Rods: A small, slide-out rod perfect for planning an outfit or hanging dry cleaning.
- Velvet-Lined Jewelry Trays: Custom-divided drawers to keep necklaces untangled and earrings paired.
- Tie and Belt Racks: Slide-out racks that keep accessories organized and easy to see.
- Integrated Hamper: A tilt-out cabinet with a removable laundry bag to keep dirty clothes hidden.
- A Fold-Out Ironing Board: A space-saving feature that makes quick touch-ups a breeze.
When planning a custom closet, it’s easy to get carried away with cool gadgets and features. The most important tip is to design for the wardrobe you have, not the wardrobe you wish you had. If you own two belts, you don’t need a fancy motorized tie rack. If you wear mostly dresses, prioritize long-hang space over drawers. A truly functional closet is one that is perfectly tailored to your actual clothing and habits. Take a detailed inventory first, then choose the features that solve your specific storage problems.
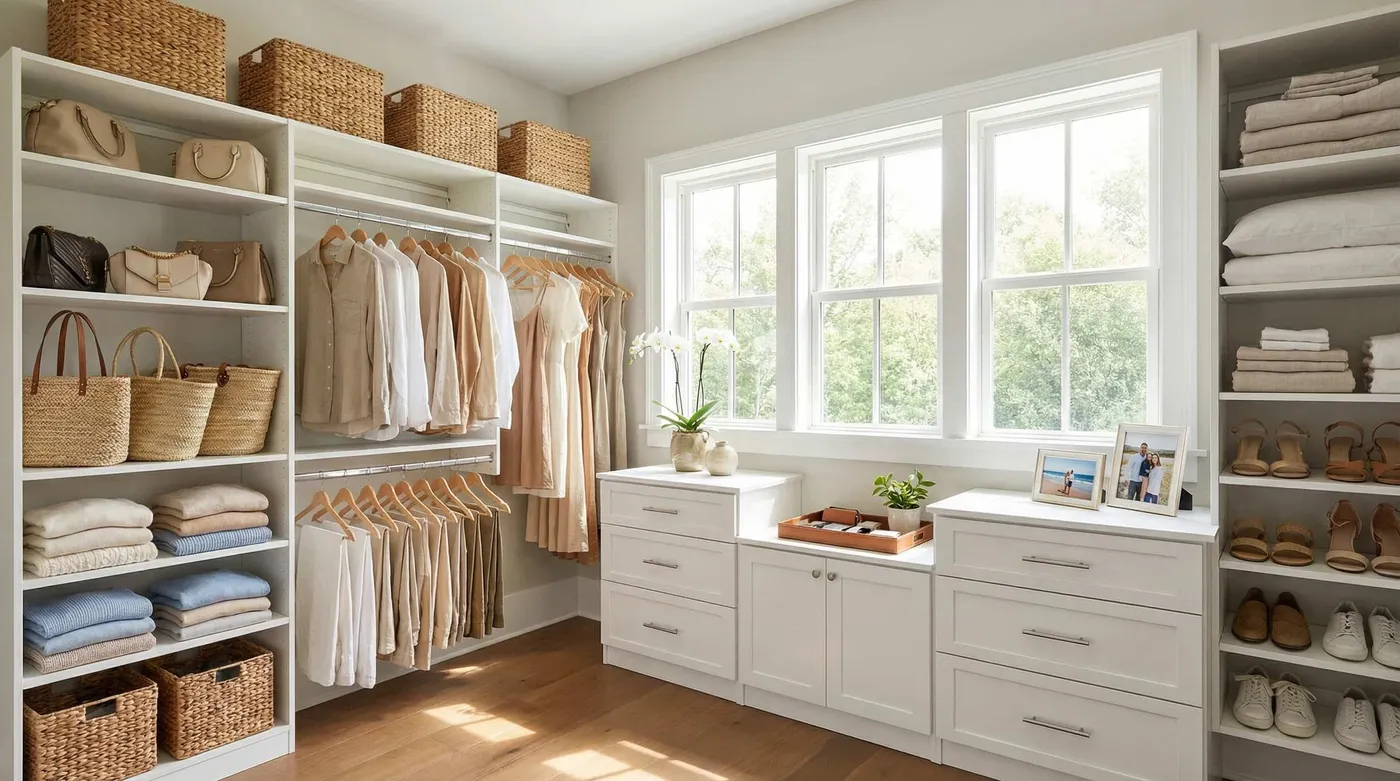
24. Flood Your Closet with Natural Light From Large Windows
Having a window—let alone a bank of three—in a walk-in closet is an absolute dream for creating a bright, pleasant space. However, direct sunlight is the enemy of clothing. Over time, UV rays can cause significant fading, especially on delicate fabrics and dark colors. To get the benefit of the light without damaging your wardrobe, it’s essential to install UV-blocking window film or have good quality blinds or shades that you can close during the brightest parts of the day. This protects your investment in your clothes.
|
📋 Copy HEX 🔗 Share |
It’s the windows, full stop. In a room type that is so often a dark, enclosed box, the presence of abundant natural light completely changes the character of the space. It makes colors appear true, helps you spot stains or wrinkles, and transforms the daily routine of getting dressed into a much more pleasant experience. The white shelving and light wood floors are beautiful, but they are support systems for the real star of the show: the connection to the outdoors and the beautiful, natural light it provides.
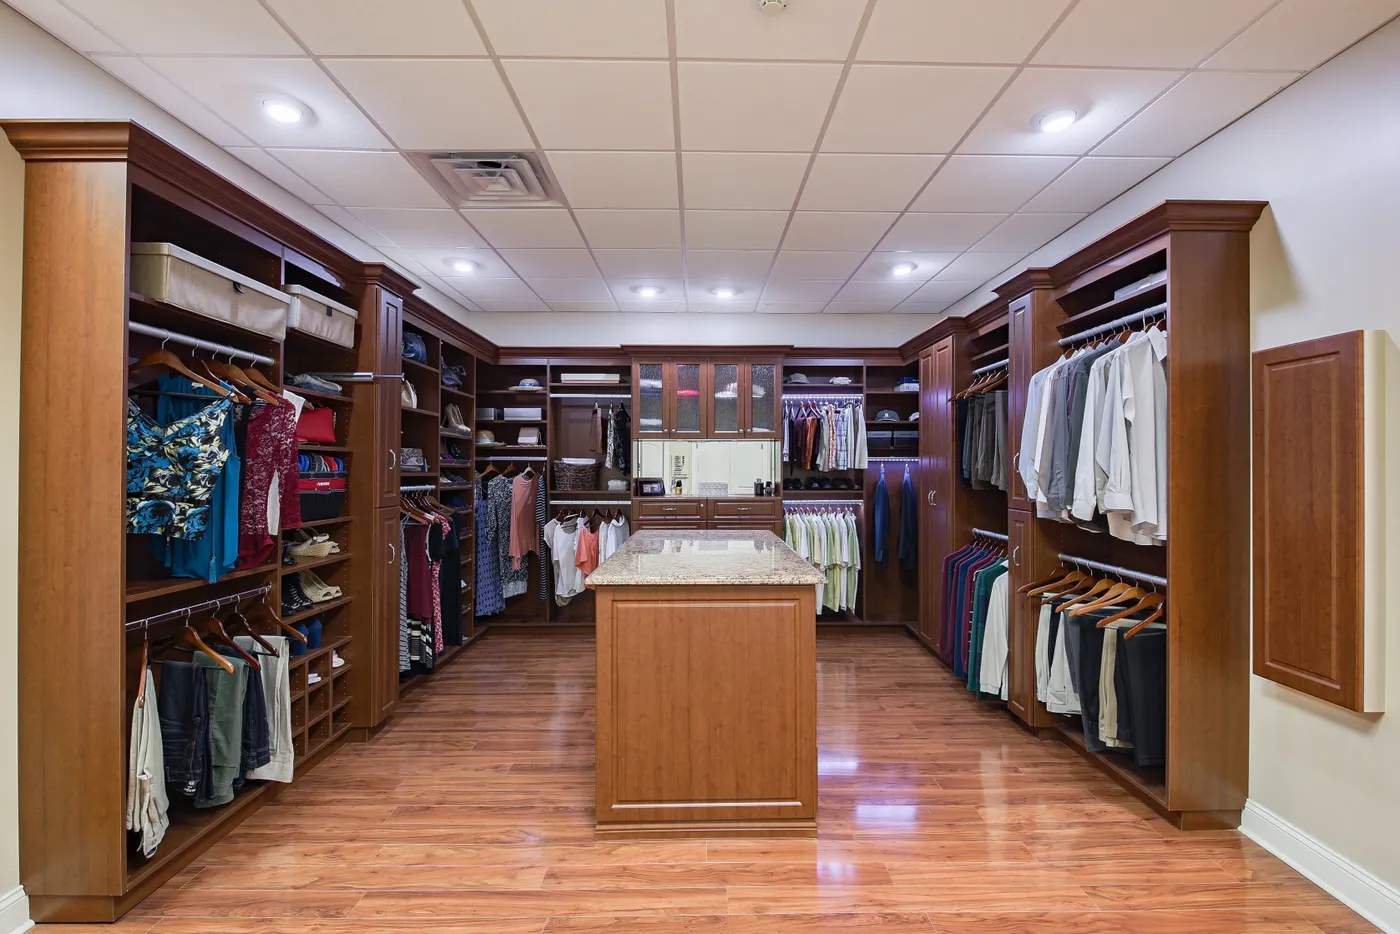
25. A Classic and Functional Family-Sized Wood Closet
A closet of this magnitude, complete with a large central island and extensive perimeter cabinetry, is essentially a spare bedroom conversion. To comfortably house a layout like this, you need a room that is no smaller than 10 feet by 12 feet. This allows for the 24-inch deep cabinets along the walls, a 3-foot wide island, and the necessary 3-foot clearance on either side of the island for walkways and opening drawers. It’s a significant footprint, ideal for a primary suite in a larger home. For a smaller wood closet, check out Idea #14.
|
📋 Copy HEX 🔗 Share |
The custom wood cabinetry seen here can be very expensive. For a similar look with a more manageable price tag, consider using stock kitchen cabinets from a big-box store like Home Depot or Lowe’s. You can purchase pantry cabinets, upper cabinets, and drawer bases in a wood finish and arrange them to create a custom-fit closet system. An unfinished wood island base can be stained to match and topped with a stock piece of granite or butcher block. This approach requires more planning and DIY skill but can save you 50-70% compared to a fully custom job.
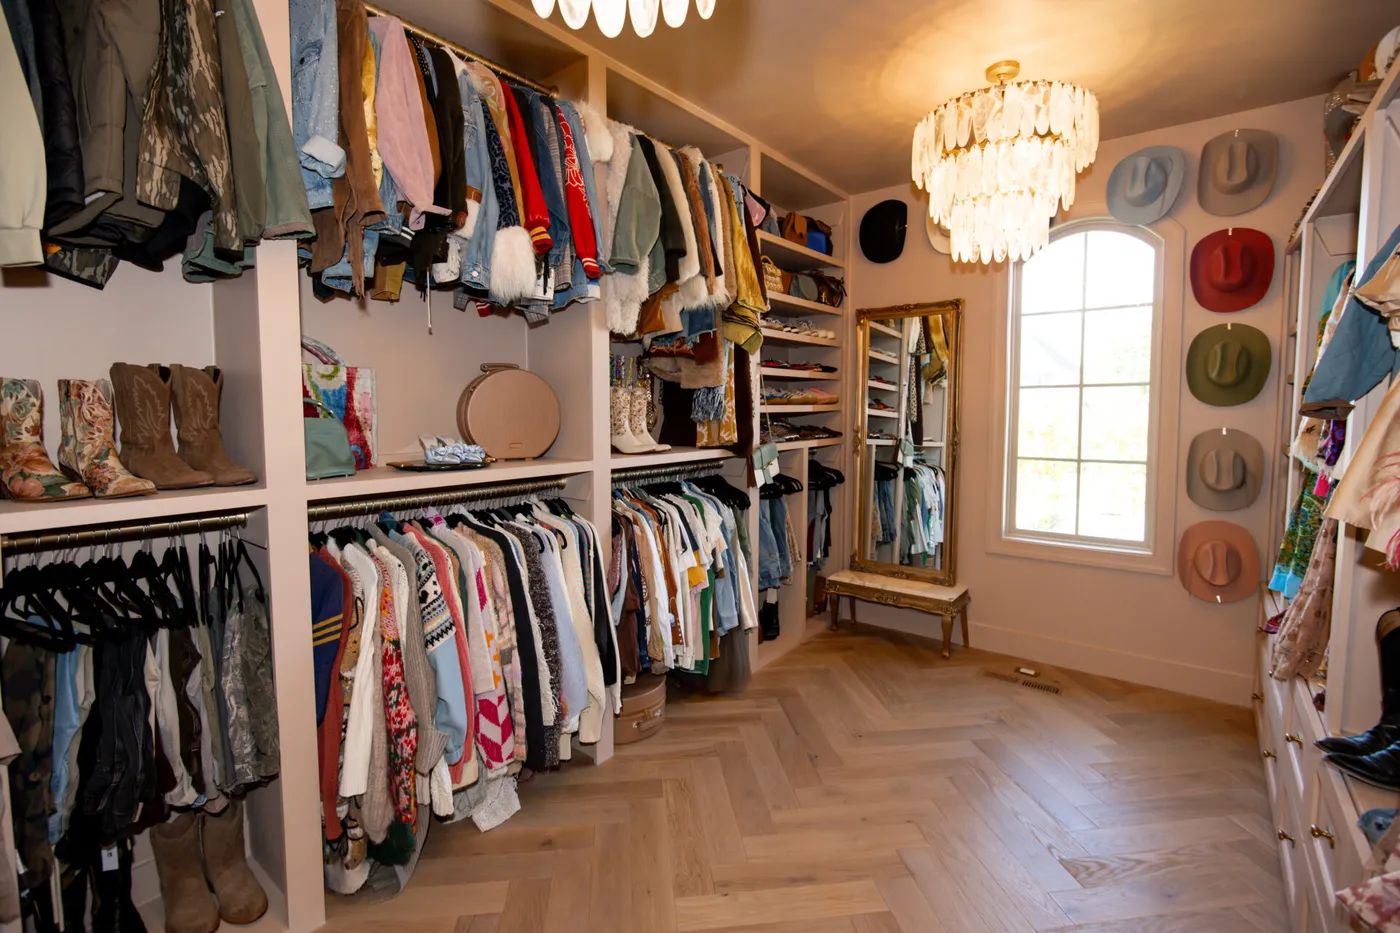
26. Eclectic Charm with Herringbone Floors and a Capiz Chandelier
This space feels so unique and personal because it masterfully mixes different styles and textures. The herringbone wood floor is a timeless, classic pattern that provides a sophisticated base. The clean, simple lines of the pinkish-beige cabinetry are distinctly modern. Then, the capiz shell chandelier and ornate gold mirror introduce a touch of bohemian glamour. Finally, the display of cowboy hats adds a rustic, personal quirk. It’s this confident blending of styles—classic, modern, boho, and personal—that creates a room with true character.
|
📋 Copy HEX 🔗 Share |
The visual recipe for this eclectic space is all about balance: 40% classic foundation + 40% soft modern storage + 20% glam/boho accents. The herringbone floor provides the classic, grounding element. The simple, colorful closet units are the modern workhorse of the room. The final 20% is where the personality shines through—the shell chandelier, the gold mirror, and the hat collection. You could swap the herringbone for slate tile and the chandelier for something industrial to achieve a totally different but equally balanced eclectic vibe.
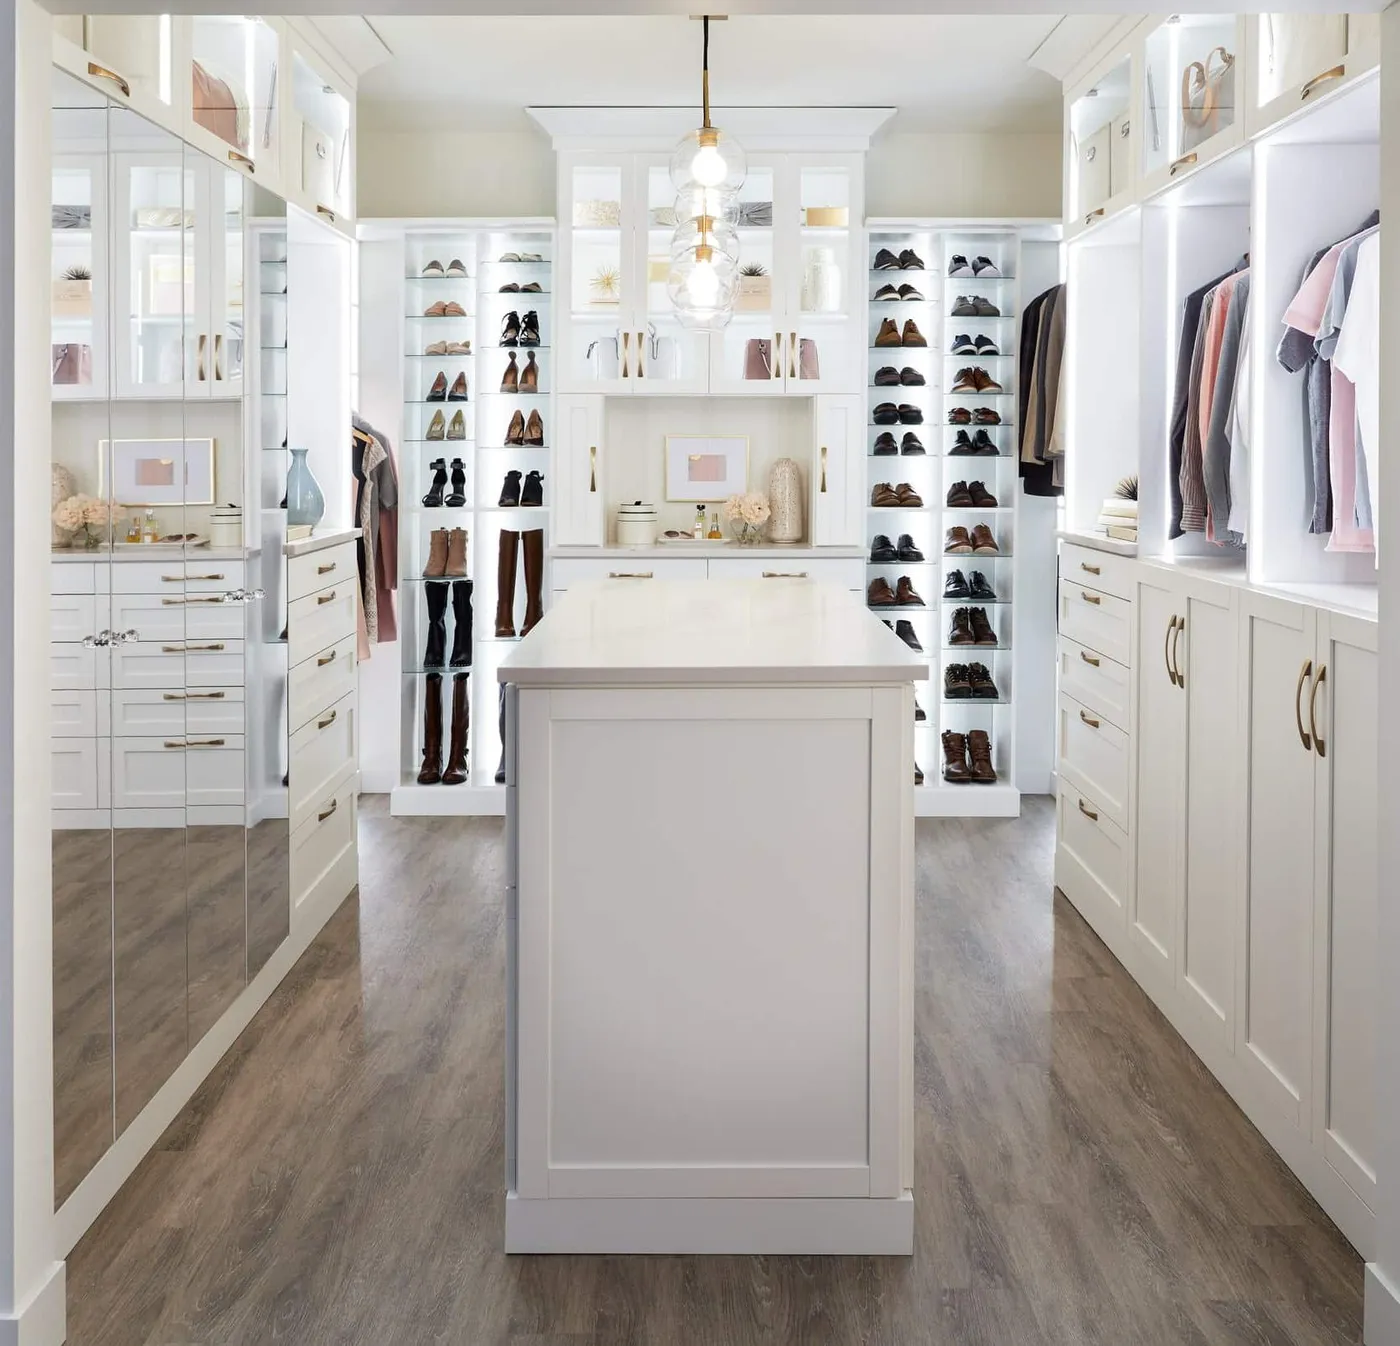
27. Maximize Light and Space with Mirrored Doors and Gold Hardware
When using mirrored doors in a closet, placement is everything. The ideal spot is directly opposite a window or your primary light source. This will capture and bounce the maximum amount of light throughout the space, making it feel significantly brighter and larger. Another great spot is at the end of a long, narrow closet. Placing a mirror there will trick the eye and create an illusion of depth, making the galley space feel less confining and more expansive. The mirror here perfectly reflects the island and light from the rest of the room. Compare this to the mirrors in Idea #24.
|
📋 Copy HEX 🔗 Share |
The mirrored wardrobe doors are the key to this closet’s bright, expansive feel. While the white cabinetry and integrated lighting certainly help, the mirrors are doing the heavy lifting. They effectively erase a solid wall, replacing it with a reflection of the room that doubles the visual space. They bounce light into every corner, eliminating shadows and creating a brilliant, glittering effect, especially when combined with the gold hardware. Without the mirrors, this would be a lovely white closet. With them, it’s a glamorous, light-filled dressing room.
Your Dream Closet is Closer Than You Think
Feeling inspired? The best part about creating a dream closet is that you don’t have to do it all at once. Start with one idea—maybe it’s finally getting matching hangers, adding a statement light fixture, or simply decluttering. Your perfect, organized space is waiting for you. Ready to start planning? Pin your favorite ideas from this list to your Pinterest board and turn that dream into a reality.