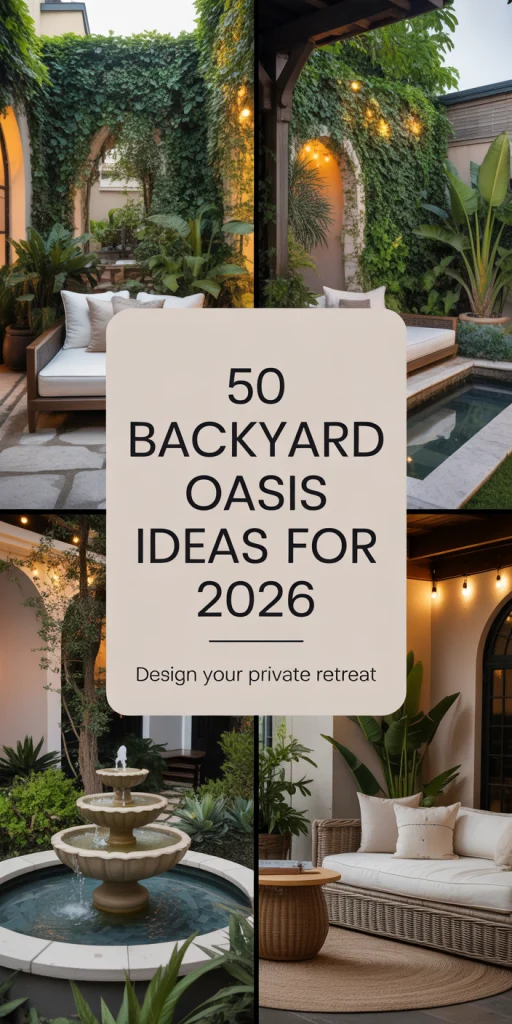
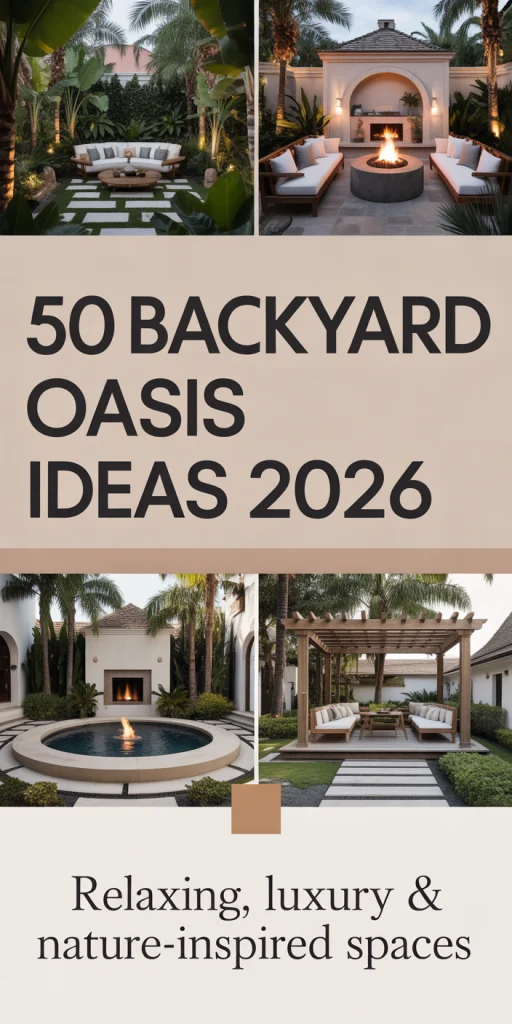
50 Backyard Oasis Ideas for 2026: Transform Your Outdoor Space into a Personal Paradise
Transforming your backyard into a personal retreat has become one of the most sought-after home projects for American homeowners in 2026. Whether you’re browsing Pinterest for backyard oasis inspiration or planning a complete outdoor living transformation, creating your own sanctuary doesn’t require a massive budget or professional landscaping crew. From tropical escapes to minimalist small yard solutions, these ideas blend functionality with the aesthetic appeal that makes a space truly feel like home. This guide walks you through practical, beautiful ways to craft your dream backyard retreat—each one designed for real homes, real budgets, and real life.
1. Lagoon-Style Pool with Natural Stone Edges
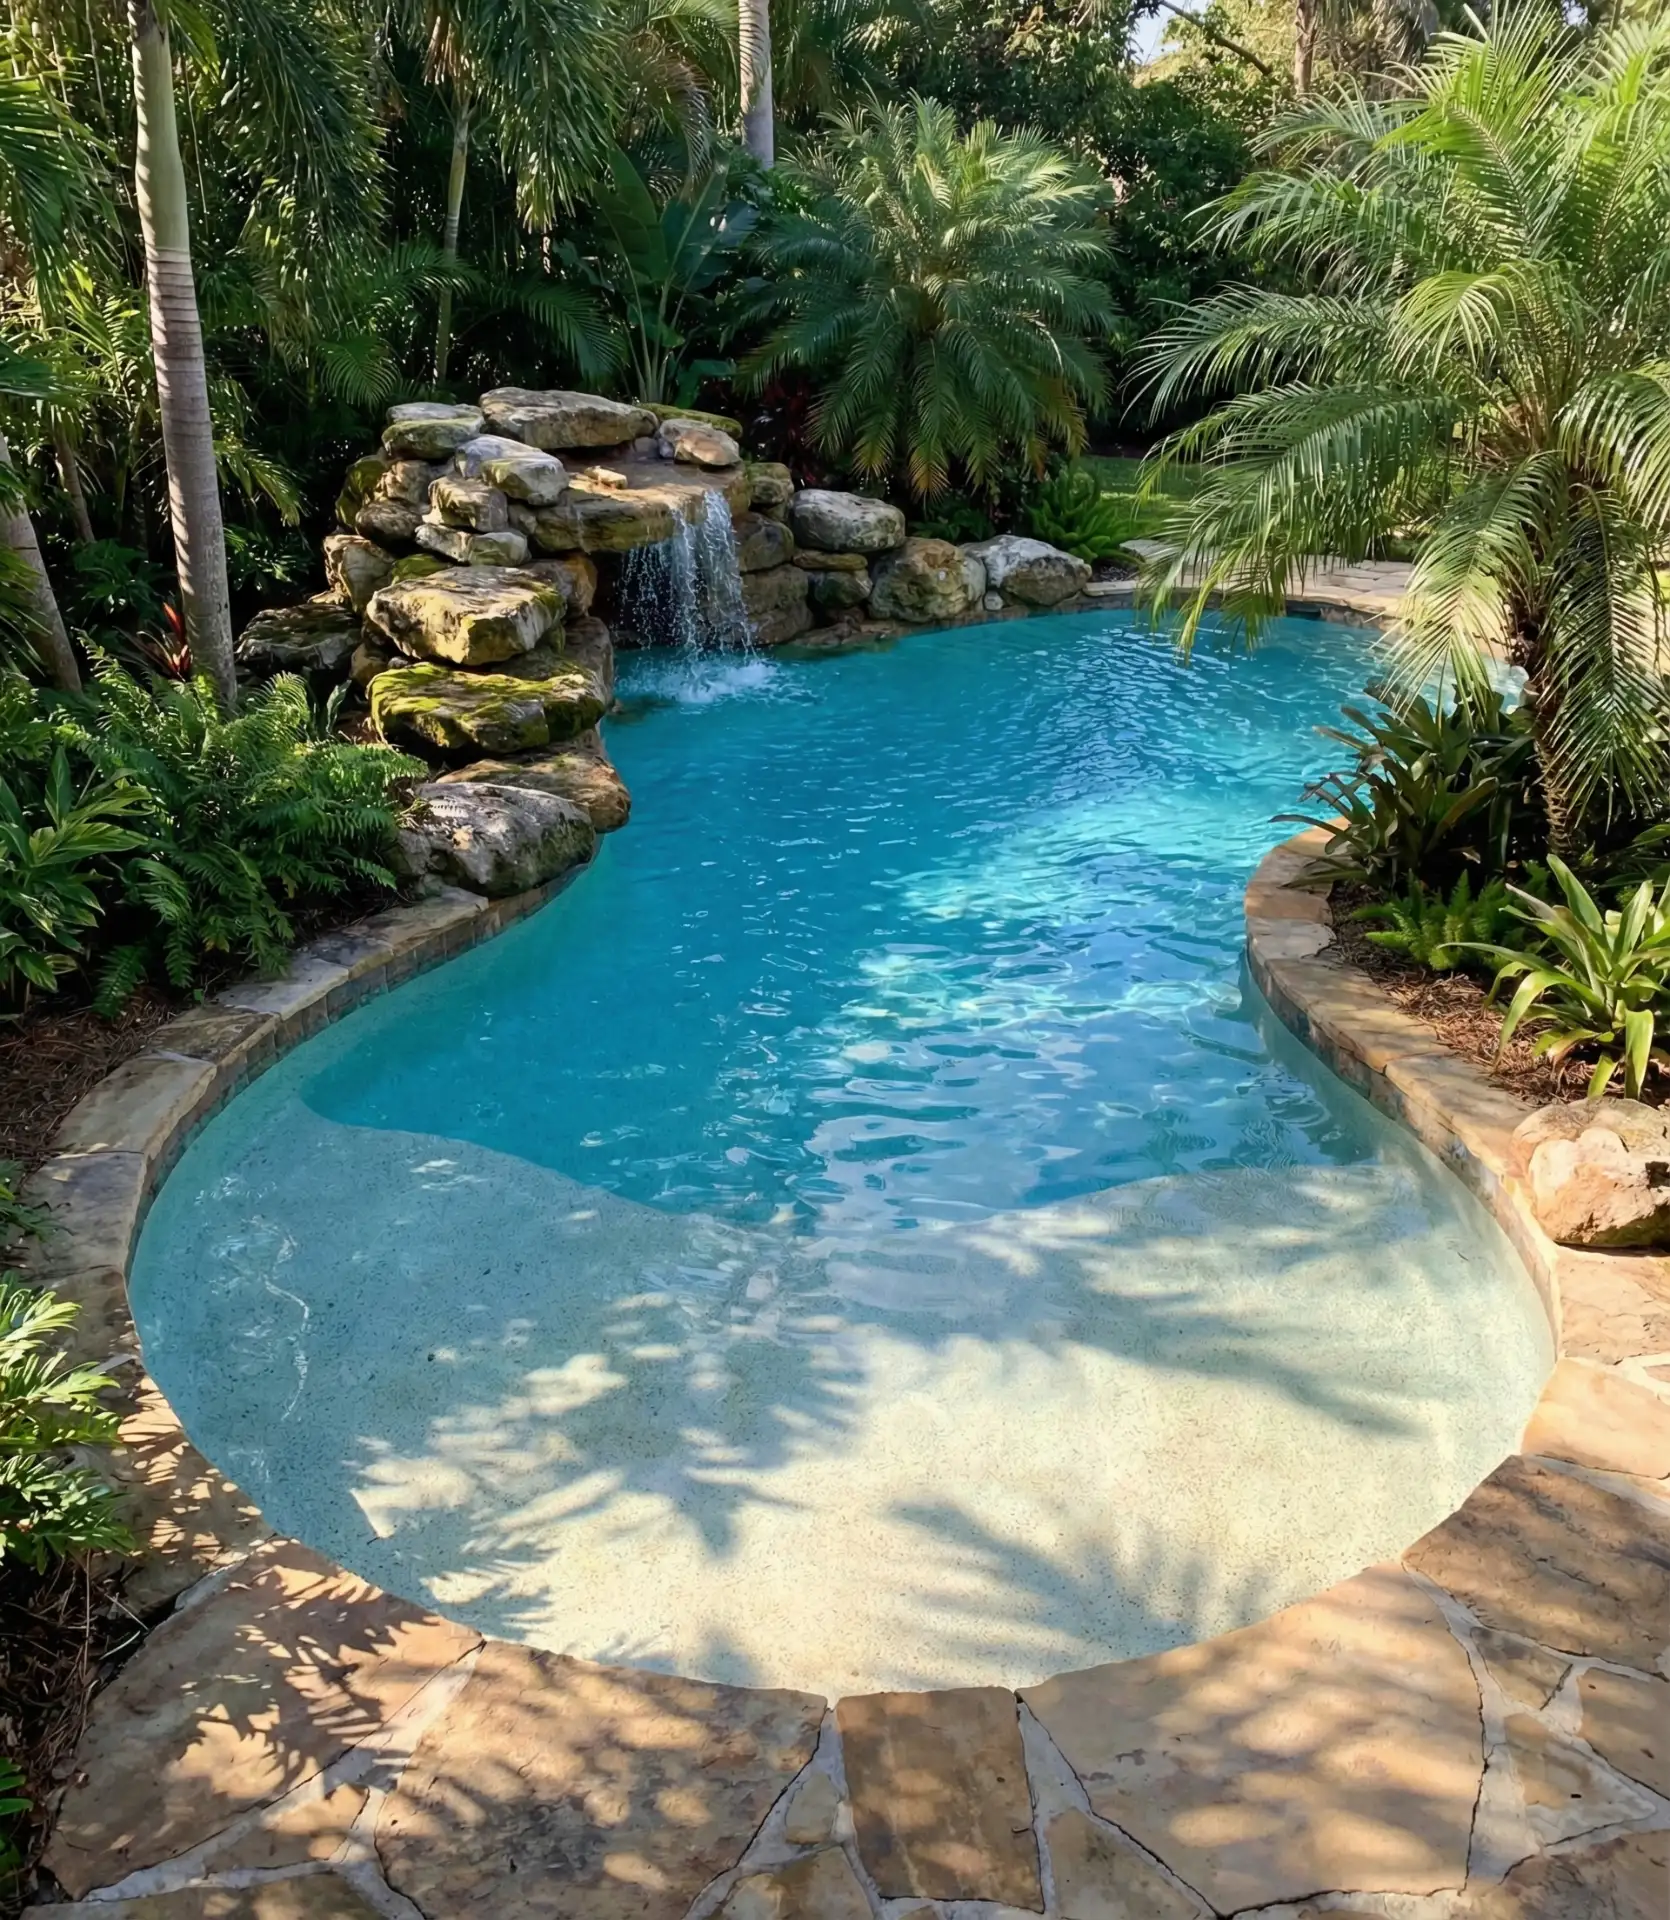
A lagoon pool brings the feeling of a secluded natural swimming hole right to your property, with irregular curves that mimic organic water formations. Unlike traditional rectangular pools, this design incorporates moss-covered boulders, cascading water features, and lush tropical plantings around the perimeter. The key is layering different stone sizes and textures to create depth and visual interest, while the freeform shape allows it to fit naturally into yards of various dimensions without looking forced or out of place.
This design works best in larger yards where you have at least 400 square feet to dedicate to the pool area, allowing the naturalistic curves to develop organically. The surrounding landscaping needs 3-5 feet of clearance on all sides for the planted buffer zone that sells the illusion. Maintenance is surprisingly manageable—the irregular shape actually creates pockets where beneficial bacteria thrive, and the stone edges don’t require the caulking and resurfacing that traditional pool coping demands. Plan for professional installation costs between $45,000 and $75,000, though the investment typically adds more resale value than standard pools in suburban markets.
2. Budget-Friendly Stock Tank Pool Setup
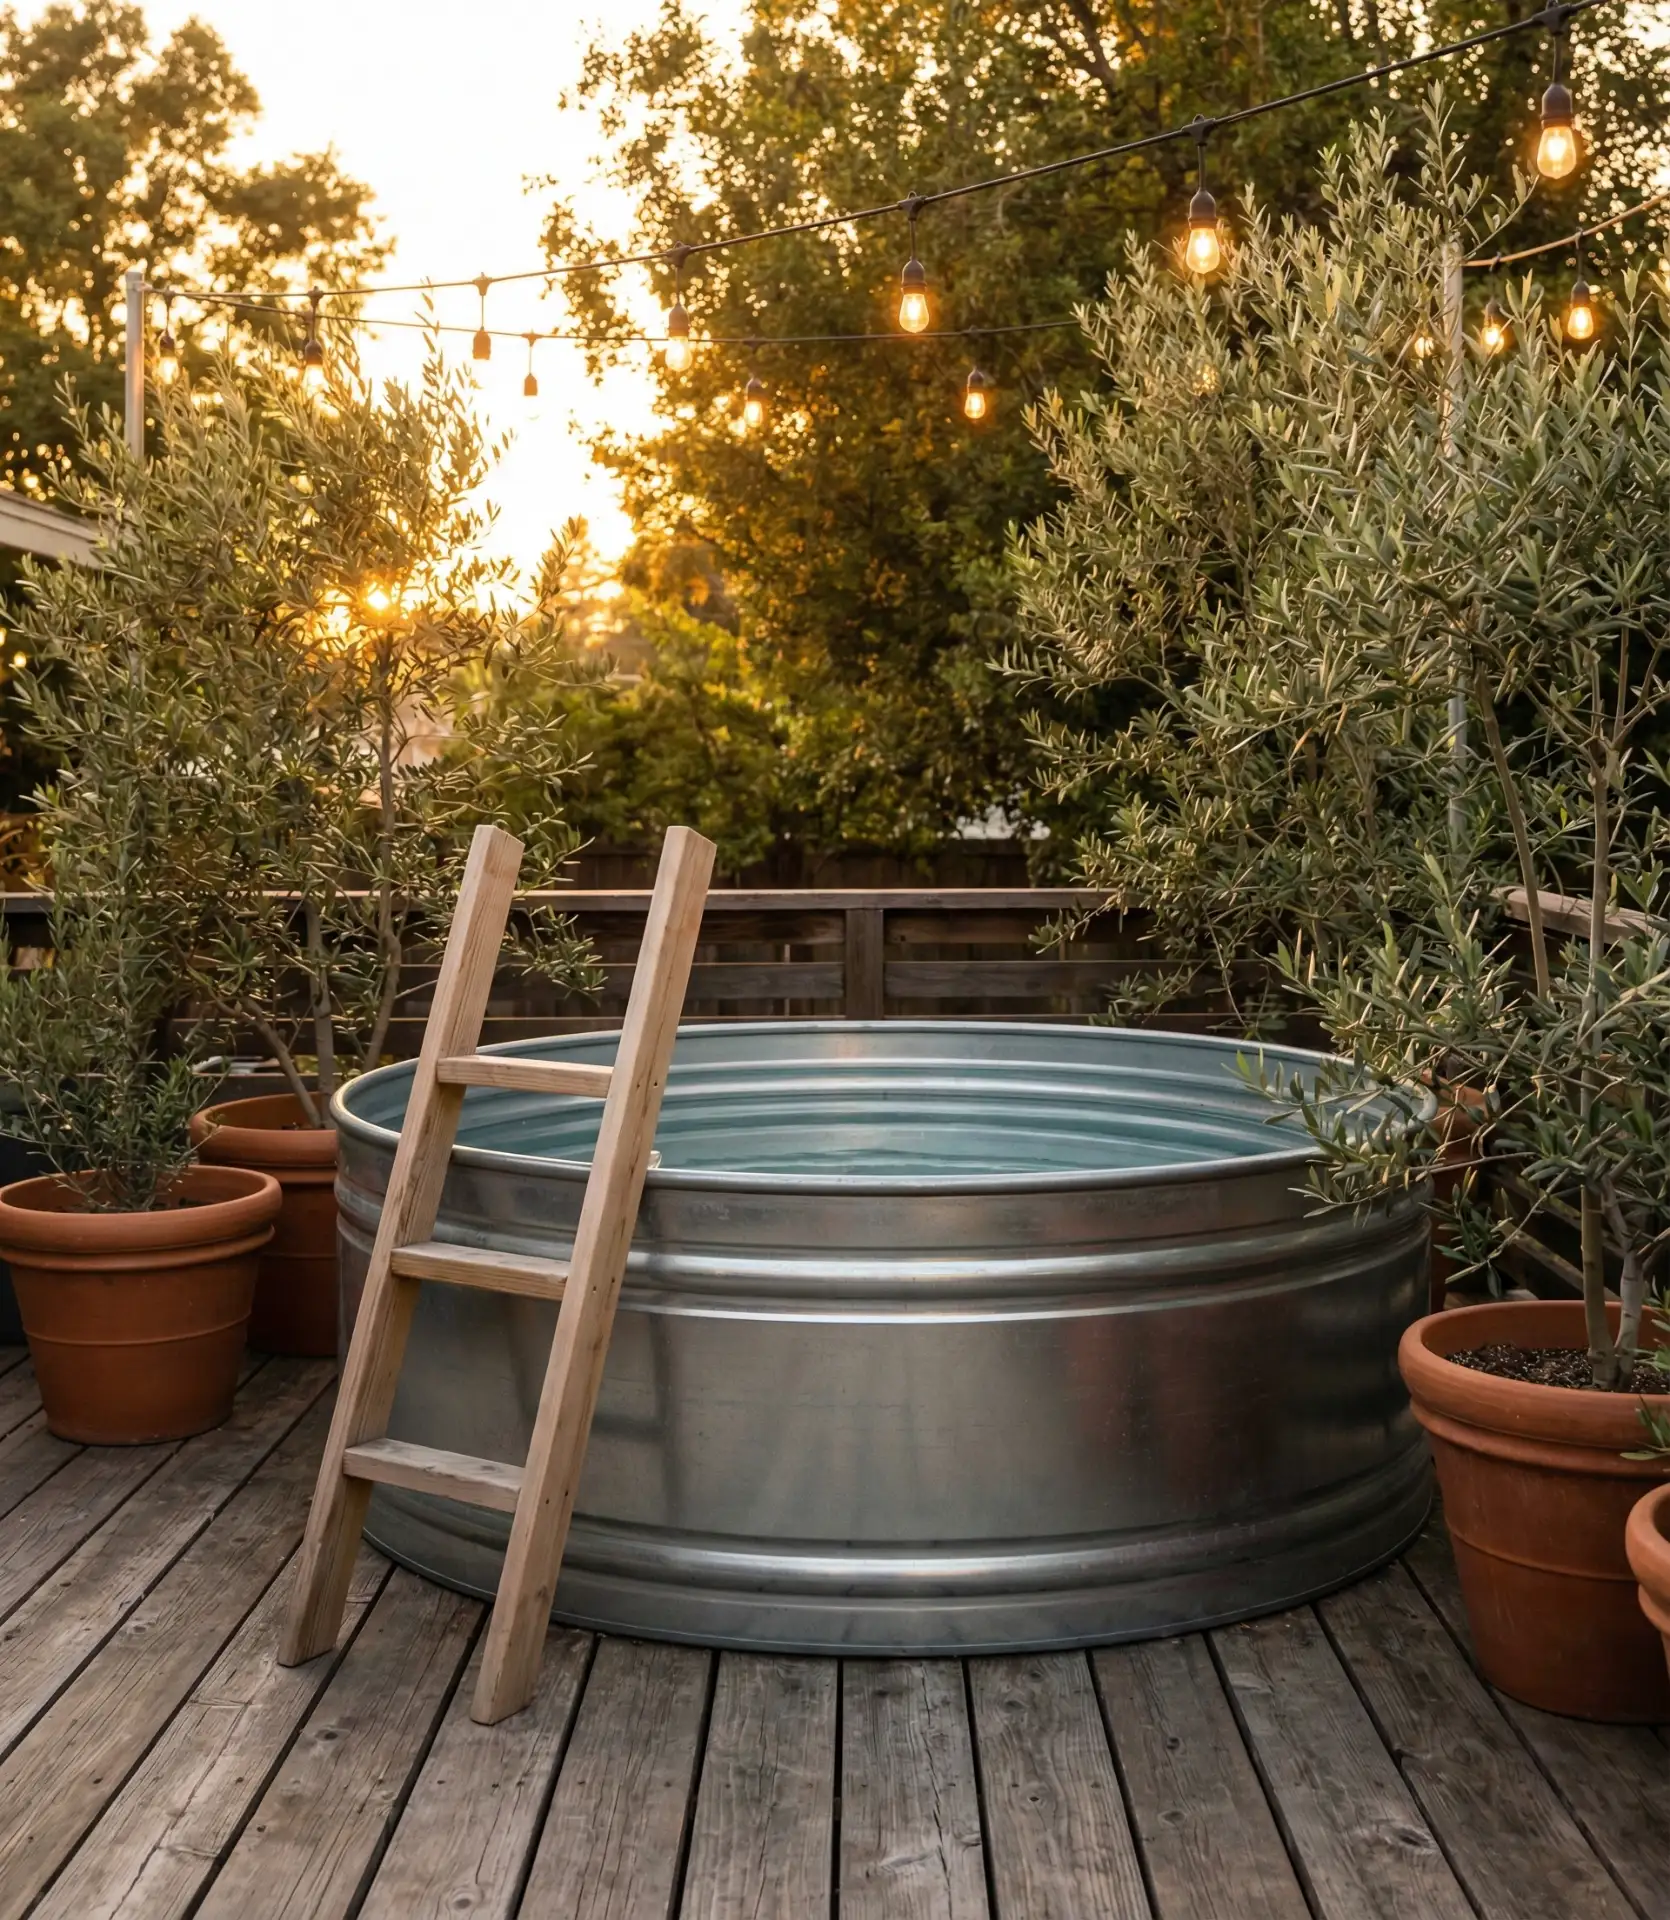
The trend of stock tank pools has exploded across American backyards as a practical budget alternative to traditional in-ground installations. These galvanized metal tanks, originally designed for livestock watering, range from 6 to 10 feet in diameter and cost between $400 and $800 before equipment. The setup requires a simple pump and filter system (around $300-$500), a level base of pea gravel or pavers, and some basic plumbing connections. The result is a fully functional pool that can be installed in a single weekend without permits in most municipalities.
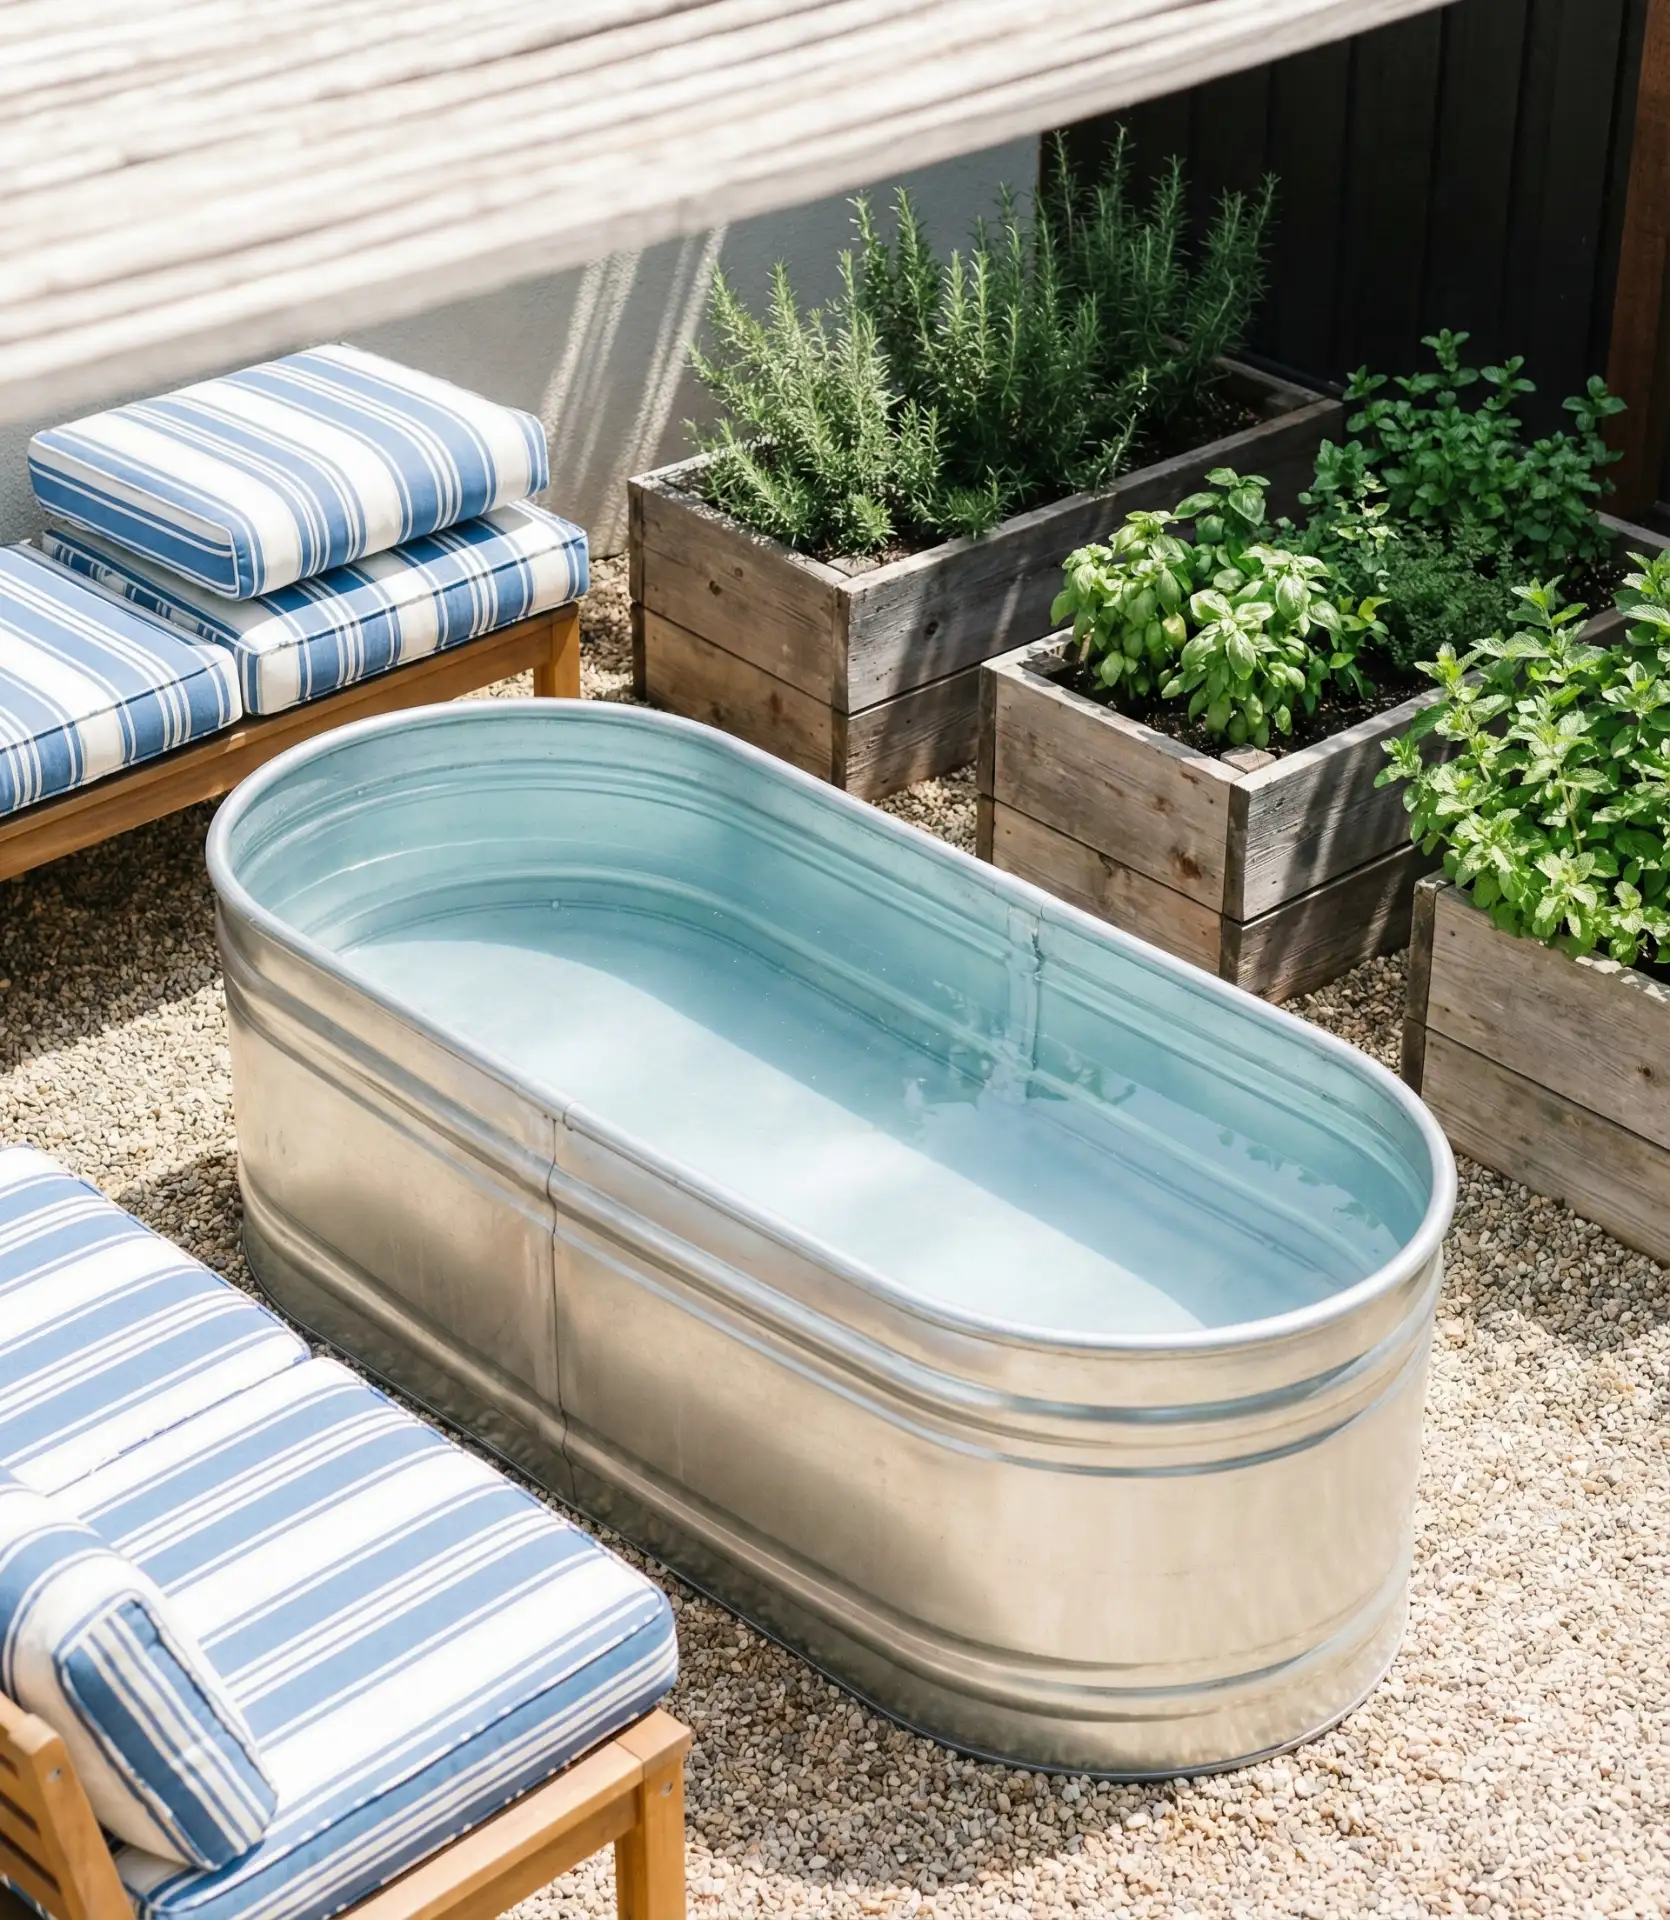
A landscape designer in Austin mentioned that stock tank pools have become the go-to solution for young homeowners who want immediate backyard relief without the $30,000+ commitment. The galvanized steel holds up remarkably well to chlorine and sun exposure, typically lasting 8-10 years before showing significant wear. The biggest mistake people make is skipping the proper filtration system and trying to maintain it like a hot tub—you need continuous circulation to keep the water clean. Most families find that a 6-foot tank provides enough space for 2–3 people to cool off comfortably.
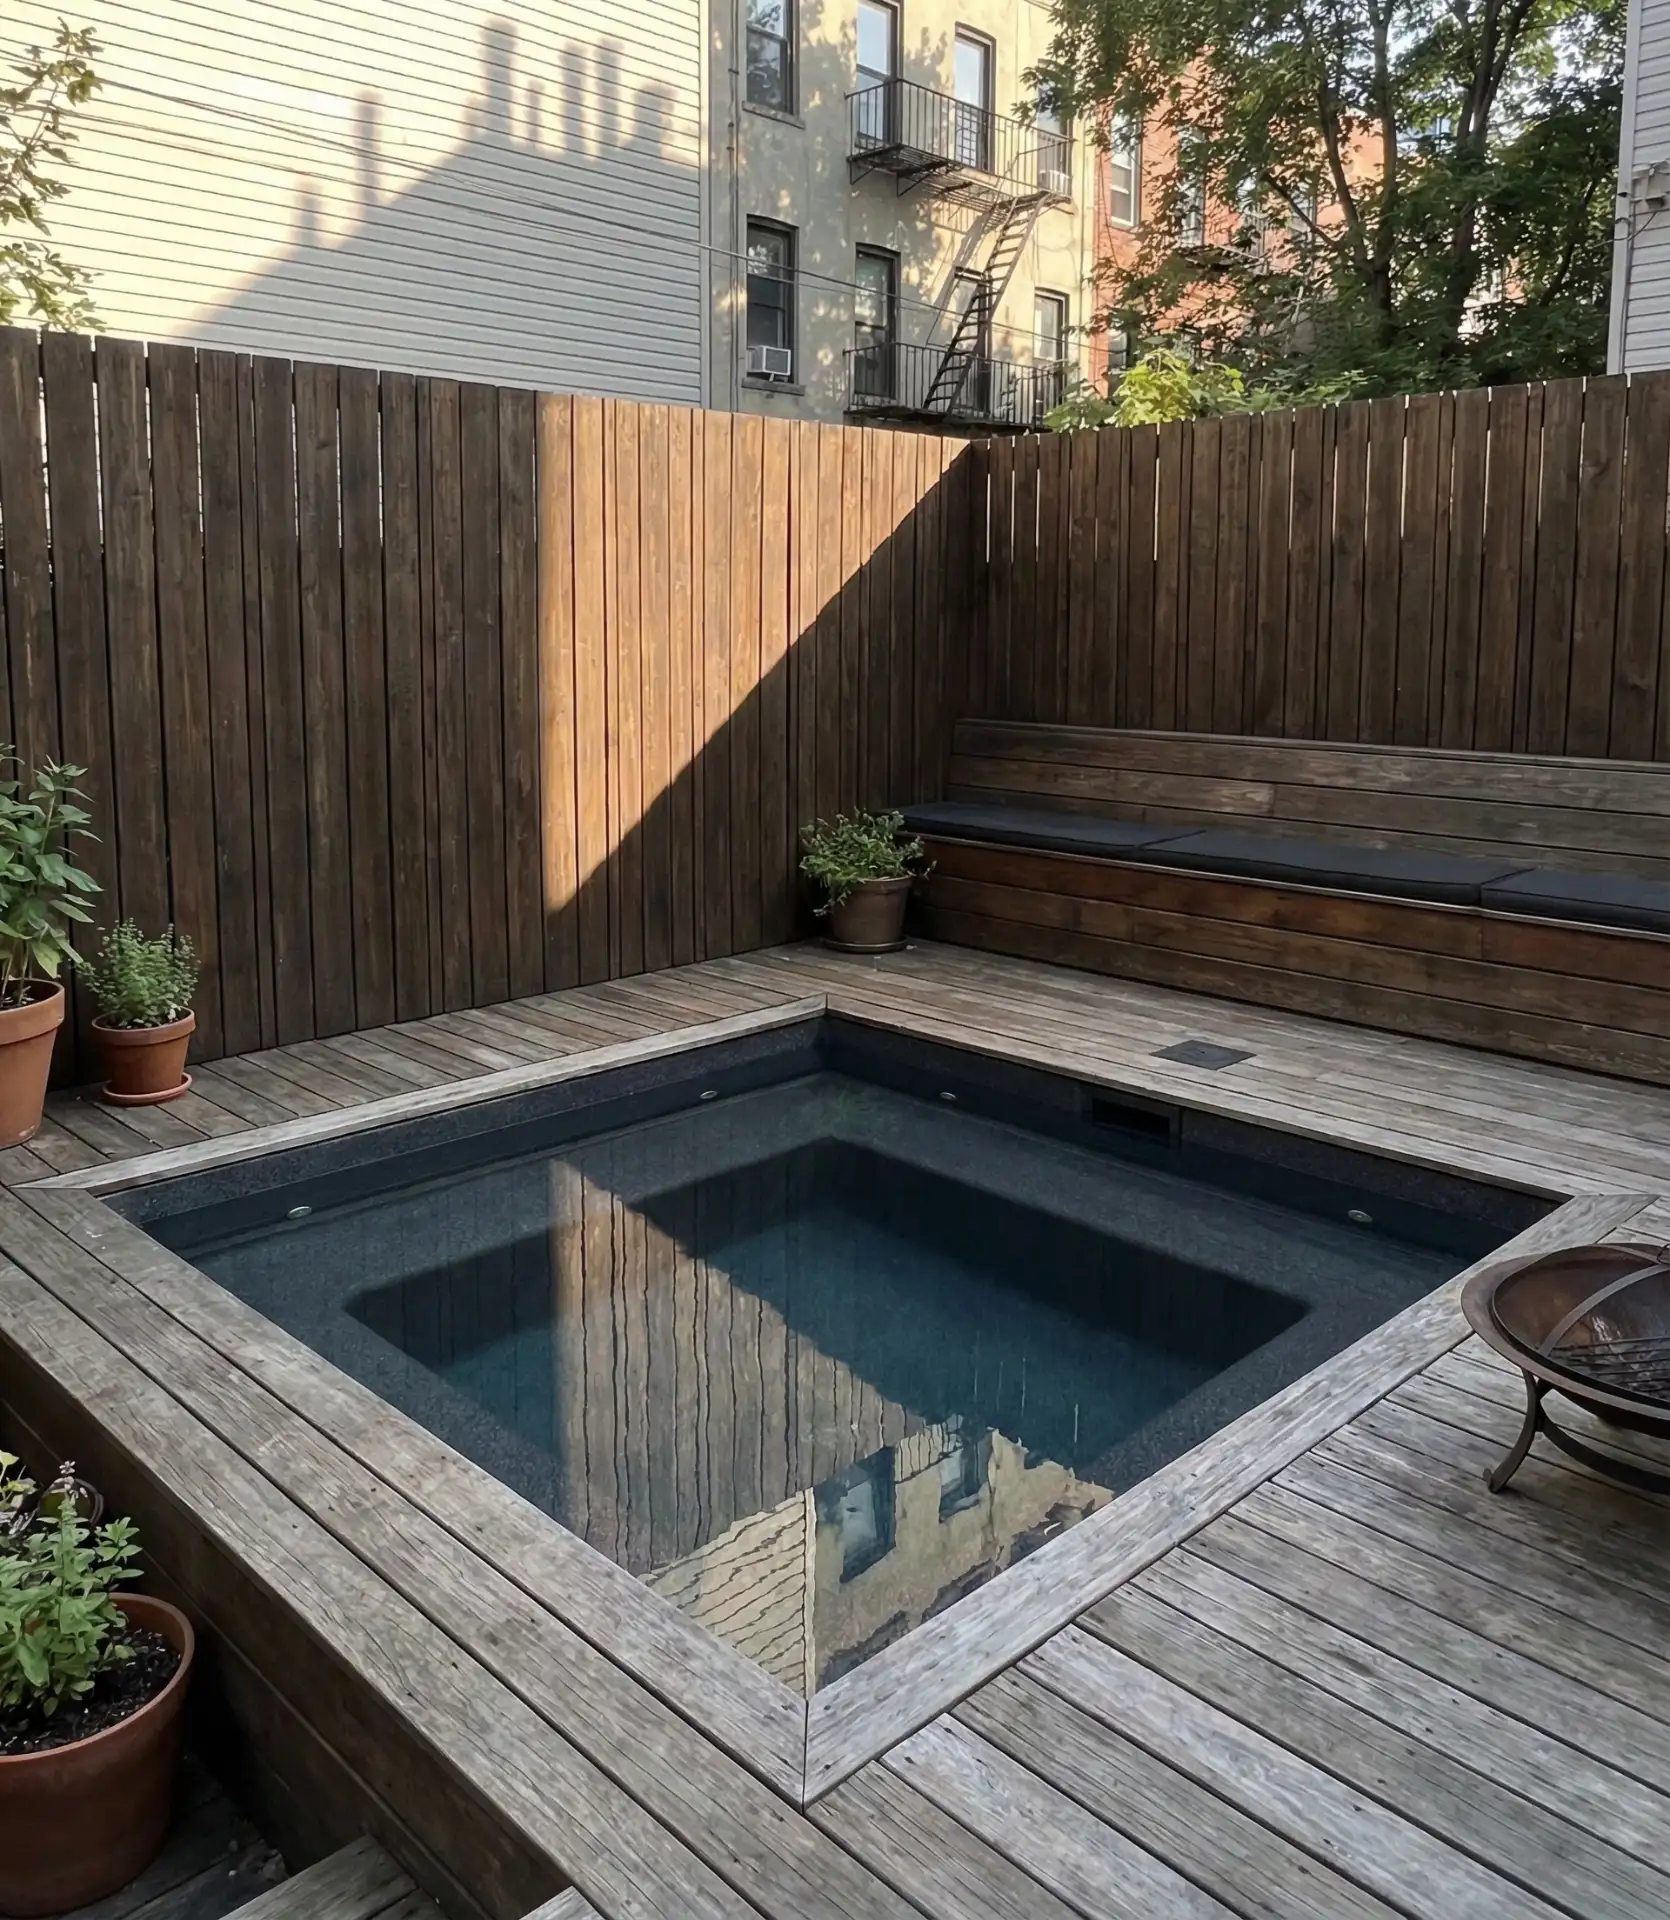
3. Multi-Level Deck with Integrated Hot Tub
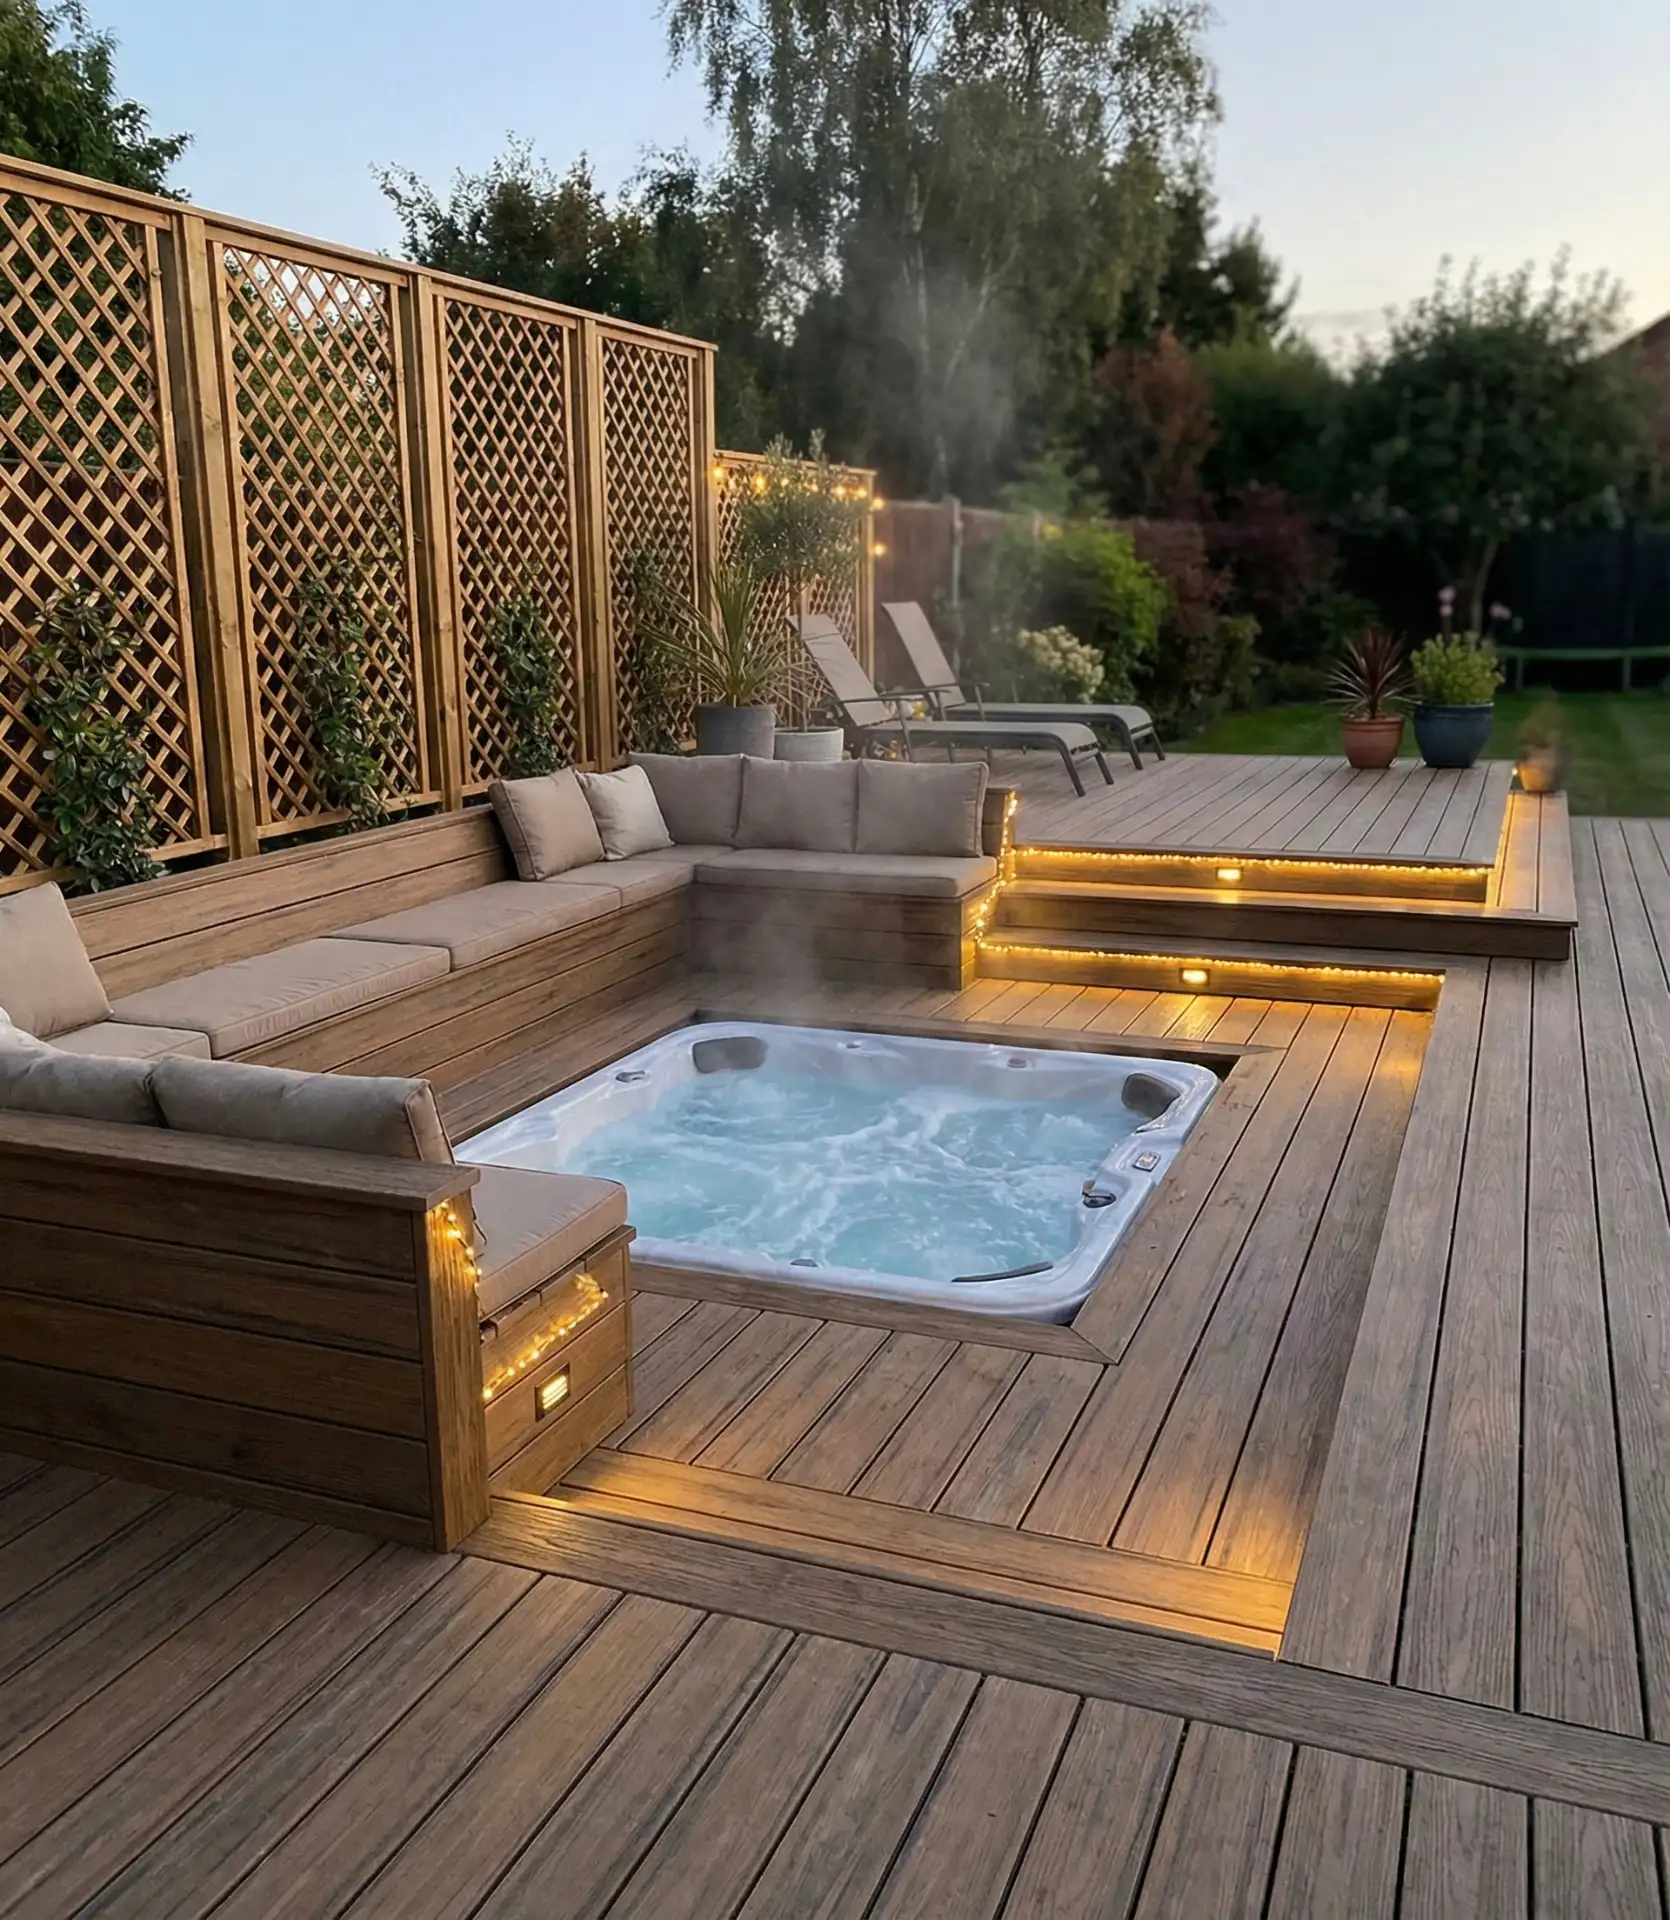
Creating distinct zones within your outdoor space makes even compact yards feel intentionally designed and more spacious. A multi-tiered deck with a recessed hot tub area provides visual separation between dining, lounging, and soaking zones without requiring fences or walls. The elevation changes—typically 7-14 inches between levels—naturally guide traffic flow and create intimate pockets for different activities. Building the hot tub into the lower deck level rather than placing it on top distributes weight more evenly and creates a more polished, permanent appearance.
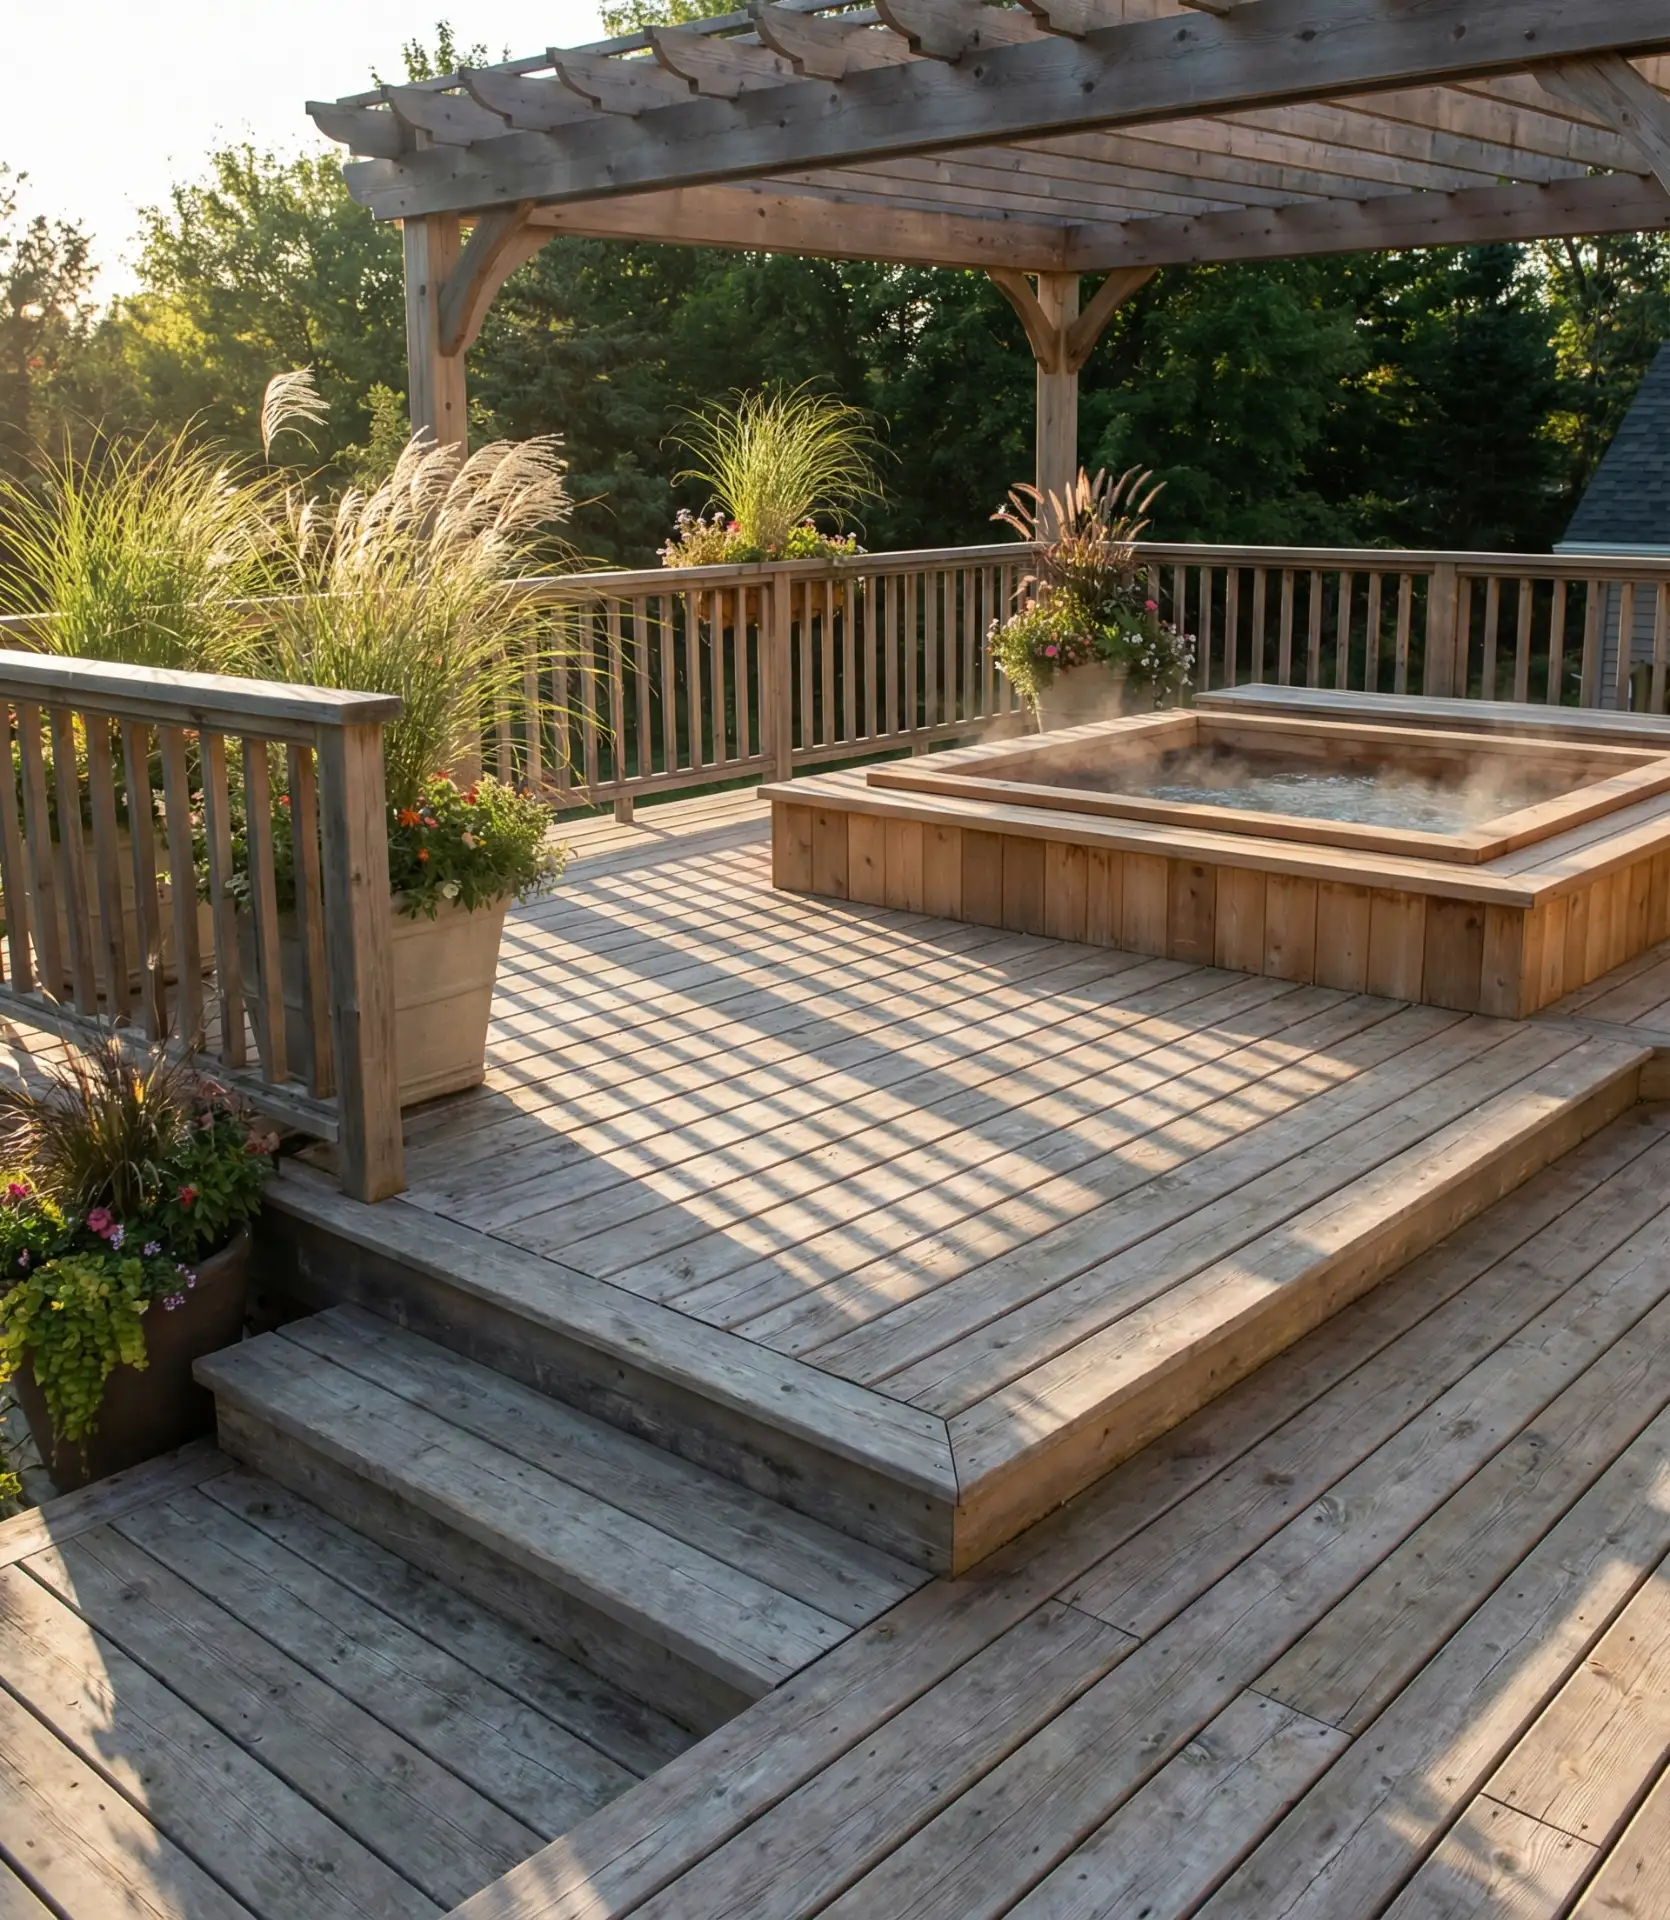
This setup particularly shines in sloped yards where you’re already dealing with grade changes—instead of fighting the topography with extensive grading, you work with it. The structural requirements are more involved than a simple platform deck, requiring deeper footings and reinforced framing around the hot tub area to support the 3,000–4,000 pounds of water. Budget $12,000–$25,000 for the complete installation, depending on size and material choices. Composite decking costs more upfront but eliminates the annual staining and sealing that traditional wood demands in hot tub environments where moisture exposure is constant.
4. Tropical Paradise with Palm Clusters
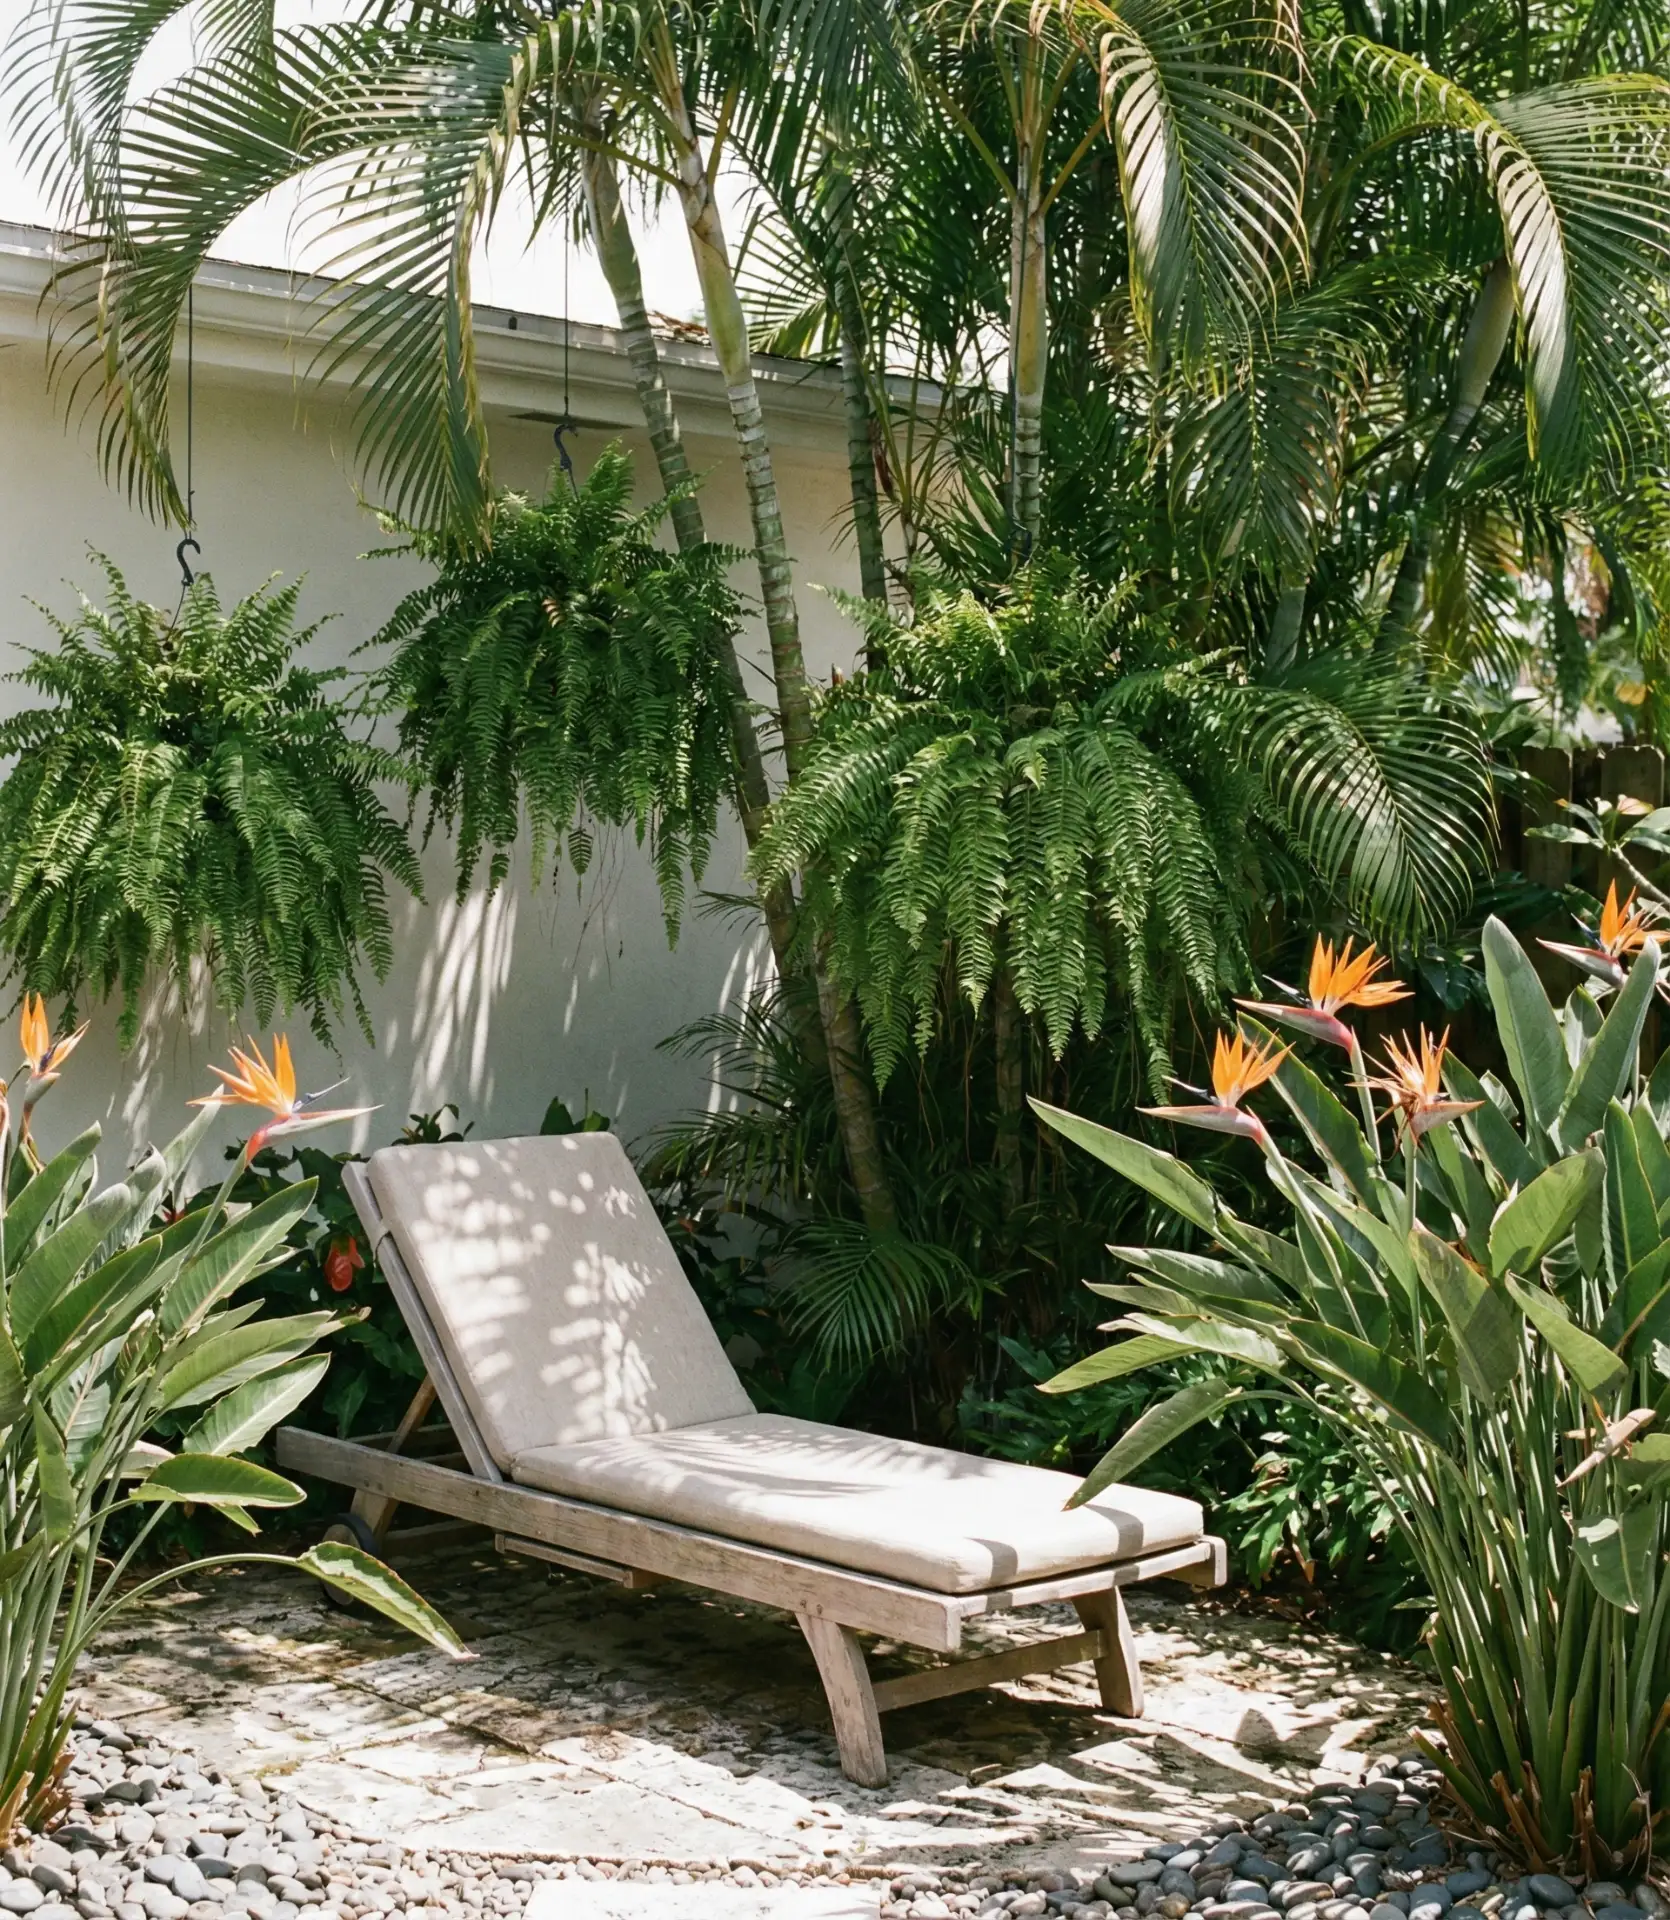
Achieving an authentic tropical atmosphere depends less on your climate zone and more on strategic plant selection and layering techniques. Even in zones where palms require winter protection, you can create the backyard oasis inspiration you’re craving by combining cold-hardy palm varieties like windmill and needle palms with broad-leafed companion plants. The secret is planting in odd-numbered groupings of 3-5 palms at varying heights, then understory plantings of elephant ears, cannas, and coleus to fill the mid-level space. This creates the dense, lush canopy effect that defines tropical landscapes.
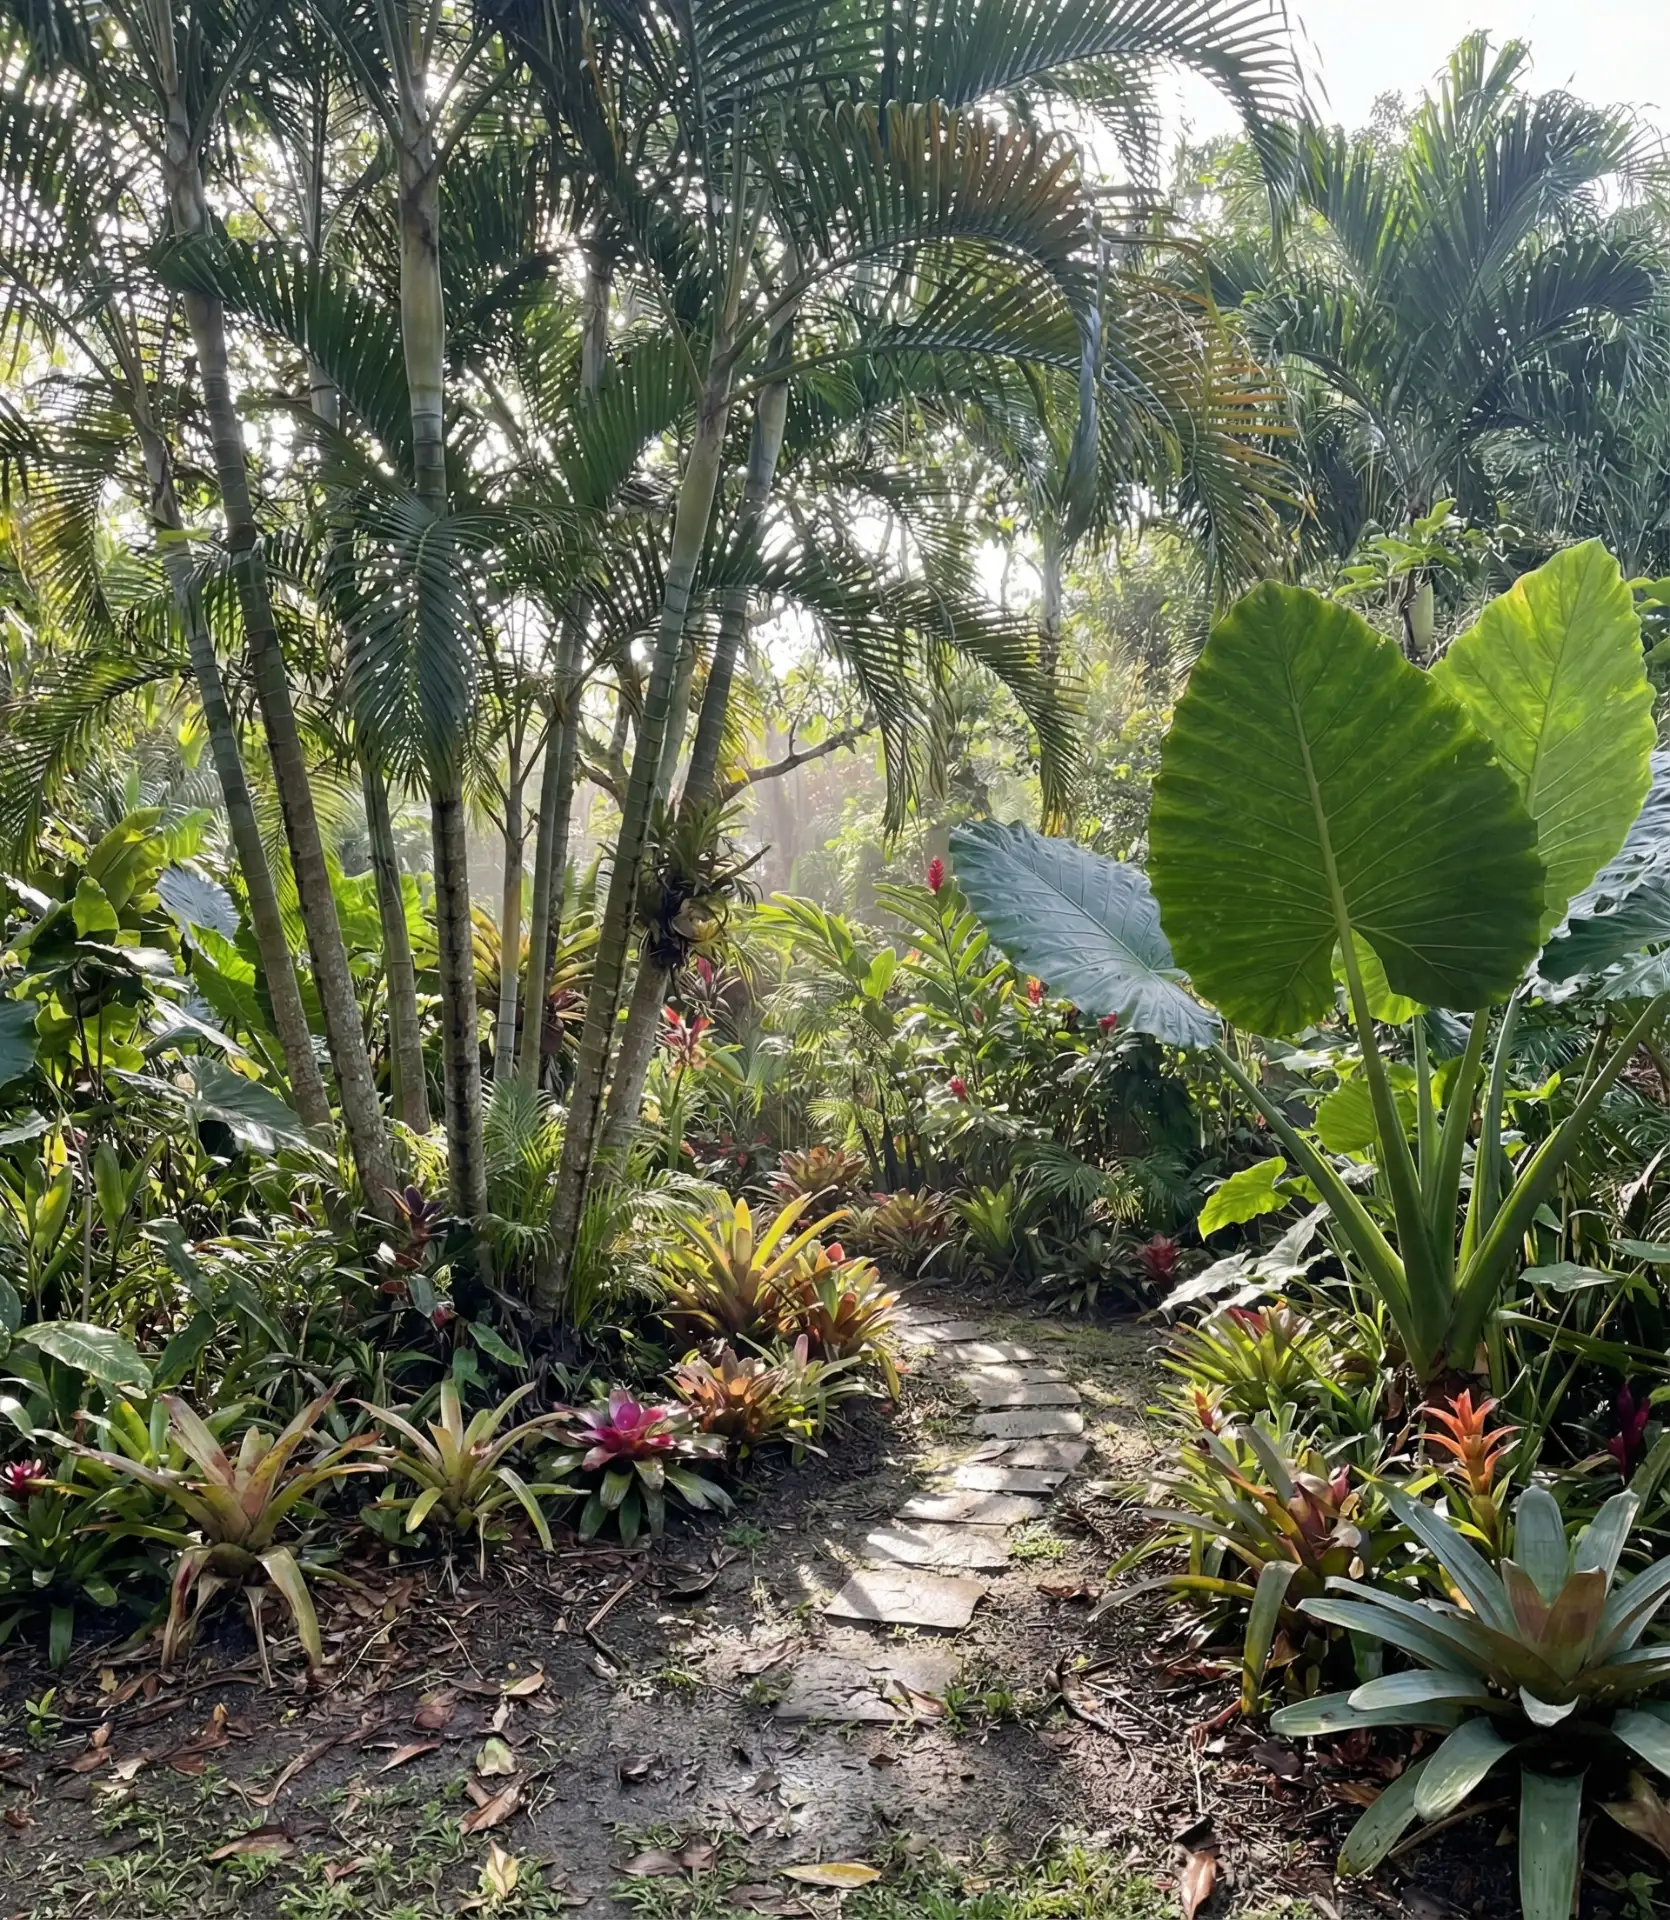
In southern states like Florida, homeowners have the advantage of year-round growing seasons that allow even frost-sensitive varieties to thrive. Further north, container planting becomes your friend—moving key specimens into a garage or basement for winter keeps the investment alive. The real challenge is maintaining consistent moisture without creating swampy conditions; tropical plants want humidity but well-draining soil. Installing drip irrigation with timer controls takes the guesswork out of daily watering, and mulching heavily with shredded bark keeps roots cool during peak summer heat while suppressing weeds that compete for nutrients.
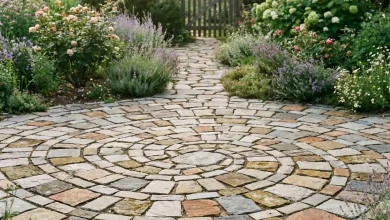
5. Simple Gravel Patio with Fire Feature
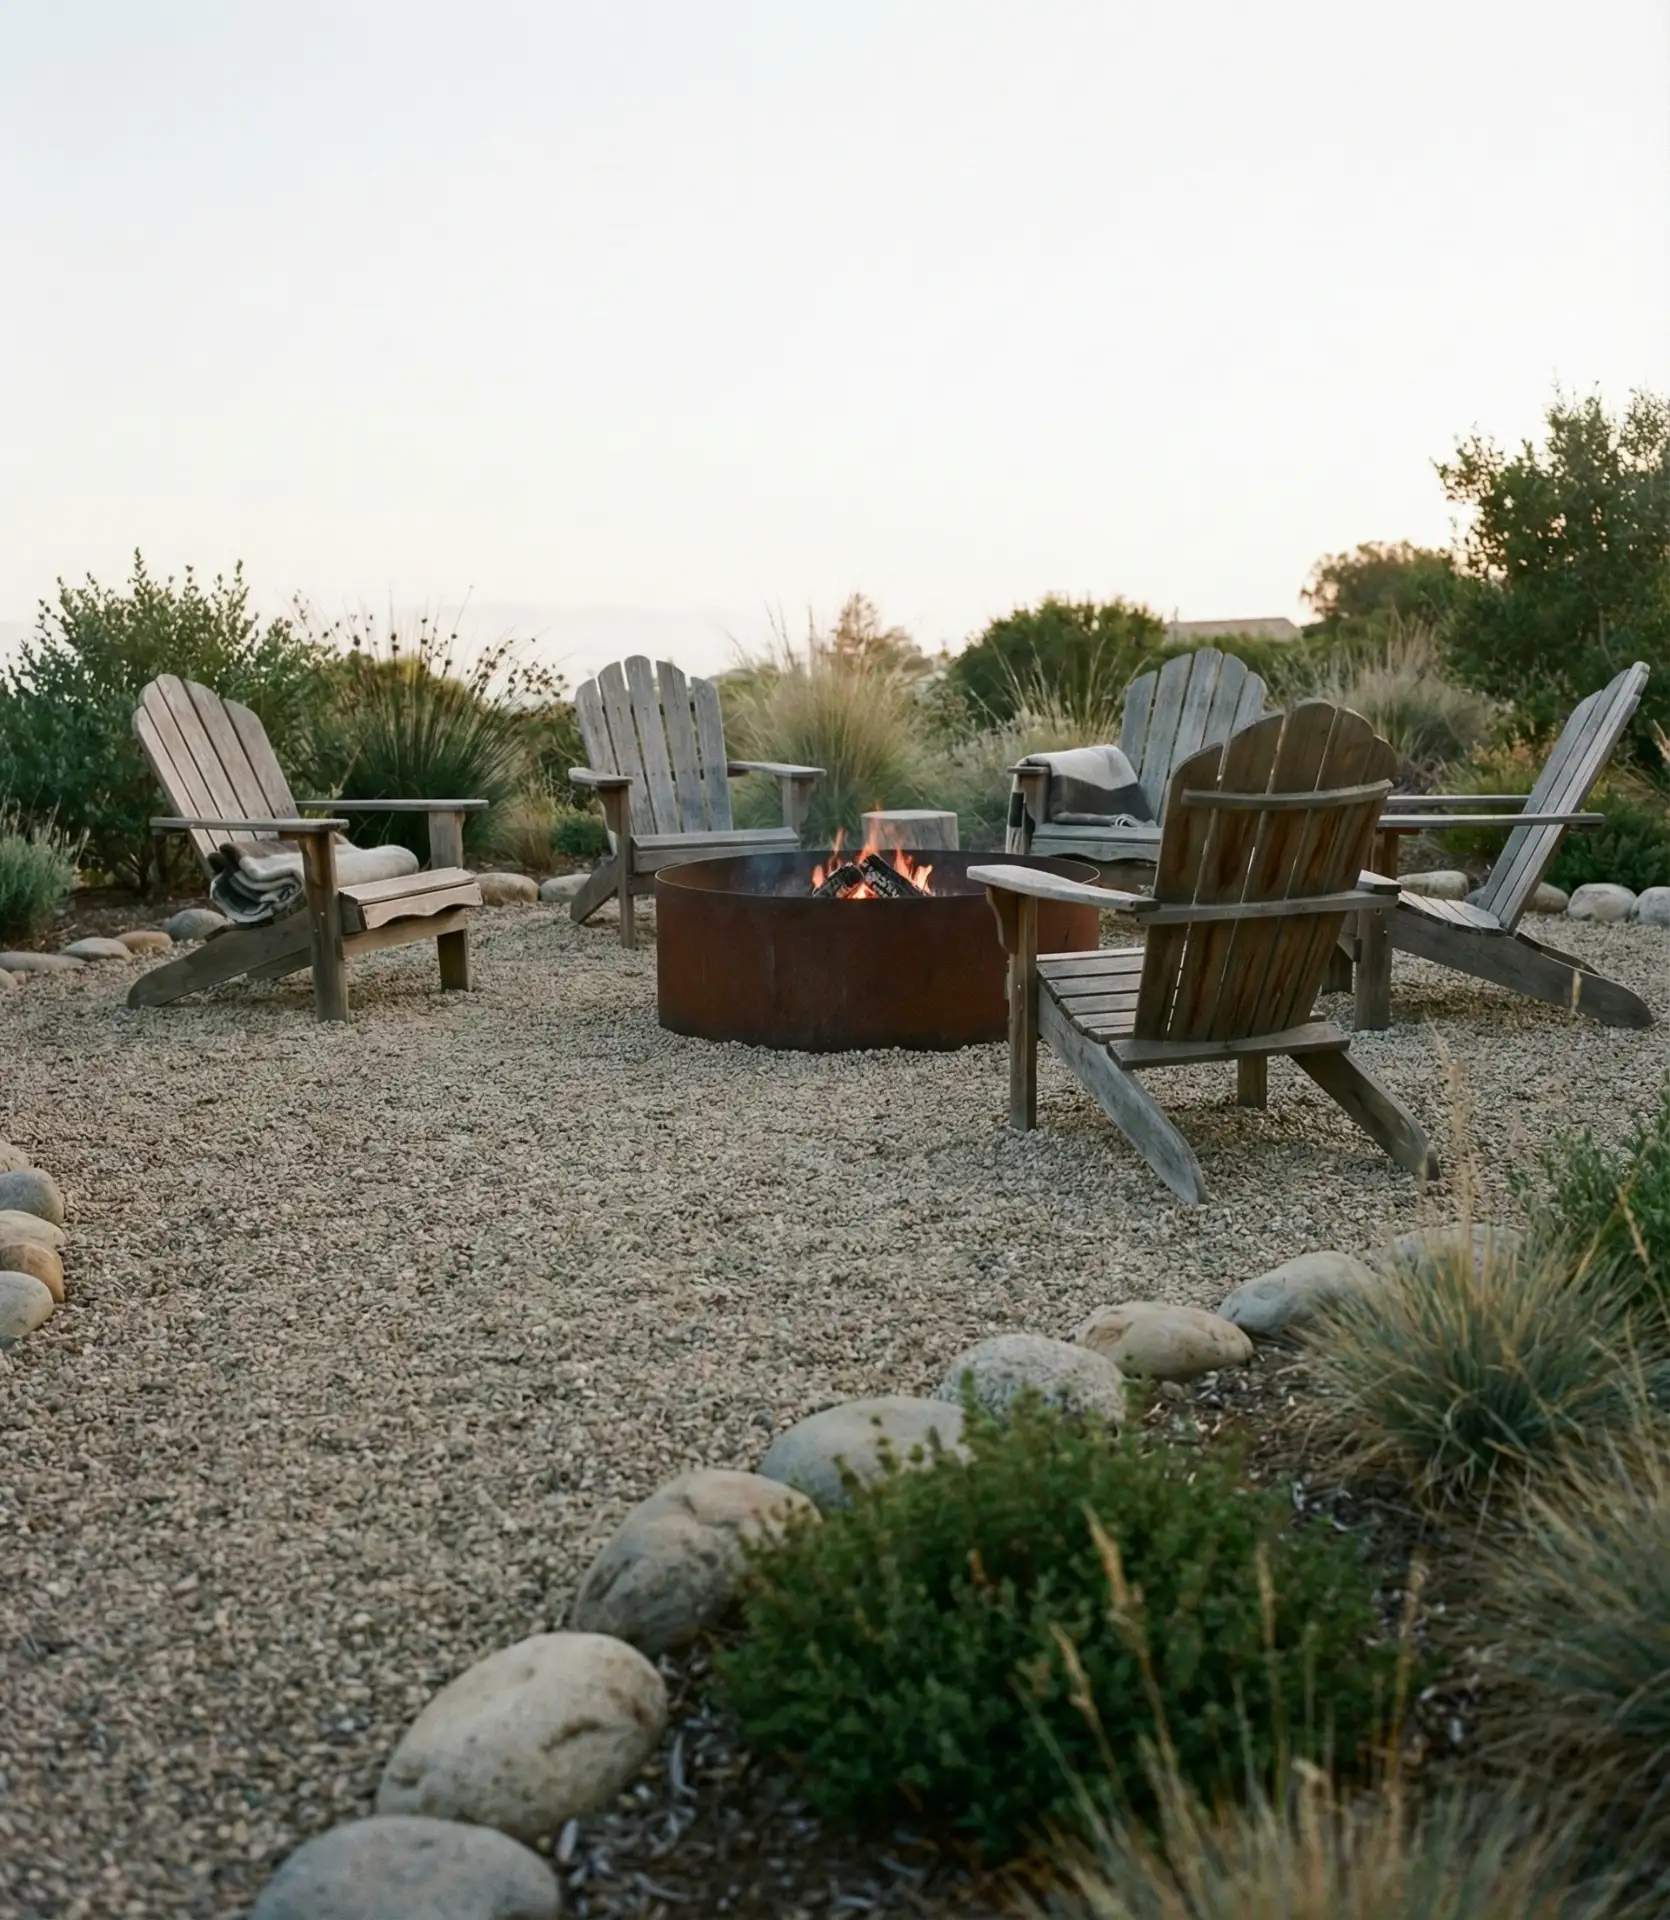
When you’re working with a tight timeline or limited budget, a simple gravel patio delivers maximum impact with minimal investment. The material costs run about $2-$4 per square foot, including landscape fabric and edging, compared to $15-$30 for pavers or concrete. The installation is genuinely DIY-friendly: excavate 4-6 inches, lay fabric to suppress weeds, install metal or composite edging to contain the stones, then fill with ¾-inch crushed granite or pea gravel. A central fire pit creates a natural gathering point and extends the usable season into cooler months.
Gravel patios work exceptionally well in regions with clay soil or drainage issues since the permeable surface lets water filter through rather than pooling. The main maintenance involves occasionally raking to redistribute stones and adding a top layer every few years as material naturally settles into the ground. Most homeowners complete a 200-square-foot gravel patio in a single weekend, making this one of the fastest transformations possible. Choose angular crushed stone rather than round pea gravel if you’ll be placing furniture—the irregular shapes lock together and create a more stable surface that doesn’t shift underfoot.
6. Compact Above-Ground Pool with Deck Surround
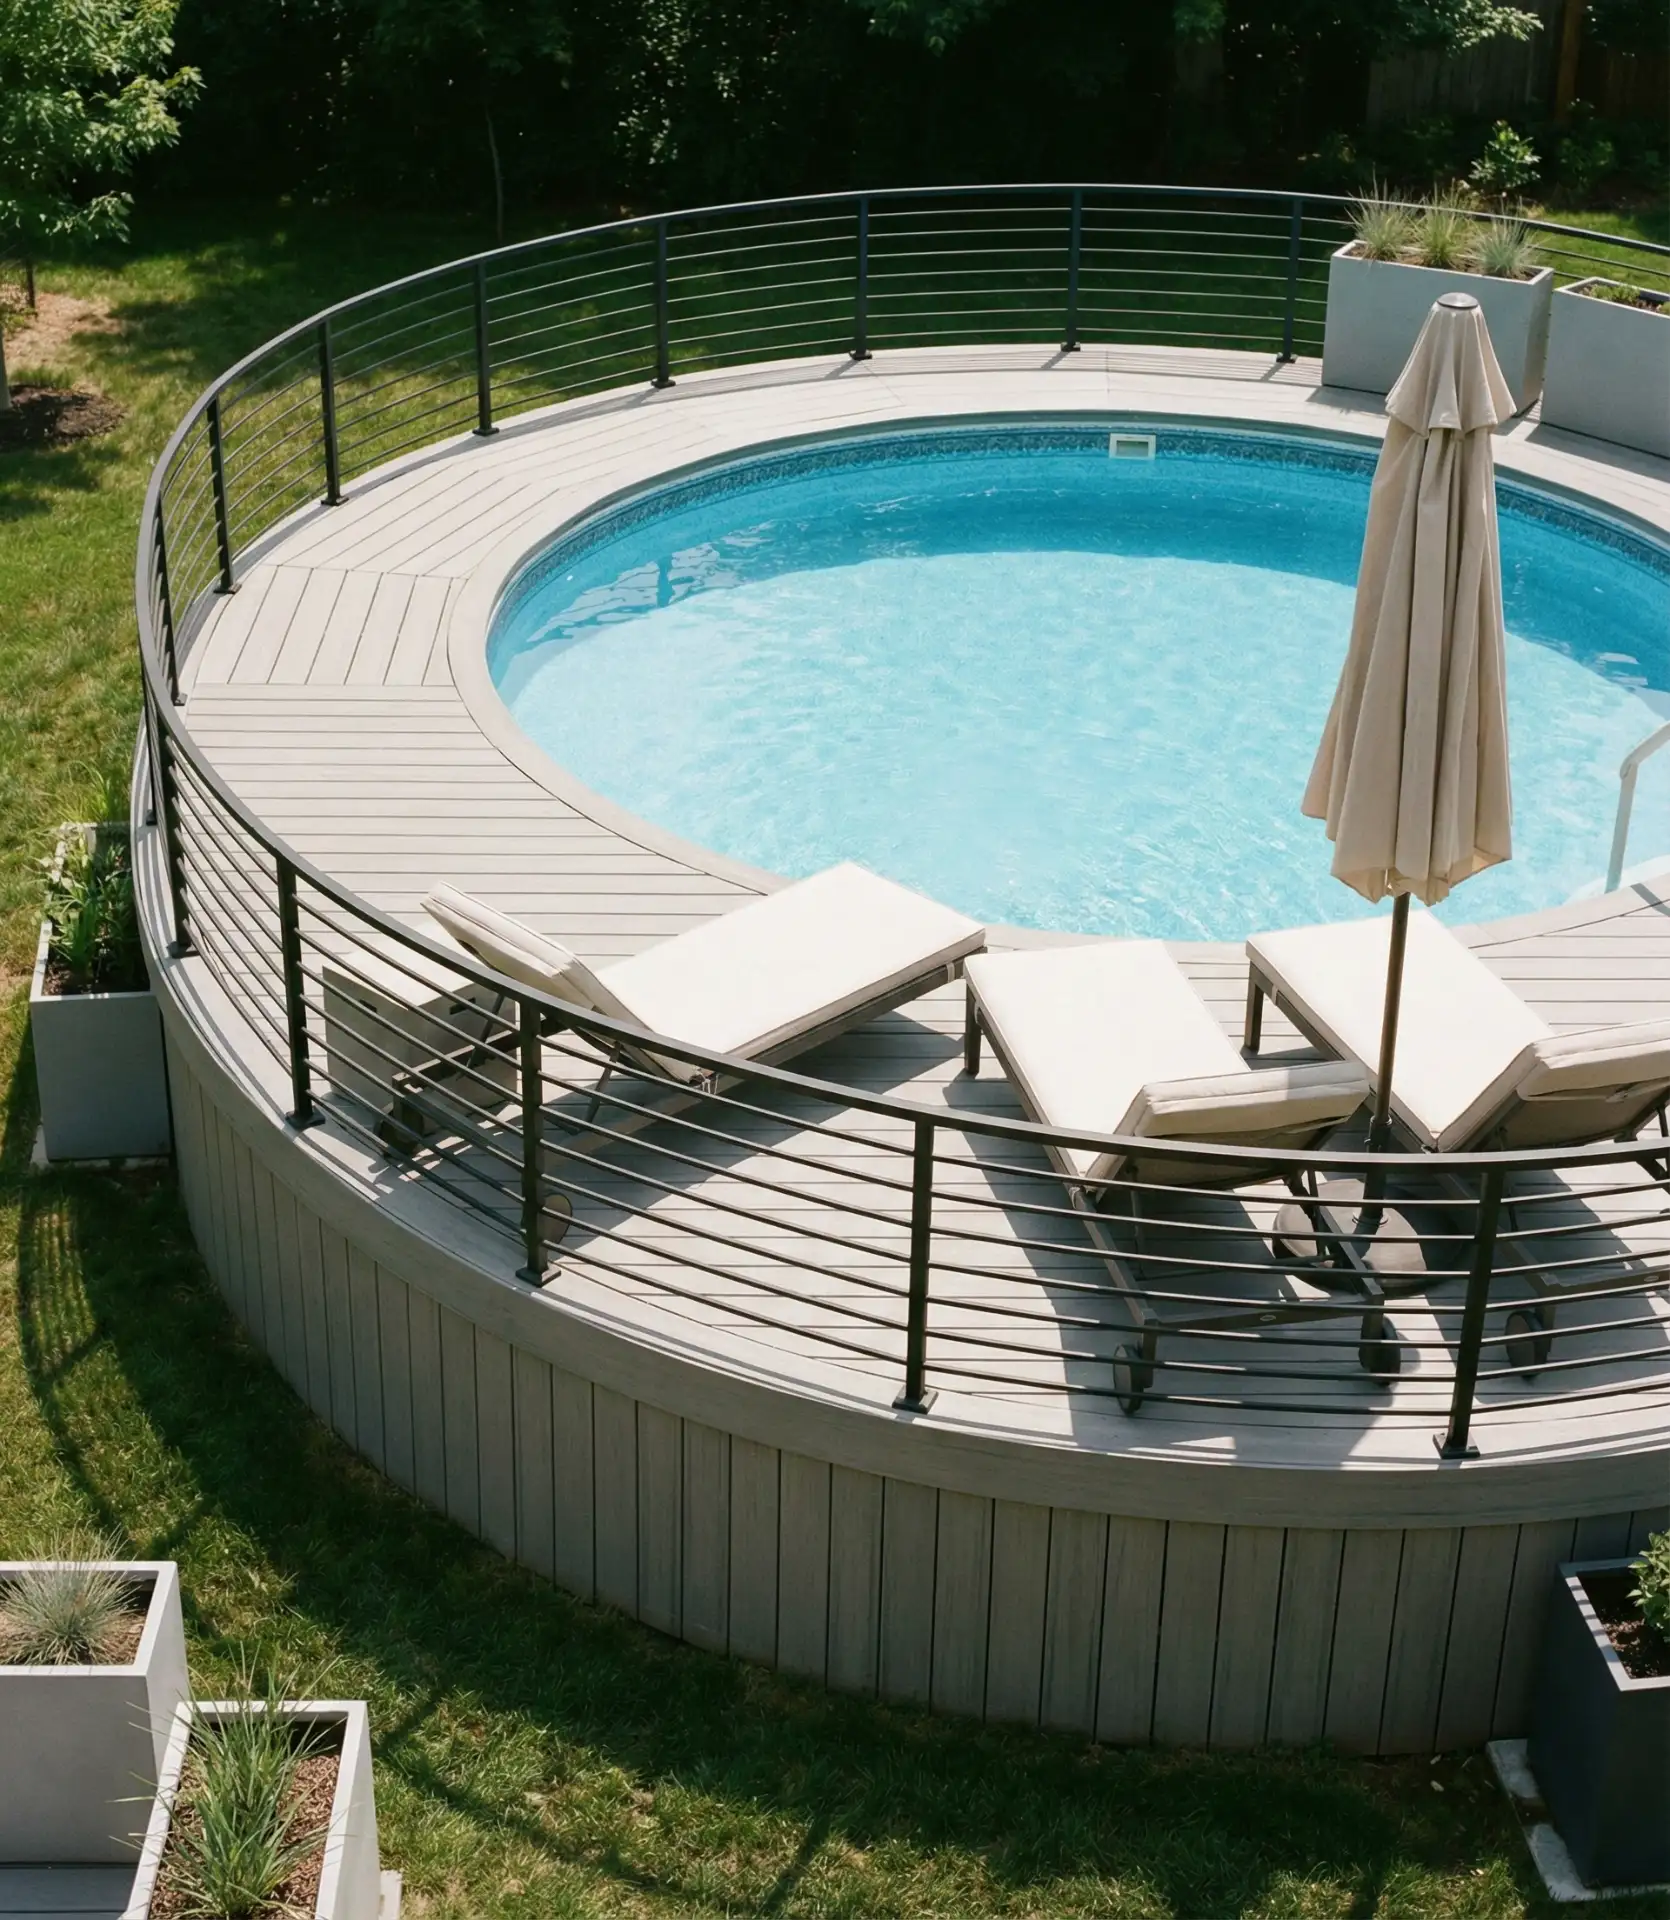
Modern above-ground pool designs have evolved far beyond the basic metal-walled cylinders of decades past, now offering steel-framed models with realistic stone or wood-grain finishes. The real transformation happens when you build a deck platform around the pool to bring the water level flush with the walking surface—this single upgrade makes an affordable pool feel built-in and intentional. For a backyard oasis on a budget, this approach delivers swimming access at $4,000-$8,000 total compared to $35,000+ for in-ground construction. The deck also creates valuable peripheral space for lounging, dining, or container gardens.

My neighbor installed one of these setups three summers ago and initially worried about how it would look—now she says the deck space has become the most-used area of her entire property. The structural requirements are straightforward: the pool needs level ground, and the deck needs posts set in concrete, but no excavation or special permits in most areas. One common mistake is building the deck too narrow; you want at least 4-5 feet of walking space around the pool perimeter so people aren’t constantly edging around furniture or brushing against the pool wall. Plan the deck height carefully so the top rail sits just below or level with the pool rim for easy entry and exit.
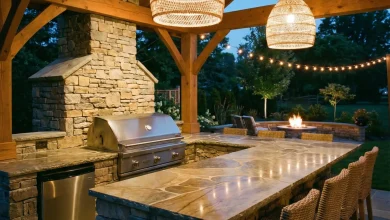
7. Outdoor Kitchen with Pool and Hot Tub Views
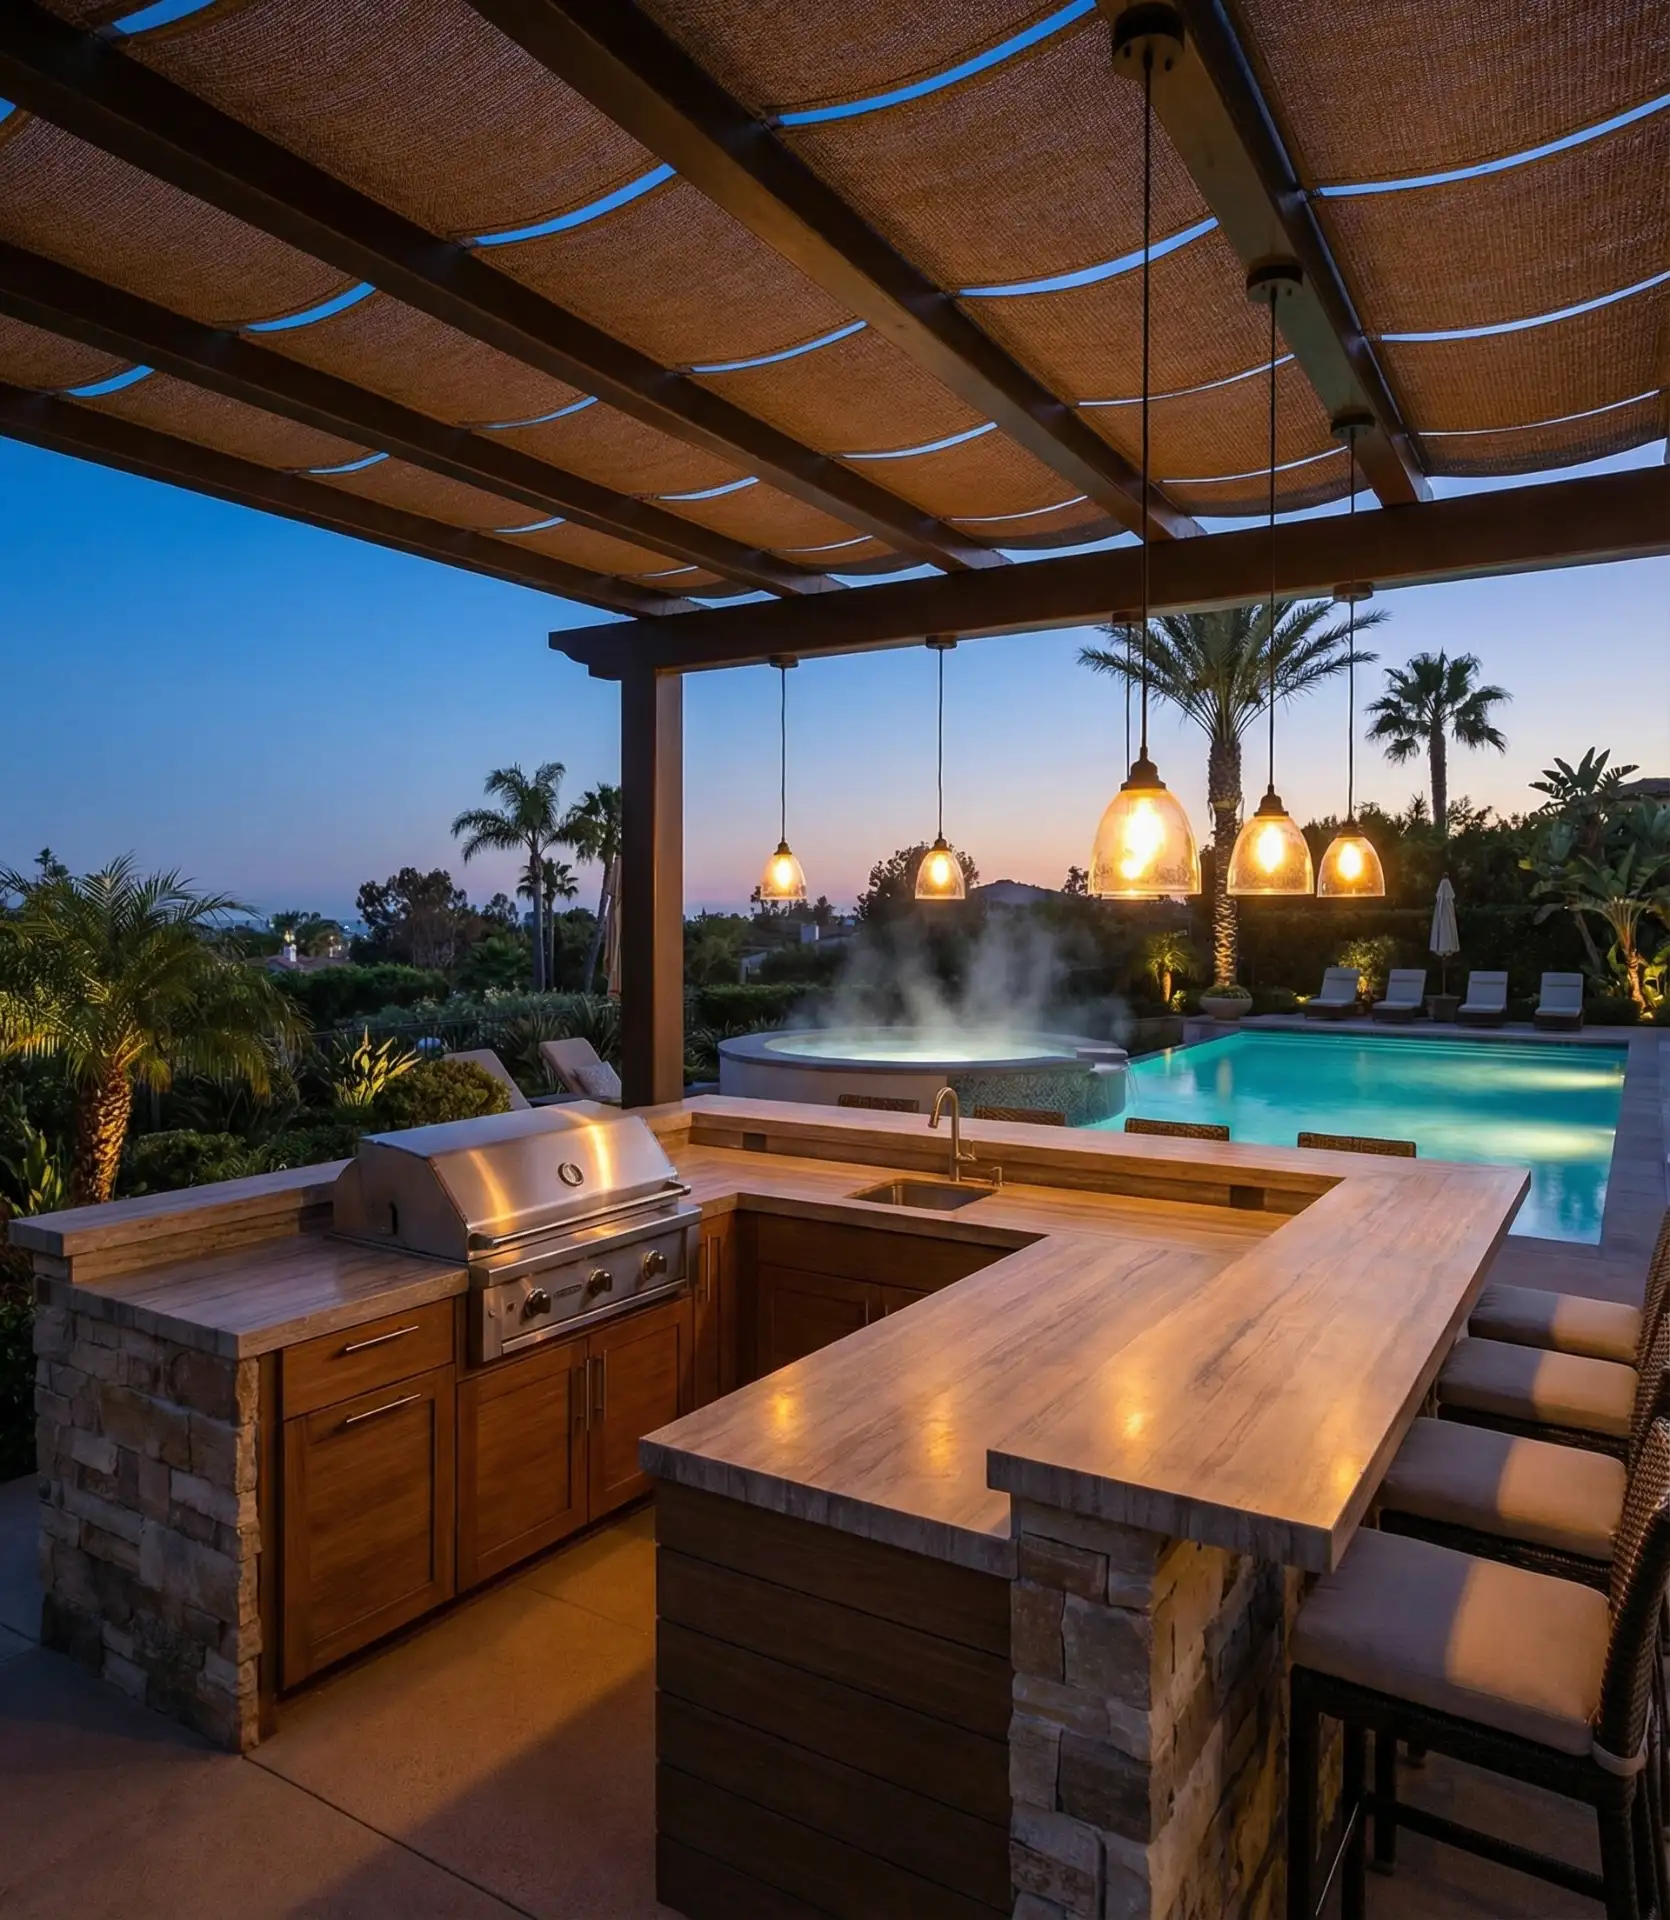
An outdoor kitchen, pool, and hot tub configuration creates the ultimate entertainment zone where the cook stays connected to swimmers and loungers rather than isolated indoors. The kitchen positioning matters tremendously—ideally placed 10-15 feet from the pool edge to avoid grease splatter and steam issues while maintaining sight lines. Core components include a built-in grill, weatherproof refrigerator, sink with hot and cold water, and generous counter space for prep and serving. Finishing with the same stone or tile that surrounds the pool creates visual cohesion that makes the entire space feel professionally designed.
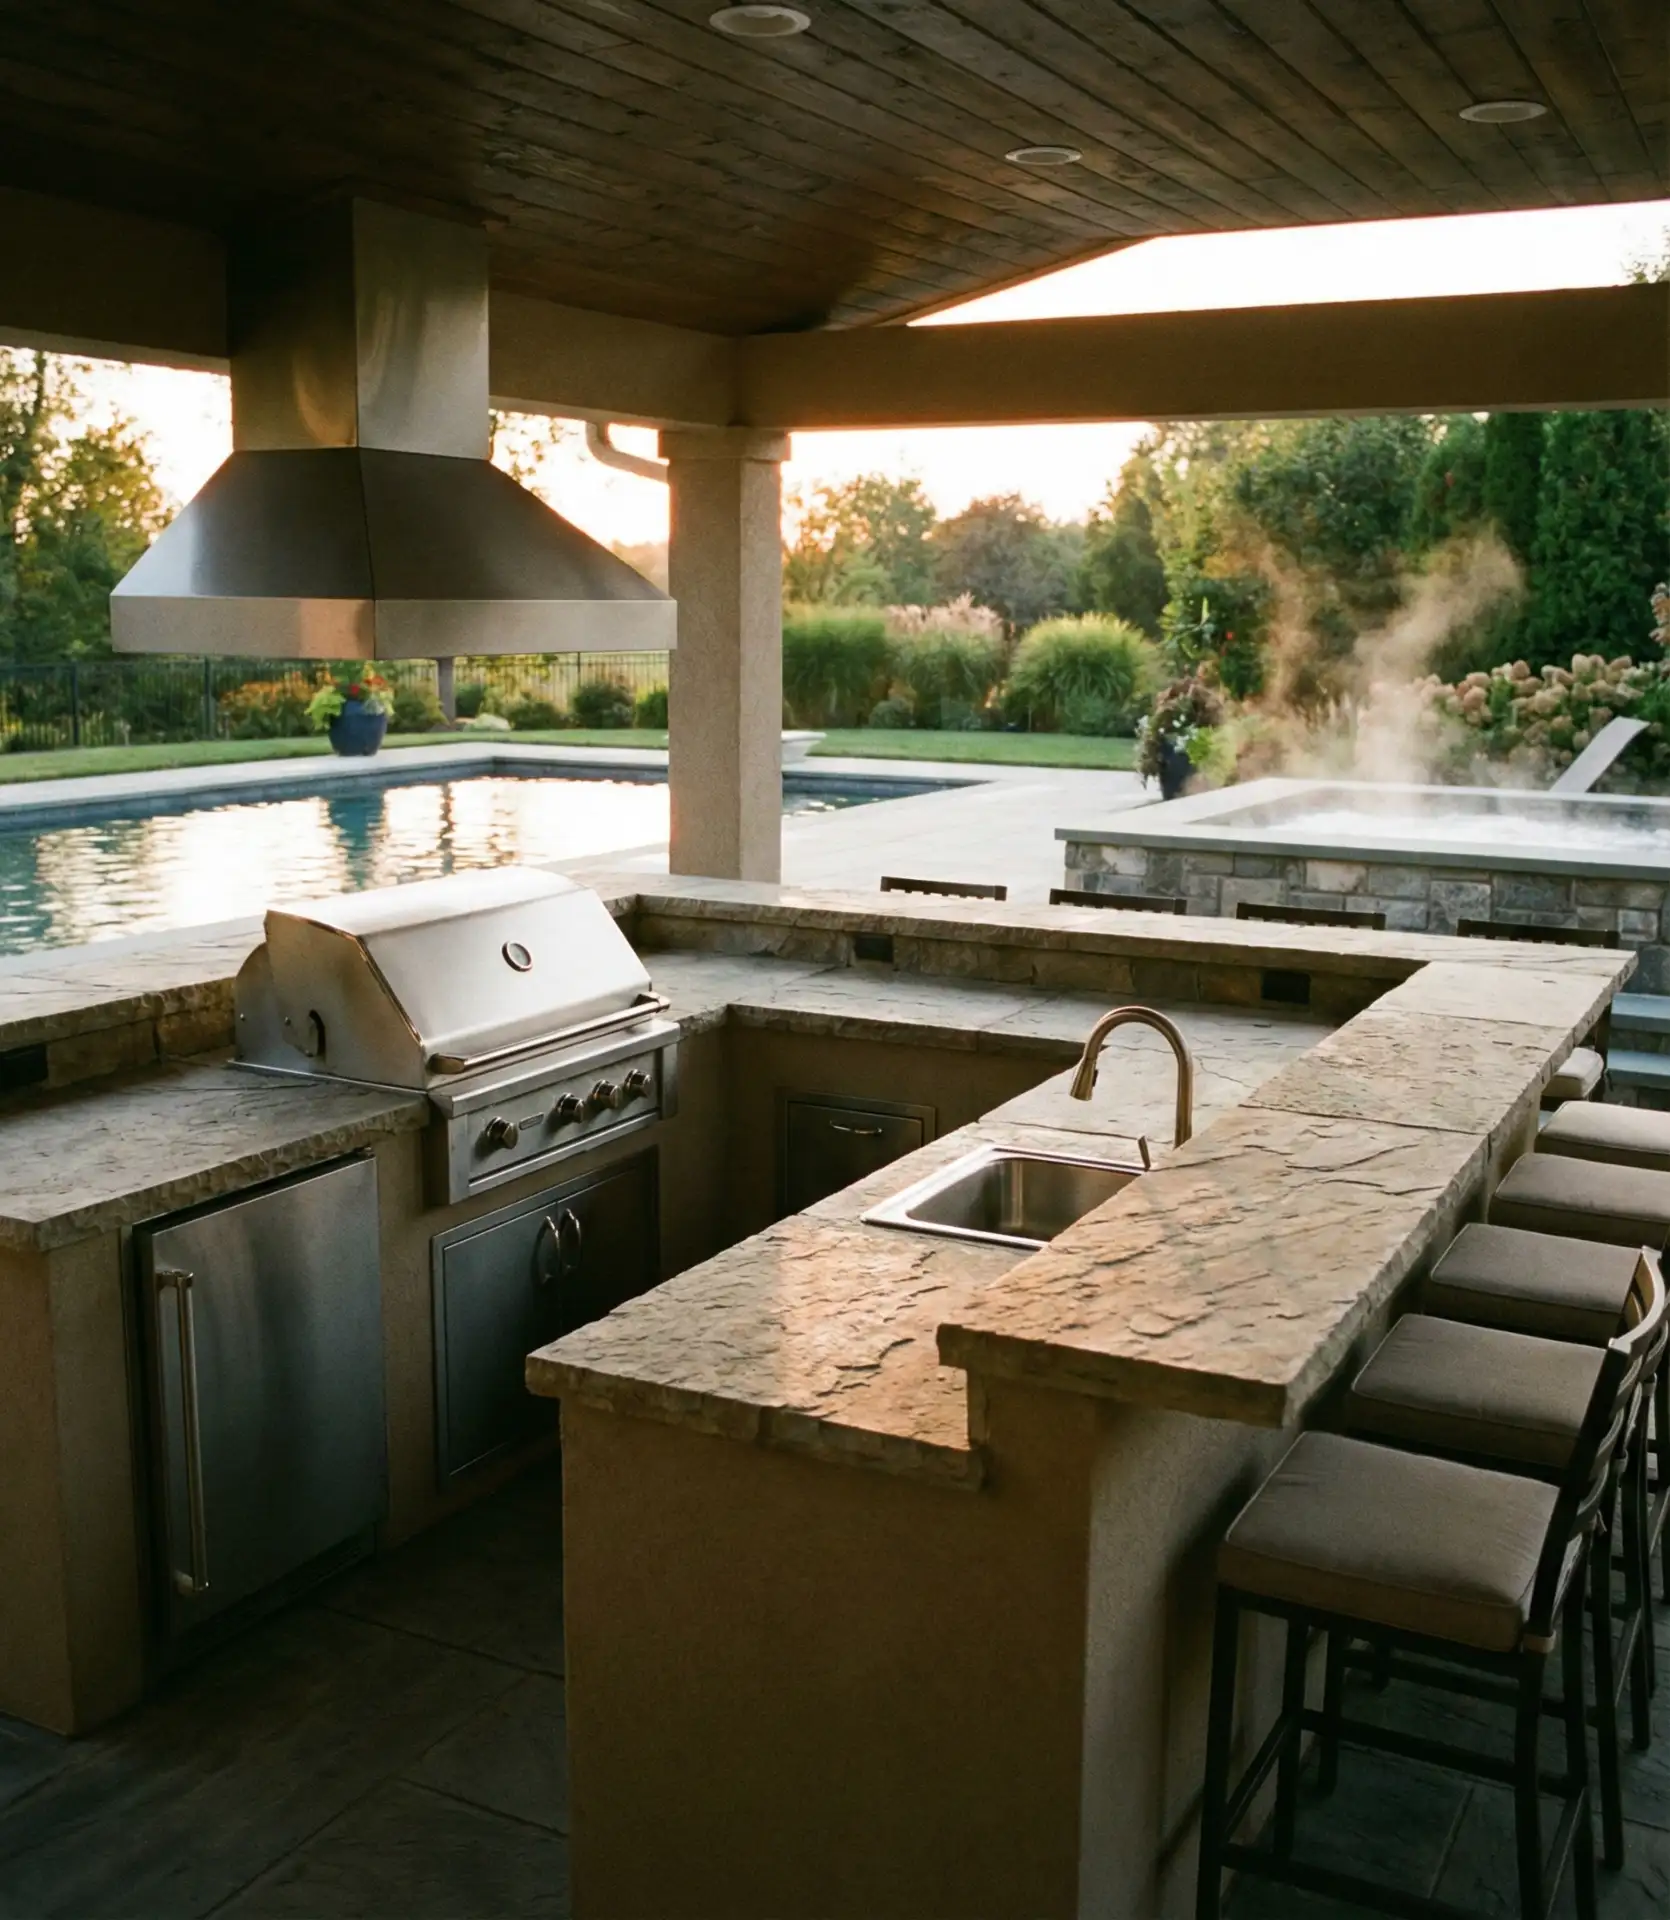
This layout works best when planned during initial pool construction so electrical, gas, and plumbing can be trenched simultaneously—retrofitting these utilities later costs 30-50% more. The investment ranges from $8,000 for a basic setup to $35,000+ for full luxury installations with pizza ovens and beverage centers. Real homeowners consistently report that outdoor kitchens change their entertaining patterns completely, with summer dinner parties moving entirely outside and pool days extending later into the evening. Weather-resistant cabinetry is worth the premium; marine-grade polymer cabinets last decades without the warping and rust issues that plague cheaper options in humid climates.
8. Private Screening with Vertical Gardens
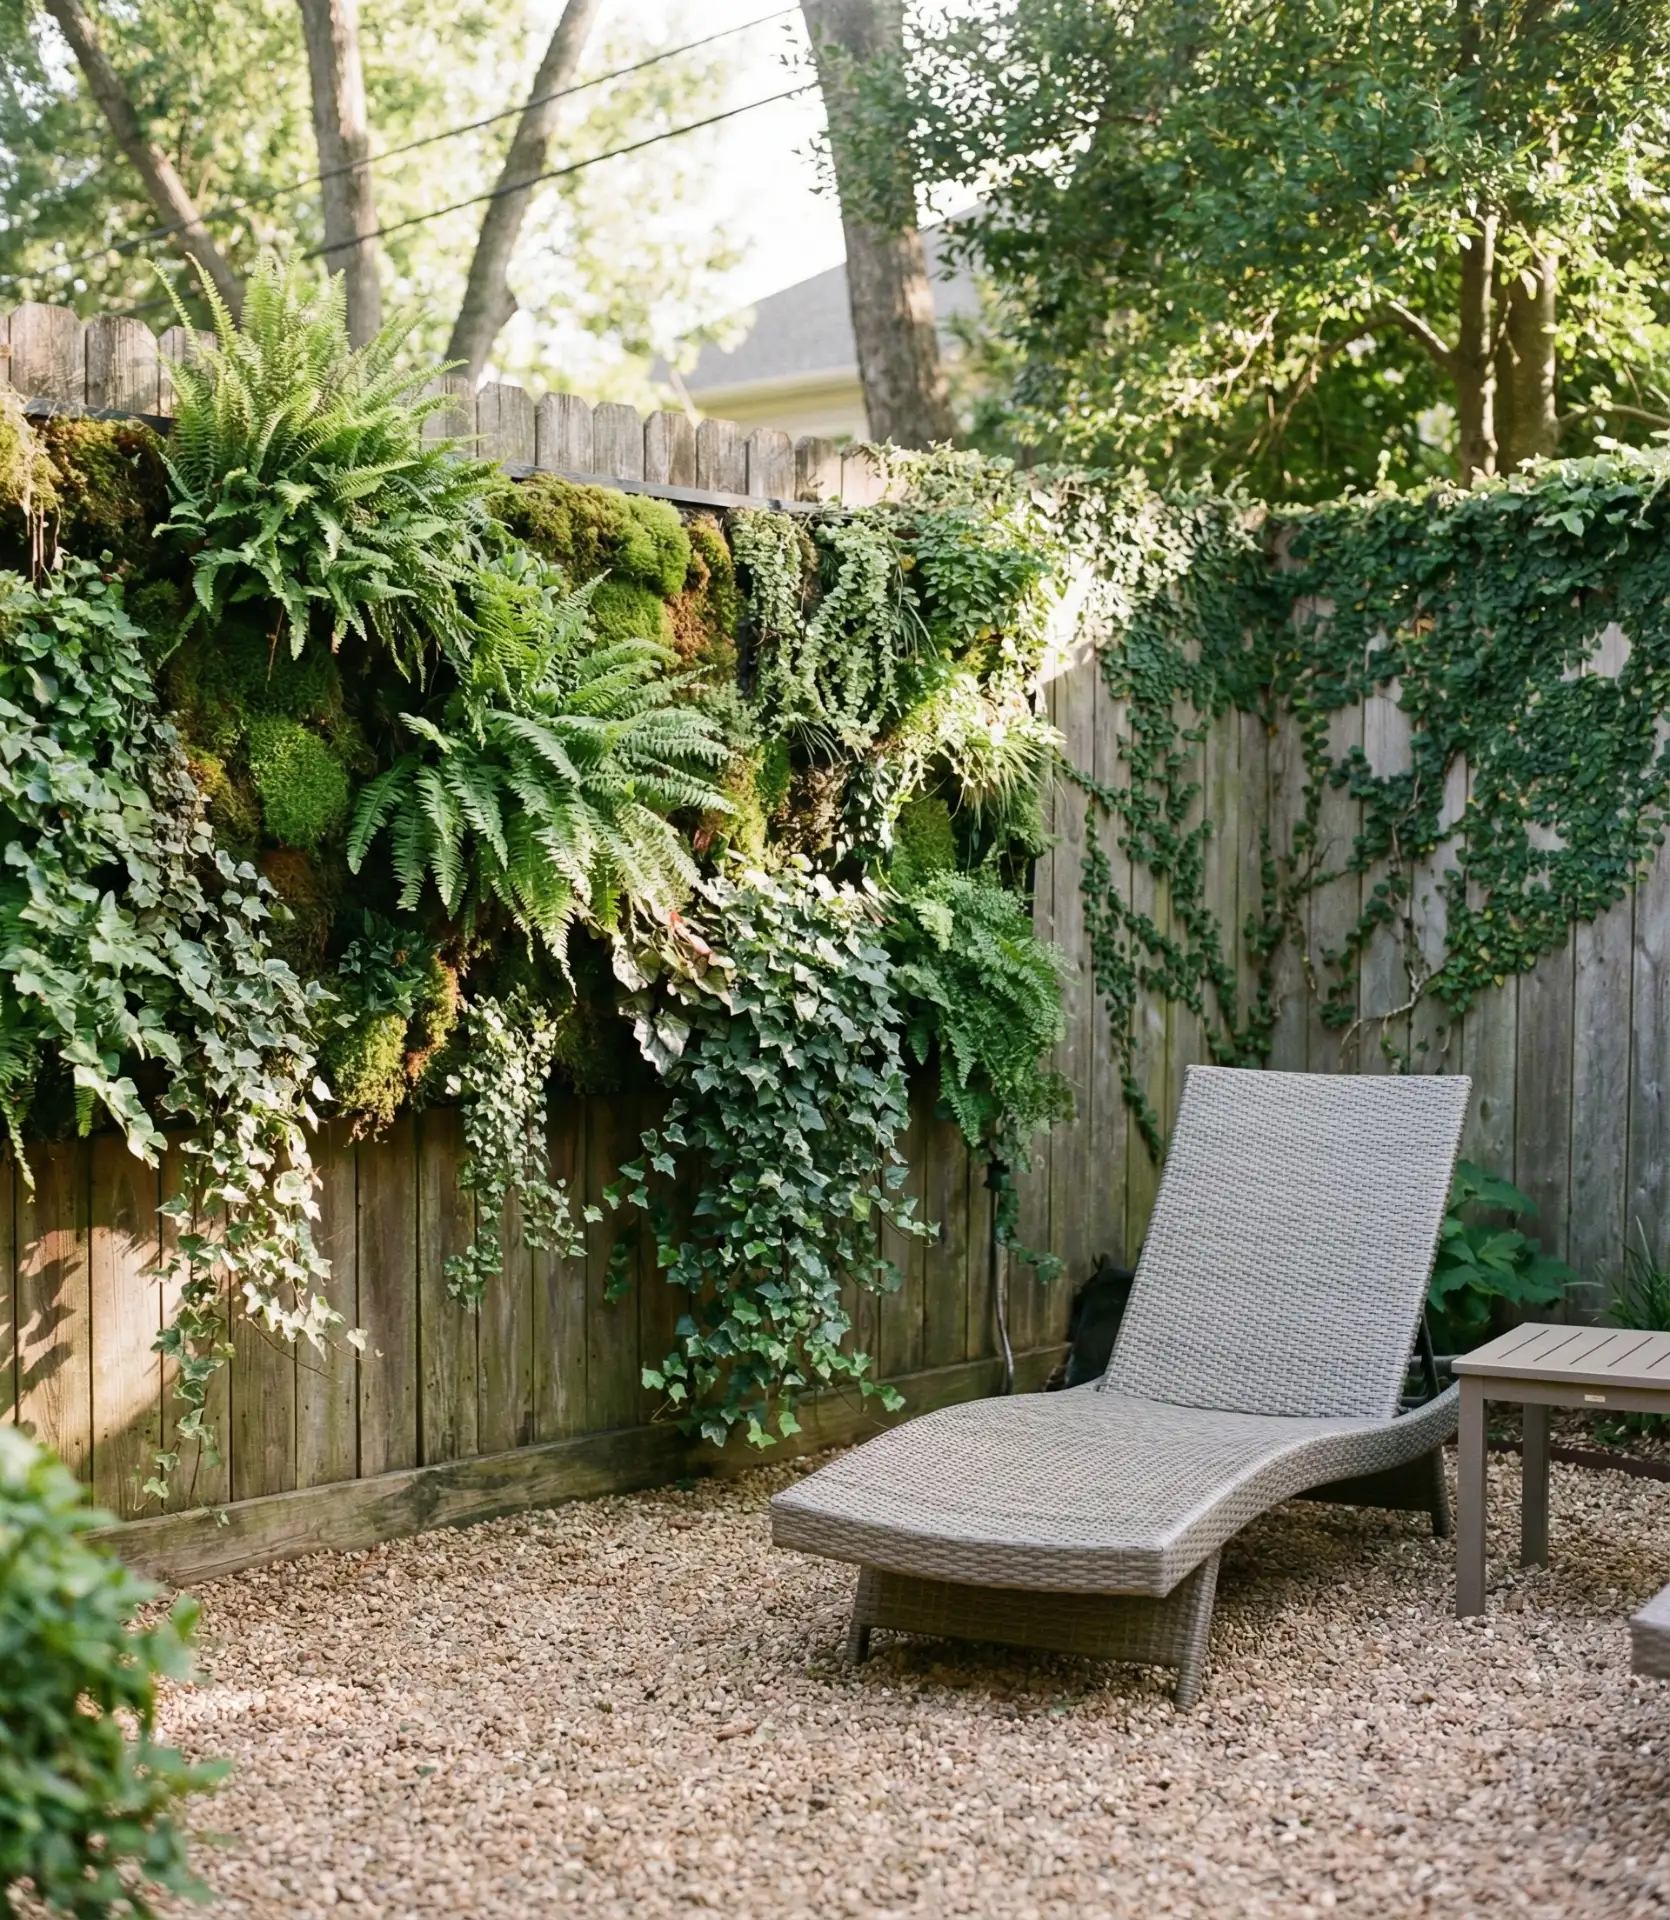
Creating a private retreat in suburban neighborhoods where houses sit close together requires strategic screening solutions that don’t feel fortress-like. Vertical garden systems—whether modular living walls or traditional trellises covered in climbing vines—provide year-round privacy while softening the hardscape with organic texture. The vertical approach maximizes screening impact in a minimal footprint, crucial for small yard situations where every square foot counts. Options range from DIY cattle panel trellises for $50-$100 to sophisticated hydroponic wall systems at $200-$400 per panel. Fast-growing climbers like clematis, jasmine, or climbing hydrangea can cover a 6-foot trellis in a single season.
Professional landscapers emphasize the importance of choosing evergreen varieties in mixed plantings so winter doesn’t leave you completely exposed. Combining deciduous flowering vines with evergreen groundcovers like ivy or wintercreeper maintains coverage year-round while providing seasonal interest. The structure needs proper anchoring—lightweight trellises in planters work fine for annual vines, but permanent screening with woody climbers requires posts set in concrete or heavy-duty wall mounting. Water access is essential; drip irrigation keeps plants thriving without constant hand-watering. Position screening 3-4 feet inside your property line rather than right at the fence to avoid neighbor conflicts and provide maintenance access.
9. Kid-Friendly Splash Pad Area
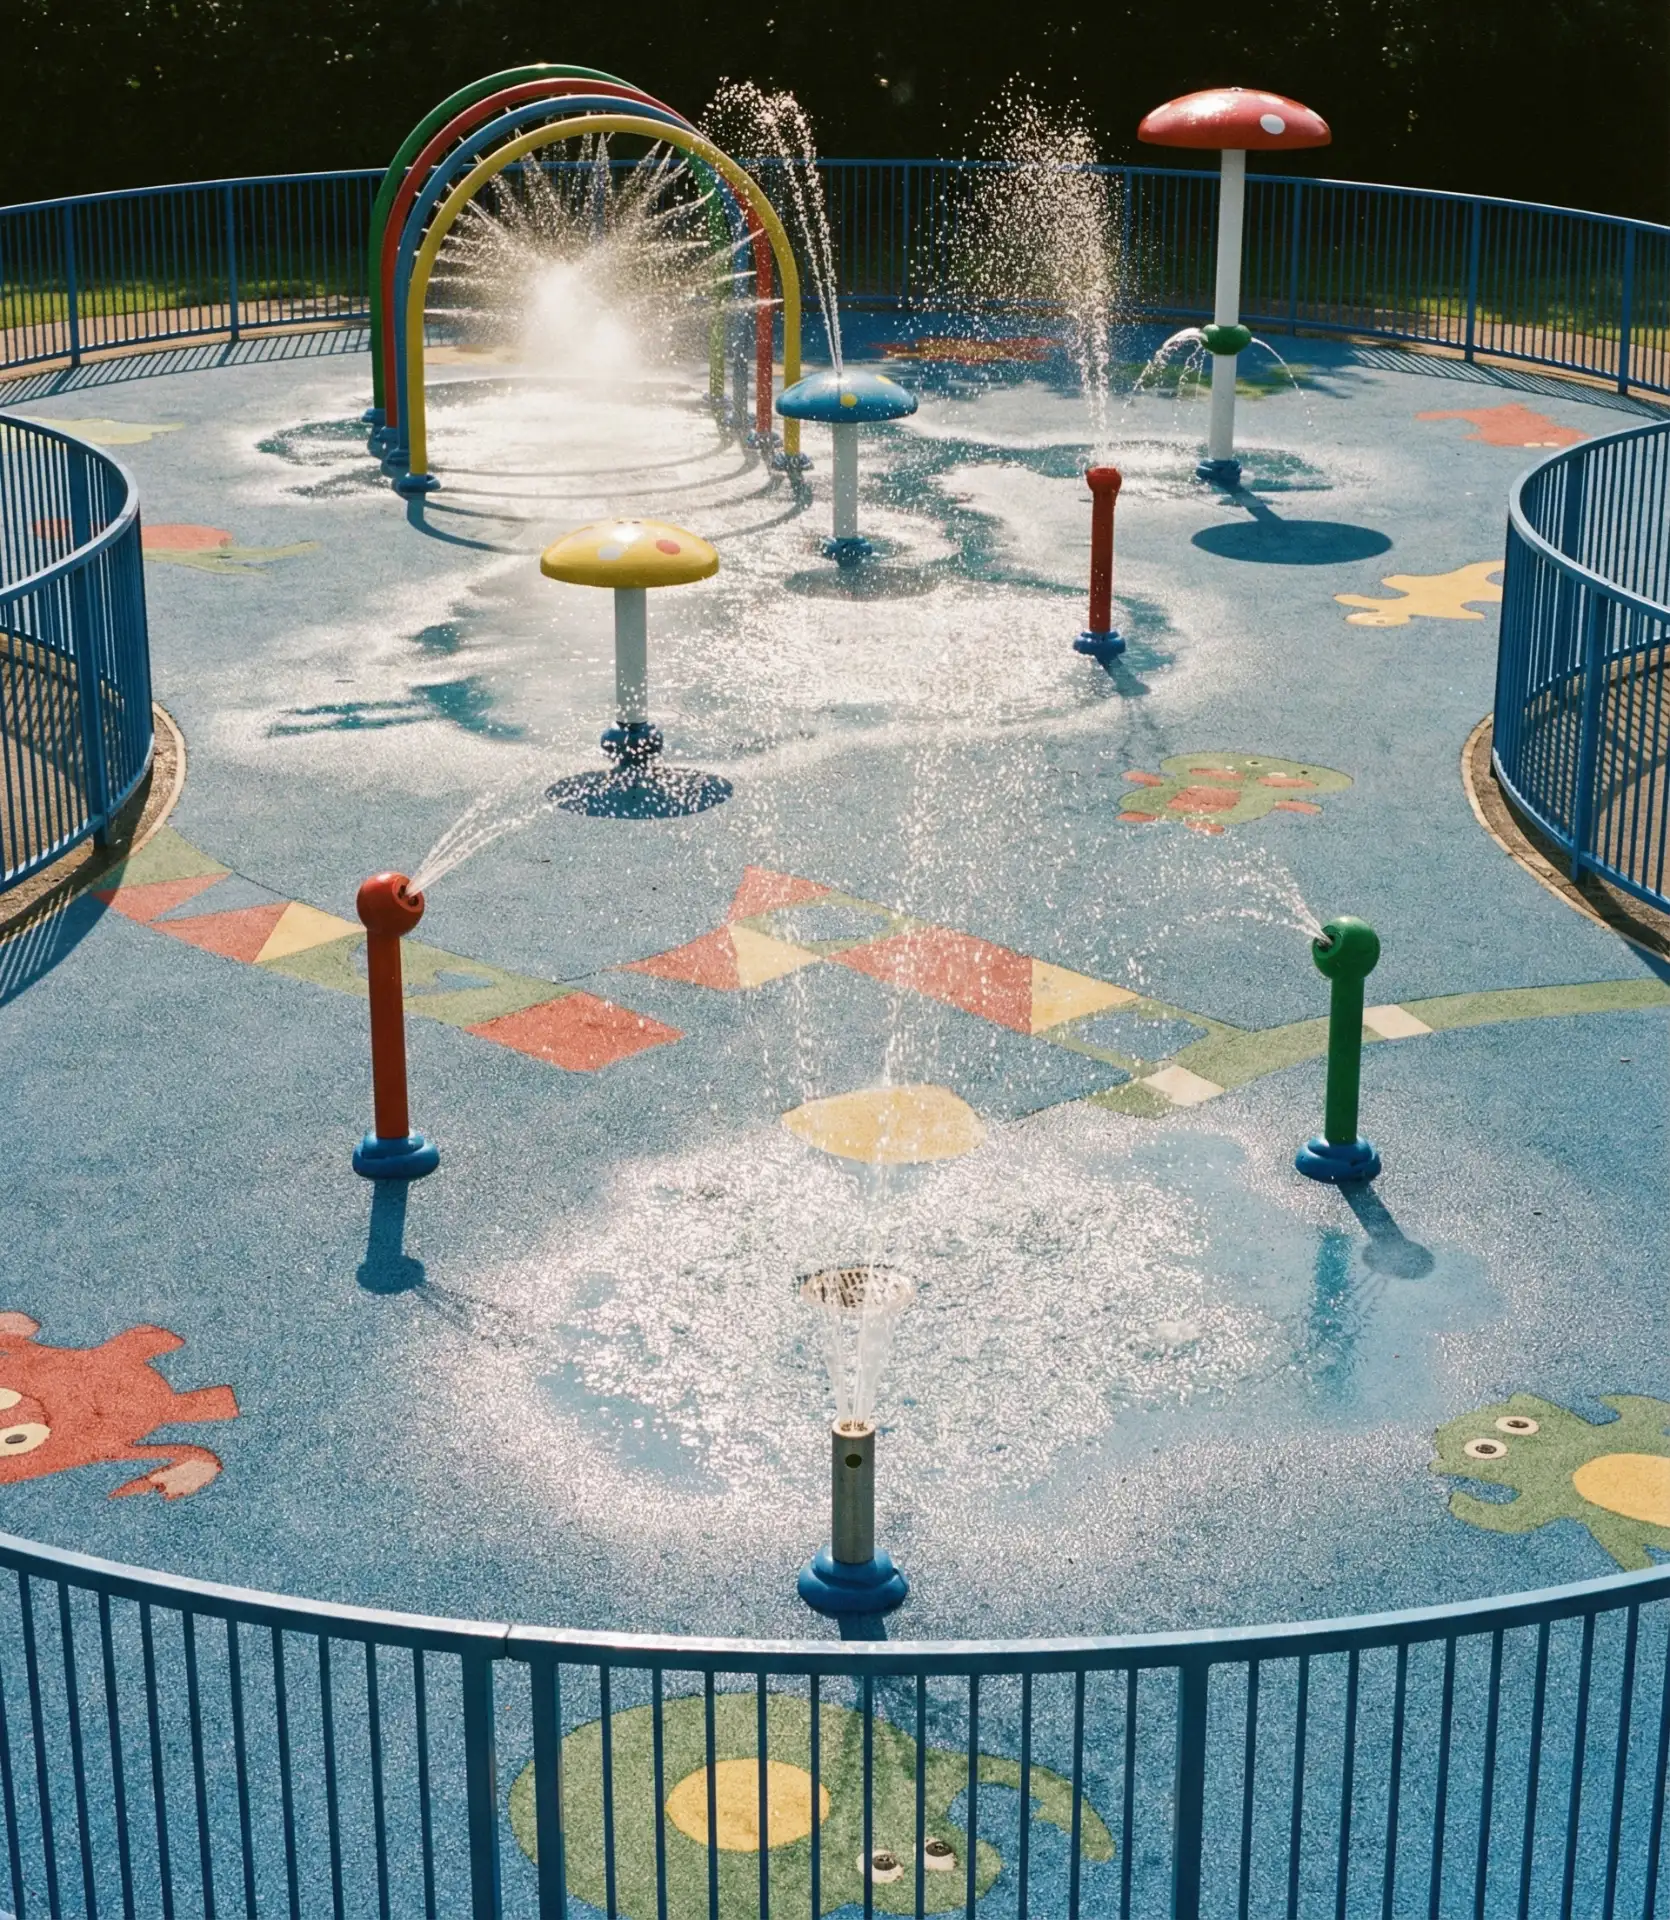
Families with young children are increasingly choosing splash pad installations over traditional pools for kids because they eliminate drowning risks while providing water play. These systems use recycled water that sprays up from ground-level jets, drains through a perforated surface, filters, and recirculates continuously. DIY splash pad kits start around $1,500-$3,000 for basic spray features, while full custom installations run $5,000-$15,000. The footprint can be as small as 10×10 feet, making it viable even in compact yards. Rubberized playground surfacing underneath provides slip resistance and cushioning, though some homeowners opt for exposed aggregate concrete for a more polished look.

The practical advantages extend beyond safety—splash pads require minimal maintenance compared to pools, with no chemicals to balance or vacuum cleaning schedules. The water system typically uses the same filtration setup as a small pool, running for a few hours daily during warm months. Installation requires plumbing and electrical work but no excavation, keeping costs reasonable. Most systems shut off automatically after a set period or can be controlled via smartphone apps, conserving water when not actively in use. Parents appreciate that splash pads stay engaging for a wider age range than kiddie pools, entertaining toddlers through elementary age without needing constant water depth adjustments or supervision intensity.
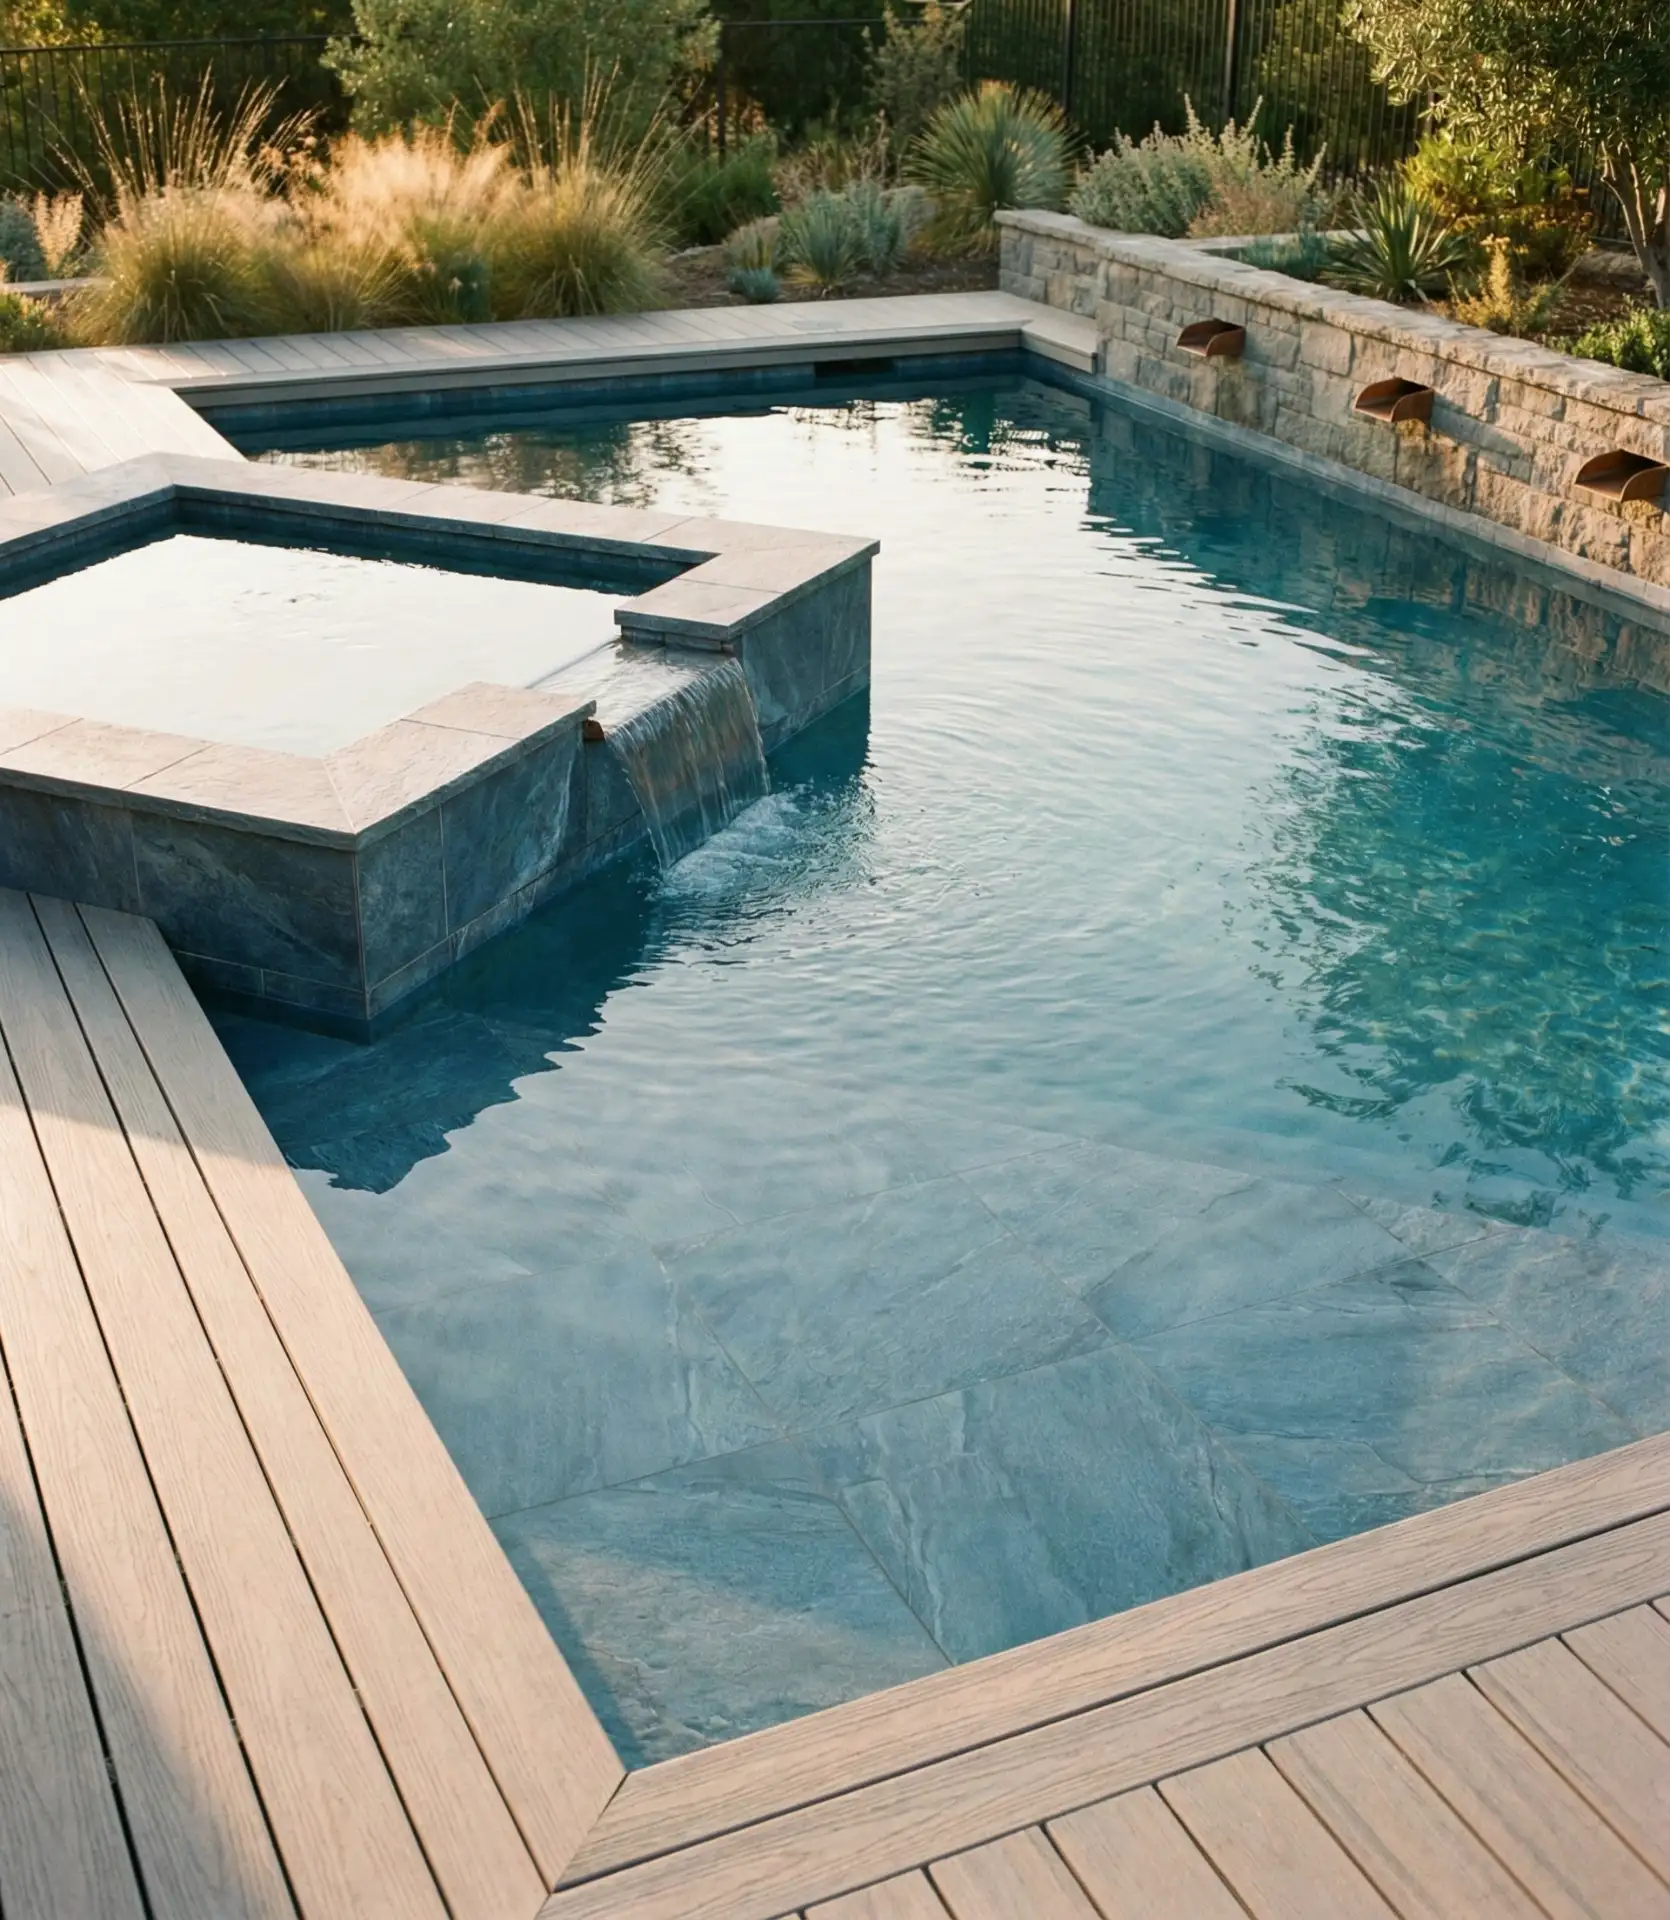
10. Minimalist concrete patio with a linear pool
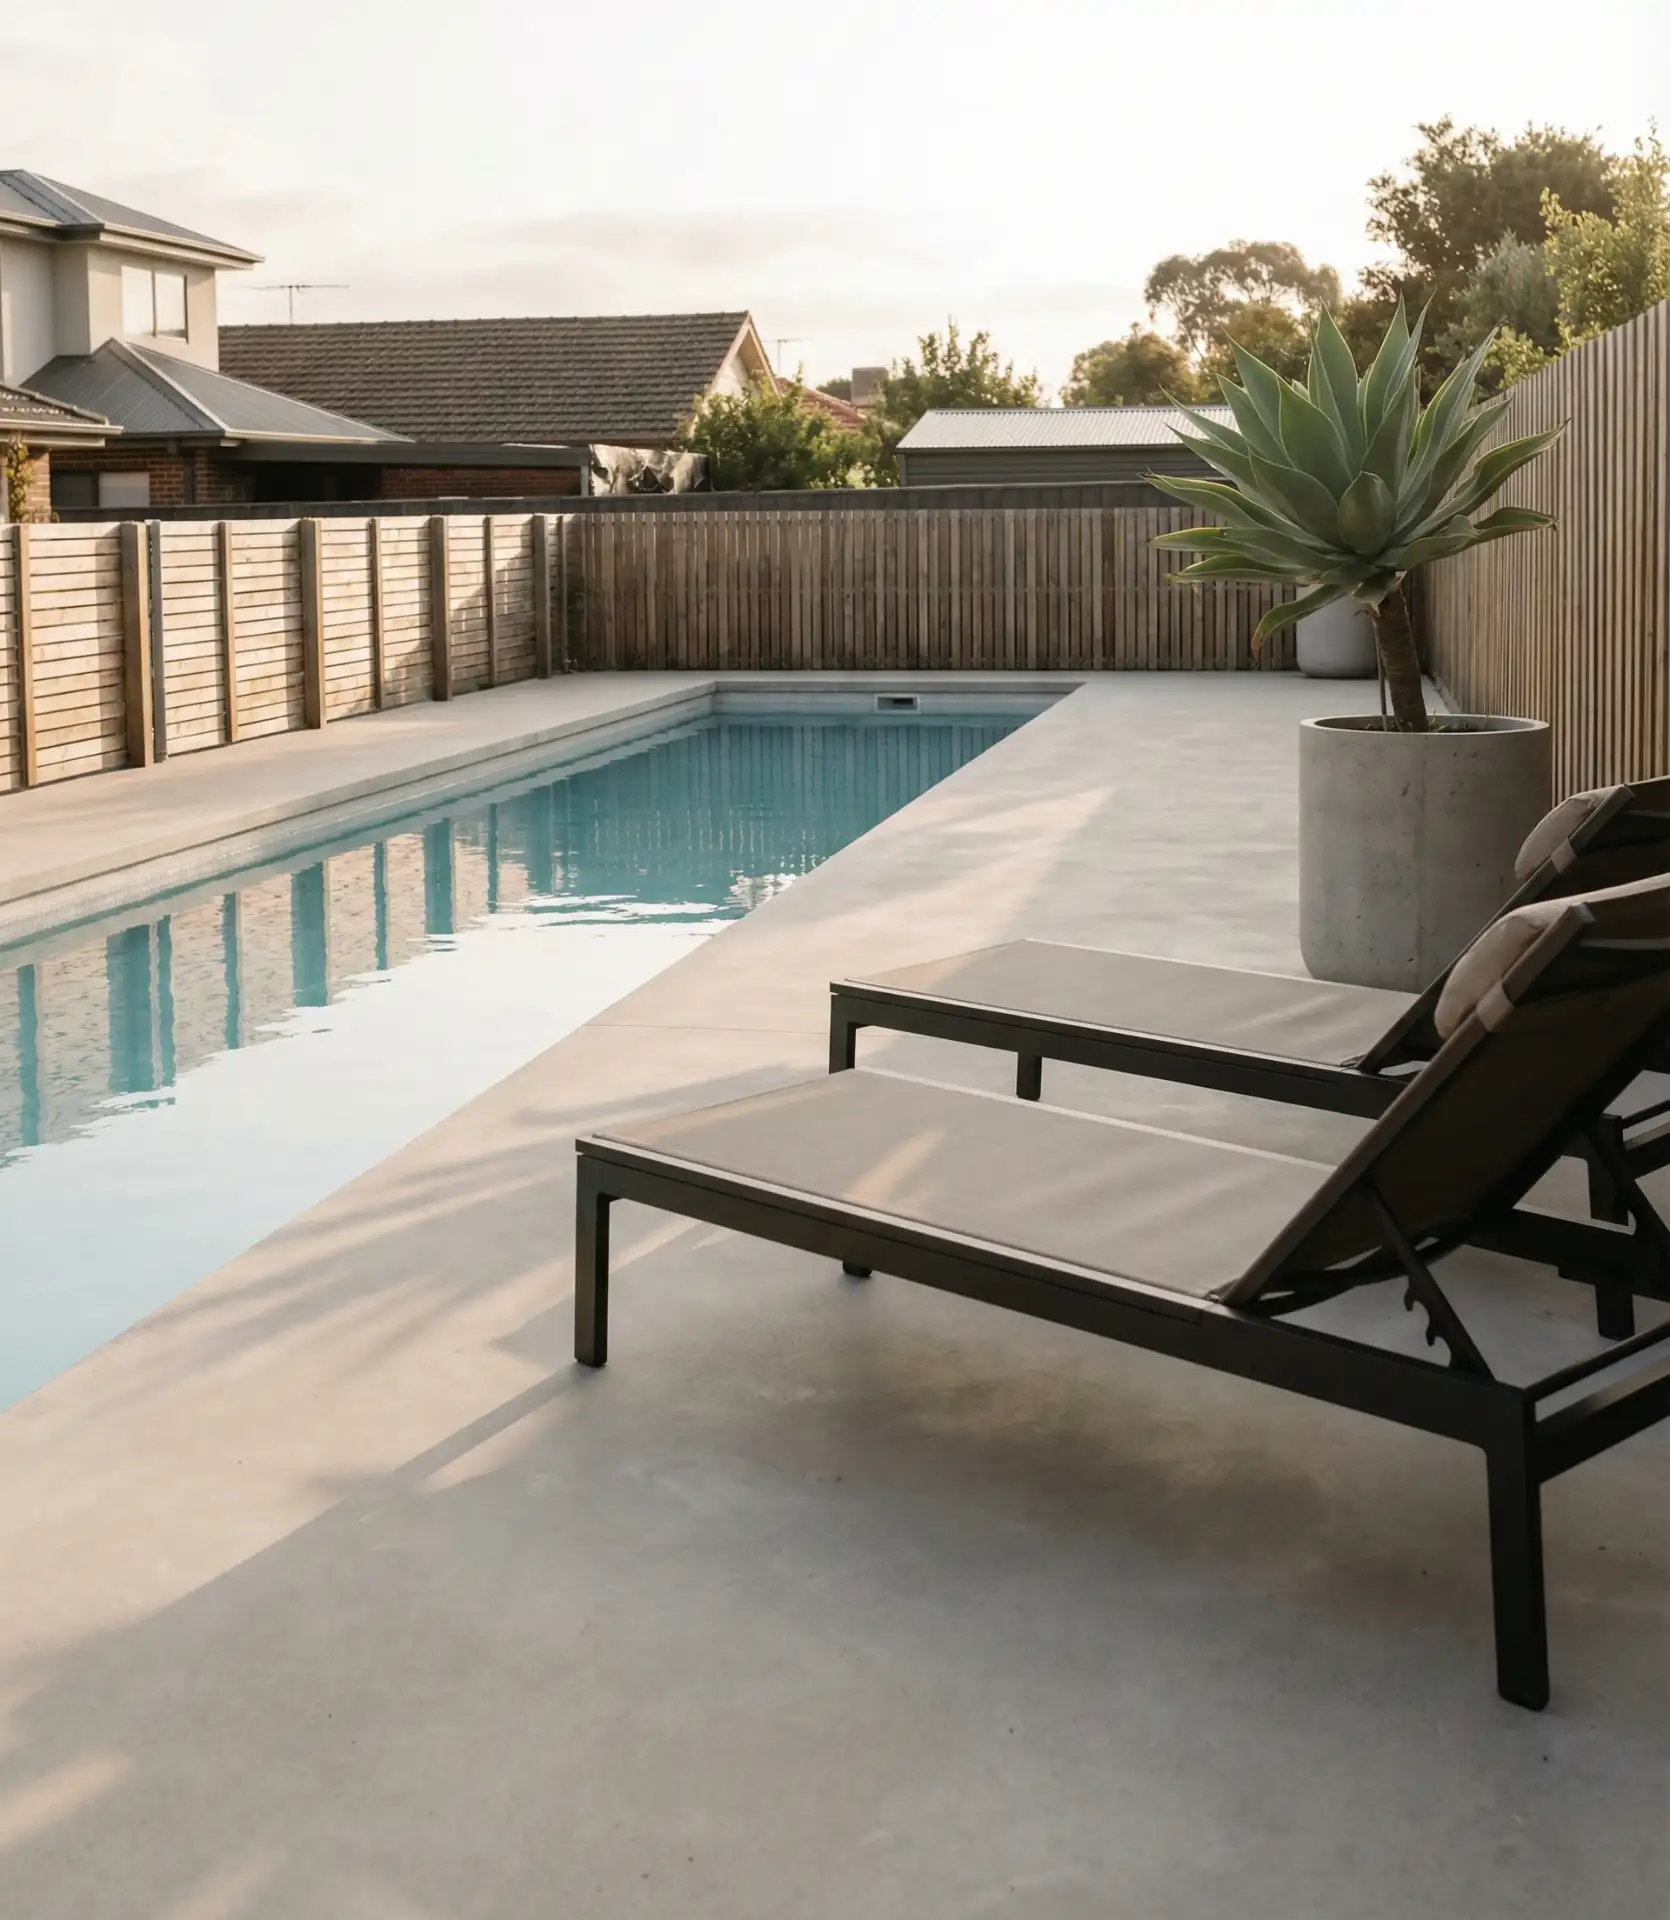
The clean lines and monochromatic palette of contemporary design translate beautifully to outdoor spaces, especially when working with limited square footage. A lap-style rectangular pool proportioned at a 3:1 or 4:1 length-to-width ratio maximizes swimming capability while occupying less total area than traditional shapes. Pairing it with poured concrete hardscaping in matching tones creates seamless visual flow where the patio and pool deck read as a unified surface. This approach works particularly well for tiny urban backyards where every design element needs to pull its weight aesthetically and functionally.
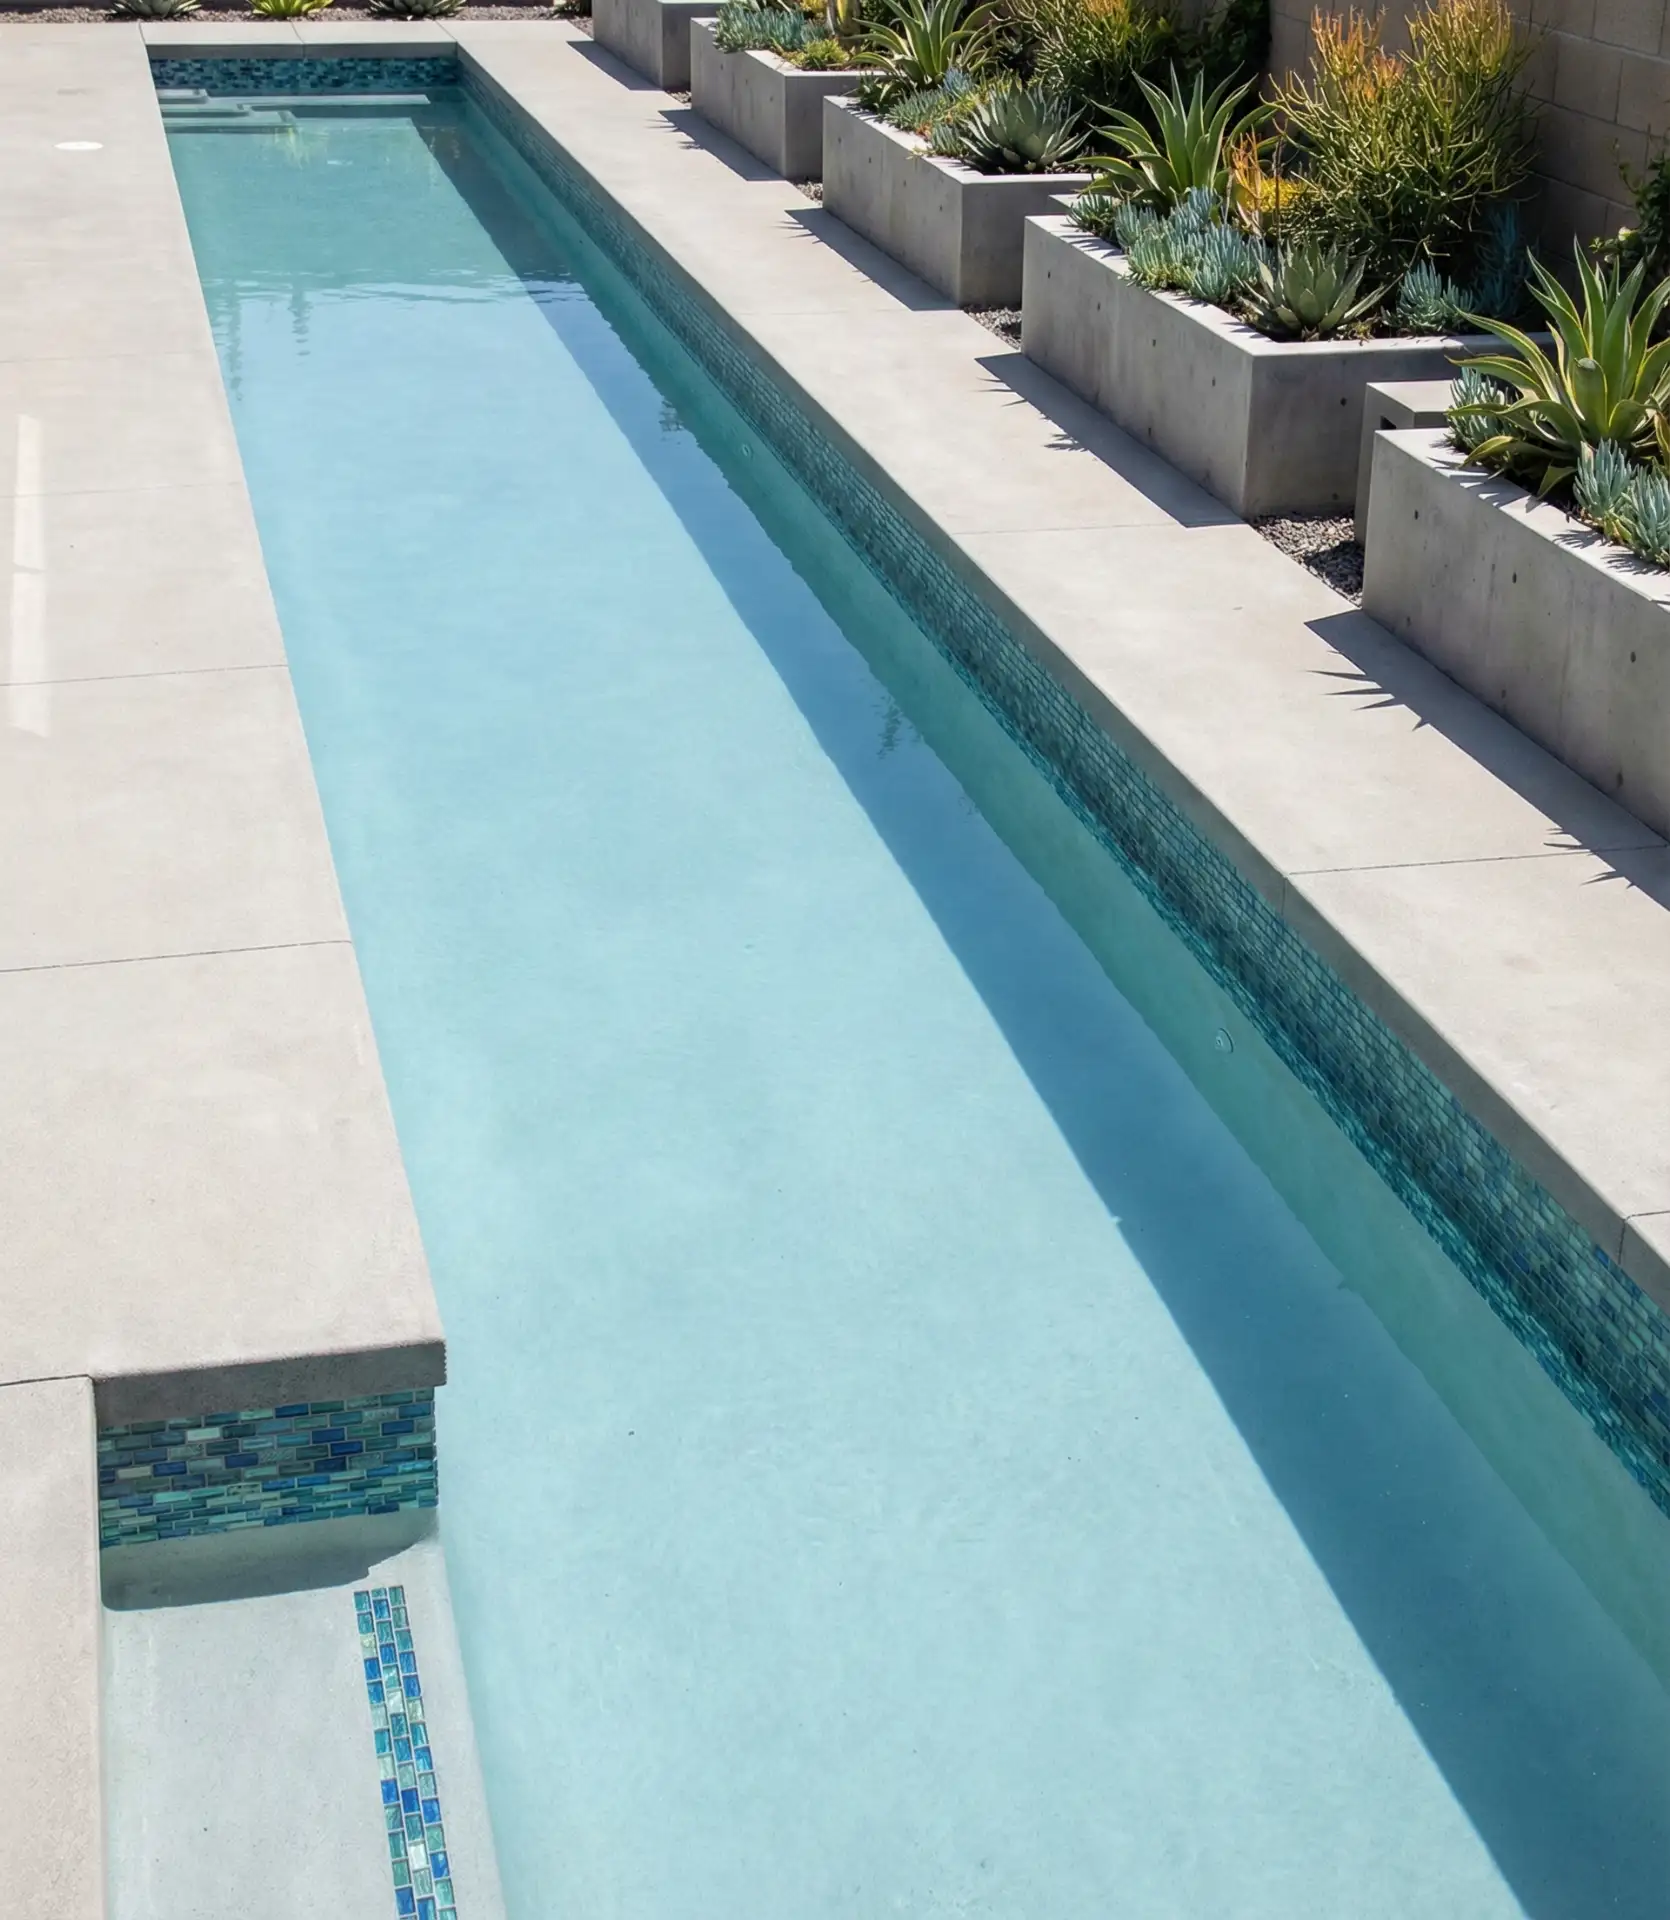
Concrete finishing techniques have expanded dramatically, offering broom-finished texture for slip resistance, salt finish for subtle sparkle, or exposed aggregate that reveals embedded stones. Integral color mixed into the concrete itself eliminates the need for painting or staining that requires periodic renewal. The geometric simplicity looks deceptively easy but demands precise grading and drainage planning—even slight water pooling disrupts the clean aesthetic. Budget $50–$85 per square foot for quality stamped or textured concrete installation. The minimalist approach means accessories and furniture become focal points, so invest in pieces with architectural presence rather than conventional patio sets.
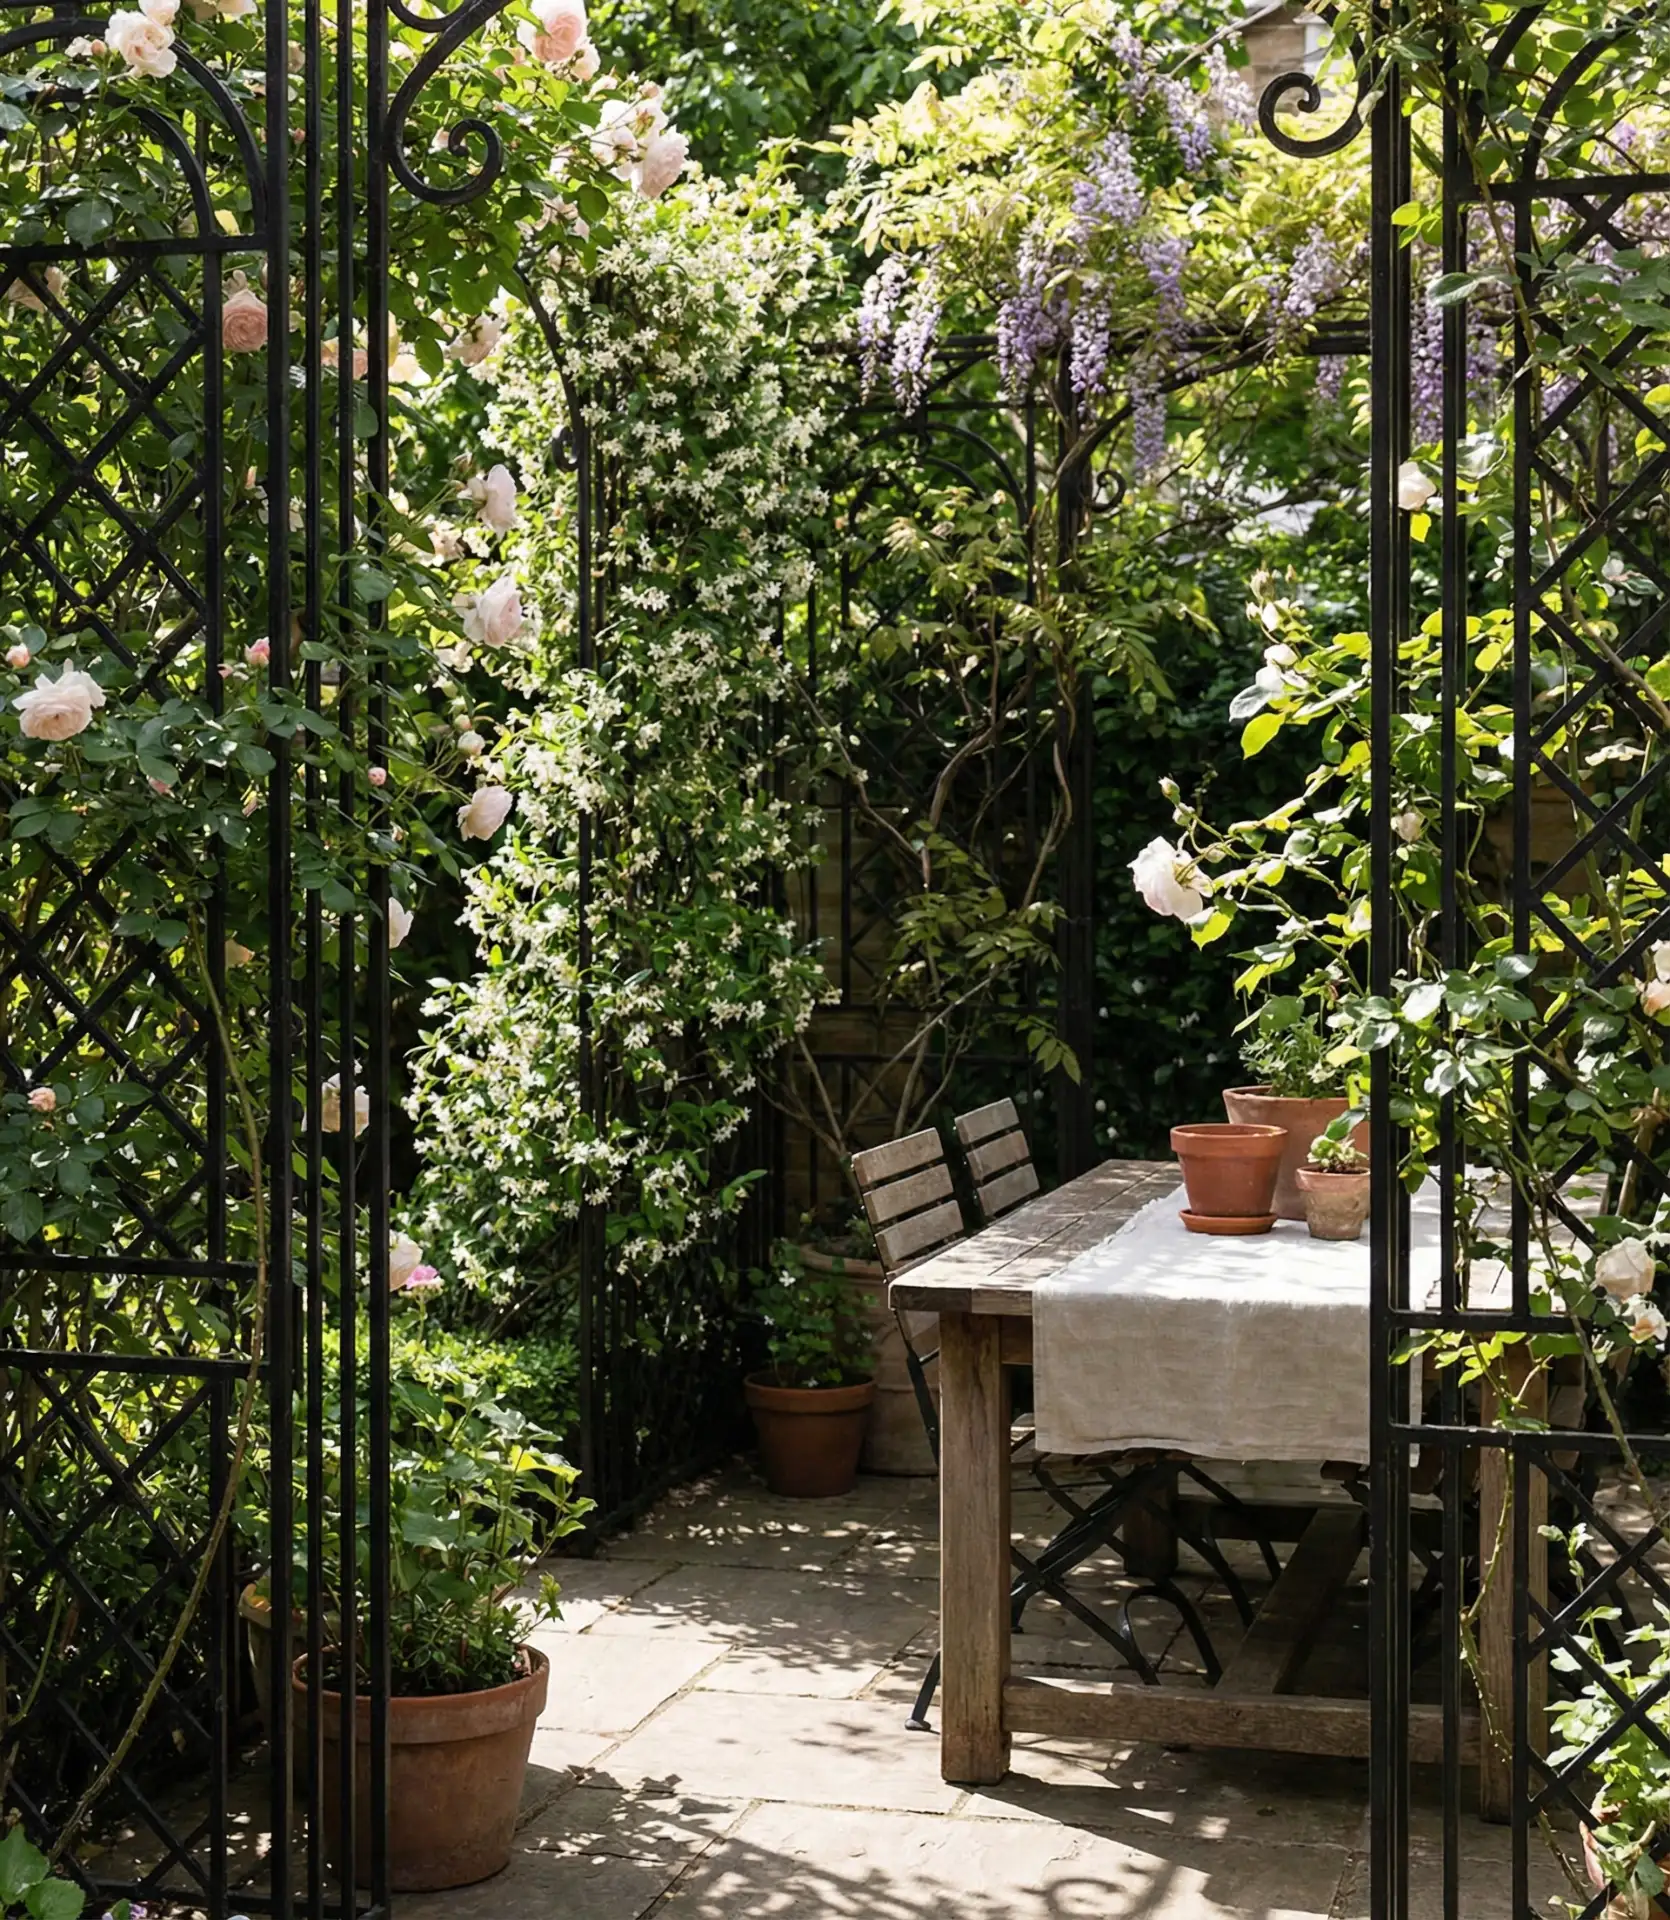
11. Mediterranean Courtyard with Fountain
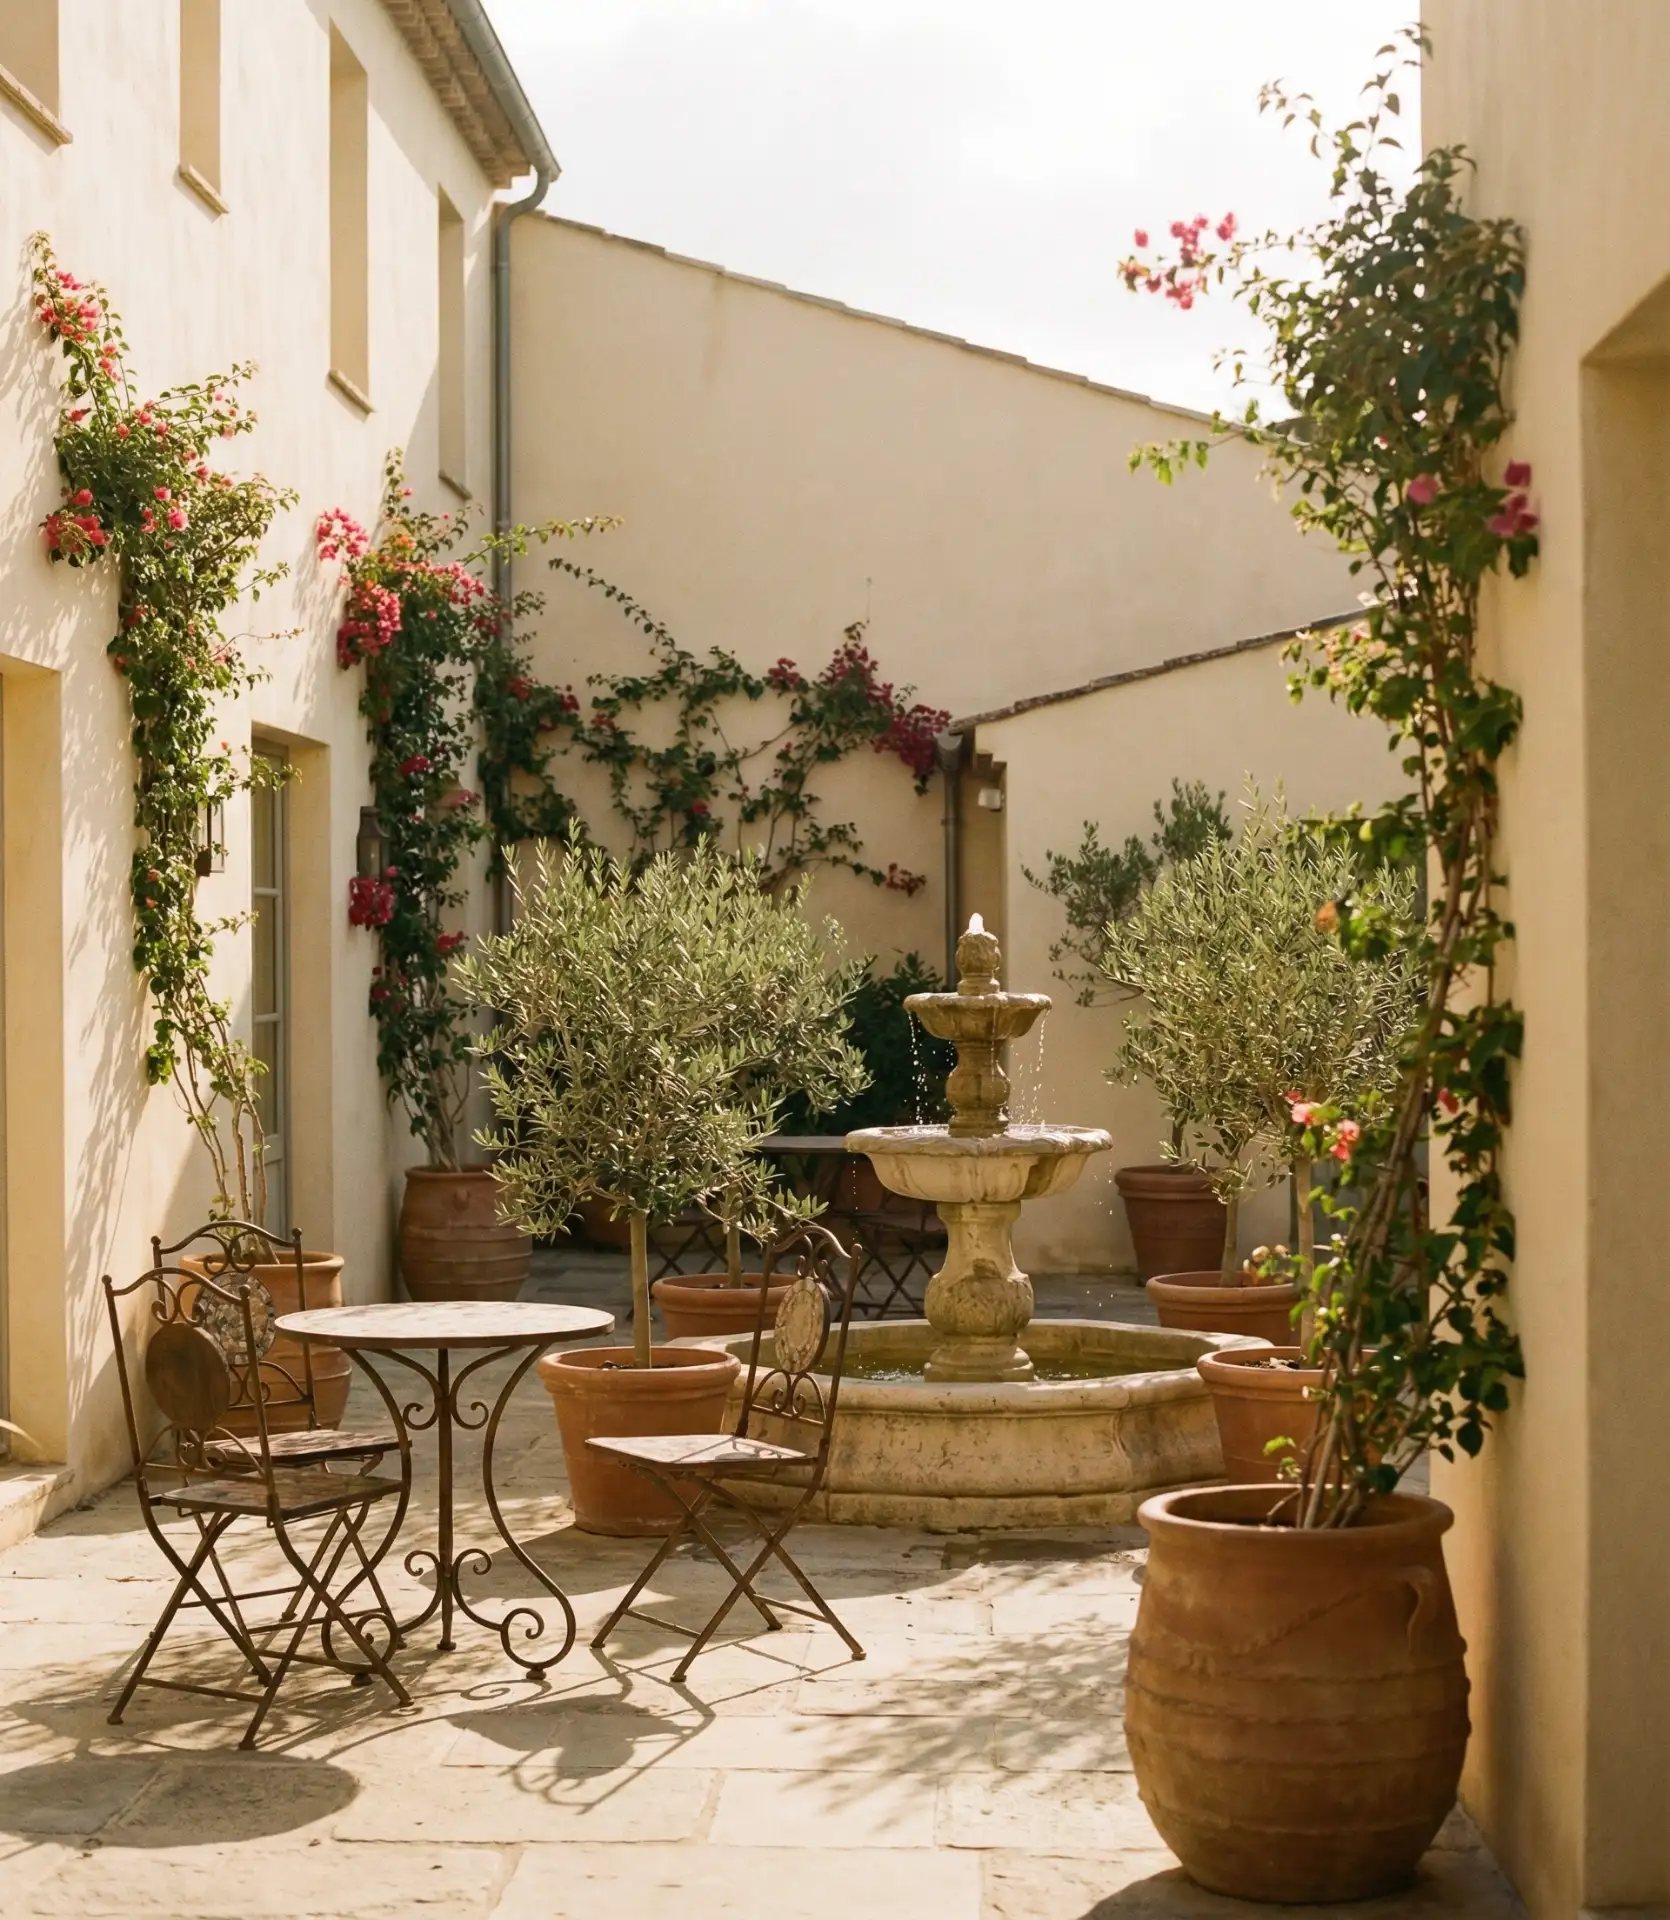
Drawing inspiration from Spanish and Italian villa courtyards, this charming enclosed backyard oasis style centers around a water feature that provides both visual interest and soothing sound. The key components include textured stucco walls (real or simulated with paint techniques), terracotta or saltillo tile flooring, potted citrus trees, and a tiered fountain as the central anchor. The enclosed feeling—even if partially open—creates a microclimate that’s several degrees cooler than surrounding areas and provides excellent wind protection for candles and dining. This approach transforms even small rectangular yards into intentional retreats.

Regional context matters here—this style thrives in arid climates from Southern California through Texas and the Southwest, where the aesthetic aligns with local architecture and climate. The fountain doesn’t require complex plumbing; recirculating pumps run on standard outdoor outlets and use 50-100 gallons of water that cycles continuously. Terra cotta and unglazed ceramic pots dry out quickly, requiring daily watering in summer, but this frequent interaction becomes part of the ritual that makes these spaces feel tended and personal. String lights or lanterns hung at varying heights above the courtyard extend usability into evening hours and create a magical ambiance that feels transported from European destinations.
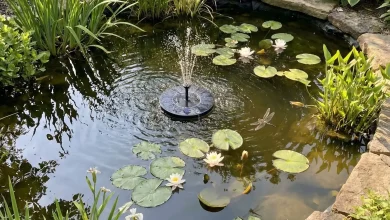
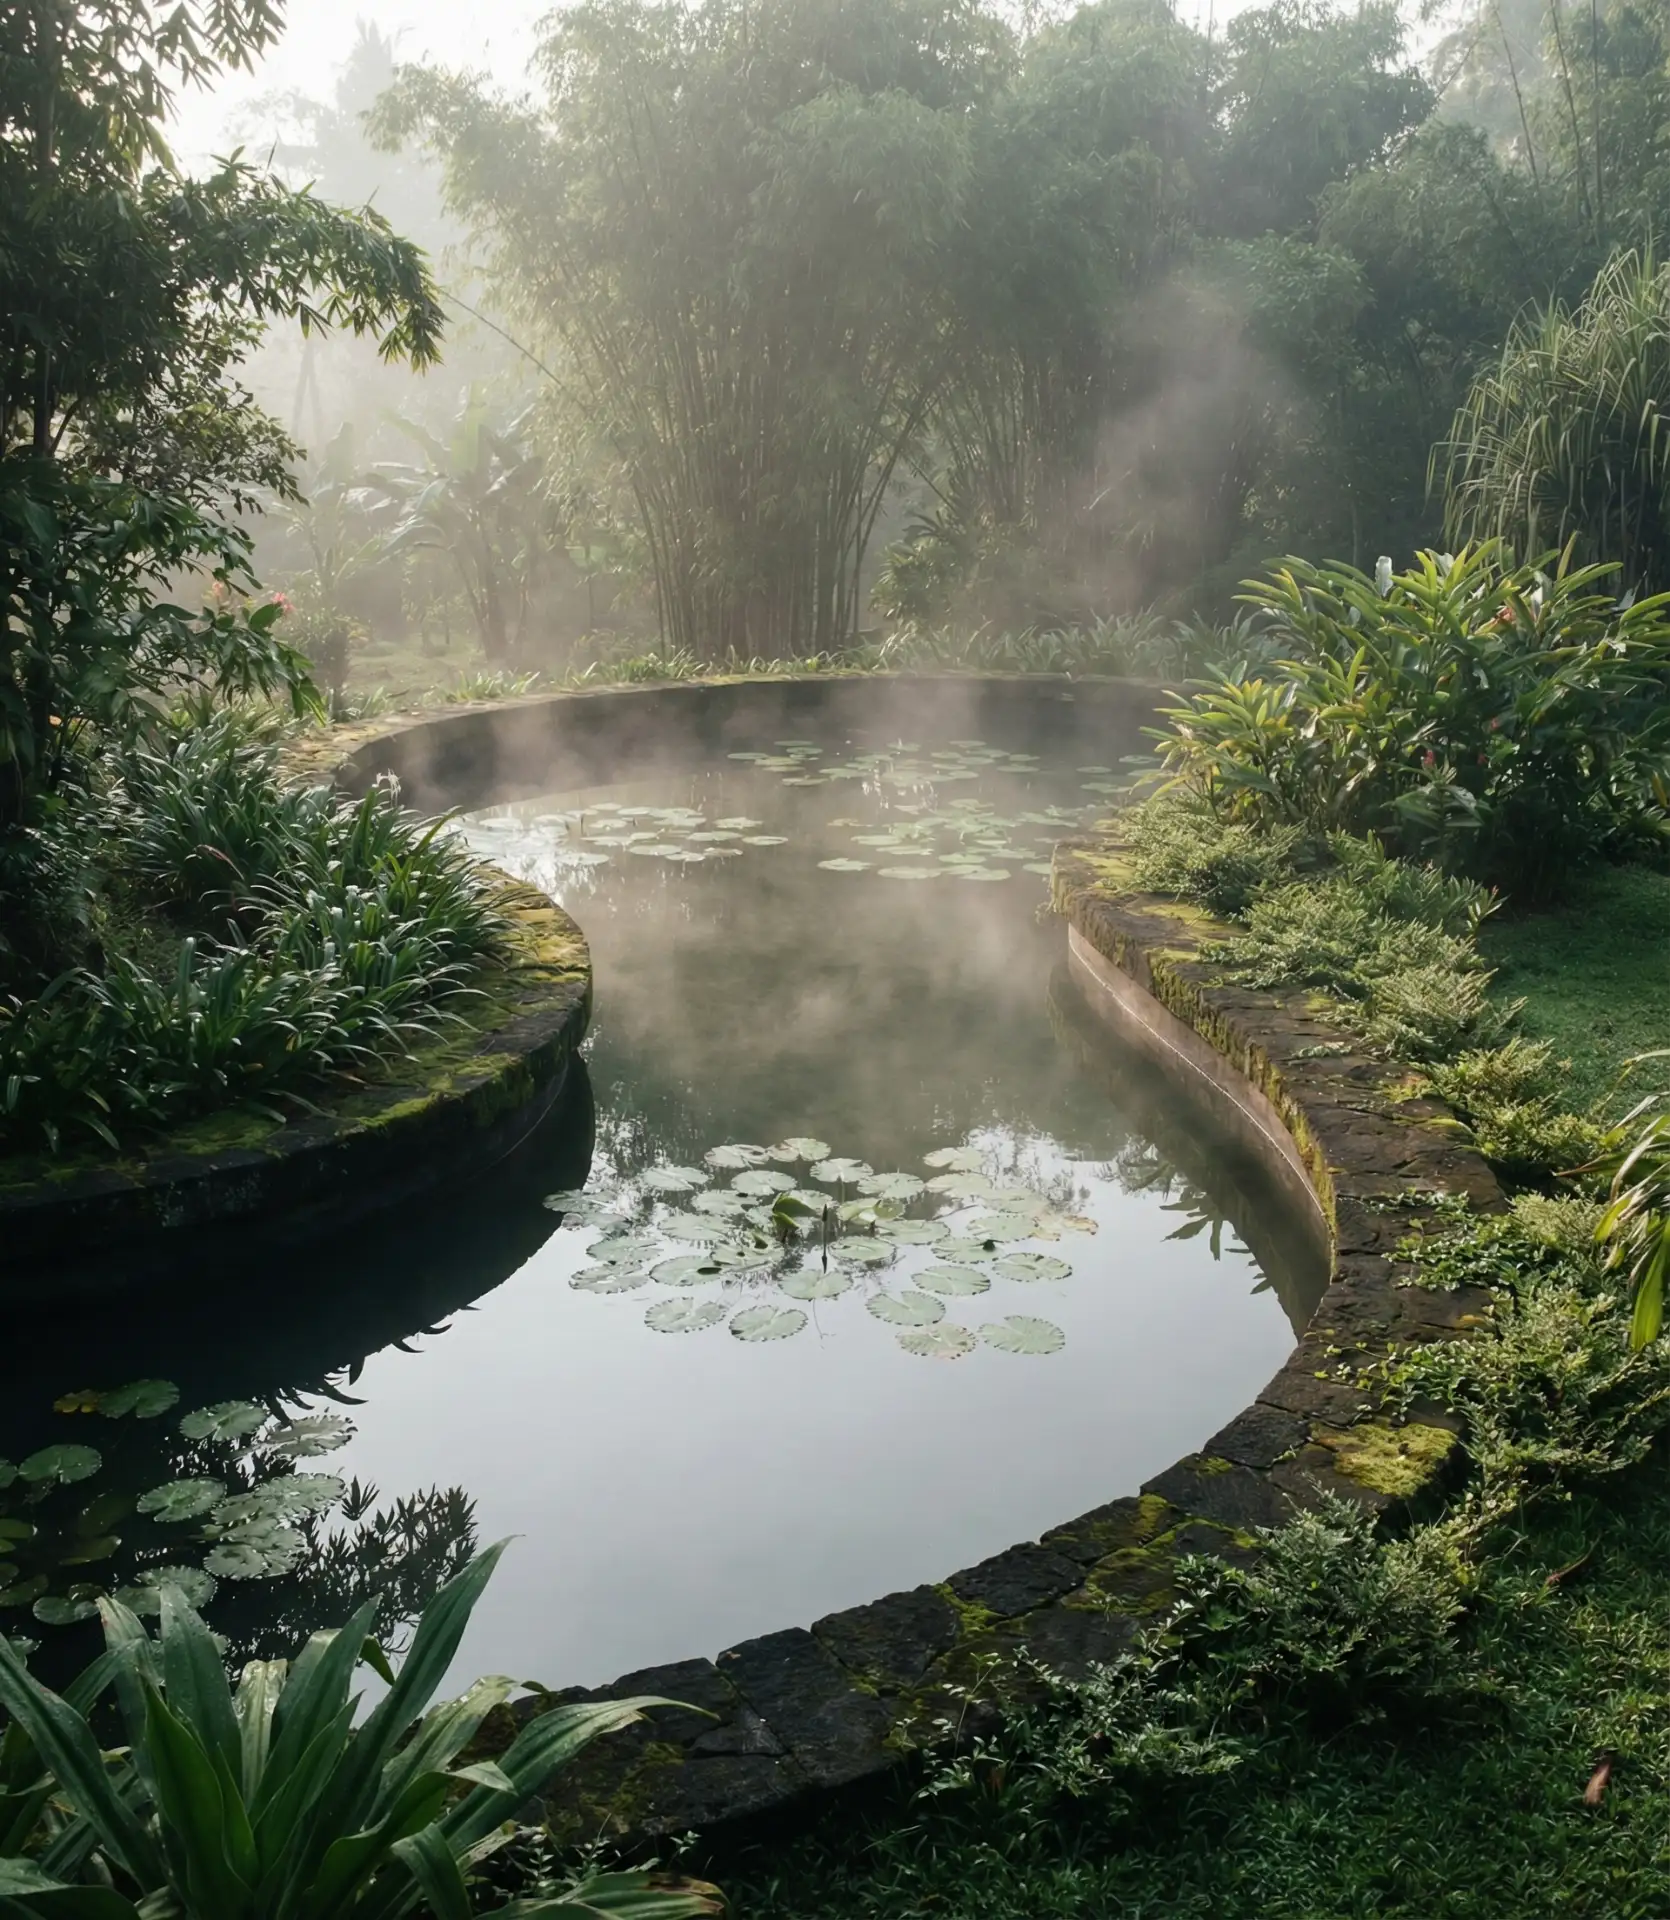
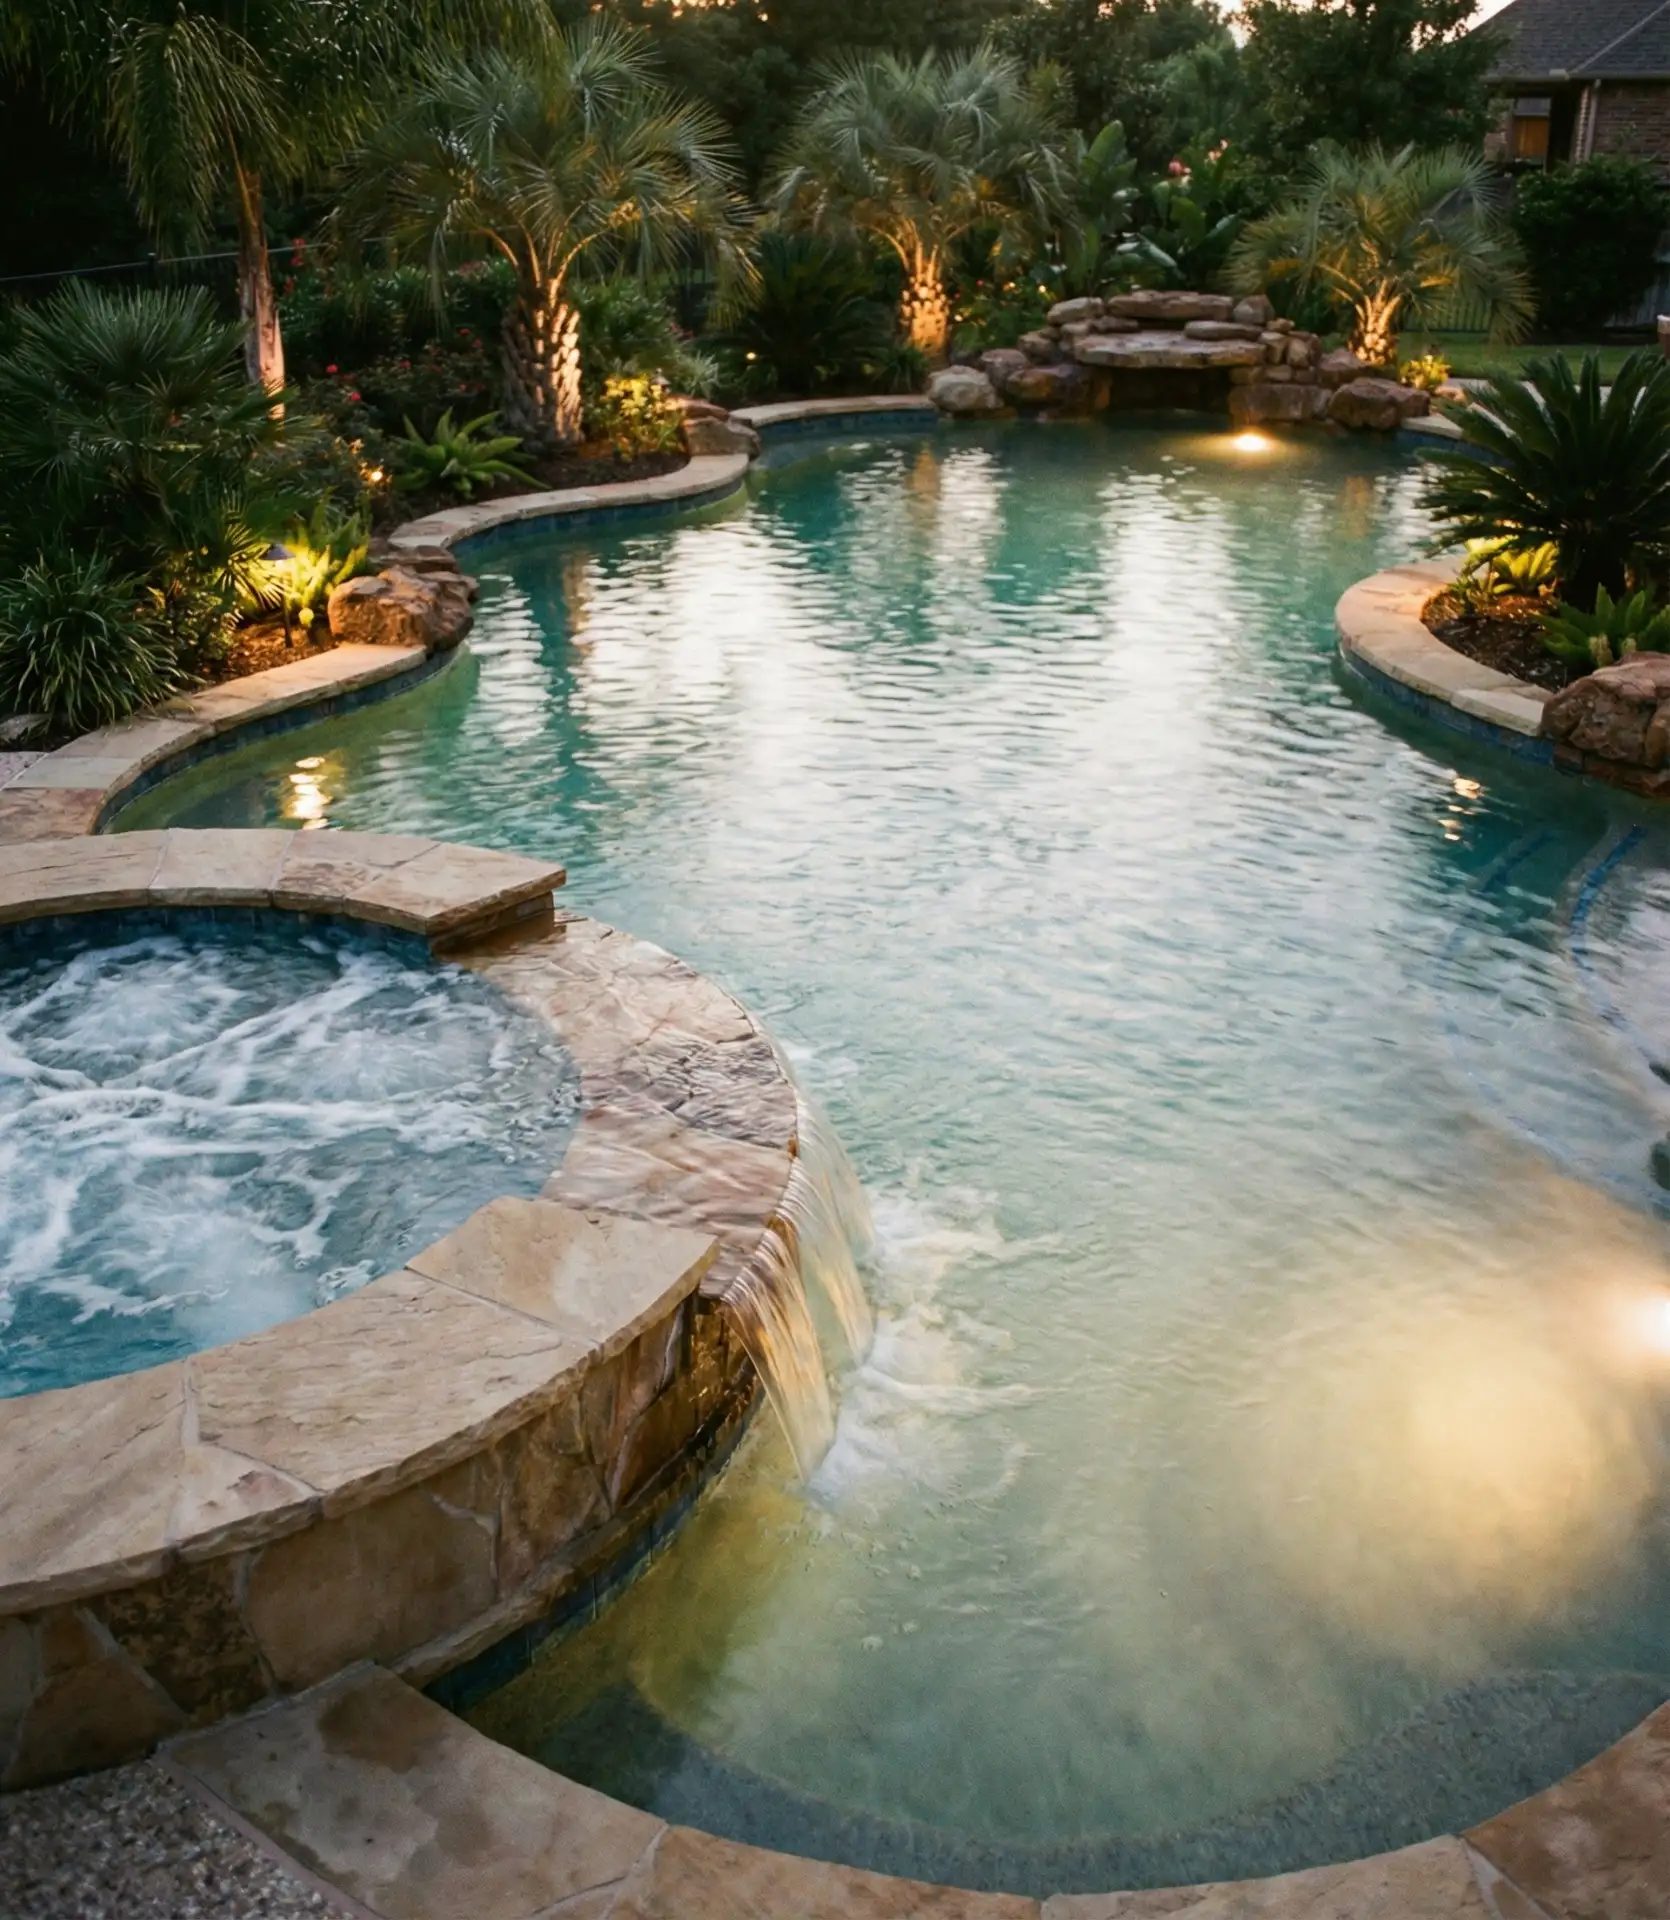
12. Natural Swimming Pond with Regeneration Zone
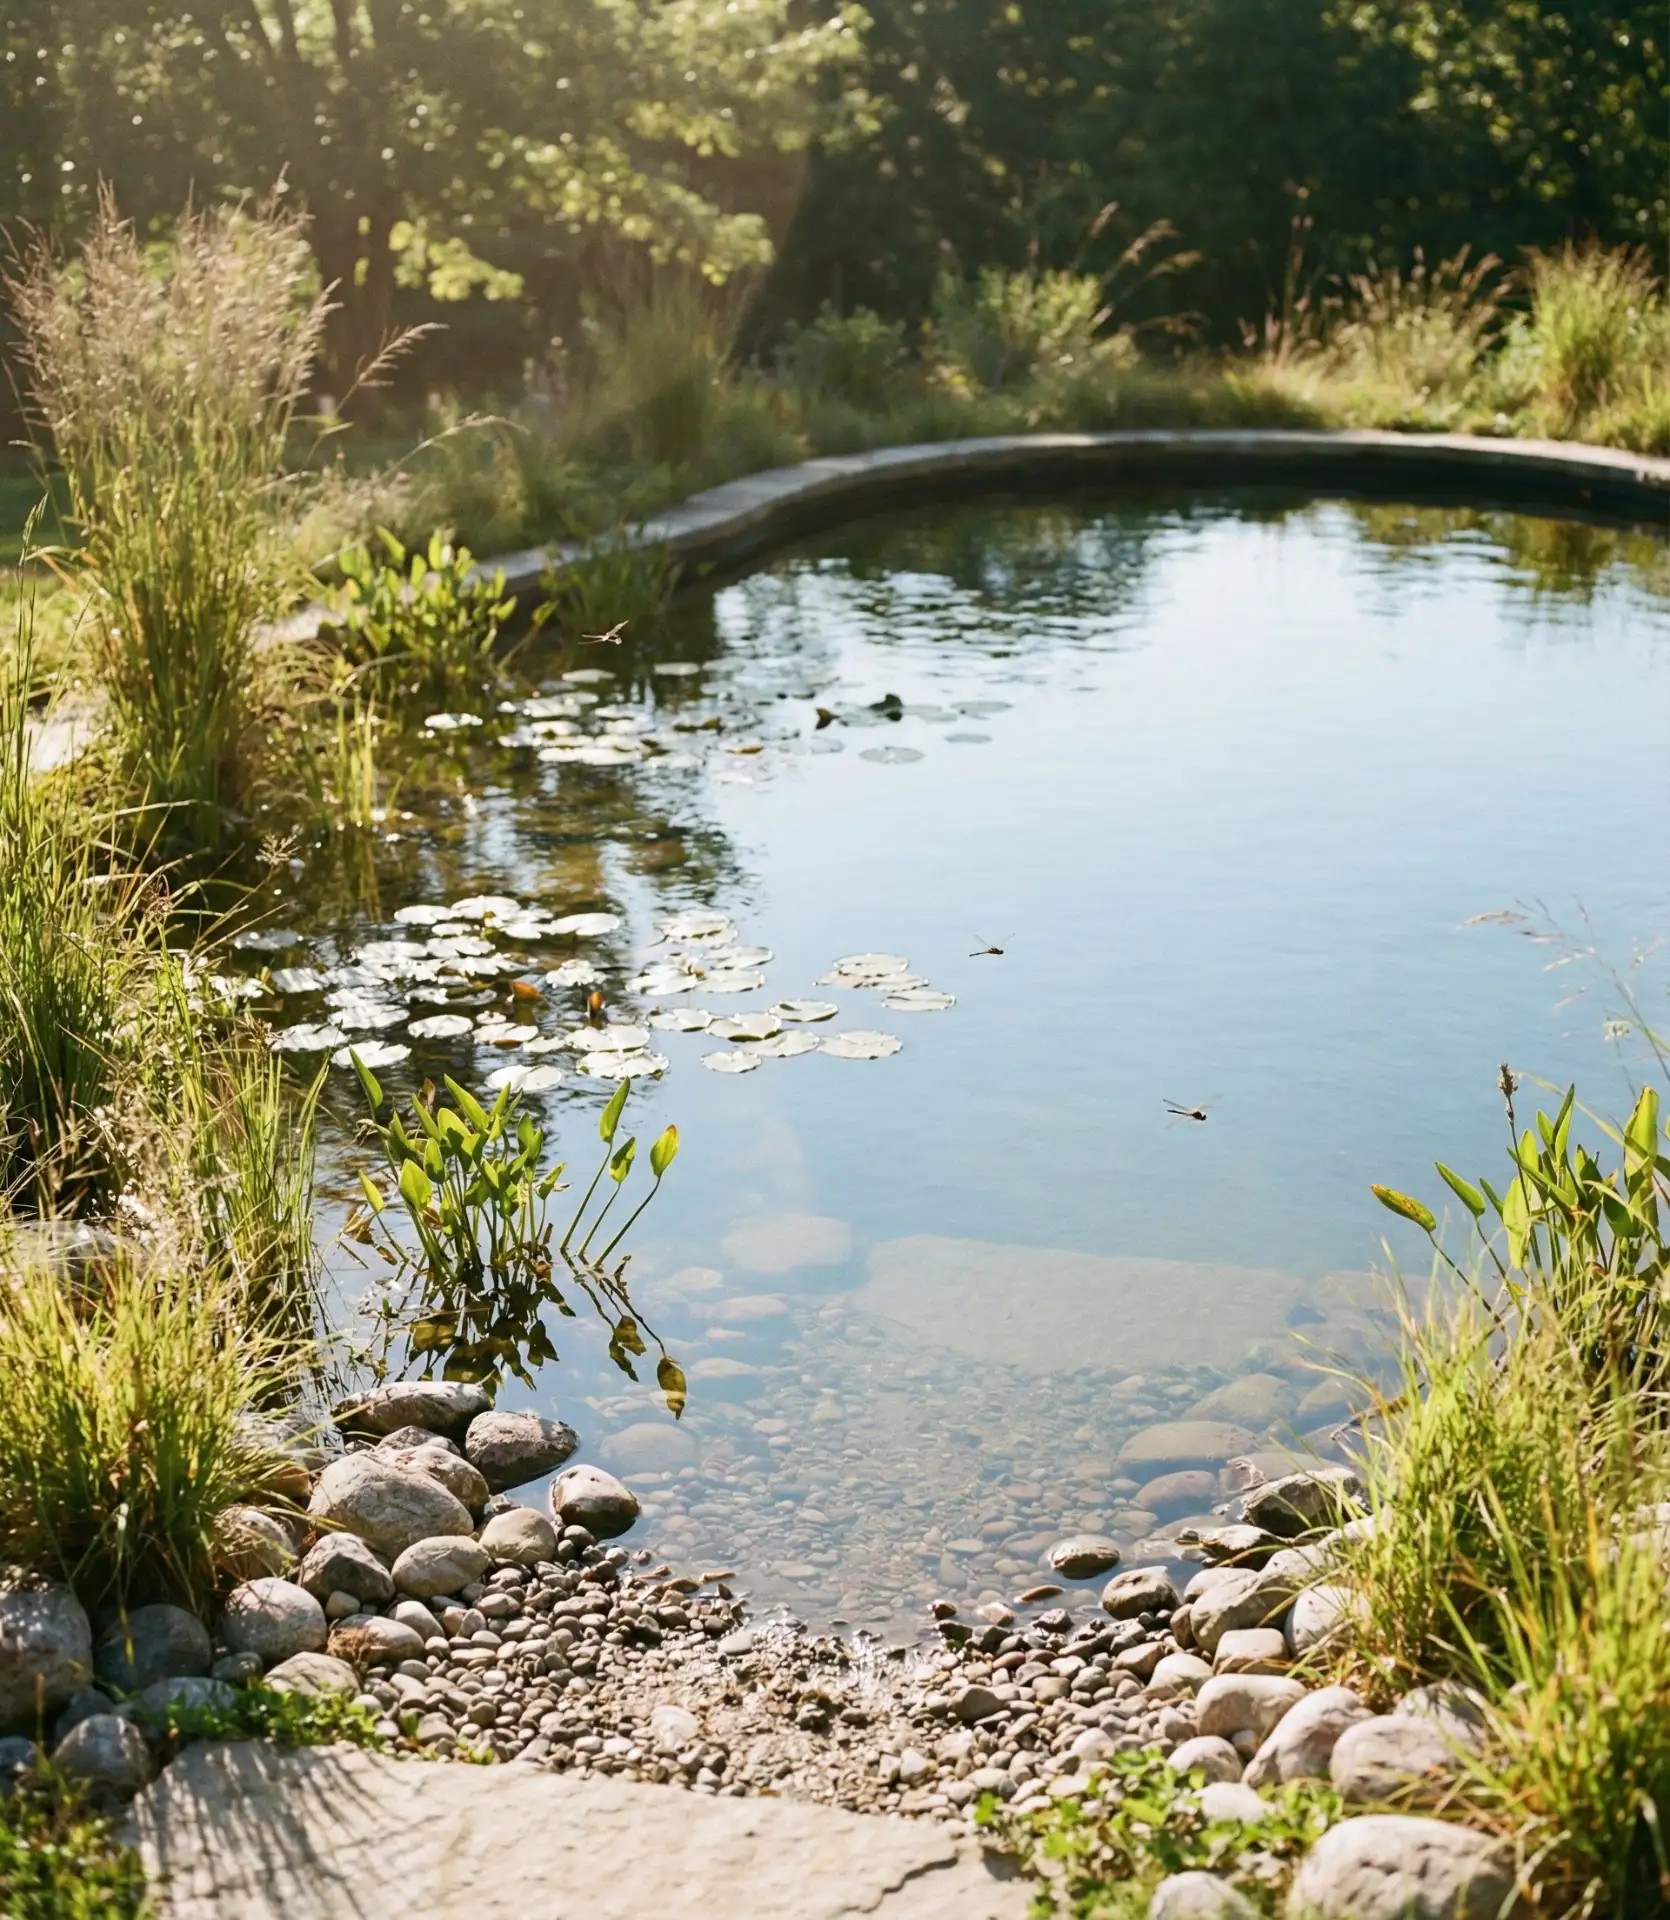
Natural swimming ponds use biological filtration through aquatic plants rather than chemicals, creating a chemical-free swimming environment that looks more like a lagoon pool than a traditional installation. The system divides into two zones: the deeper swimming area and a shallow regeneration zone where water plants filter impurities. Water circulates between zones via submersible pumps, with plants like water lilies, rushes, and submerged oxygenators doing the purification work. The result is crystal-clear water that supports local ecosystems and requires less maintenance than chlorinated pools once established.
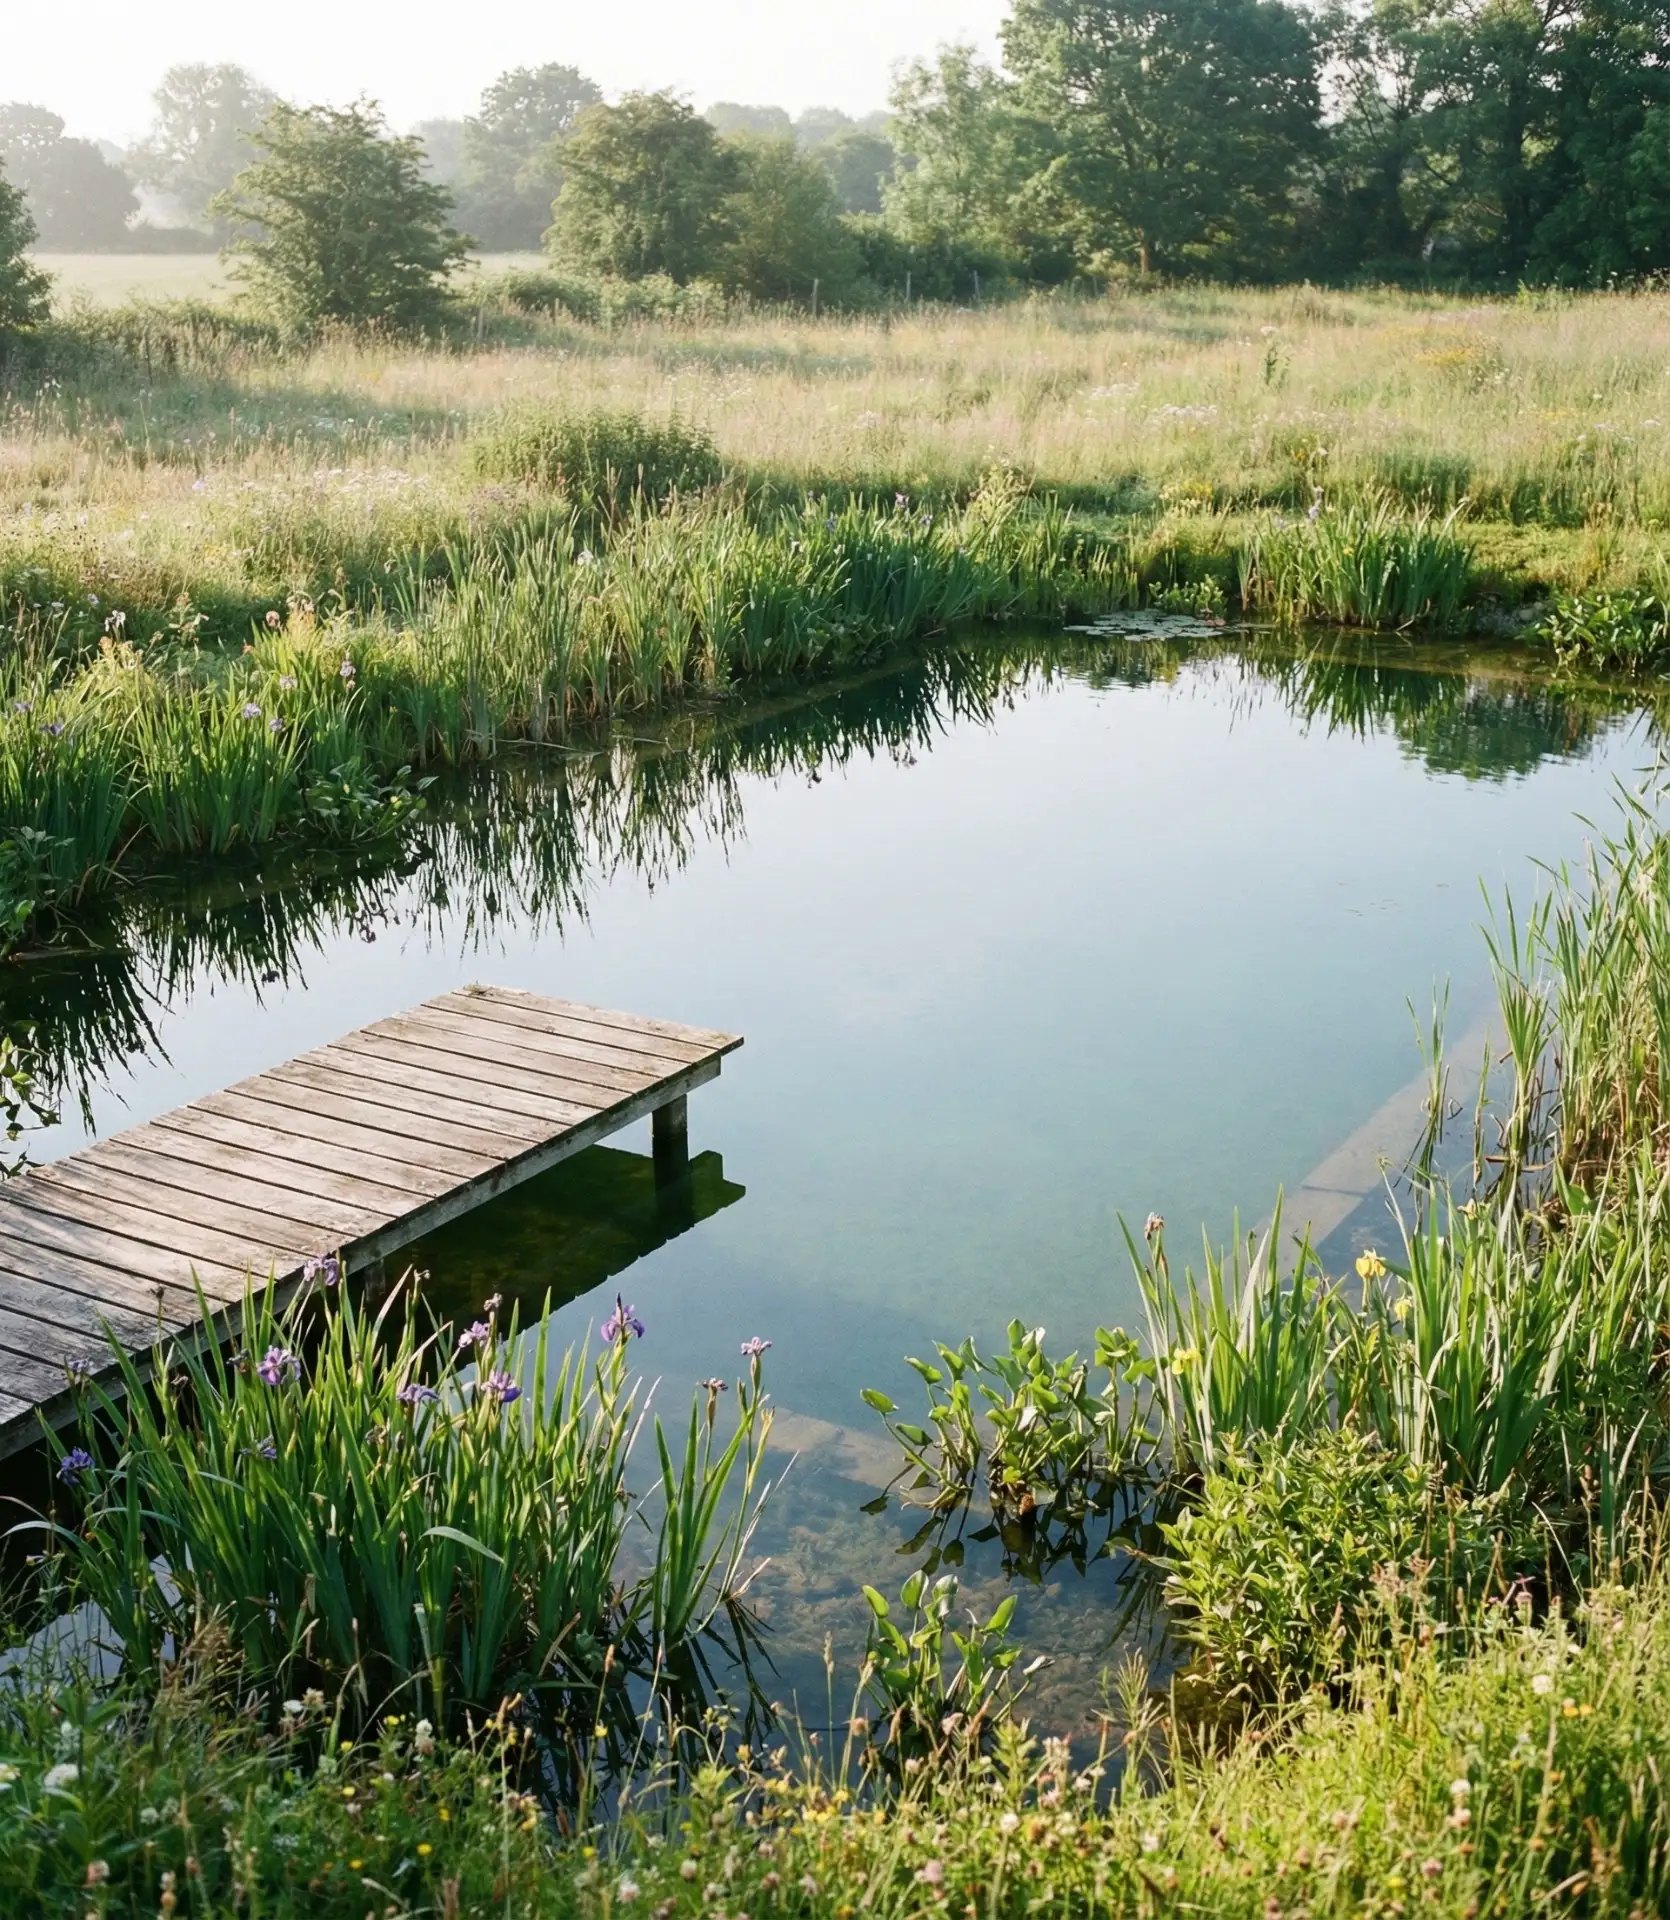
Installation costs run comparable to traditional in-ground pools ($30,000-$60,000), but ongoing costs drop dramatically—no chlorine, fewer chemicals, and lower energy bills. The concept works in any climate where natural ponds function, though northern zones see limited swimming seasons. The biological balance takes 6-12 months to fully establish, so patience is essential in the first year as the plant ecosystem matures. One common mistake is making the regeneration zone too small; you need roughly 50% of the total surface area dedicated to plants for proper filtration. The aesthetic naturally fits properties with naturalistic landscaping but can look out of place next to modern contemporary architecture.
13. Covered Pergola Dining Area
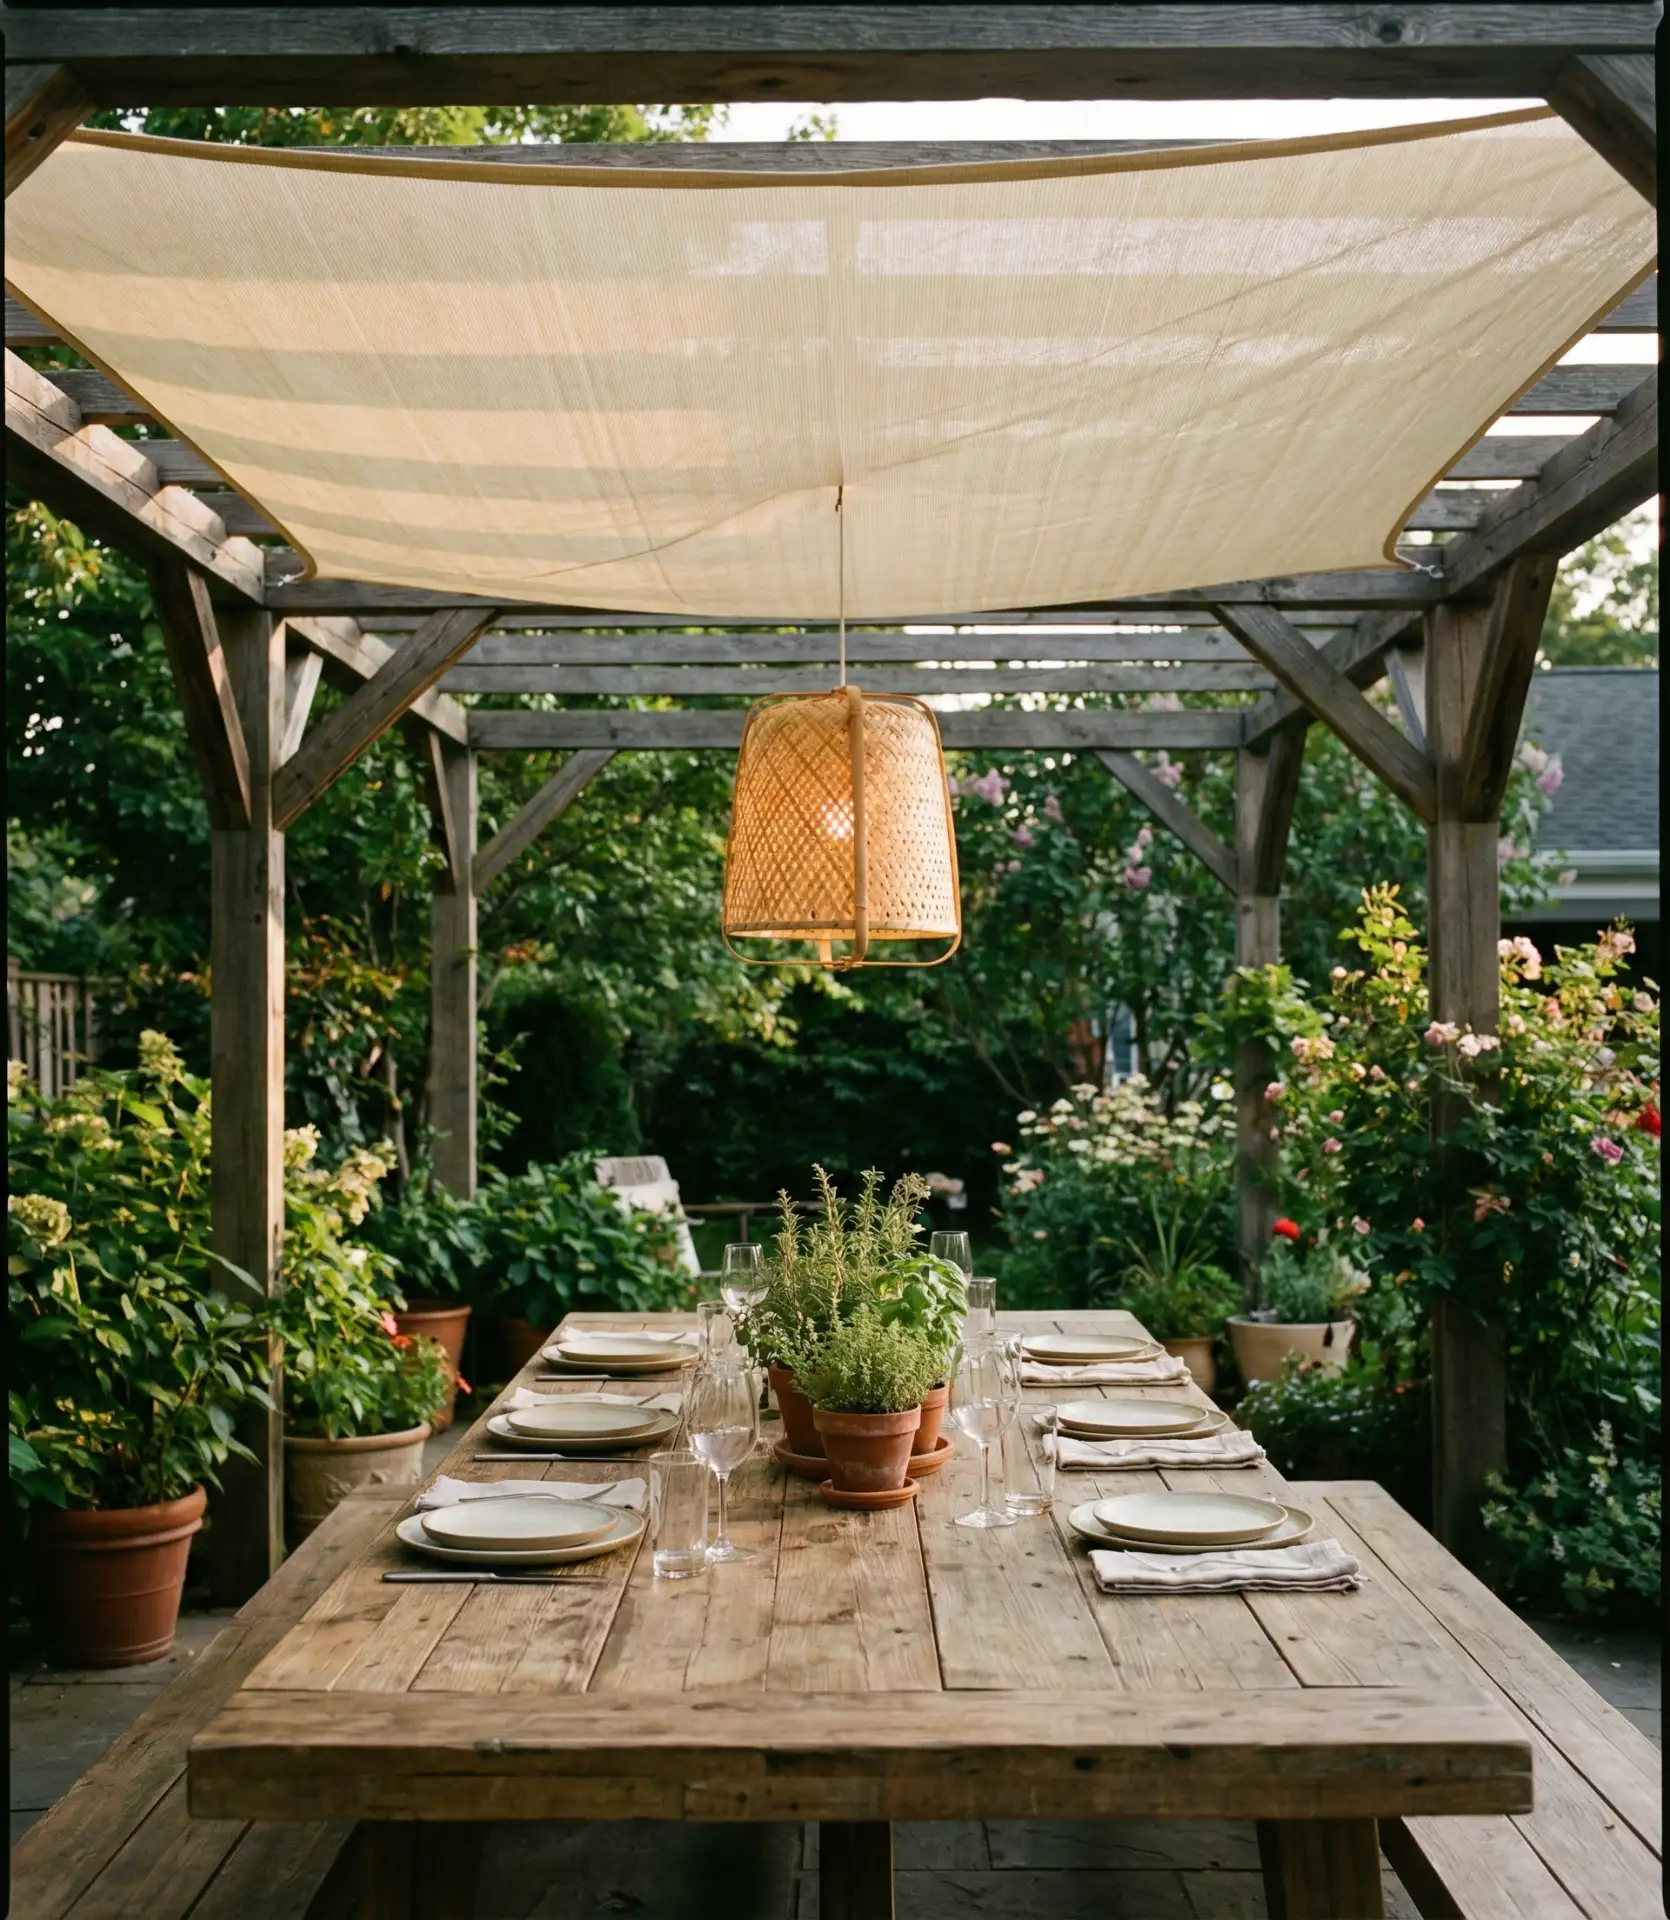
A substantial dining pergola transforms outdoor eating from an occasional novelty to a daily routine by providing shade and defining the space as a genuine outdoor room. The structure typically spans 12×12 or 12×16 feet—large enough for a 6-8 person table with circulation space. Modern prefab kits in cedar, powder-coated aluminum, or vinyl range from $2,000 to $6,000 and can be assembled in a weekend. The outdoor living upgrade comes from thoughtful additions: retractable shade canopies for sun control, string lights or lanterns for evening ambiance, and nearby counter space for serving. This becomes the anchor point that encourages outdoor meal preparation and dining throughout warm months.
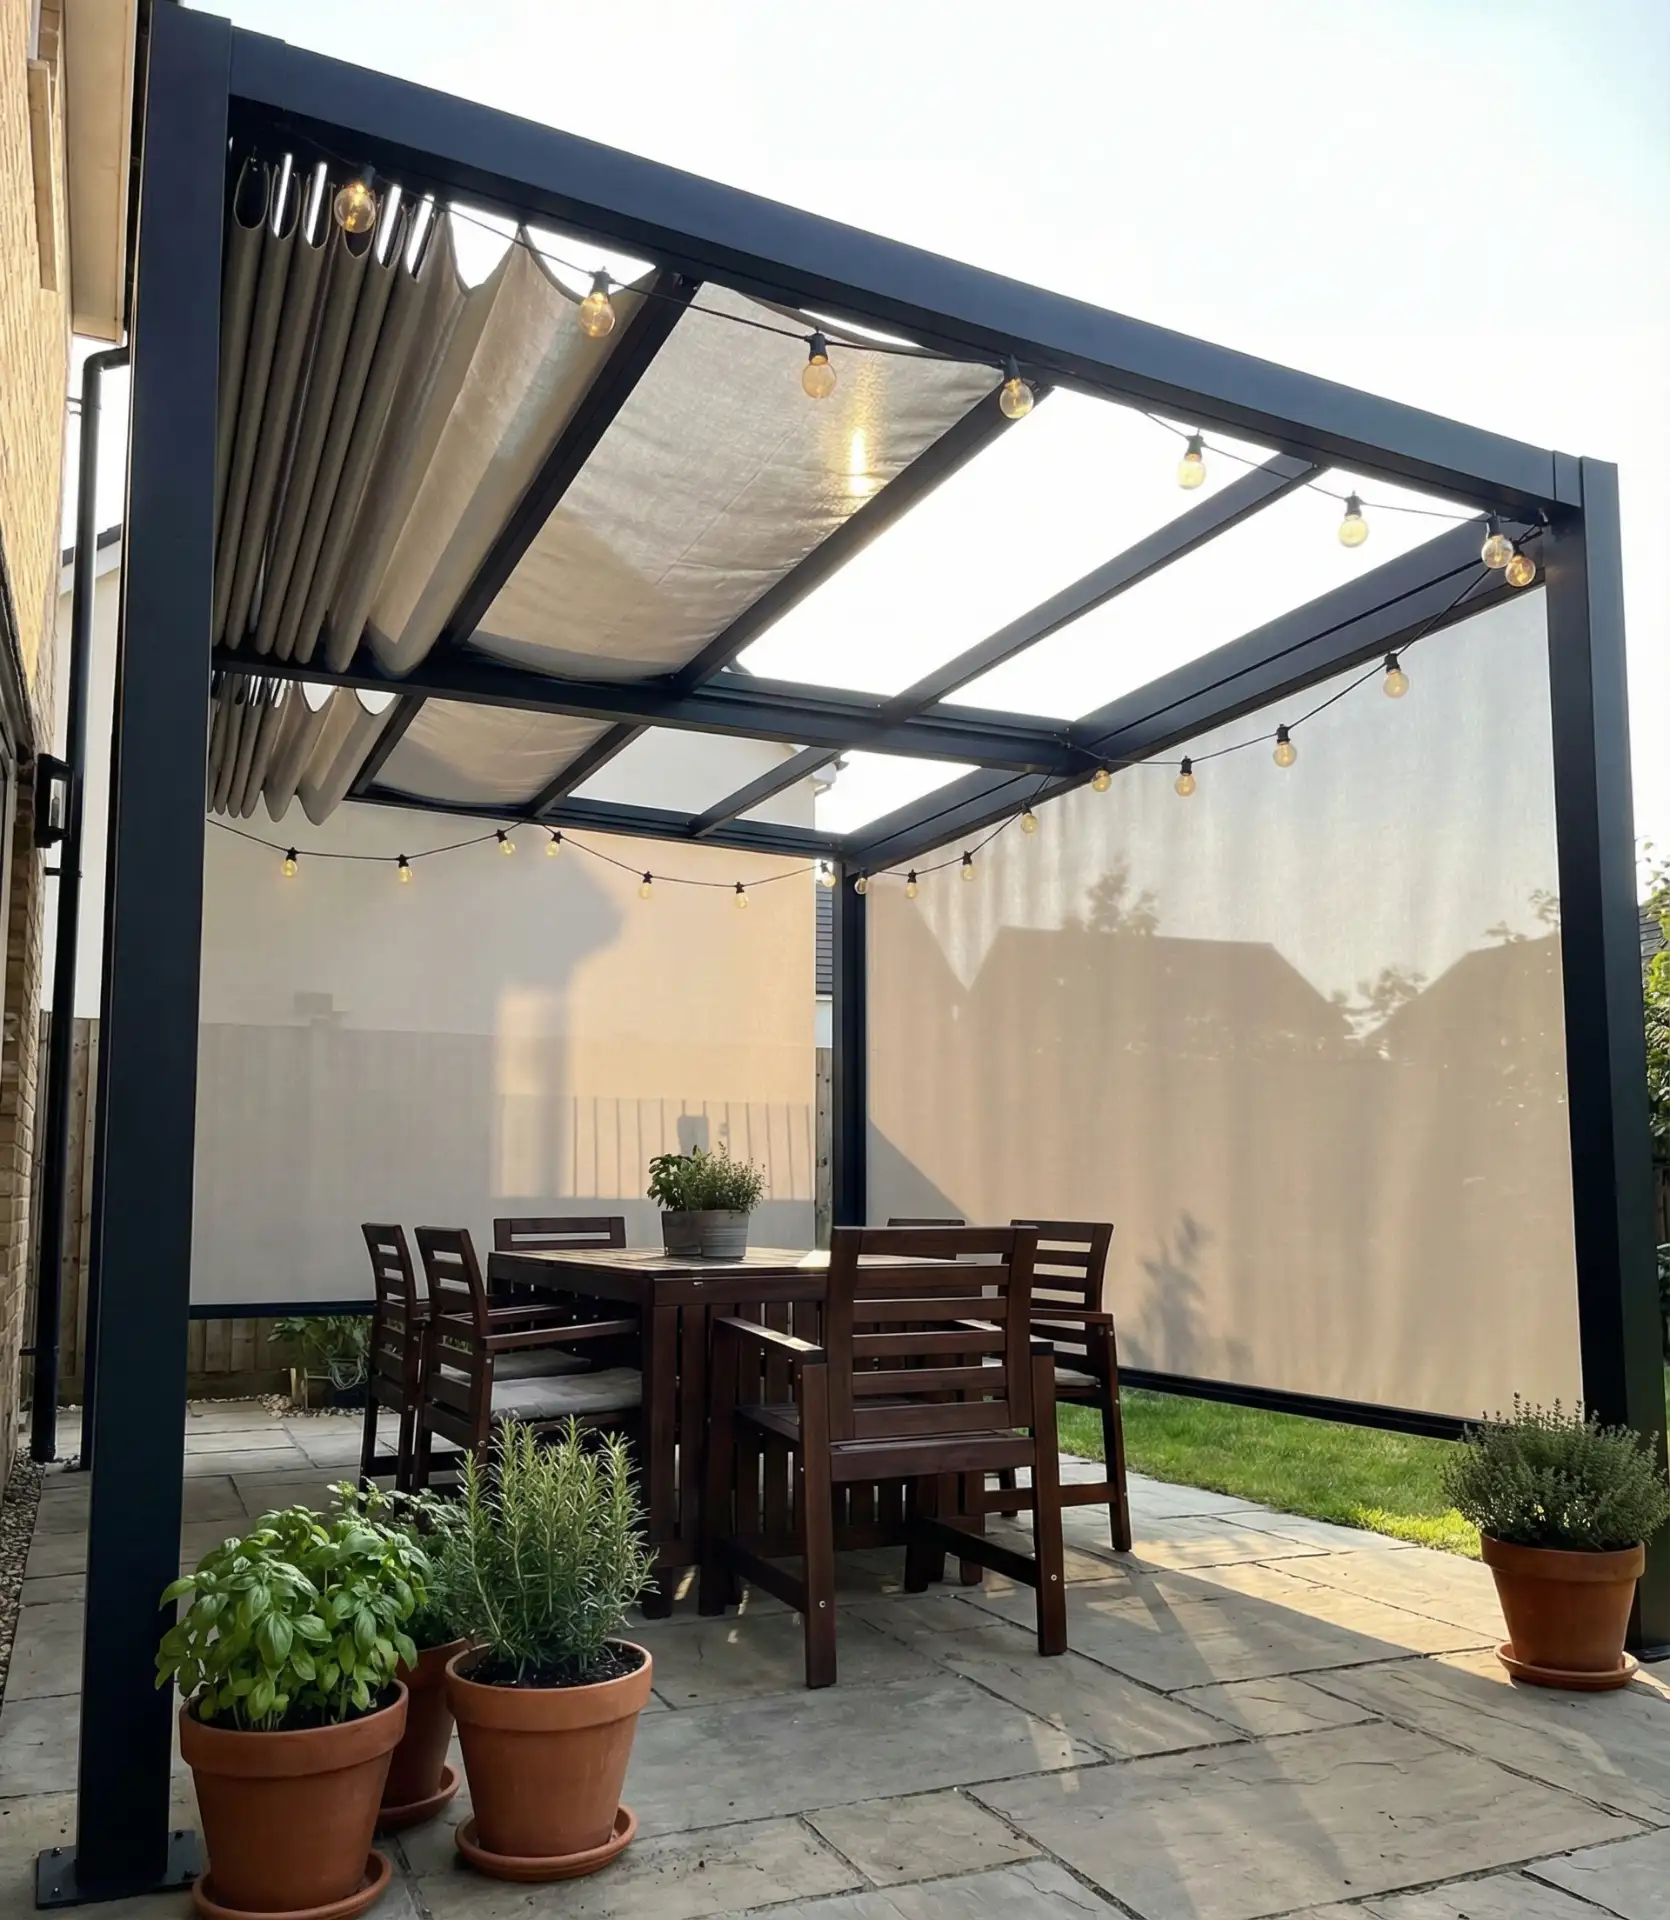
Homeowners in regions with intense summer sun—Southwest states, Southern California, and Texas—find that pergolas without additional shade coverage don’t provide adequate relief during midday heat. Adding a retractable canopy, shade cloth, or growing climbing vines over the top makes the difference between a structure that’s usable only morning and evening versus all-day functionality. The solid roof pergolas (sometimes called pavilions) offer better weather protection but require more substantial footings and framing to meet building codes for wind and snow loads. Position the structure strategically relative to your kitchen door—the 15-30 foot distance to the house determines whether you’ll actually use it regularly or find the trek too inconvenient.
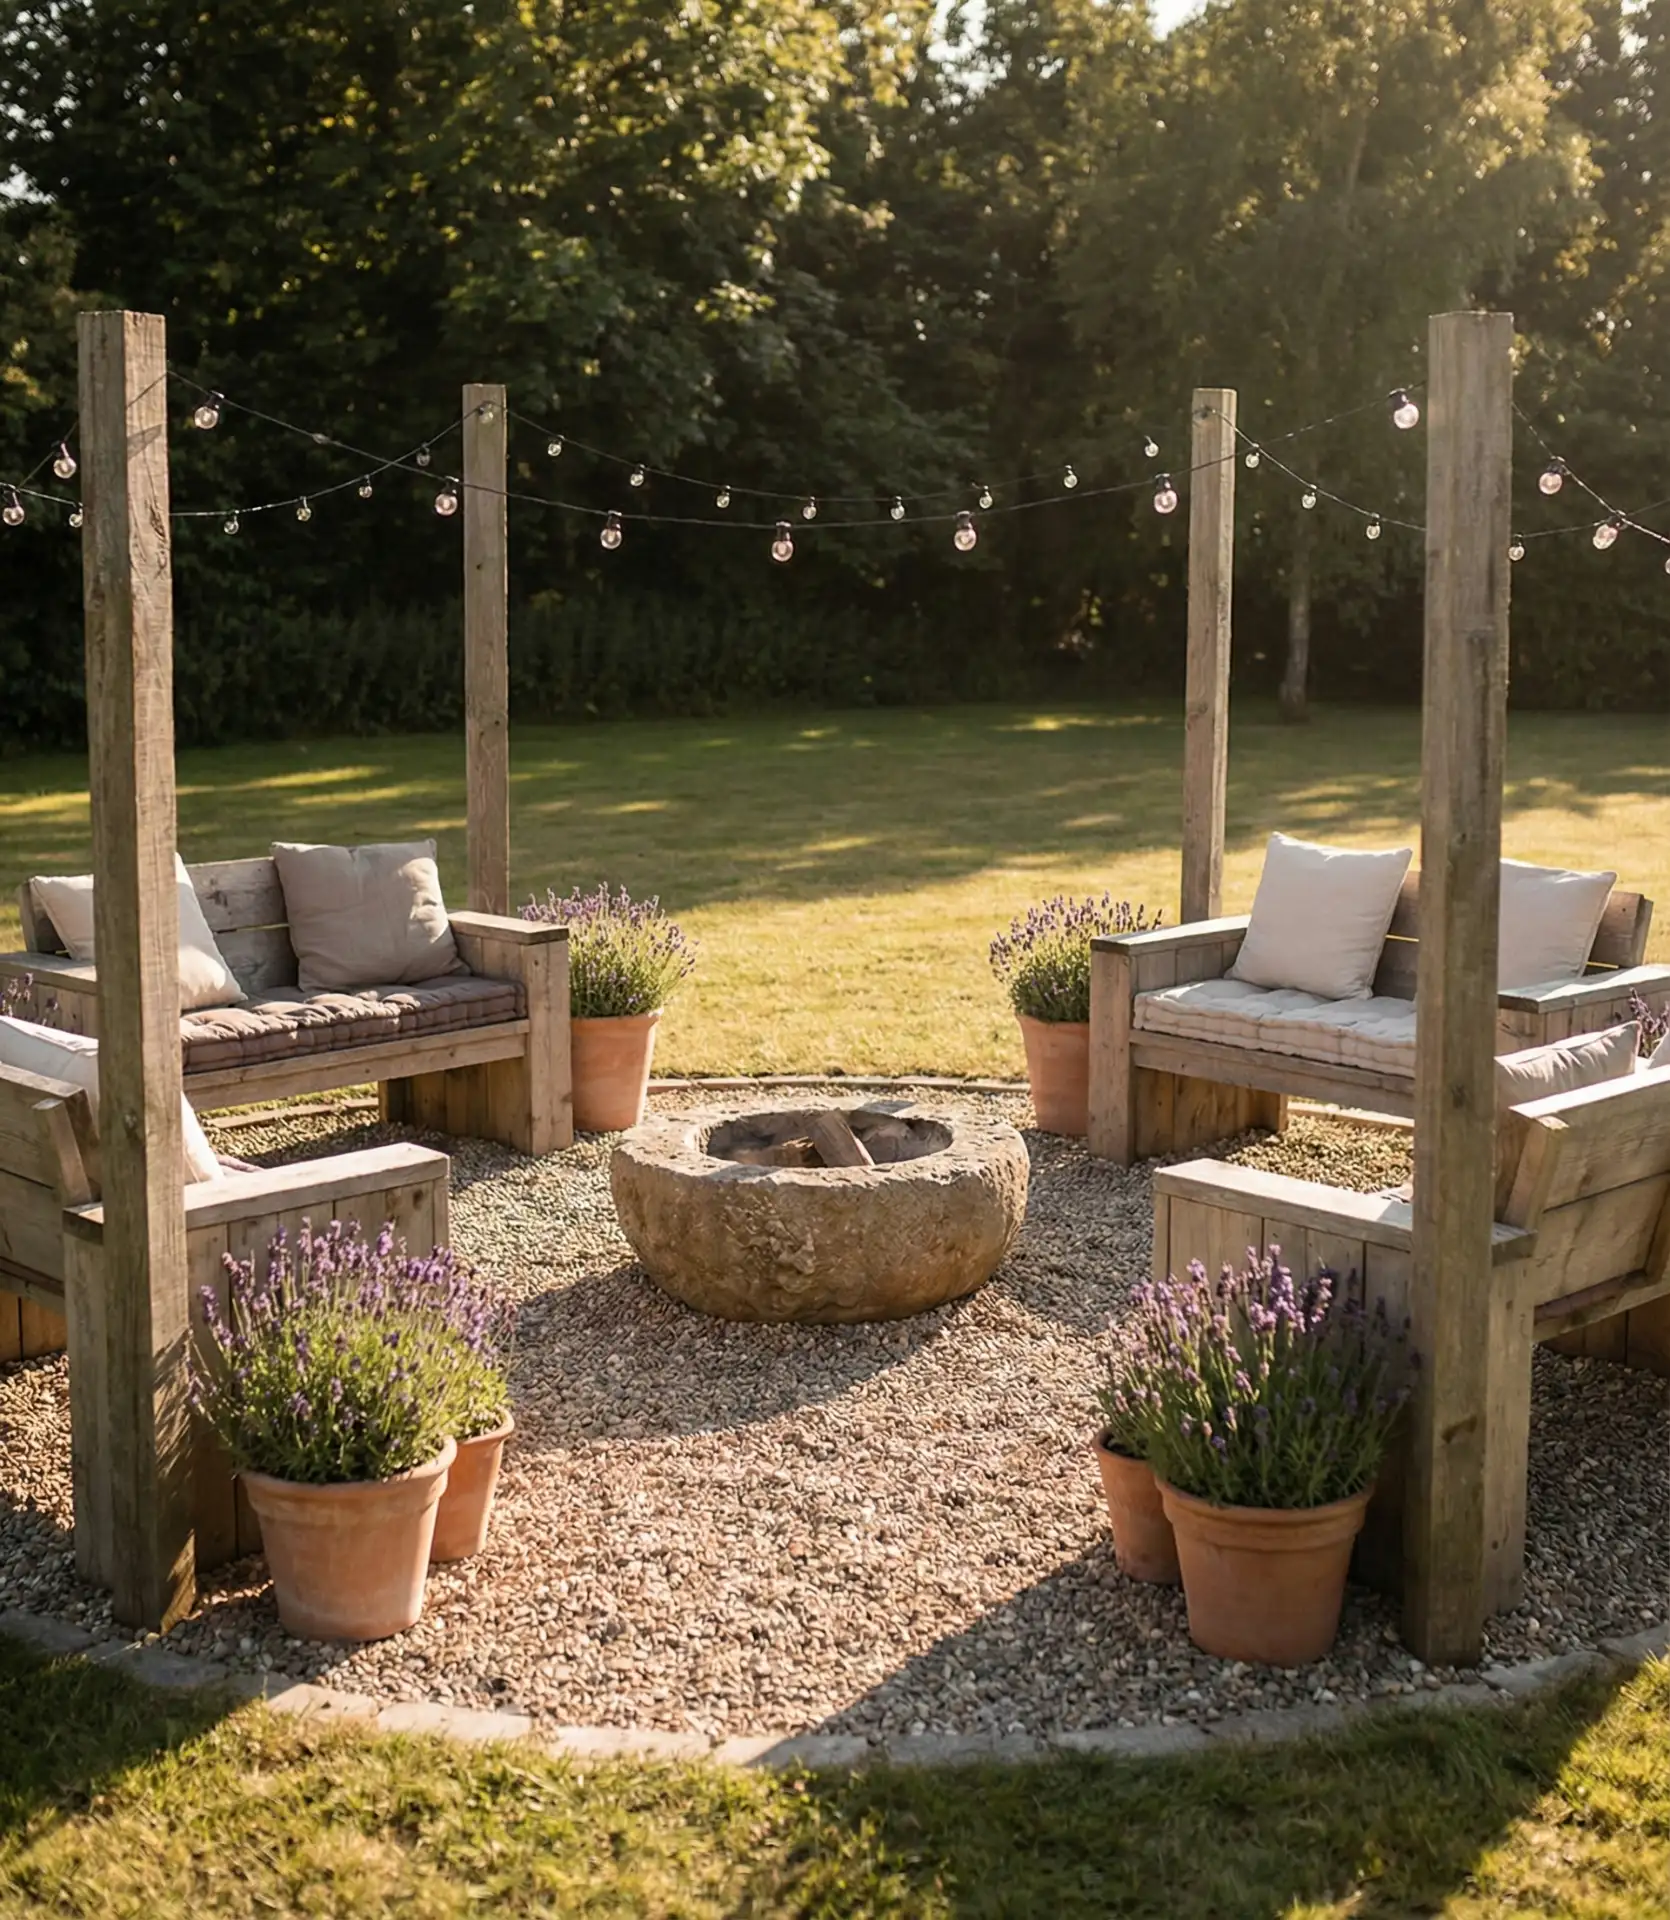
14. Fire Pit Lounge with Built-In Seating
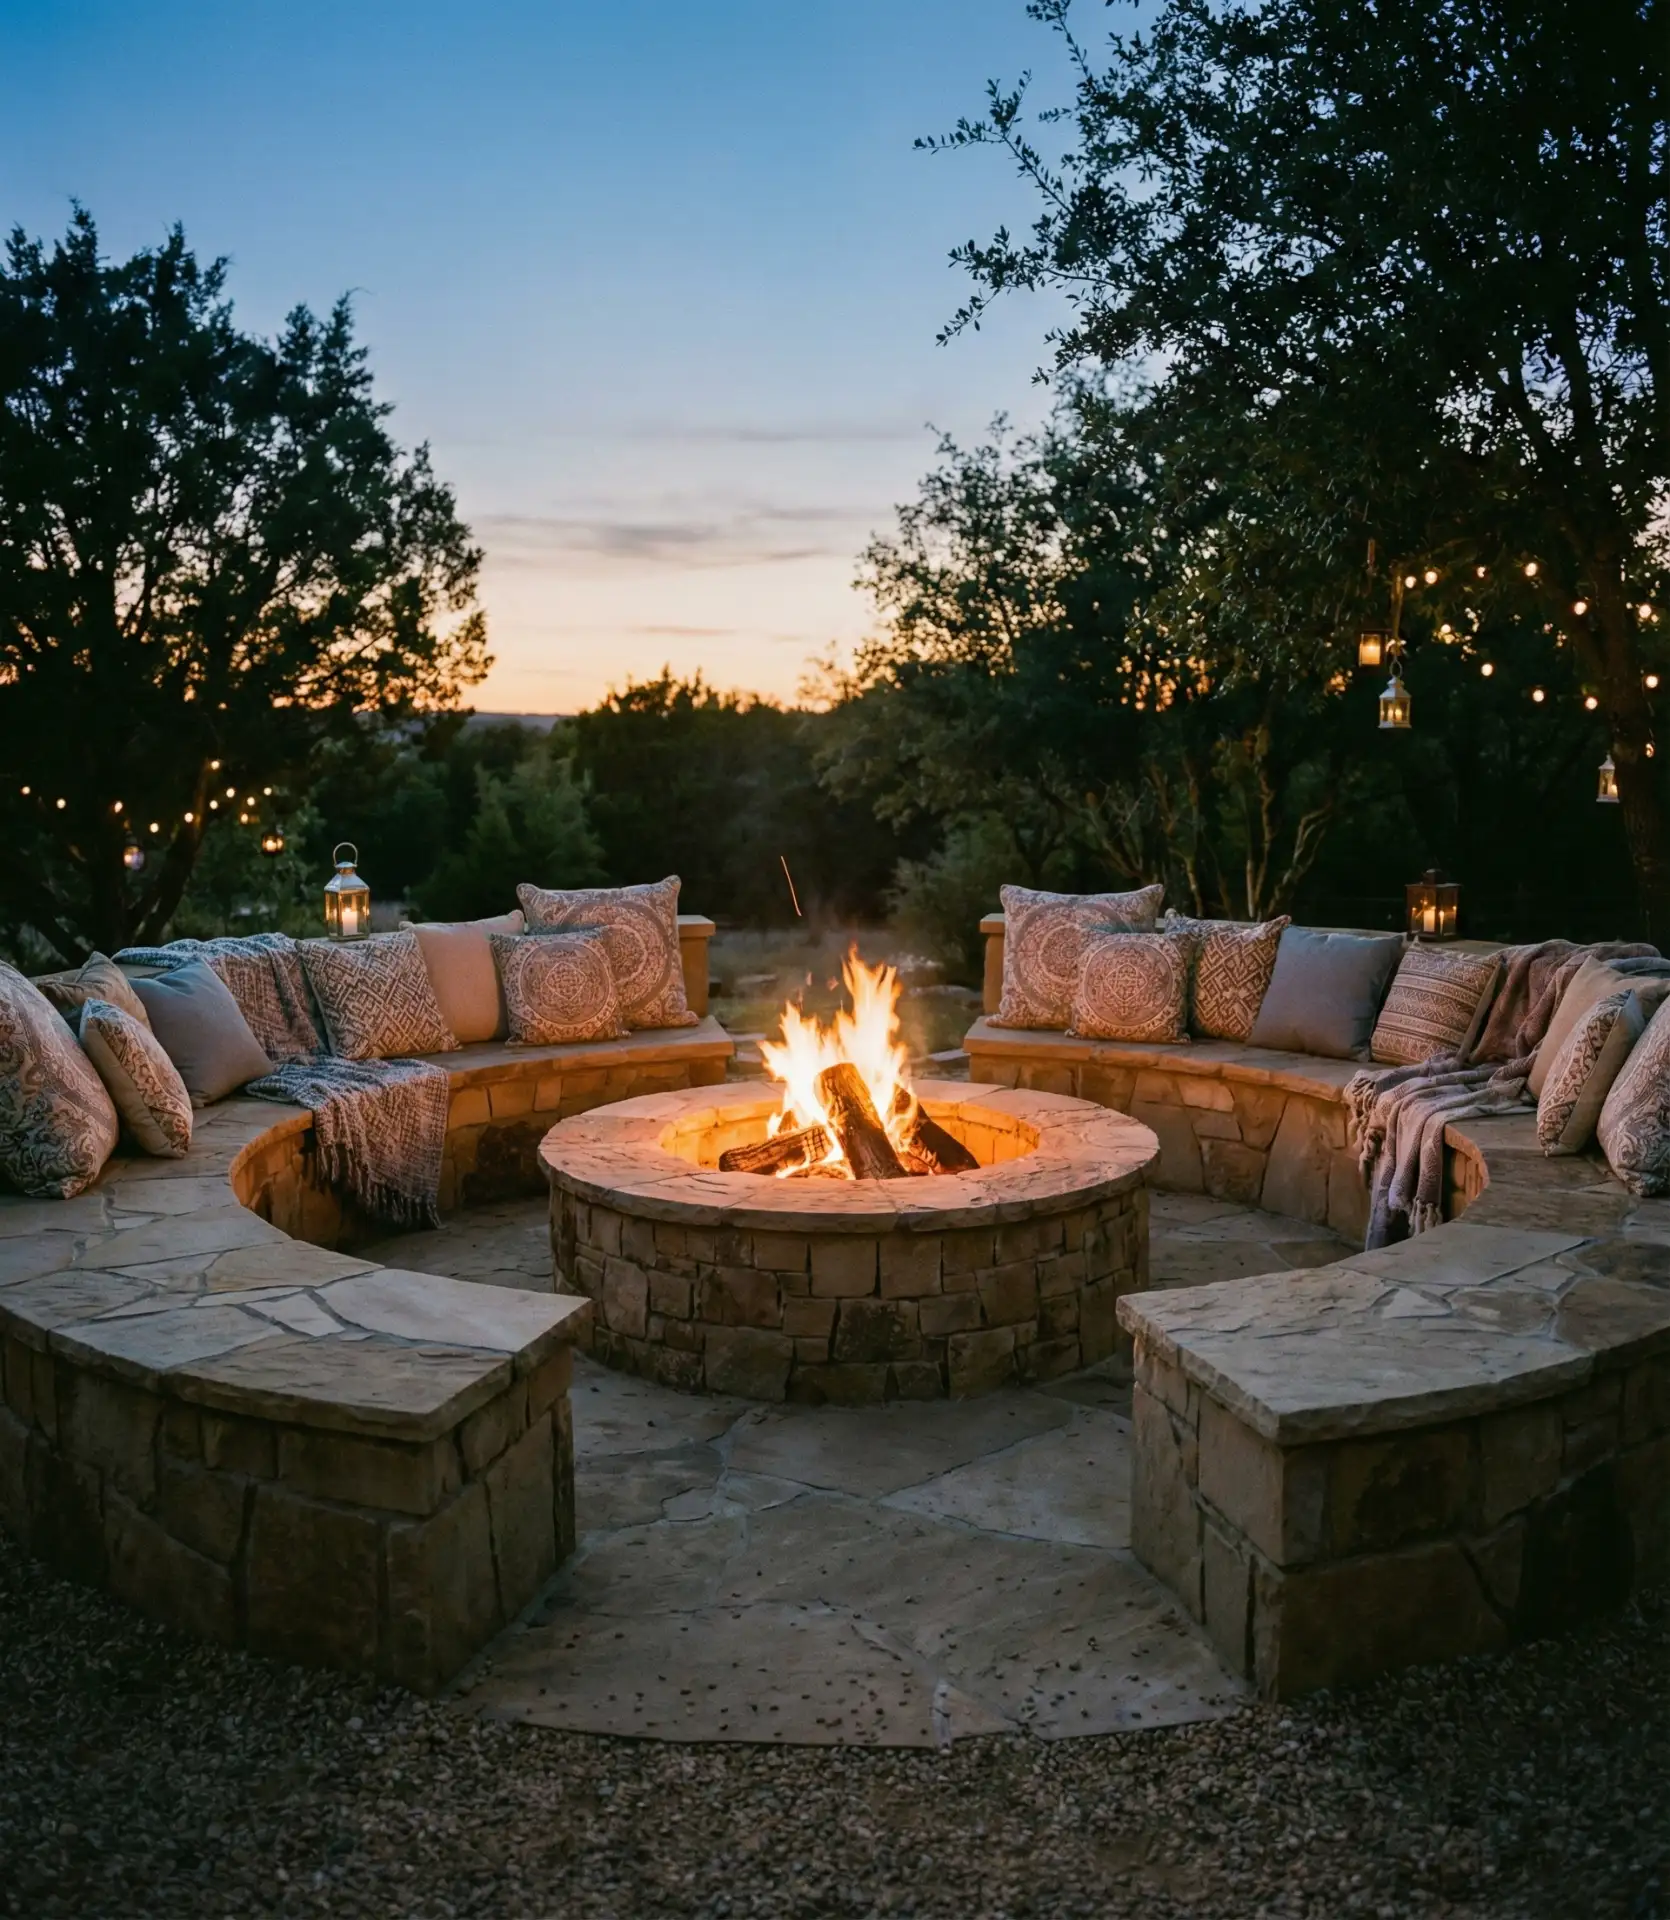
Creating a dedicated conversation zone around a fire feature encourages the gathering behavior that makes backyard oasis ideas actually function for socializing. Built-in seating formed from stacked stone, concrete block, or poured concrete eliminates the furniture-shuffling that happens with loose chairs and defines the space with architectural permanence. The ideal configuration positions seating 3-4 feet from the fire pit rim in a circular or squared arrangement, with seat heights at 16-18 inches and backs at 30-36 inches for comfort during extended conversations. Capstones on the seat walls provide flat surfaces for drinks and plates, increasing functionality.
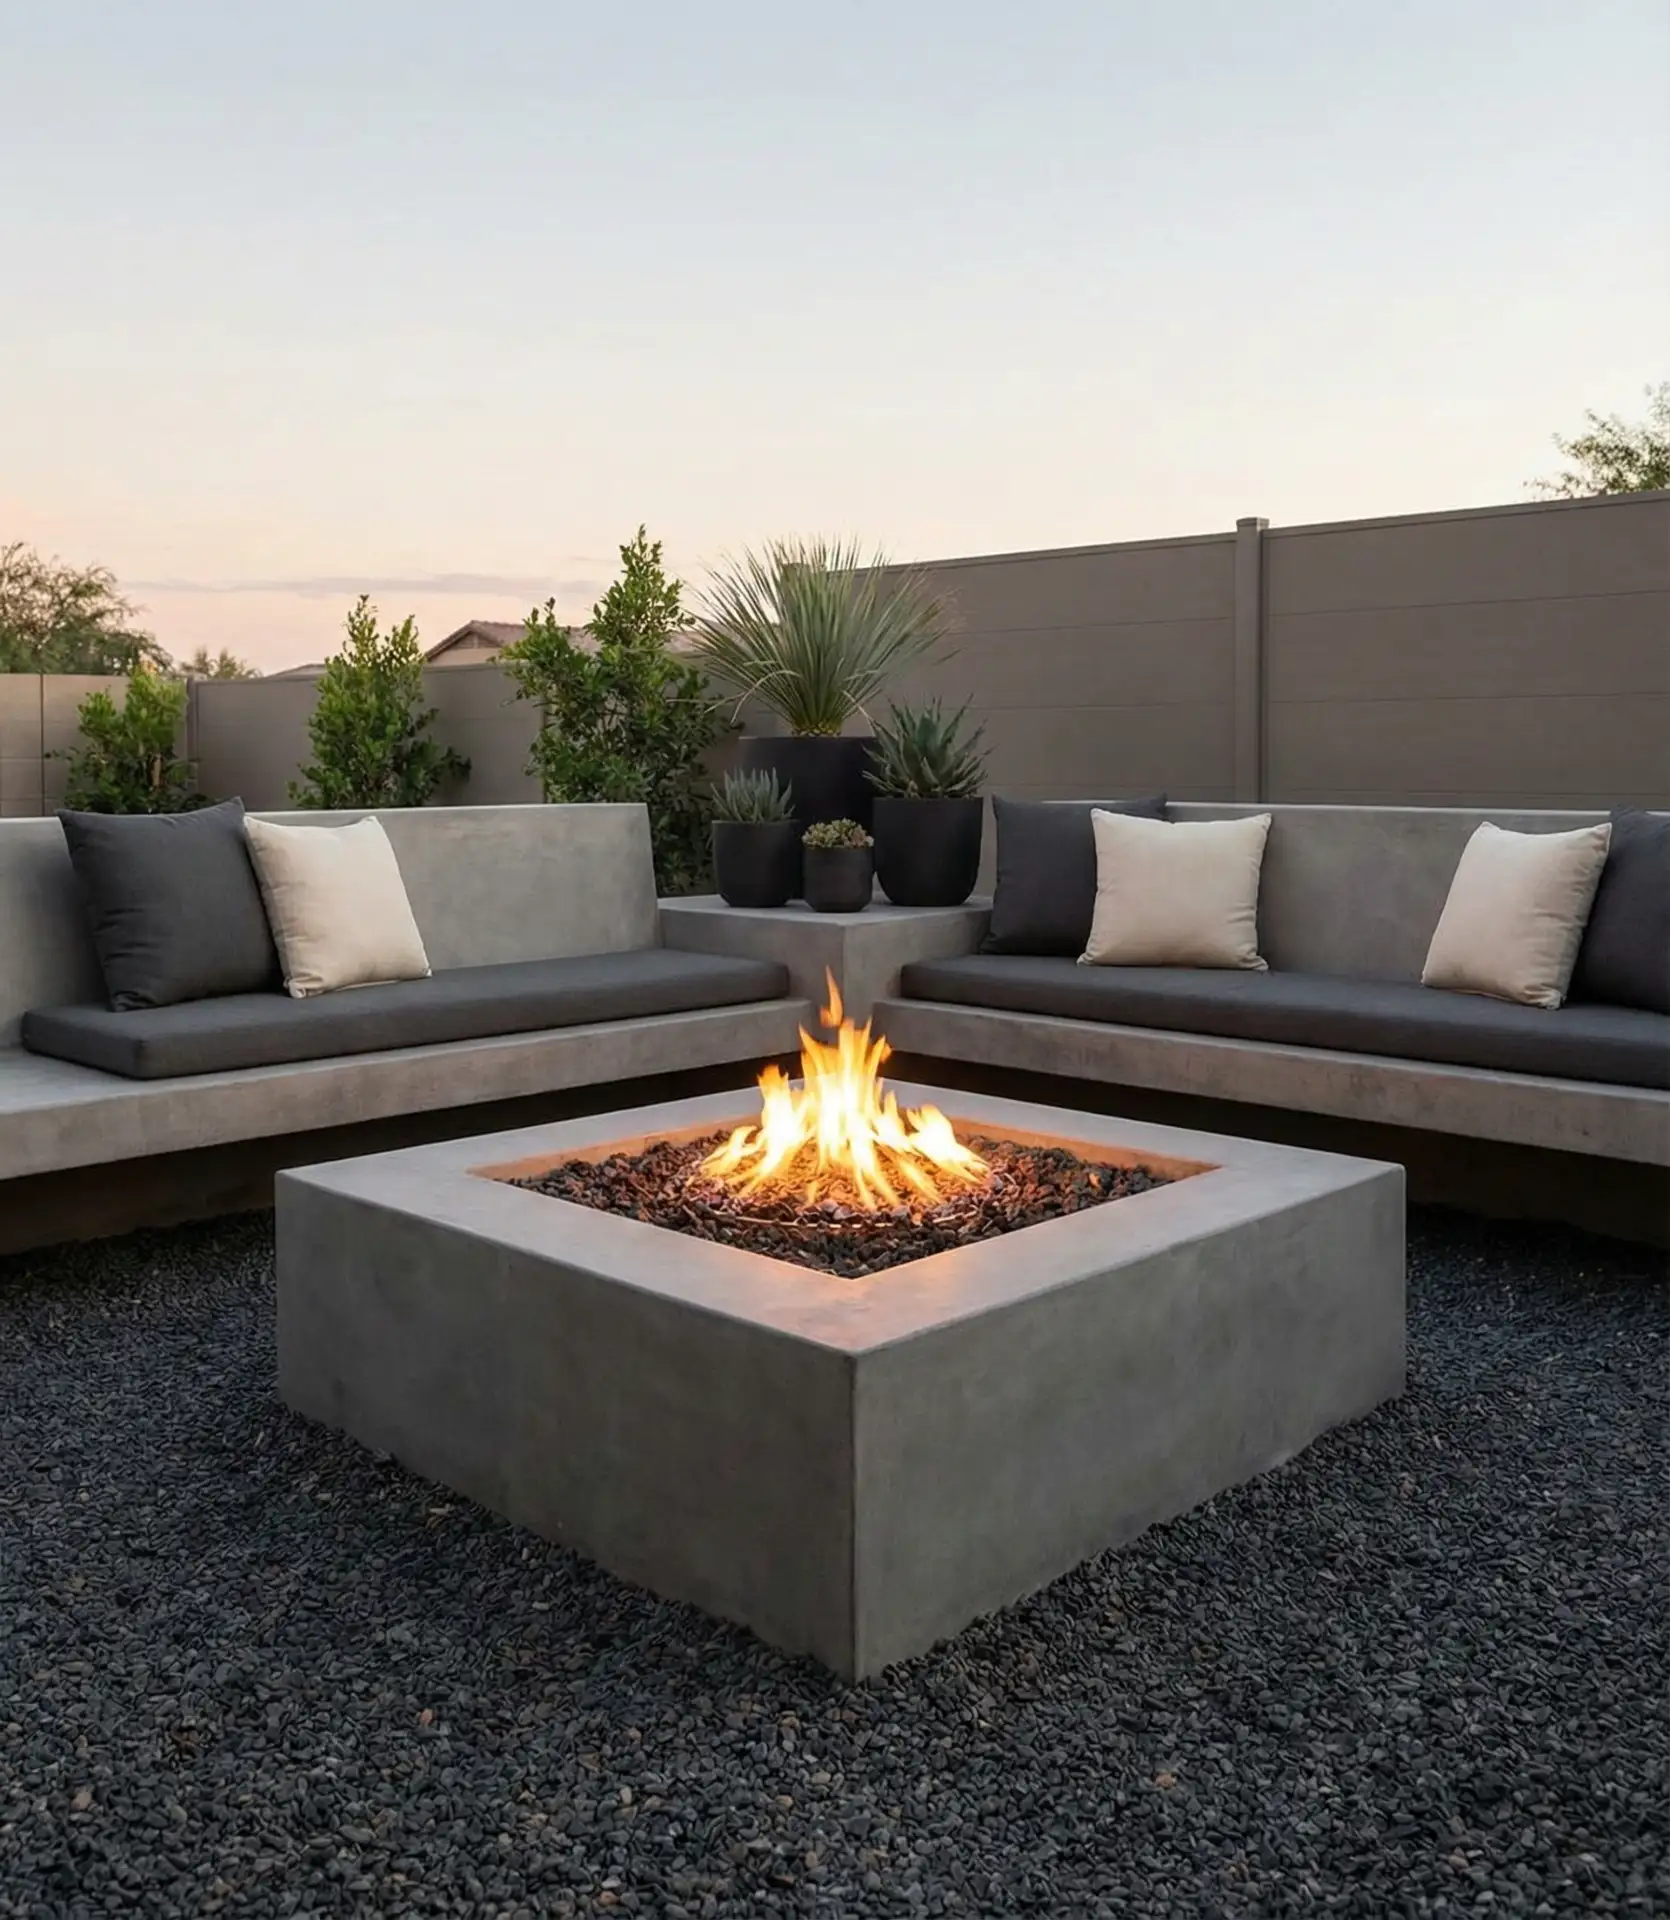
Real estate agents consistently note that fire pit areas with permanent seating photograph exceptionally well and create emotional responses in potential buyers. The investment ranges from $3,000 to $8,000 for DIY construction to $8,000 to $15,000 for professional masonry work, depending on materials and size. Gas fire pits offer convenience—no ash cleanup, instant ignition, and flame height control—while wood-burning provides authentic campfire ambiance and doesn’t require gas line trenching. Check local ordinances before construction; many municipalities have setback requirements from property lines and structures. The seating walls need proper foundations below frost lines in cold climates to prevent cracking and shifting during freeze-thaw cycles.
15. Raised Deck Pool with Glass Panels
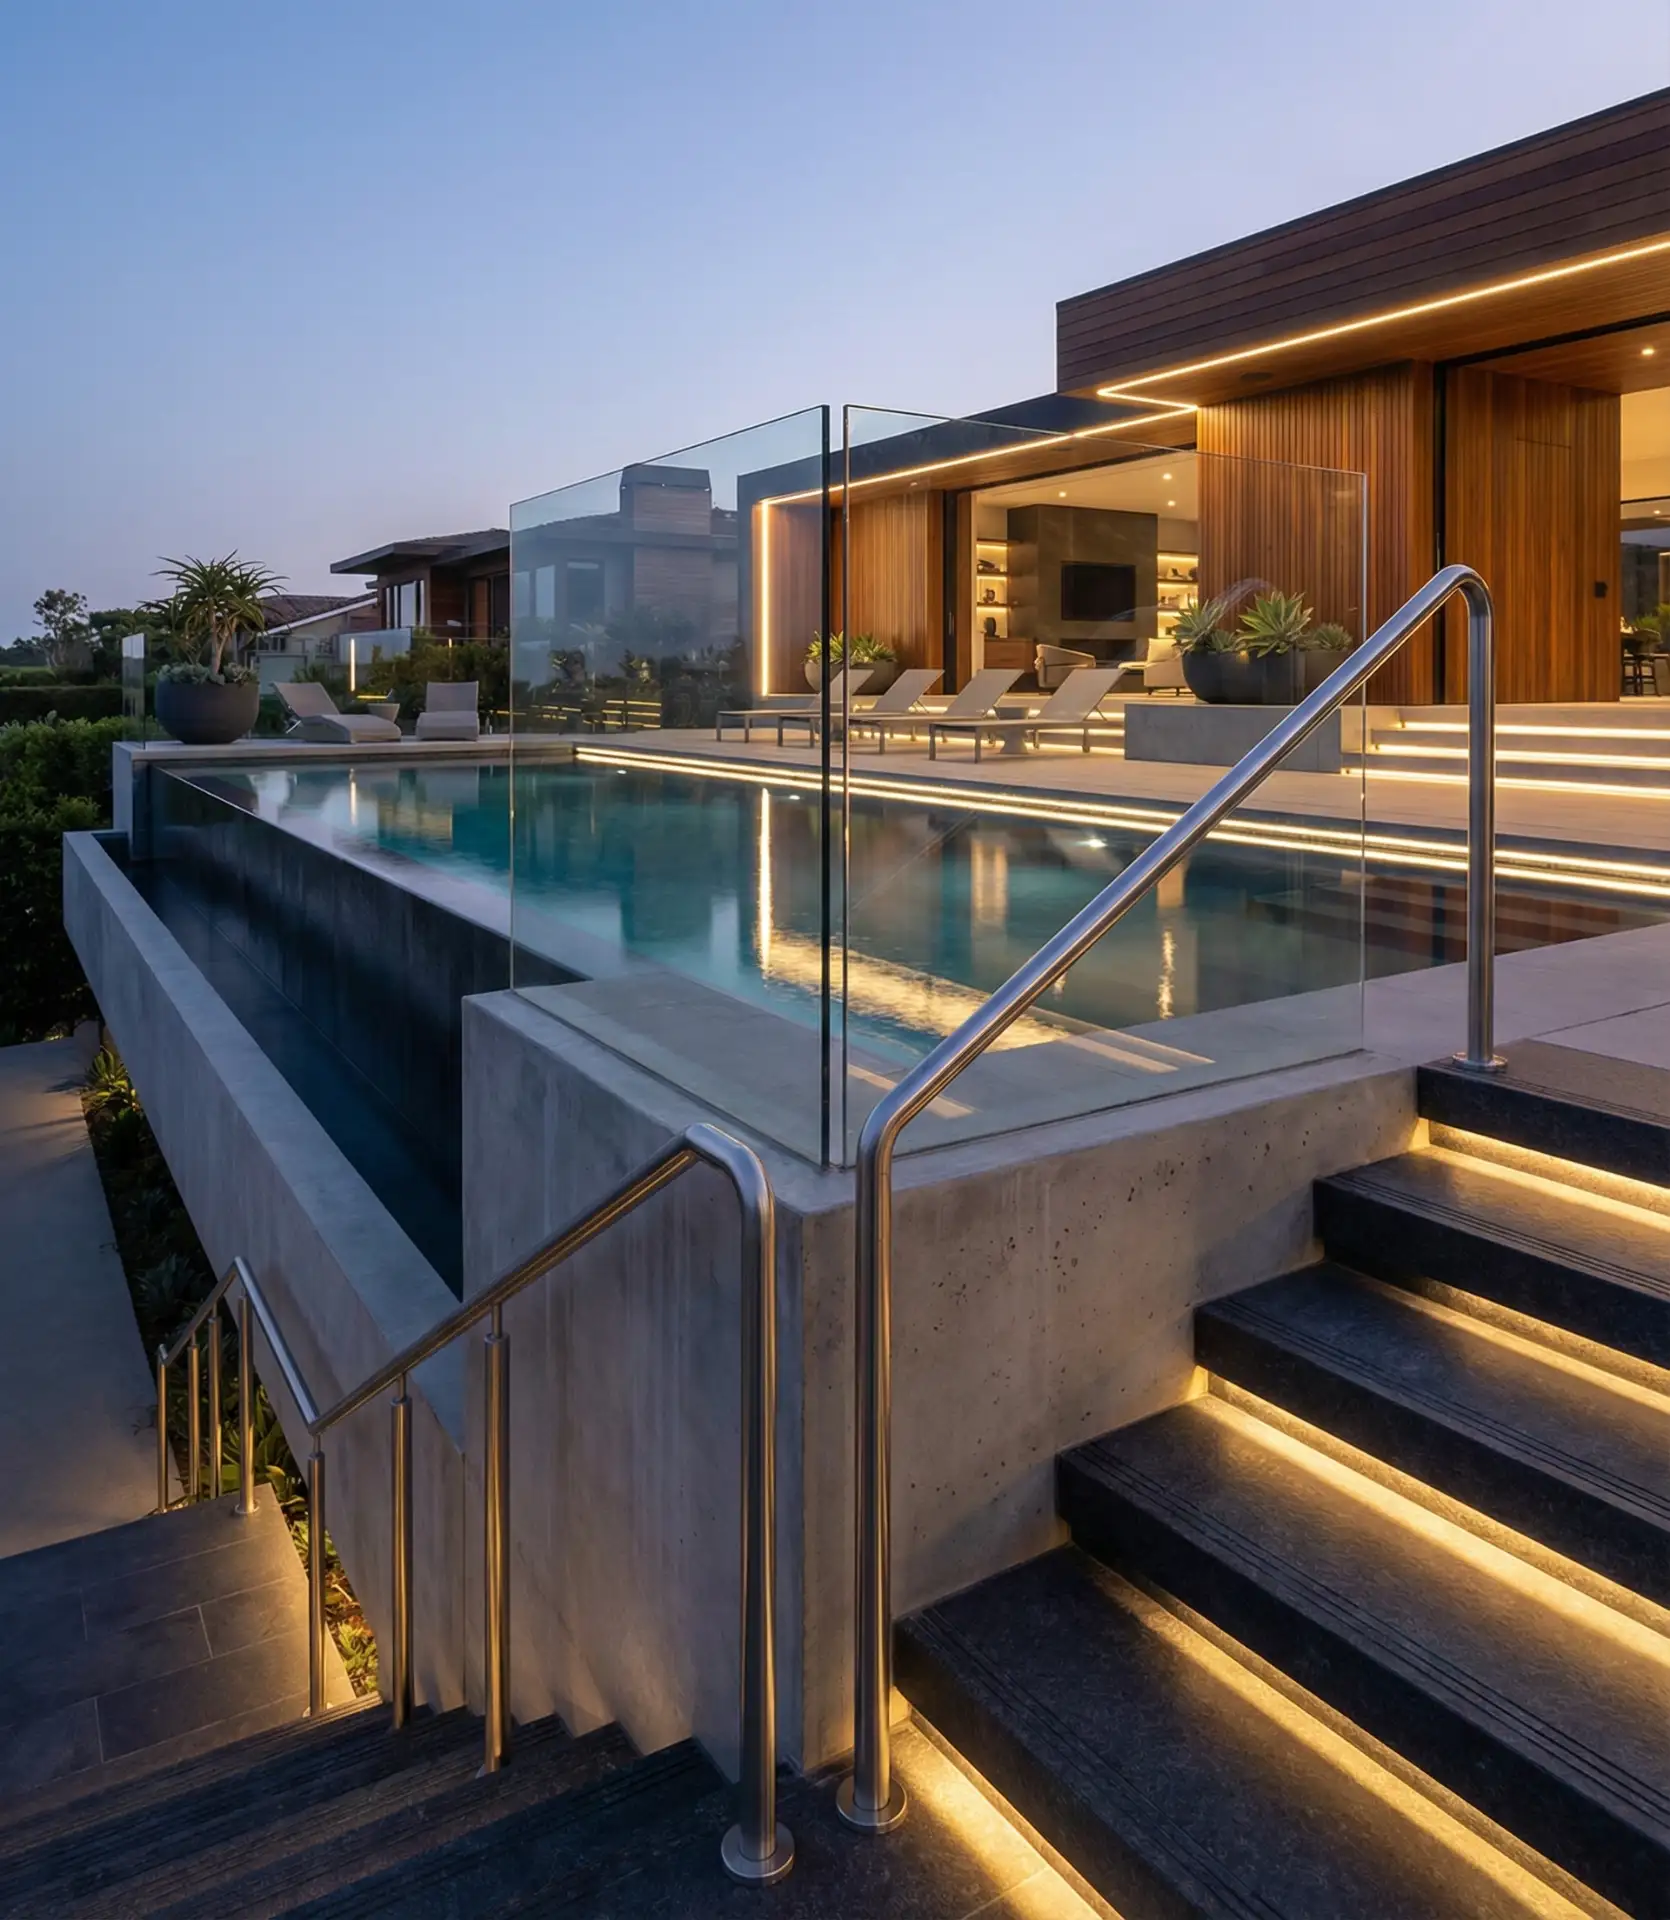
Elevating a pool above grade on a deck system creates dramatic visual impact while solving drainage and slope challenges that would make traditional in-ground installation problematic. This approach works brilliantly for properties with views—the raised perspective opens sight lines over fences and vegetation. Glass railing panels around the deck perimeter maintain those views while meeting safety codes, plus they don’t visually chop up the space like traditional wood or metal balusters. Structural requirements are substantial since you’re supporting 20,000-40,000 pounds of water, requiring engineered plans and typically a steel or reinforced concrete framework rather than standard wood framing.
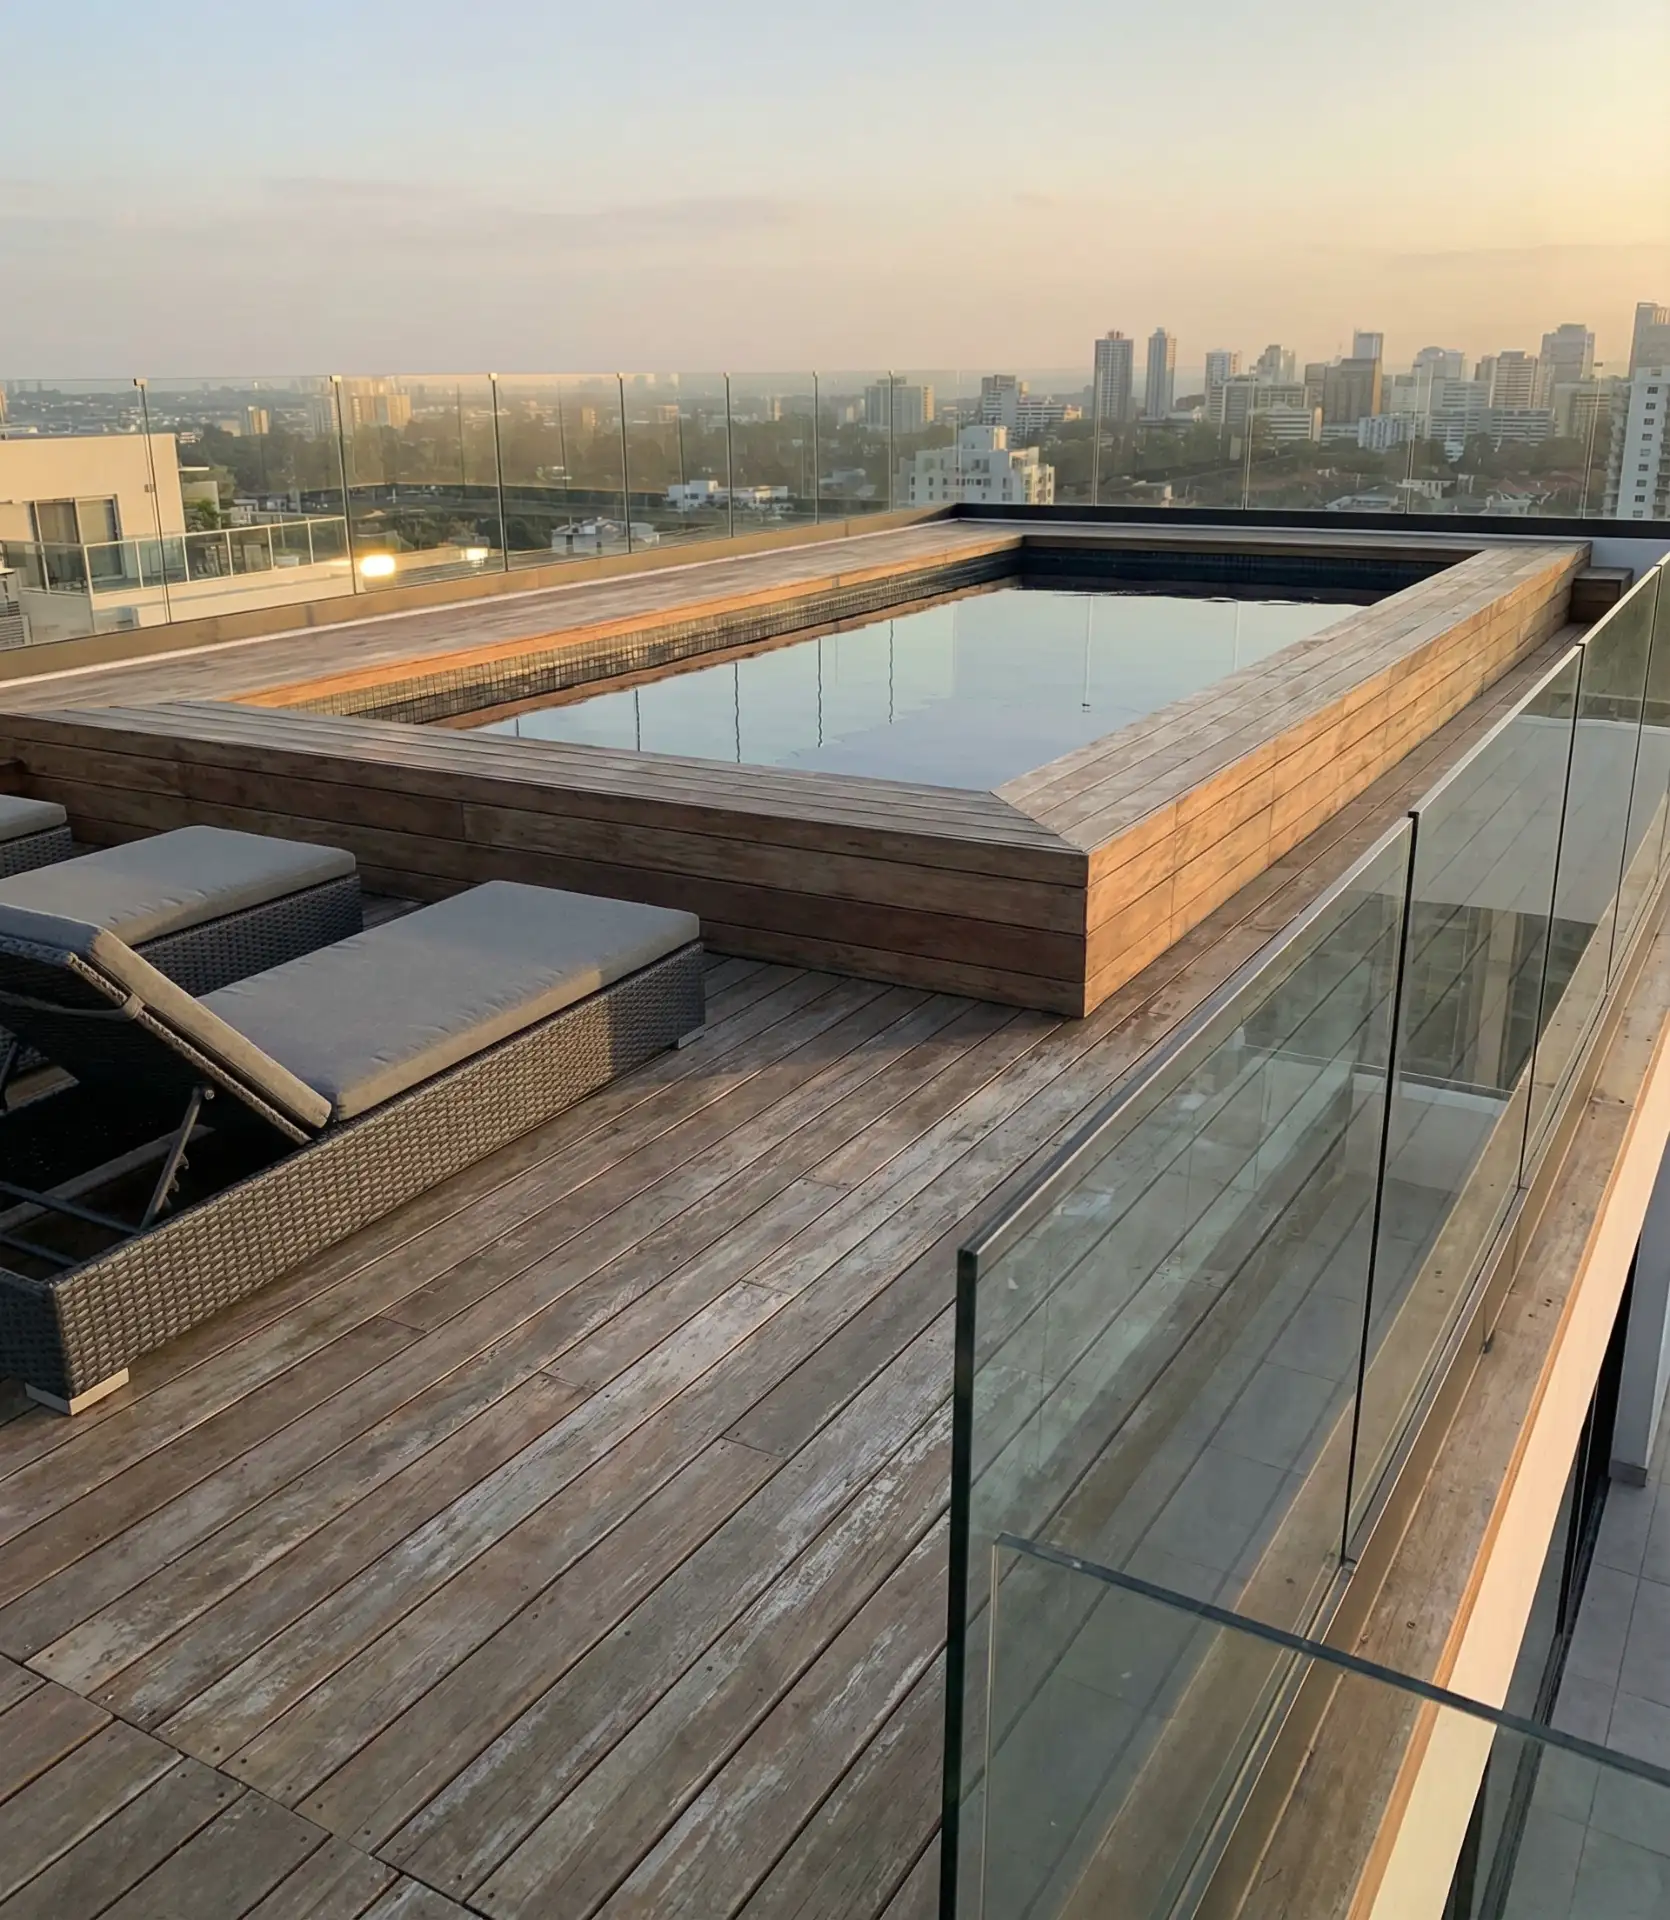
The cost premium over ground-level pools is significant—expect $60,000-$120,000+, depending on height, size, and finishes—but the result photographs like luxury hotels and creates unique backyard architecture. Glass panels require regular cleaning to prevent water spots and maintain clarity, though rain naturally rinses away most surface dust. The under-deck space becomes valuable storage for pool equipment, outdoor furniture during winter, or additional entertaining areas if you finish it properly. Some designers incorporate the pump and filter systems into the structure itself, hiding mechanical elements while maintaining easy service access. This remains a niche option best suited to custom home construction or major renovations rather than simple backyard updates.
16. Cottage Garden Pool Surround
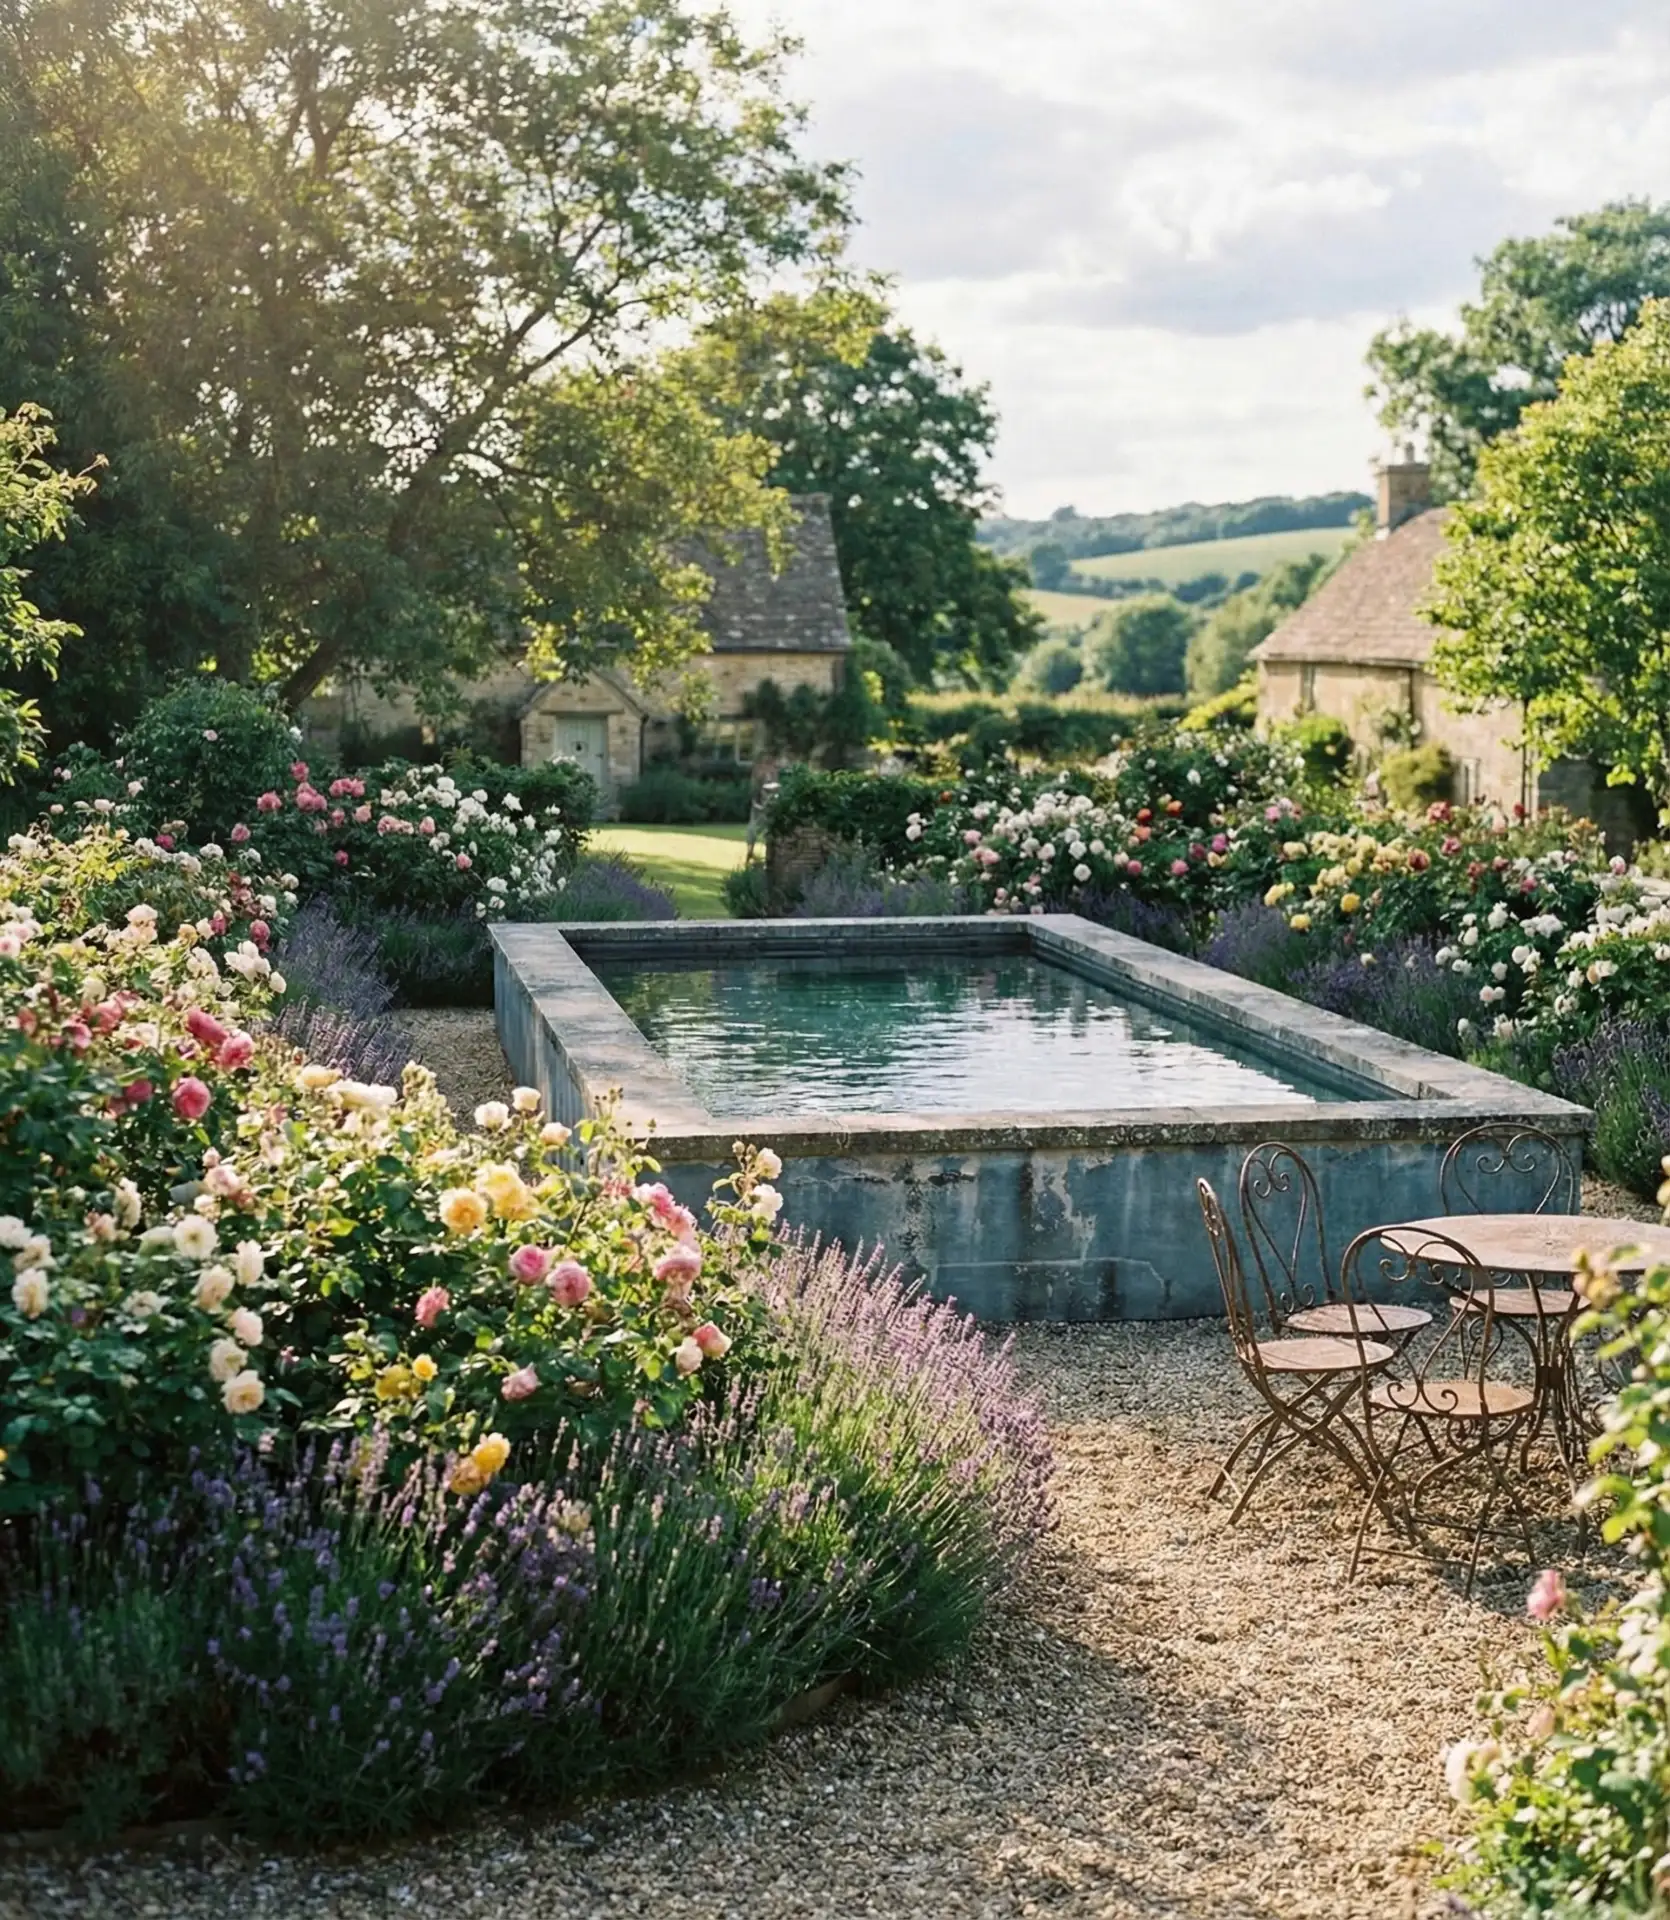
Softening the hard edges of pool decking with romantic flowering plantings creates an oasis that feels more like a garden retreat than an aquatic facility. The cottage-style layers roses, lavender, salvia, catmint, and other sun-loving perennials in informal drifts around the pool perimeter, typically maintaining a 3-5 foot planted buffer between the water’s edge and garden beds. The planting approach is intentionally dense and slightly wild-looking rather than rigidly structured, with plants allowed to spill onto pathways and self-seed naturally. This style particularly appeals to homeowners who want their pool integrated into the landscape rather than dominating it.

The challenge is managing leaf drop and flower debris that inevitably ends up in the pool, requiring more frequent skimming than stark minimalist designs. Choose plants that bloom at different times to extend color throughout the season rather than everything peaking simultaneously. Drip irrigation hidden within the planting beds keeps maintenance reasonable—cottage gardens look effortless but require consistent watering and deadheading to maintain their abundant appearance. The style works less well in scorching climates where high-water plants struggle; consider adapting with drought-tolerant options like Russian sage, yarrow, and ornamental grasses that provide similar texture with lower water needs.
17. Small Yard Plunge Pool
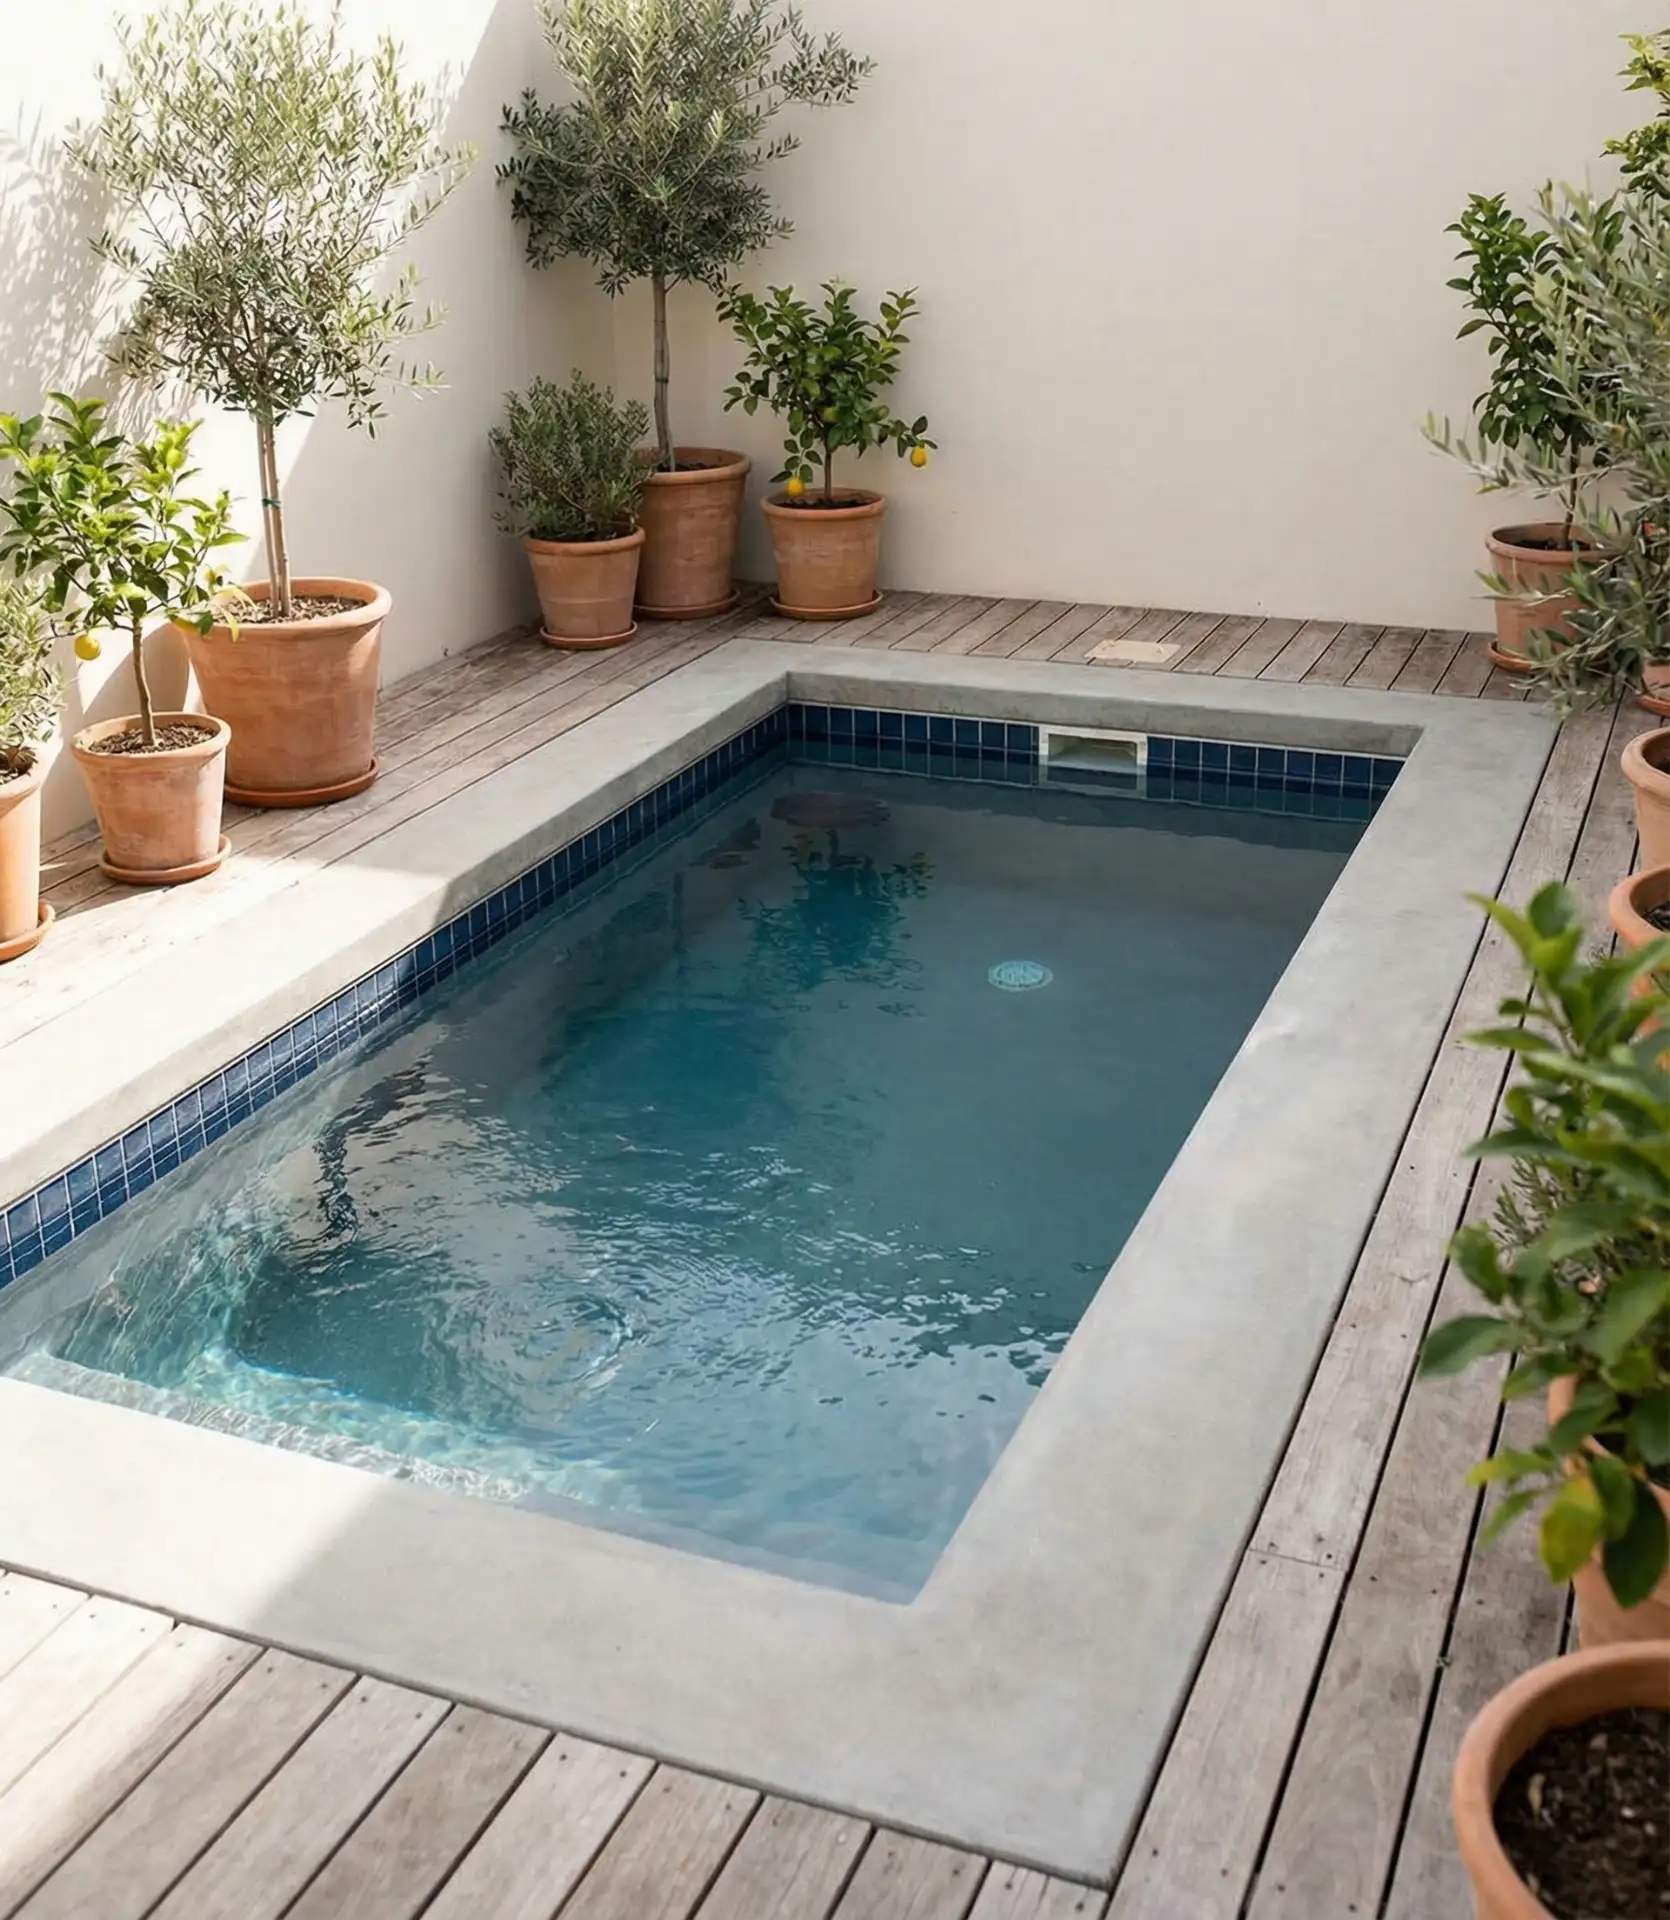
Plunge pools pack maximum cooling relief into minimum square footage—typically 8×12 to 10×16 feet—making them viable for compact small yard situations where traditional pools won’t fit. The depth runs 5-7 feet throughout rather than sloping, creating a vertical profile that maximizes water volume in a limited footprint. These aren’t designed for swimming laps but for cooling off, hydrotherapy, and entertaining small groups. The compact dimensions keep construction costs reasonable at $20,000-$35,000, including equipment, and the reduced water volume means lower heating costs if you add that feature for year-round use in temperate climates.
Plunge pools work especially well in urban environments where outdoor space comes at a premium and neighbors are close—the vertical walls allow for strategic placement that preserves usable yard space around the pool. Adding jets converts them into swim spas where you can exercise against current resistance. The small water surface area means less evaporation and fewer chemicals needed for maintenance. Many models now come prefabricated in fiberglass or stainless steel, dropping installation time from weeks to days and eliminating much of the excavation mess. The trend has exploded in Australia and is gaining traction across American coastal cities, where lot sizes are shrinking but climate demands remain constant.
18. DIY Pallet Furniture Lounge
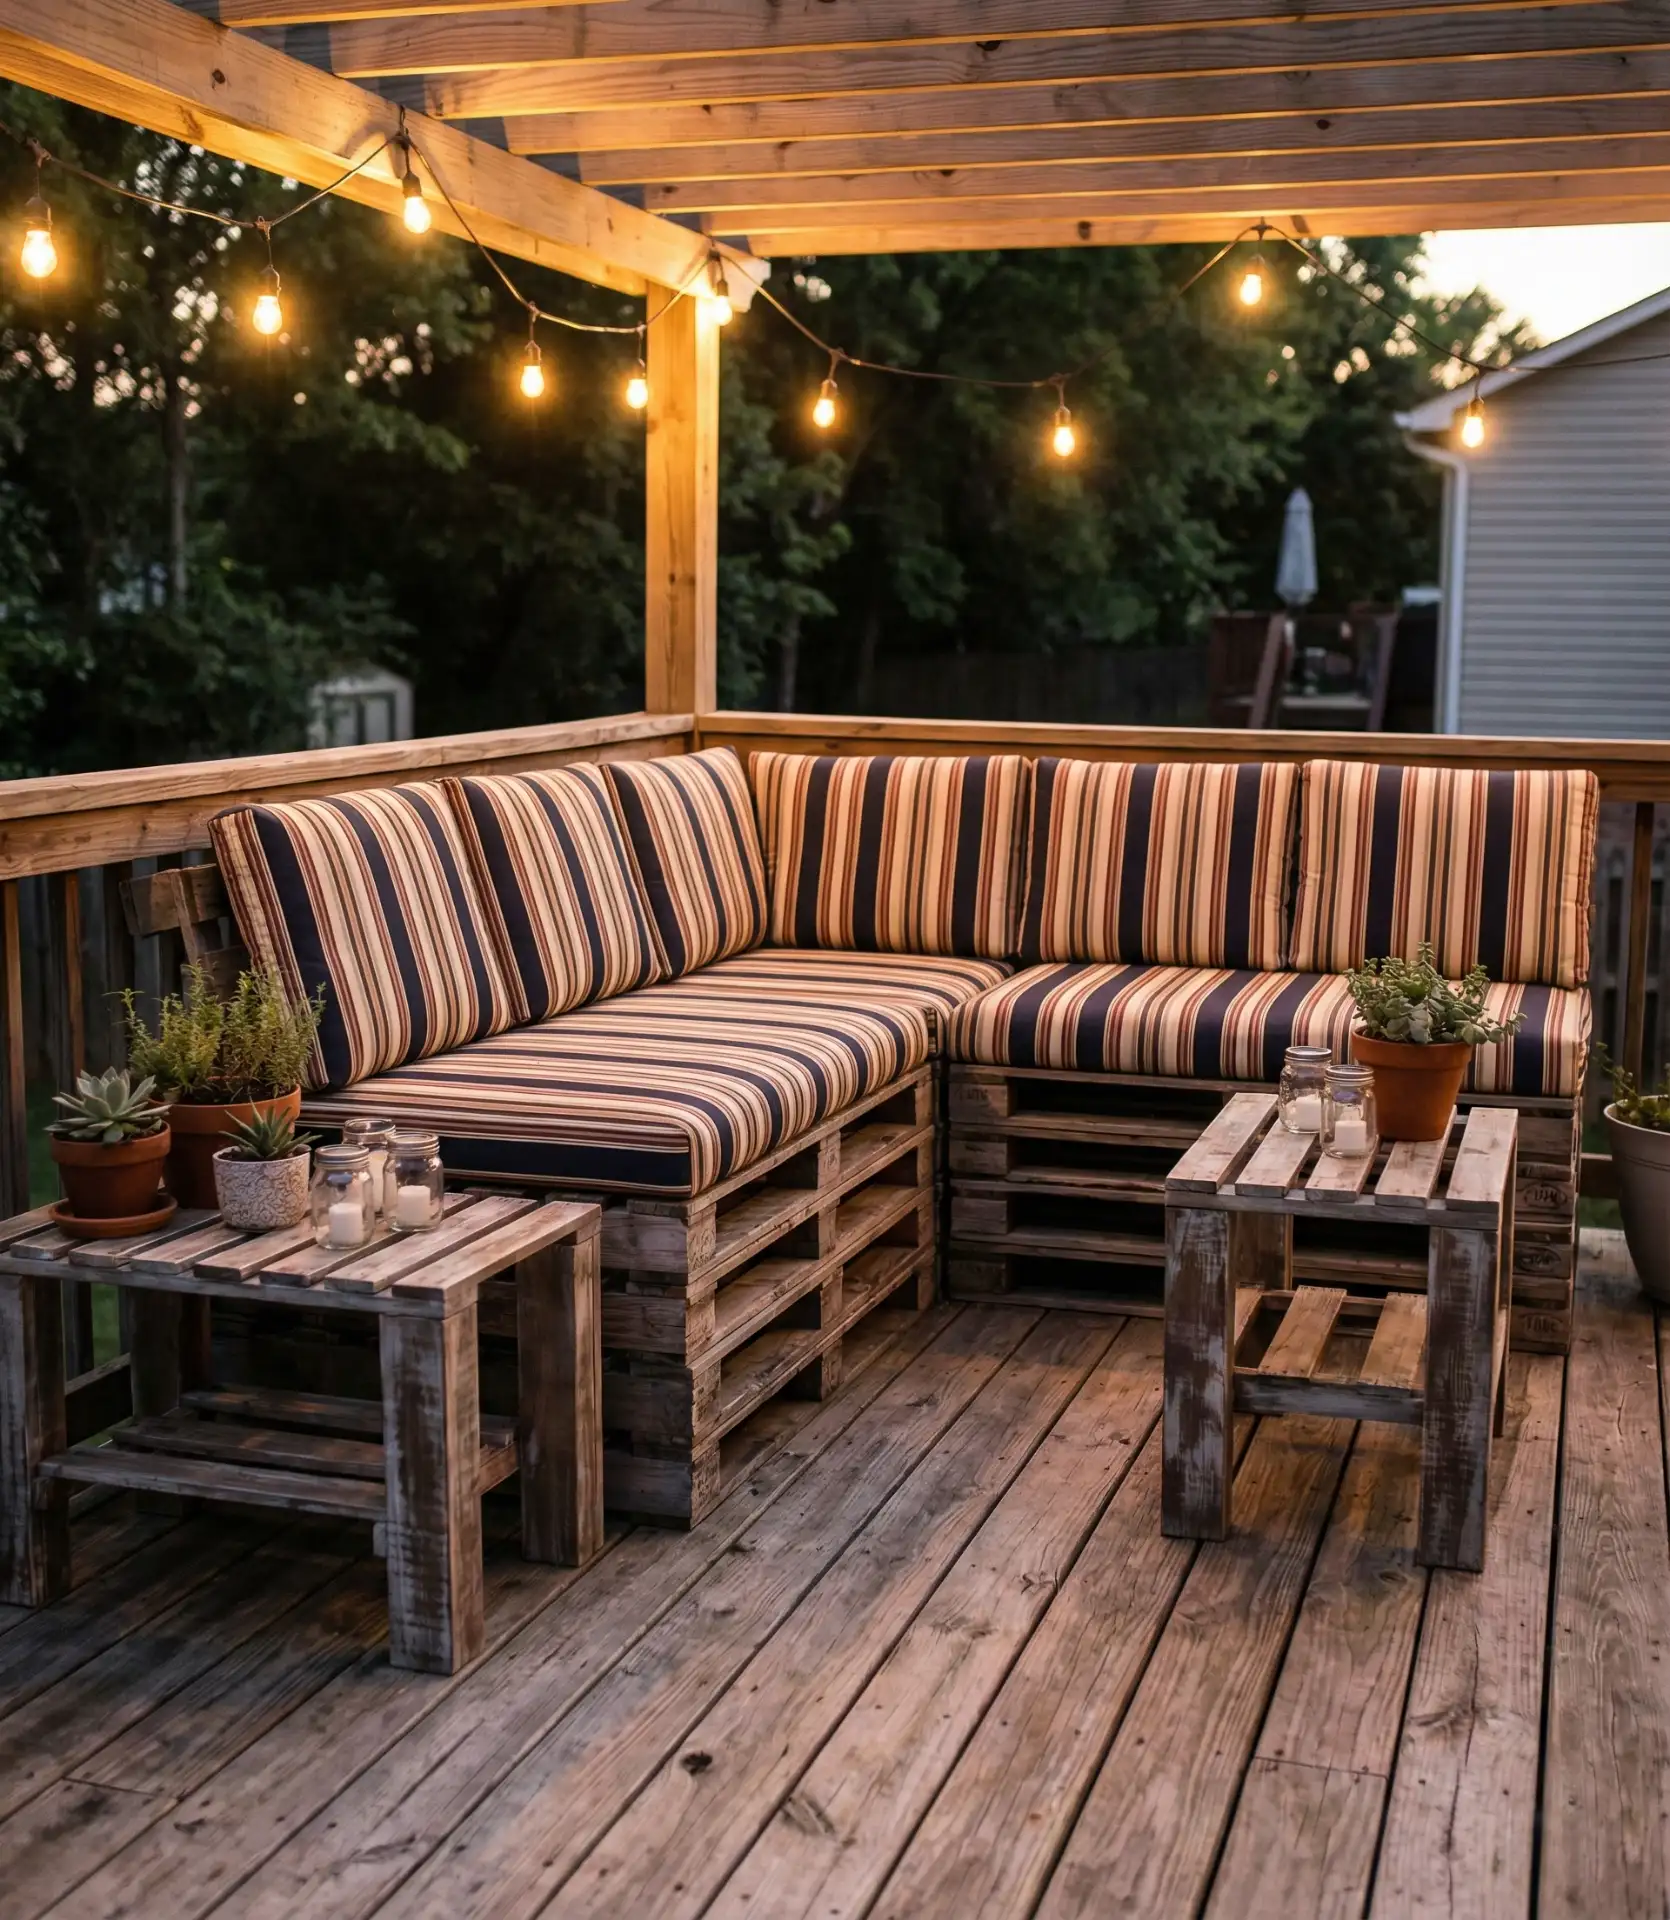
Creating custom outdoor furniture from reclaimed shipping pallets has become a popular budget strategy for backyard oasis ideas on a budget and cheap DIY projects. Heat-treated pallets (marked HT, not chemically treated MB) can be disassembled, sanded, and reconstructed into sectional sofas, coffee tables, planters, and bars for essentially the cost of fasteners and cushions. A complete lounge set, including L-shaped seating and a table, typically requires 8-12 pallets plus outdoor cushions and weatherproof finishing. The raw material cost runs $0-$5 per pallet from commercial suppliers or is free from retail/wholesale businesses, with the project requiring basic tools: a circular saw, sander, drill, and exterior screws.
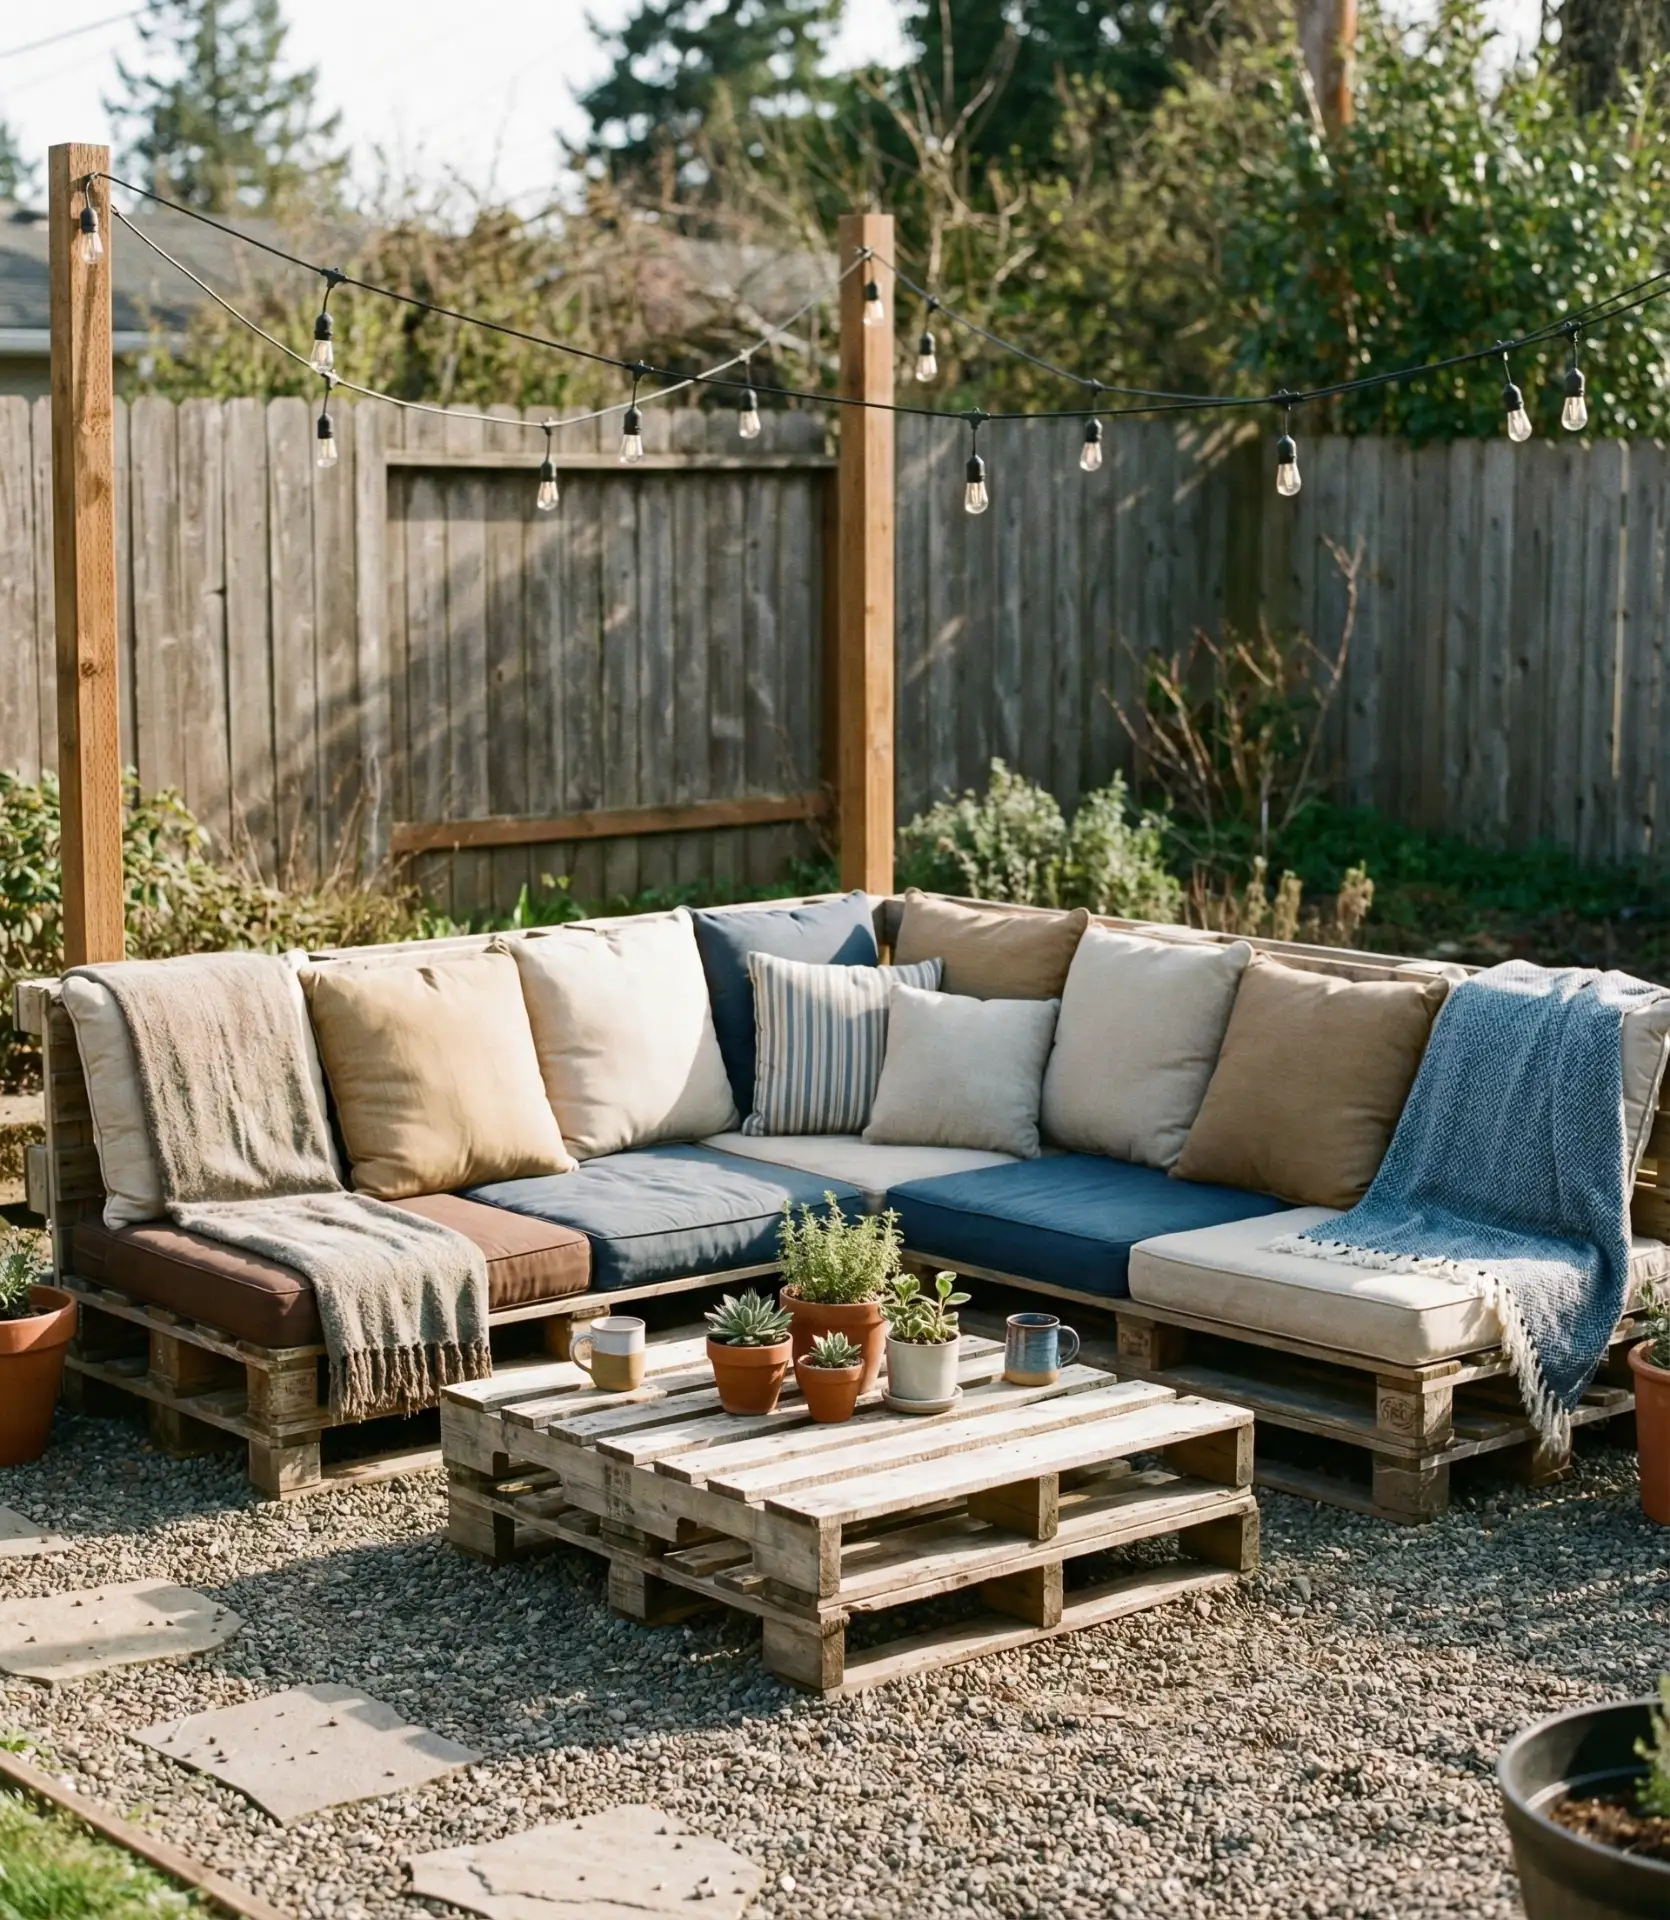
Finishing is critical for longevity—untreated pallet wood outdoors splinters and deteriorates within a season. Sand thoroughly to remove rough edges, then apply exterior stain or paint designed for decks and fences. Many builders add caster wheels to larger pieces for easy rearranging, and some incorporate hidden storage within the base structure. The aesthetic balances between industrial and rustic styles, making it suitable for casual backyard settings but not suitable for formal landscapes. Most people complete a seating area over two to three weekends of intermittent work. The main limitation is comfort—even with thick cushions, hard wooden surfaces don’t match commercial outdoor furniture, making this structure better suited for casual entertaining than extended lounging sessions.
19. Tropical Water Feature Wall
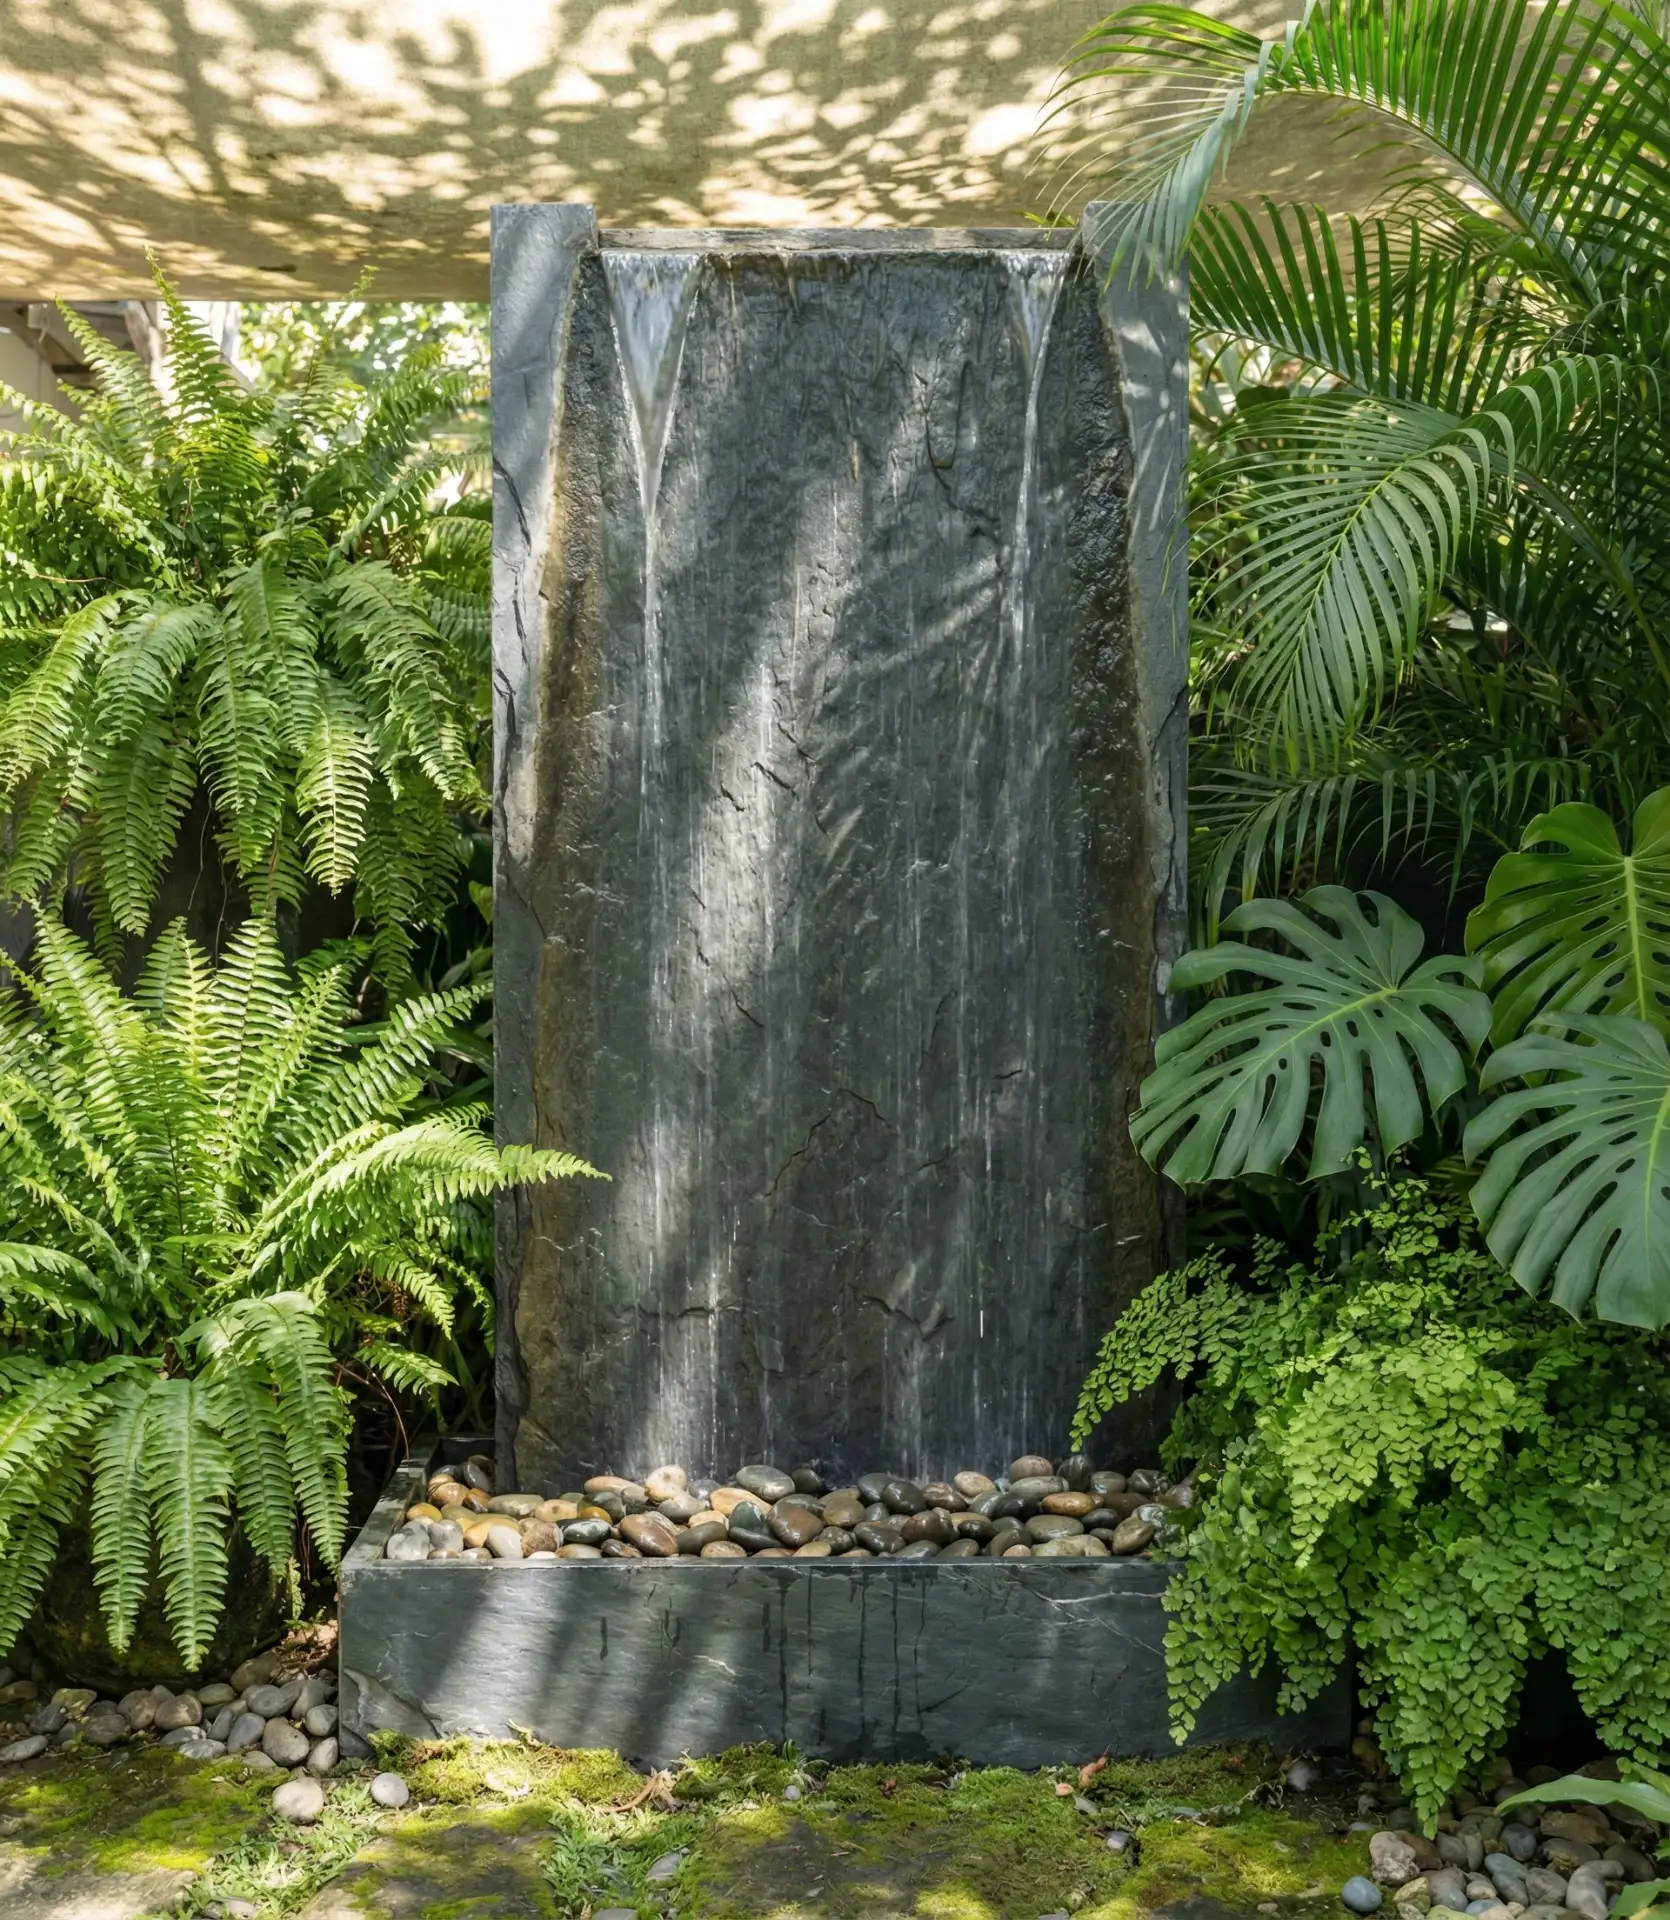
A vertical water wall serves as a striking focal point while masking noise from nearby streets or neighbors—the white noise effect makes even small backyards feel more isolated and peaceful. Modern DIY kits include the back panel (slate, stacked stone, or copper), submersible pump, water reservoir basin, and tubing for $800-$2,500 depending on size and materials. The installation mounts to existing fences or structures, requiring only a nearby GFCI outlet. Water sheets down the face continuously, recirculating from the bottom reservoir. Surrounding the feature with tropical planting—elephant ears, bromeliads, ferns—amplifies the resort atmosphere and creates humidity that these moisture-loving plants thrive in.
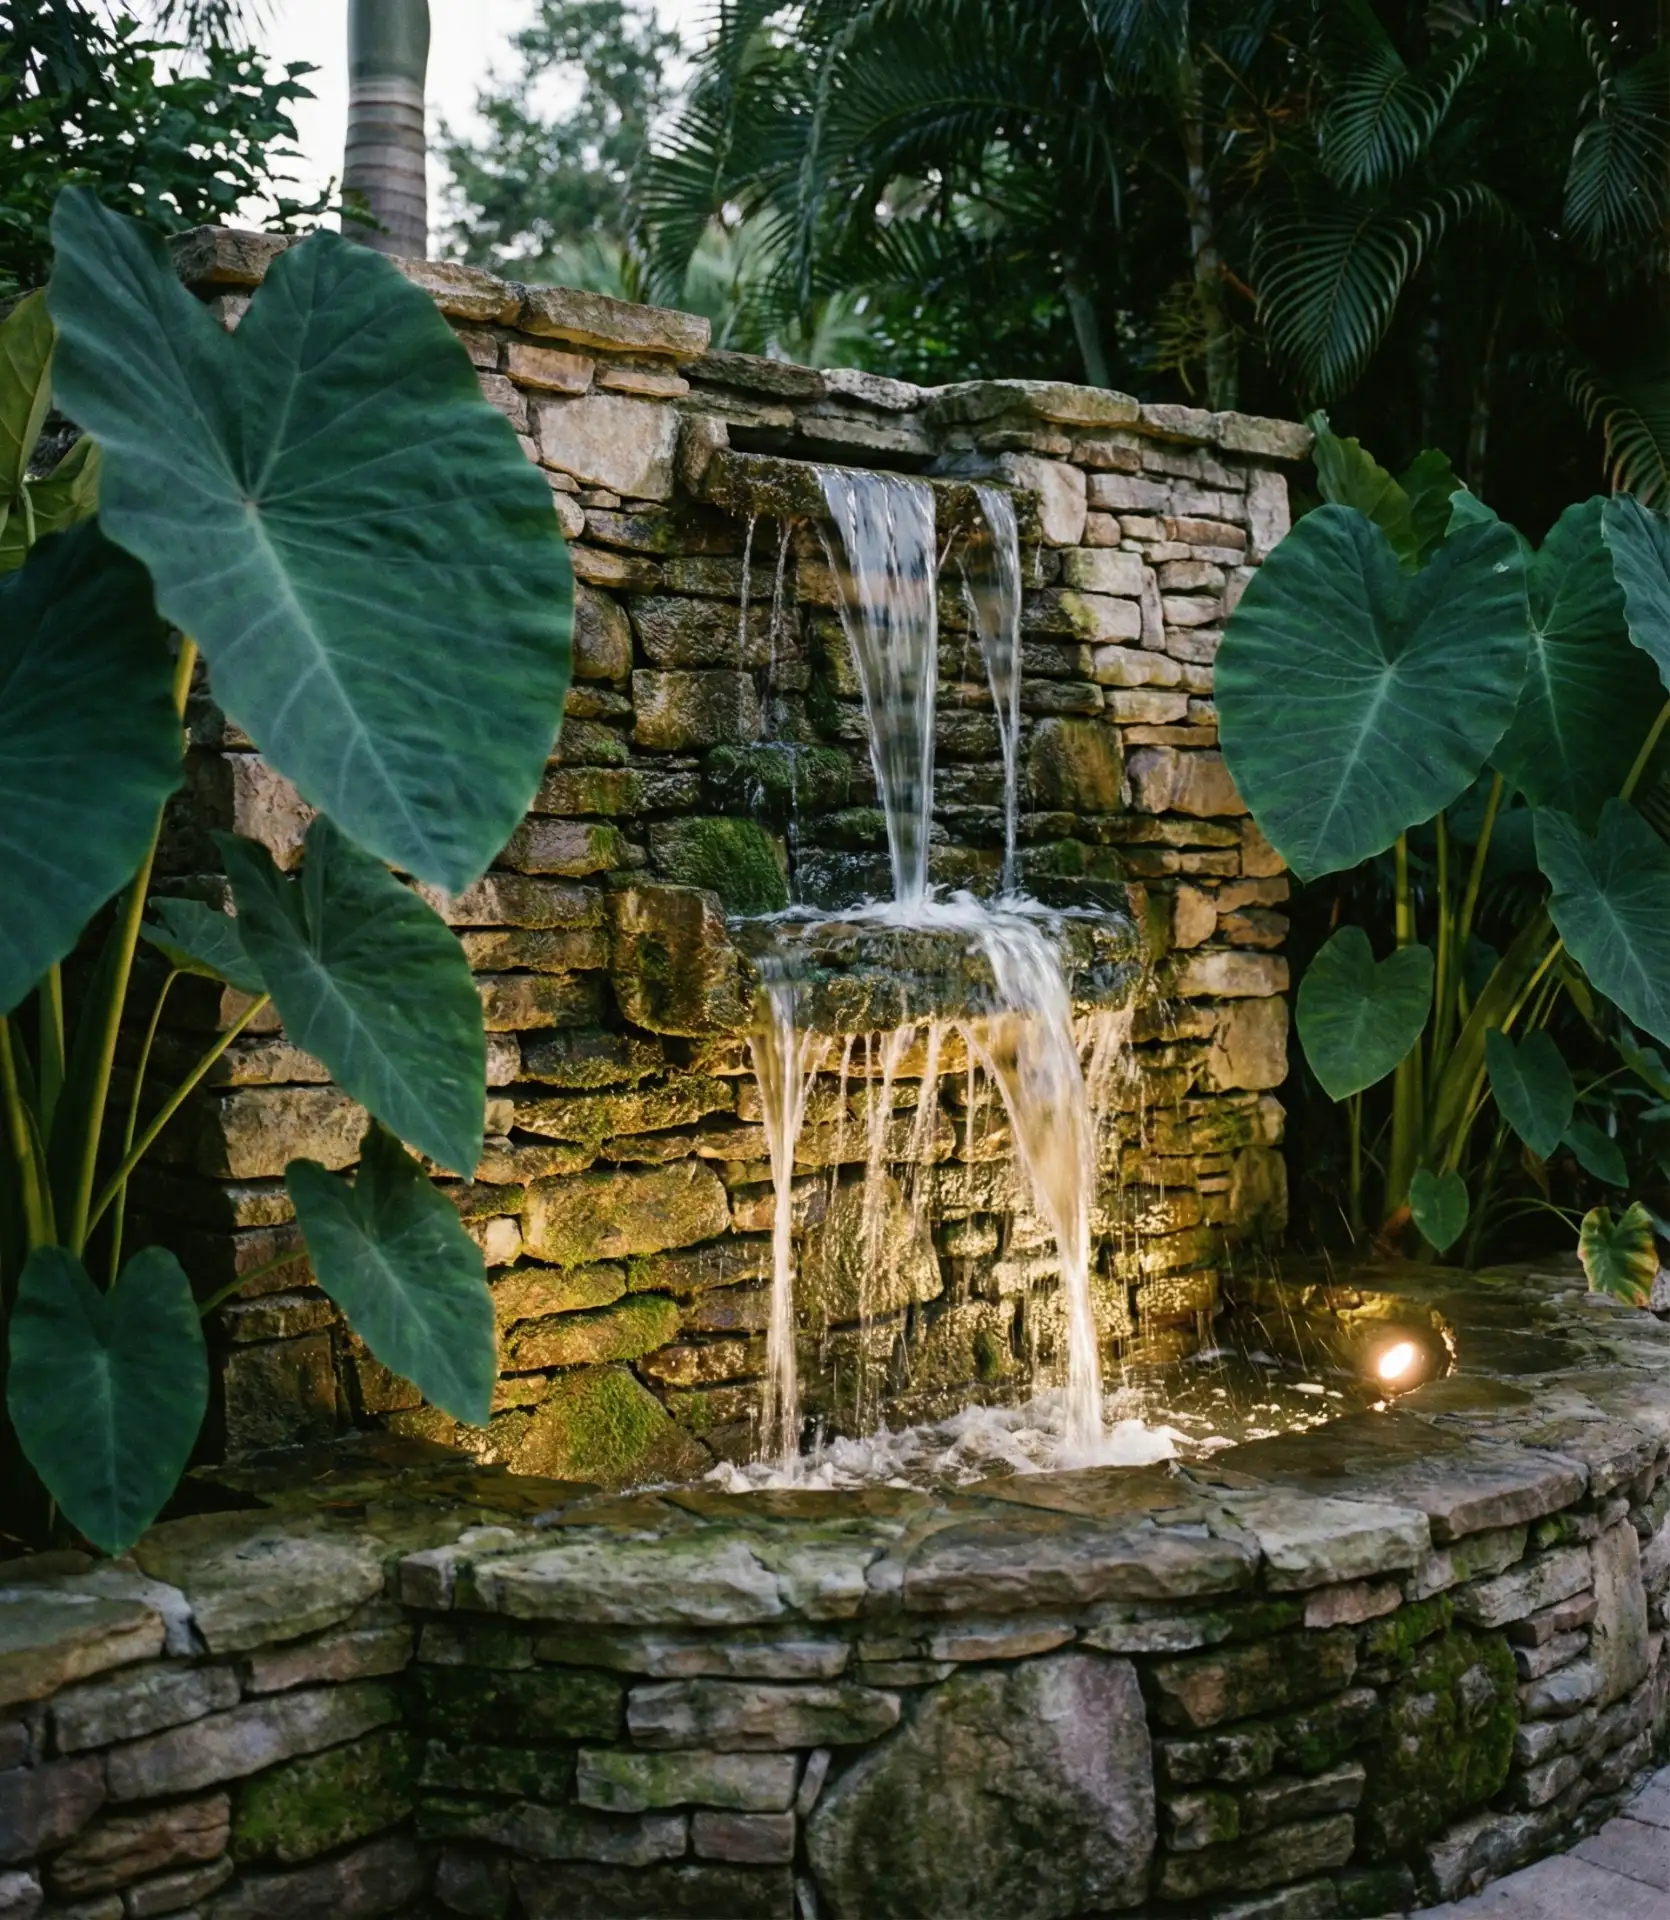
Maintenance involves refilling the reservoir every week or two as evaporation reduces volume and occasional cleaning of the pump filter and stone surface to prevent algae buildup. The pump runs continuously during warm months but should be drained and shut down before freezing temperatures to prevent damage. One installation tip: slope the wall slightly backward (1-2 degrees) so water flows down the face rather than pulling away at the top and dripping forward. Scale the feature appropriately—a 3×5 foot wall works in compact yards, while 6×8 feet or larger suits spacious properties. The sound level is adjustable via pump flow rate; higher flow creates more audible rushing, and lower flow produces gentle trickling.
20. Modern Poolside Cabana
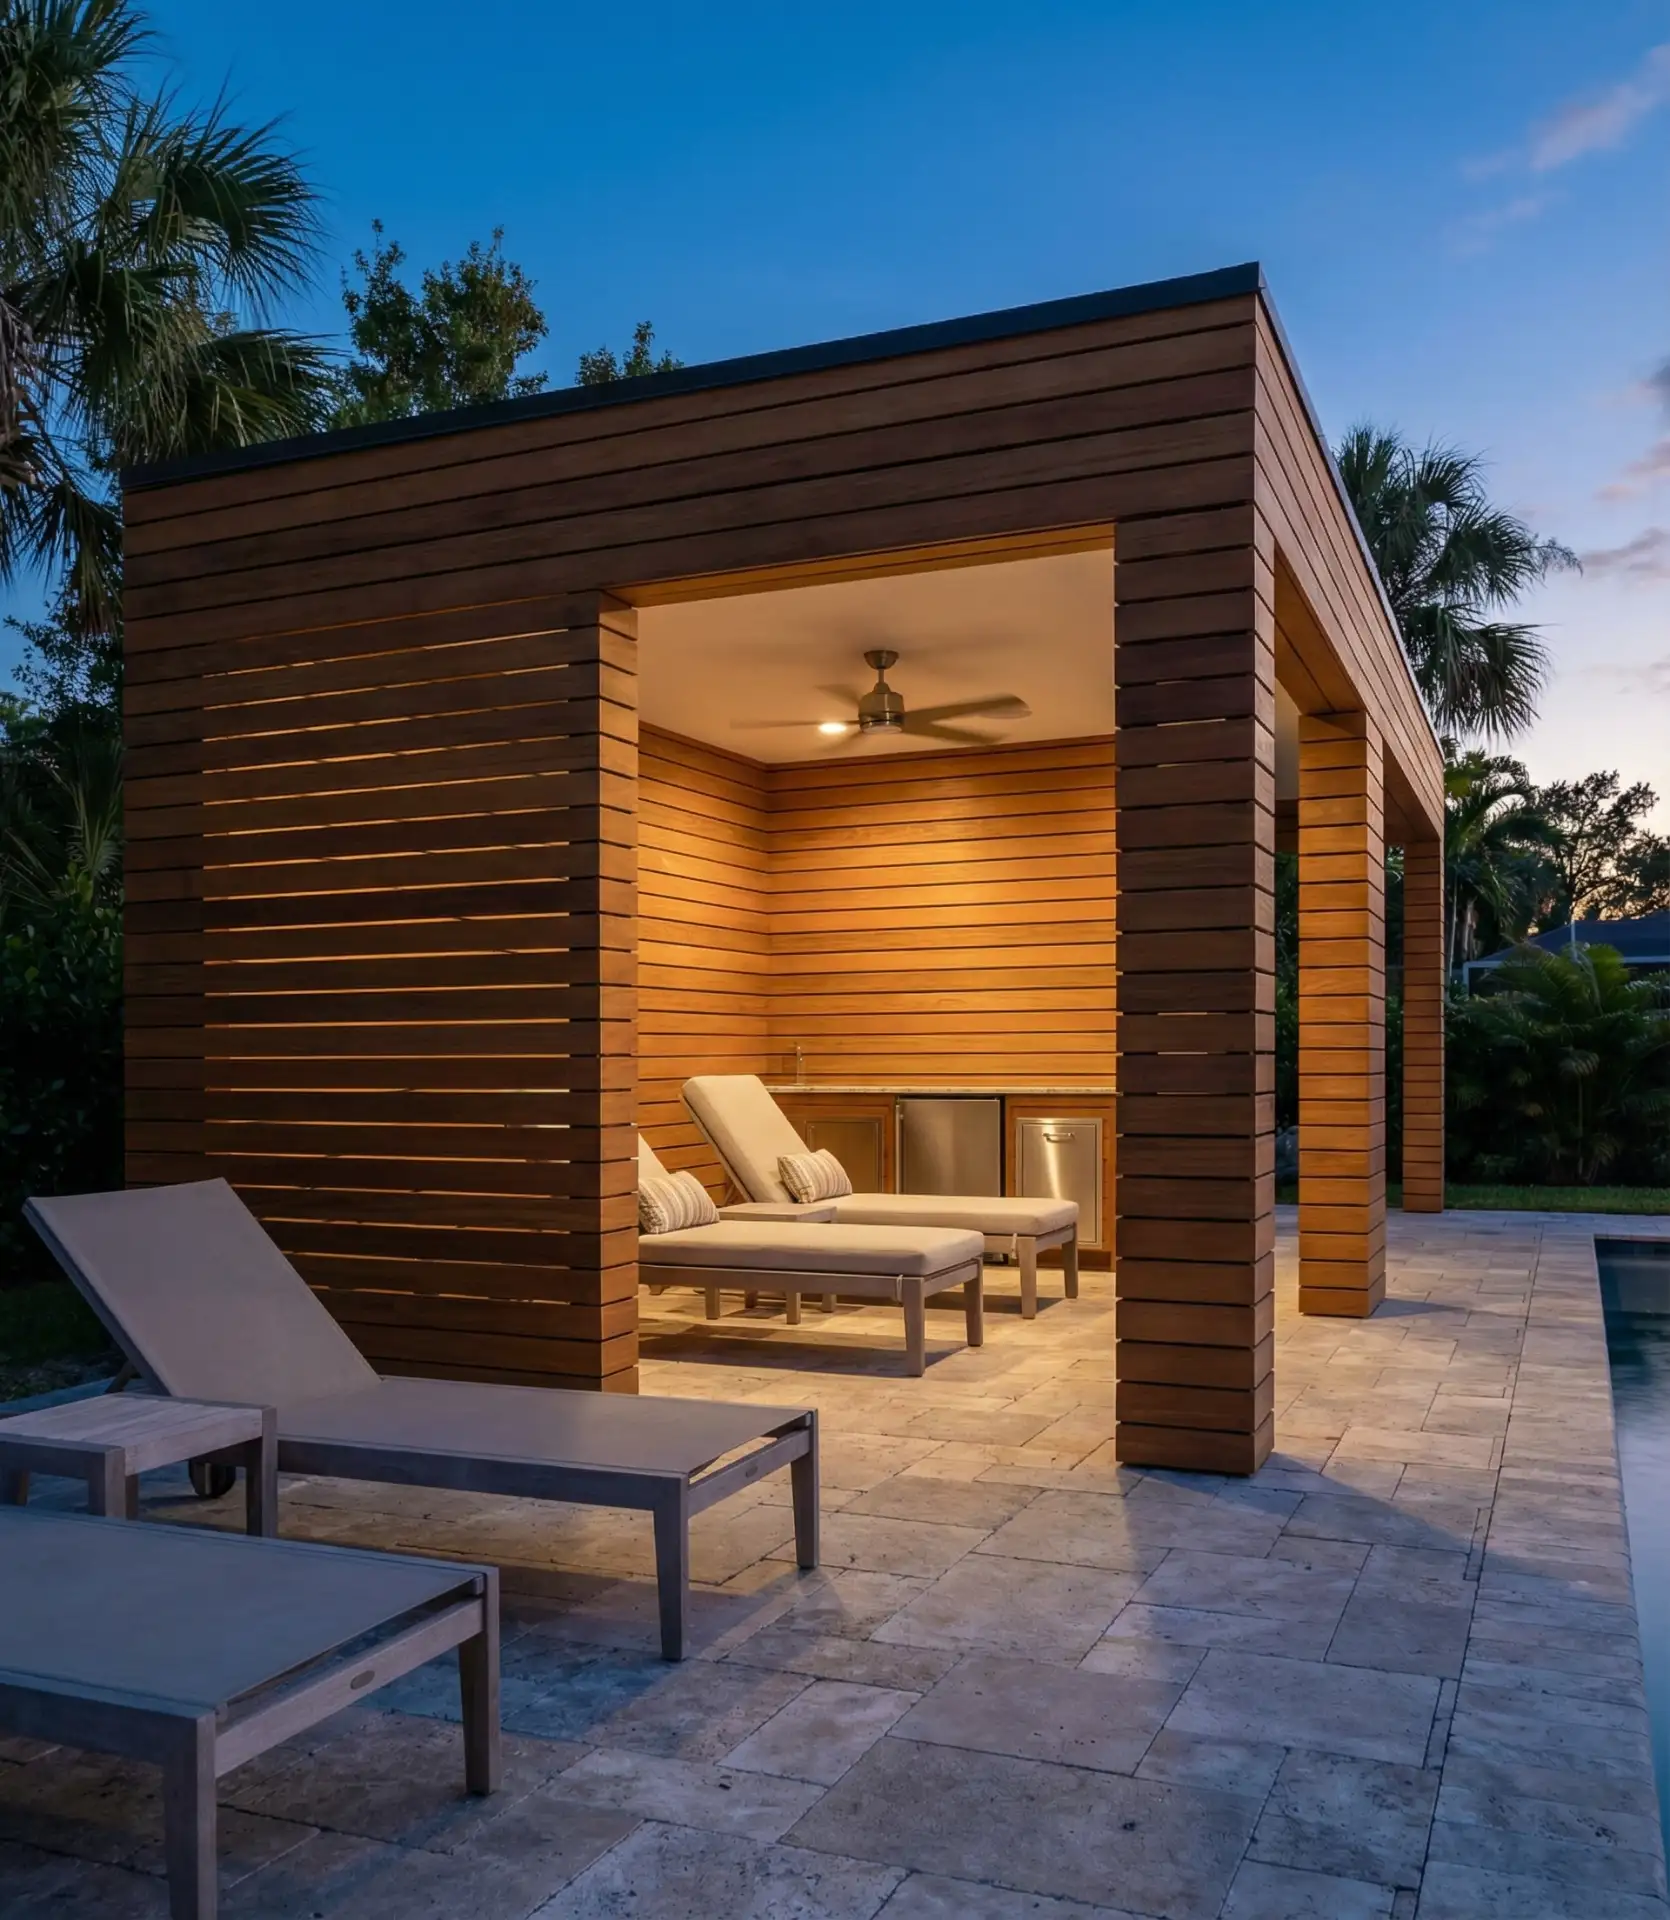
A dedicated poolside structure provides shade, storage, changing space, and a bar or kitchenette—essentially functioning as a pool house without requiring a full building permit. Modern prefab cabanas come in contemporary designs with clean lines, flat or shed roofs, and optional amenities like ceiling fans, electrical outlets, and plumbing stubs. Sizes range from 8×10 feet for basic shade and storage to 12×16 feet for full entertaining capability. The investment spans $3,000-$8,000 for quality prefab units plus installation, while custom builds reach $15,000-$35,000 depending on finishes and utilities. Position it 10-20 feet from the pool edge, where it provides functional proximity without overwhelming the pool area visually.
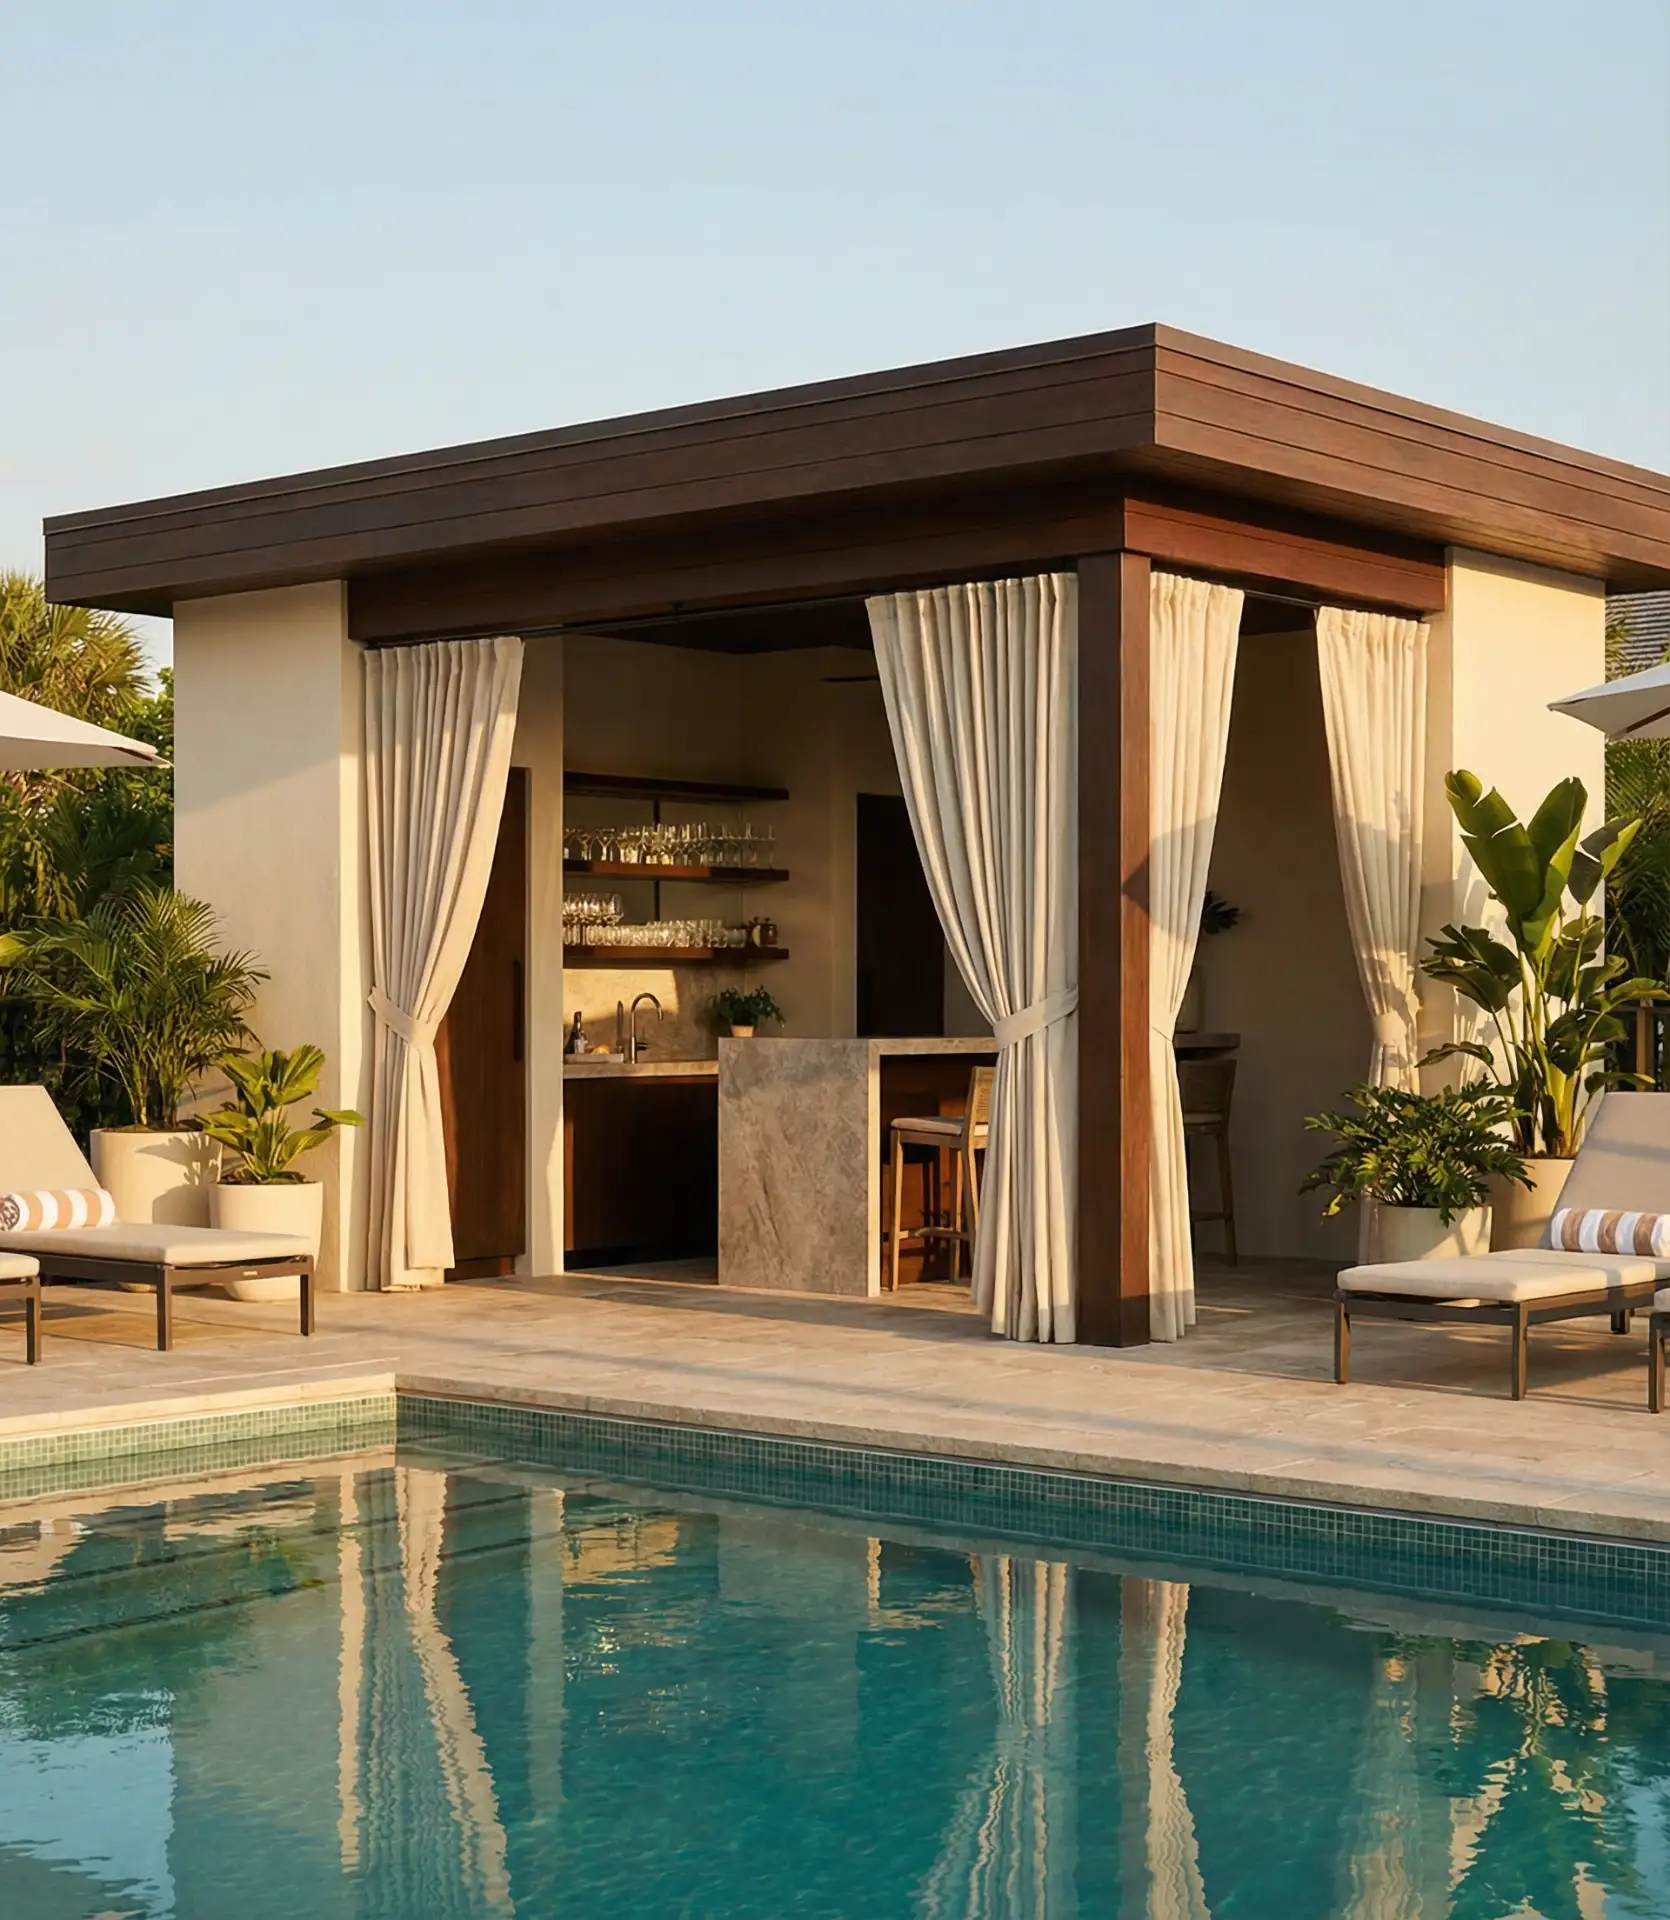
Cabanas significantly extend comfortable pool time by providing relief from intense sun, particularly important in southern climates where midday summer heat drives people indoors. The structure needs proper anchoring—either a concrete pad or deck-mount connections—to prevent wind damage during storms. Many homeowners wire them with outlets and lighting, though the installation requires electrical permits and potentially trenching conduit from the house. The open-front design with retractable curtains or roller shades offers flexibility—completely open for parties, partially closed for shade, or fully enclosed for weather protection or privacy. Storage built into the back wall accommodates pool toys, cleaning equipment, and outdoor cushions, keeping the pool deck uncluttered.
21. Xeriscaped Desert Oasis
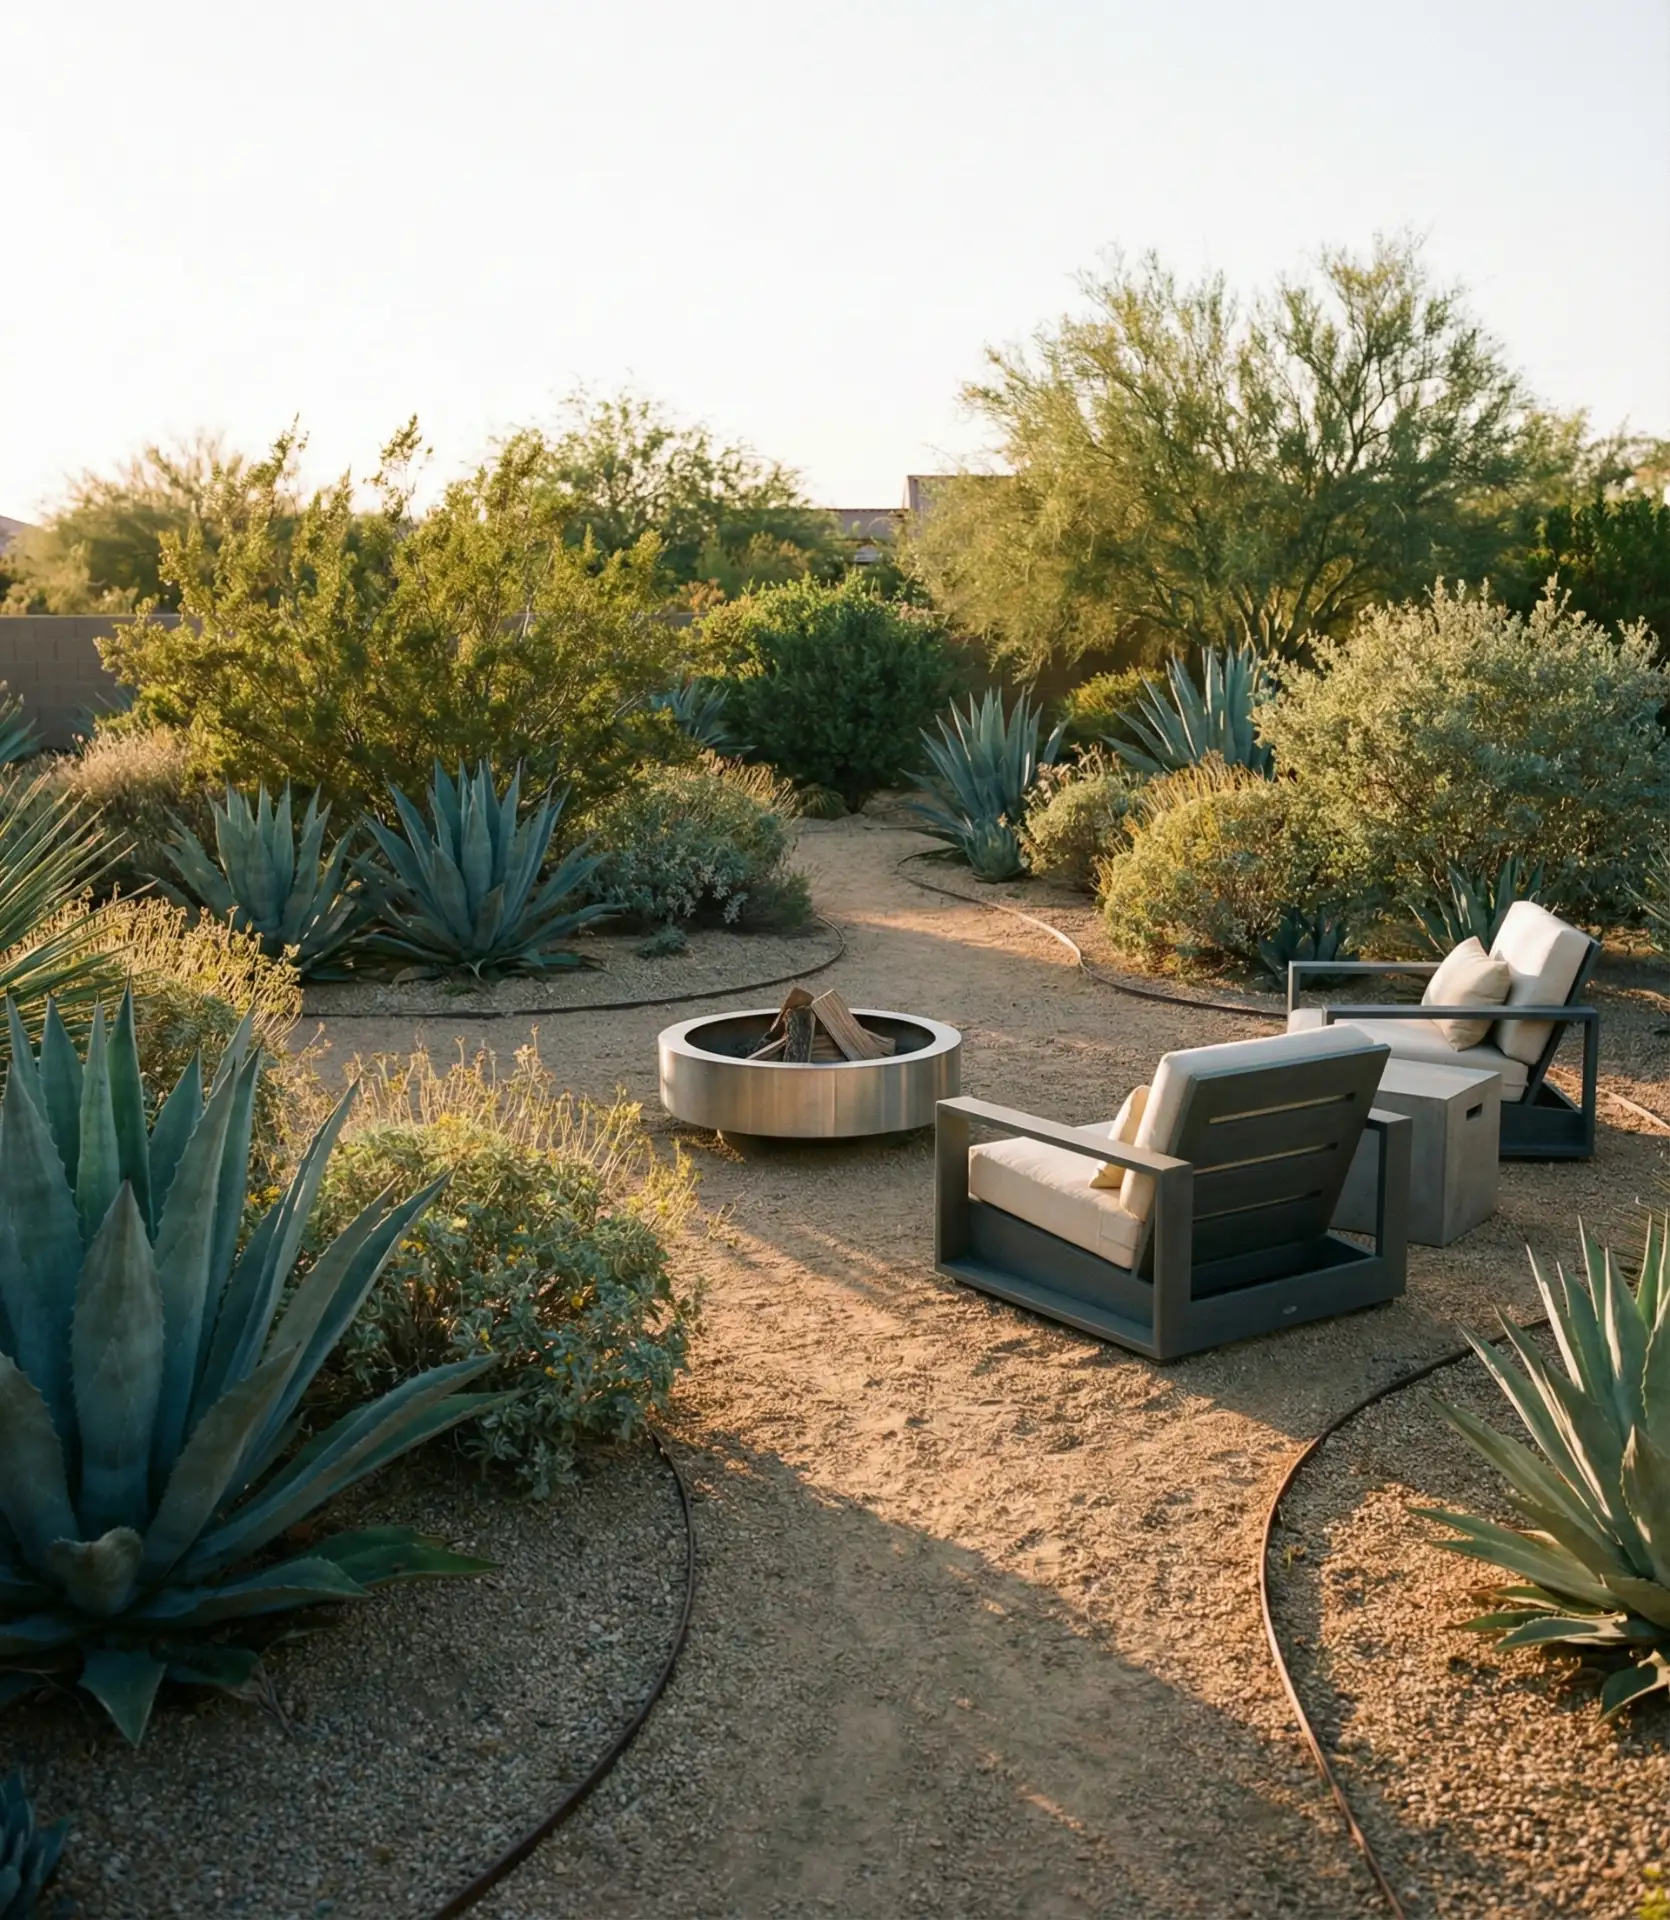
Creating an oasis in arid climates requires embracing drought-tolerant landscaping rather than fighting the environment with thirsty lawns and traditional plants. Xeriscaping combines gravel or decomposed granite surfaces with architectural succulents (agave, aloe, and barrel cactus), native shrubs, and strategic focal points like boulder arrangements or metal sculptures. A small water feature becomes even more impactful in this context—a simple bubbling urn or wall fountain provides the cooling sound and visual relief that defines an oasis atmosphere. The color palette naturally leans toward earth tones with pops of desert bloom color, creating dramatic contrasts that photograph beautifully and maintain interest year-round.
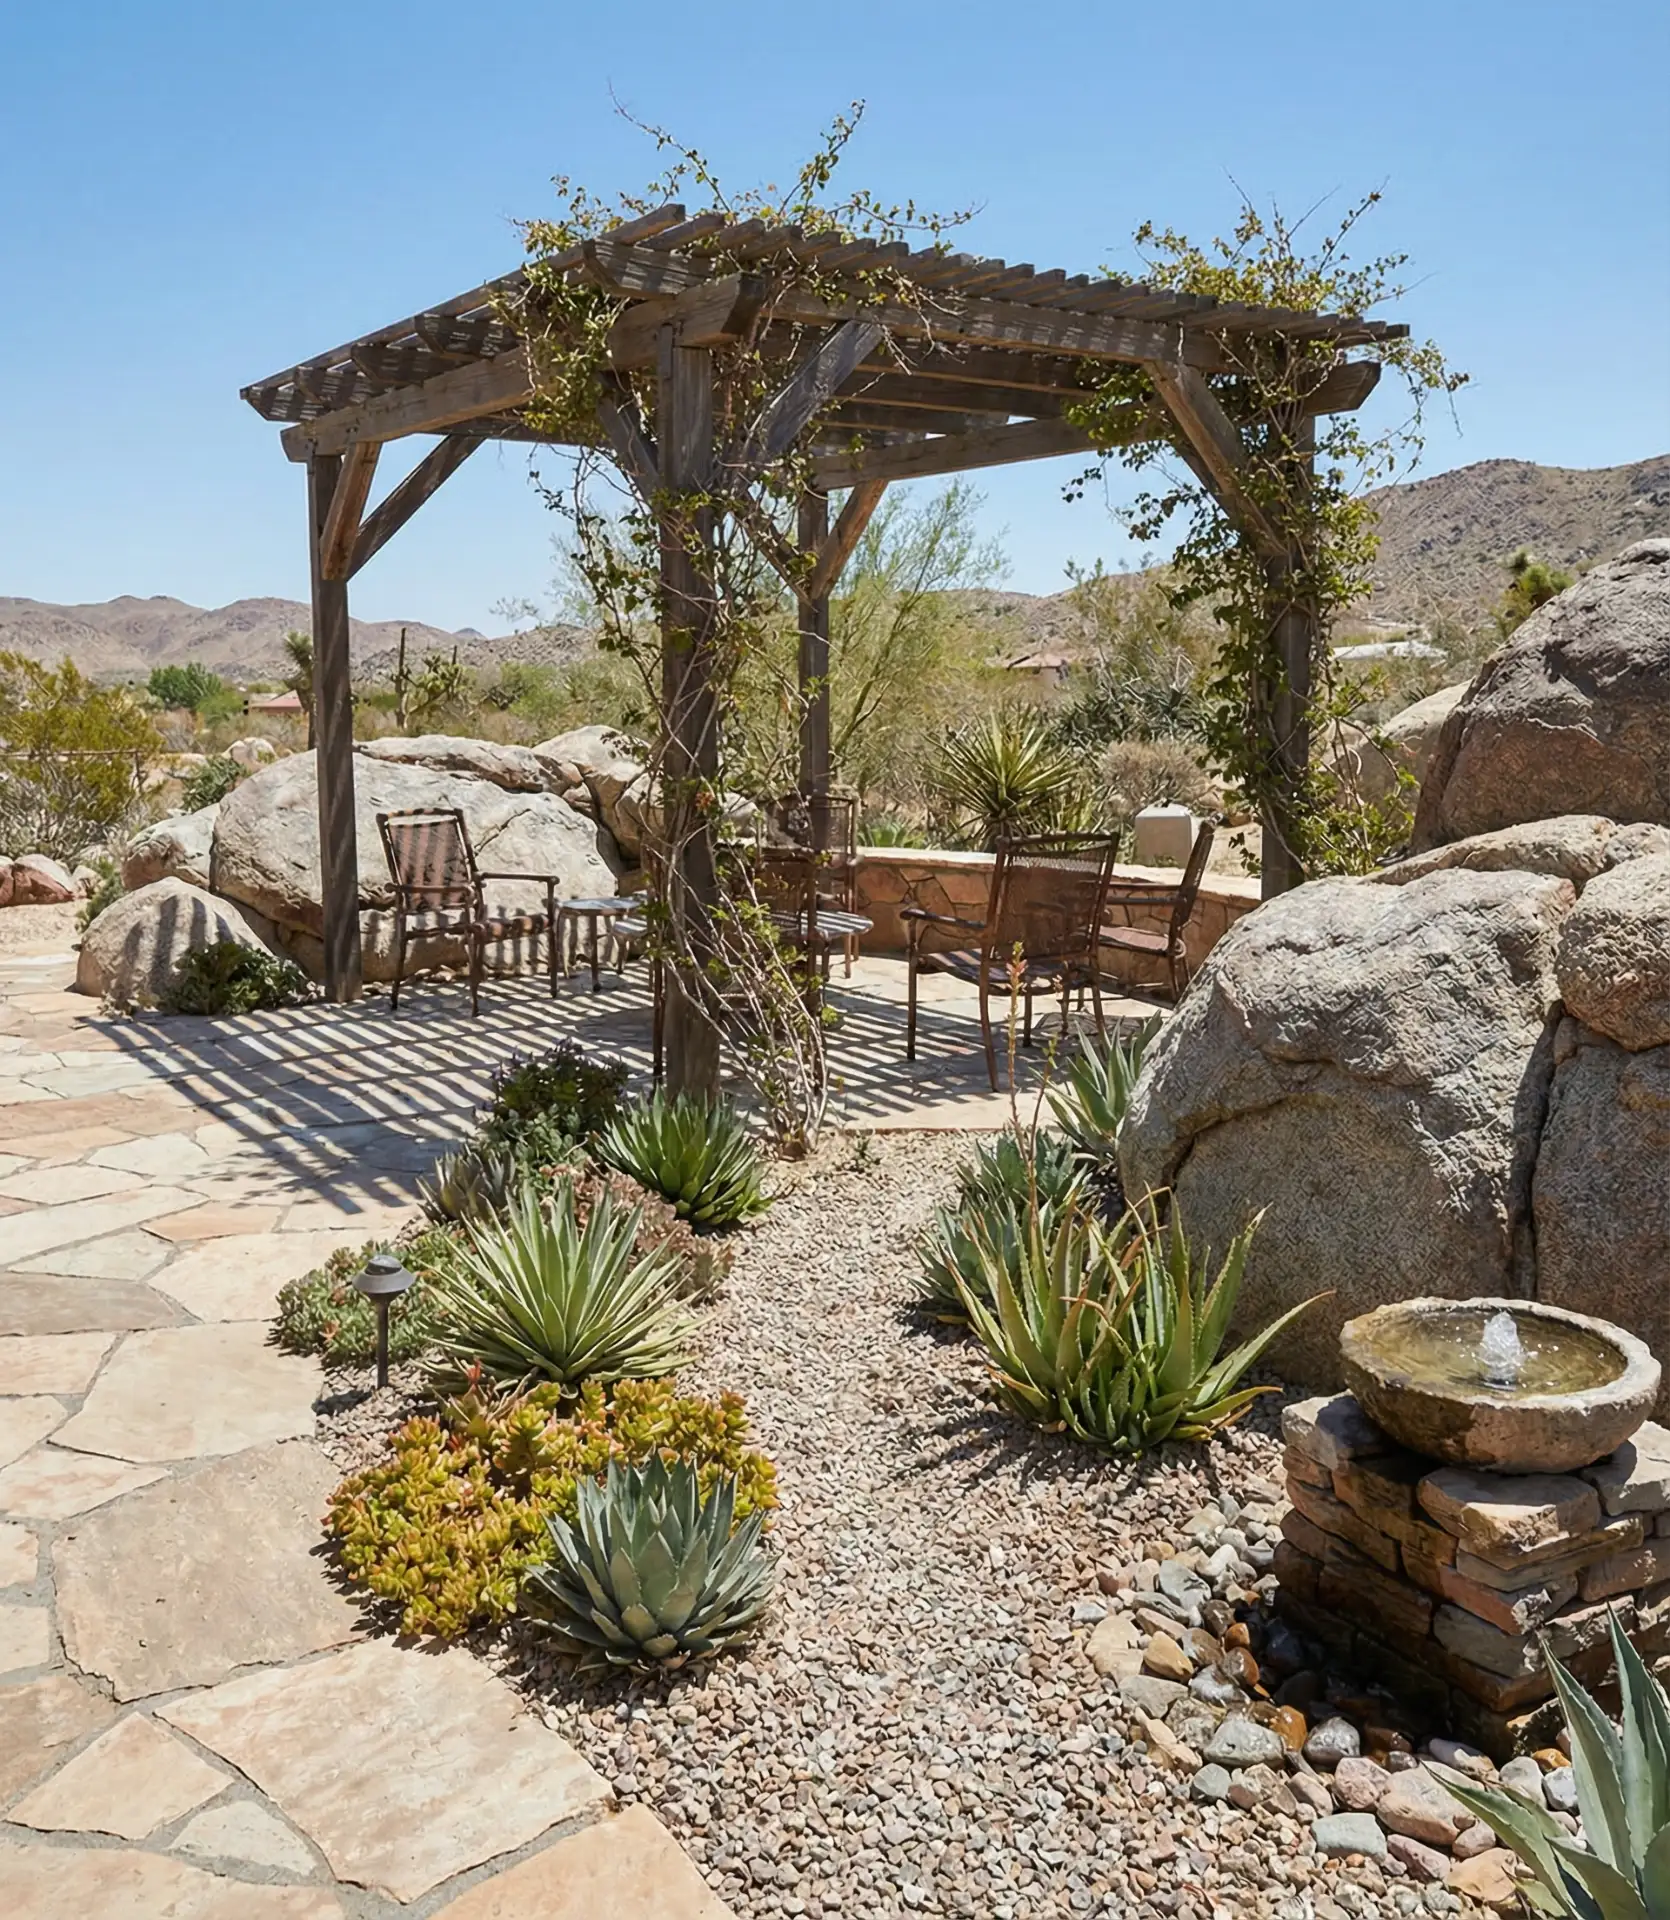
Water usage drops by 50–75% compared to traditional landscaping, with many xeriscape yards using less than 10 gallons per square foot annually once established. The initial installation actually costs less than sod and irrigation systems, though quality decomposed granite and mature specimen plants represent real investment. Maintenance shifts from mowing and watering to occasional weeding and pruning—typically 2-3 hours monthly versus weekly lawn care. This approach particularly resonates in Western states facing persistent drought conditions and water restrictions. The aesthetic has matured significantly from early xeriscaping attempts that looked barren; contemporary designs balance hardscape with strategic planting to create genuine beauty rather than just water conservation.
22. Screened Pool Enclosure
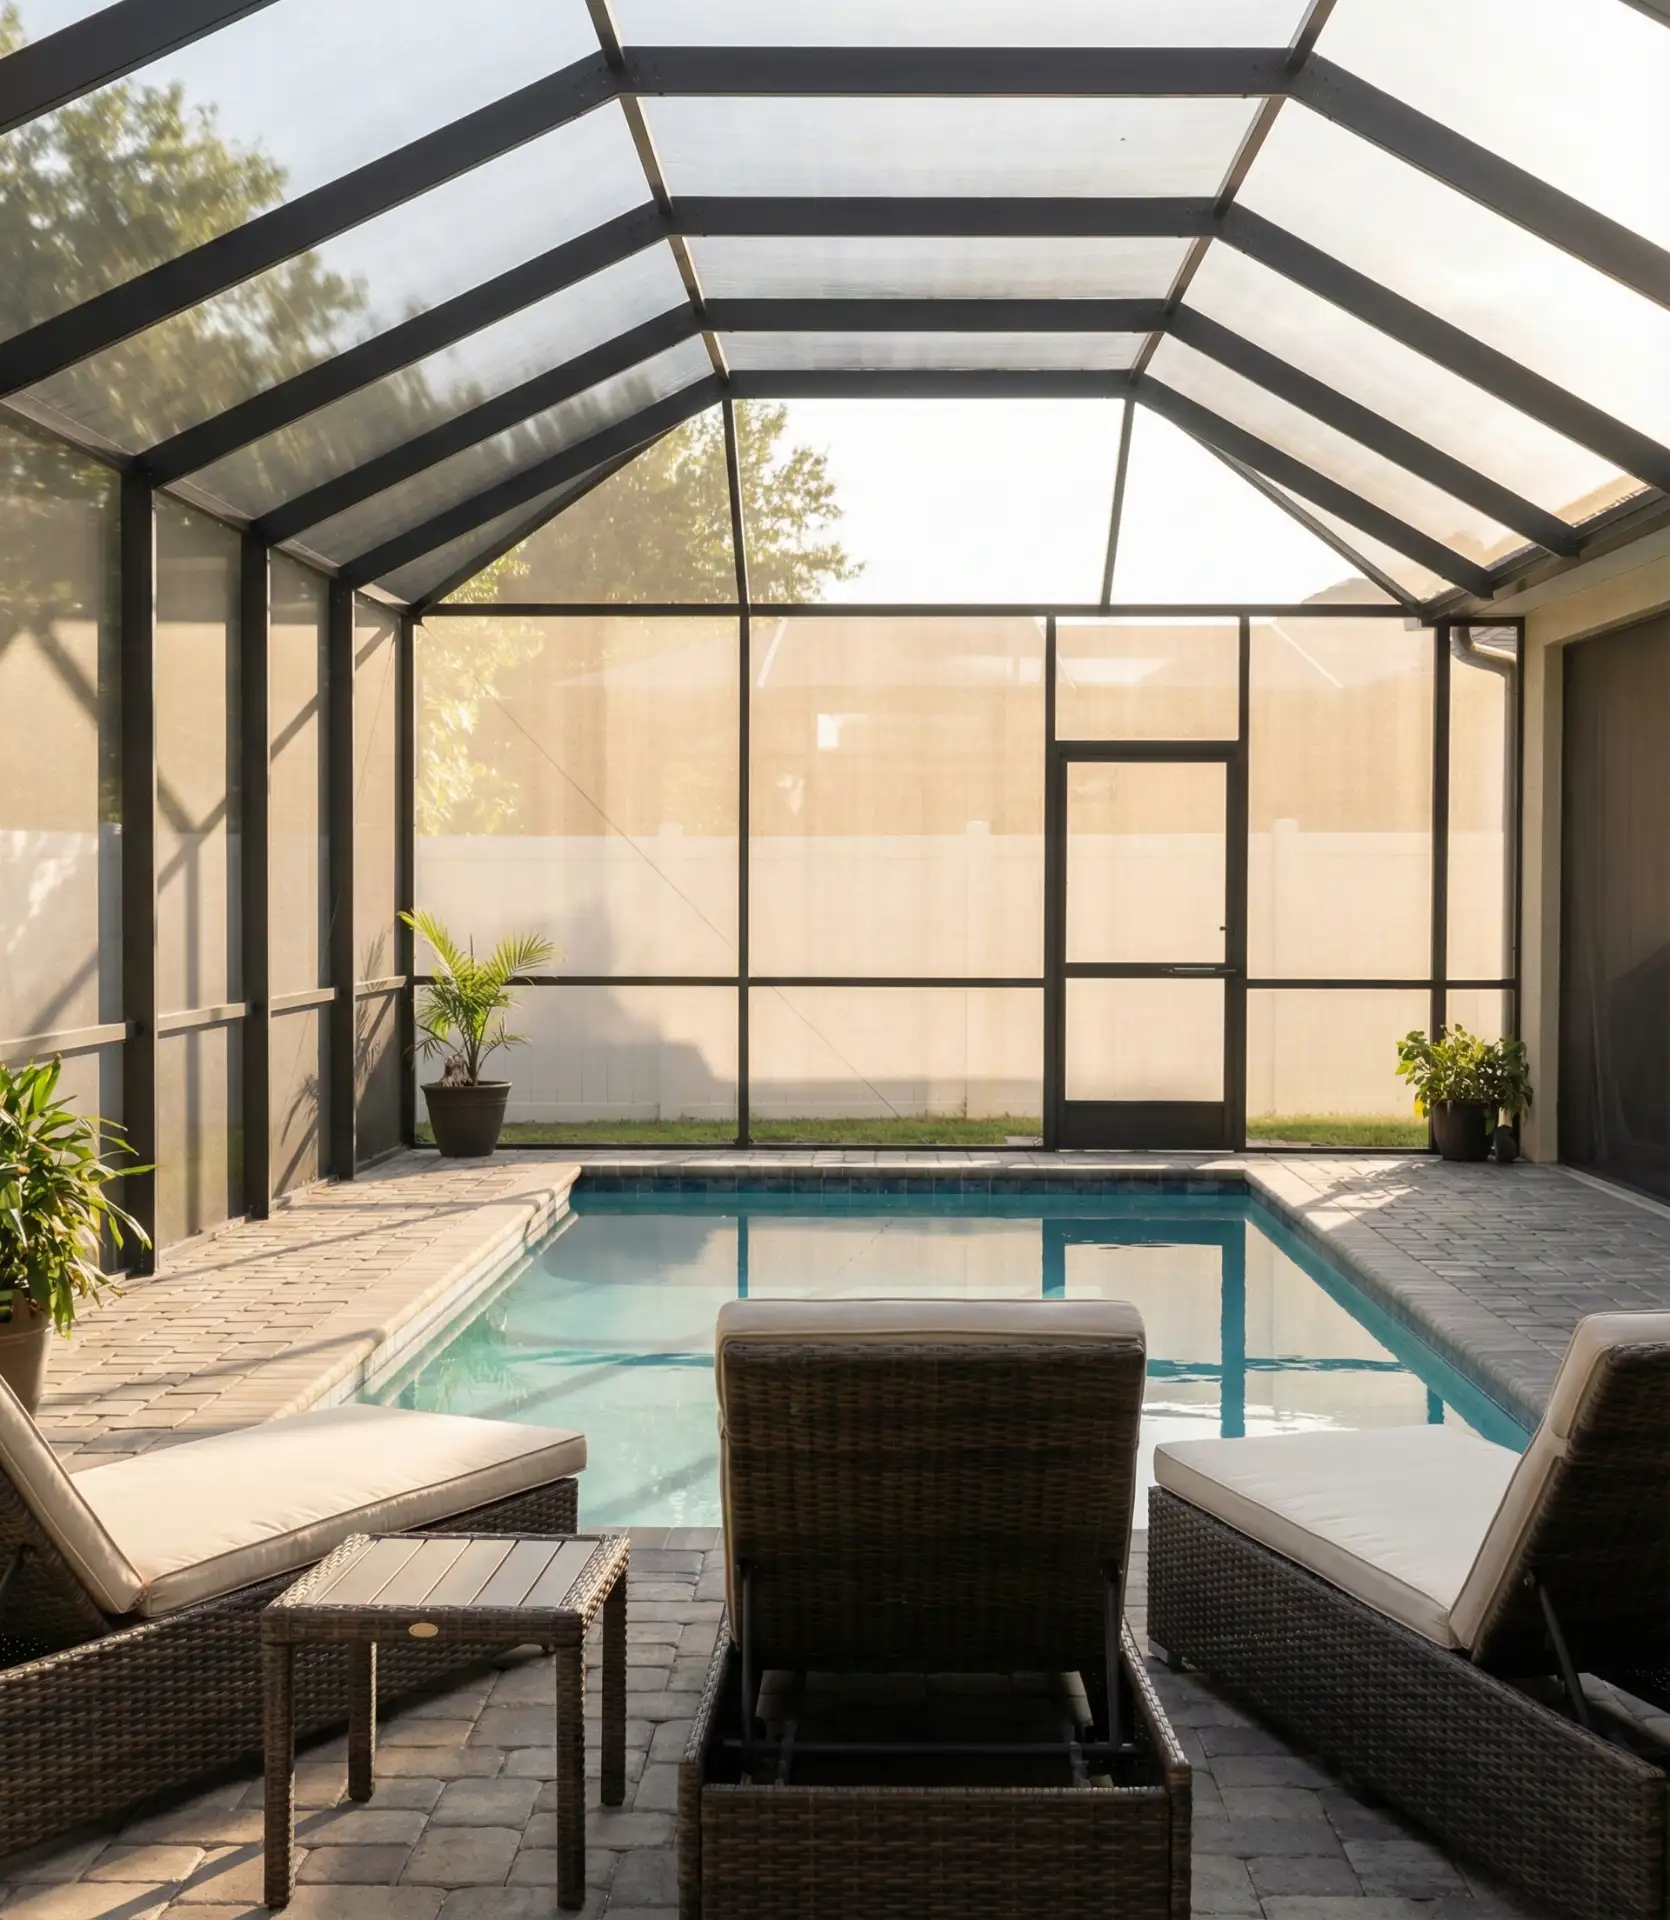
Screen enclosures—standard in Florida and gaining popularity in other humid regions—solve the persistent problem of insects, leaves, and debris contaminating pools. The structures frame aluminum posts and beams with fine-mesh screening that spans from ground to roof, creating a fully enclosed outdoor room. Benefits extend beyond cleanliness: UV-filtering screens reduce sun intensity by 15–30%; pools stay cleaner, requiring less chemical treatment; and enclosed spaces feel more private. Standard installations cover 300-800 square feet and range from $6,000 to $15,000. The screening itself needs replacement every 10-15 years as UV exposure gradually degrades the material, but the aluminum framework lasts decades with minimal maintenance.
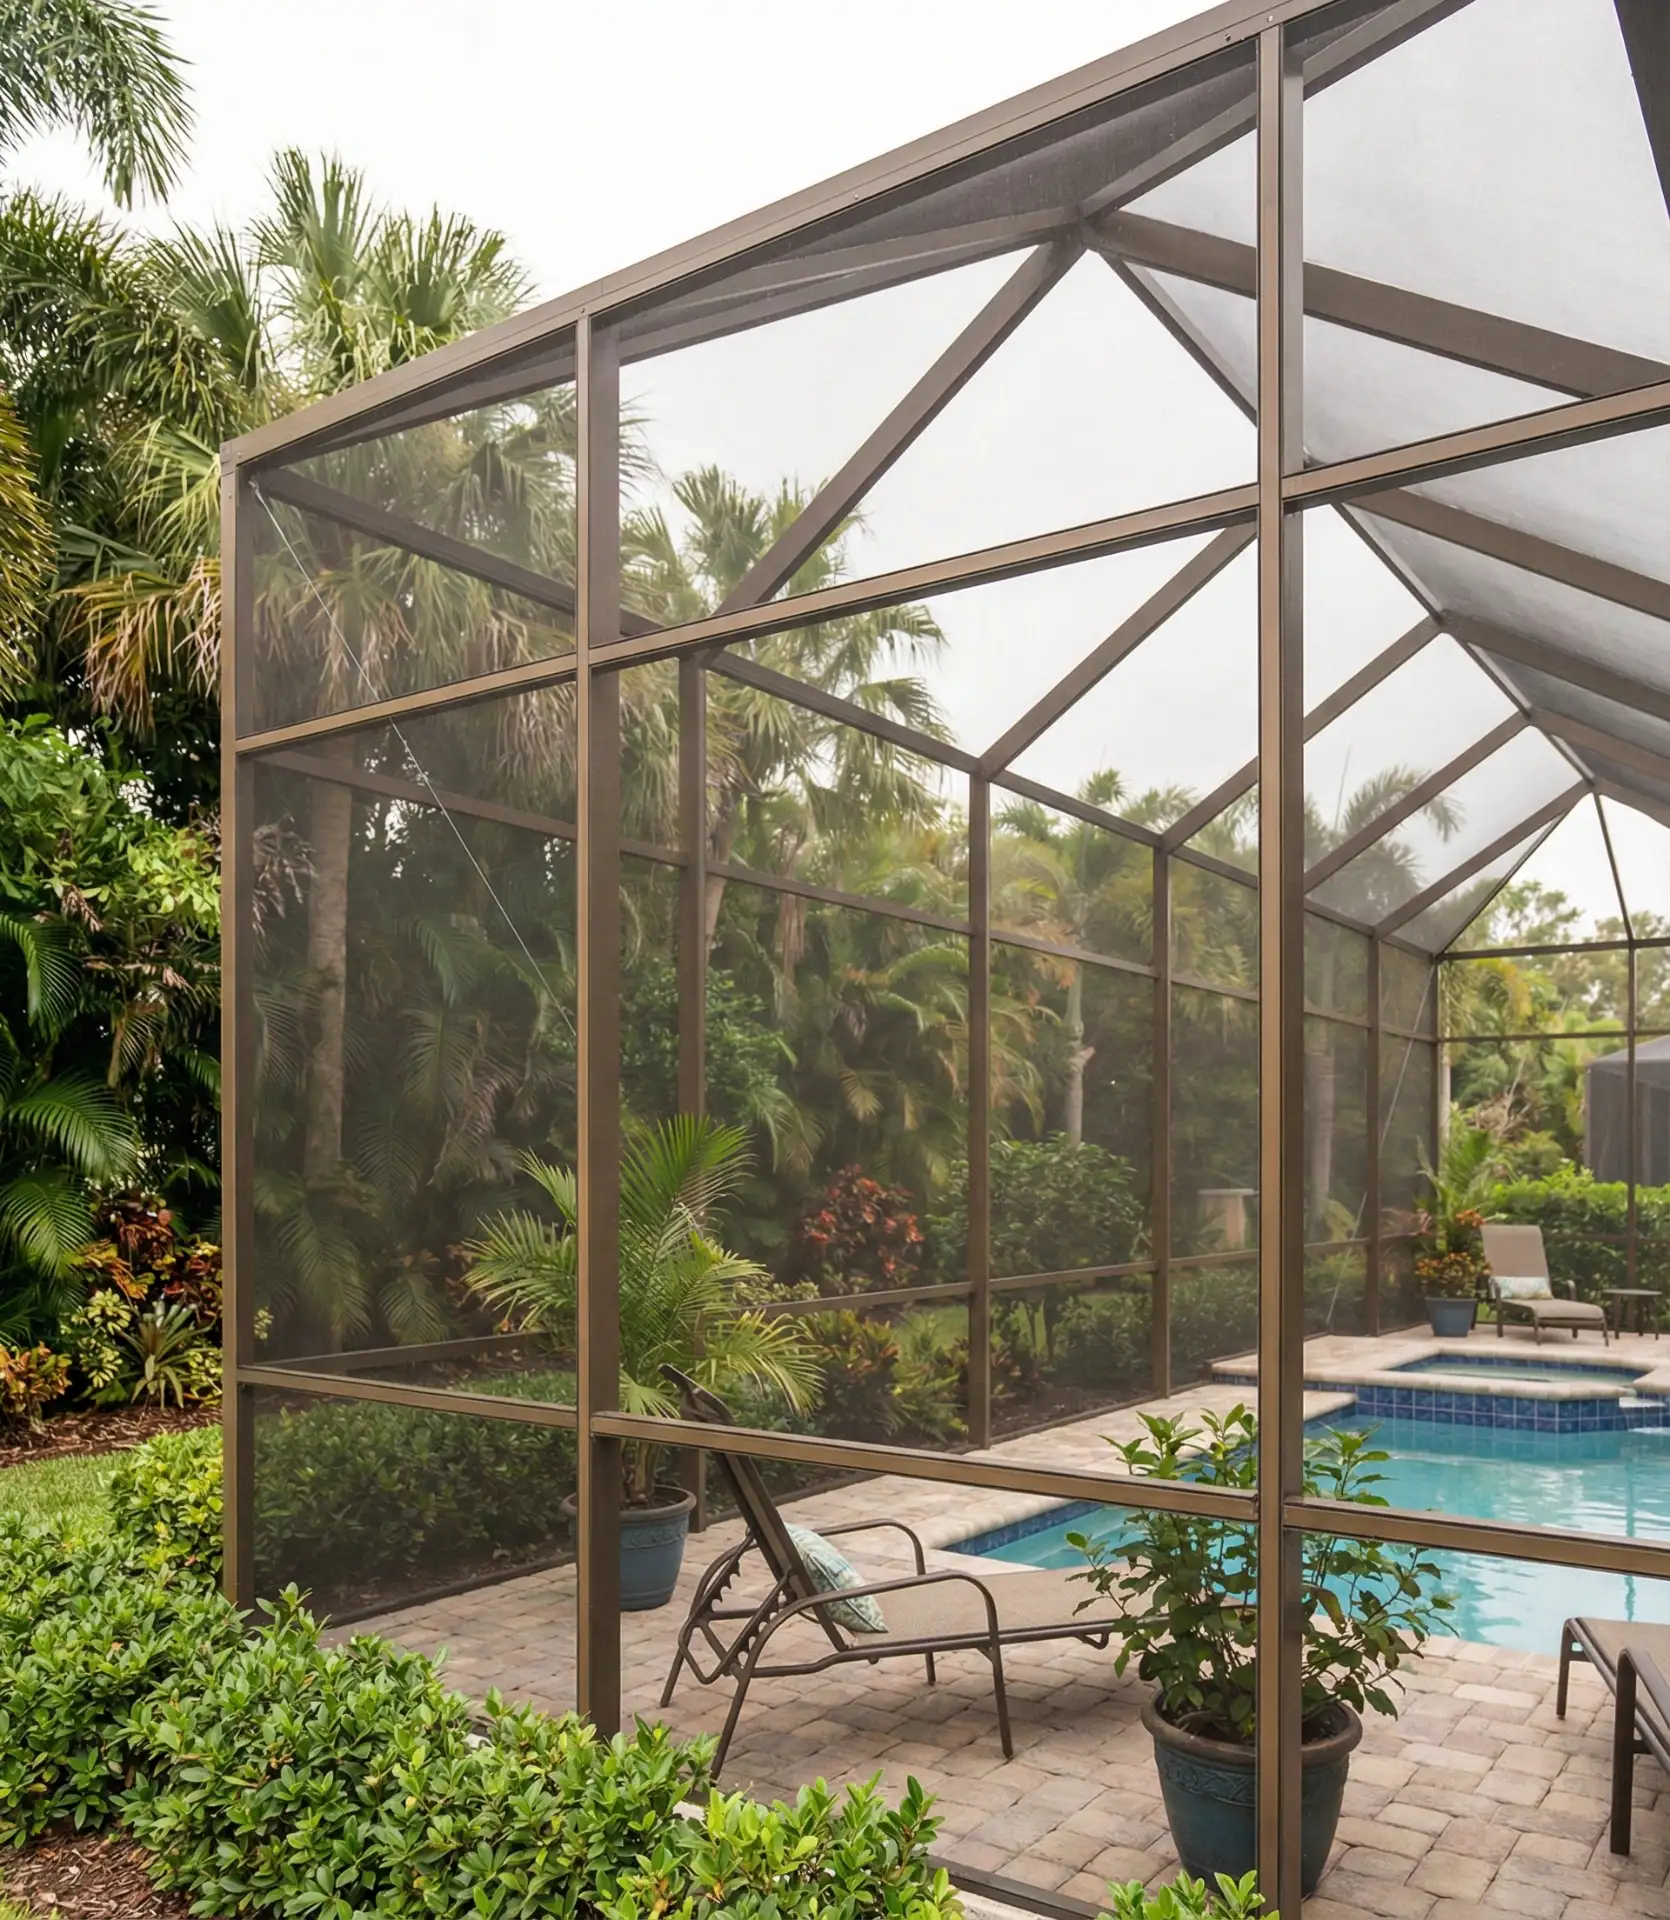
The aesthetic divides opinions—some find enclosures institutional, while others appreciate the practical benefits and the defined room-like feeling they create. The structures need engineering for wind loads, particularly in hurricane-prone coastal areas where they must meet stringent building codes. Adding a section of solid roof panels over a dining or seating area creates weather protection without sacrificing the airflow and open feeling that makes these structures appealing. The enclosed space also enables earlier season pool use in temperate climates by blocking wind and creating a greenhouse effect that warms the air several degrees. Skimming frequency drops from daily to 2-3 times weekly, and vacuum cleaning needs reduce by half.
23. Sunken Conversation Pit with Fire
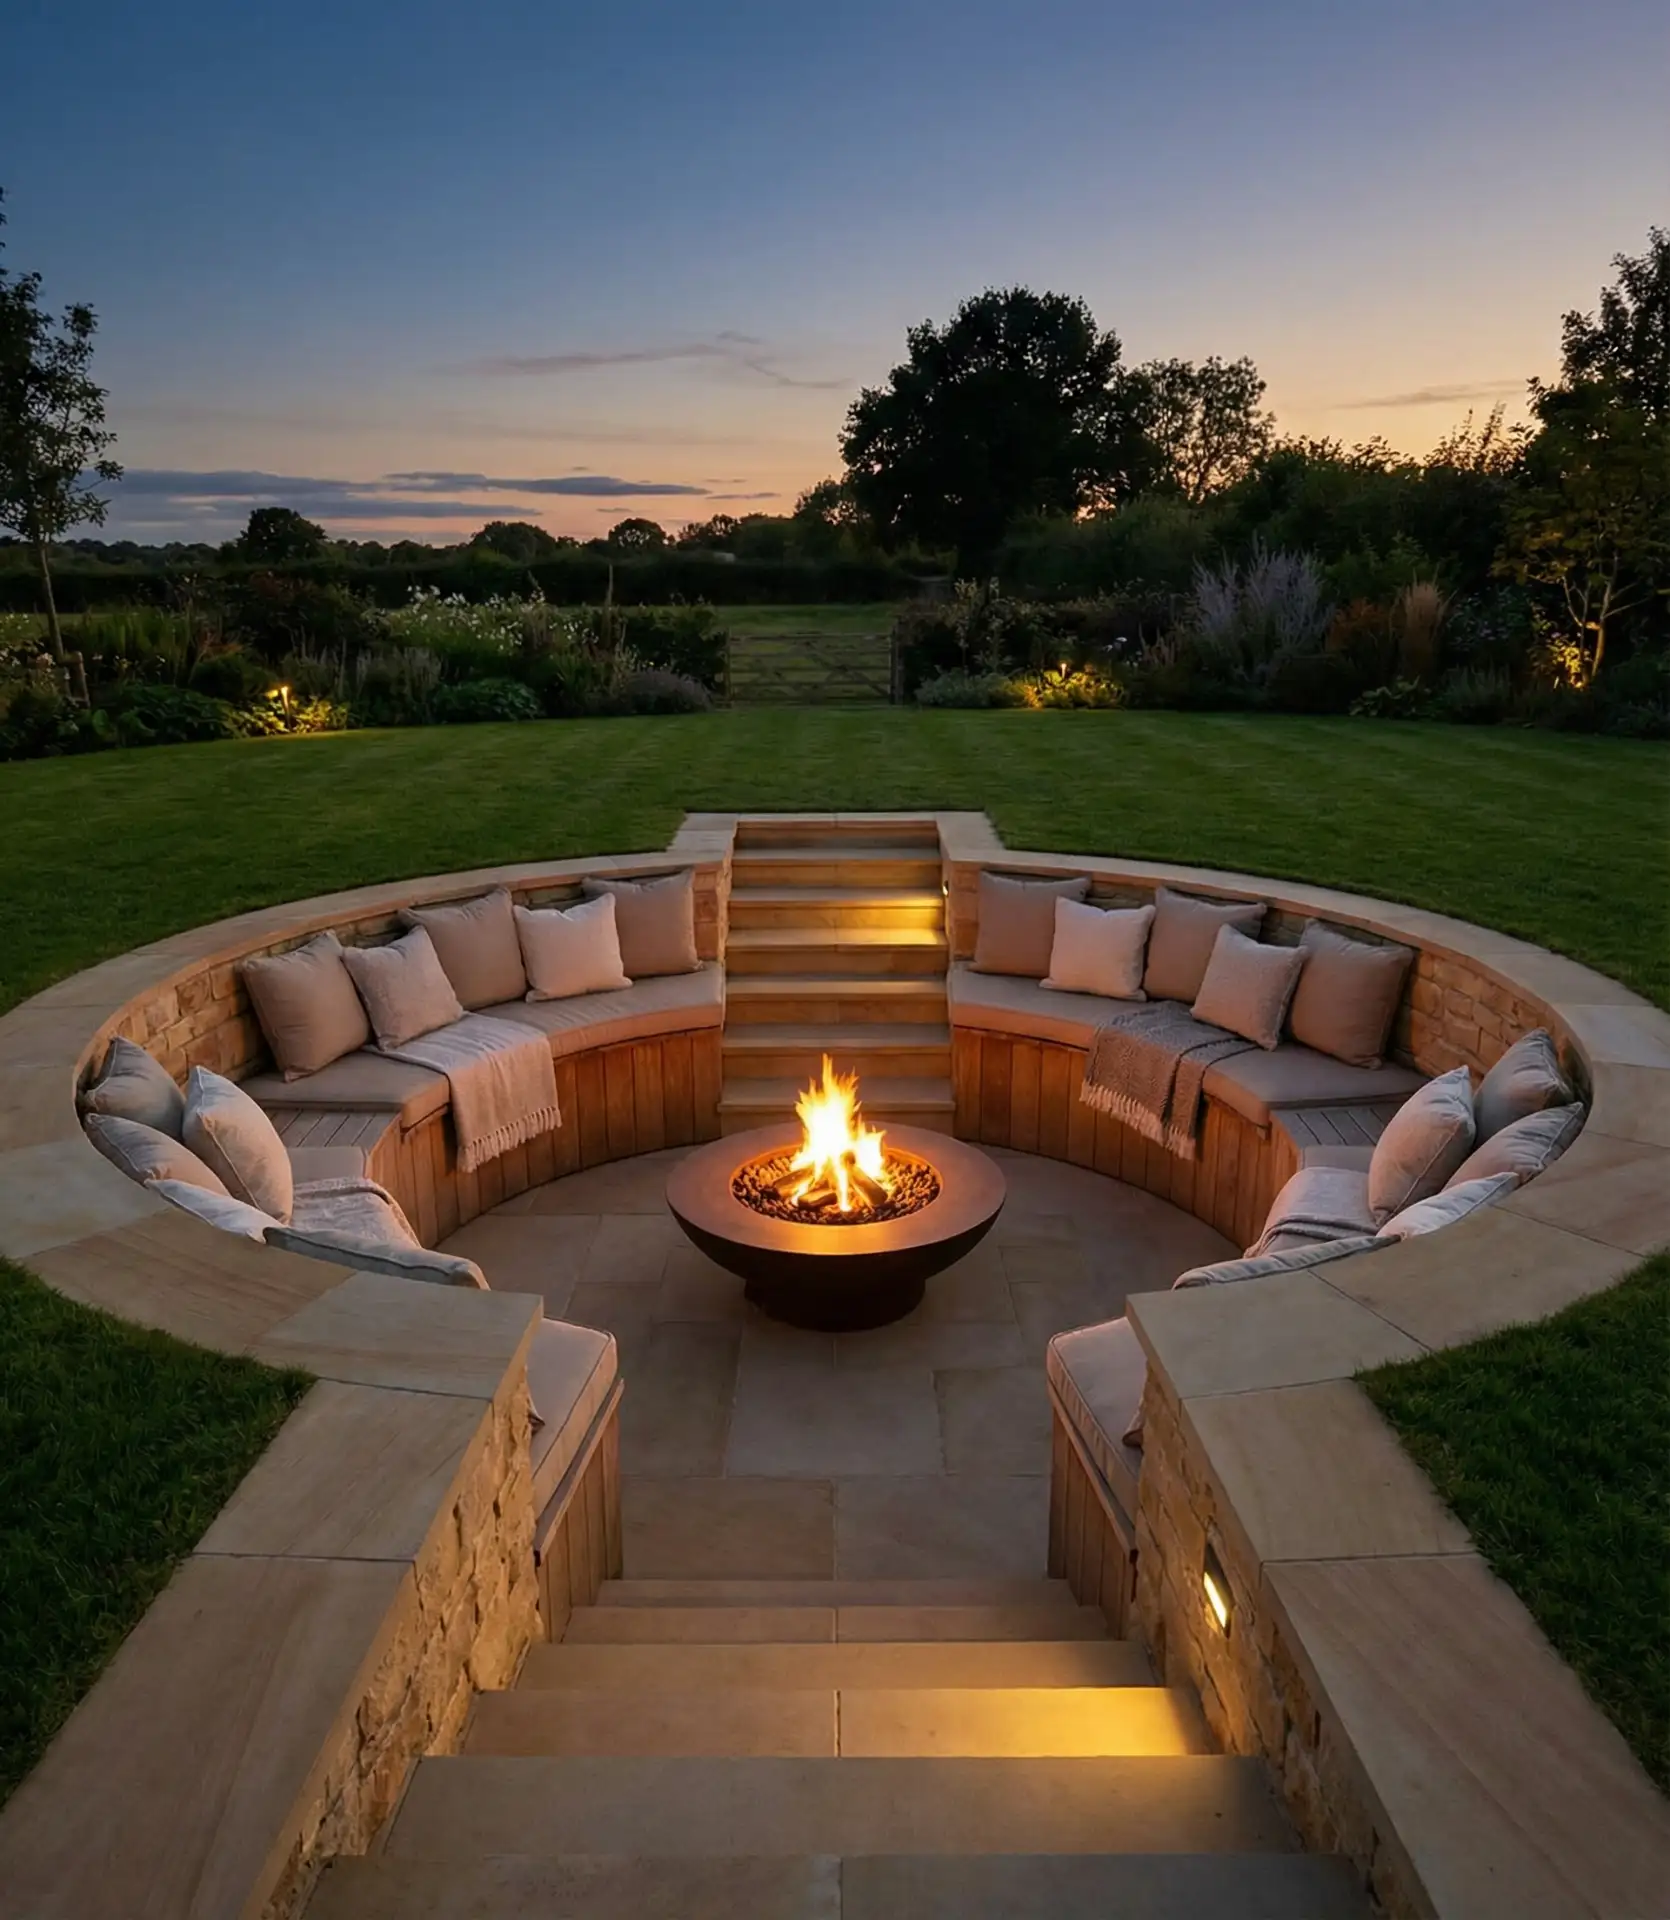
Dropping a seating area 12–18 inches below grade creates intimate scale and wind protection that makes outdoor spaces feel genuinely comfortable rather than just tolerable. The sunken pit—borrowed from mid-century modern interior design—works in both contemporary and traditional landscape styles. Built-in bench seating rings the perimeter at 16–18 inches tall, with a central fire element anchoring the space. The excavation and retaining walls add construction complexity and cost ($8,000-$18,000 typically), but the resulting microclimate and aesthetic impact justify the investment. Even without fire, the configuration encourages face-to-face conversation better than traditional furniture arrangements.
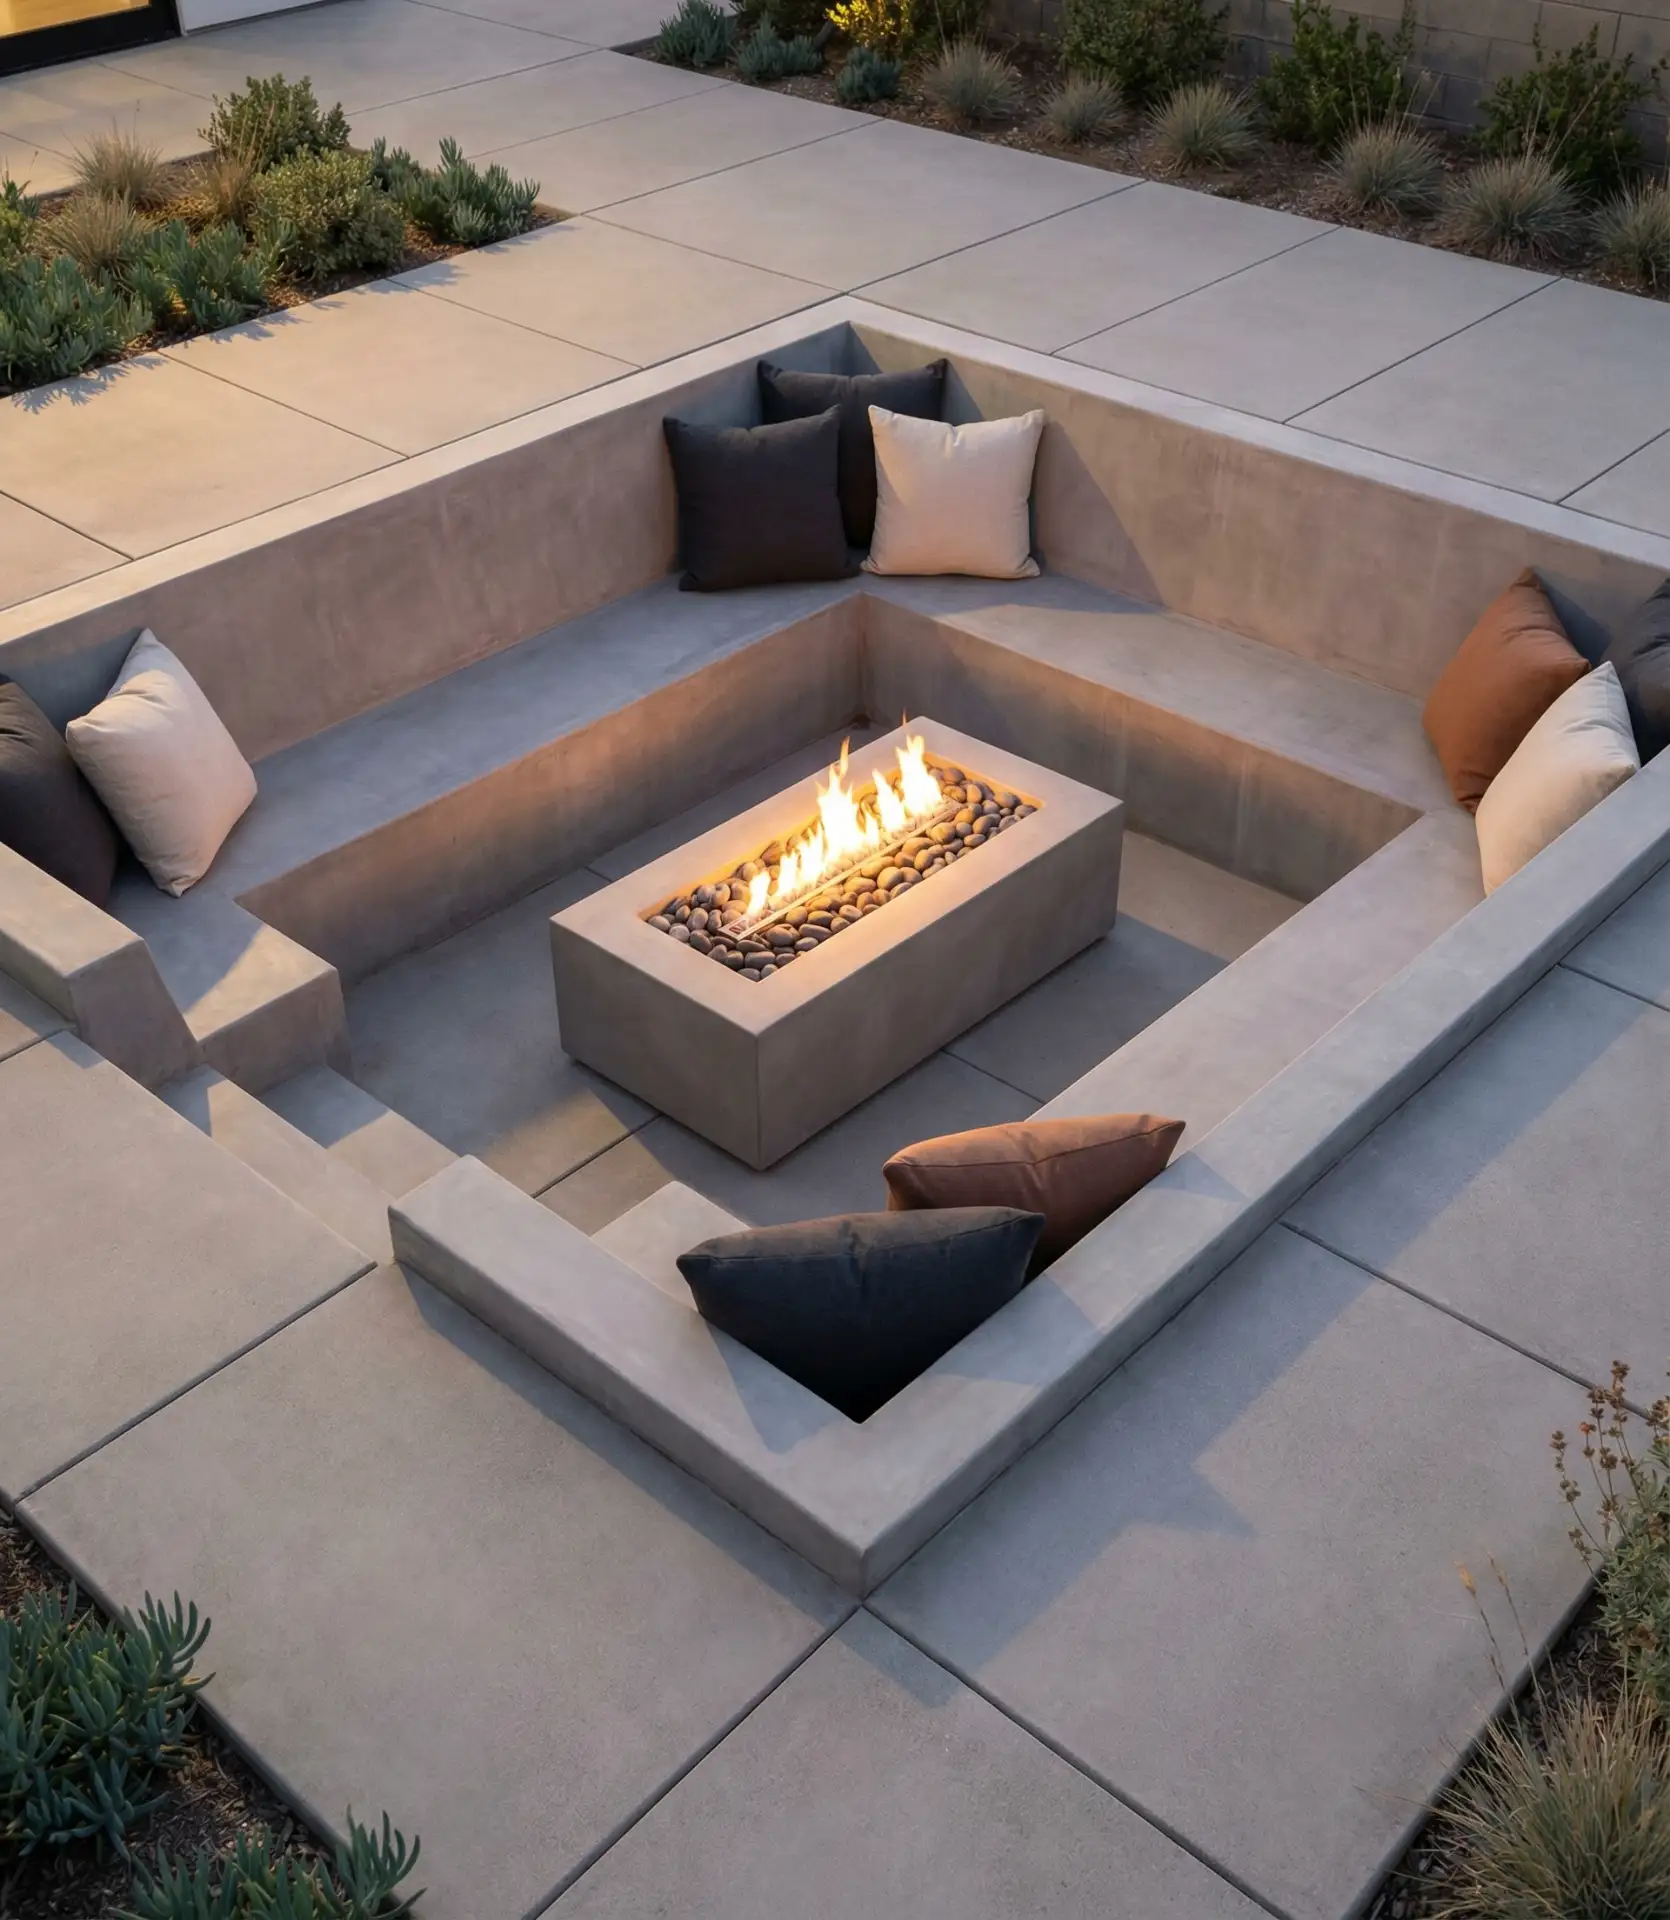
Drainage becomes critical—the pit needs proper sloping and drainage outlets to prevent water pooling during rain events. Many designs incorporate discreet drains at the lowest point connected to the yard’s overall drainage system. The retaining walls need frost-depth footings in northern climates and waterproof membranes to prevent soil erosion behind them. Cushions and pillows should be storage-friendly since you’ll want to remove them during rain; built-in storage lockers within the seating walls solve that problem elegantly. The feature photographs dramatically, creating striking views from elevated windows or second-story decks. This layout works best in larger yards where the excavated area won’t dominate—a minimum 20×20 foot overall footprint allows the pit to feel purposeful rather than cramped.
24. Pool with Integrated Spa Spillover
Combining a pool and hot tub in a single integrated system creates visual continuity while offering temperature flexibility for different seasons and preferences. The spa typically sits elevated 12-18 inches above pool water level, with a spillover edge that creates a waterfall effect as spa water cascades into the pool. Both bodies share filtration and circulation equipment, reducing infrastructure costs and maintenance compared to separate installations. The spa heater operates independently, allowing the hot tub to stay warm year-round while the main pool remains unheated or heated only seasonally. This configuration works particularly well in rectangular or geometric pool designs where the spa forms a natural extension at one end.
The spillover creates soothing ambient sound and constant water movement that helps with circulation and surface skimming. Construction costs run 15–25% higher than pool-only installations due to additional plumbing, an elevated spa structure, and waterproofing requirements. The spa should seat 4-6 people comfortably with proper jet placement for hydrotherapy effect. Real homeowners report that the integrated system gets used more frequently than separate hot tubs positioned elsewhere in the yard—the proximity and visual connection make transitioning between pool and spa natural during pool parties. Since you’re only heating the small spa volume instead of thousands of gallons of pool water, winter heating costs remain manageable.
25. Multi-Purpose Sport Court Conversion
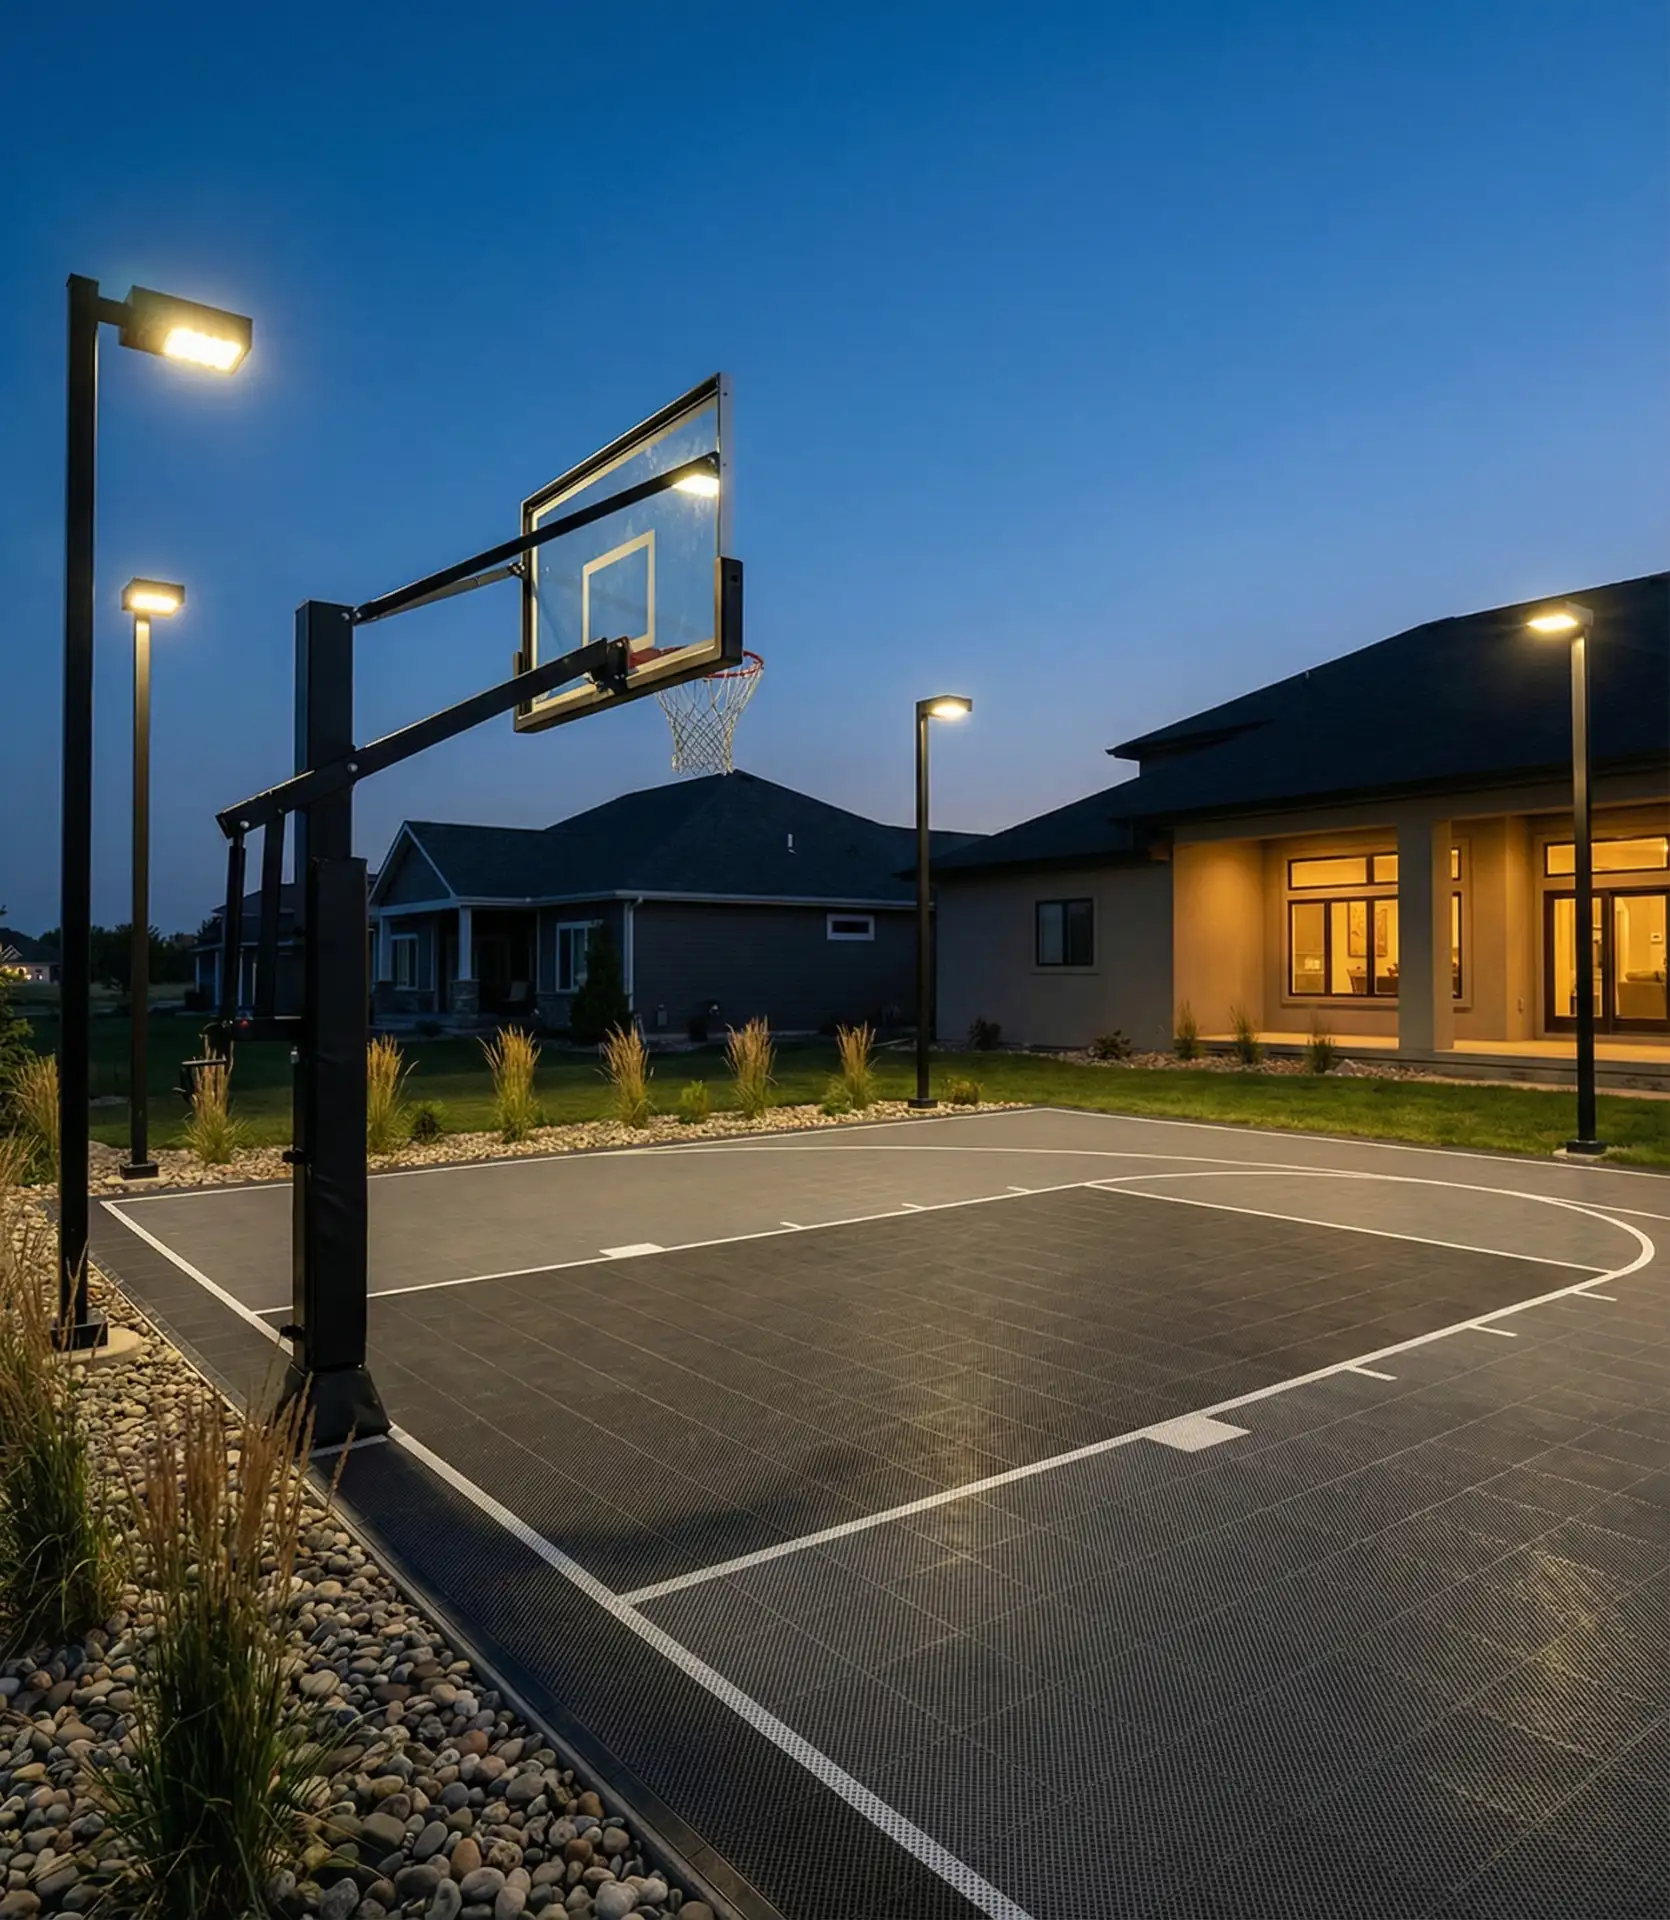
Repurposing an existing concrete pad or installing a modular sport court surface creates active recreation space that families actually use, particularly with kids who age out of play structures but still need outdoor engagement. Interlocking tile systems designed for basketball, pickleball, or multi-sport use are installed over existing concrete or compacted gravel bases, costing $3–$6 per square foot. A half-court basketball setup requires roughly 30×25 feet, while regulation pickleball needs 44×20 feet. The perforated tiles drain quickly after rain and provide cushioning that reduces joint impact compared to straight concrete. Adding simple amenities like a basketball hoop, net posts, and perimeter seating transforms bare yard space into a true outdoor living zone.
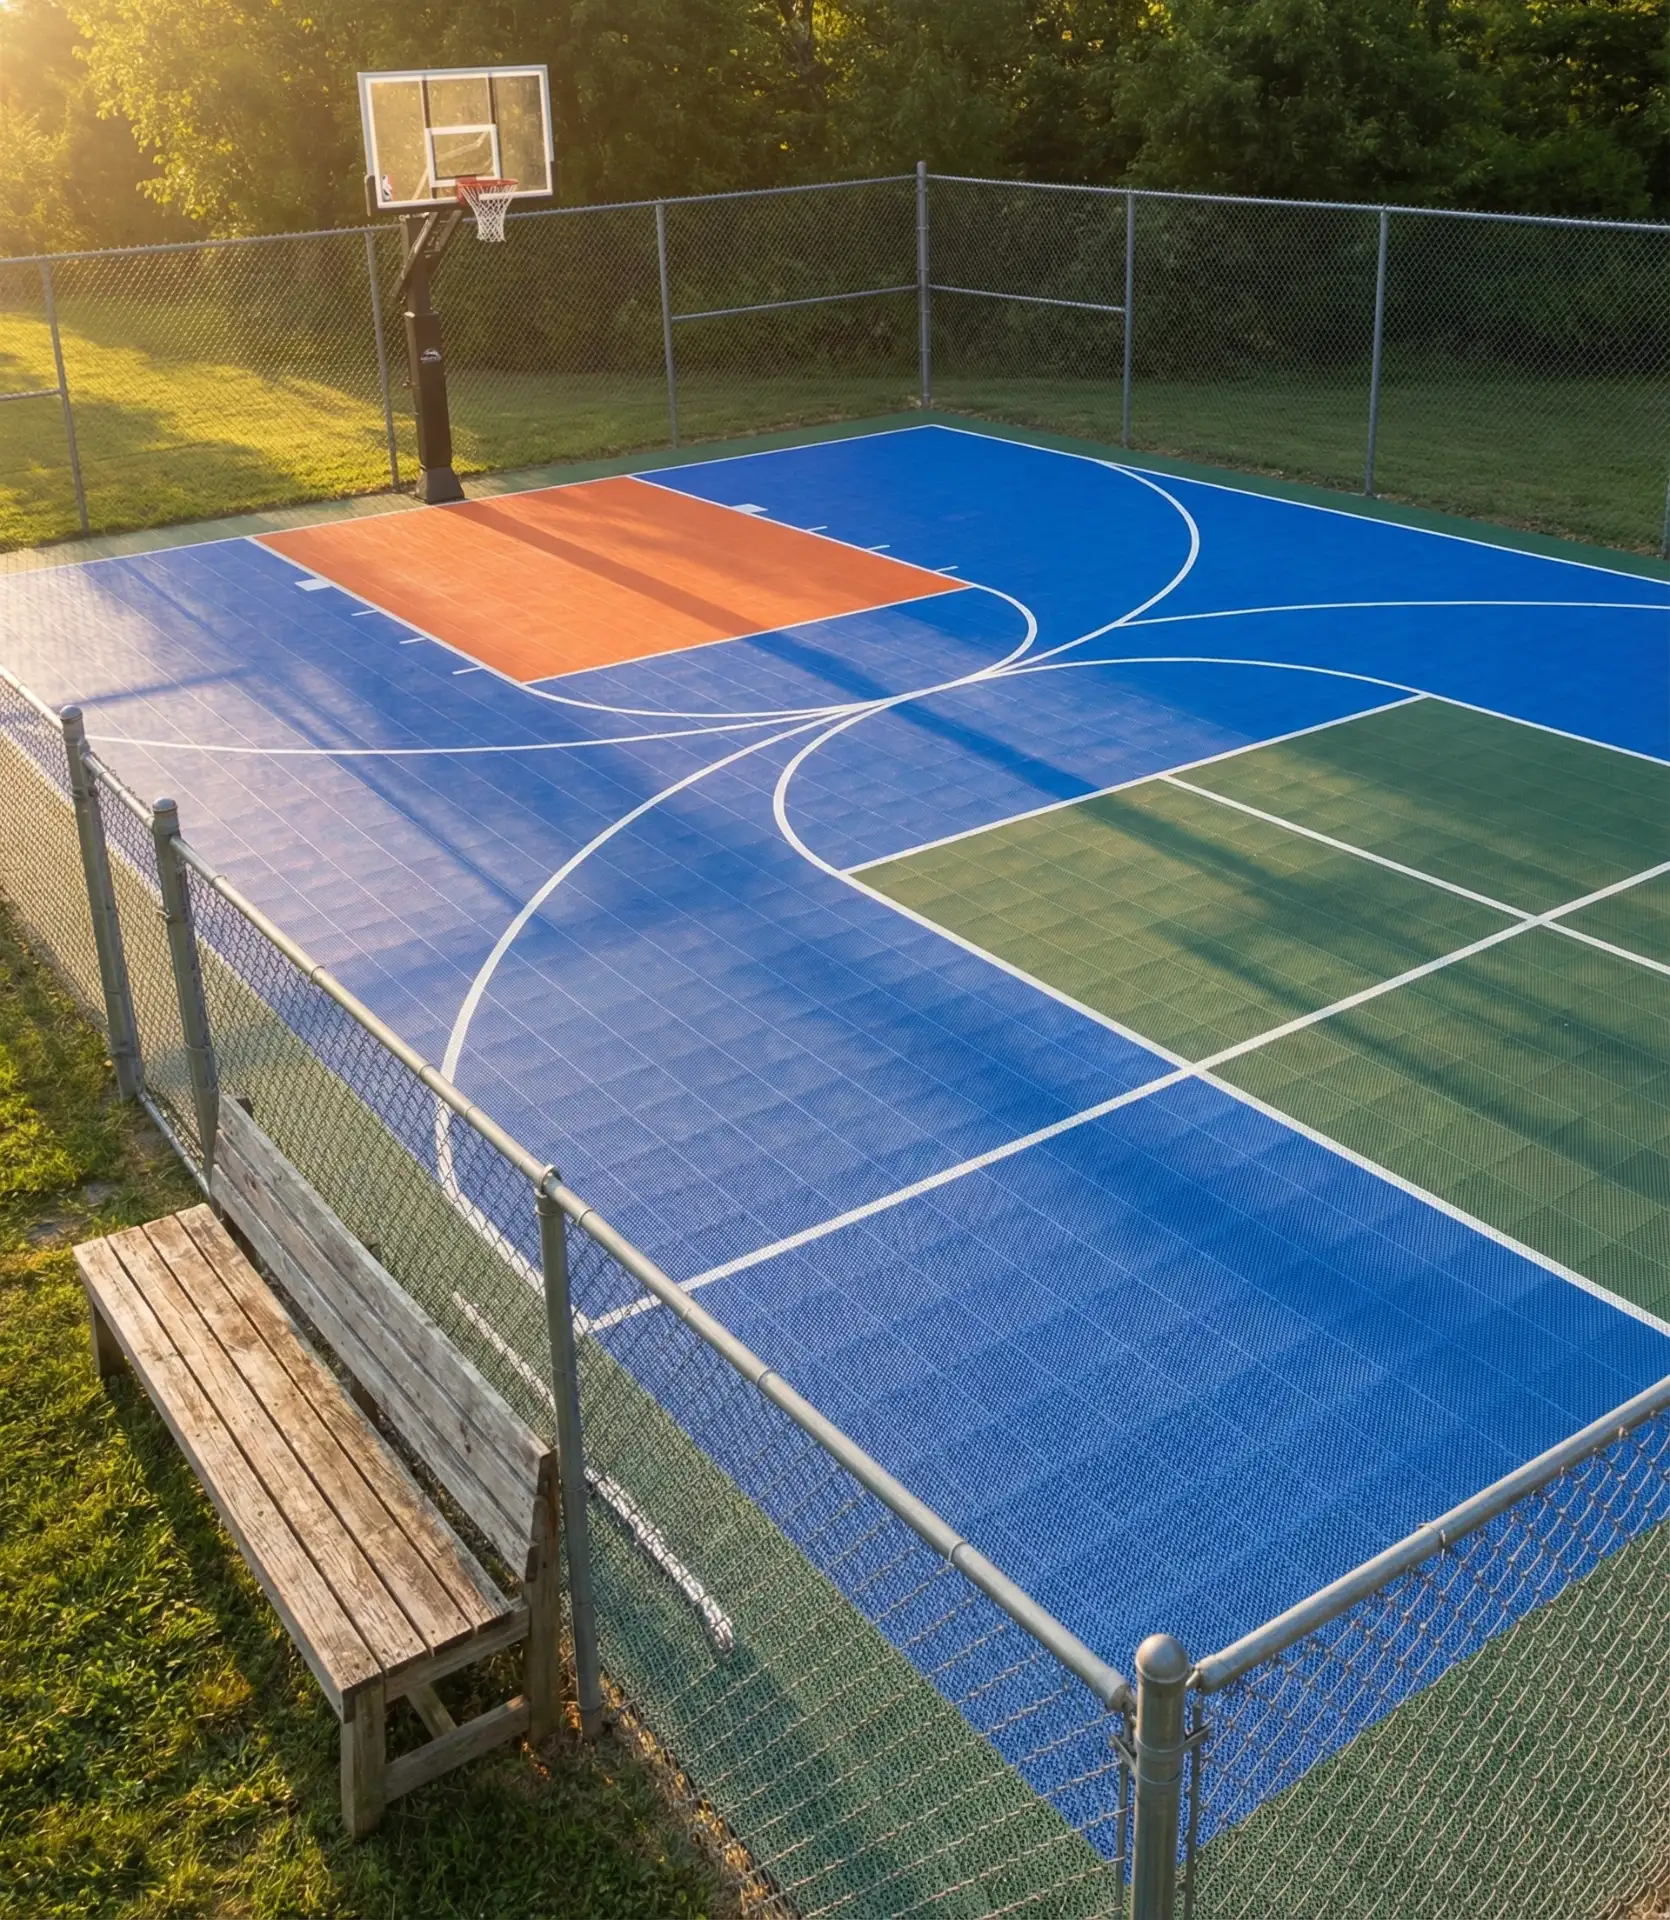
Sport courts particularly suit suburban properties with side yards or rear sections that are too shaded or oddly shaped for pools or elaborate landscaping. The surface withstands weather extremes better than painted court markings on concrete, which fade and peel within a few years. Noise can become an issue with neighbors—basketball bouncing echoes more than conversation—so positioning away from shared property lines helps maintain relationships. The tiles come in various colors, allowing custom designs or team color schemes that kids love. Beyond the novelty factor, these courts maintain their value by adapting as family needs change: basketball for teens converts to pickleball for empty-nesters or simply becomes an expanded patio surface with furniture replacing the hoop.
Your backyard oasis doesn’t require unlimited funds or professional contractors—it needs thoughtful planning that aligns with your lifestyle, climate, and available space. Whether you’re drawn to the cooling relief of water features, the gathering power of fire elements, or the simple pleasure of well-designed outdoor rooms, these ideas provide starting points that you can adapt and combine. The most successful outdoor spaces reflect personal priorities rather than trending styles, creating environments you’ll actually use rather than just admire from inside. What elements resonate with your vision? Share your backyard transformation plans or completed projects in the comments—we’d love to see how you’re crafting your own outdoor retreat.