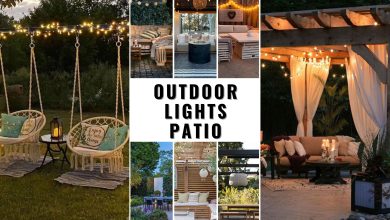
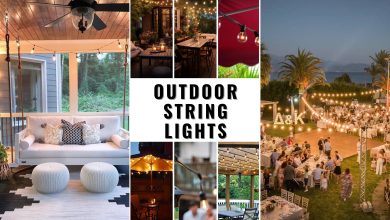
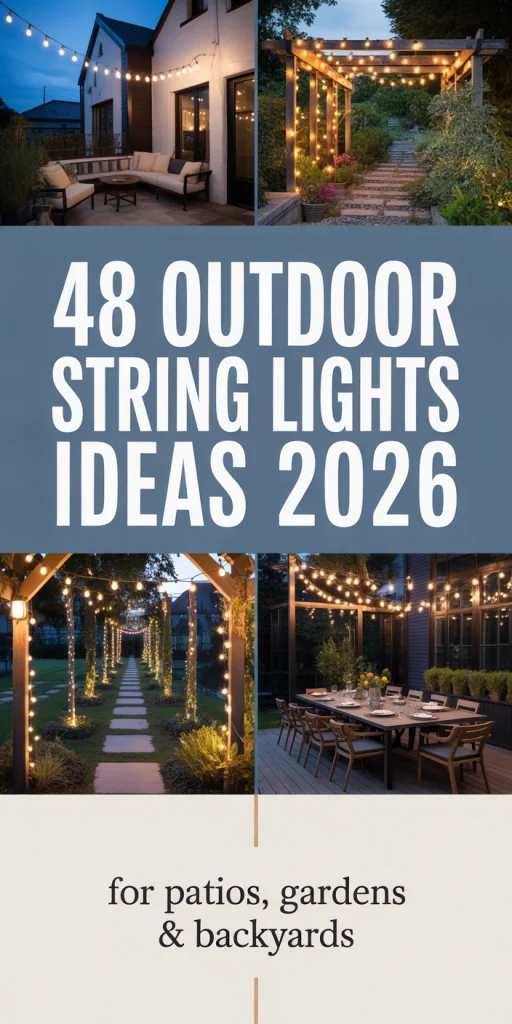
48 Outdoor String Lights Ideas 2026: Transform Your Backyard Into a Glowing Paradise
Outdoor string lights have become one of the most searched home design elements on Pinterest in 2026, and for good reason. They transform any outdoor space into a warm, inviting retreat where families gather long after sunset. Whether you’re organizing a summer wedding, revamping your backyard, or seeking to expand your living area outdoors, the appropriate lighting significantly enhances the experience. This guide explores creative approaches to hanging and styling string lights that work beautifully in American homes, from compact urban patios to sprawling suburban yards.
1. Classic Pergola Canopy Installation
A pergola provides the perfect framework for creating a stunning overhead lighting display in your backyard. String the lights in parallel lines across the beams, spacing them about 18 inches apart for even coverage. This patio approach works exceptionally well with Edison bulbs or globe lights, creating a restaurant-quality ambiance that makes outdoor dining feel special. The structured grid pattern adds architectural interest during daylight hours too. 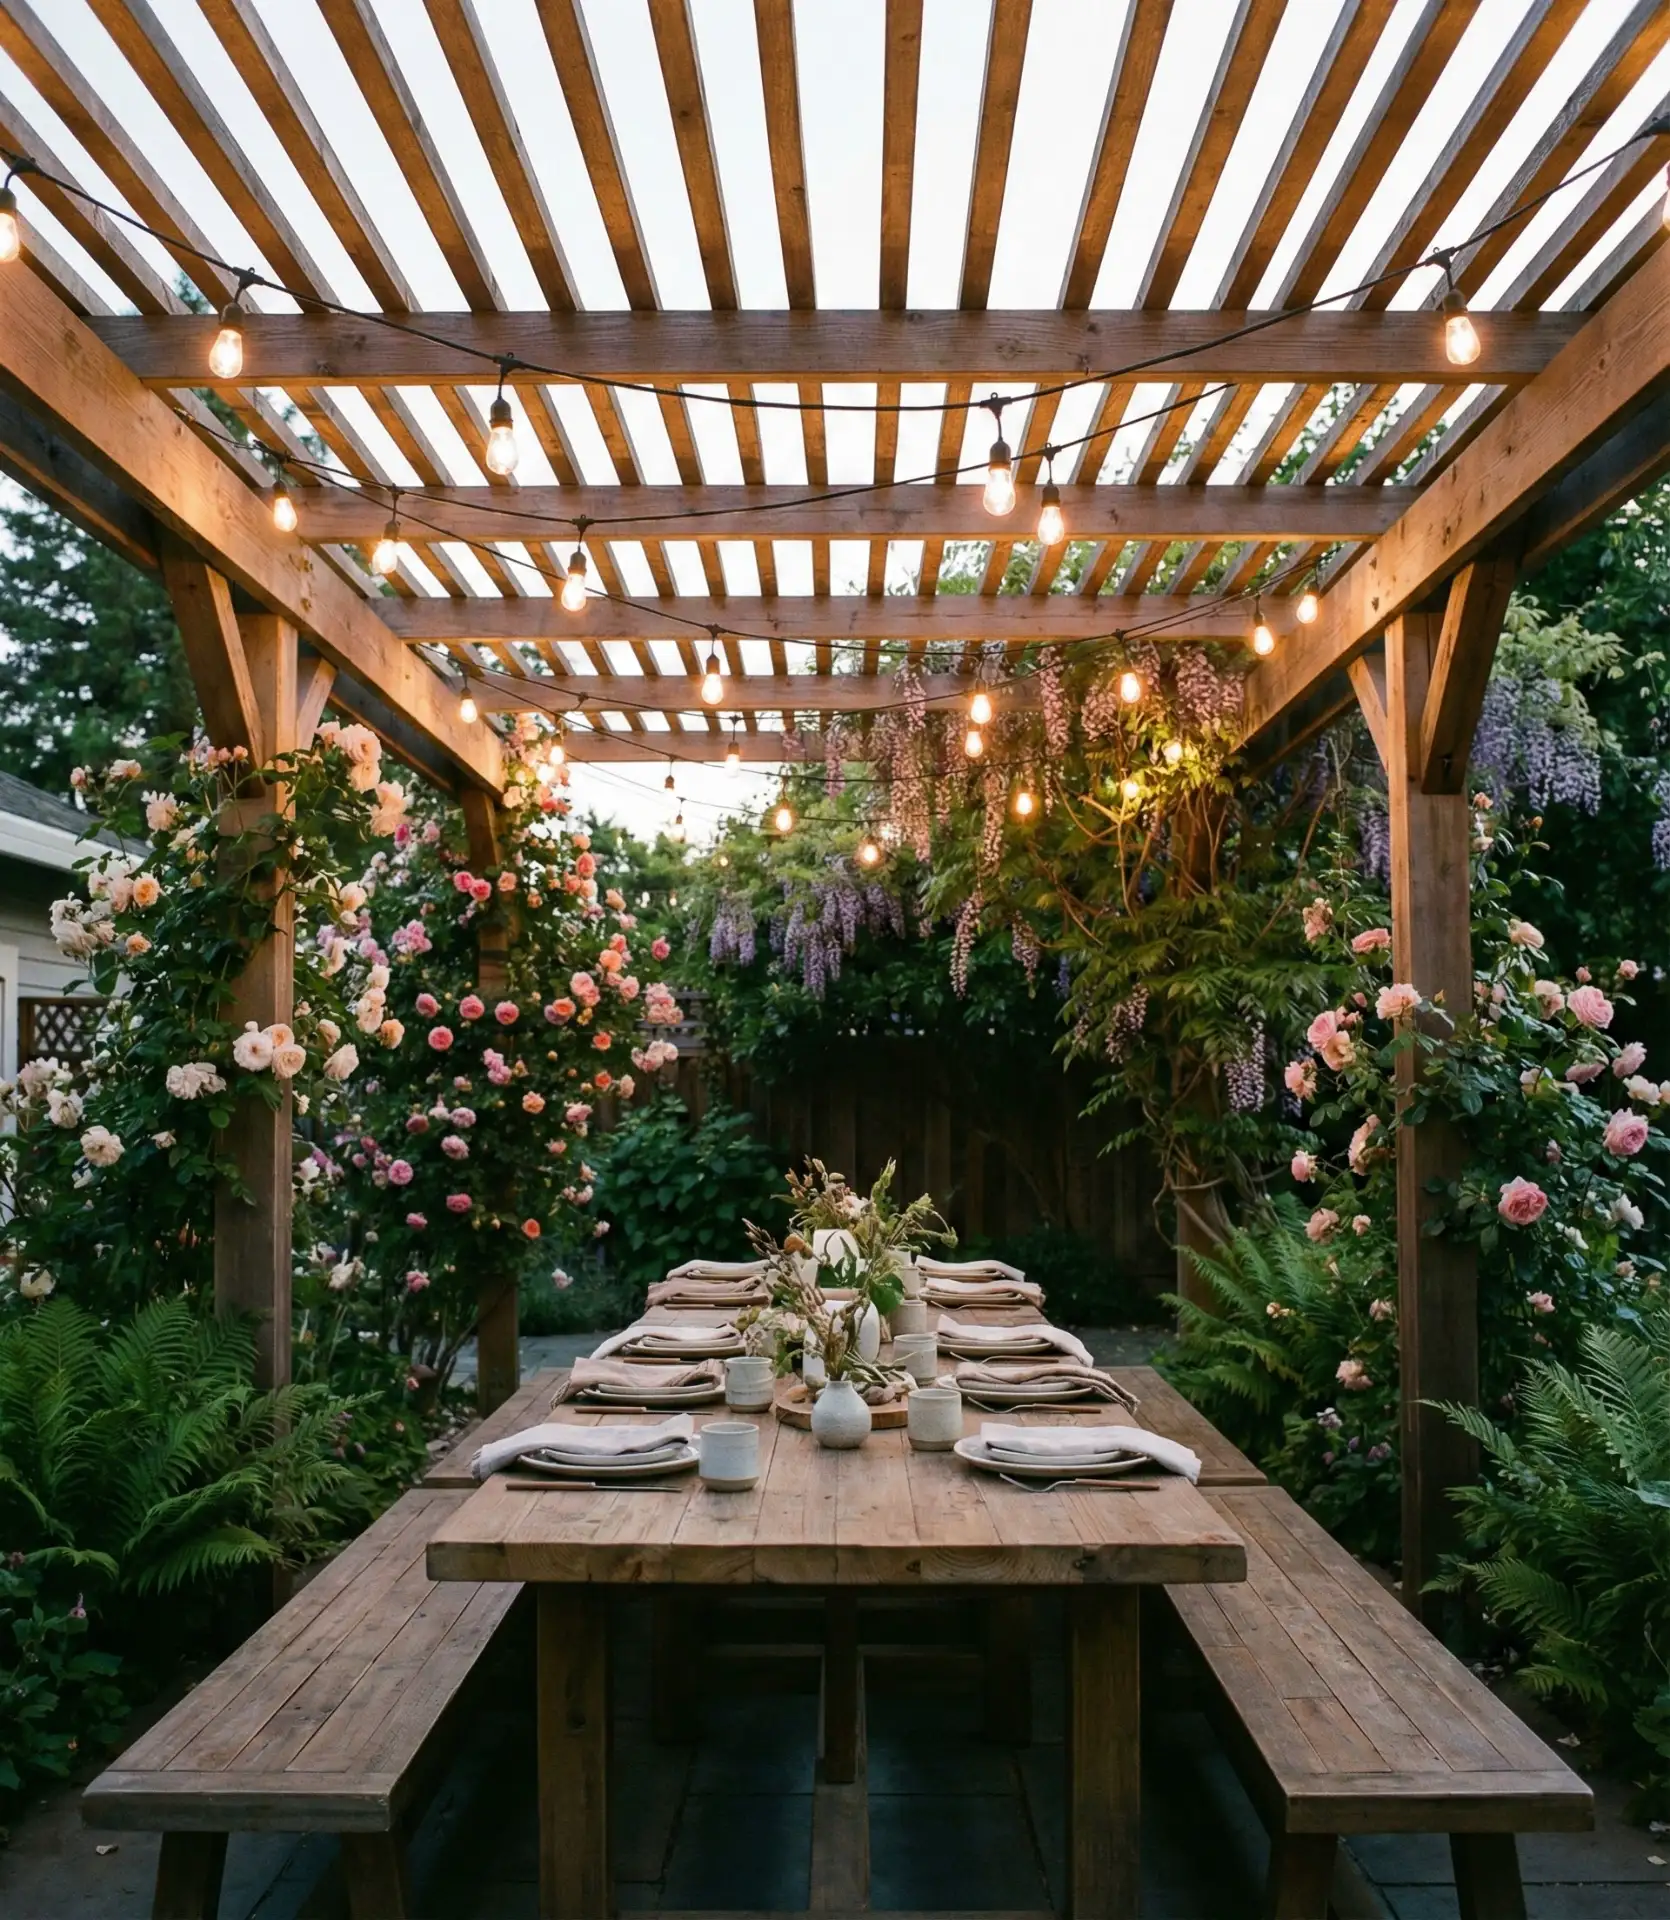
Most homeowners underestimate how much wire they’ll need—always add 20% to your measurements for proper draping and connections. The beauty of pergola lighting is its flexibility; you can adjust brightness seasonally or swap bulb styles without changing the entire setup. Consider installing dimmer switches to control the mood, from bright task lighting for barbecues to soft ambient glow for late-night conversations.
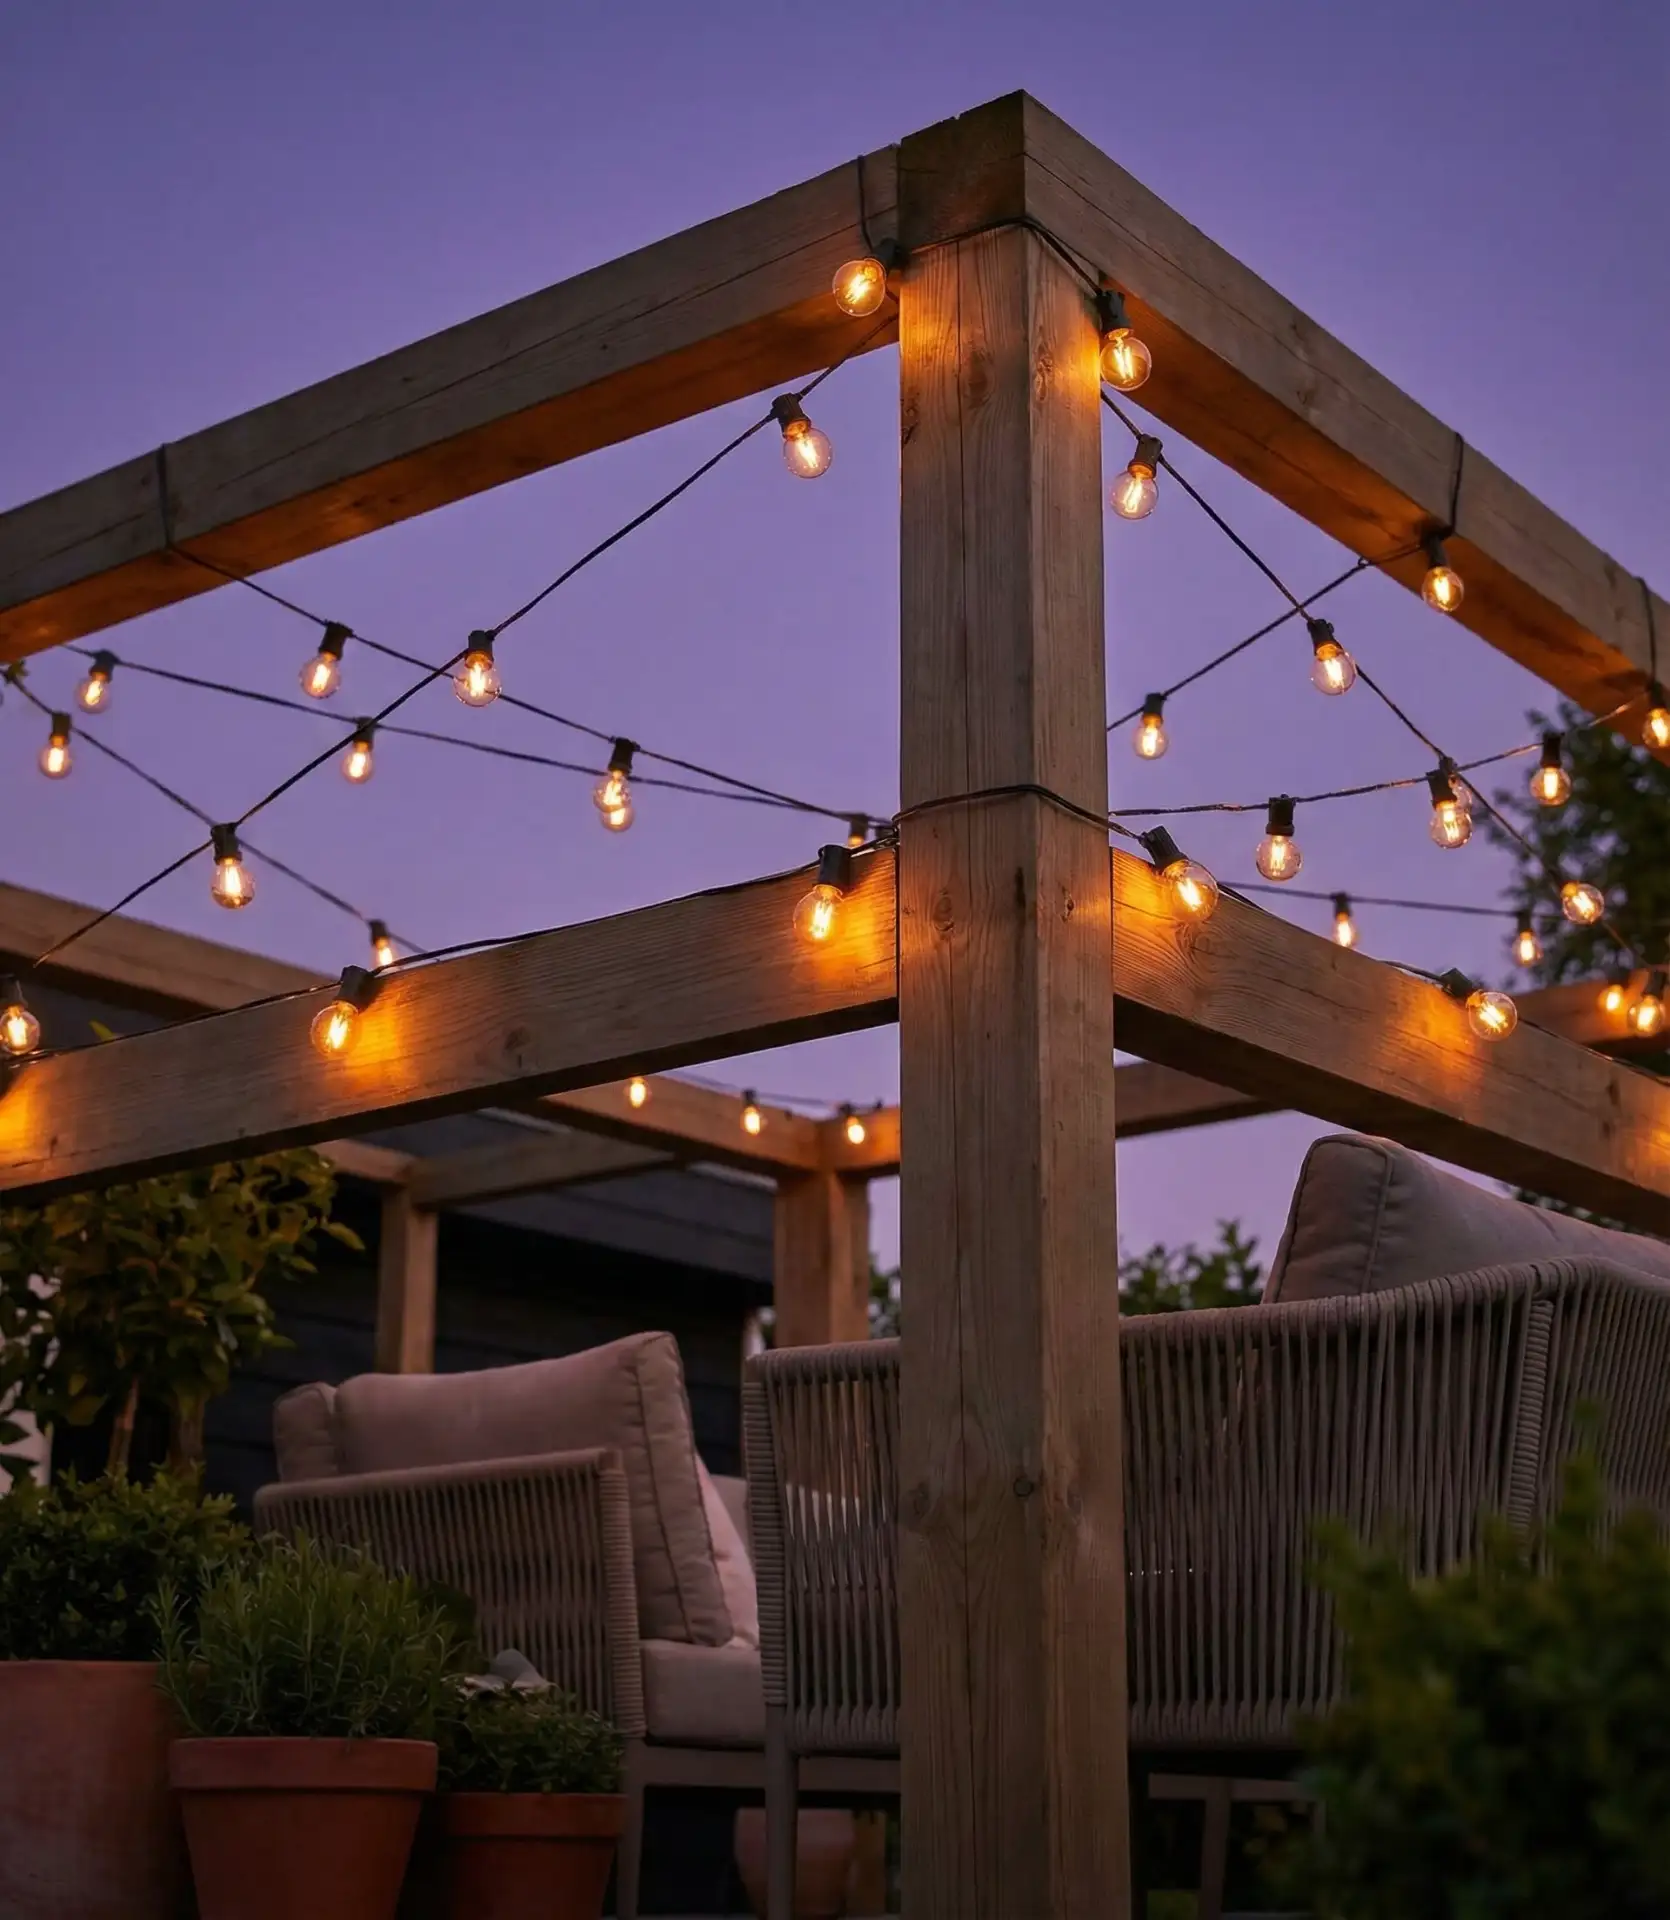
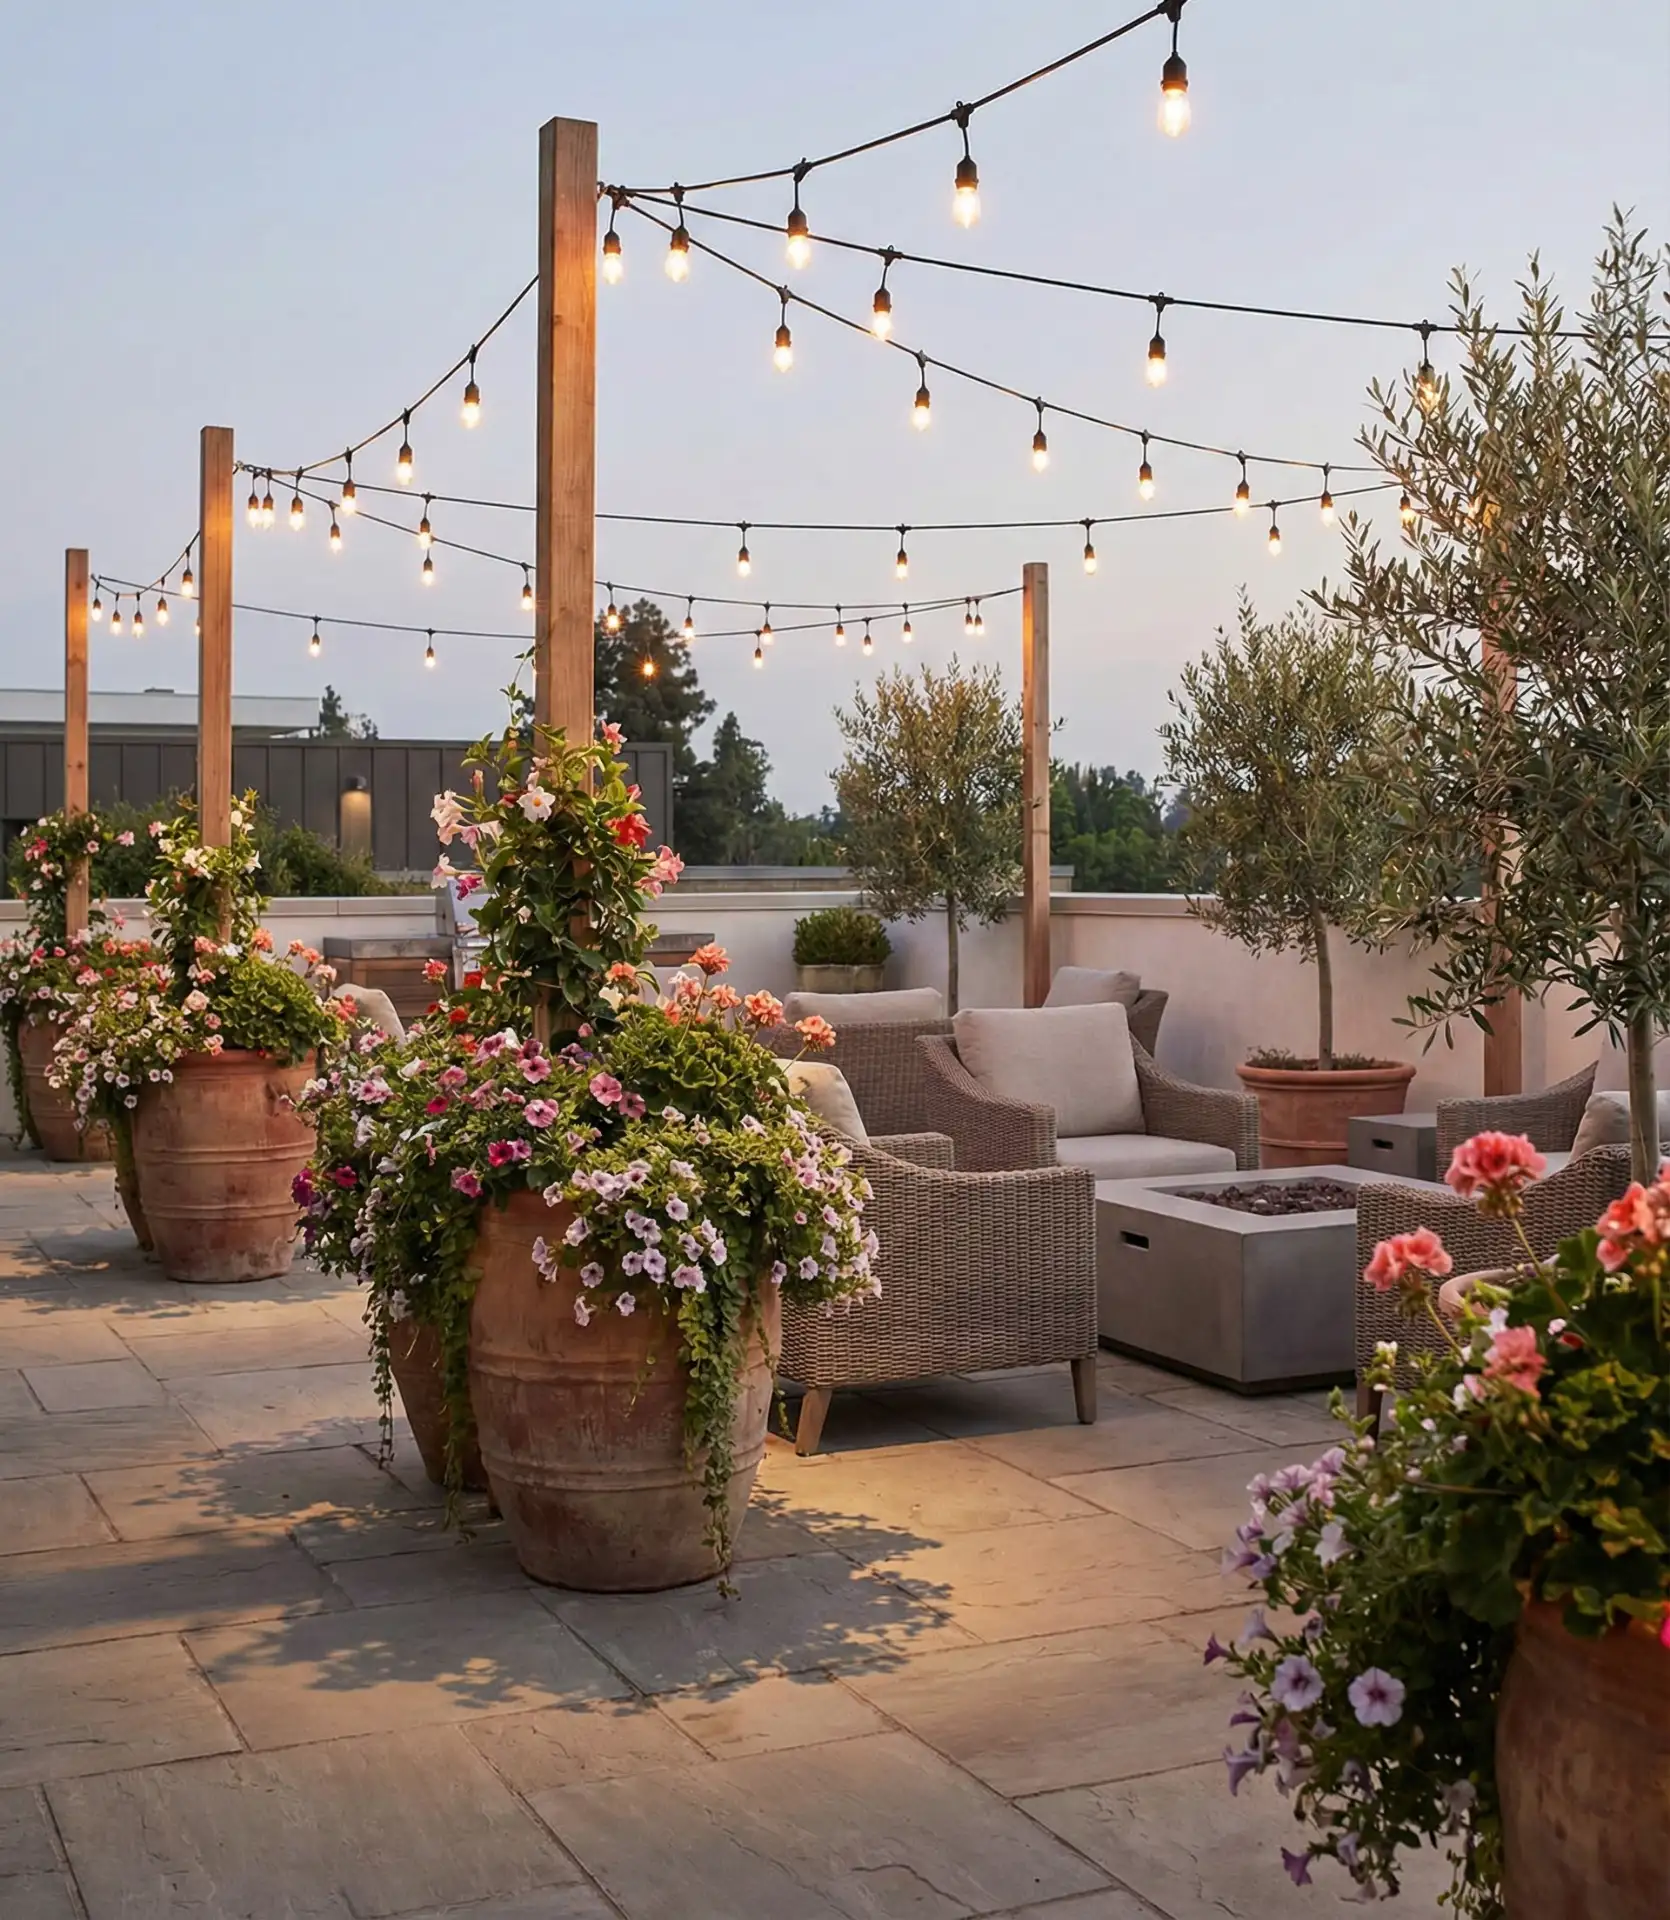
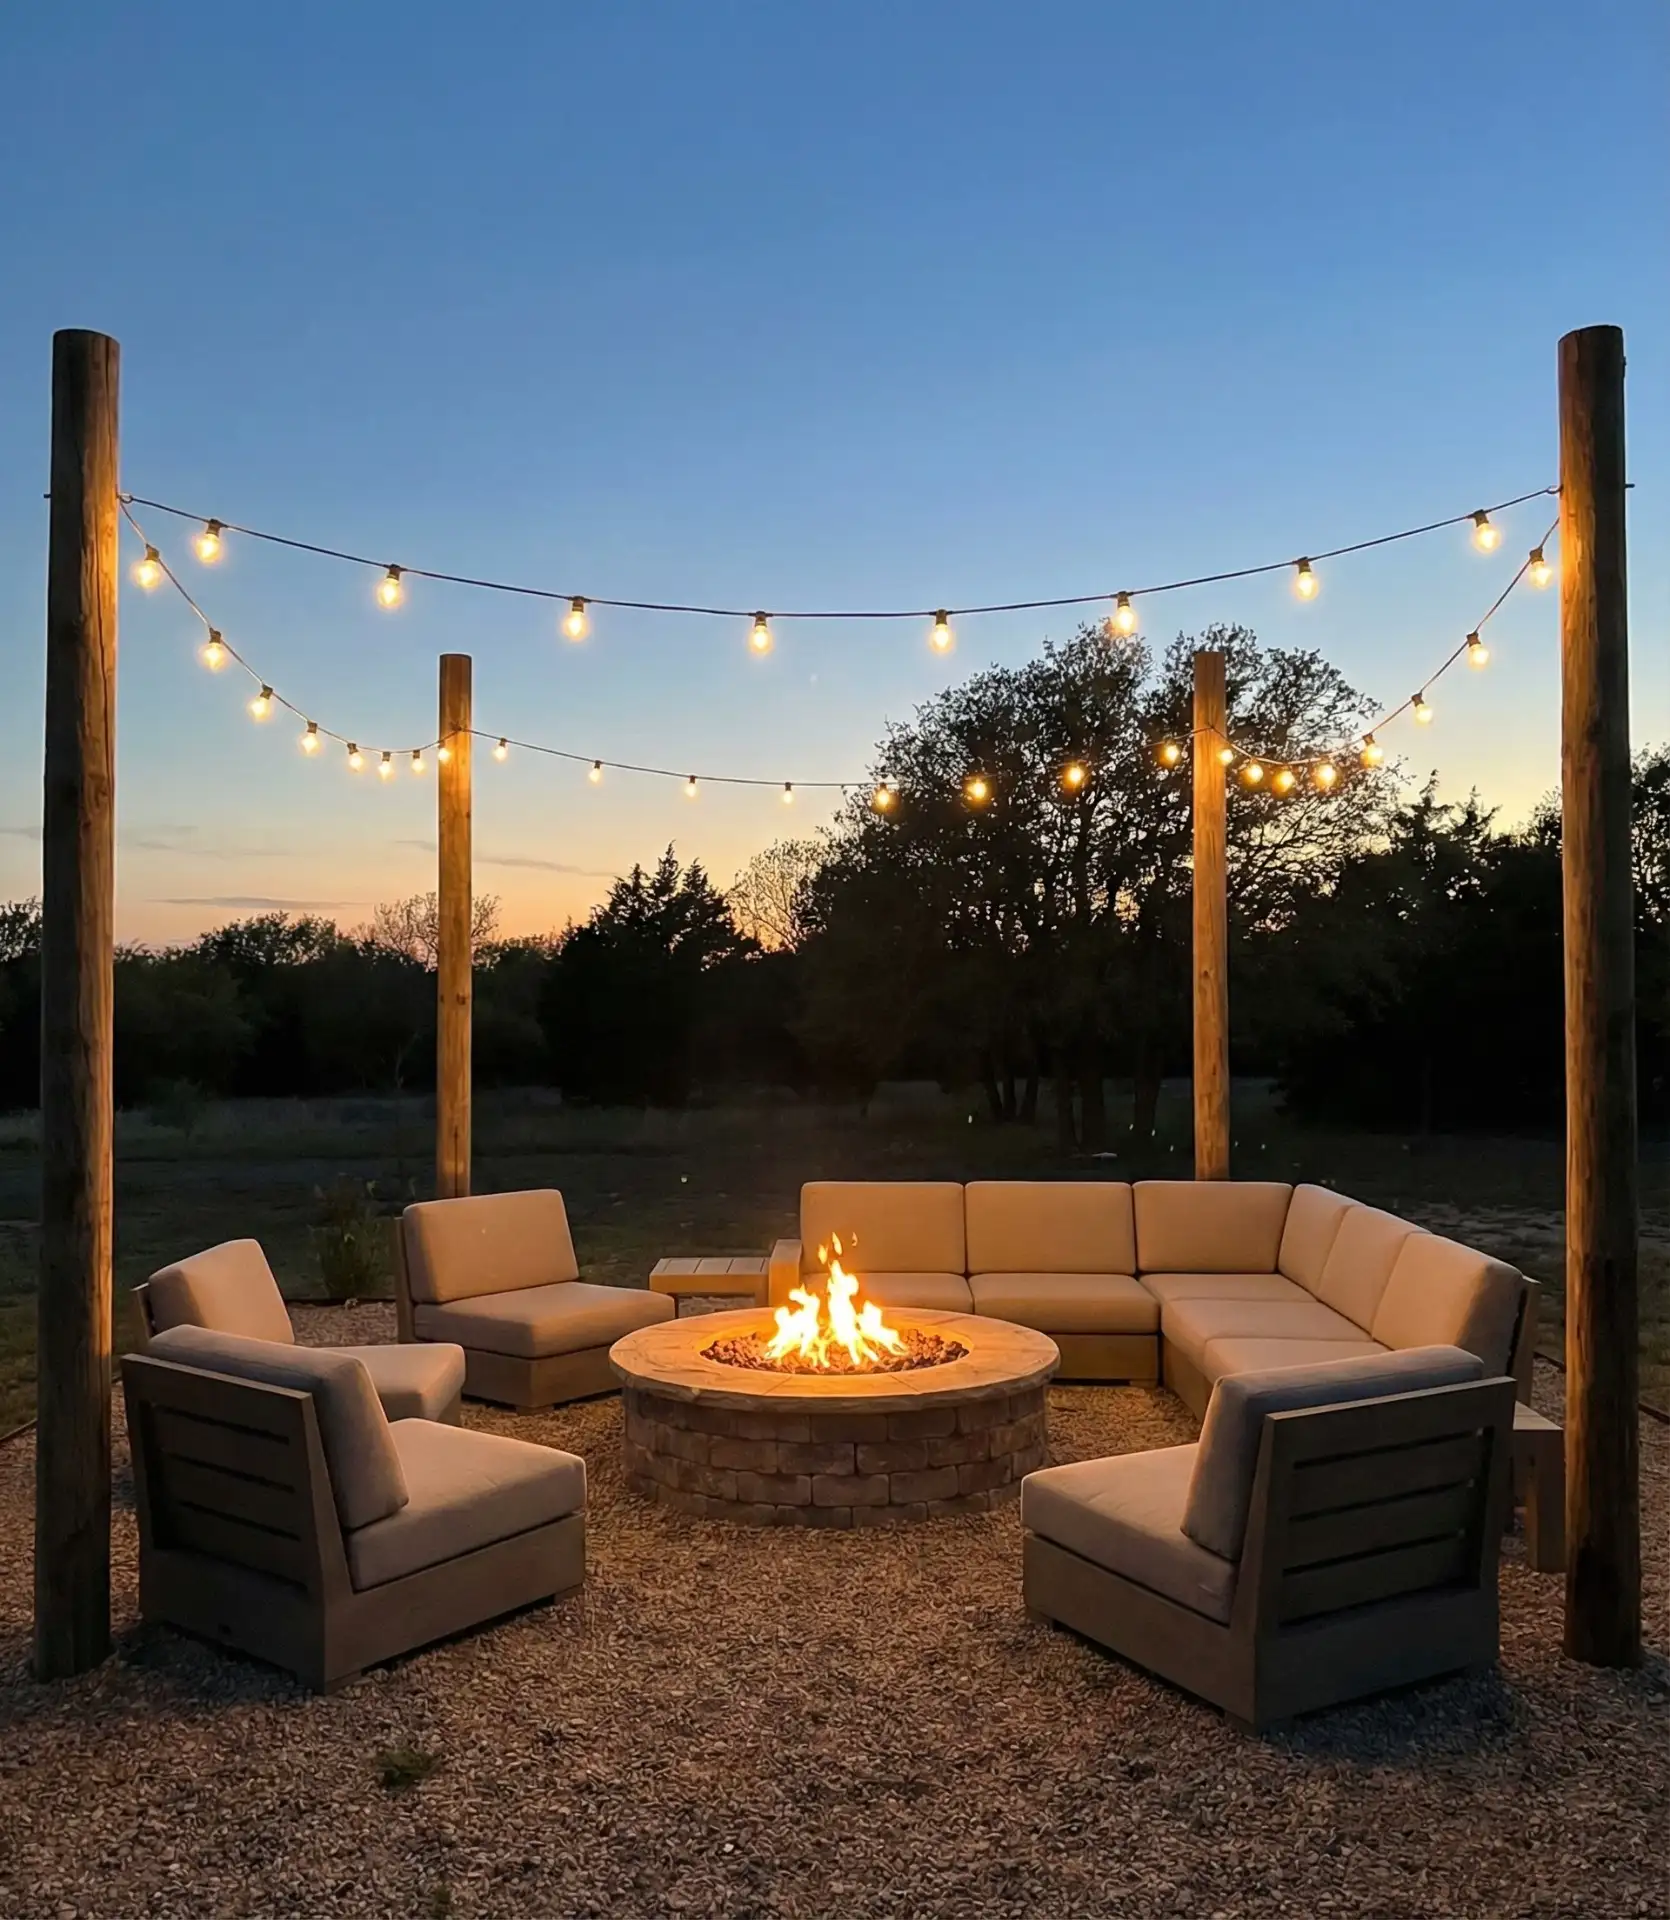
2. Wooden Post Corner Anchors
If you don’t have any, putting wooden poles at the corners of your patio gives you places to anchor string lights. For stability, use 4×4 or 6×6 pressure-treated posts cemented 2 feet deep. This DIY solution allows you to define your outdoor living space, uncompromised by the house or tree location. Make the posts a design element by staining or painting them to match your outside colors. 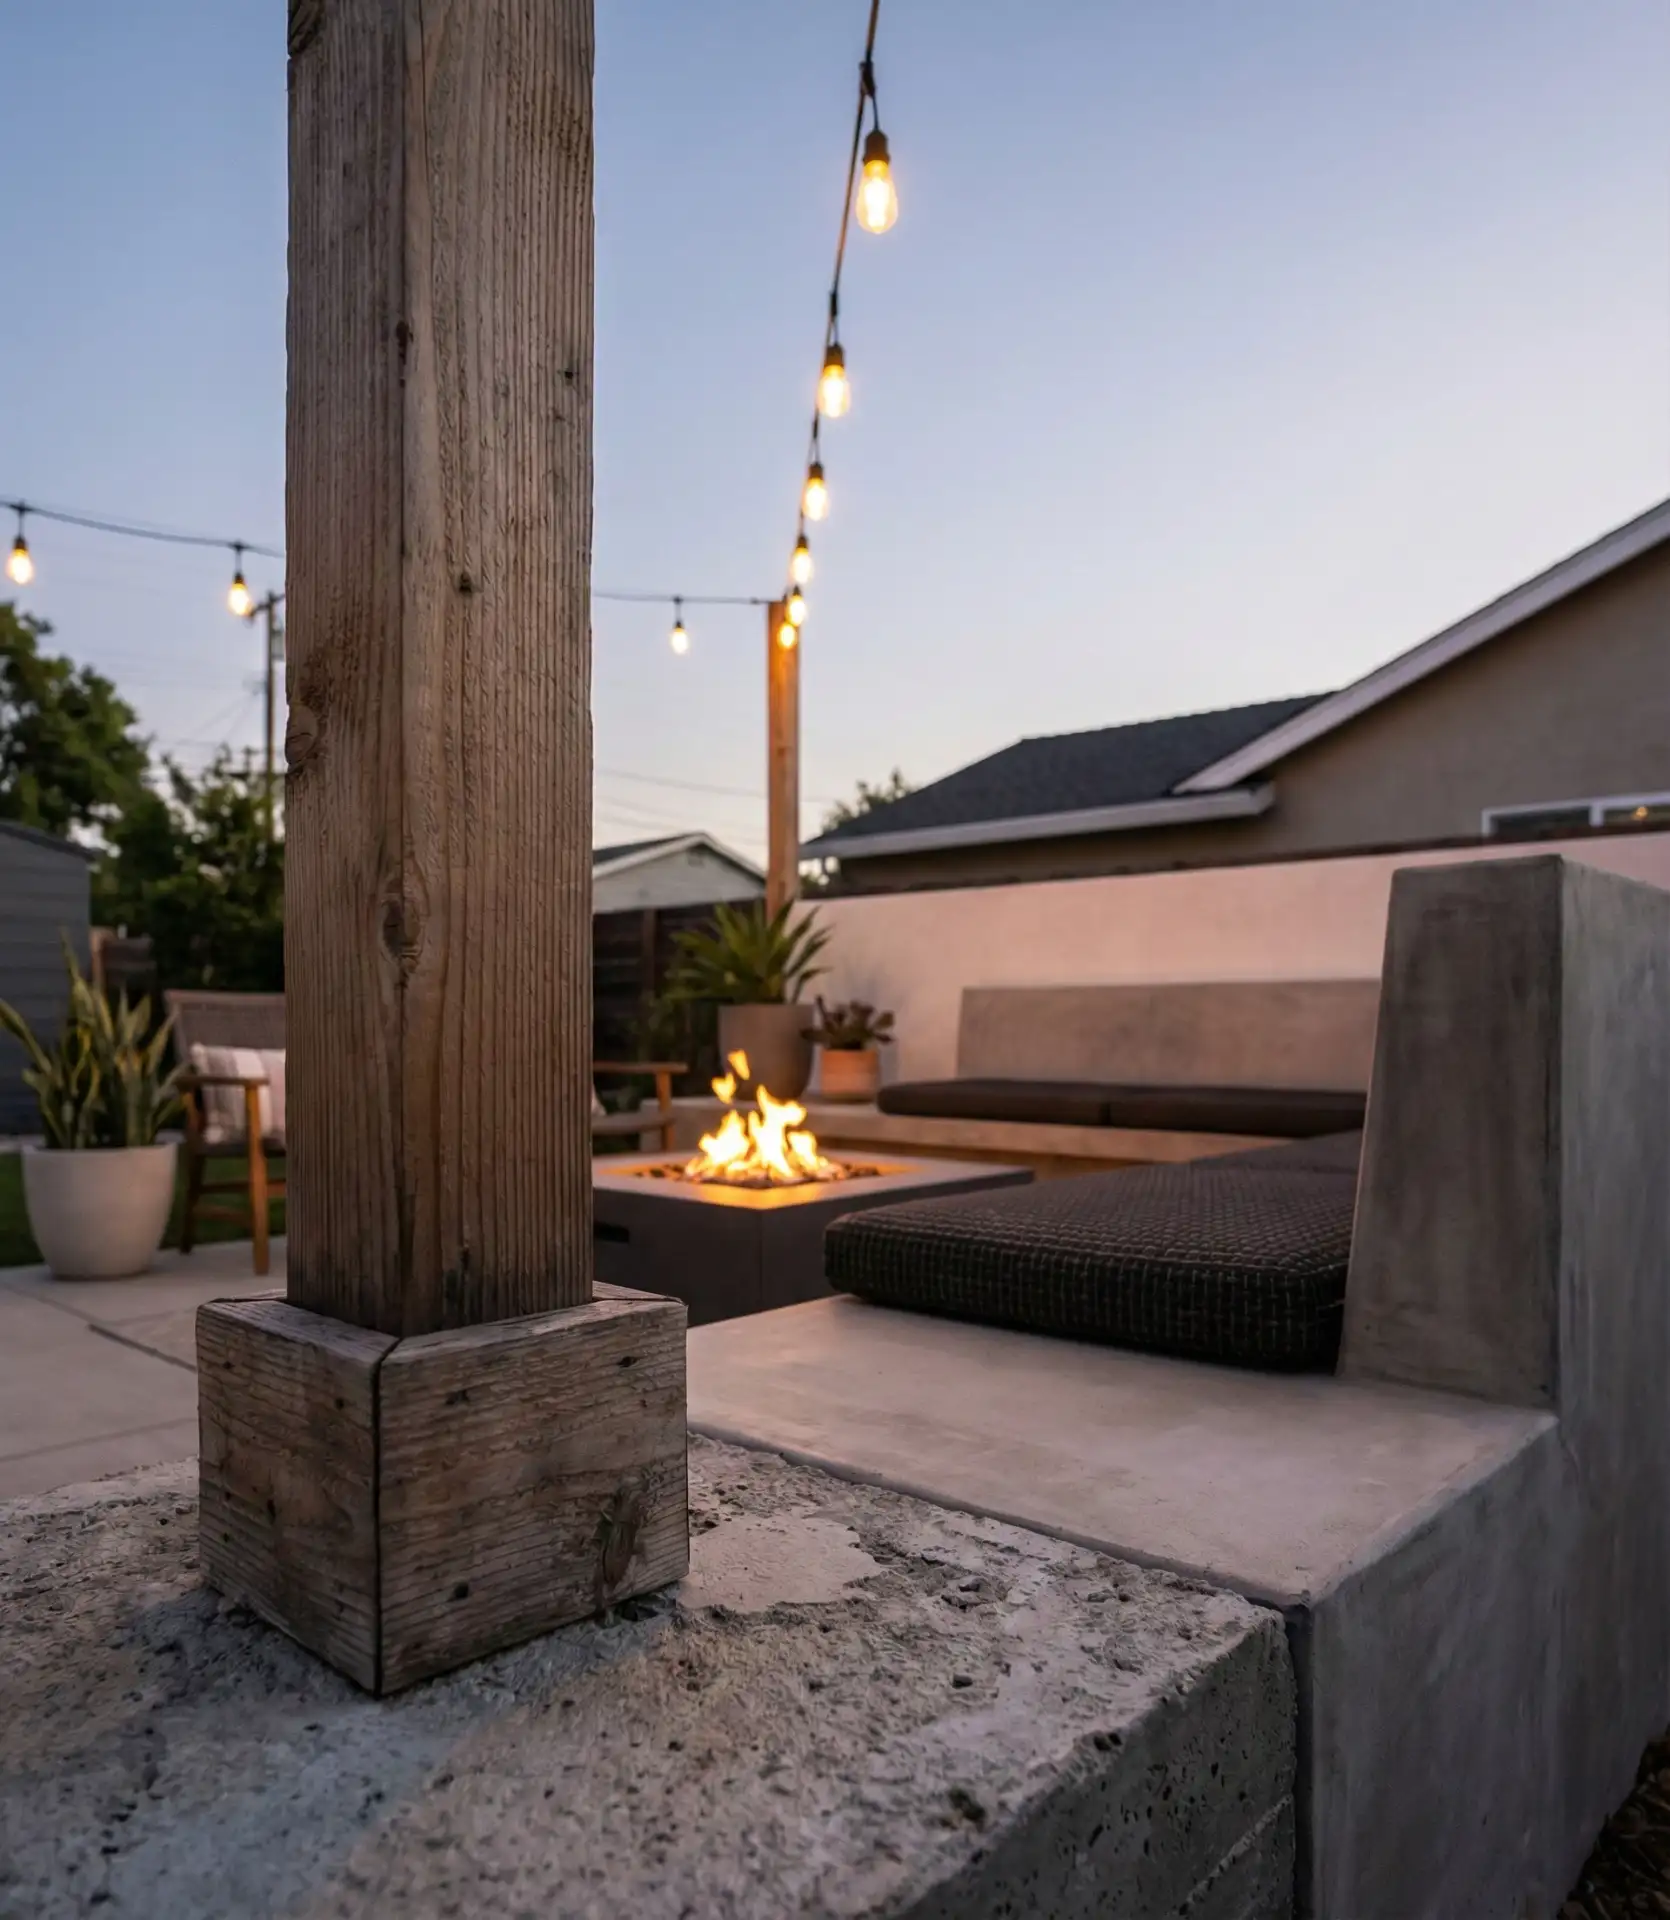
Many people in Texas and Arizona, where the intense sun fades wood quickly, routinely wrap their wooden posts with a weather-resistant stain. Cheap lumber can quickly warp within a season, causing your carefully hung lights to sag. For areas with strict building codes, it is important to check local regulations prior to installation, as posts over 8 feet may require permits in some municipalities.
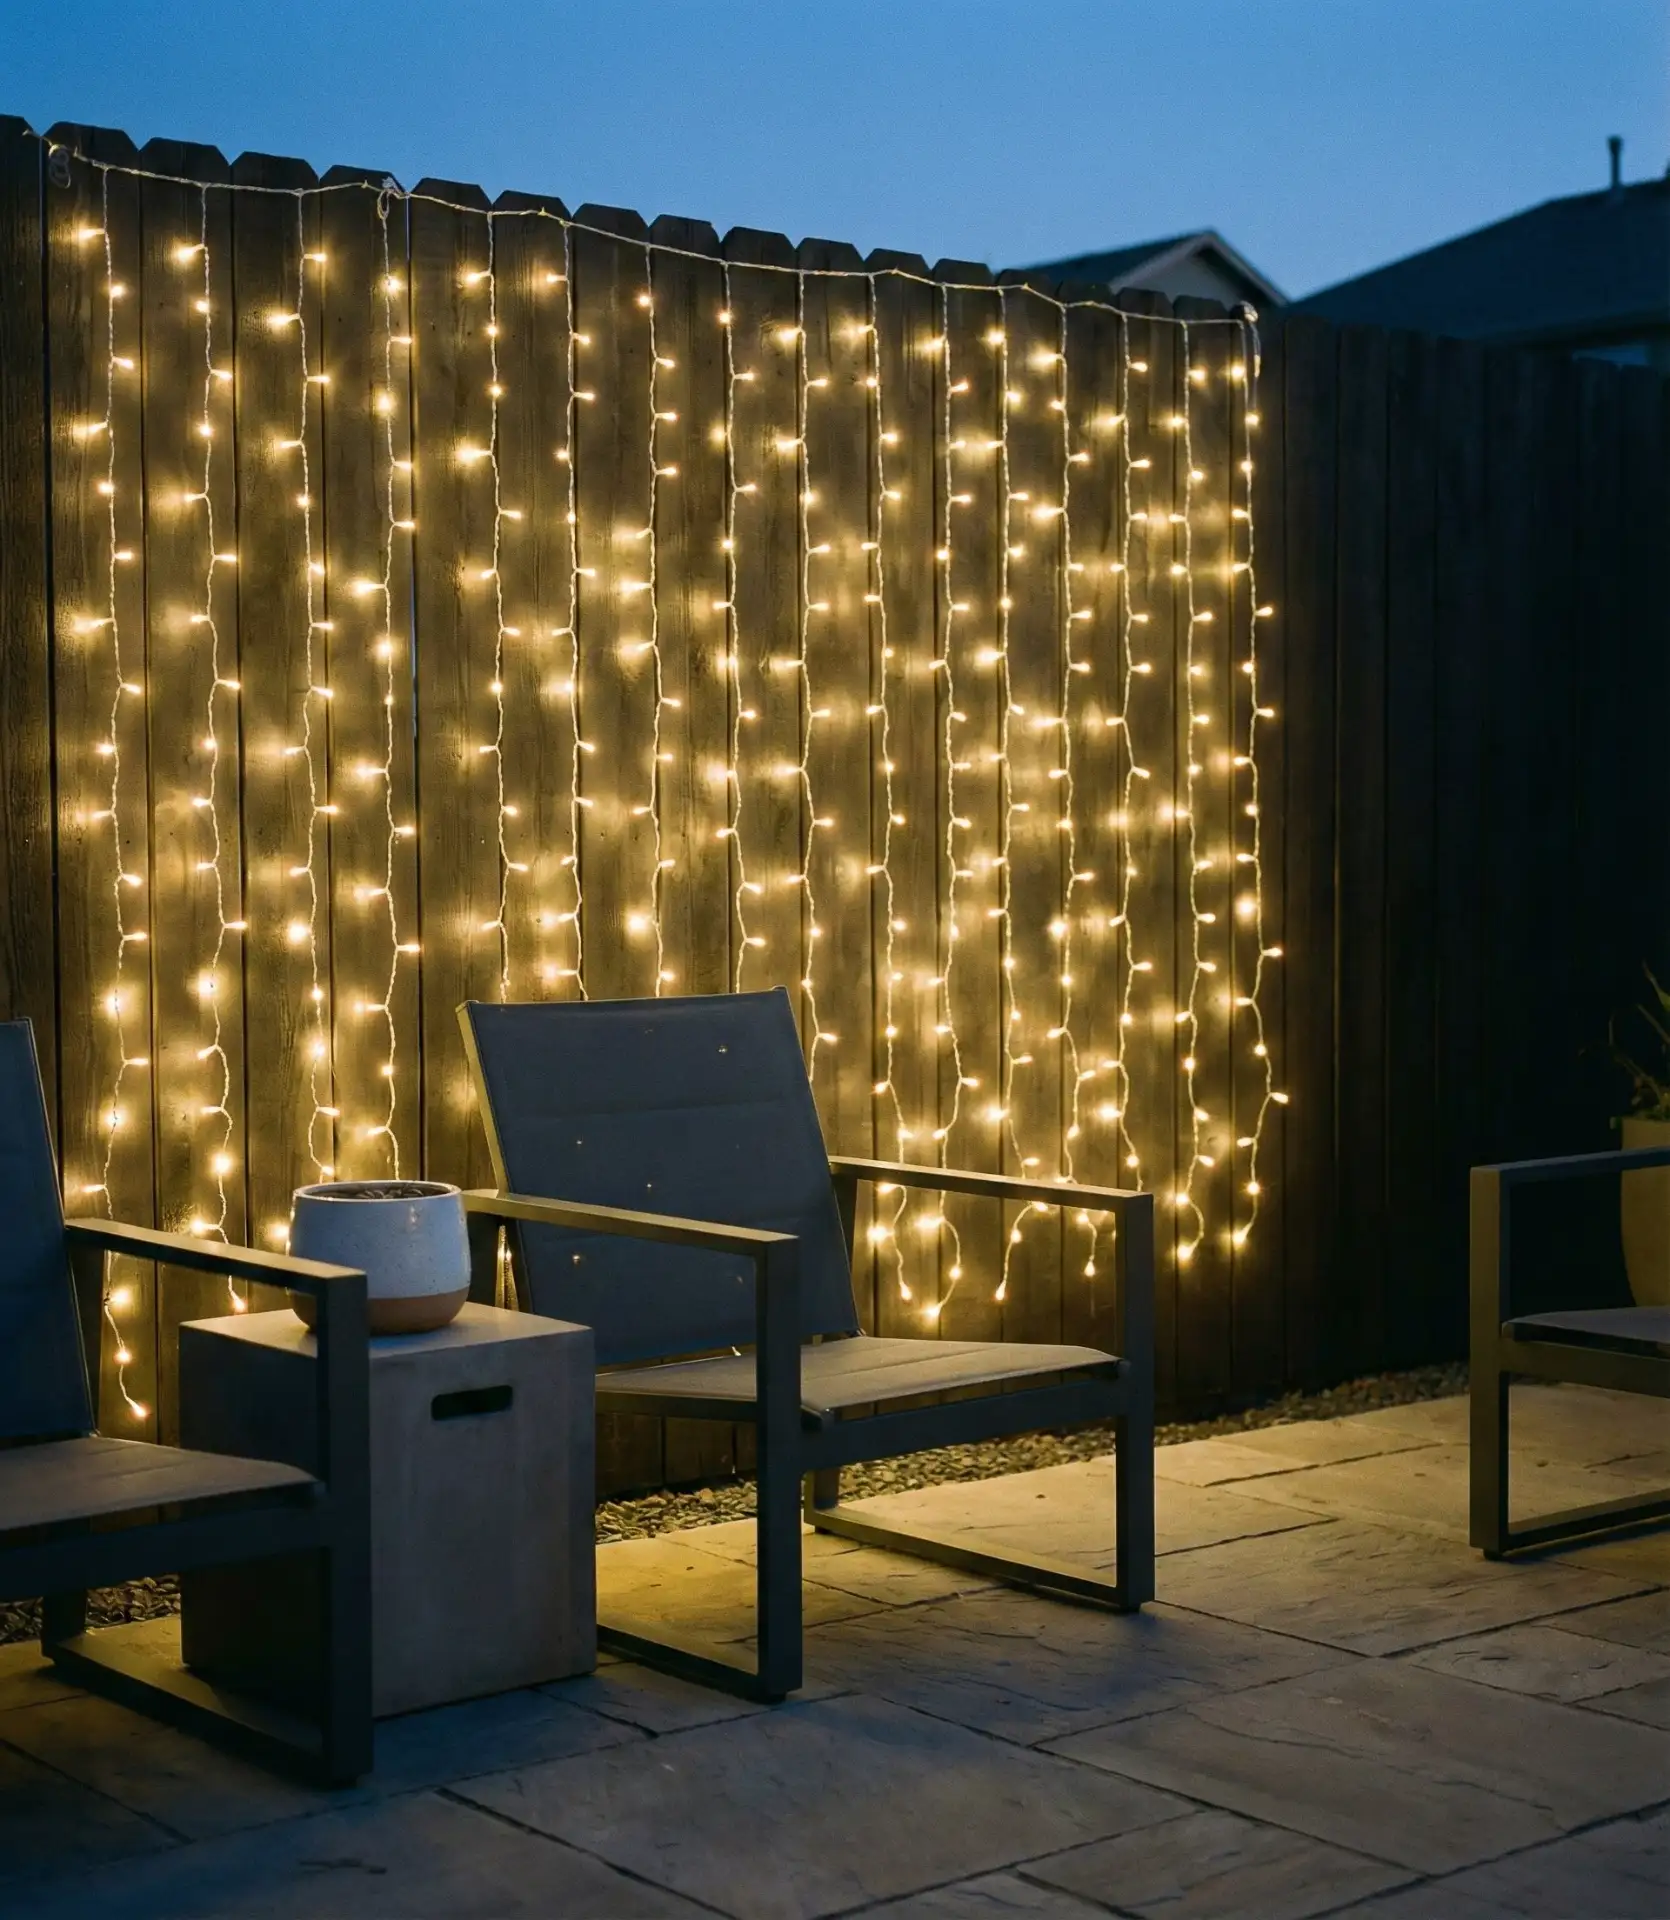
3. Fence-Mounted Linear Design
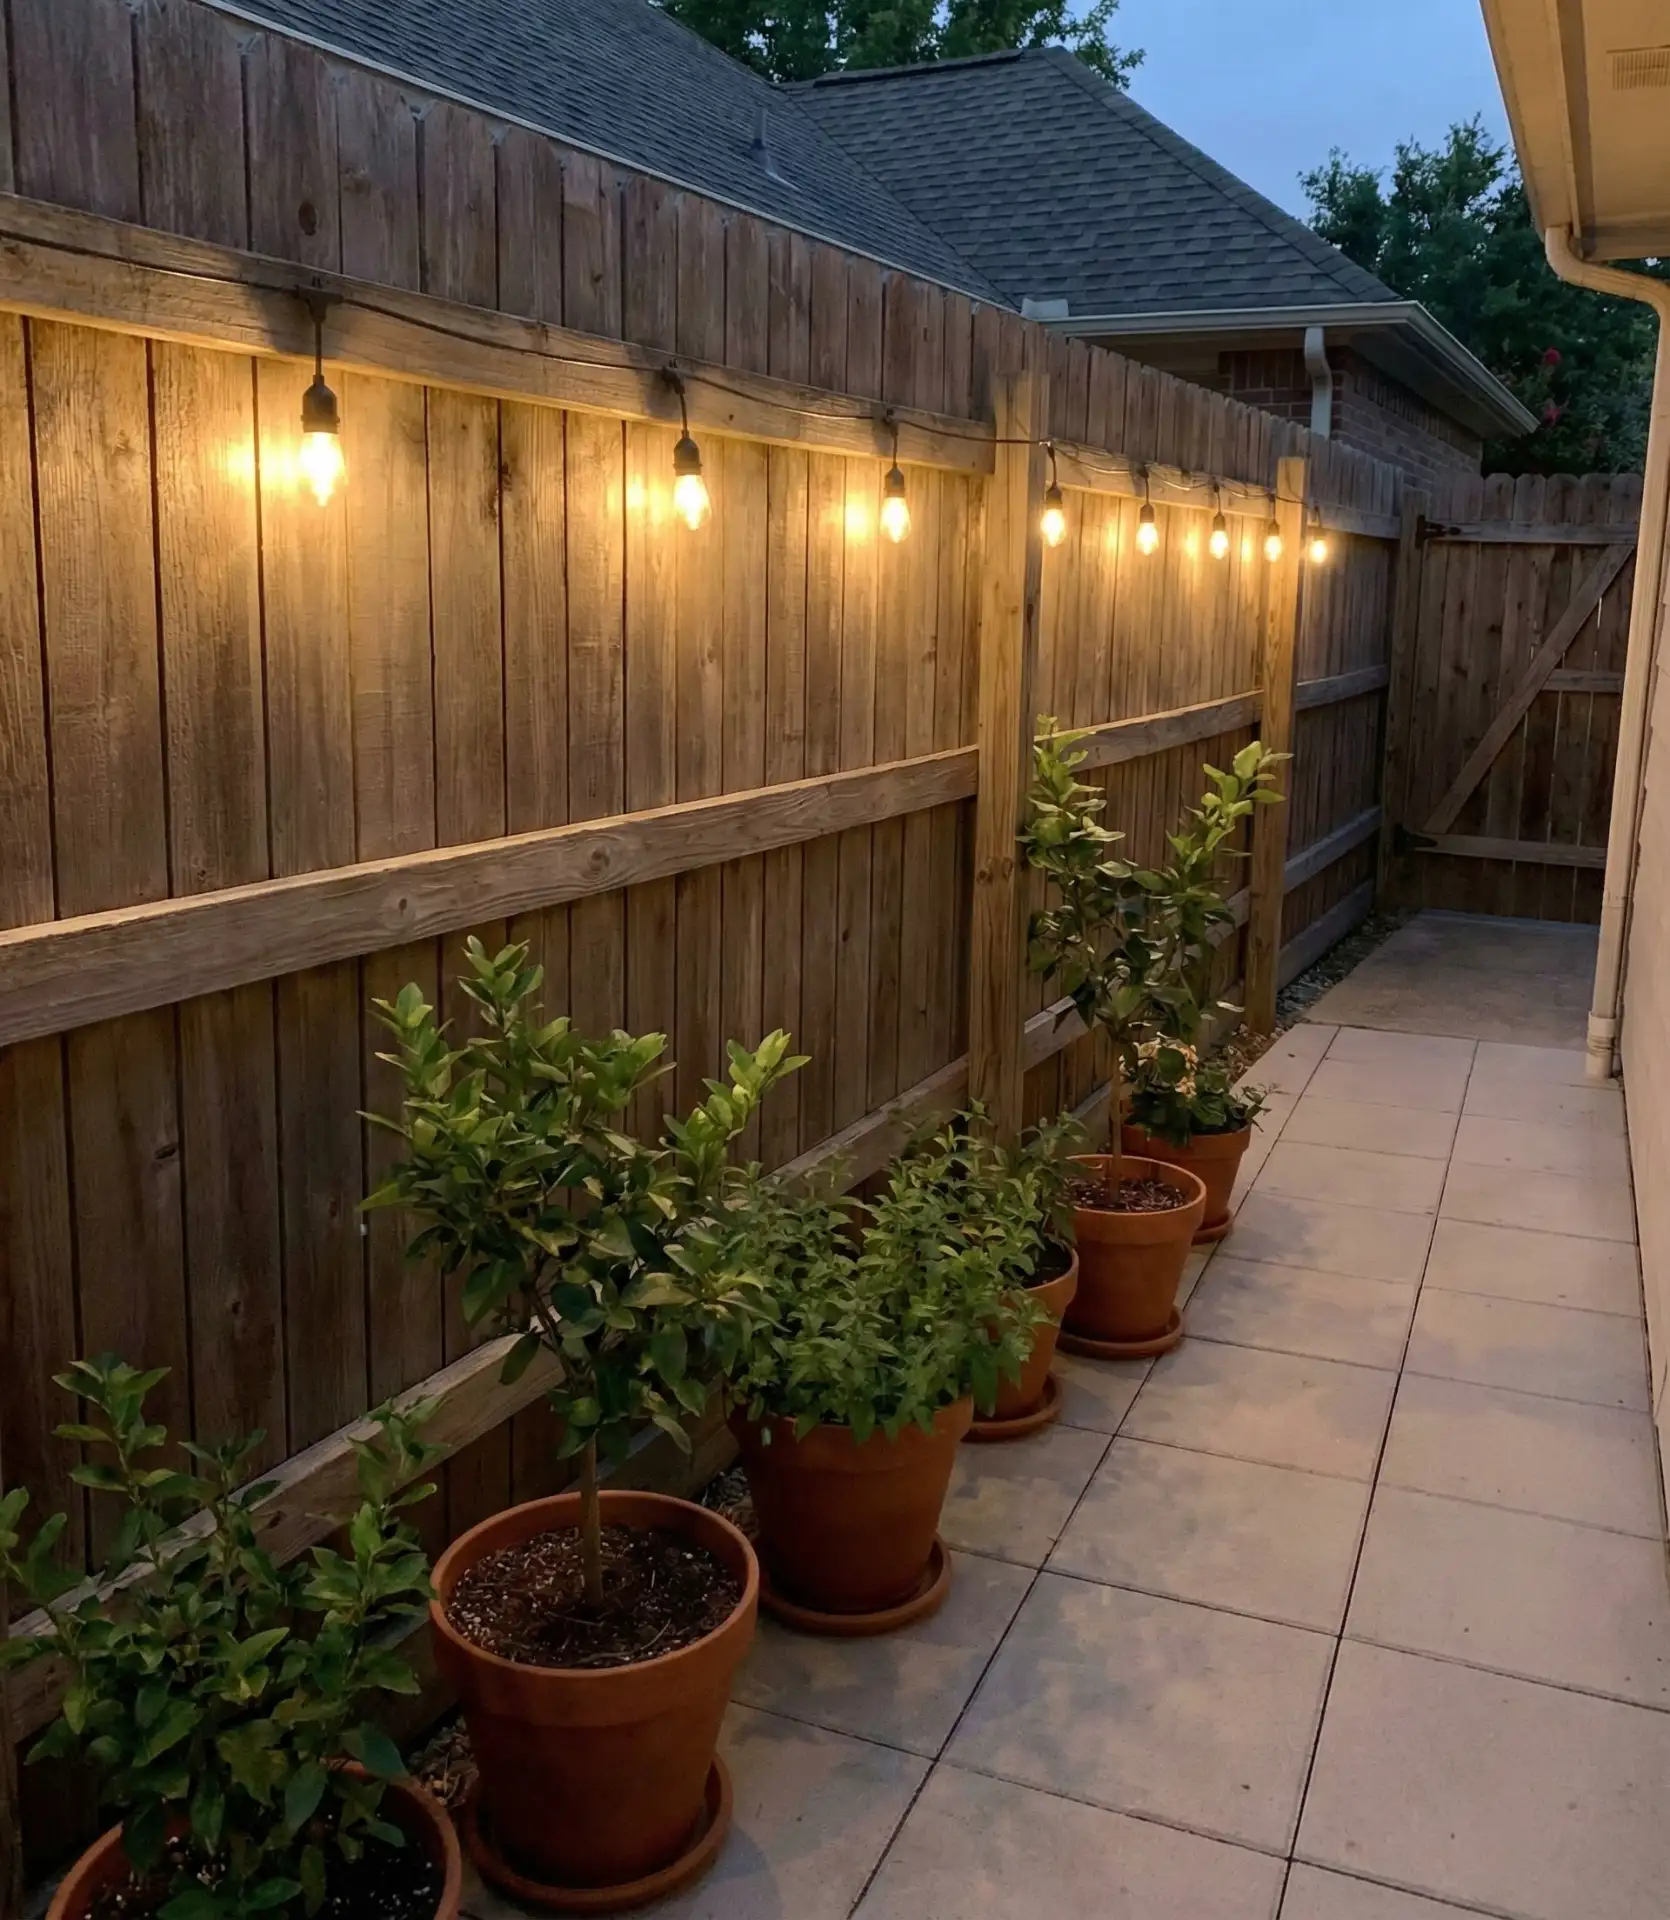
Putting up fairy lights along your fence adds more light to your yard and more lights to your yard. Power your lights with cup hooks and eye screws every three and two feet along the top. This technique works for narrow spaces like patios. Since you’re likely to have overhead lights already, this method will give your yard an open feel and will work in narrow patios where lights are likely to cause an overhead encroachment. Since lights are drawn to the horizontal traverse, they give the illusion of downward separation to the collection and cause the restricted area to feel more open. 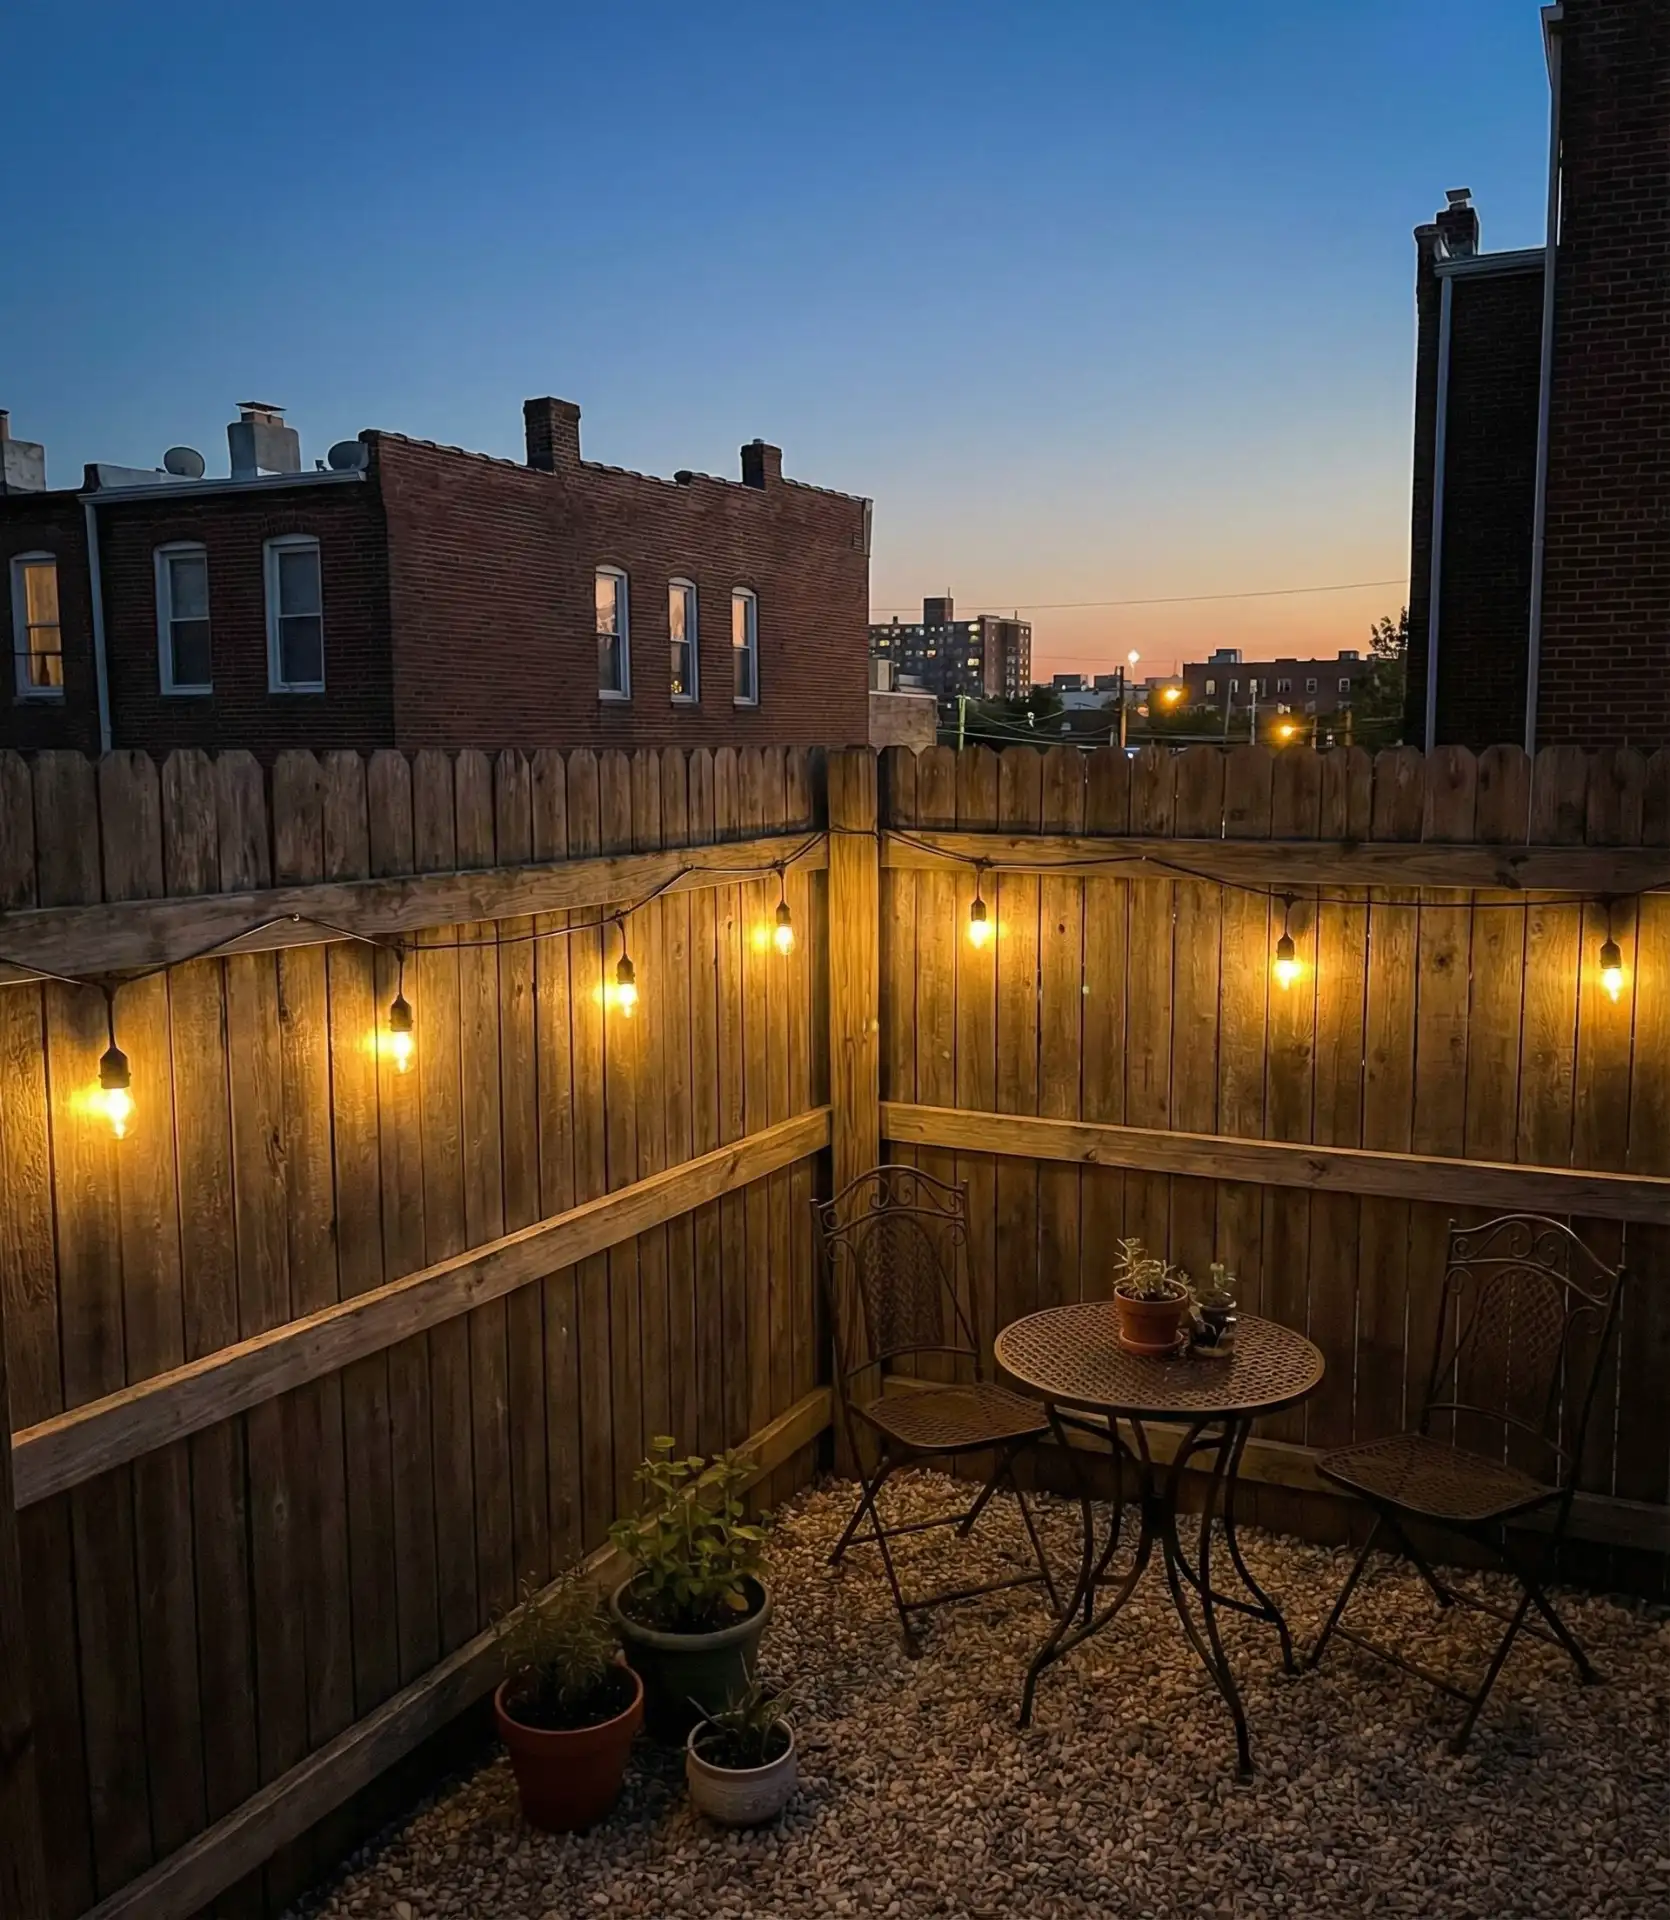
This technique works best in urban environments. Since urban townhomes and rowhouses have compact lighting, no freestanding structures are needed to complement the area. The lights provide a measure of security around the home and fit within the freestanding structures of the area. Adding rust-resistant structures will complete the line formation. If you are in coastal regions, make sure your structures are complemented with anti-corrosive structures.
4. Solar-Powered Independence
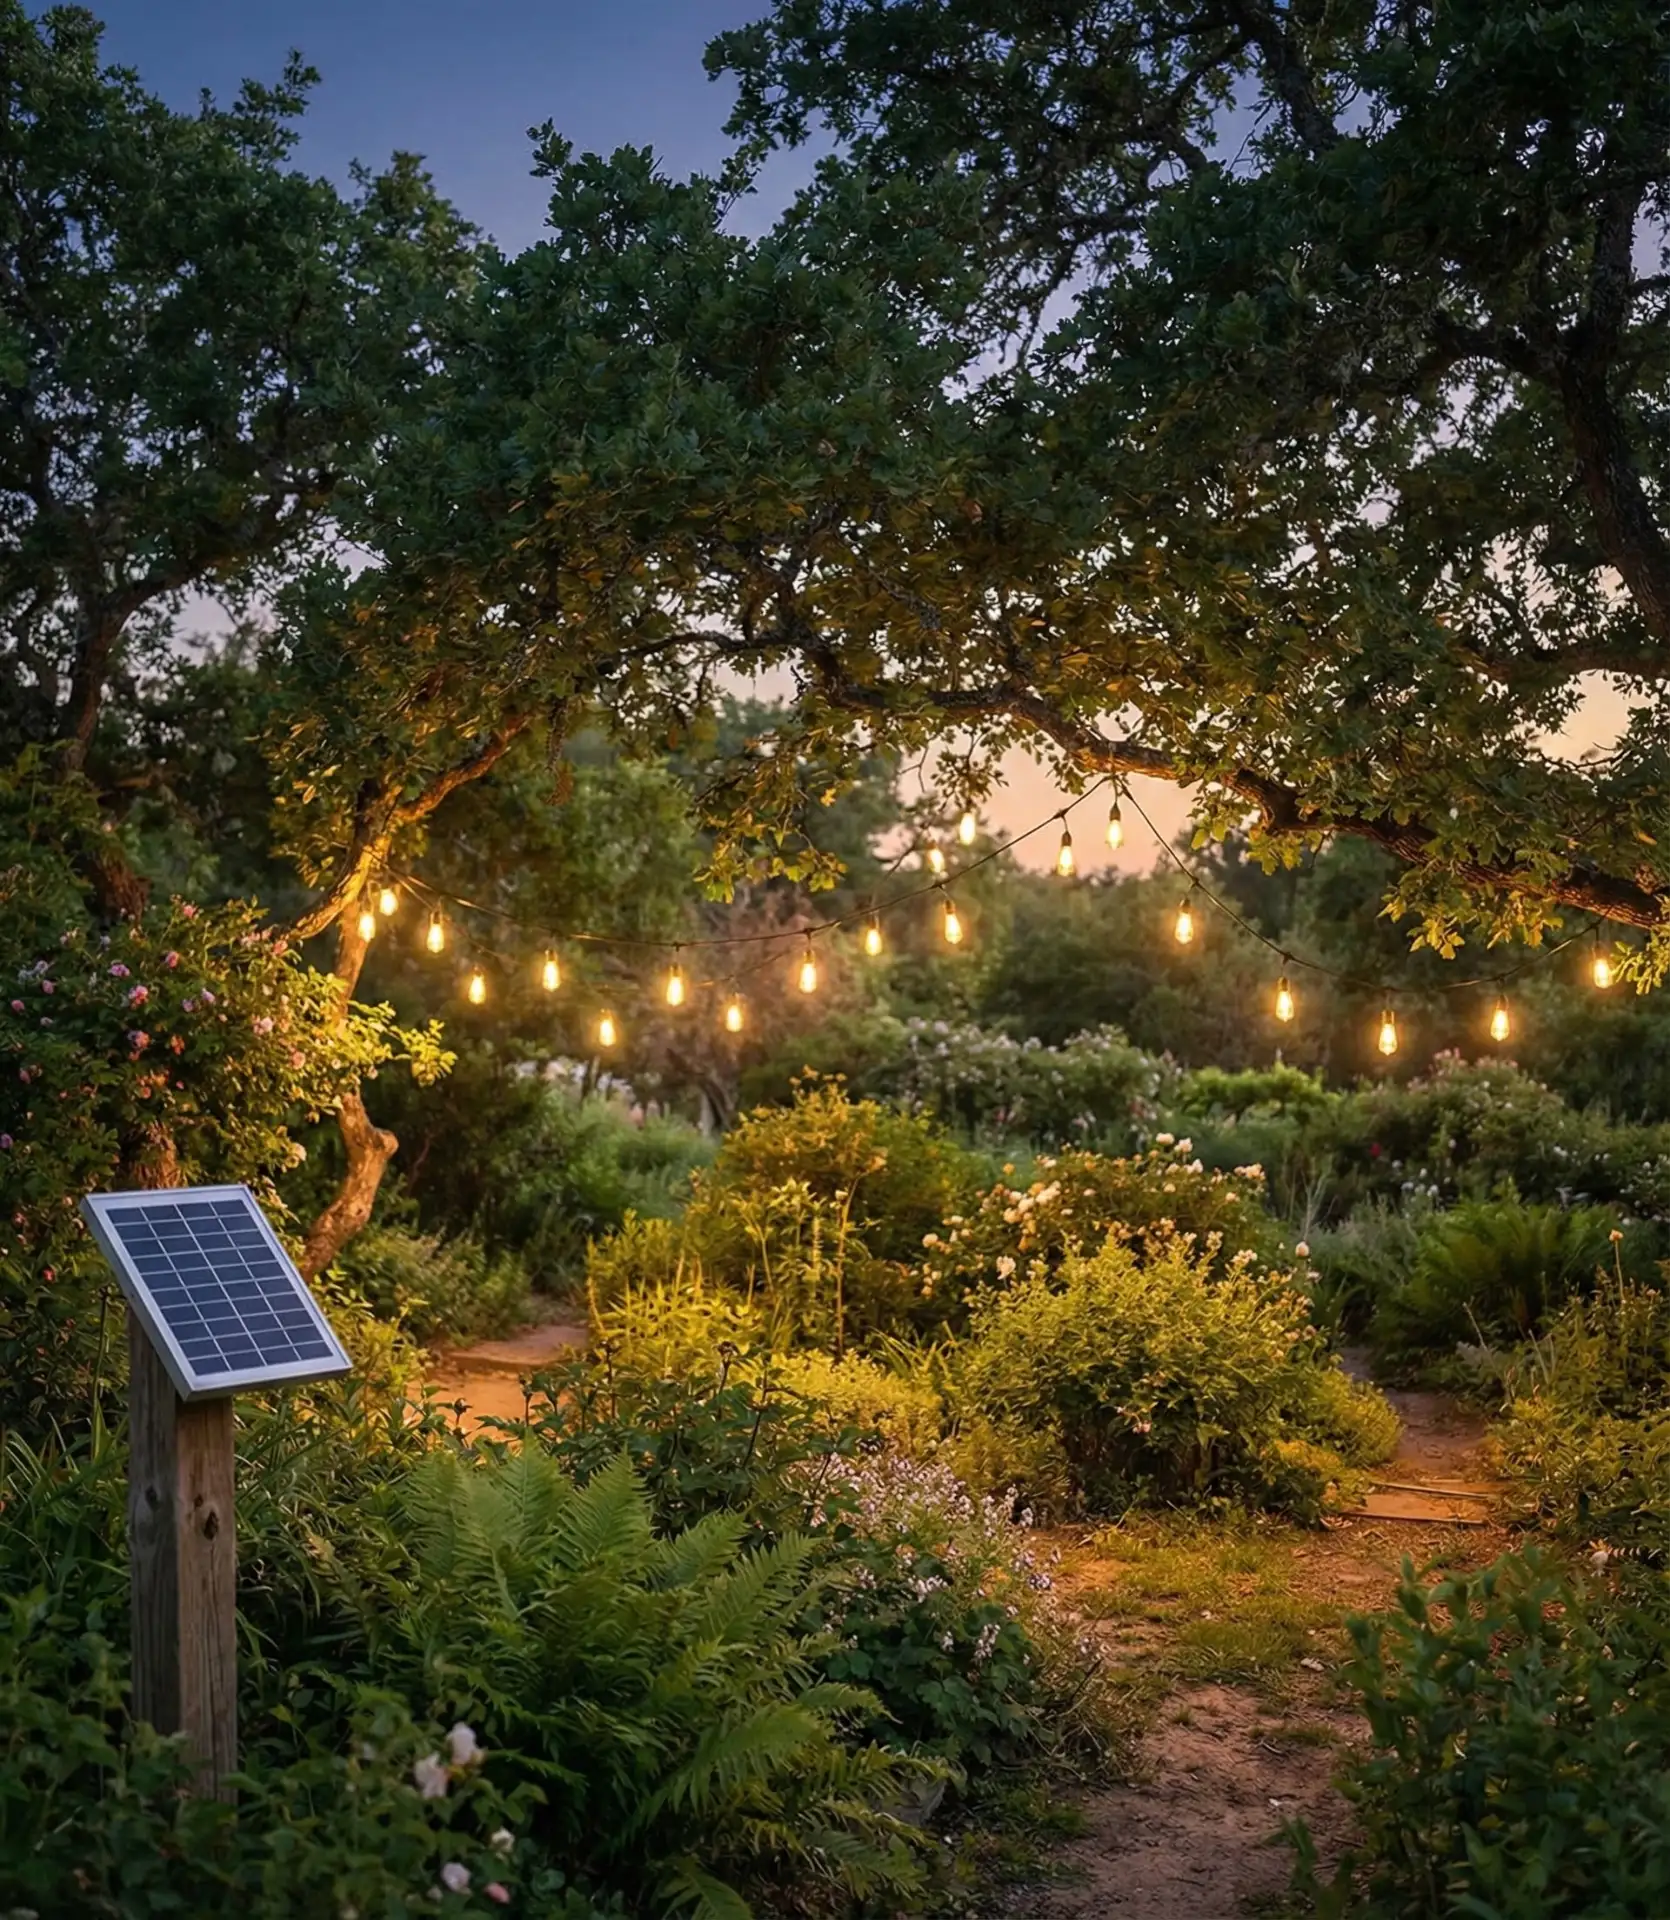
Many things have changed, including solar-powered string lights; these changes have allowed string lights in many spaces. If you have 6+ hours of direct sunlight and the solar panel faces south, you will get optimal charging.
These devices are ideal for places where electricity isn’t readily available, such as around swimming pools, along garden walkways, or in backyards where running extension cords can be hazardous. 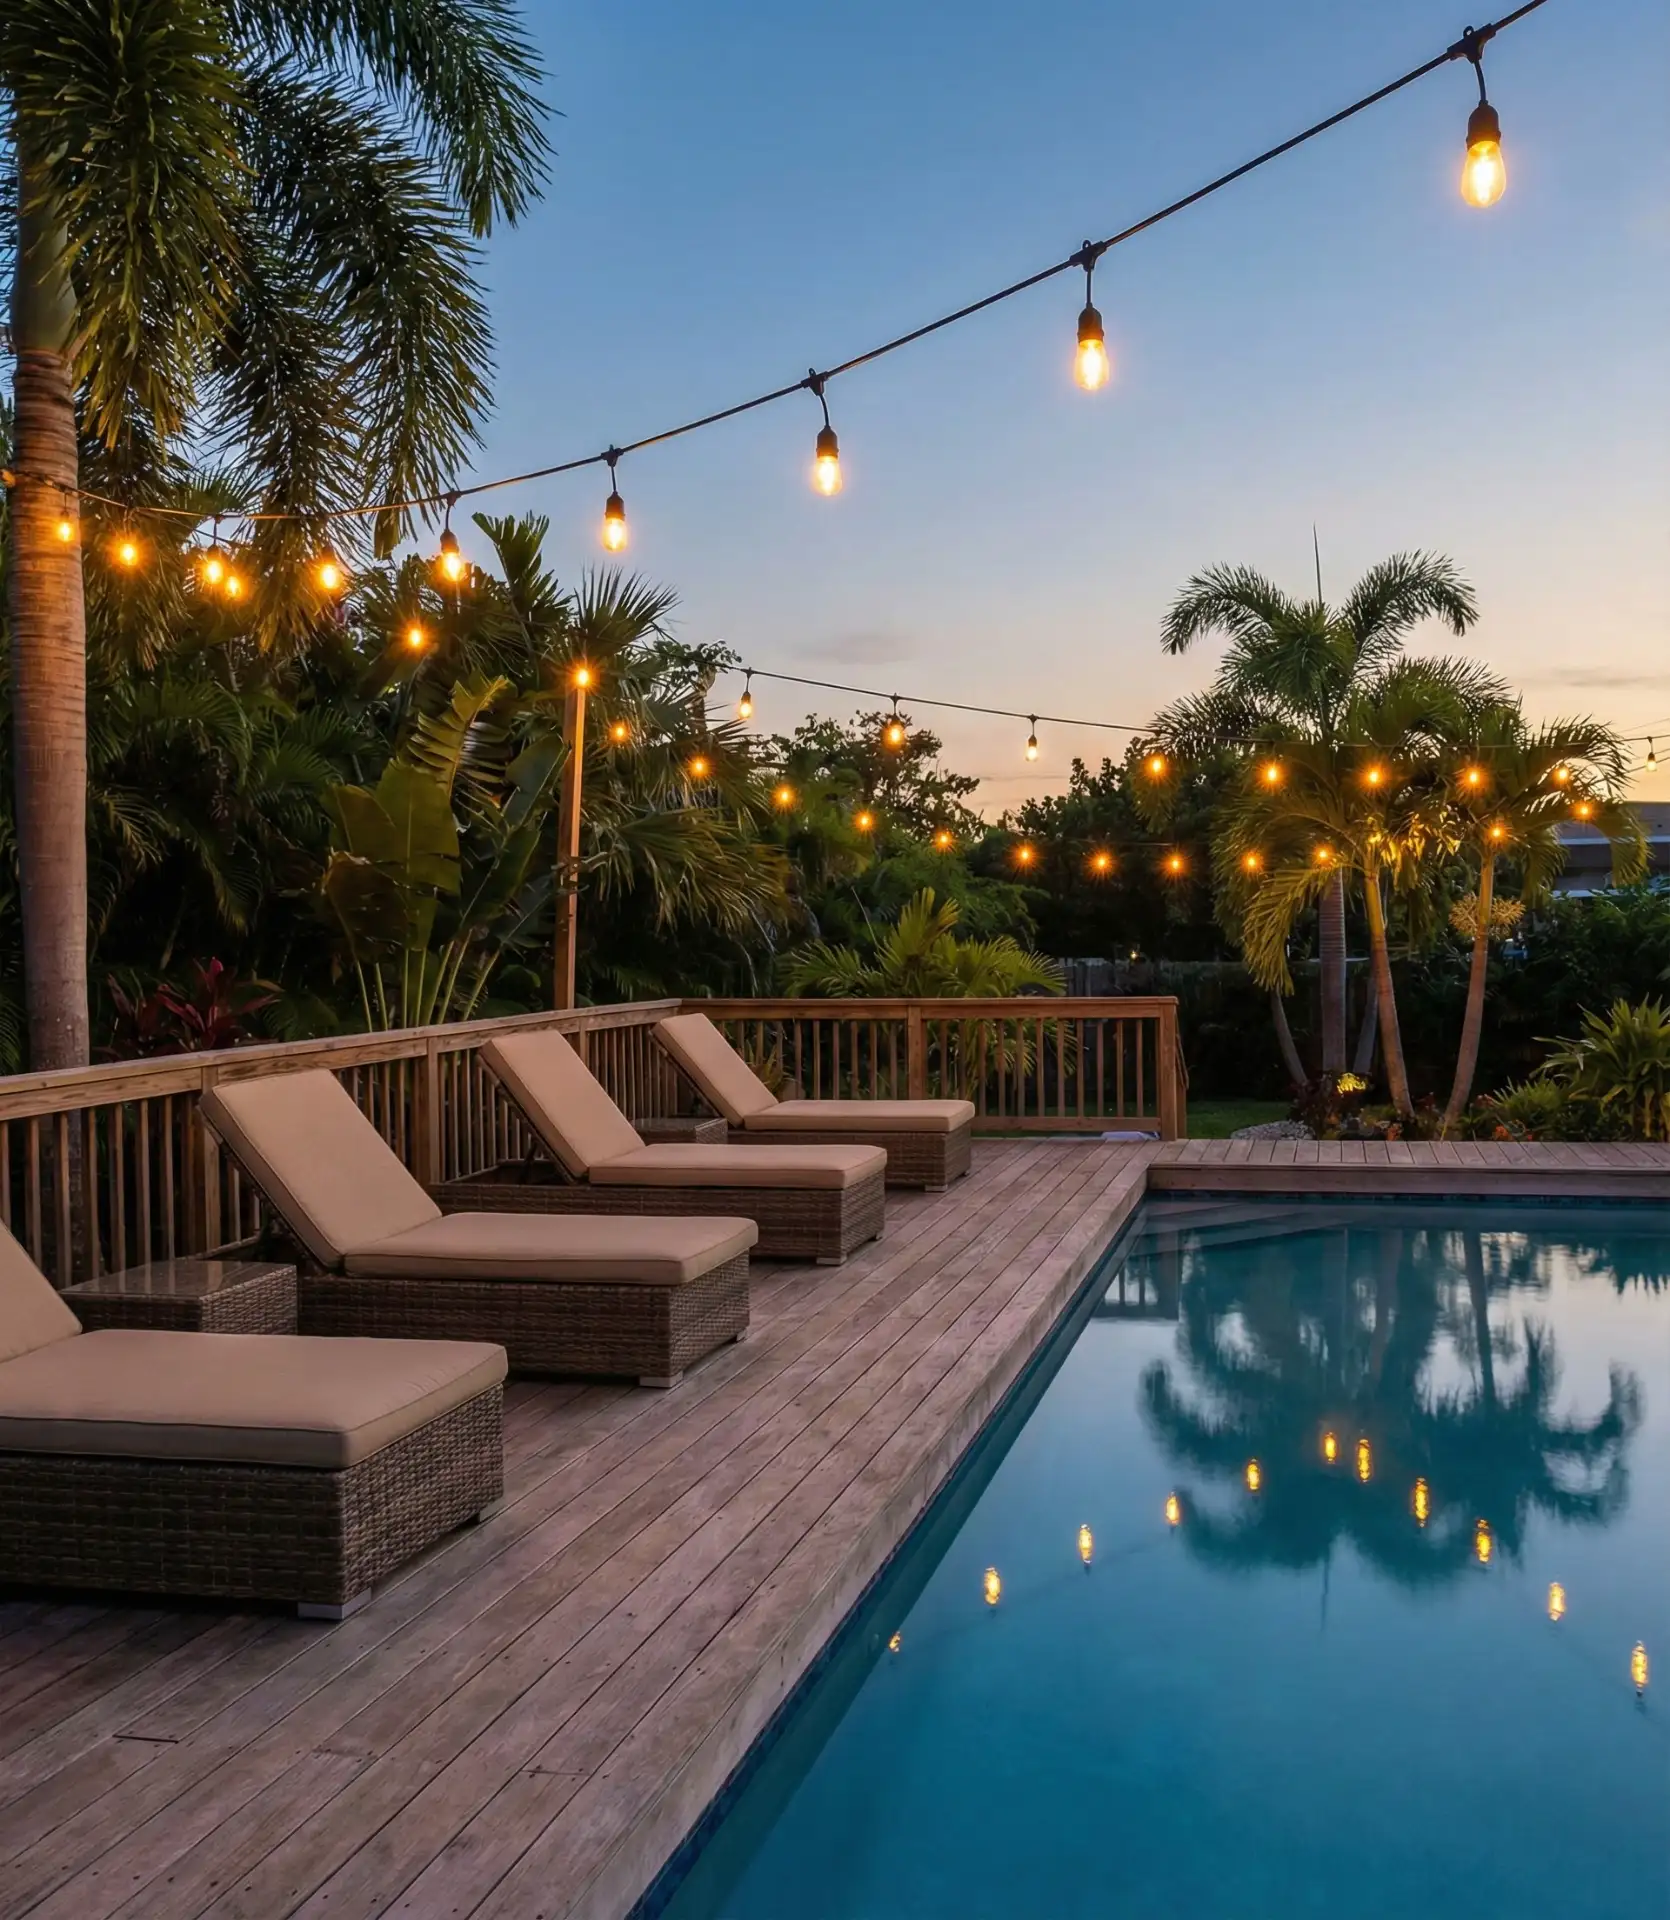
A neighbor in Oregon discovered firsthand the importance of solar panels. What works in the summer when the sun is high can leave you in the dark come October when the sun is lower. Unfortunately, budget solar lights leave you in the dark season after season, while the high-end models that have removable batteries can last five or more years. A sensible guideline is to get solar lights that have a minimum of 8-10 hours of use and an automatic on and off function for dusk and dawn.
5. Planter Box Integration
Portable lighting anchors are large planters that you can keep filling with tall bamboo stakes or metal poles that move with your design needs. This planter pole technique is especially great for renters or homeowners that want more options. 20-inch square planters can be filled with fast-setting concrete around an 8-foot pole and then topped with soil and trailing plants for a neat finished look. It allows you to reposition these poles seasonally or take them with you when you relocate. 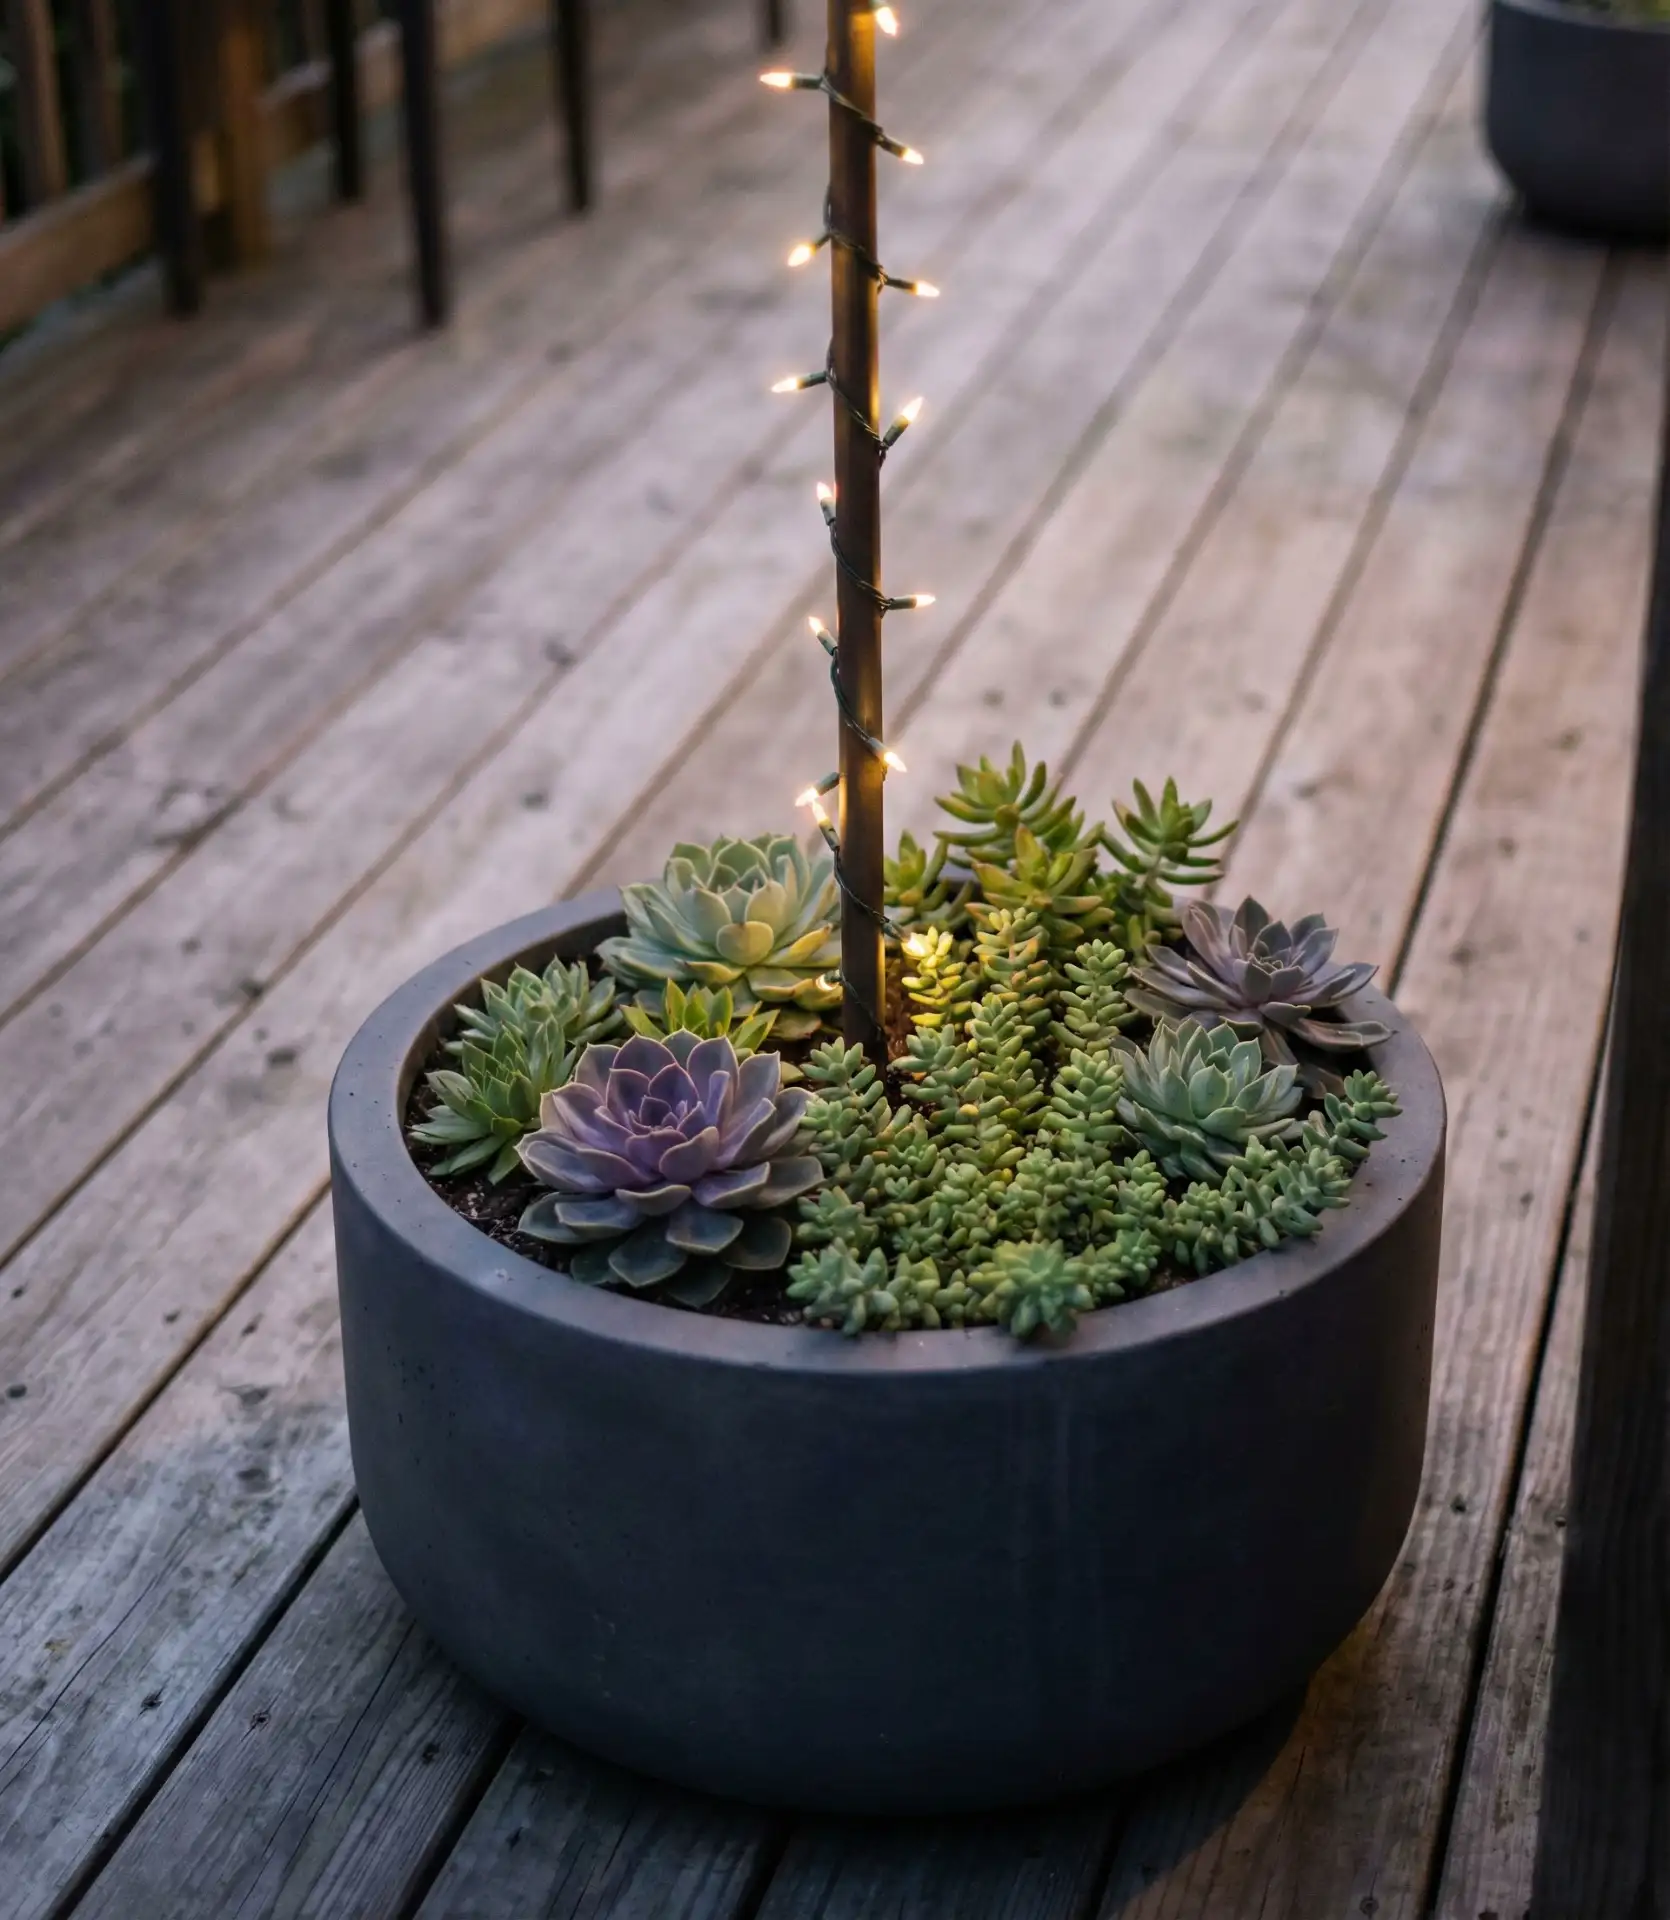
Budget-wise, this approach would cost around $150 to $250 for each anchor point, including planters, poles, concrete, and plants. This system is more than a permanent installation but less than professional hardscaping. The pliability is priceless. You can try different configurations without committing to lasting layouts. Just in case of a high wind area, you can add more weight or a wider planter base to avoid tipping. No one wants a domino effect on their patio after a summer storm.
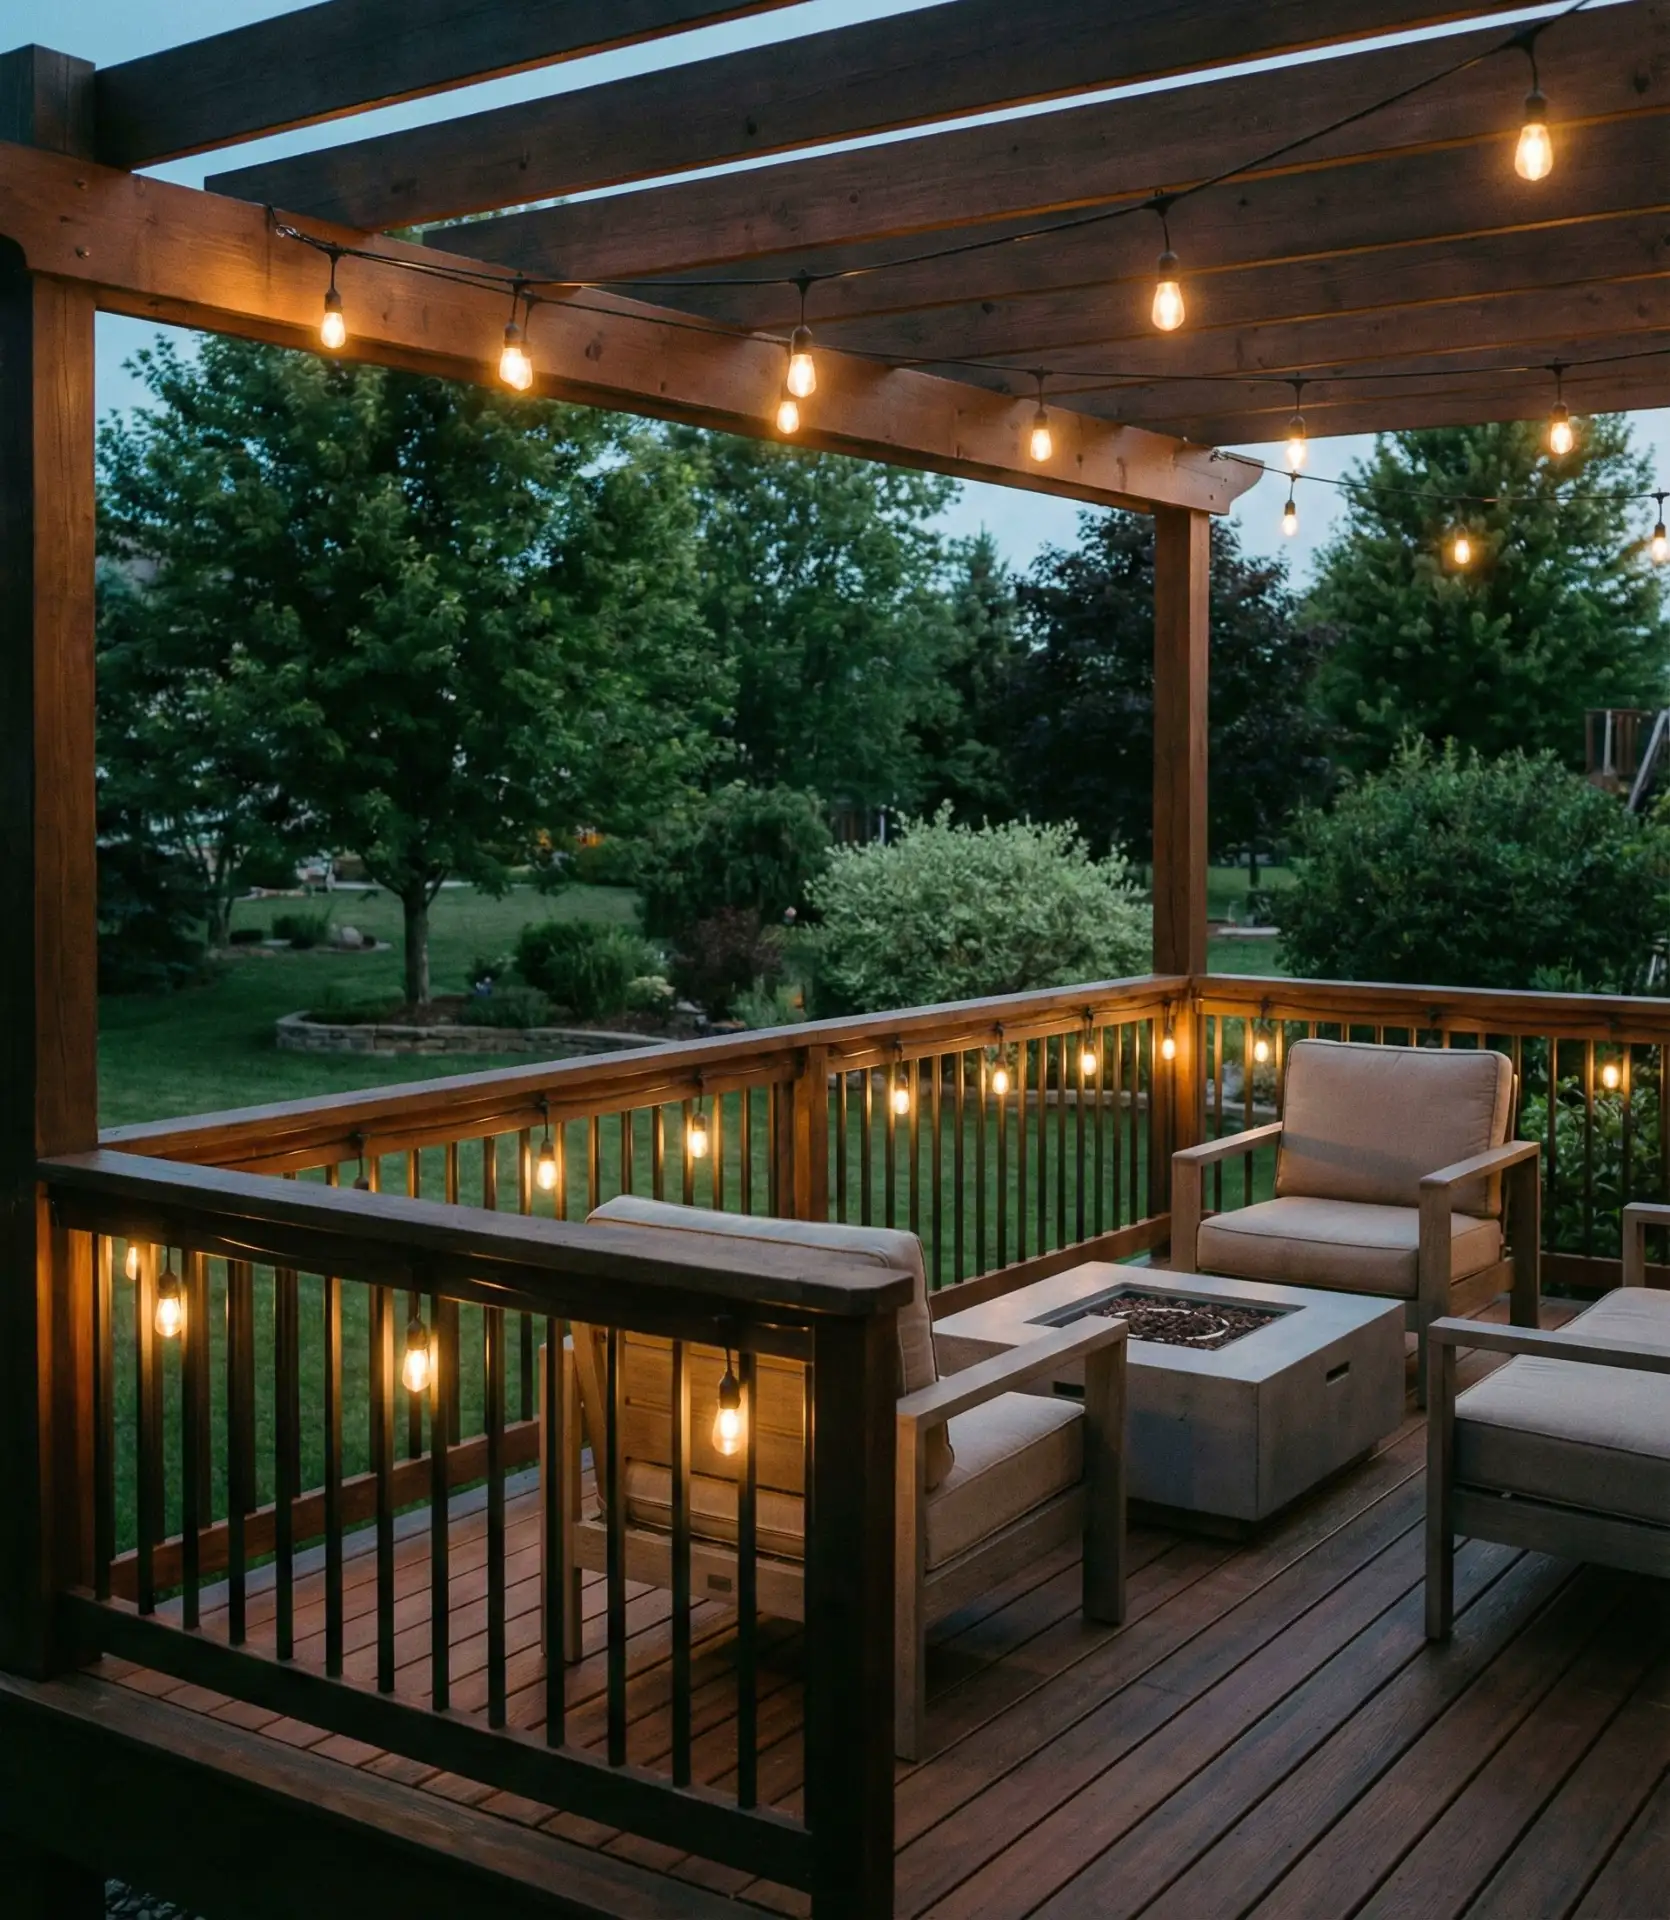
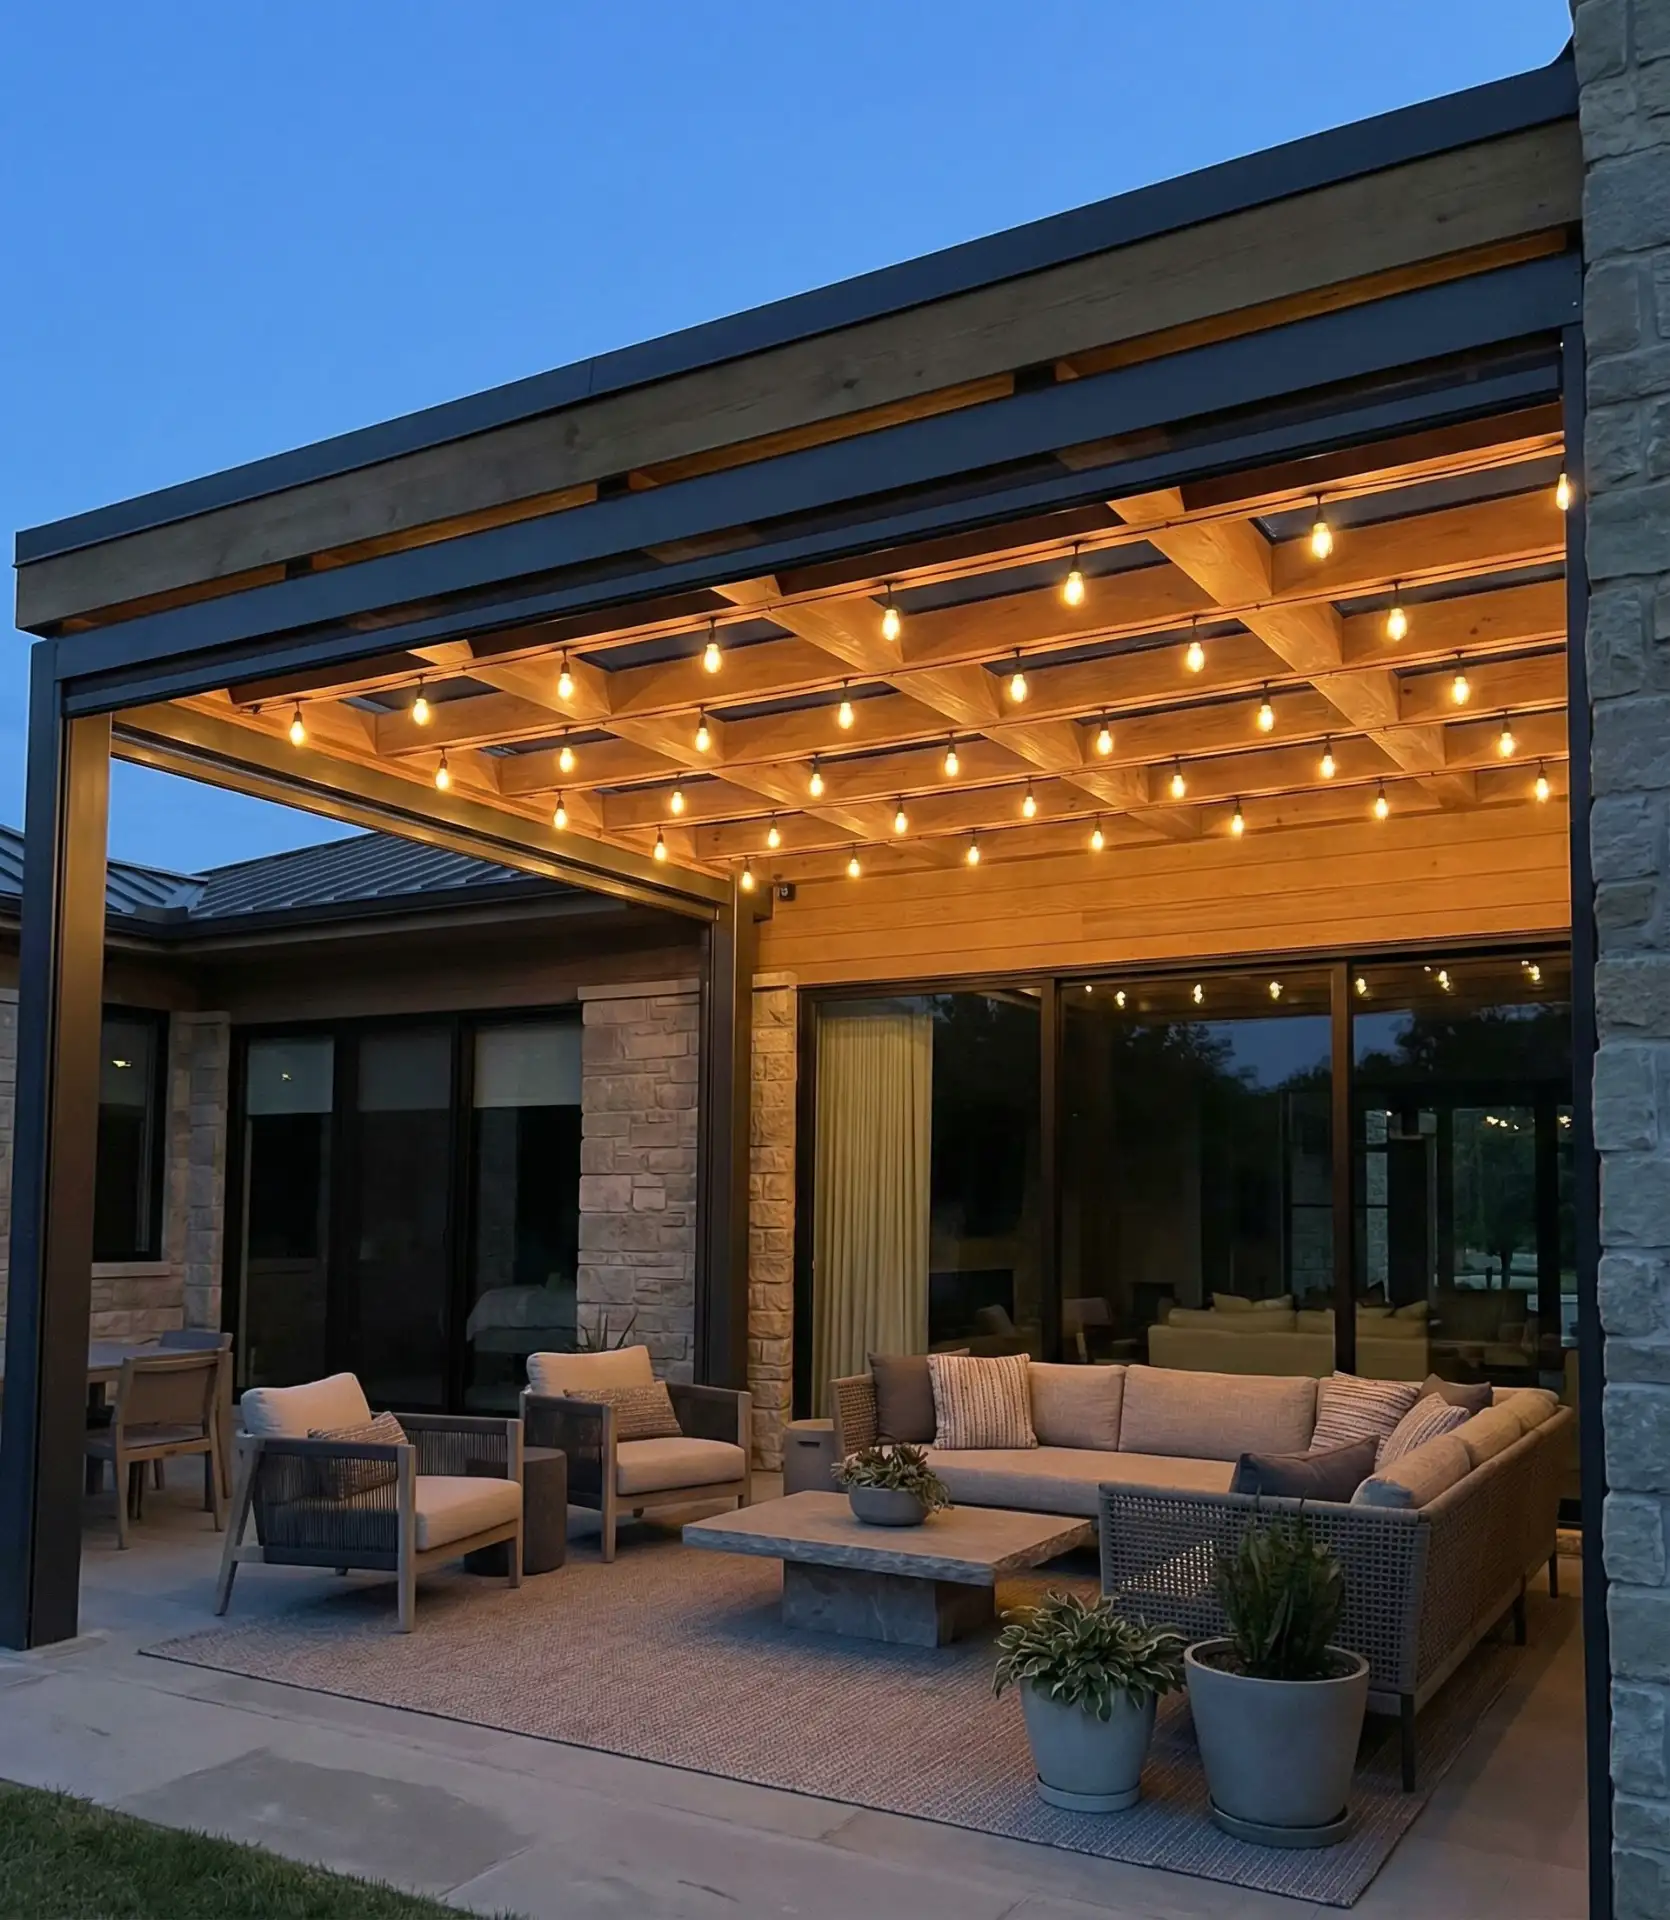
6. Covered Patio Ceiling Grid
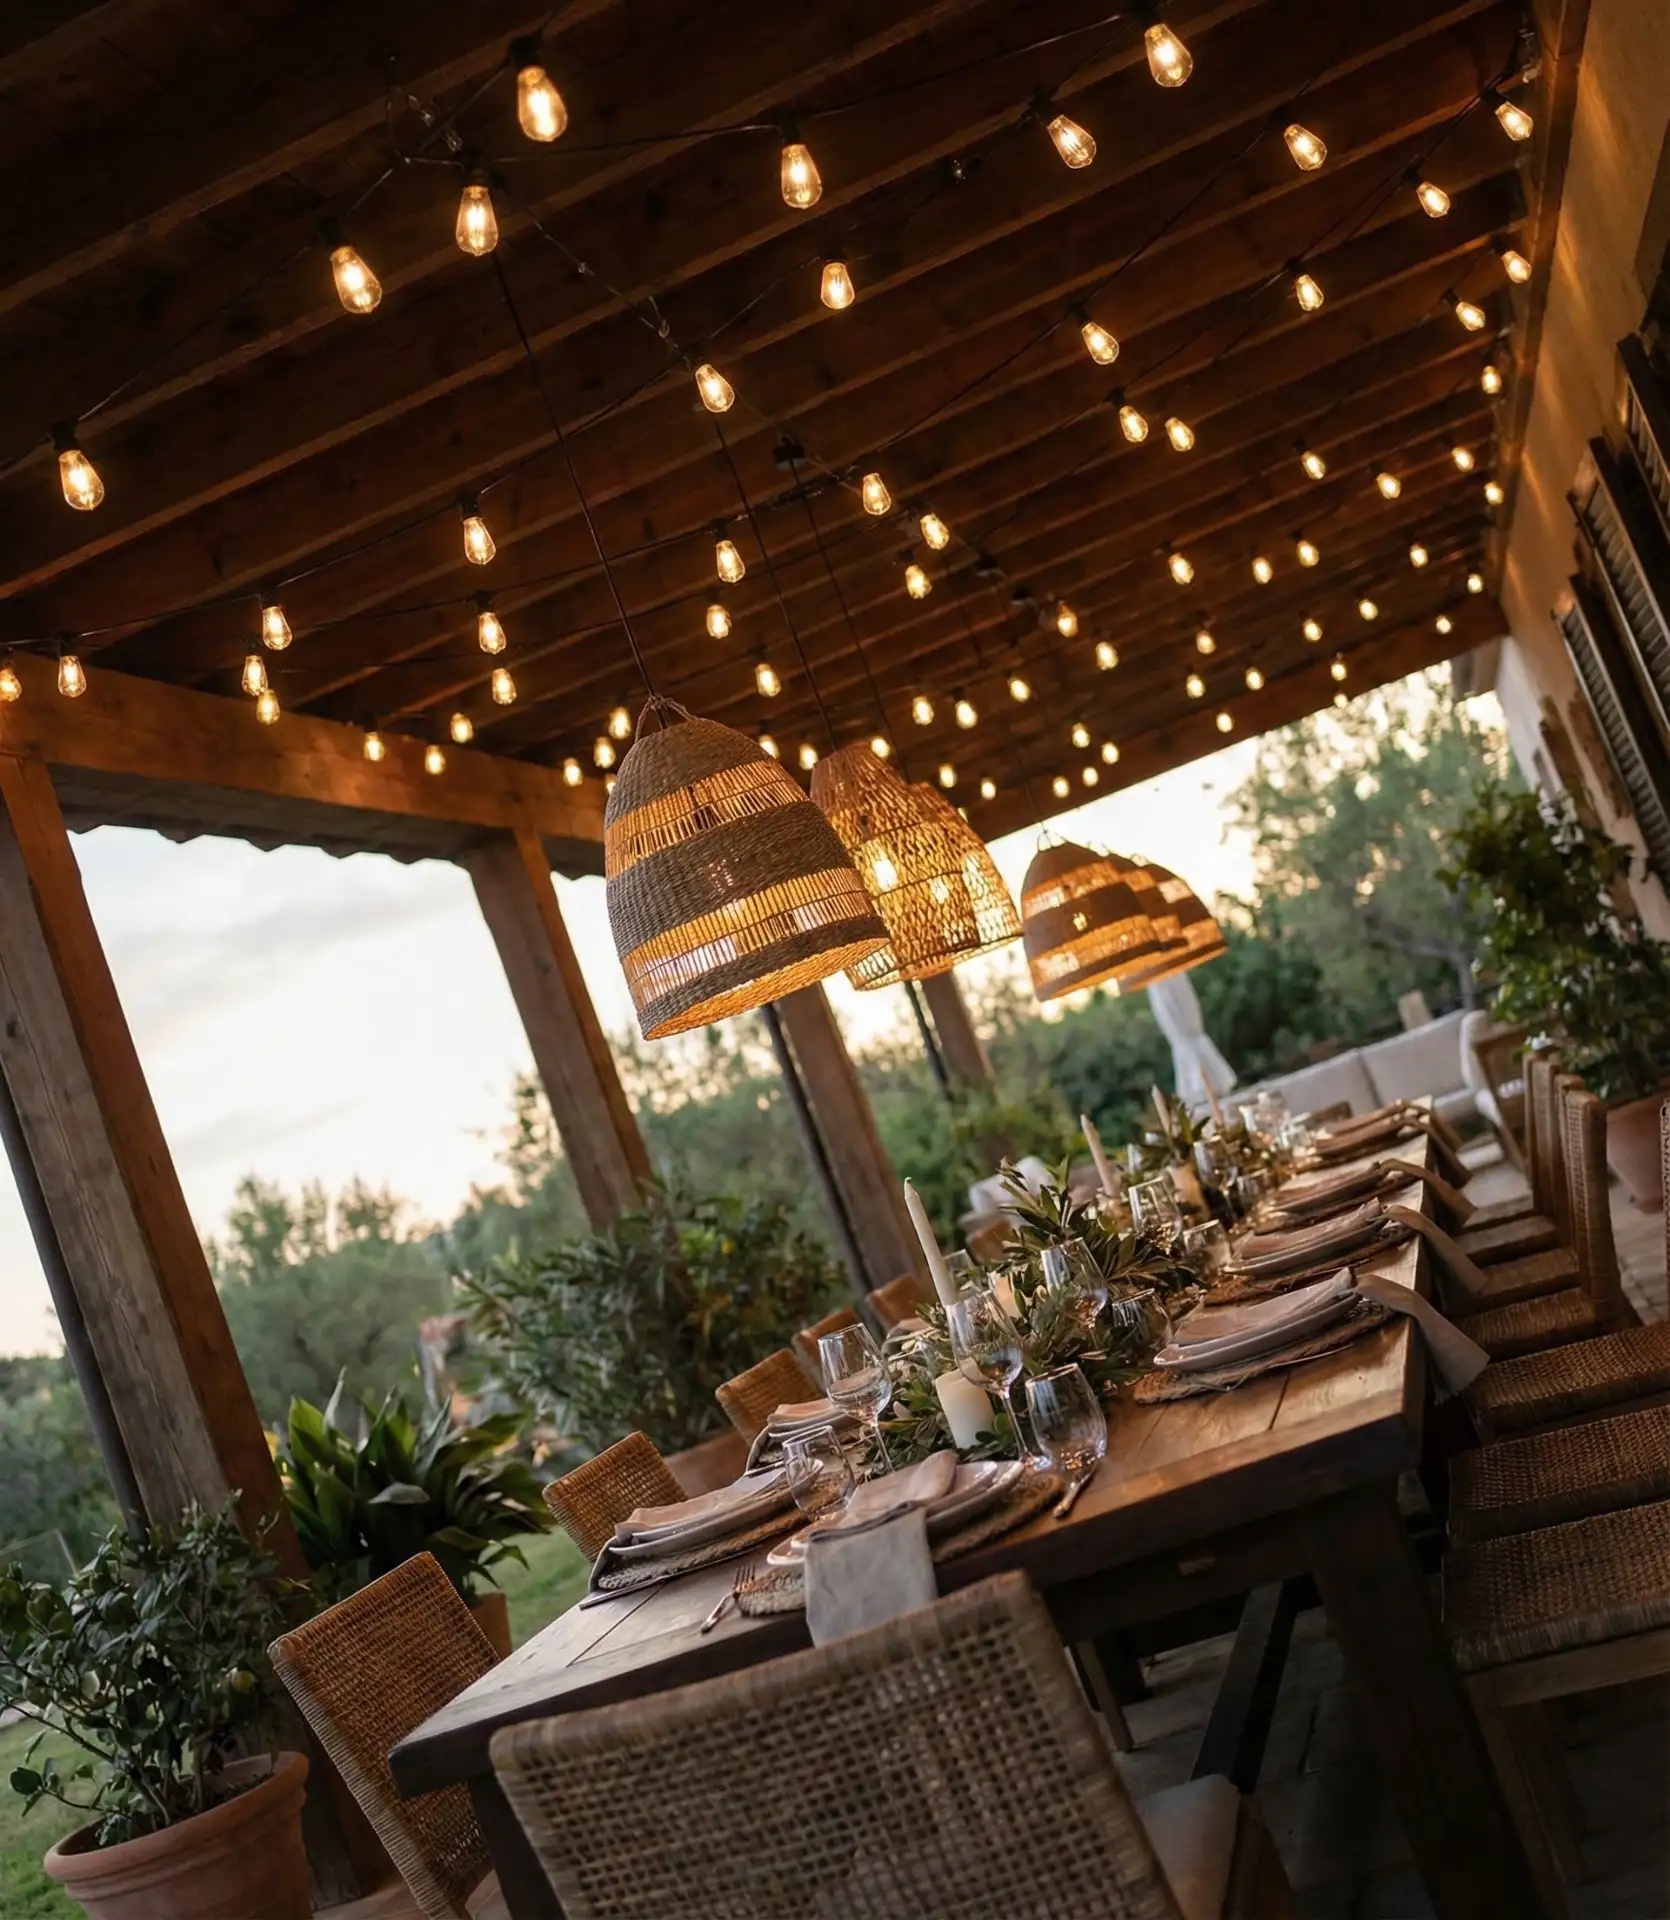
If you still have a covered patio, the ceiling design provides the possibility of ideal surfaces for mounting an intimate lighting design. Place parallel lines of lights across the width and evenly space them 24-30 inches apart to avoid the “too many lights” syndrome. This patio design defends your investment from the weather while creating a room-like feel. The ceiling beams reflect light more efficiently and create a softer glow while maximizing zero use. 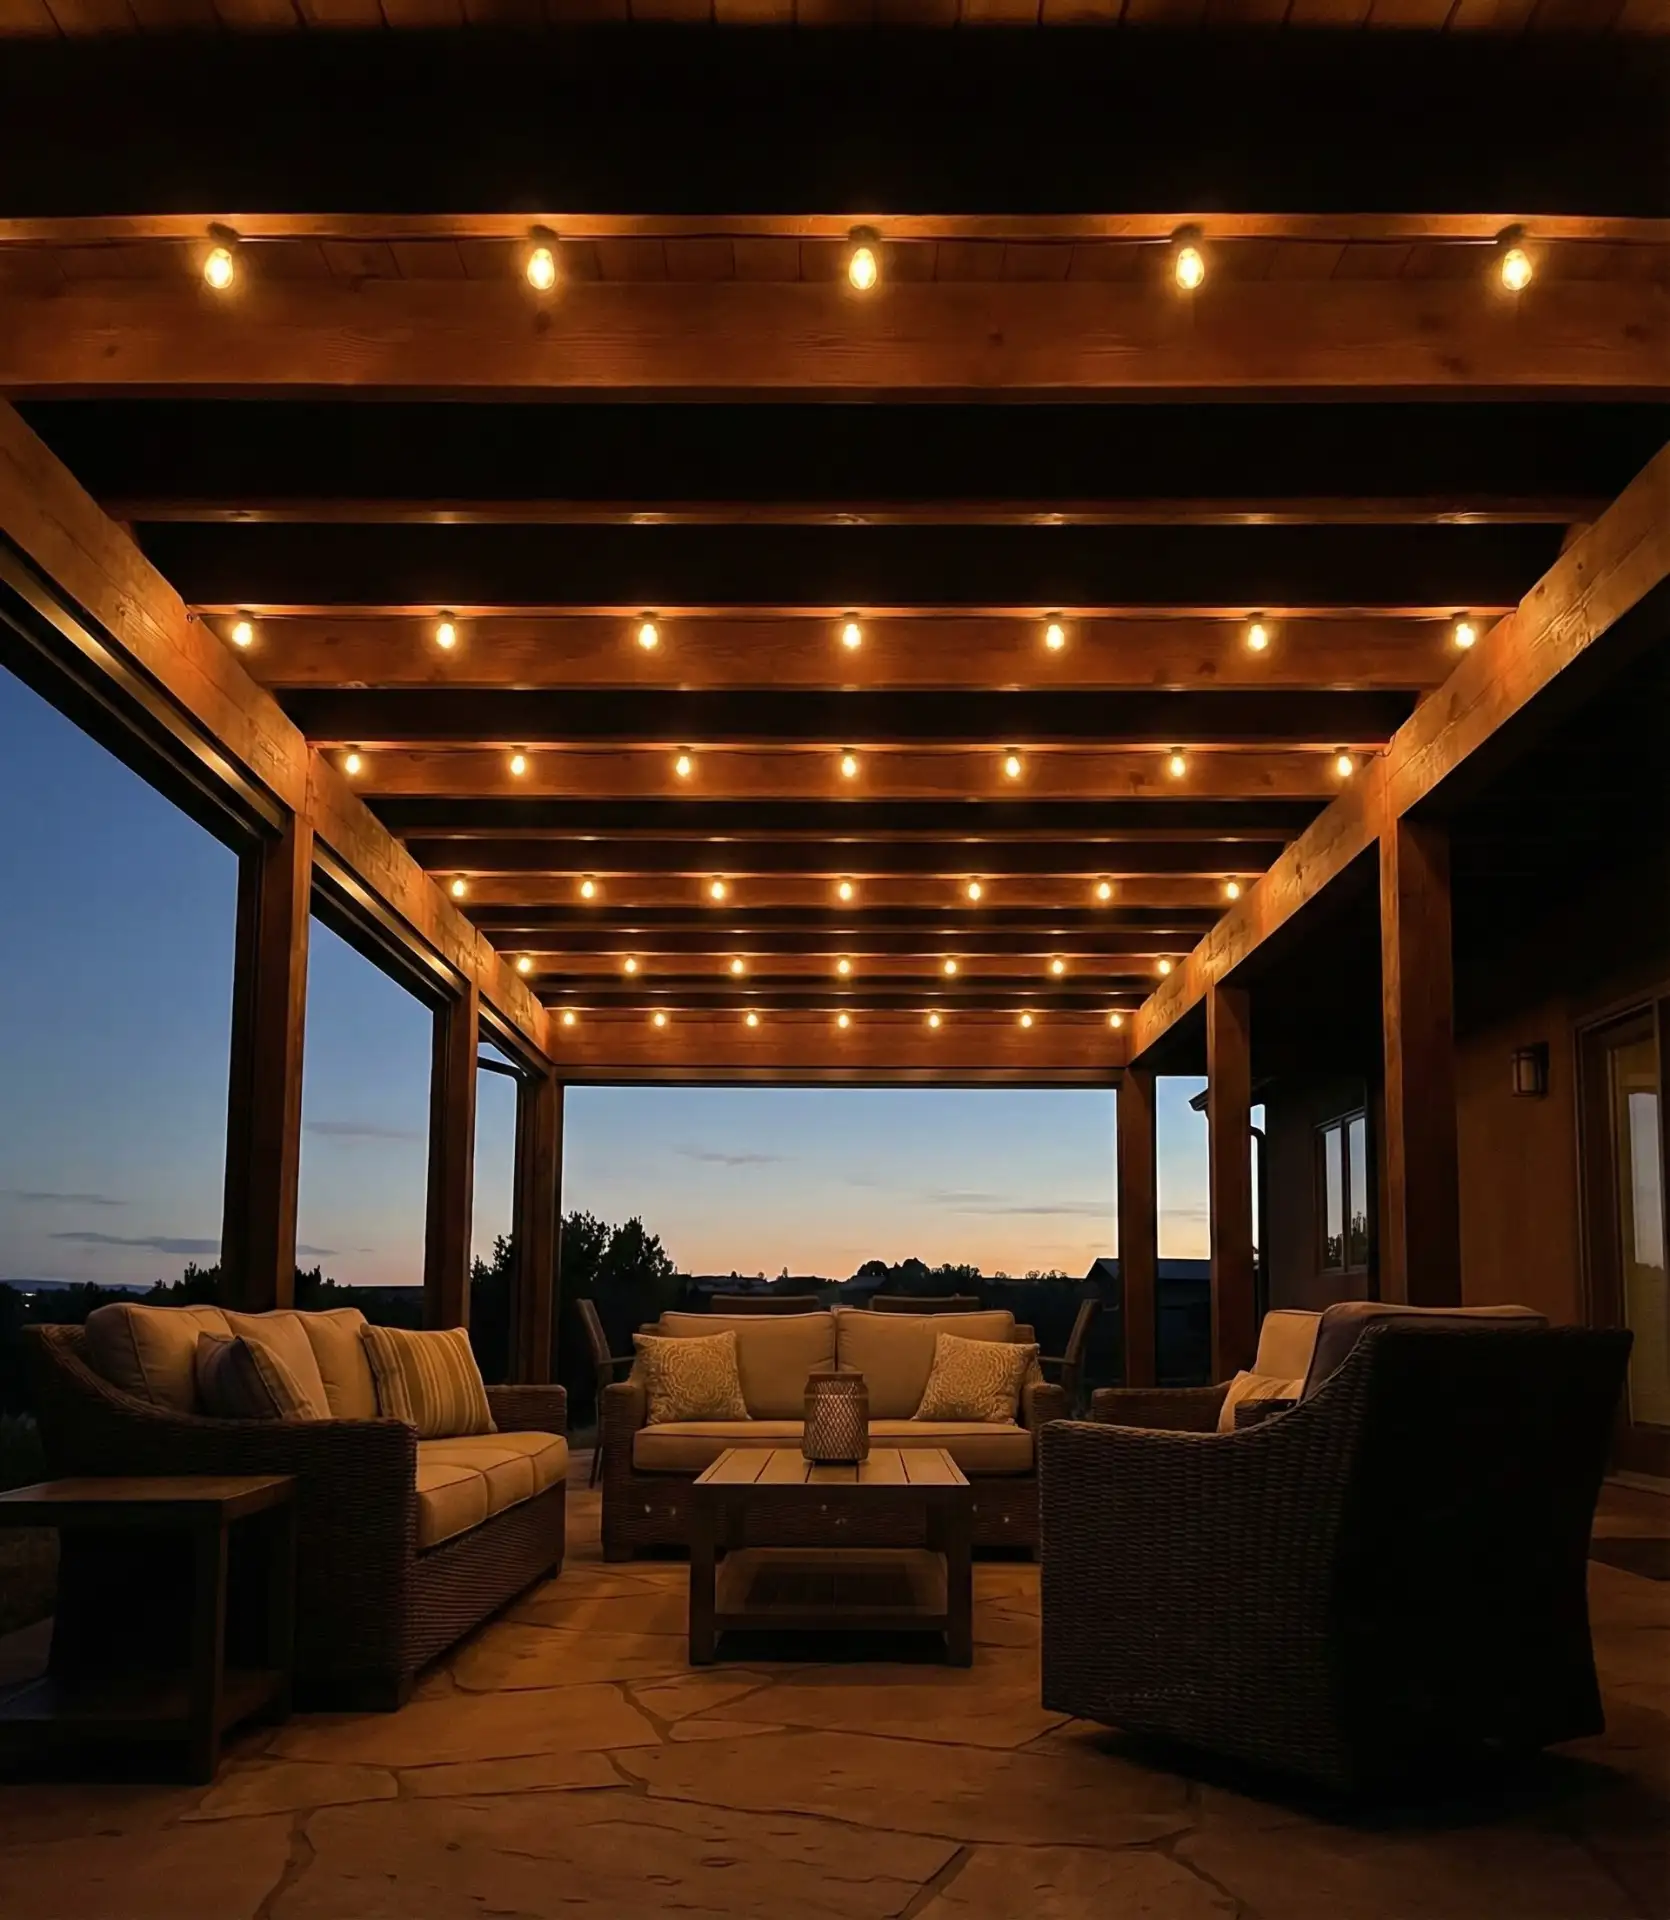
Experts recommend using shorter light strings (25-50 feet) under covered areas rather than one long continuous strand—this makes replacement easier when bulbs fail and allows you to light different zones independently. In the Pacific Northwest, where covered patios are practically standard, homeowners often install weatherproof outlets directly in the ceiling to eliminate visible cords entirely. The enclosed nature means you can use more delicate bulb styles that wouldn’t survive open exposure.
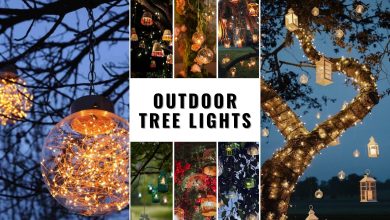
7. Tree Branch Natural Draping
Mature trees provide the most organic framework for hanging outdoor lights, creating a canopy effect that feels enchanted rather than installed. Wrap lights around sturdy branches at varying heights, using tree-friendly mounting straps rather than nails or screws that damage bark. This backyard ideas approach costs almost nothing if you have already established trees and creates that coveted “firefly forest” aesthetic that’s impossible to achieve with artificial structures. 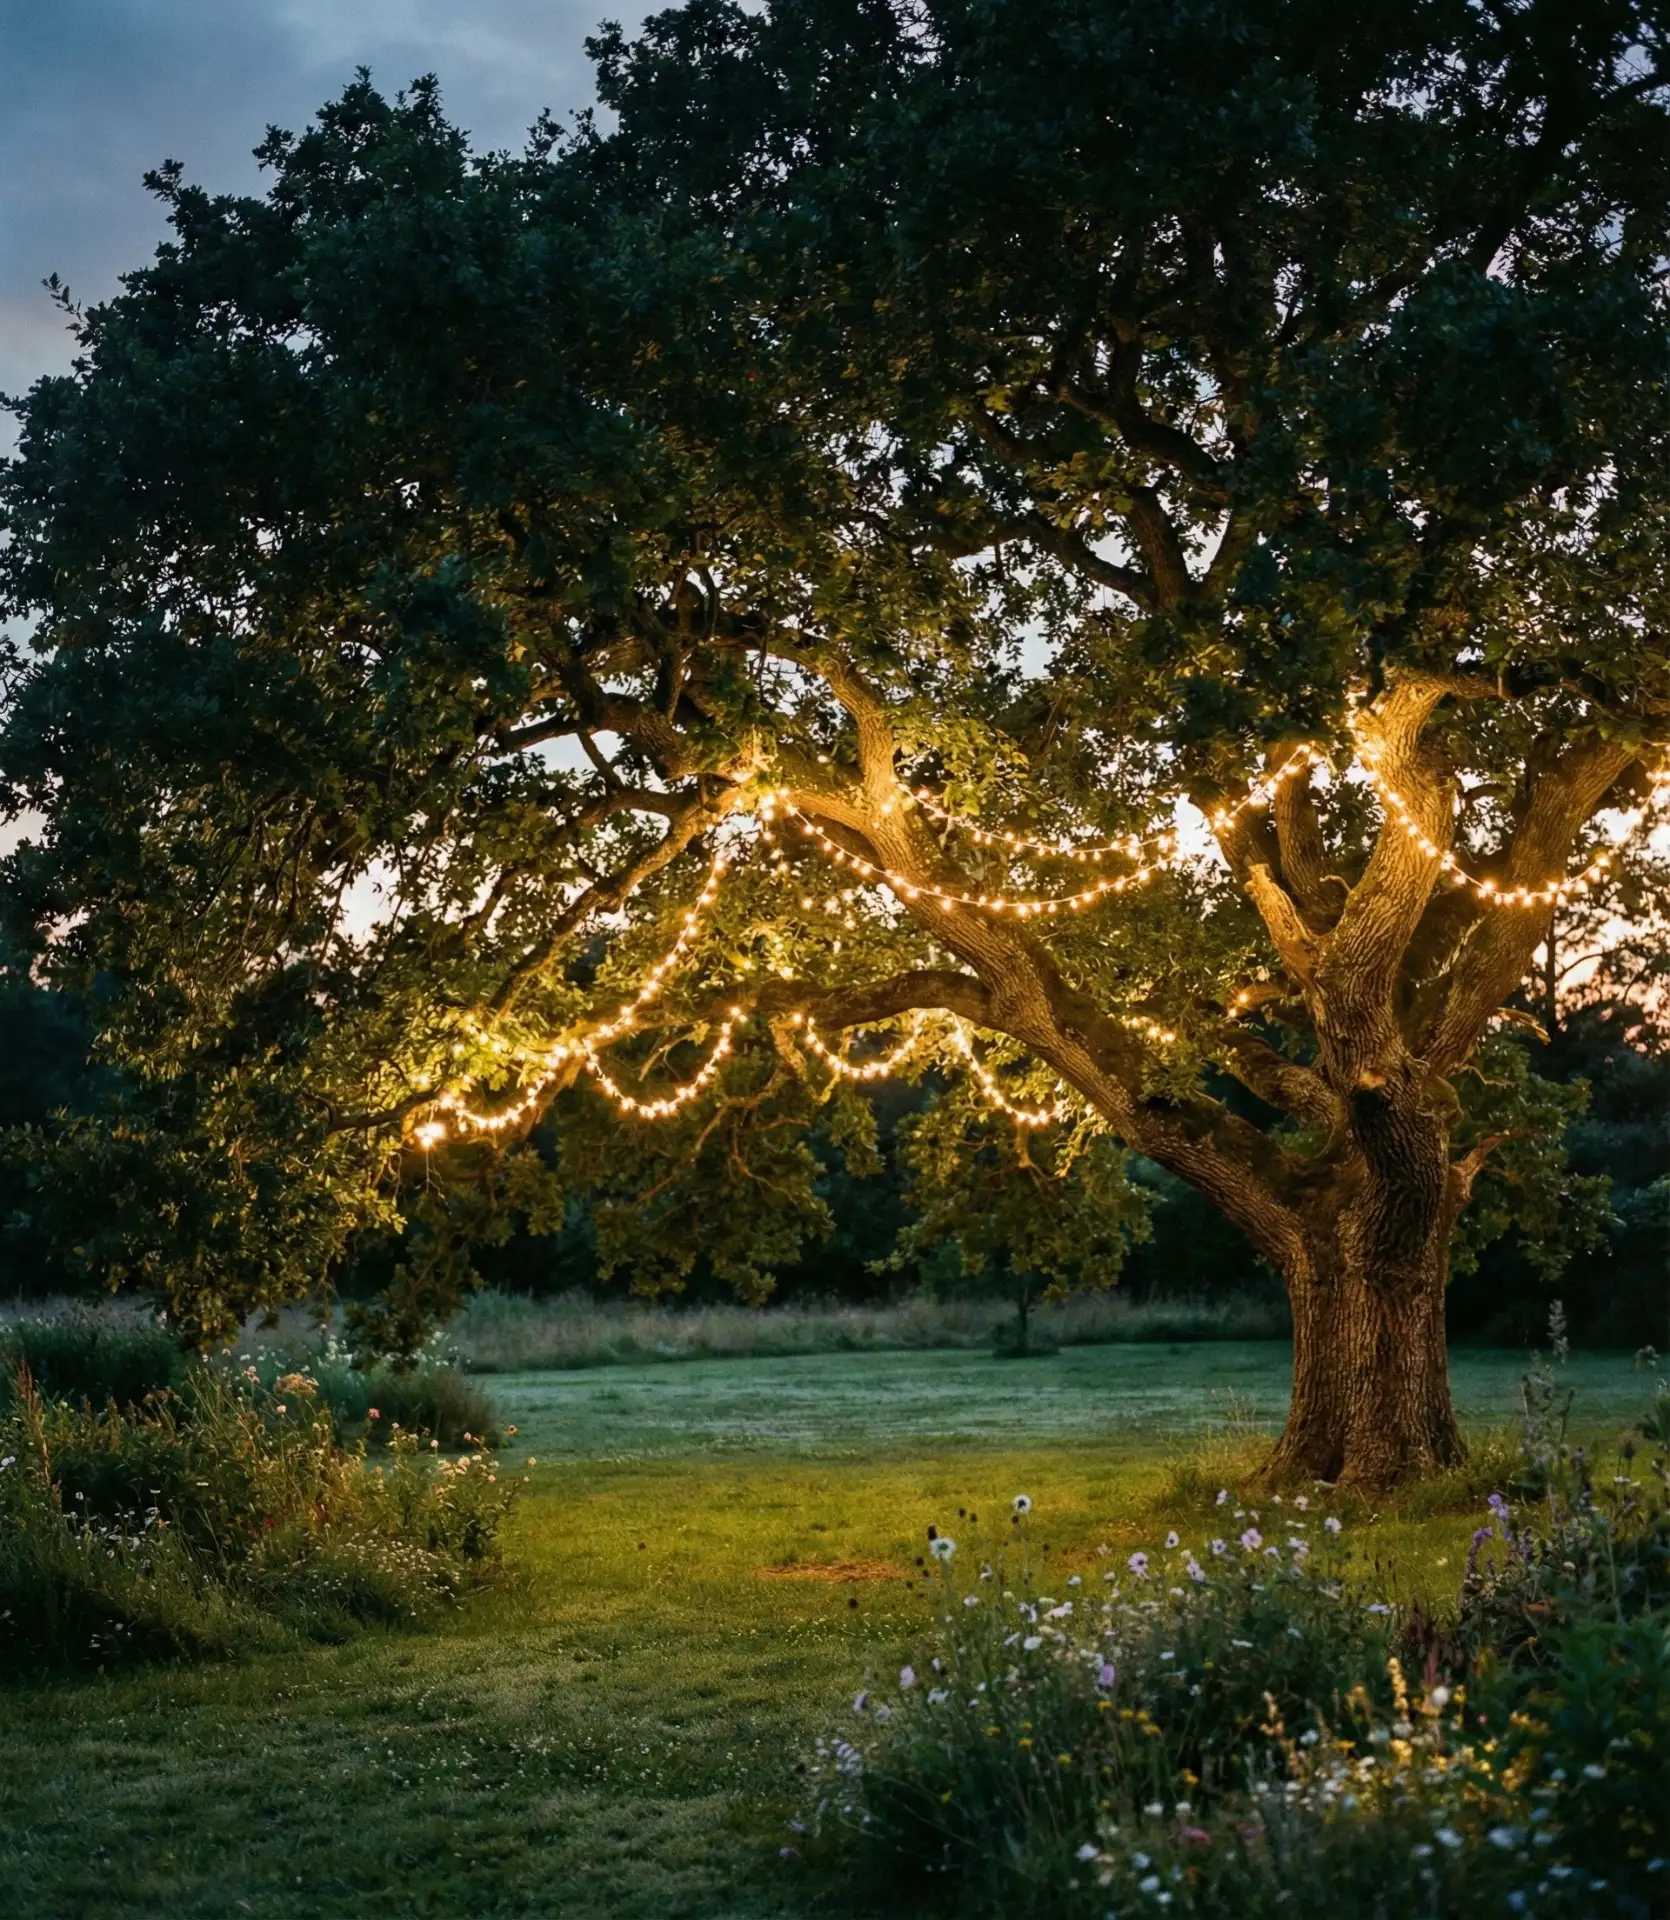
Common mistakes to avoid: Never wrap lights tightly around growing branches—trees expand each year and will eventually strangle the wires, creating both safety hazards and dead zones in your lighting. Leave slack in the lines and check annually for any pressure points. Use UV-resistant outdoor-rated lights exclusively; indoor Christmas lights will deteriorate within months under constant sun exposure, creating fire risks and necessitating complete replacement.
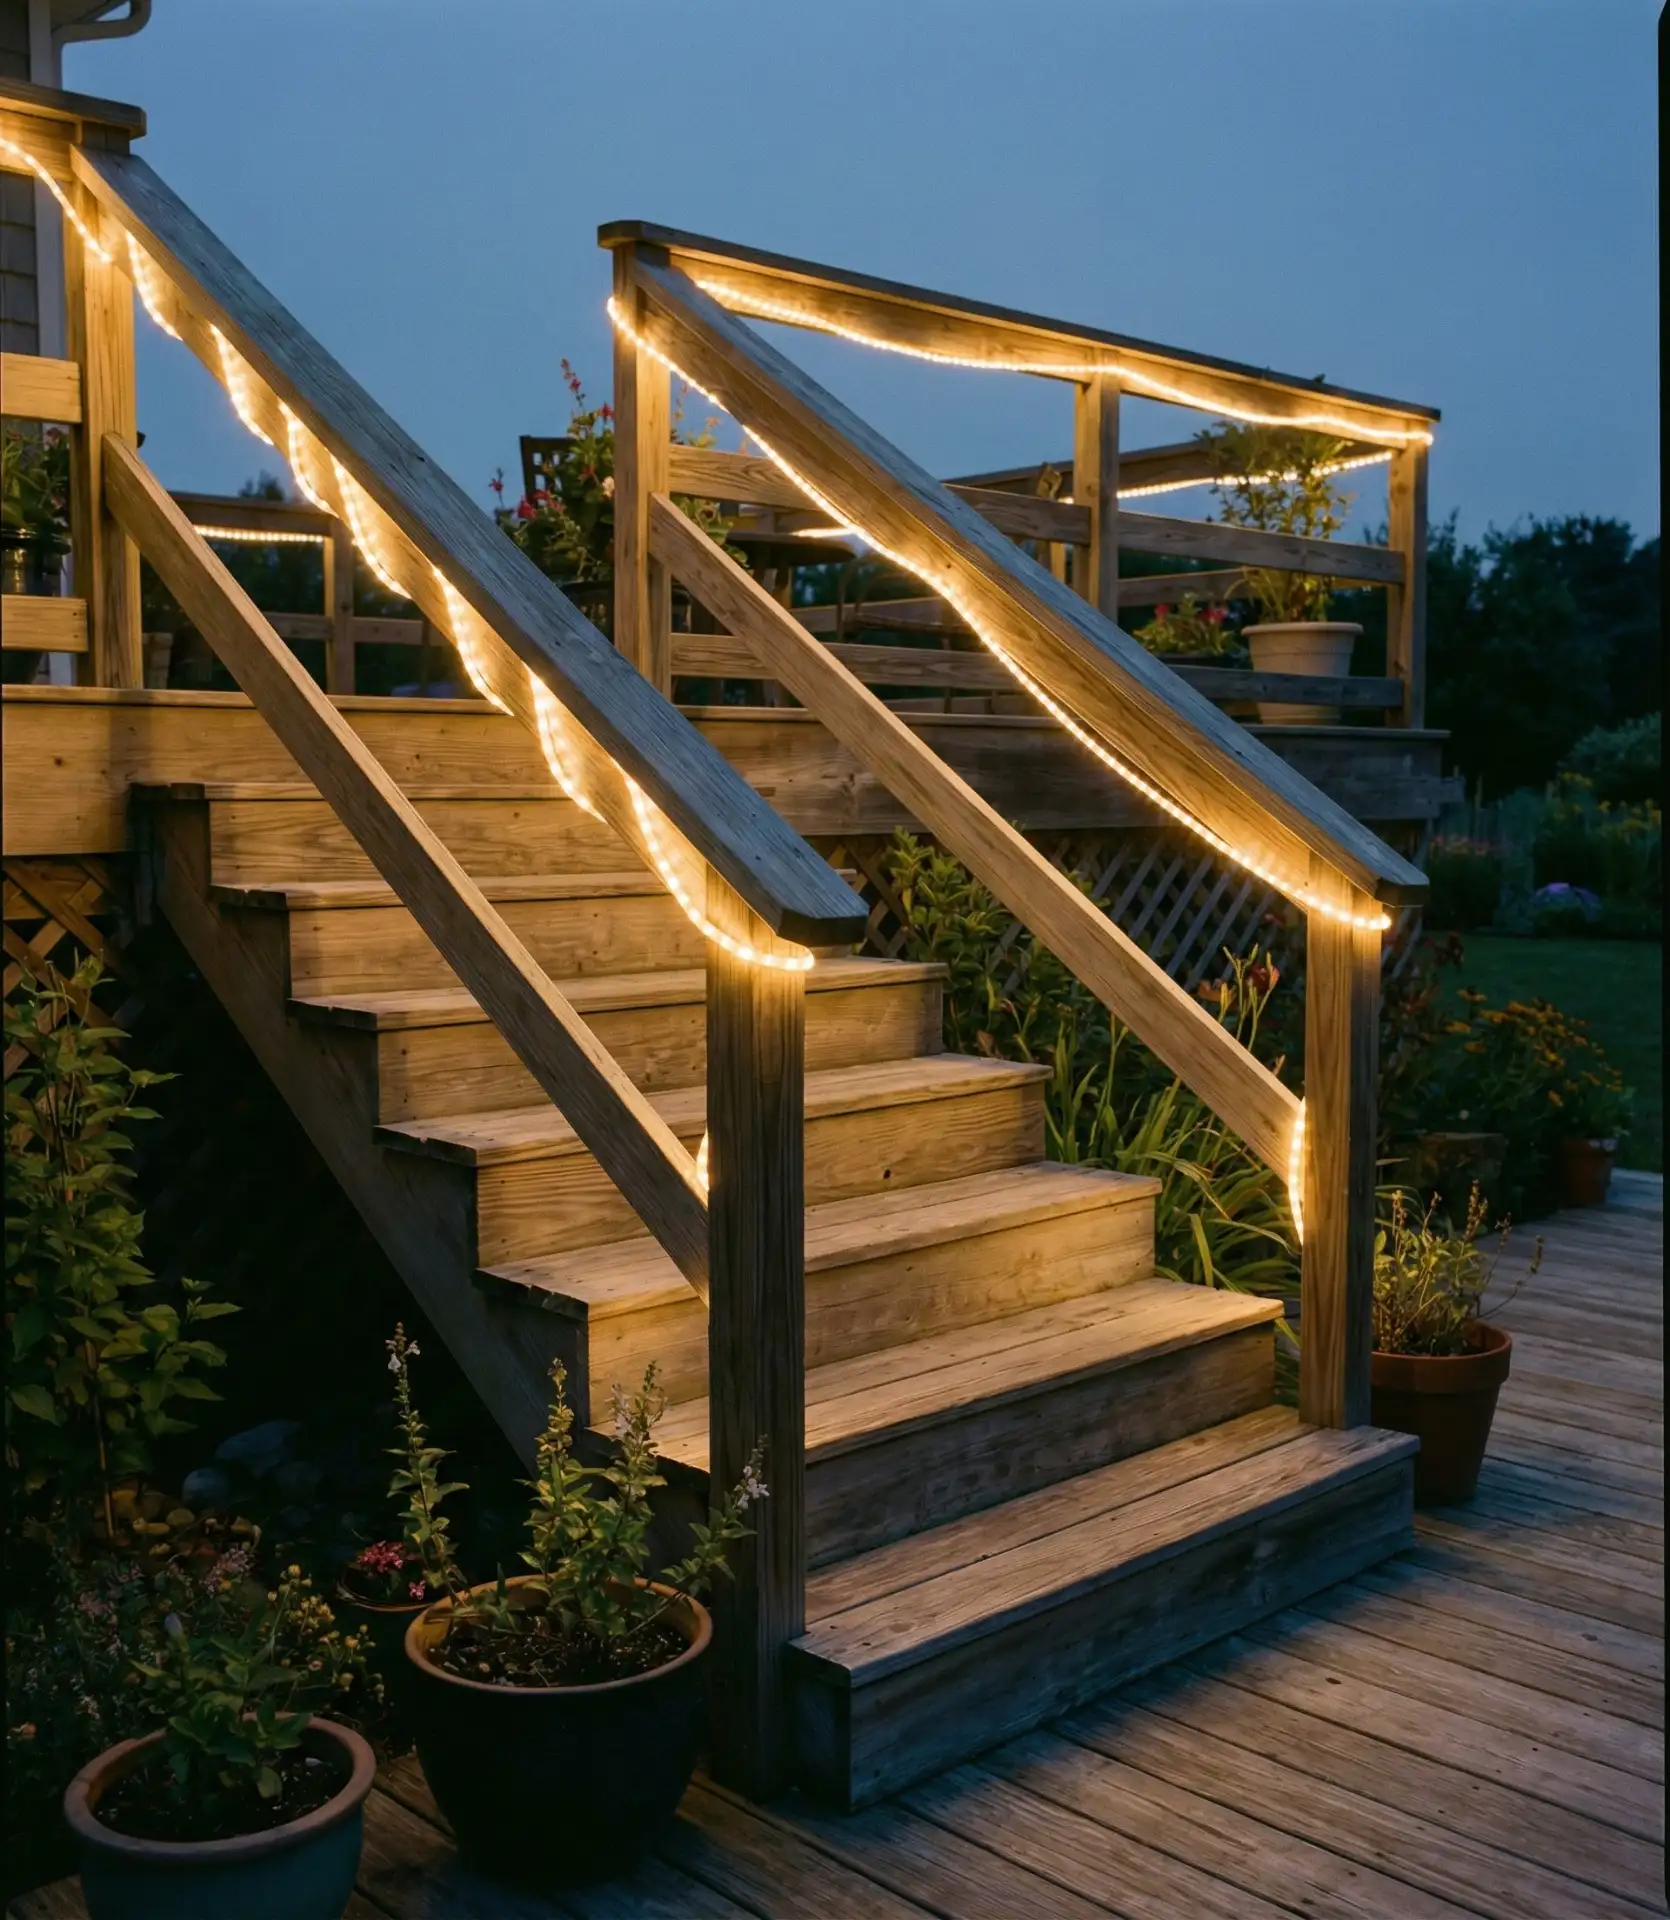
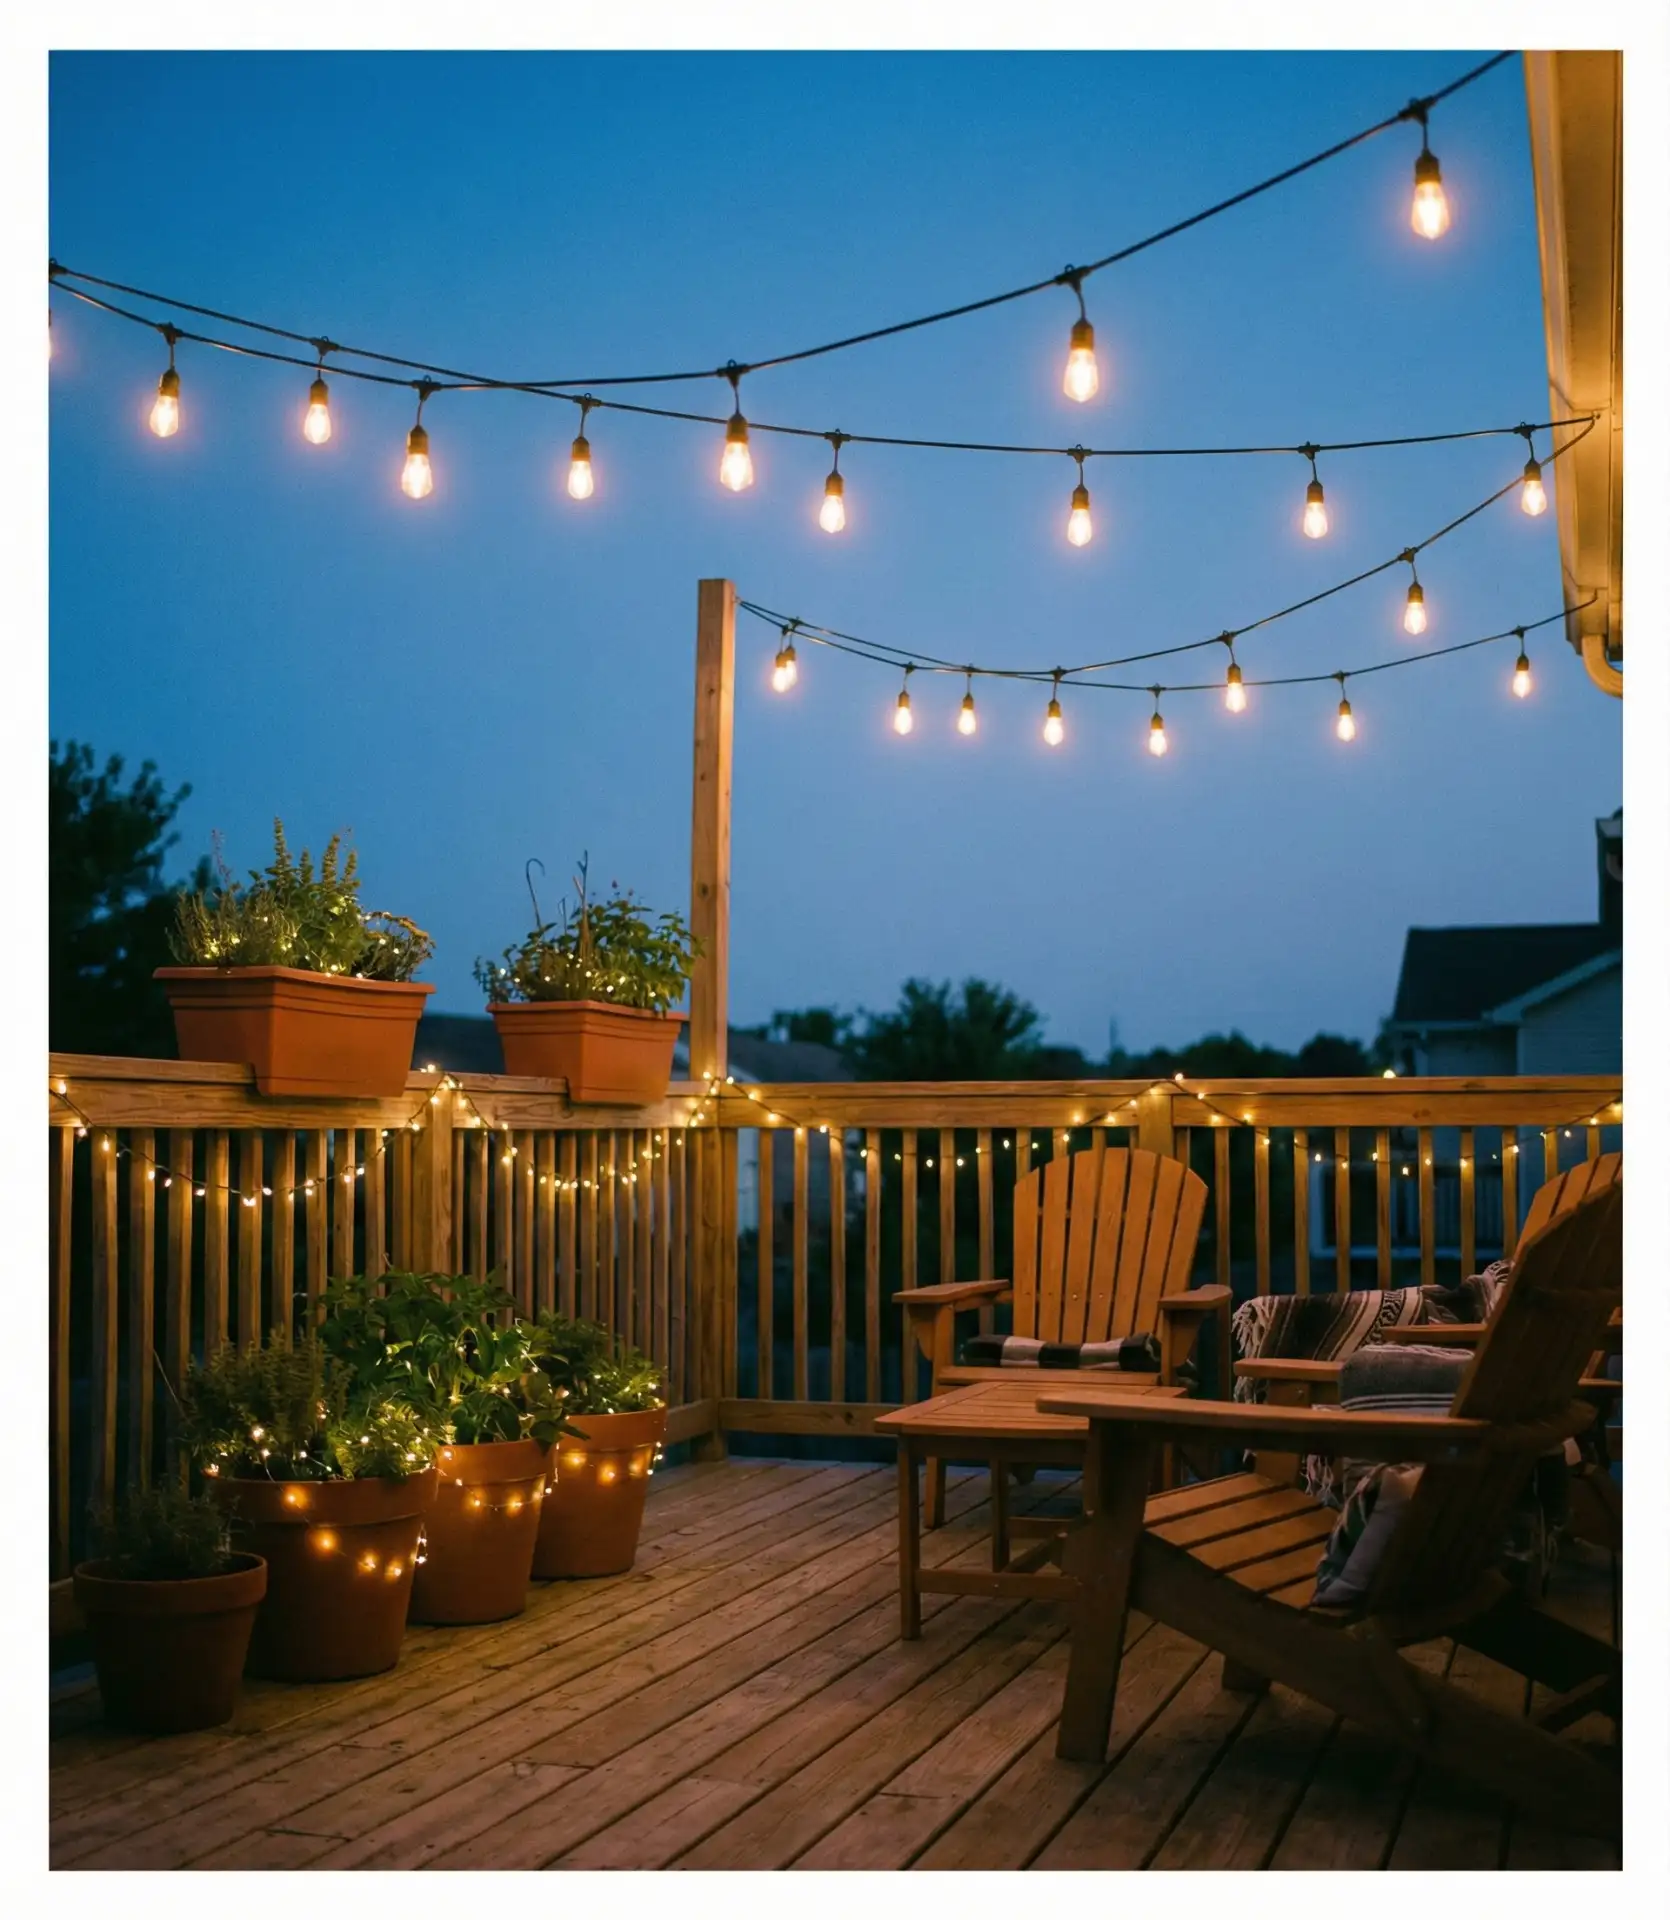
8. Deck Railing Perimeter Glow
Running string lights along deck railings creates a safety feature disguised as ambiance, clearly defining edges while providing beautiful illumination. Use plastic clips designed specifically for deck rails to avoid drilling holes that compromise weatherproofing. This deck patio ideas solution works particularly well for second-story decks where overhead hanging isn’t practical. The waist-high light placement creates an intimate scale perfect for evening gatherings. 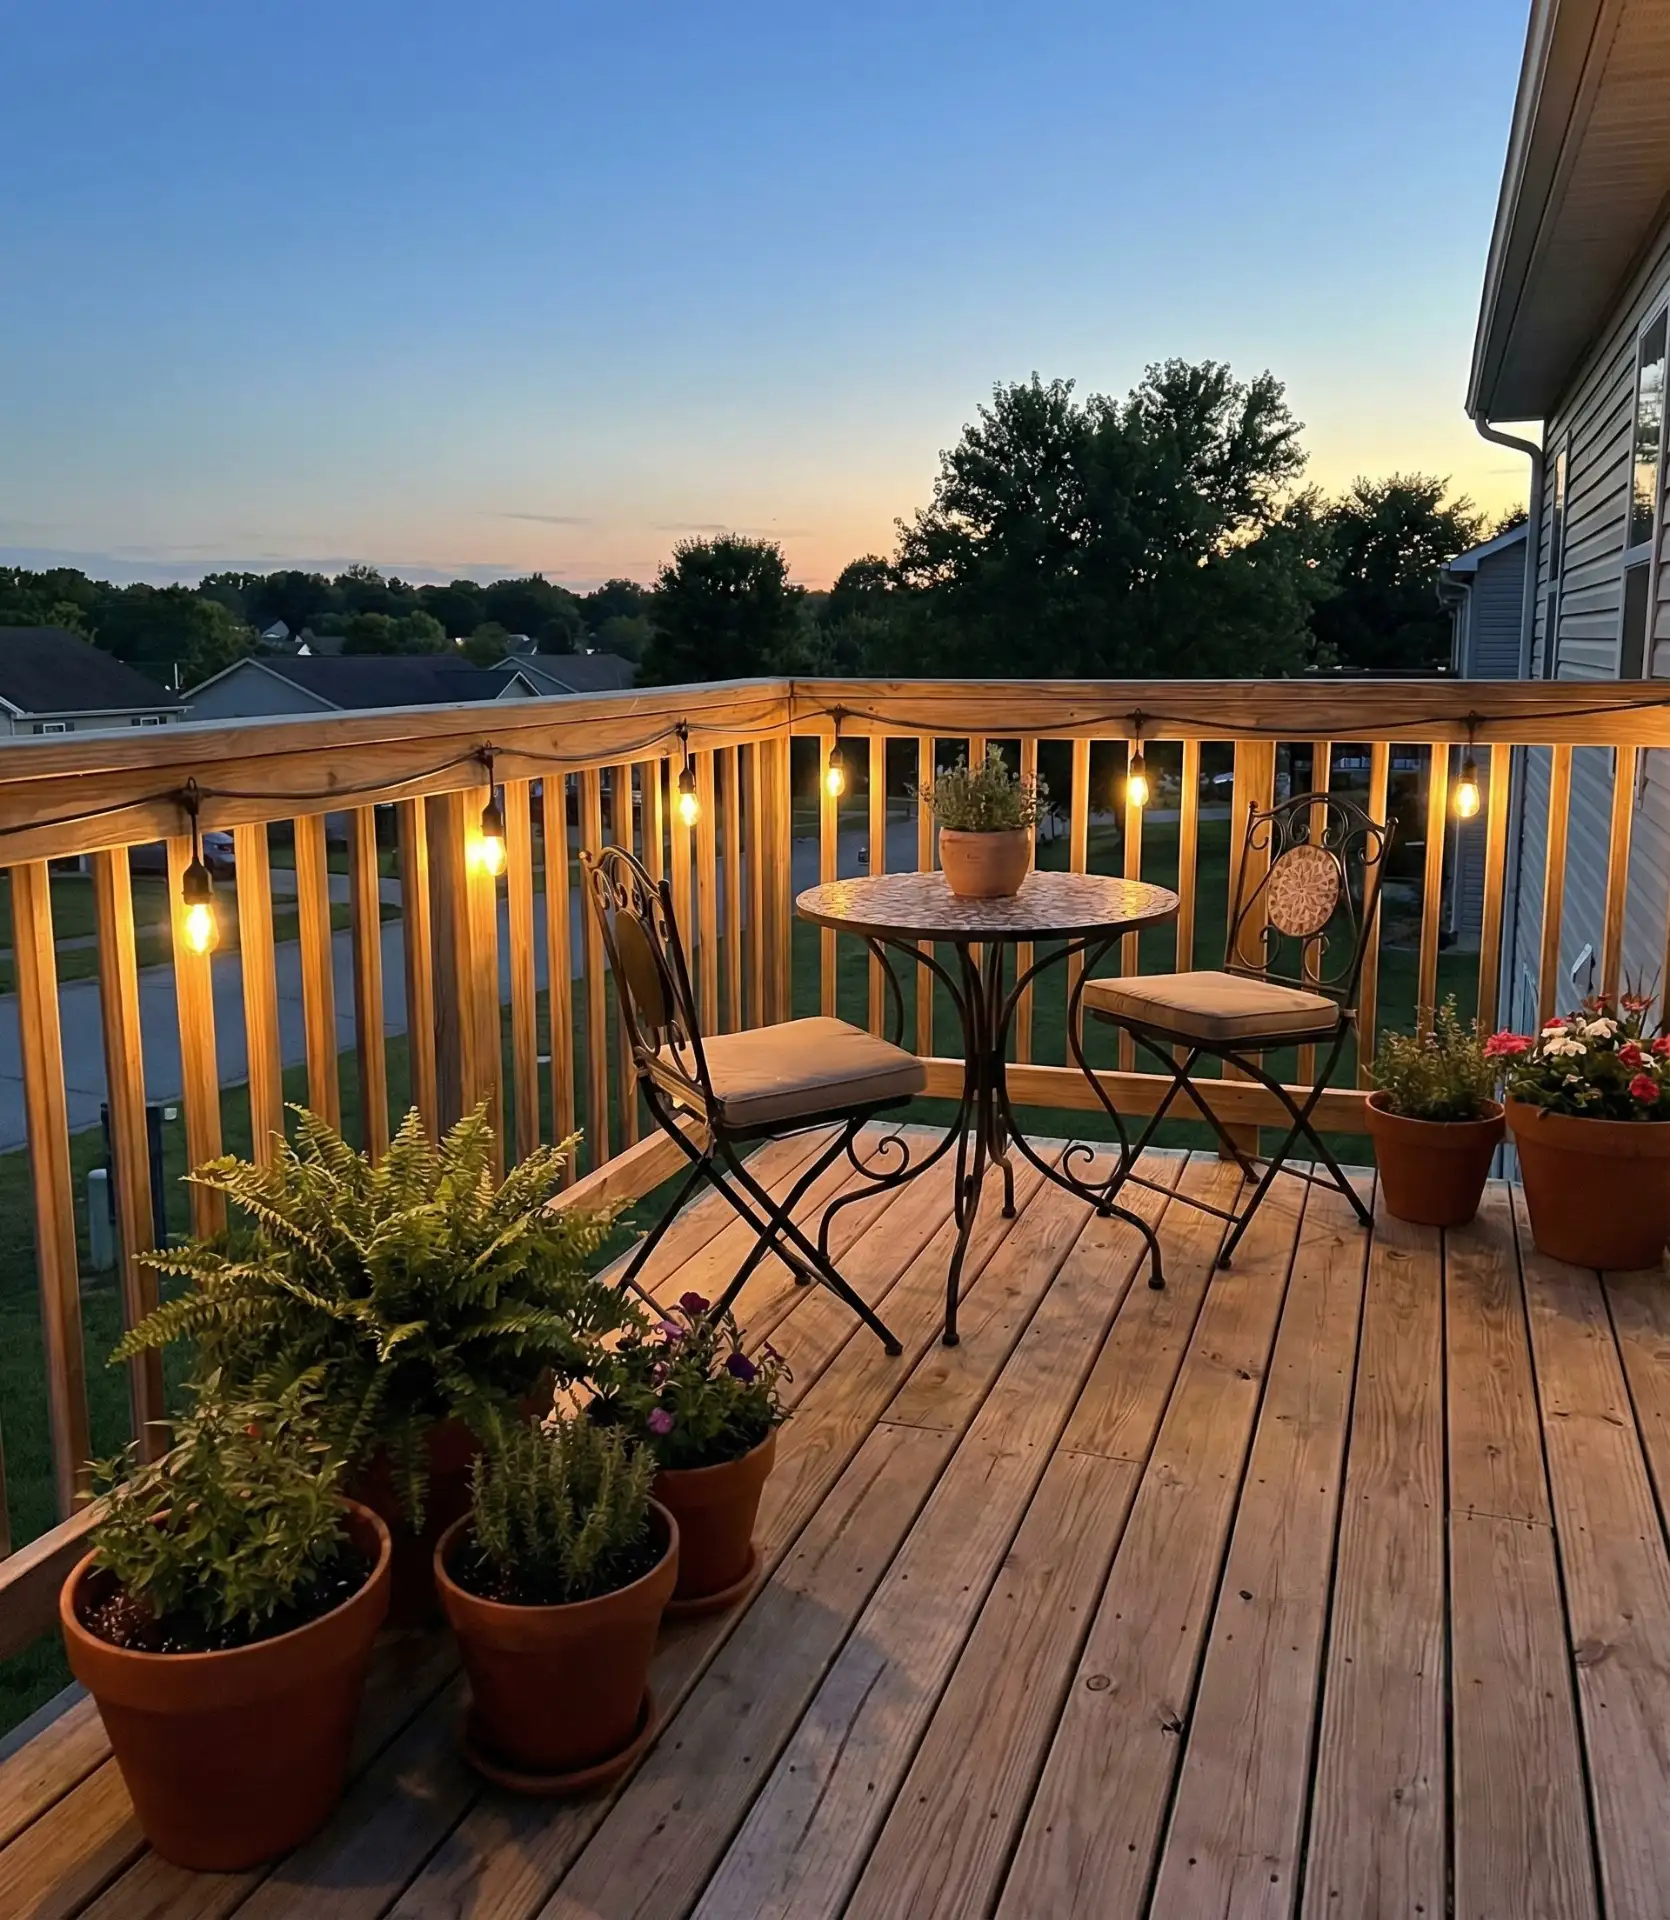
In Minnesota and Wisconsin, where decks endure harsh freeze-thaw cycles, homeowners often remove their string lights each November to prevent ice damage and extend lifespan. The clips make seasonal installation quick—most people can complete a 200-square-foot deck in under an hour. For year-round installation in milder climates, choose lights with rubber-coated wires that remain flexible in temperature swings and won’t crack when stepped on accidentally.
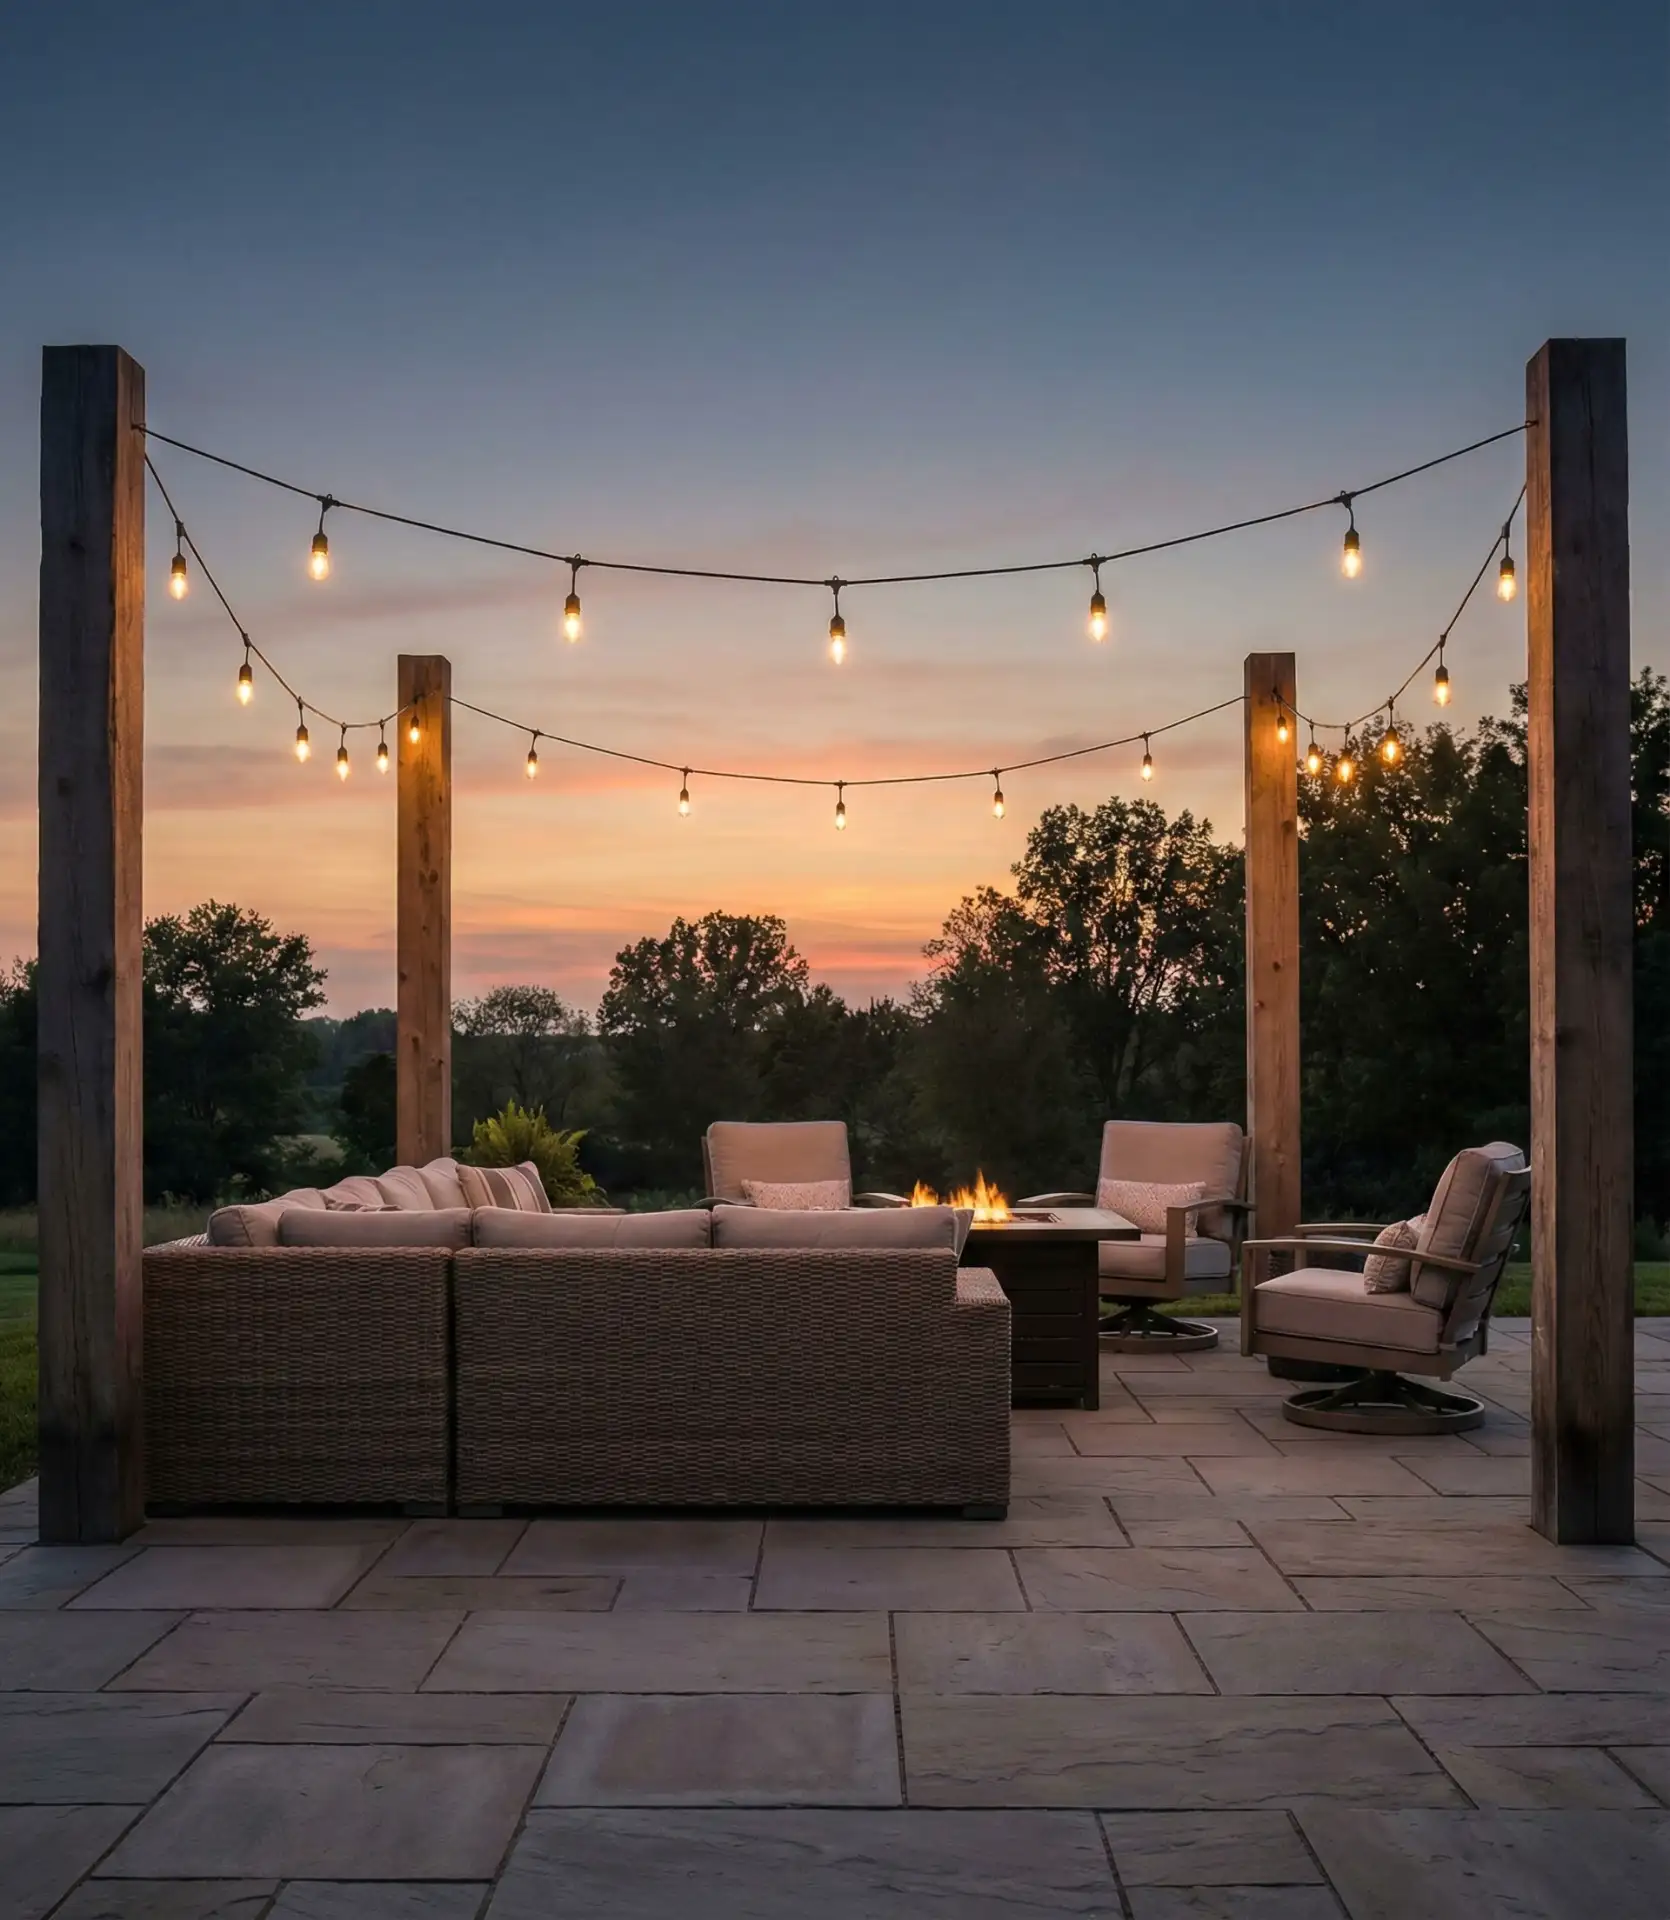
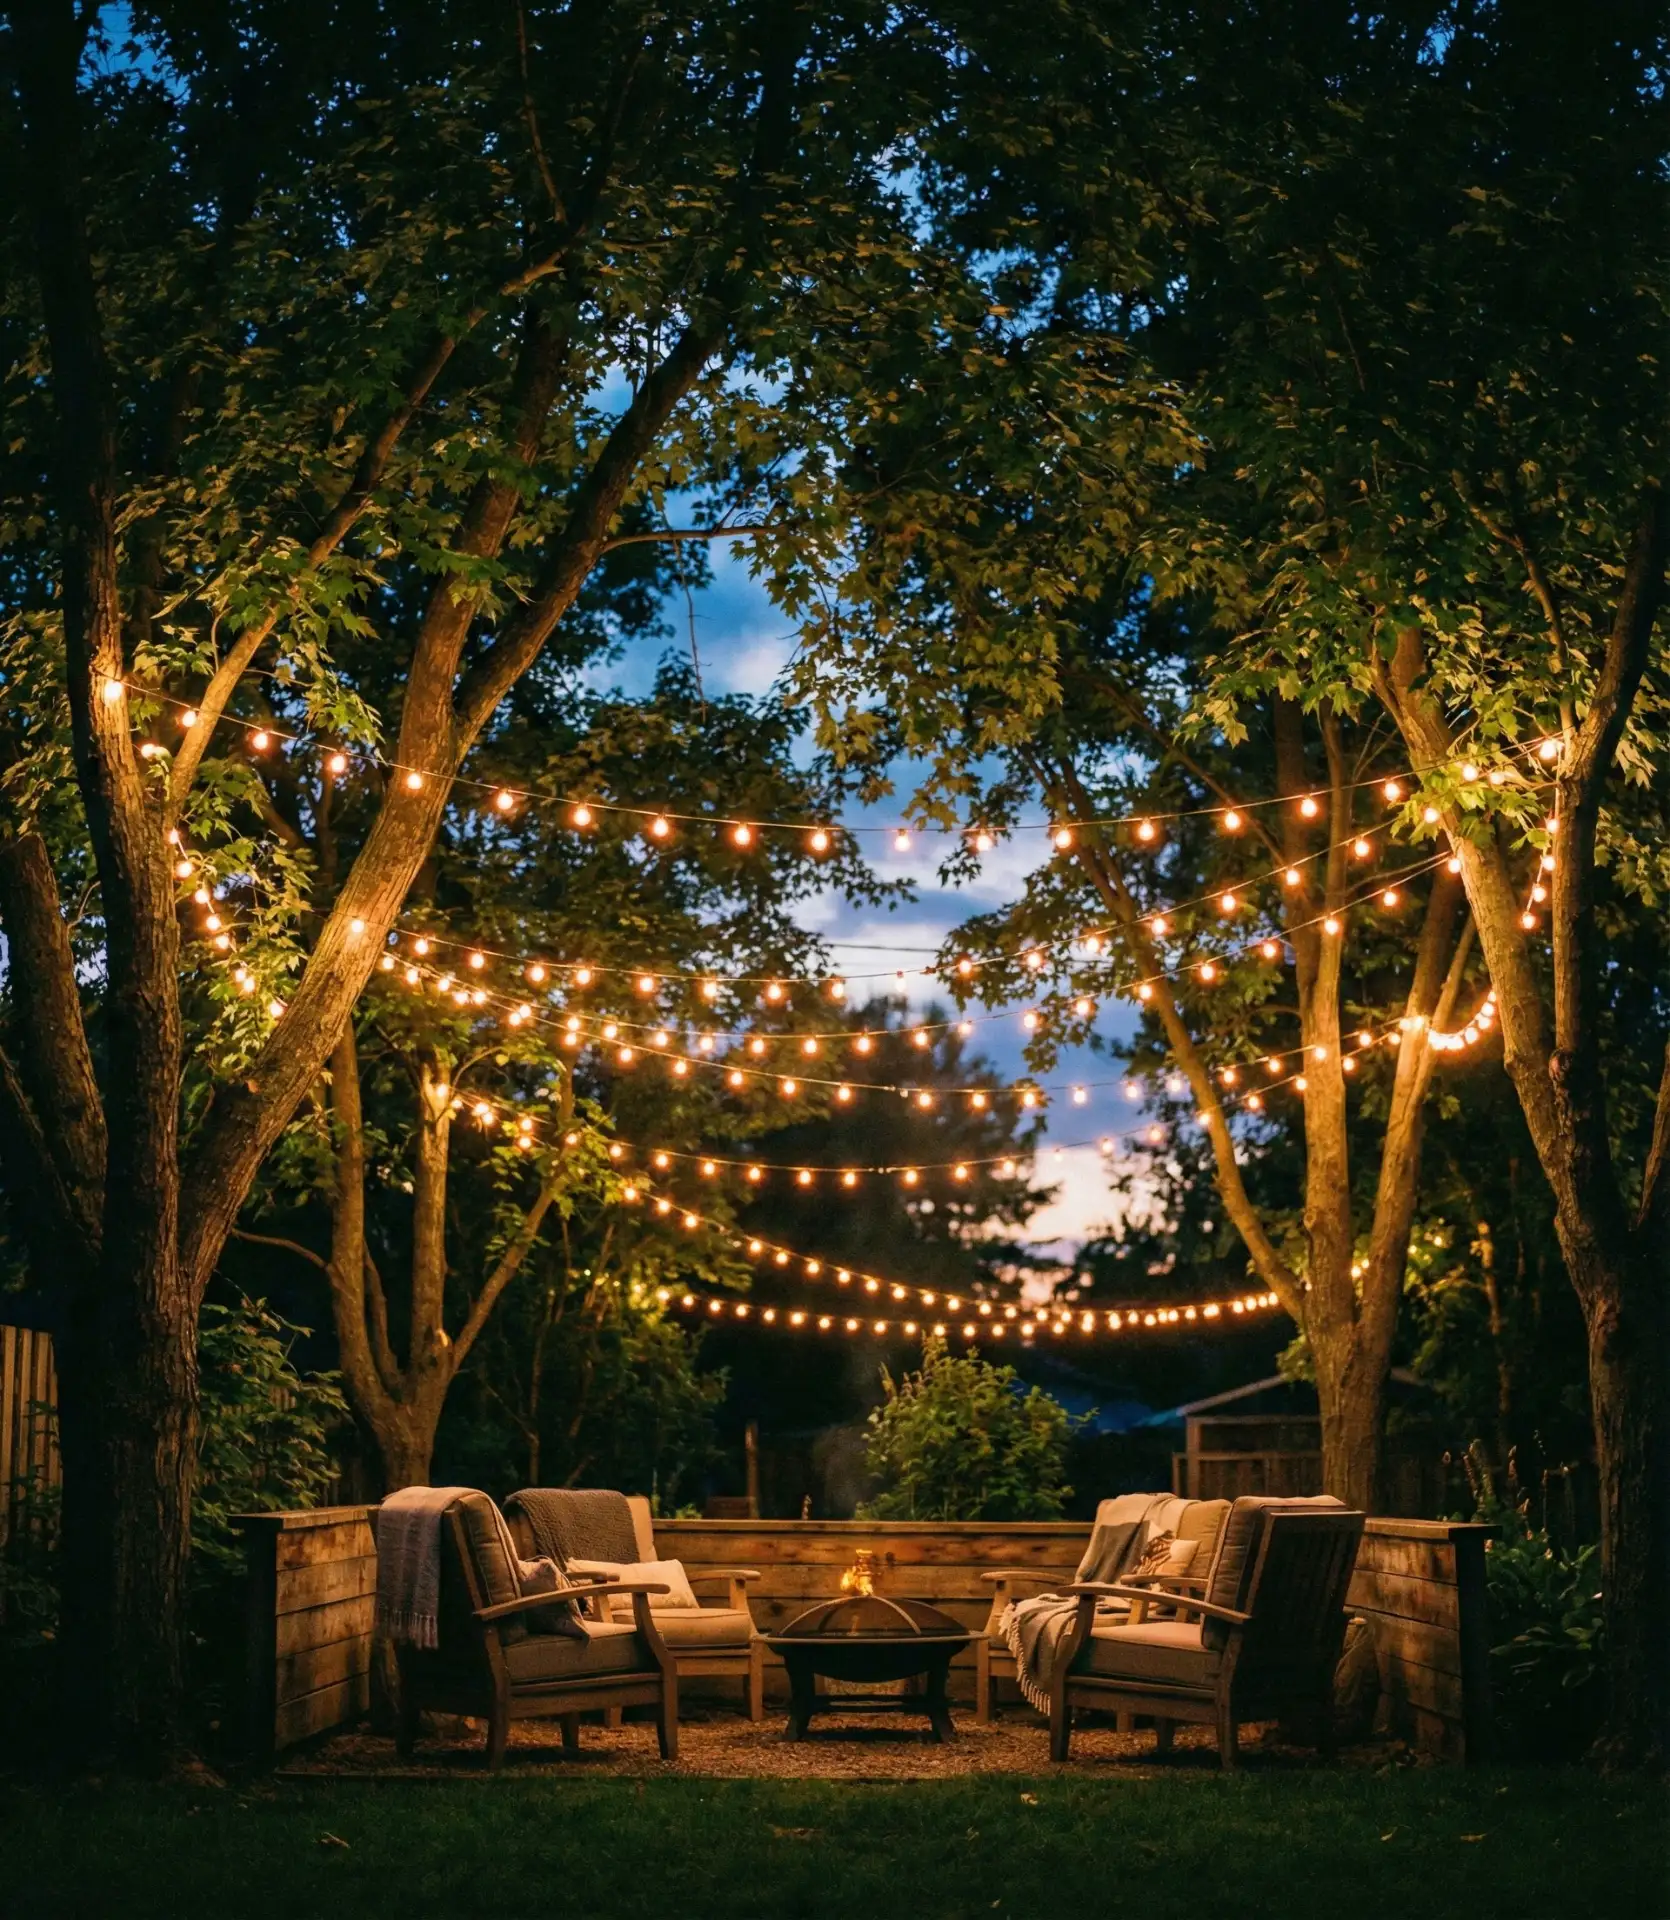
9. Fire Pit Circle Framework
Creating a lighting ring around your fire pit area establishes it as a distinct destination within your yard. Install 6-8 posts in a circle approximately 12-15 feet in diameter, then connect them with string lights to form a glowing perimeter. This backyard approach defines the seating zone while keeping lights high enough that heat from the fire doesn’t damage them. The combination of firelight and ambient string lights creates layered illumination that’s both functional and atmospheric. 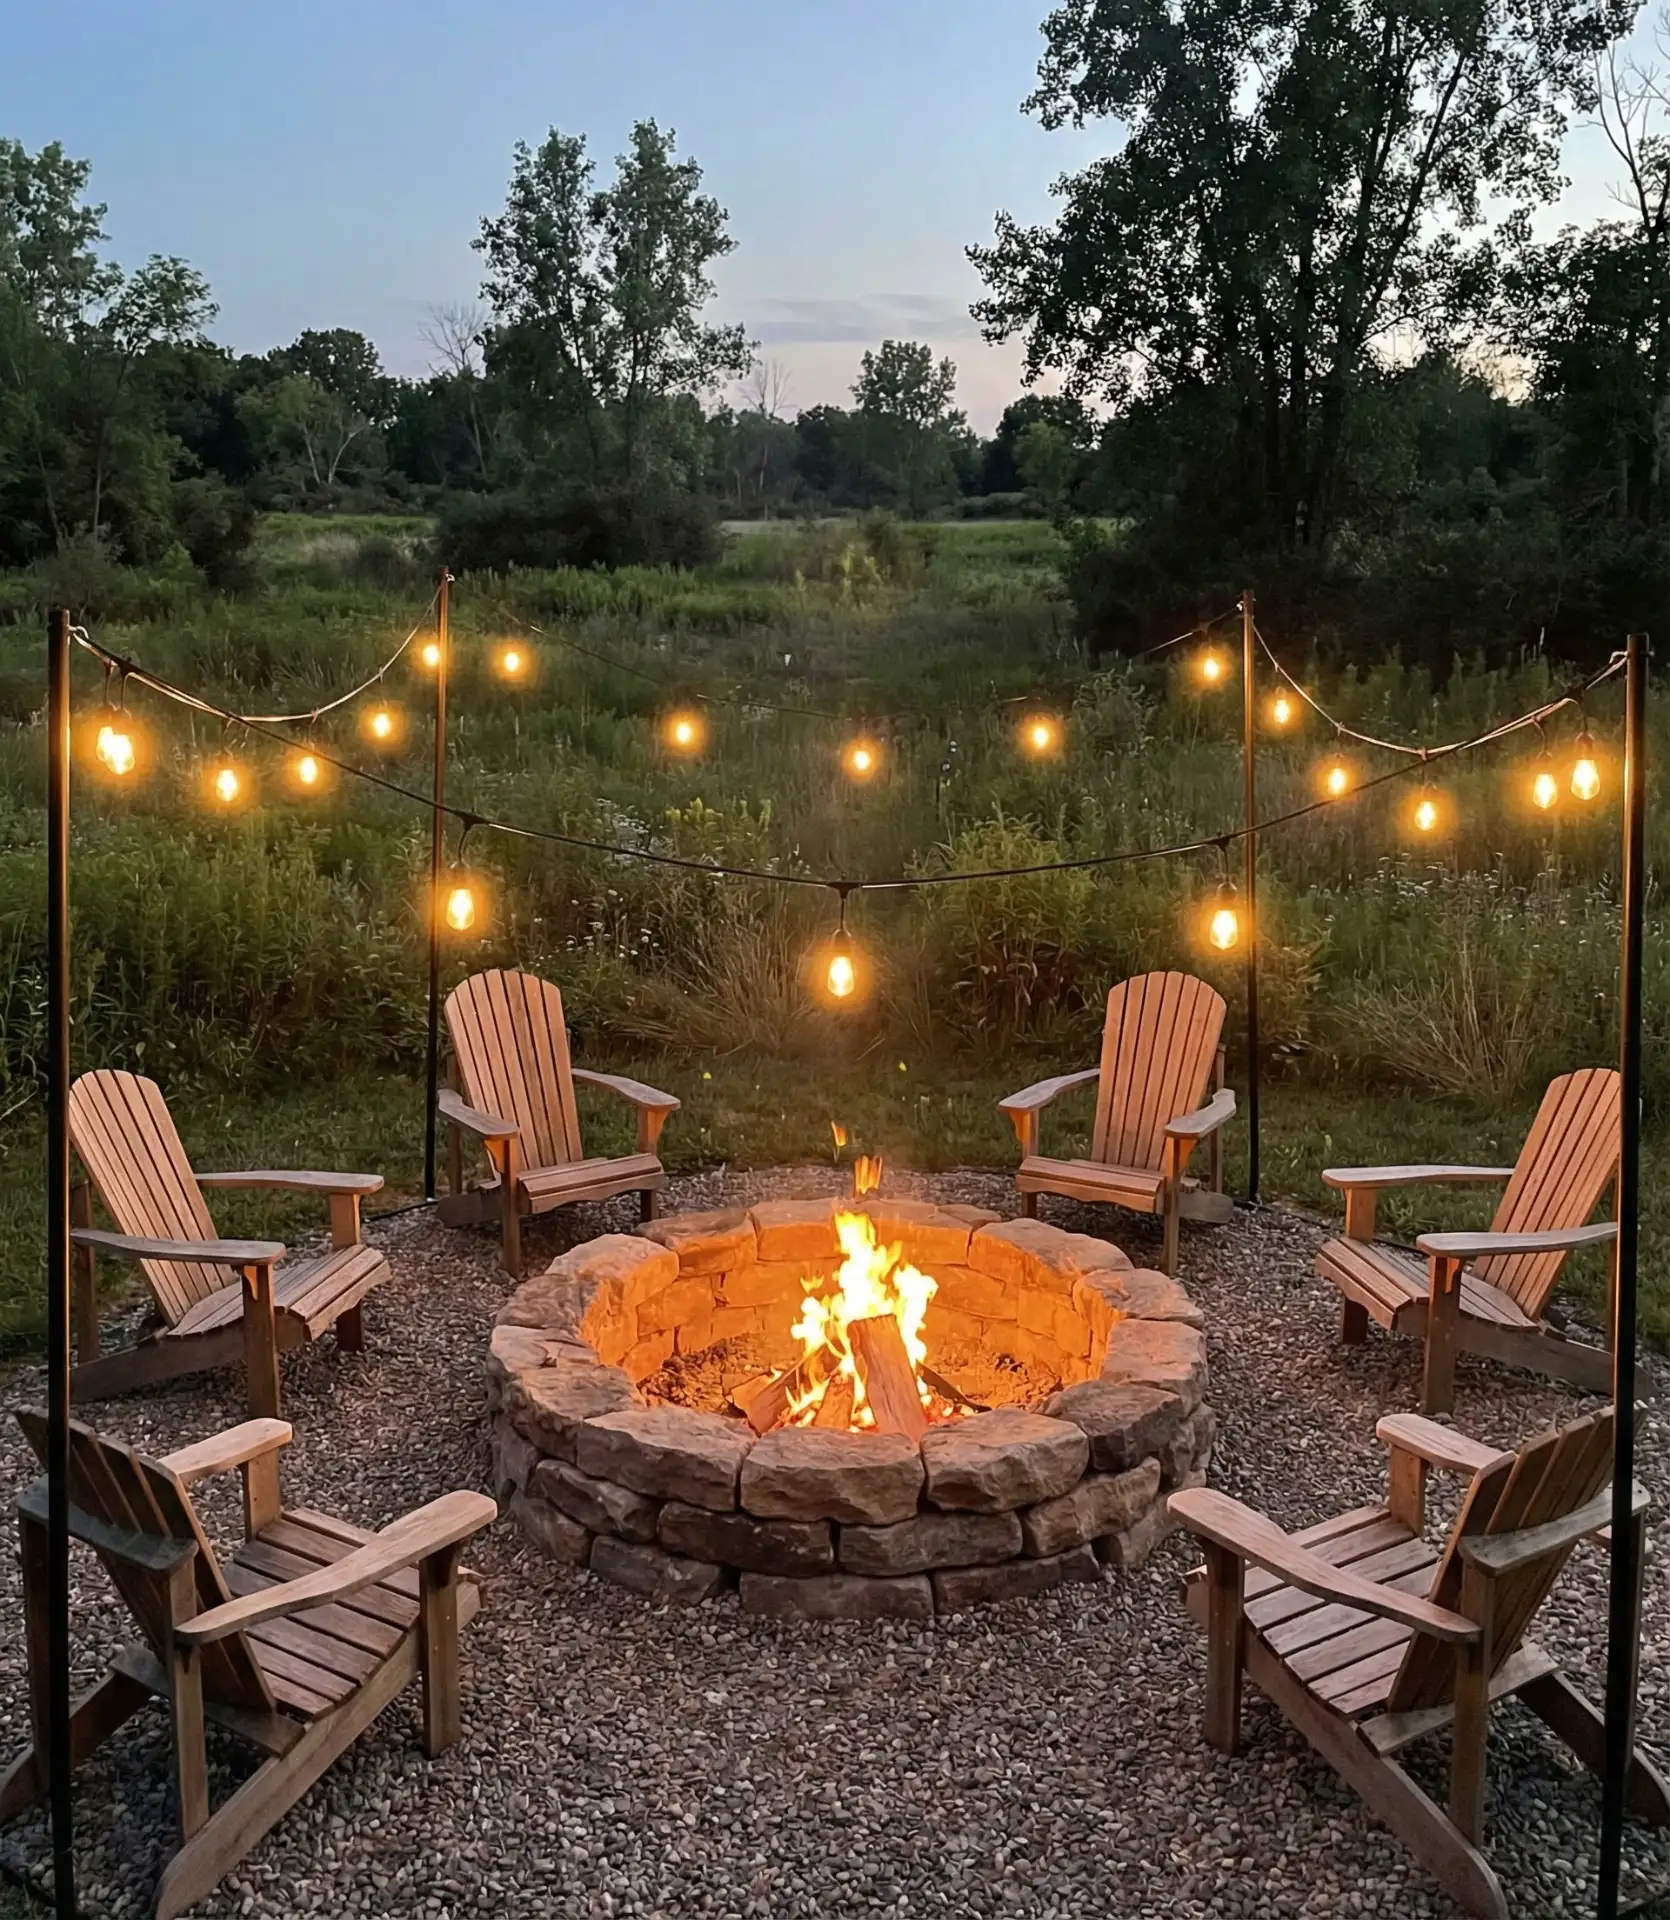
An insightful trend from real homeowner data: firepit areas with dedicated lighting get used three times more often than those that don’t, according to the 2024 Outdoor Living survey. Even before you light the fire, the lights send a message that the space is ready, encouraging spontaneous social interactions. For firepit zone lights, keep them 10 feet above the firepit and all electrical components dry from the ground to avoid the evening’s fun being killed by damp wiring and breakers.
10. Shepherd’s Hook Flexible Placement
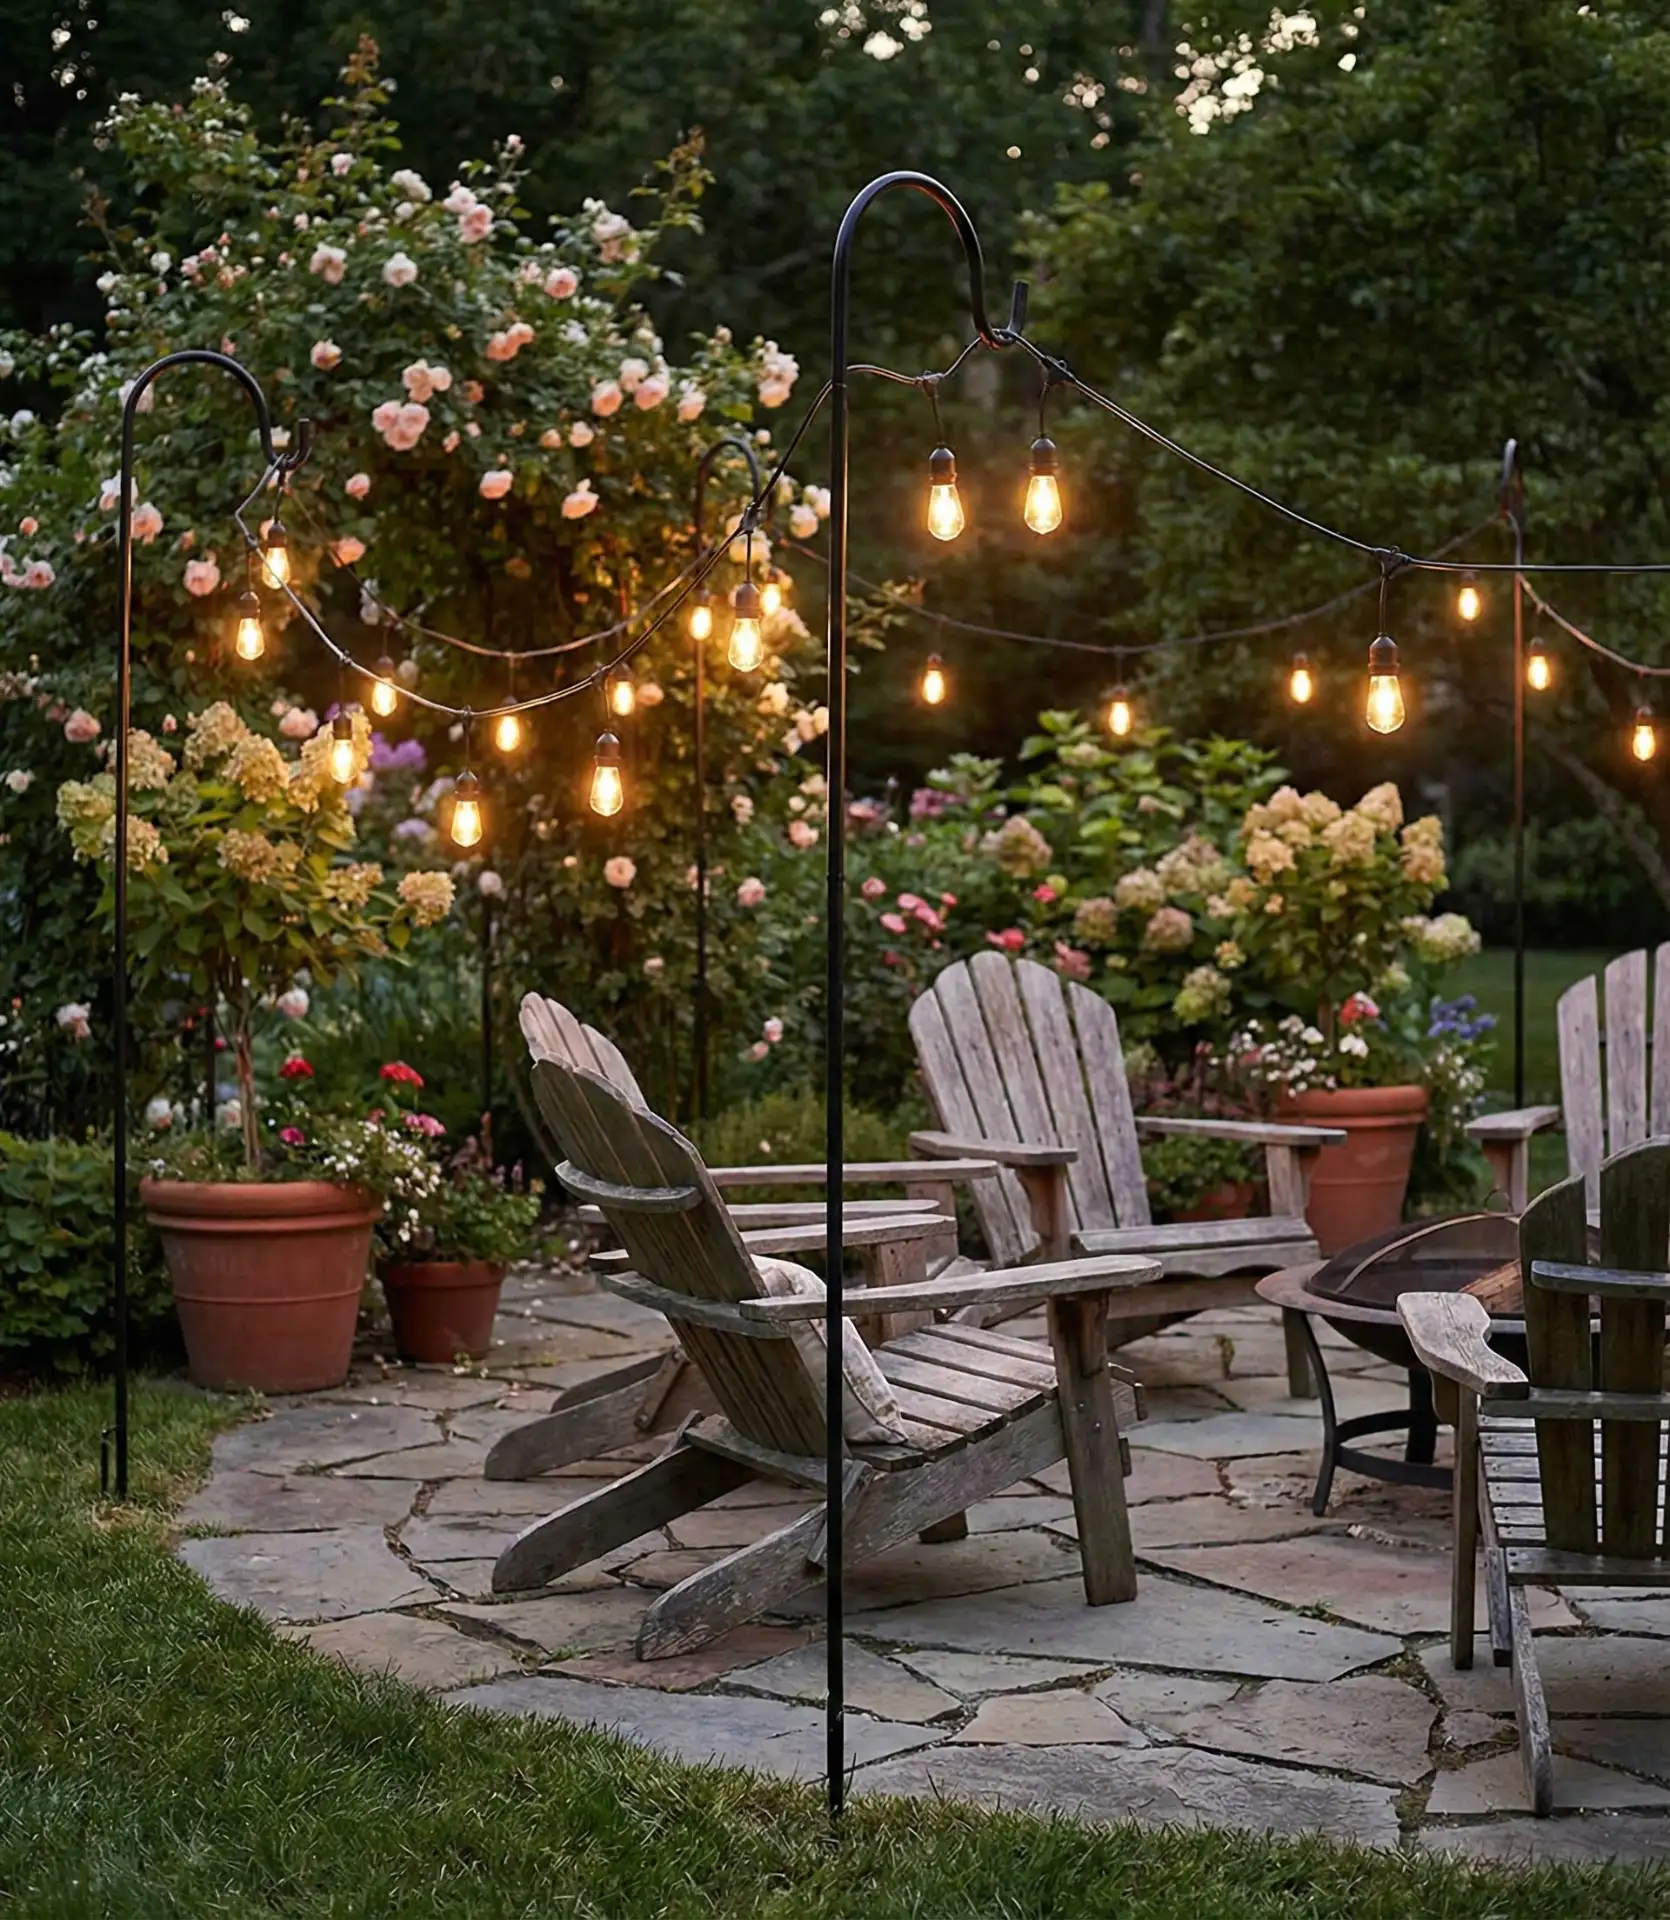
Garden shepherd’s hooks offer a removable pole stand solution perfect for temporary or seasonal lighting arrangements. Push 6- to 8-foot hooks into soft ground around your patio perimeter, then string lights between them to create instant architecture. This way to hang requires zero permanent installation and costs under $100 for four quality hooks. You can reconfigure your entire lighting layout in an afternoon or store everything in the garage during winter months. 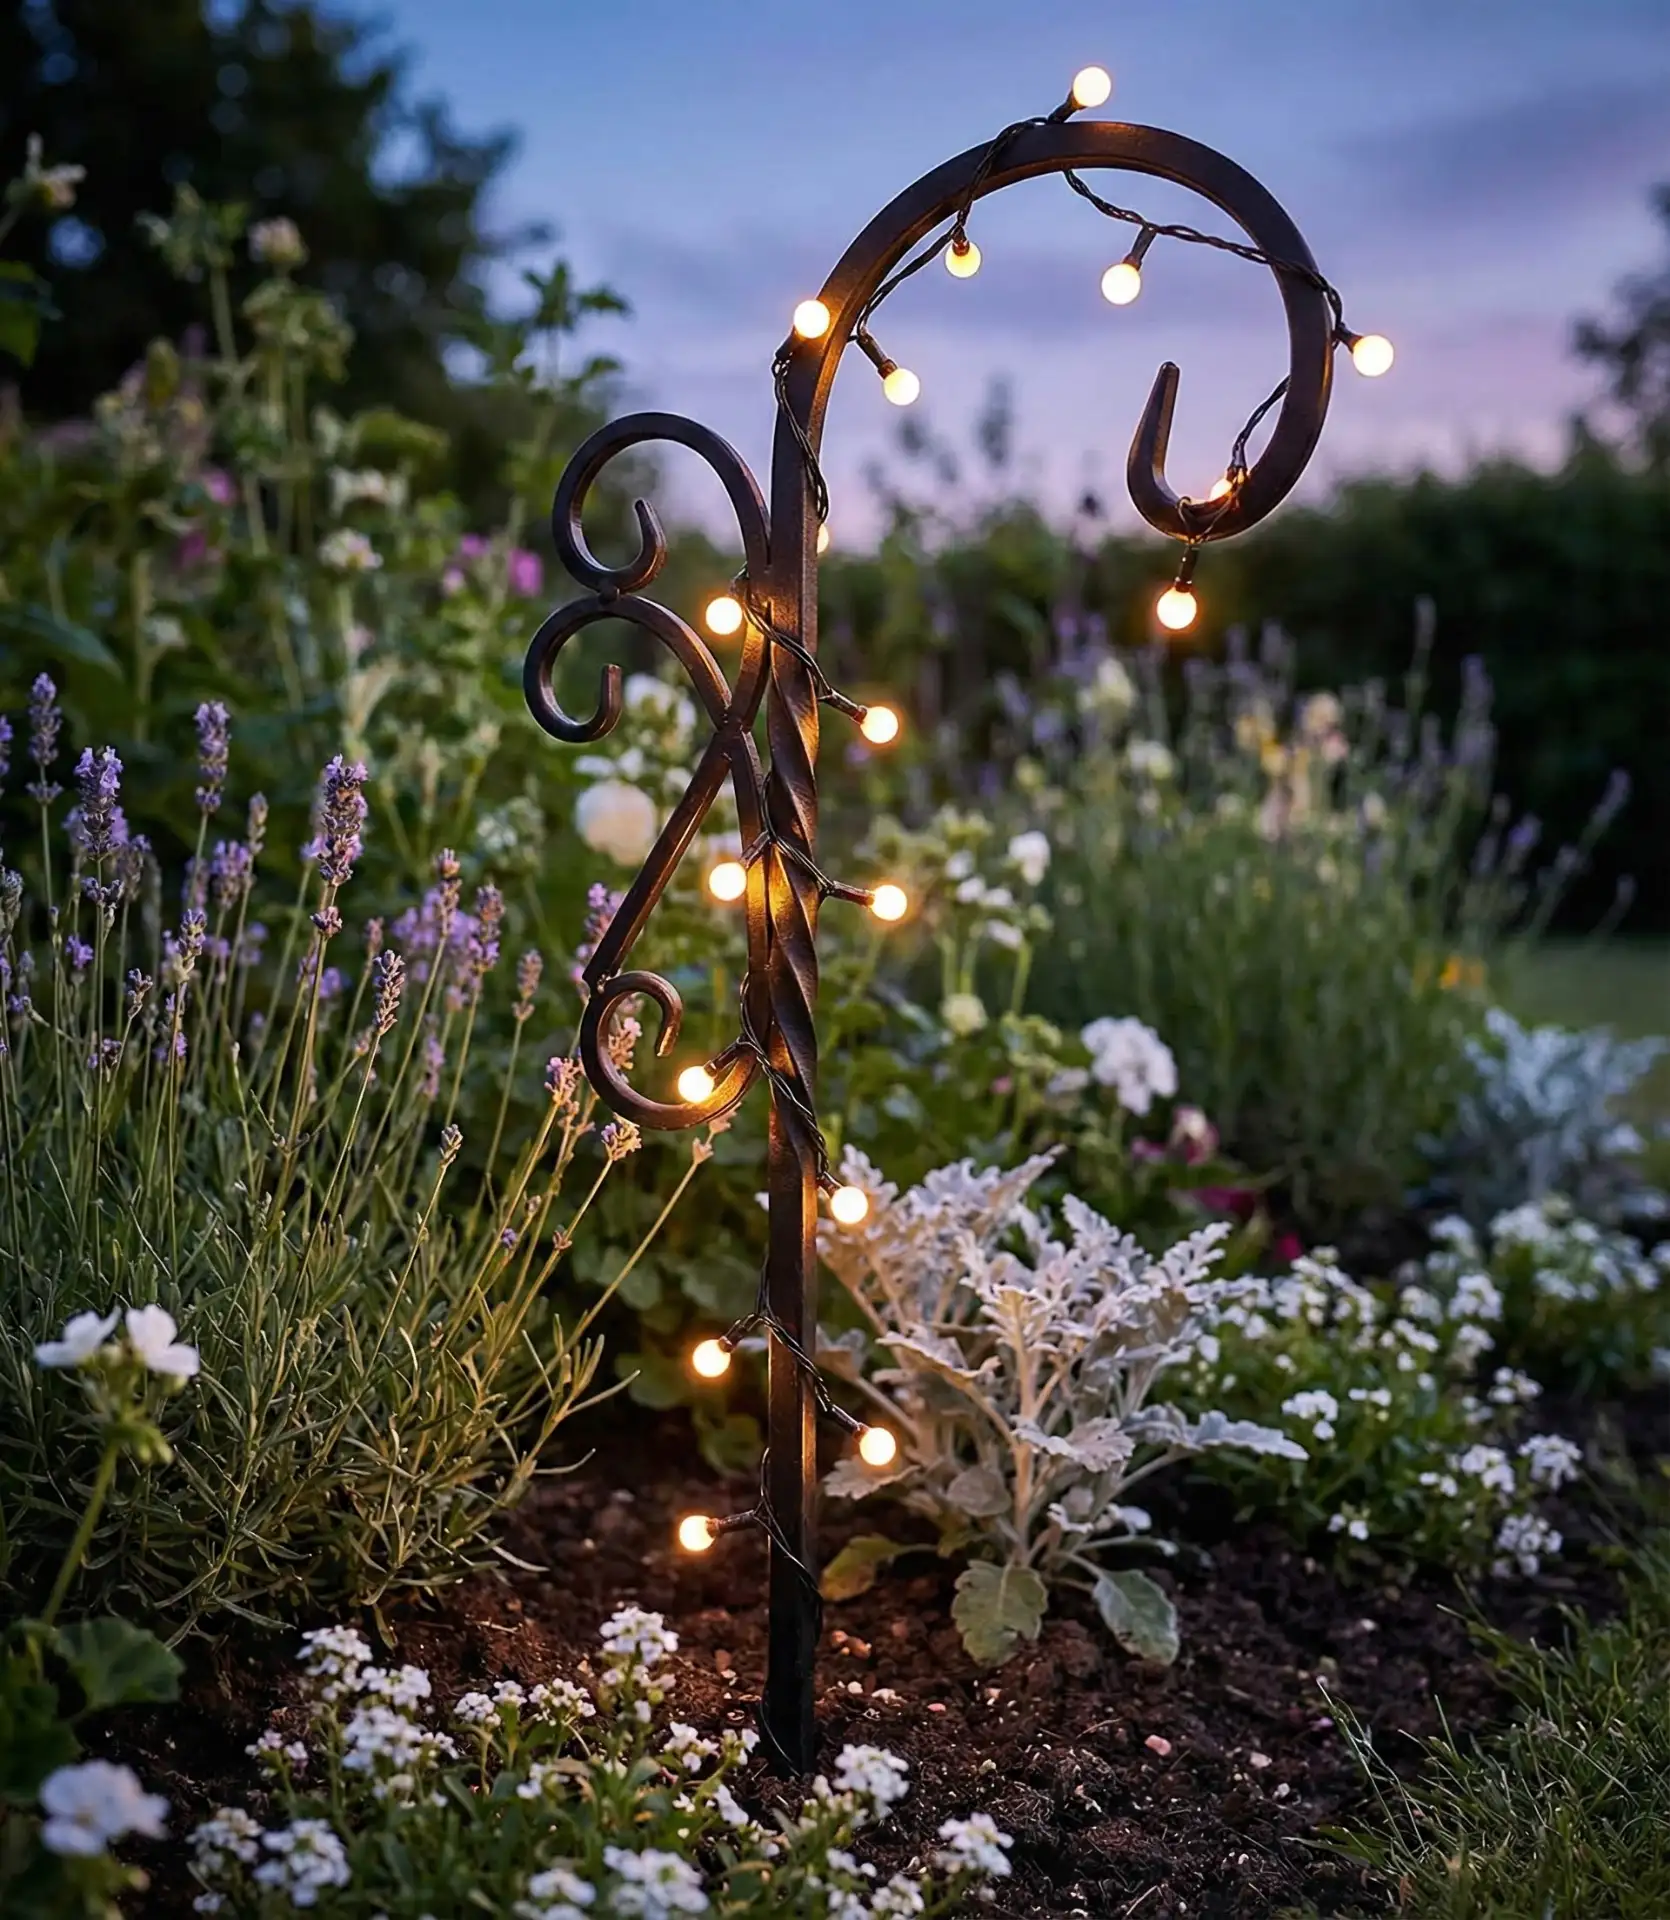
Where this strategy works best: Properties with soft, loamy soil where stakes sink easily without requiring concrete footings. Clay-heavy or rocky ground makes shepherd’s hooks impractical and frustrating—you’ll spend more time wrestling with installation than enjoying the results. For maximum stability, choose hooks with double-pronged bases and push them at least 8 inches deep. Wind resistance matters: in exposed areas, guy-wire the hooks to nearby structures or use heavier-gauge models designed for outdoor market canopies.
11. Porch Column Wrap Technique

Front or back porch columns provide vertical anchors perfect for creating a welcoming entrance illumination. Wind lights in a spiral pattern up each column, then connect between posts at the ceiling level. This hanging method frames your porch as a distinct room while highlighting architectural details. The vertical element adds visual interest often missing from purely horizontal lighting schemes and guides visitors naturally toward your door. 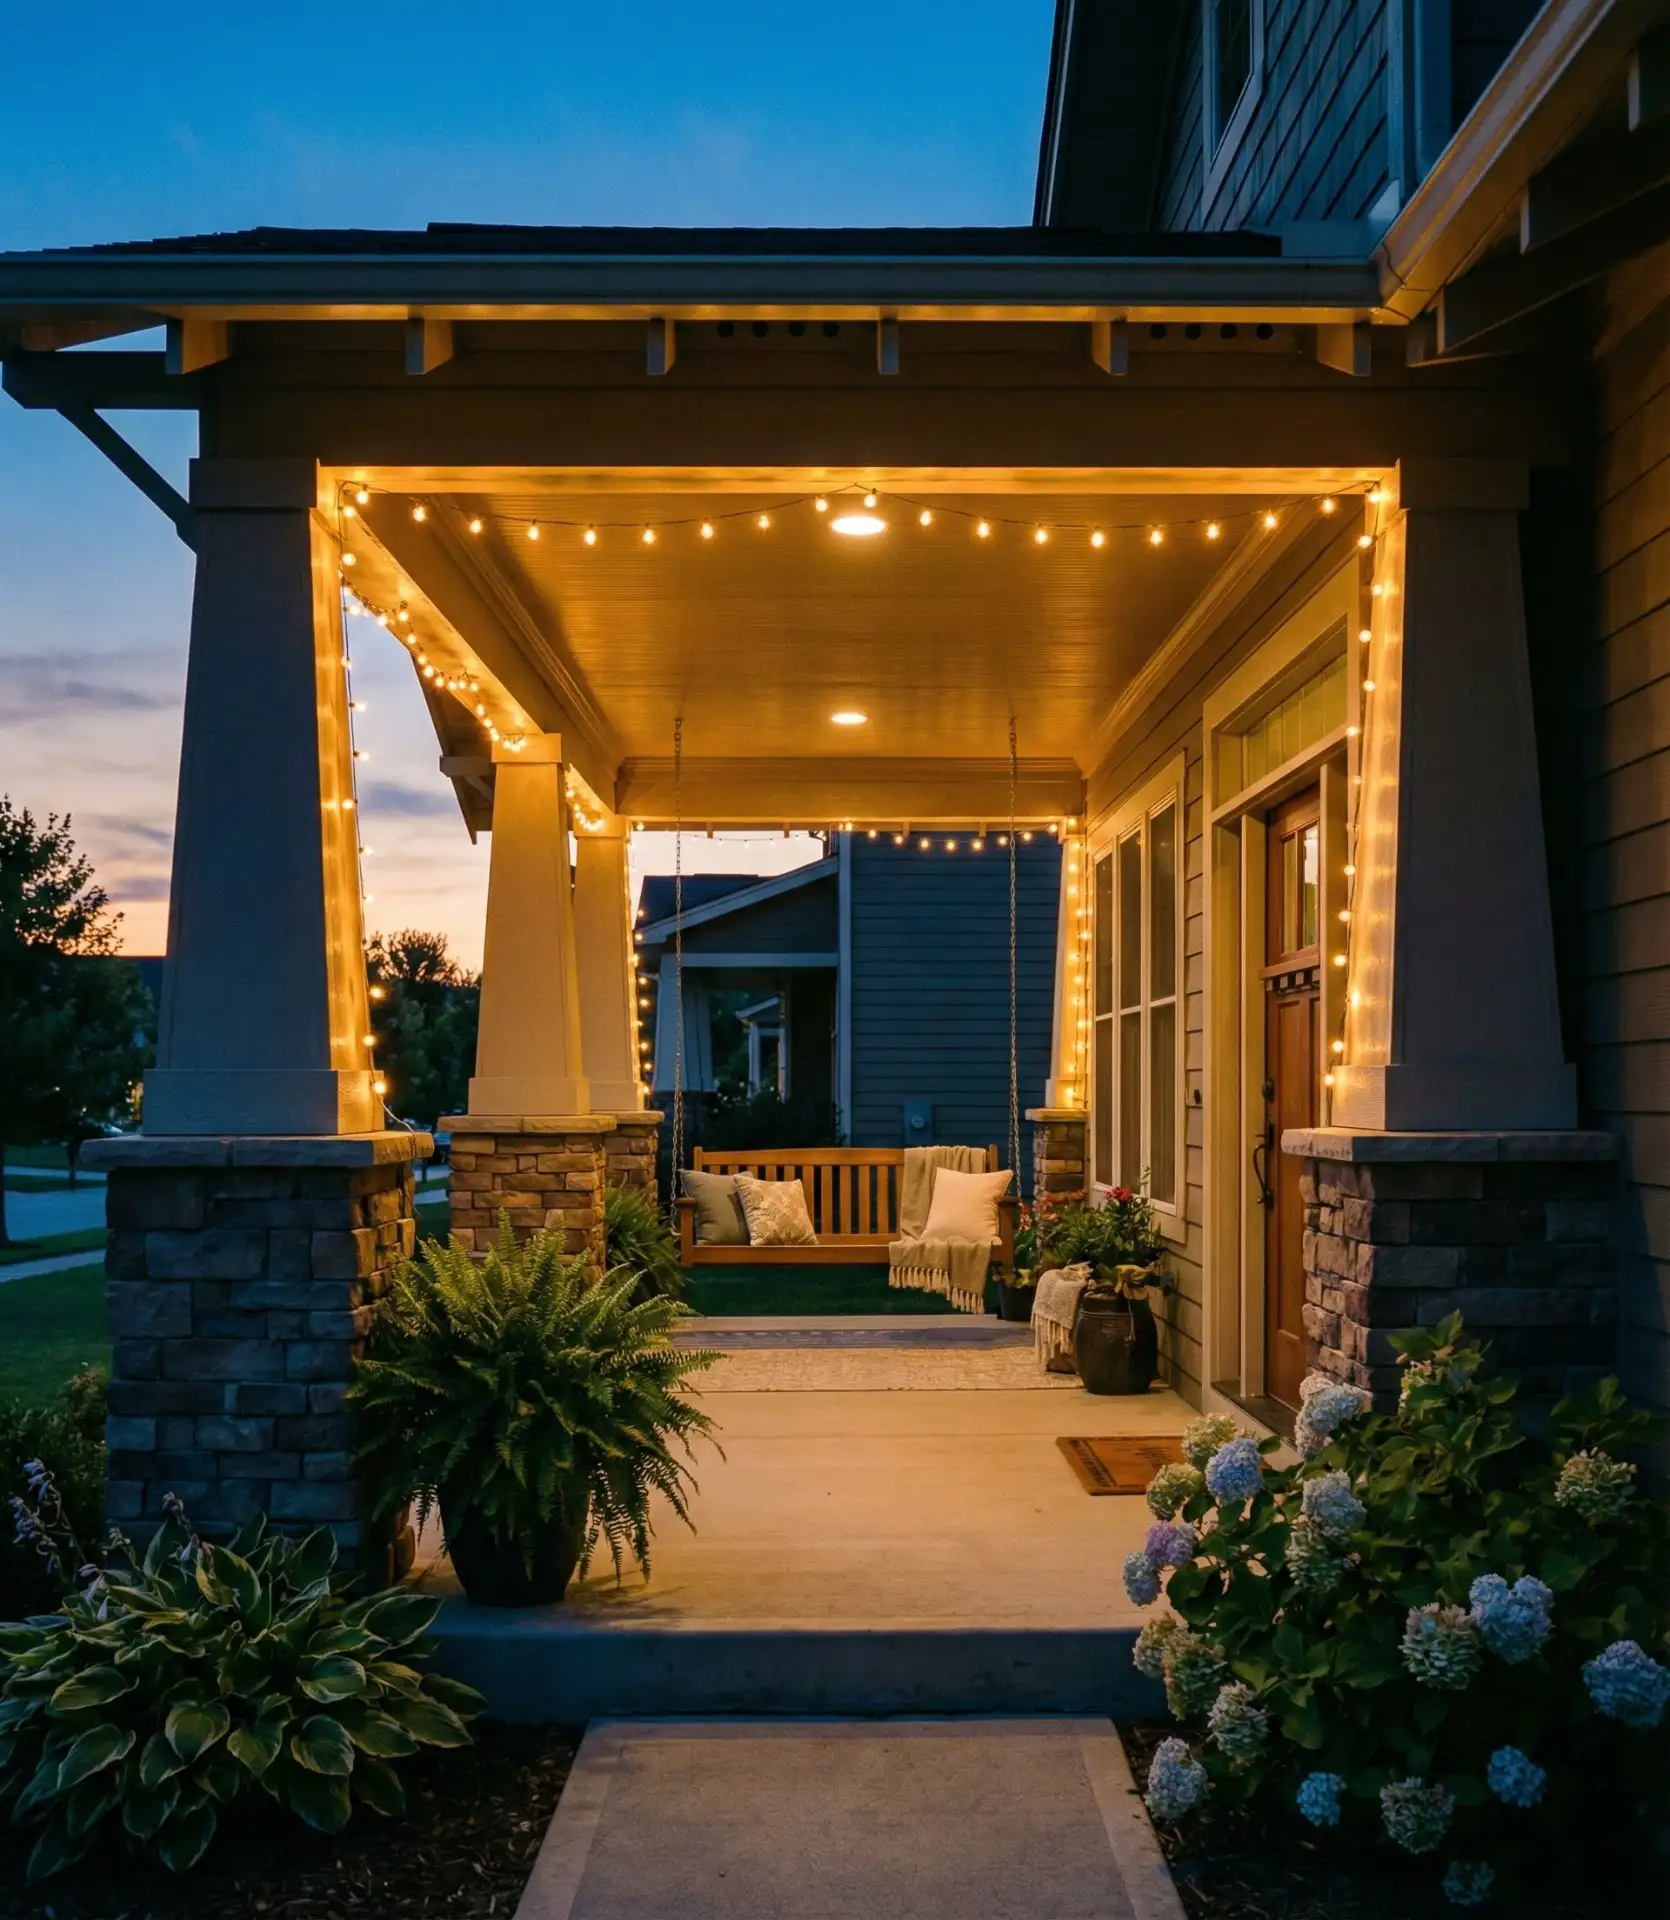
A practical insight: use removable adhesive hooks rather than nails when wrapping columns, especially on painted surfaces. Nails create entry points for moisture that lead to rot over time, and every hole is a future maintenance headache. Battery-operated LED strings work brilliantly here if outlets are scarce—modern lithium batteries run 8-12 hours on a single charge. The porch location provides some weather protection, extending the life of any light style you choose.
12. Diagonal Geometric Pattern
Breaking from standard parallel lines, diagonal crisscross patterns create contemporary visual interest in patio spaces. String lights in an X-pattern from opposite corners, then add parallel lines if desired for fuller coverage. This creative way to hang the approach suits modern homes with clean-lined architecture and works especially well over rectangular entertaining areas. The geometry adds structure to open spaces while maintaining an airy feel. 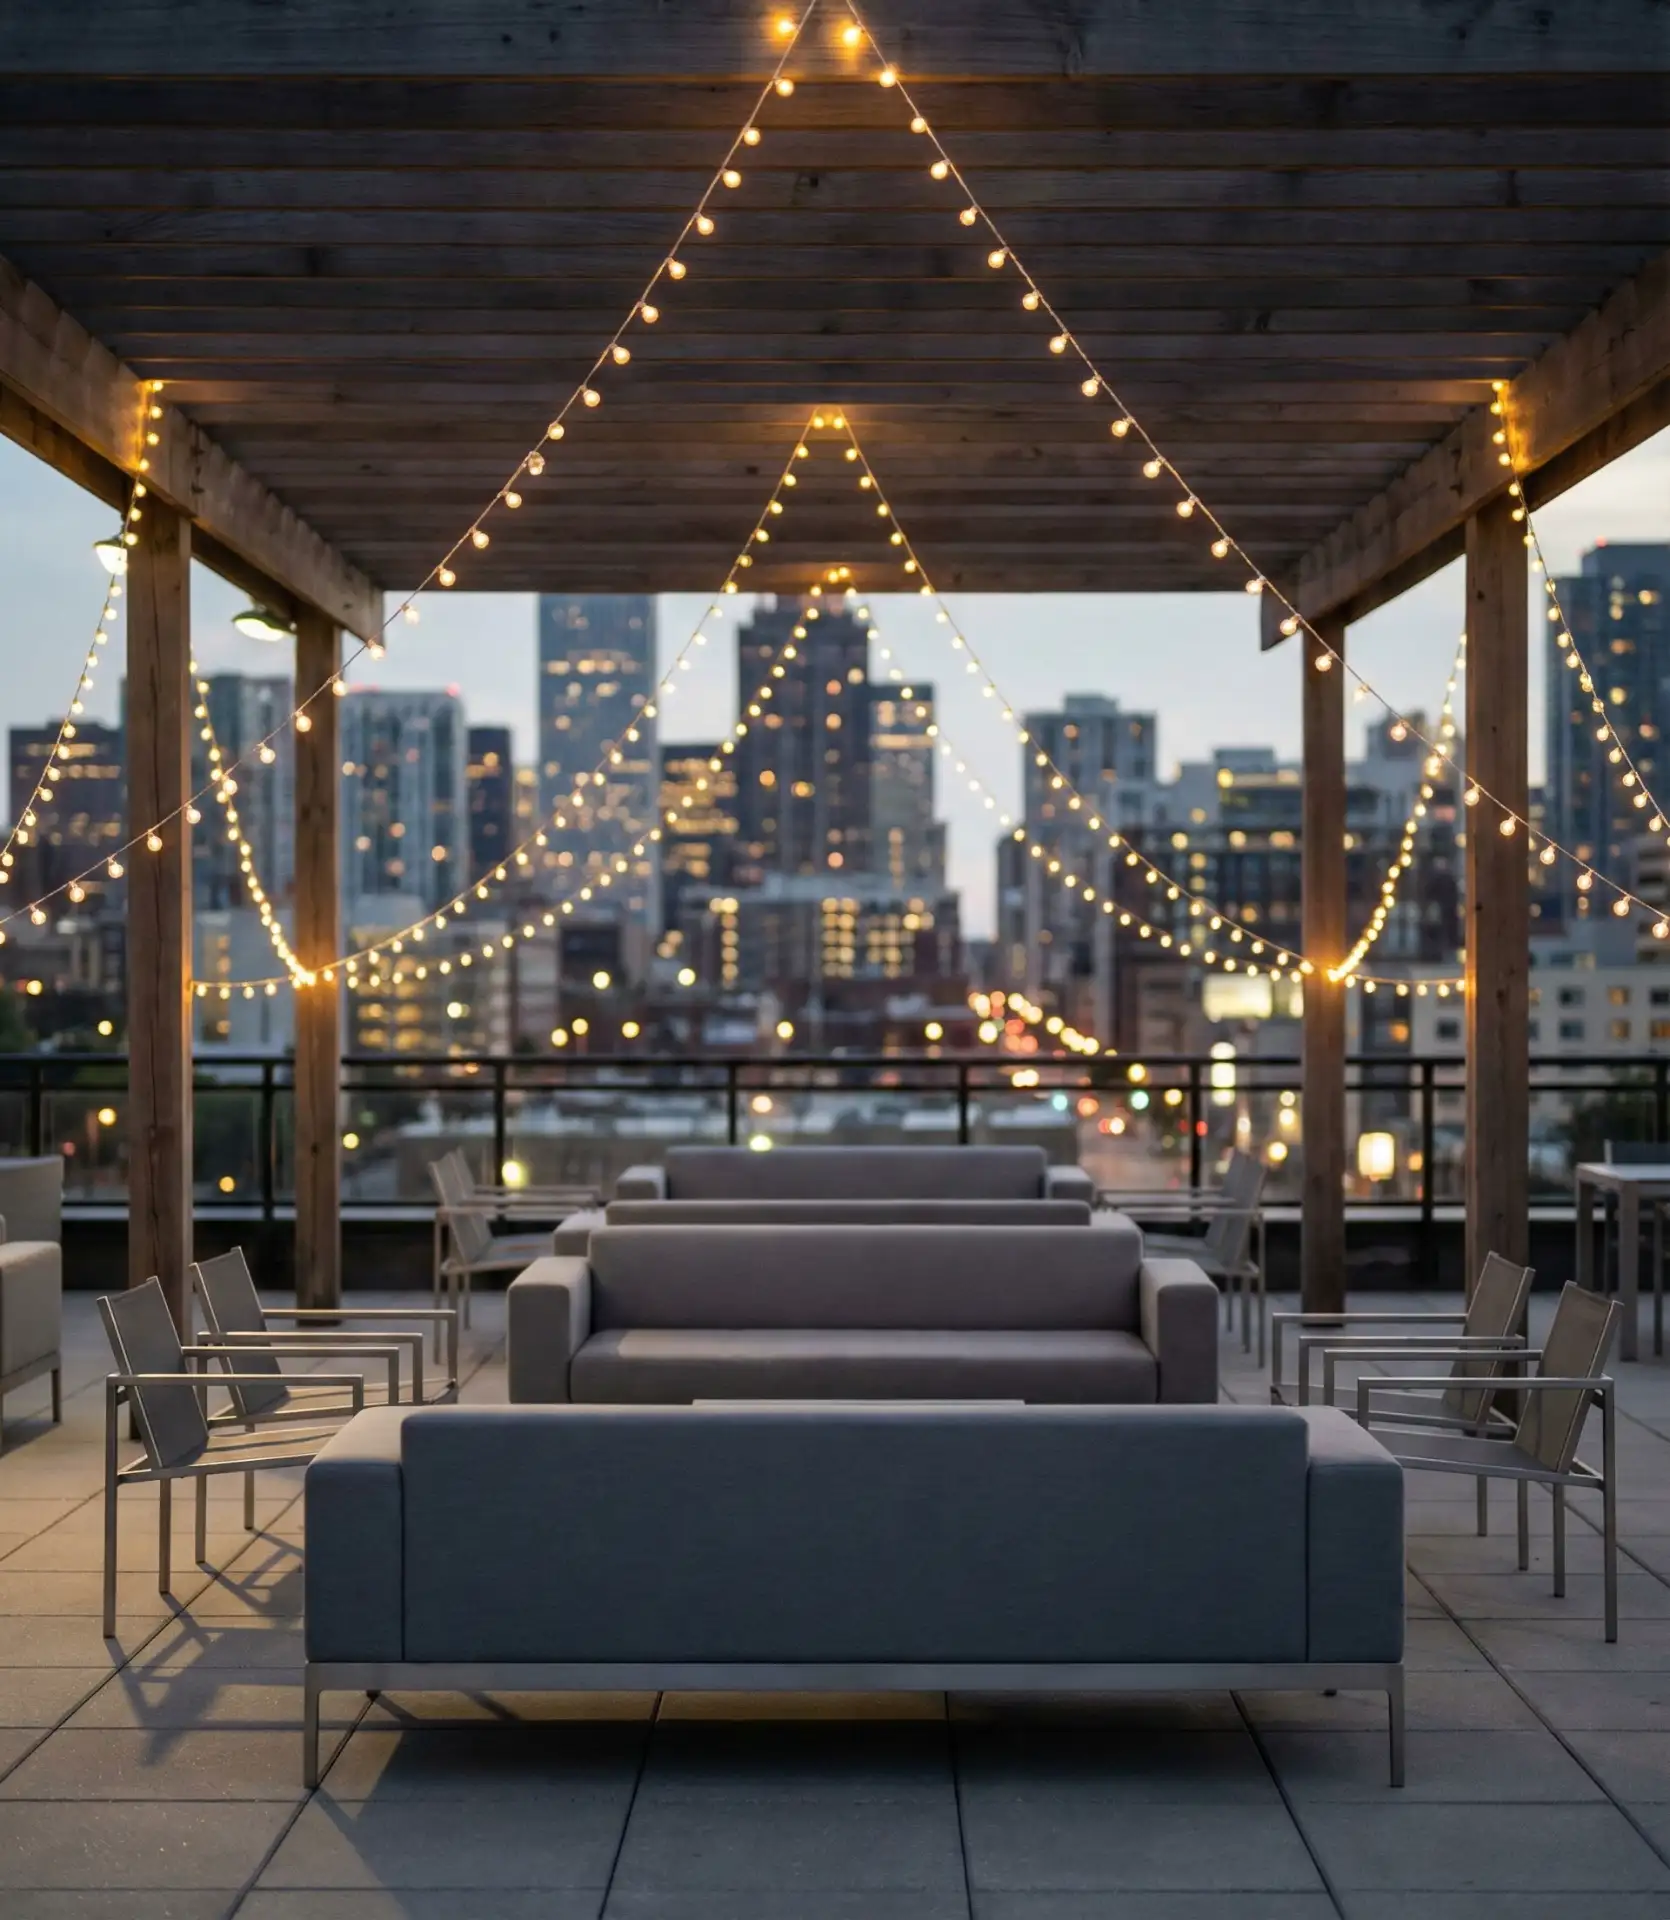
In California and Arizona, where mid-century modern homes dominate many neighborhoods, this lighting style complements the architectural era perfectly. The angular lines echo the rooflines and large window patterns characteristic of the style. Plan your anchor points carefully before installation—diagonal runs require precise measurements to achieve symmetry. Most designers recommend sketching your pattern on graph paper first, with each square representing one foot of space.
13. Wedding-Style Bistro Bulb Display
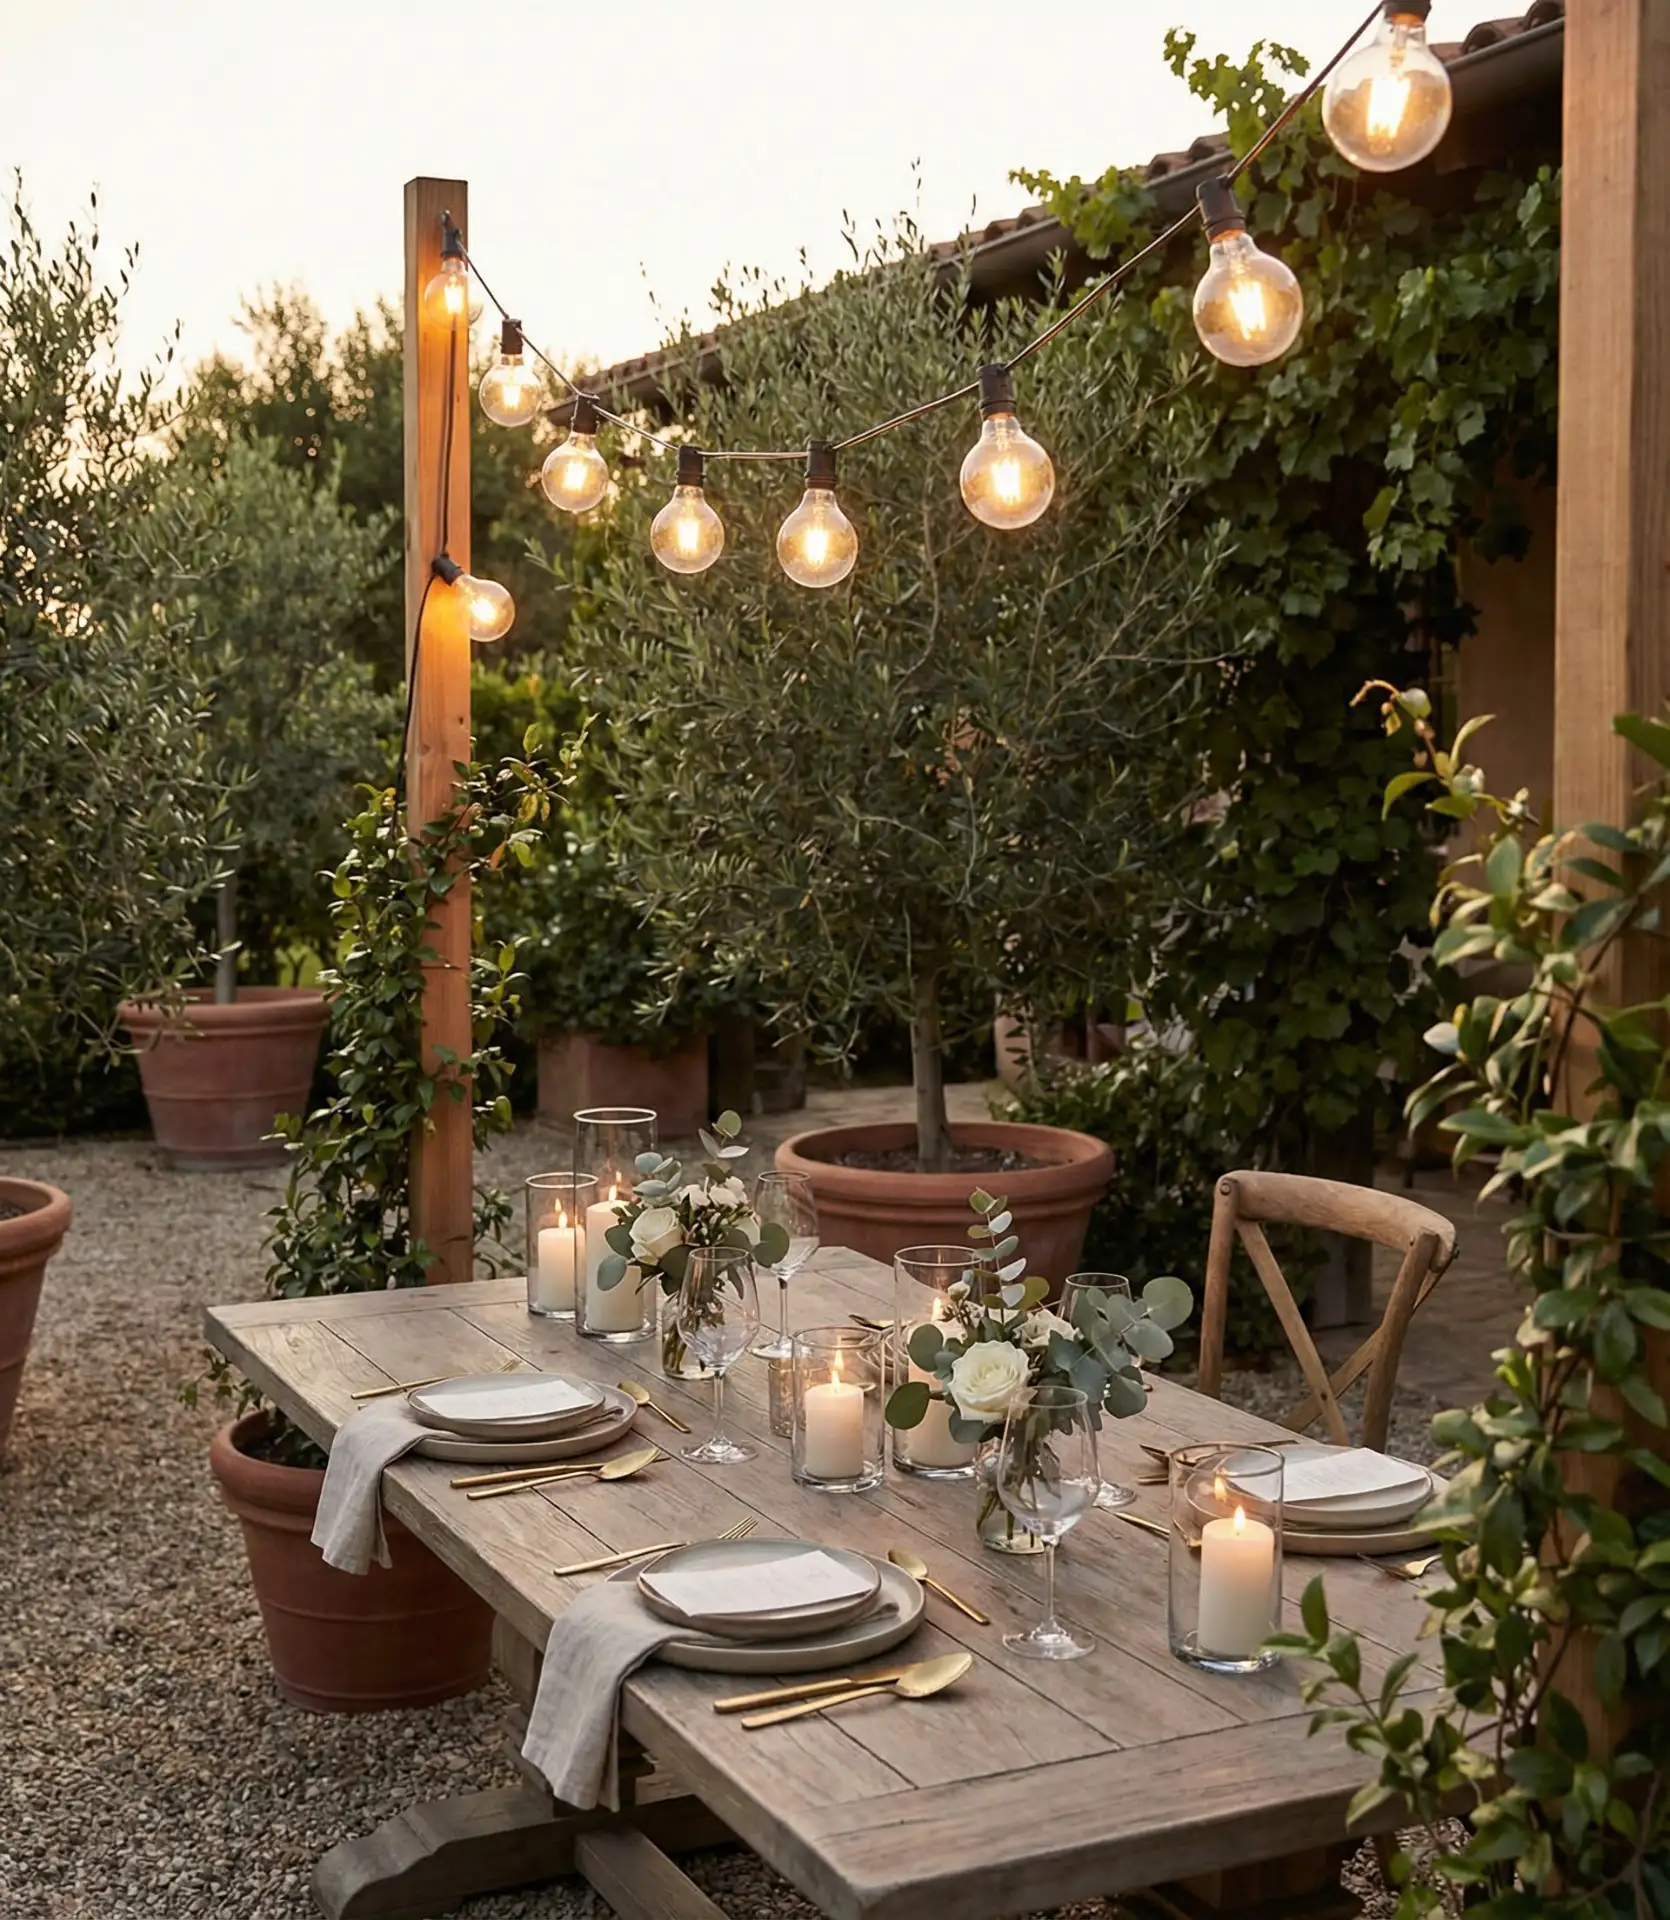
The affordability and spacing of bistro bulbs makes it such that 24-36 inch spacing of larger bulbs can create that romantic wedding ambiance that many homeowners aspire to year-round. Larger bistro bulbs create a more functional glow than your traditional bistro bulbs and will create a more visually appealing atmosphere than your standard bistro bulbs. Larger bistro bulbs, on top of functional glow, also create a more visually appealing atmosphere than your standard bistro bulbs. Visuals and glow help create an appealing ambiance for patios and dining. Such lights will help create an atmosphere where your diners can see and enjoy their food. Larger bulbs also help create a more visually appealing atmosphere from inside your home to outside your patio. 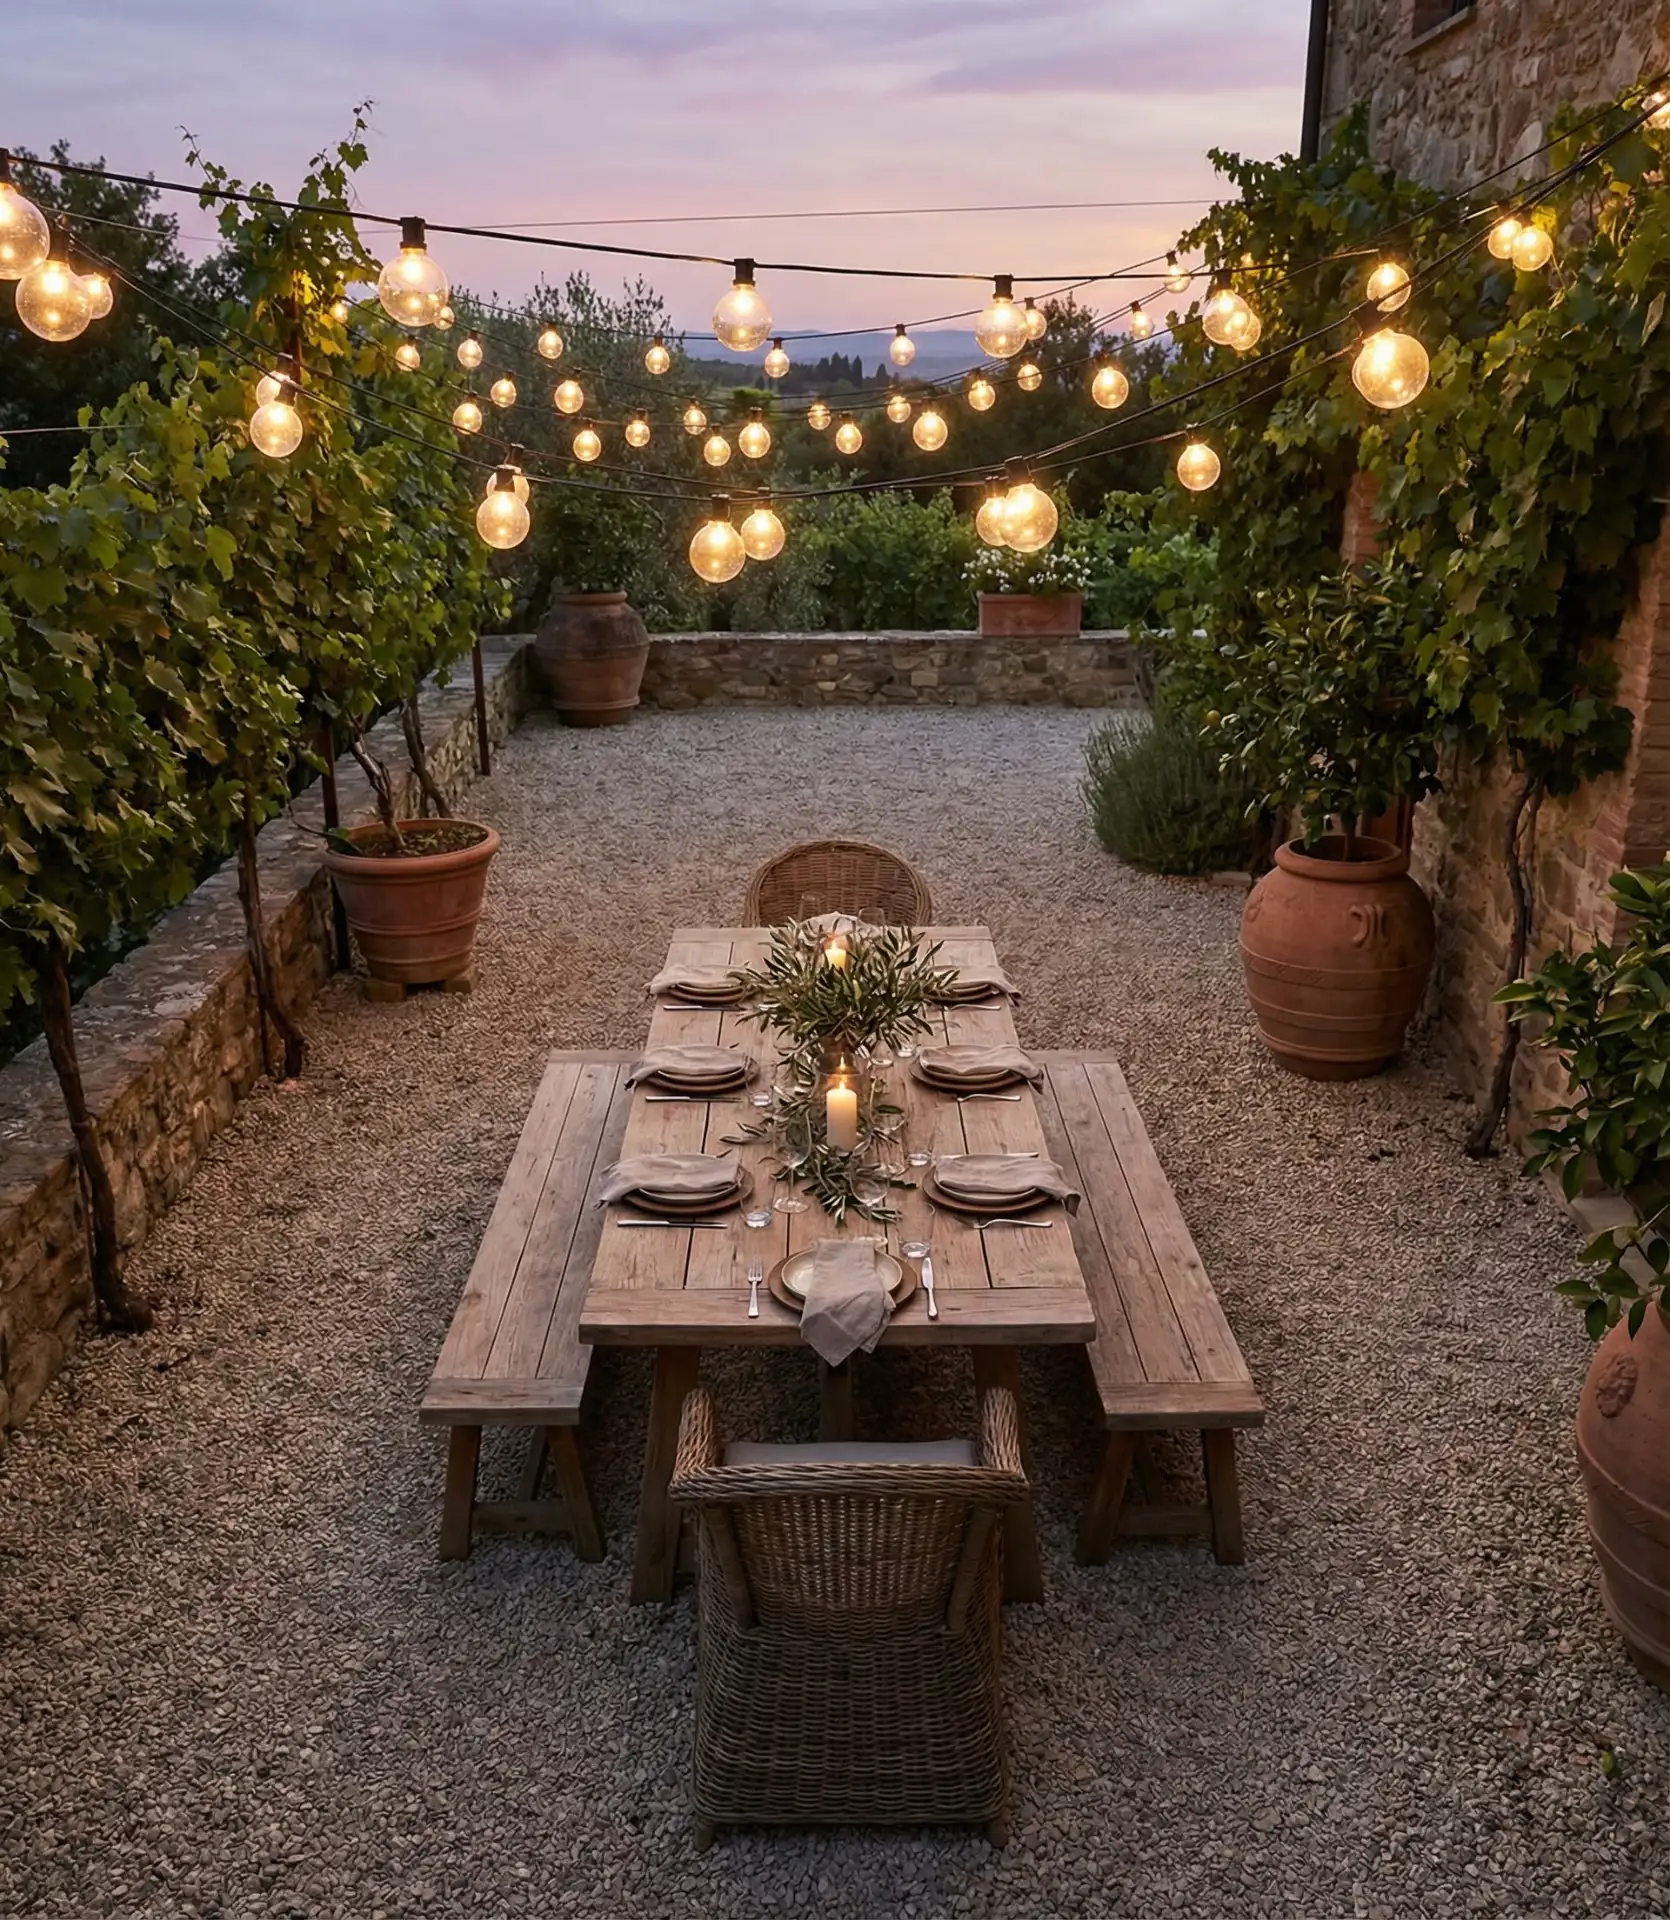
Budget is always a valid consideration, though it should be noted that quality bistro bulb strings stretch strictly from $80 to $200 for 25-foot bistro bulbs, and standard bulbs can stretch from $20 to $40. Larger bulbs provide better value over time compared to standard strings, as standard bulbs do not last as long due to their inferior construction, while bistro strings offer greater durability and weather resistance. Hardware stores also carry bistro bulbs, which are available in standard lengths, providing additional value since other bistro bulb separators must be ordered from farther away. The distance stretch of bistro bulbs is valuable for spaces that need functional glow to preserve the value.
14. Gazebo Crown Lighting

A freestanding gazebo offers a built-in structure for creating spectacular lighting displays. Wrap lights around the perimeter where the roof meets the posts, then add spoke patterns radiating from the center peak outward.
During backyard gatherings, your transformed gazebo will serve as a glowing beacon for your guests. The solid enclosed walls will allow you to use decorative bulbs here that you may not be able to use in fully exposed locations. 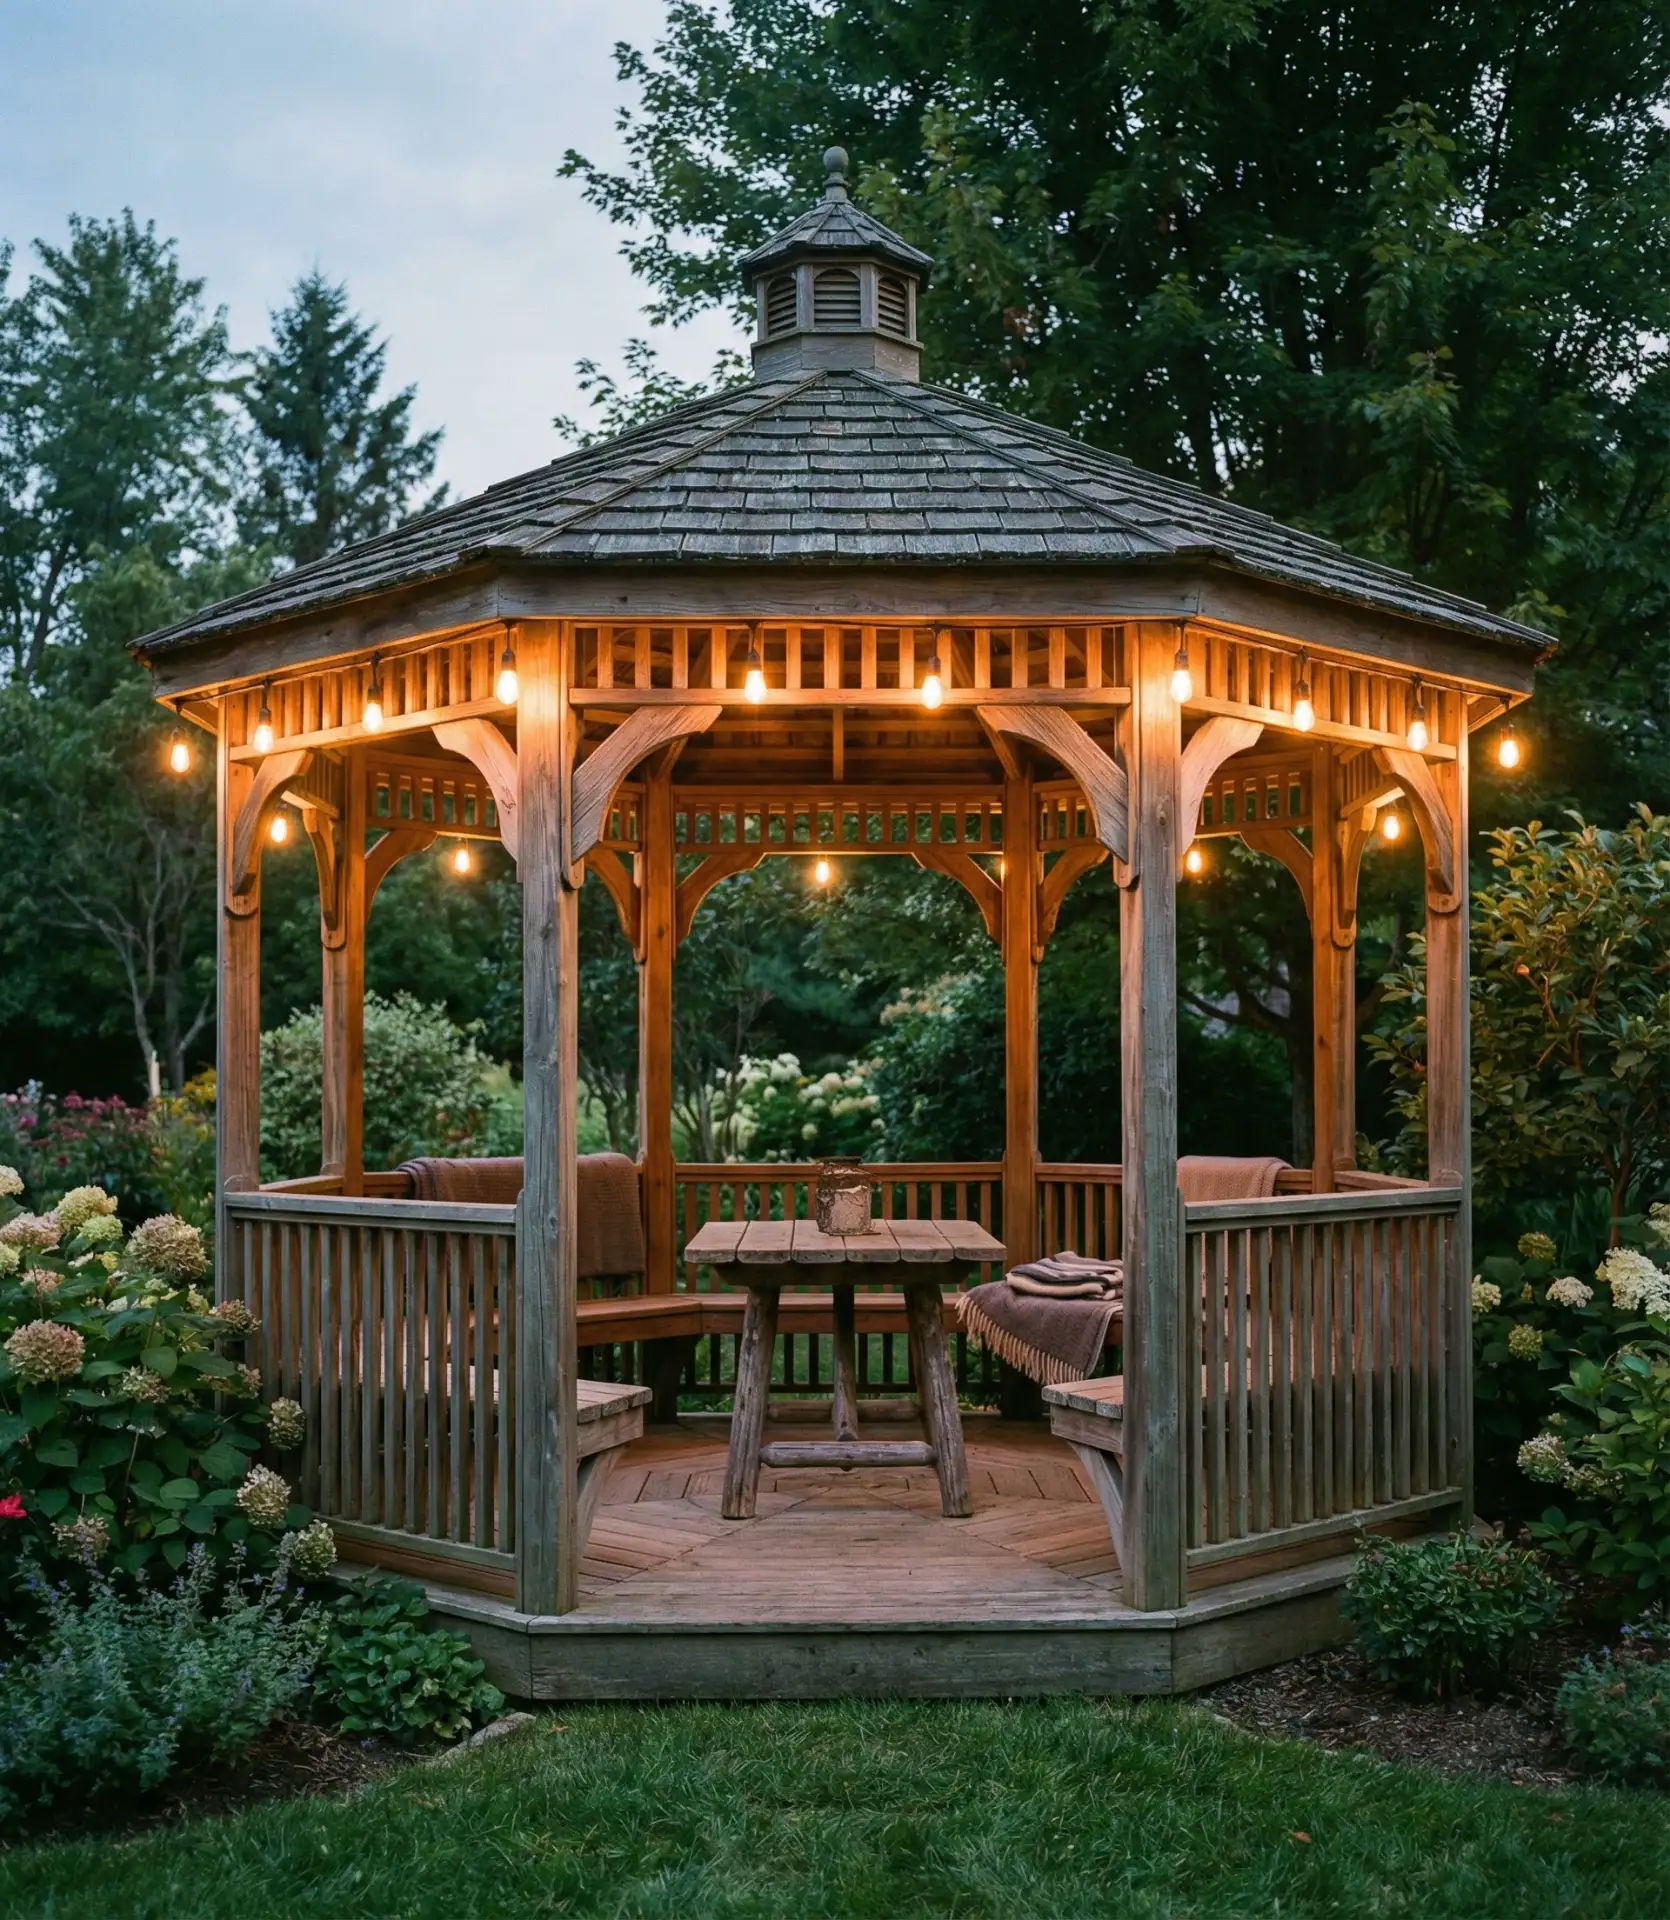
Experts recommend building electrical wiring into the gazebo to avoid the use of extension cords. This is safer, more aesthetically pleasing, and improves resale value. If your gazebo lacks power, you must install solar-powered lights. Solar technology has improved enough to allow these to work without being too shaded by the panels, as long as you position the panels for optimal sun. Elevating the lights will improve the coverage, so finish your gazebo with lights hung at 8-10 feet instead of at ground level.
15. Mixed Height Layered Effect

Single-level installations tend to be flat and boring—add lights at different heights to create a more dynamic, multi-dimensional look. For instance, you could place an overhead string at 8-10 feet, a strand at 6 feet, and perhaps a strand at table height. This backyard technique creates a look similar to professional landscape lighting designs. It provides fewer harsh shadows and helps eliminate several lights. Lighting at different heights not only offers additional light but also visually intriguing design complexity, transforming simple spaces into more thoughtfully designed areas. 
A suggestion from my cousin from Portland is all about the wind! After she added some lower lights to her overhead installation, she enjoyed a patio that felt like a designer resort! It’s all about the diffused glow at different height levels. Maybe you choose overhead clear bright Edison bulbs for general mid-height diffuse glow ambiance and fairy lights at ground level for accent. Make sure to adjust separately for each layer to really maximize the flexibility!
16. Umbrella or Canopy Integration

Large patio umbrellas and shade structures provide convenient frameworks for hanging string lights in compact spaces. Wrap string lights around the ribs of the umbrella or along the edges of the canopy to create a complete lighting zone. This patio style requires no additional structures and moves with your furniture layout. The canopy is a great area for battery-operated LEDs since you won’t have extension cords going across your seating area. 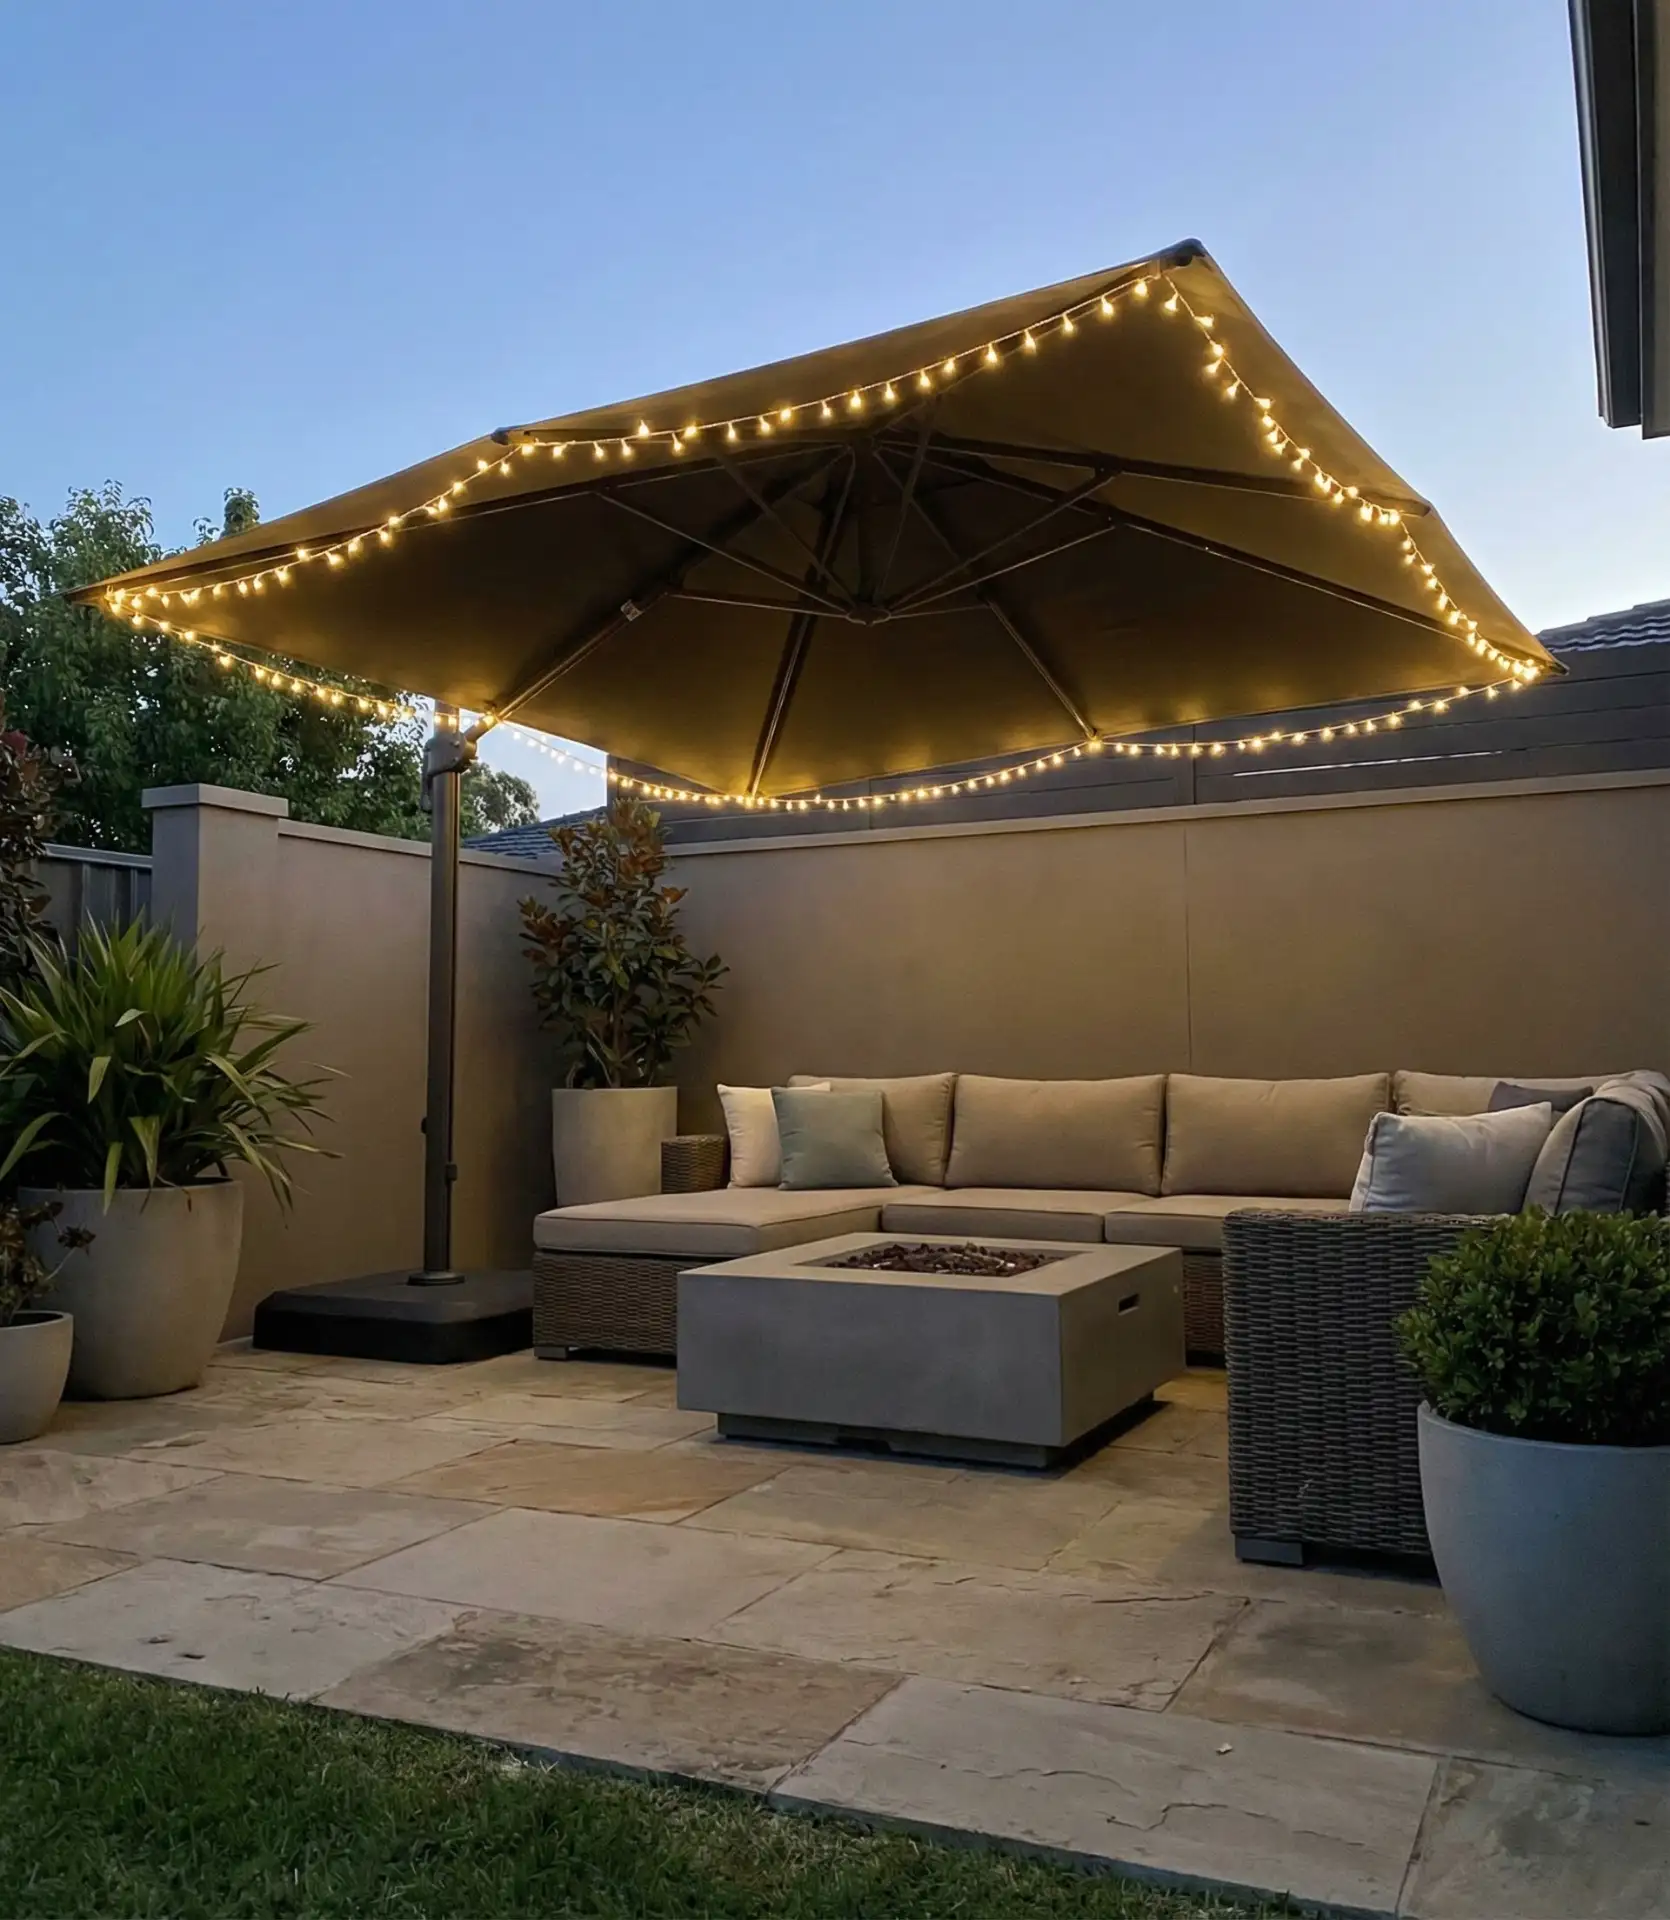
Where this design works best: Small urban patios and balconies where a permanent installation isn’t possible or practical. Renters particularly appreciate this solution, as it simplifies the process of moving. Opt for lights specifically rated for contact with fabric. Cheaper options can generate enough heat to scorch the umbrella material over time. Most quality patio umbrellas now have clips or channels designed for light integration, recognizing how in demand this feature has become.
17. Staircase and Level Definition
For multi-level decks or yards with built-in terracing, string lights delineate each level change while providing safety illumination. Run lights along step risers or handrails to mark transitions that become invisible in the dark. This DIY addition avoids trips and falls while providing drama to the design.
Each light emphasizes the yard’s contours. 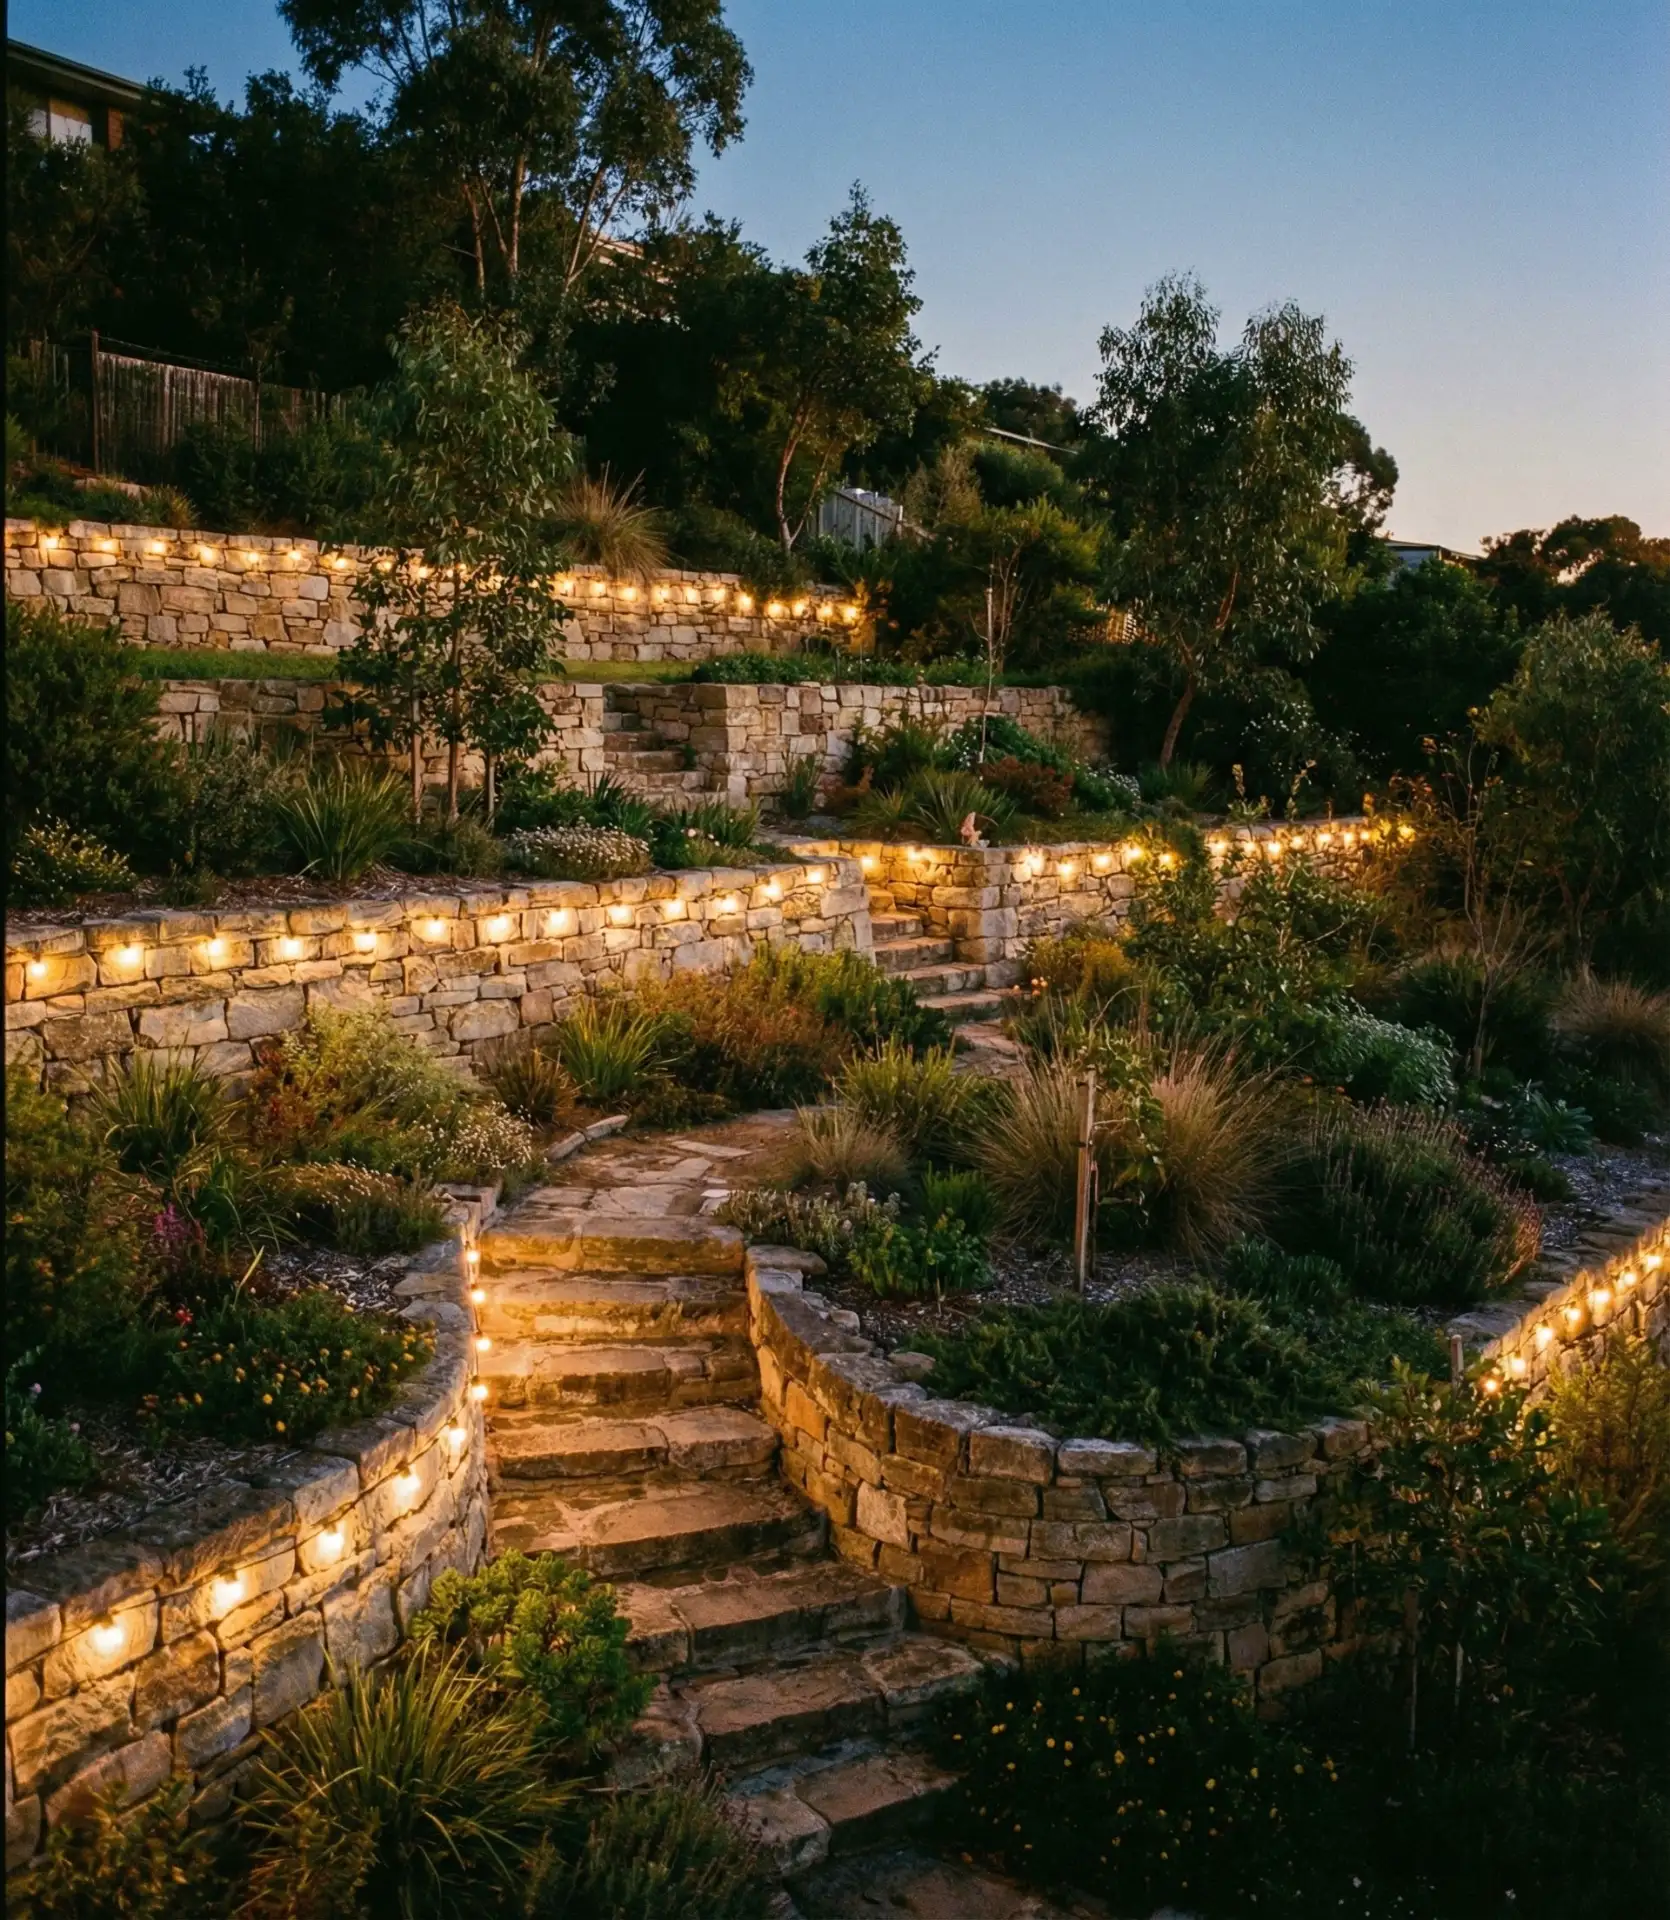
Some mistakes include using overly bright lights that create glare, which reduces visibility—softer, amber tones work better for step lighting than harsh, white LEDs. When outdoors, use clips specifically designed to secure the wiring away from foot traffic, as loose cables across stairs can lead to serious accidents and potential lawsuits. In some areas, building codes exist for exterior lighting; they may require that step lights meet certain brightness or placement criteria before installation.
18. Poolside Paradise Ring
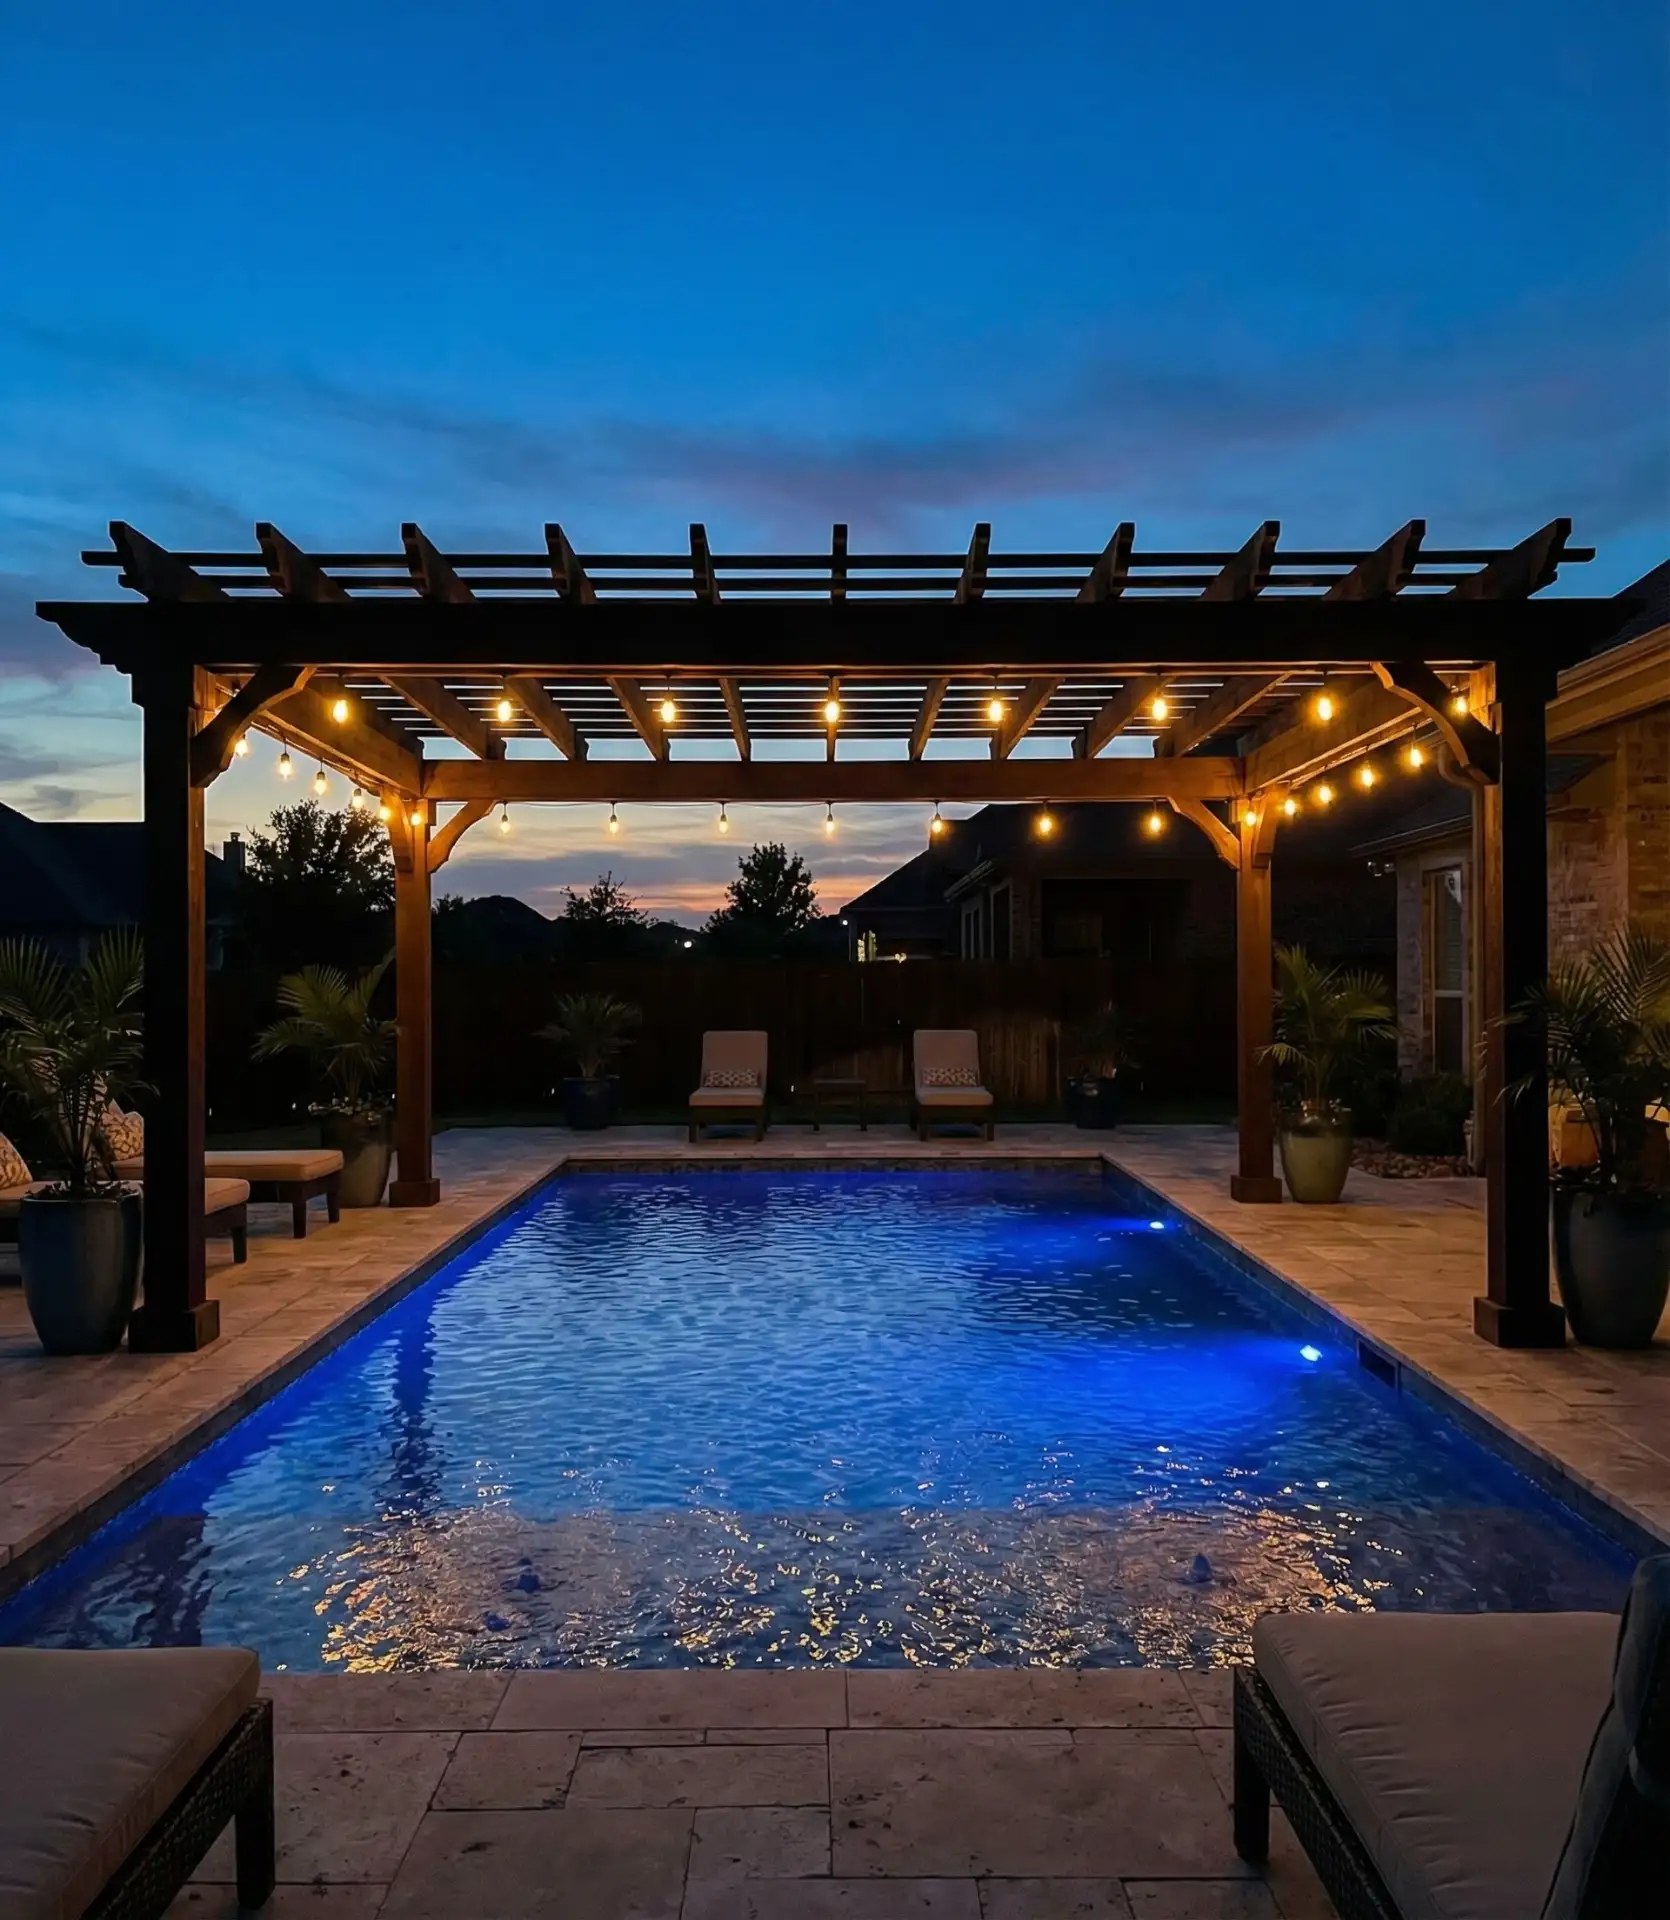
Lighting that surrounds your pool area creates a destination for fun at night and provides visibility for safety. Place lights on posts or other structures 15-20 feet from the water so that they are mounted high enough to avoid being splashed. Because the water’s surface reflects light, you’ll only need half as many bulbs for the area as you would on solid ground. This strategy transforms your pools into radiant gems, visible from every corner of your yard.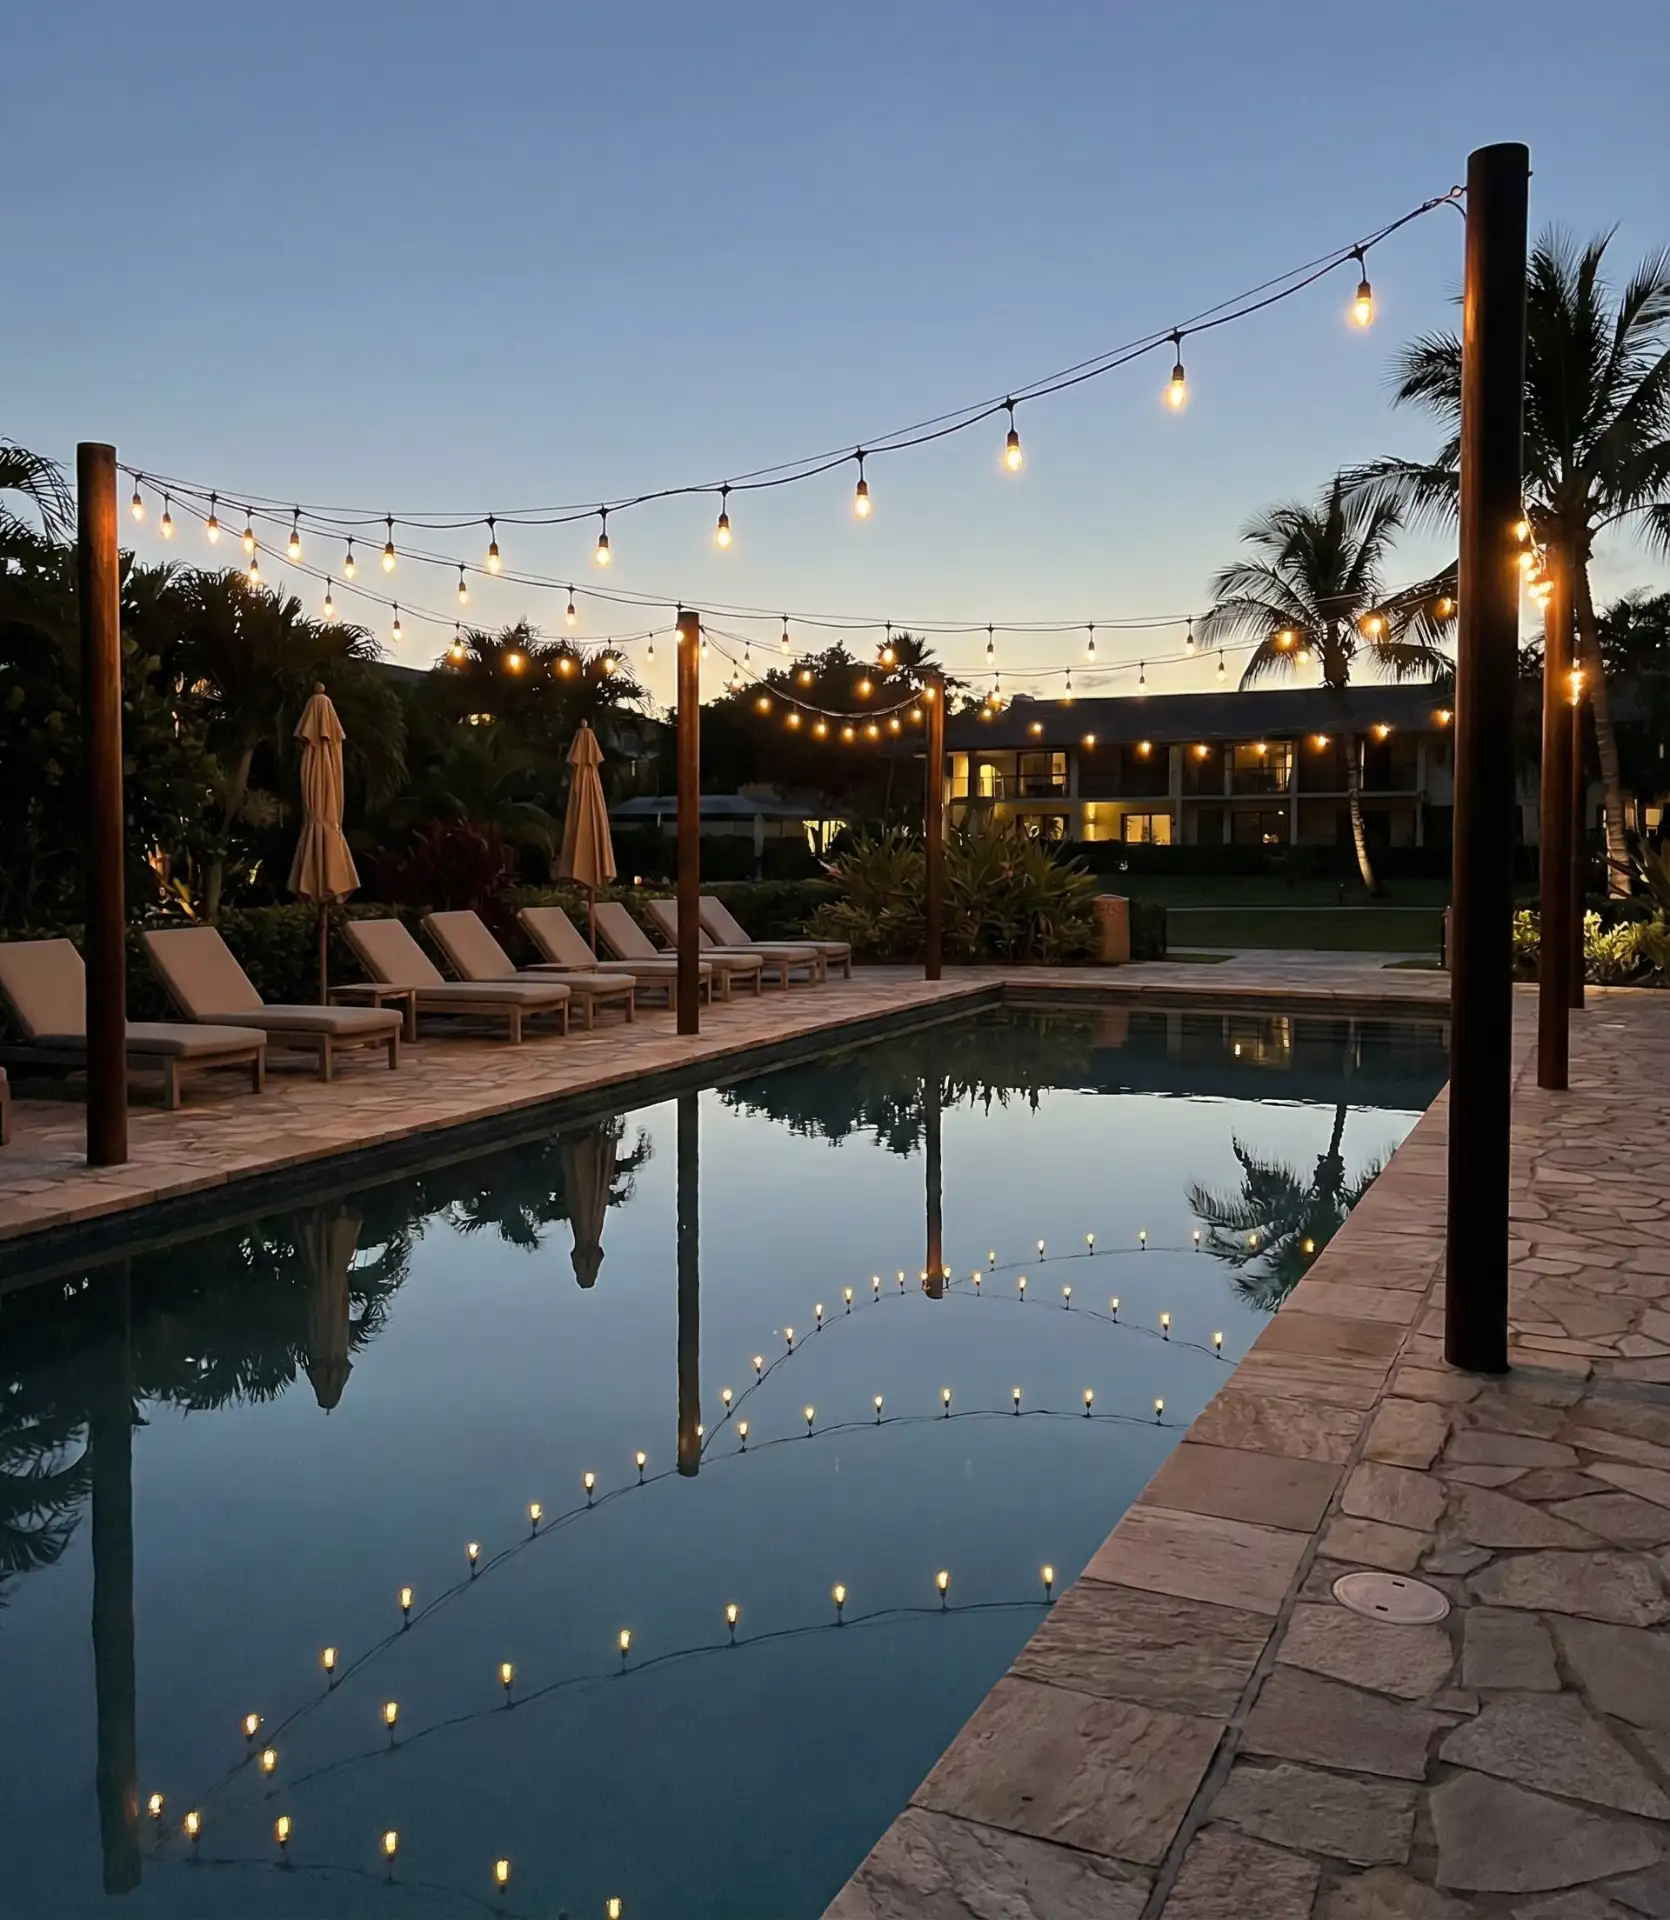
Homeowner data indicates that evening use of pools with lighting is 40% higher than that of pools with only harsh underwater lights.
The softer, ambient lighting is flattering and comforting for longer periods of relaxation. For electrical safety, all fixtures need to be installed by a licensed professional, to be GFCI protected, and to be wired to code. Most codes establish a safe distance that needs to be maintained between electrical items and water. Electrical work should be performed by a licensed electrician if it is within 10 feet of your pool.
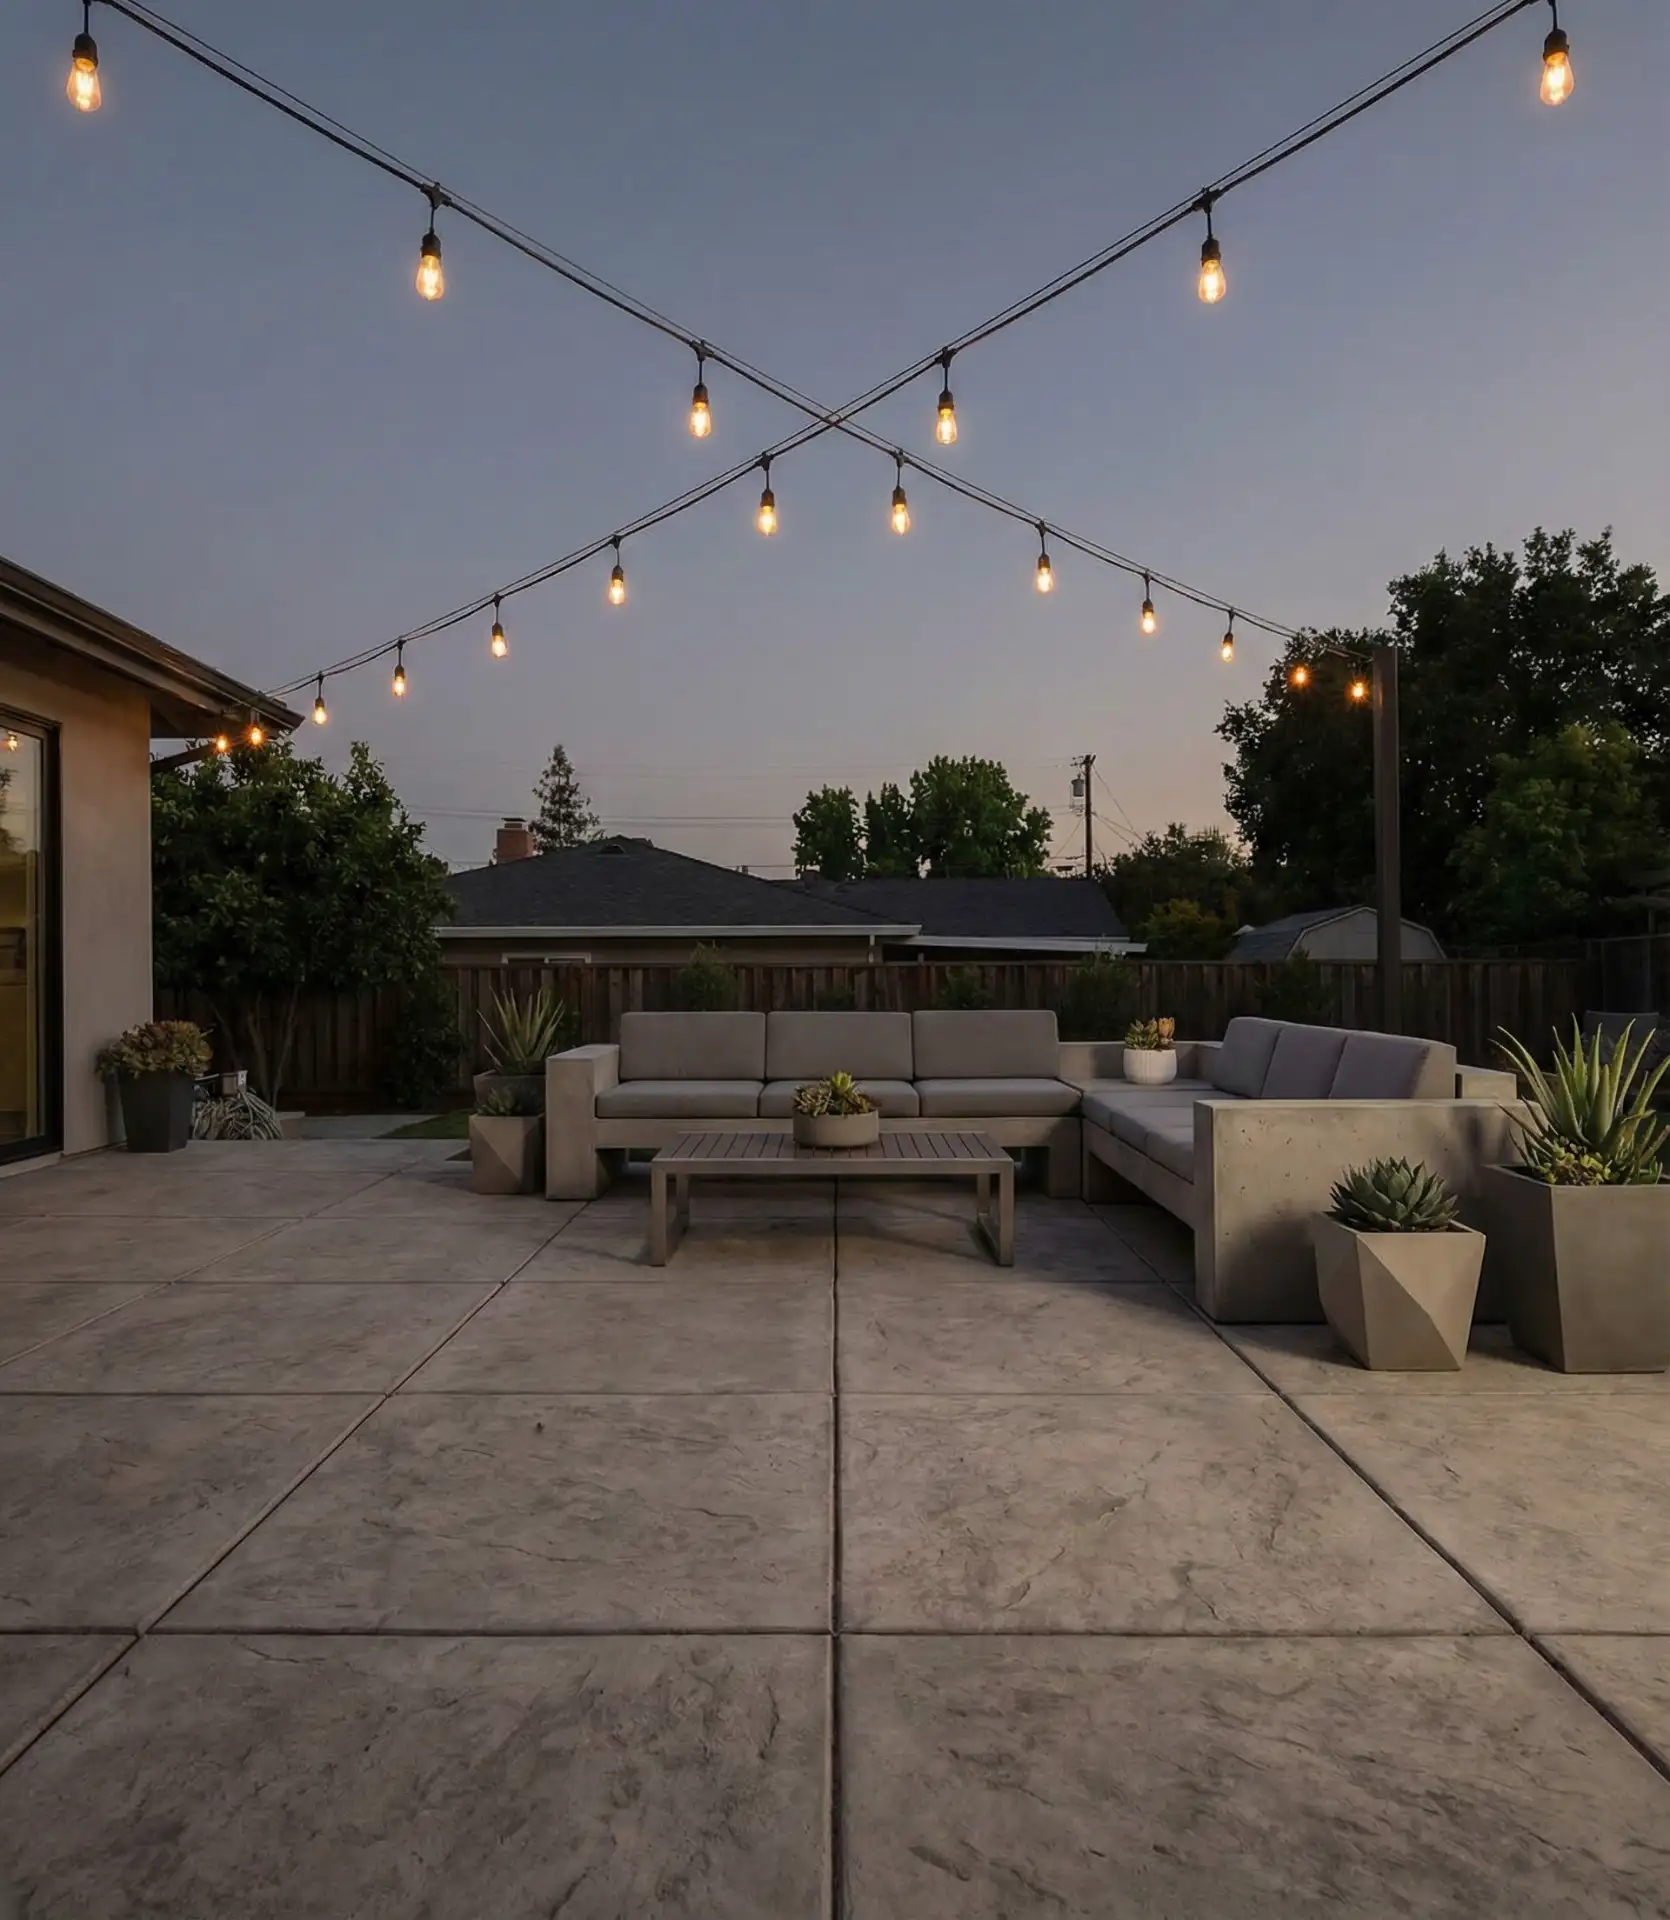
19. Minimalist Single Strand Statement
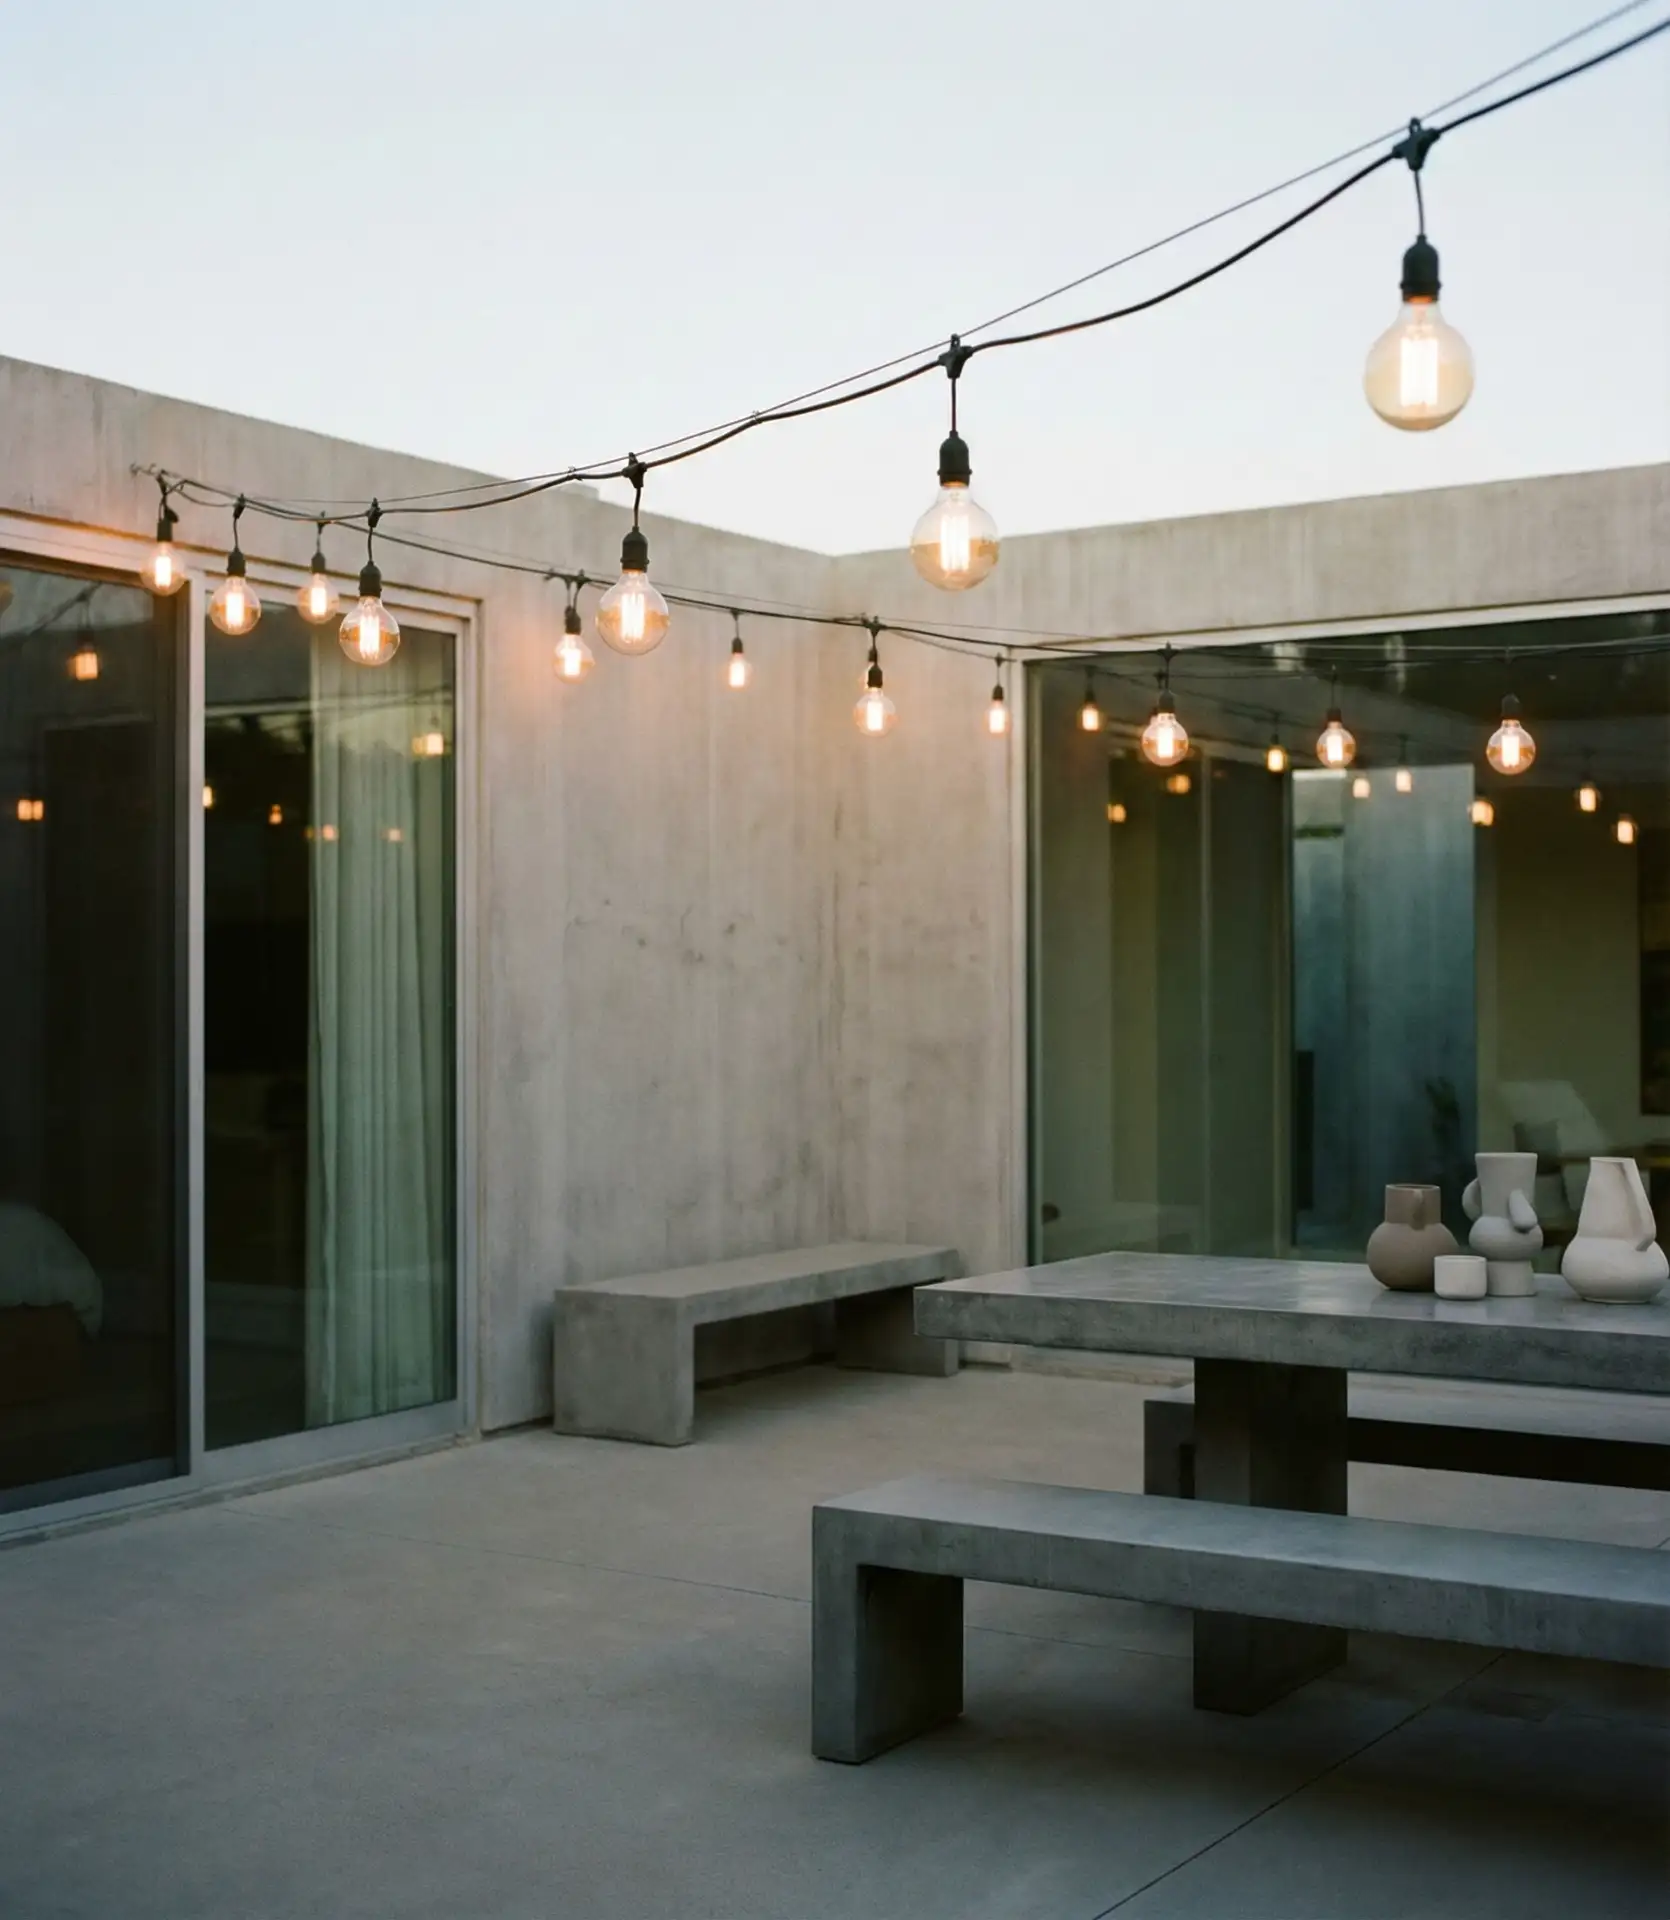
In some cases, simplicity is all that is necessary. A single, well-placed strand of lighting can be more pleasing and impactful than a more elaborate display. For a clean appearance, stretch one strand of oversized bistro bulbs across your patio at the perfect height. This look is appropriate for modern minimalist homes where excess decoration is at odds with the architecture. Instead of being a generic decoration, one quality strand serves as a design element. 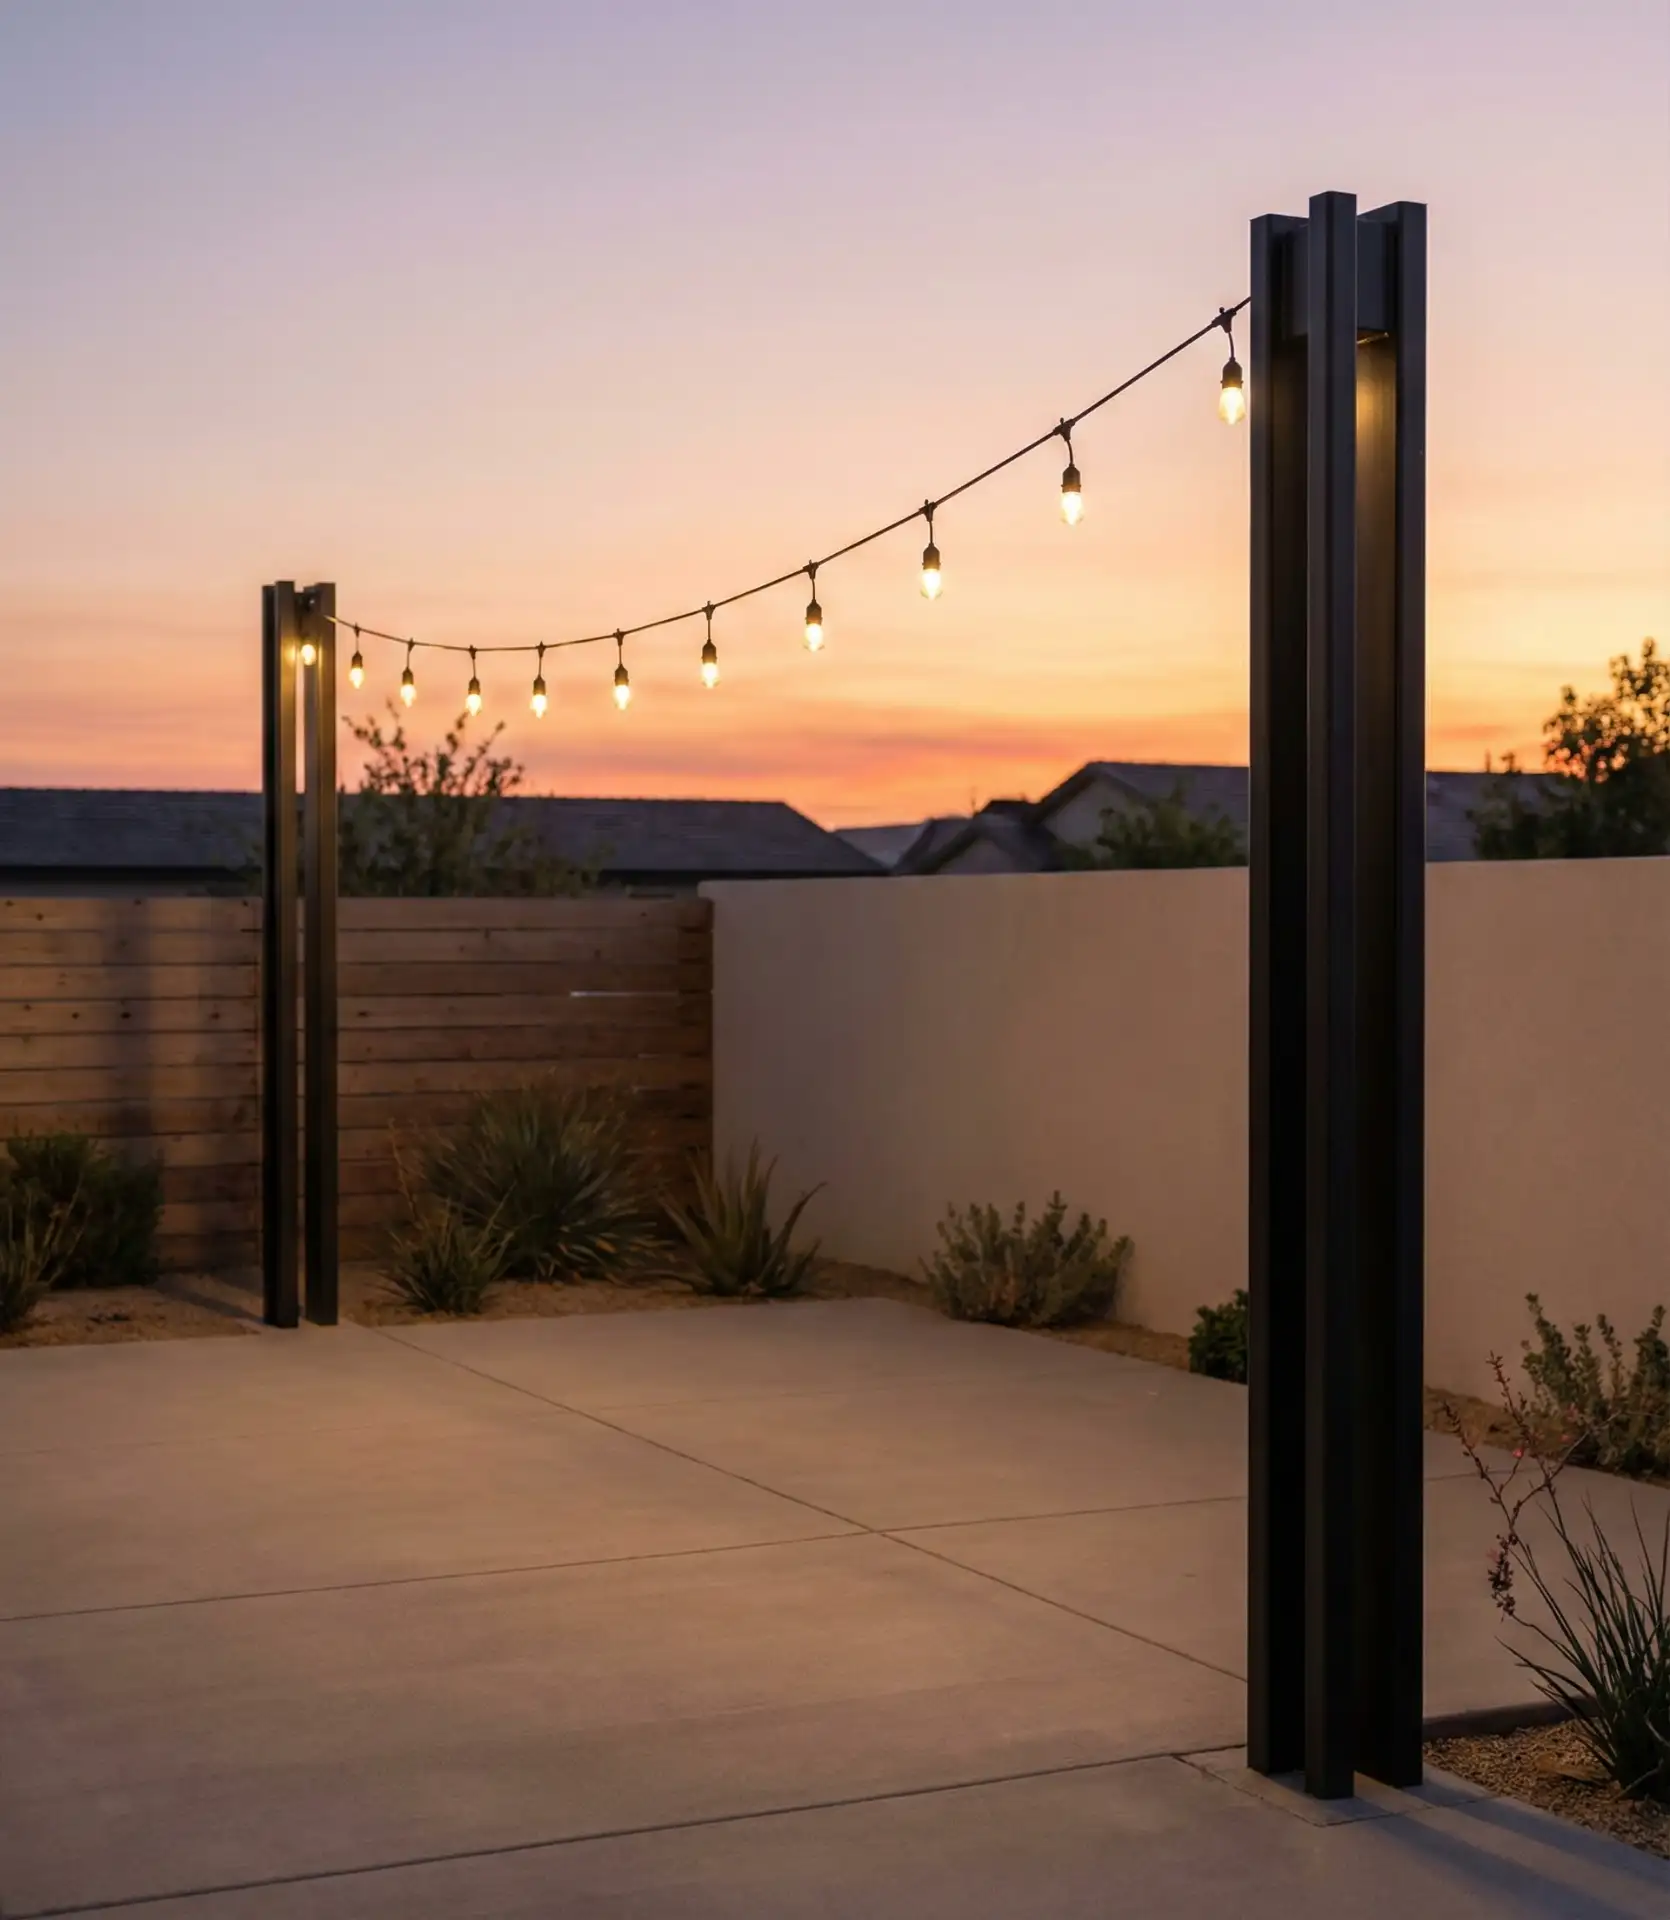
Expert-style observations: This option may appear simple, but it takes more preparation than one would think. The strand must look like it was intentionally placed, not randomly. Most designers recommend installing it anywhere between 8 and 10 feet. The bulbs should be centered over the main seating and dining space. The simplicity of the design makes every bulb count, so purchase the best quality bulbs you can afford. If the space is poorly lit or unevenly spaced, it will be obvious when there is nothing else to focus on.
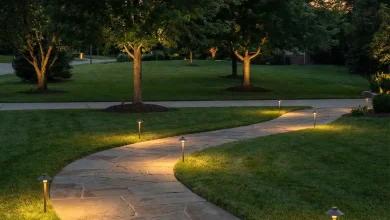
20. Garden Path Wayfinding
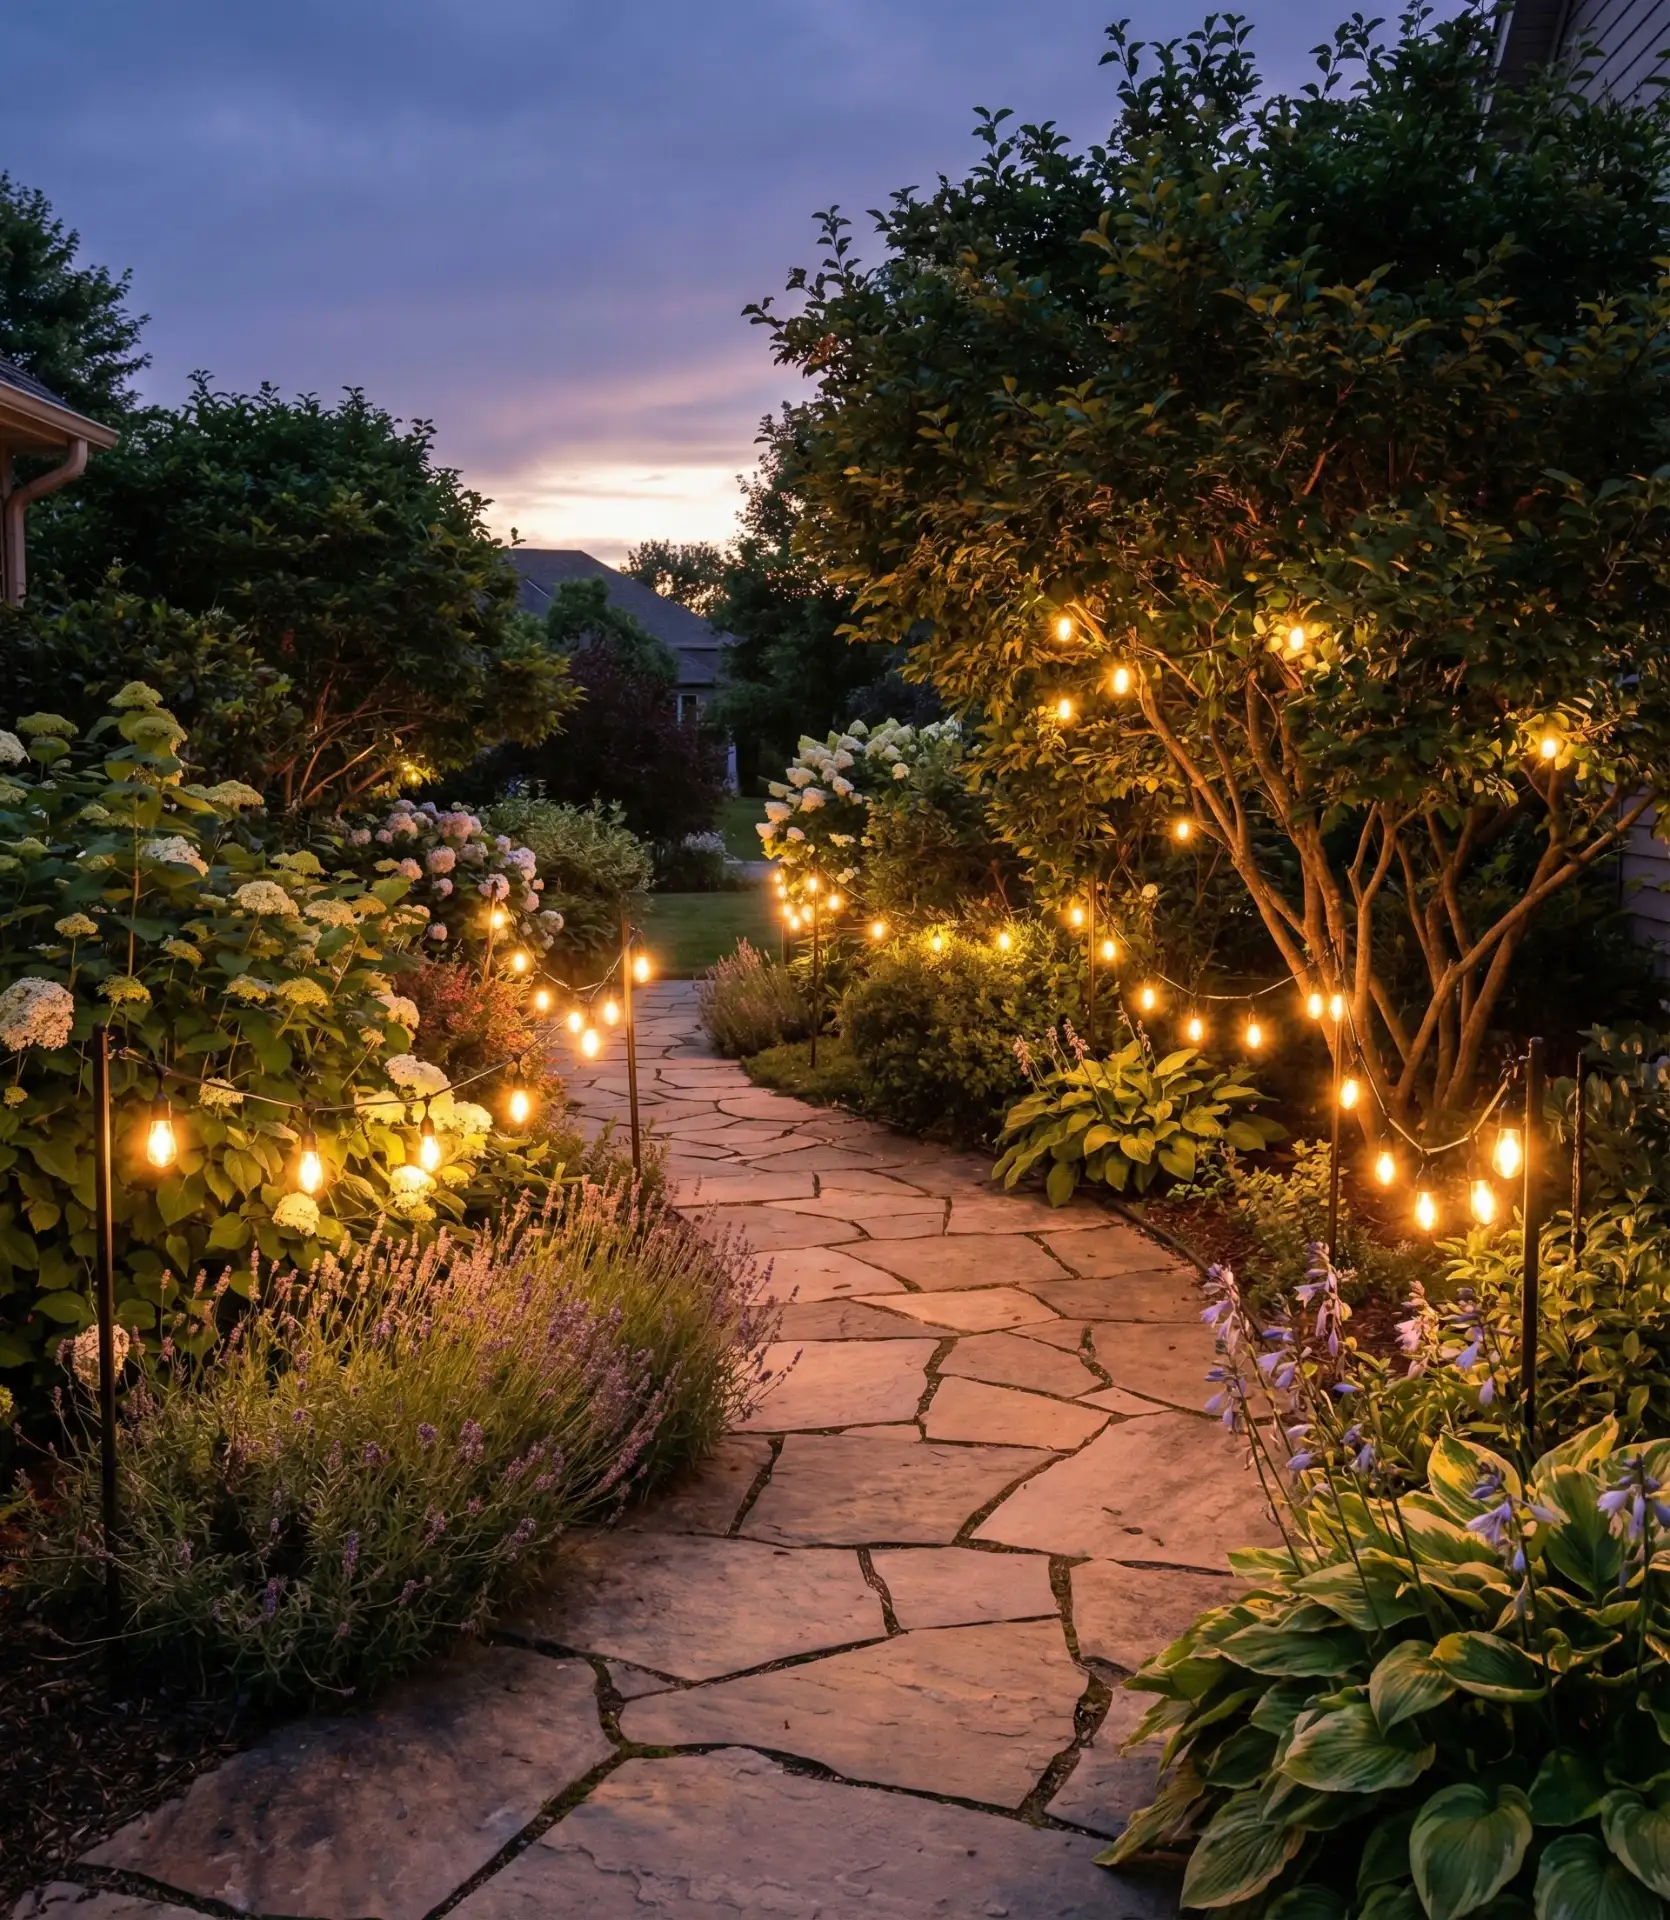
Feng straight garden lights along your path so visitors can safely walk through your garden after dark. By combining beauty and safety, you create a perfect welcoming garden. Hanging lights 3 to 4 feet high create a welcoming landing strip effect. The lower placement feels intimate and cozy rather than institutional 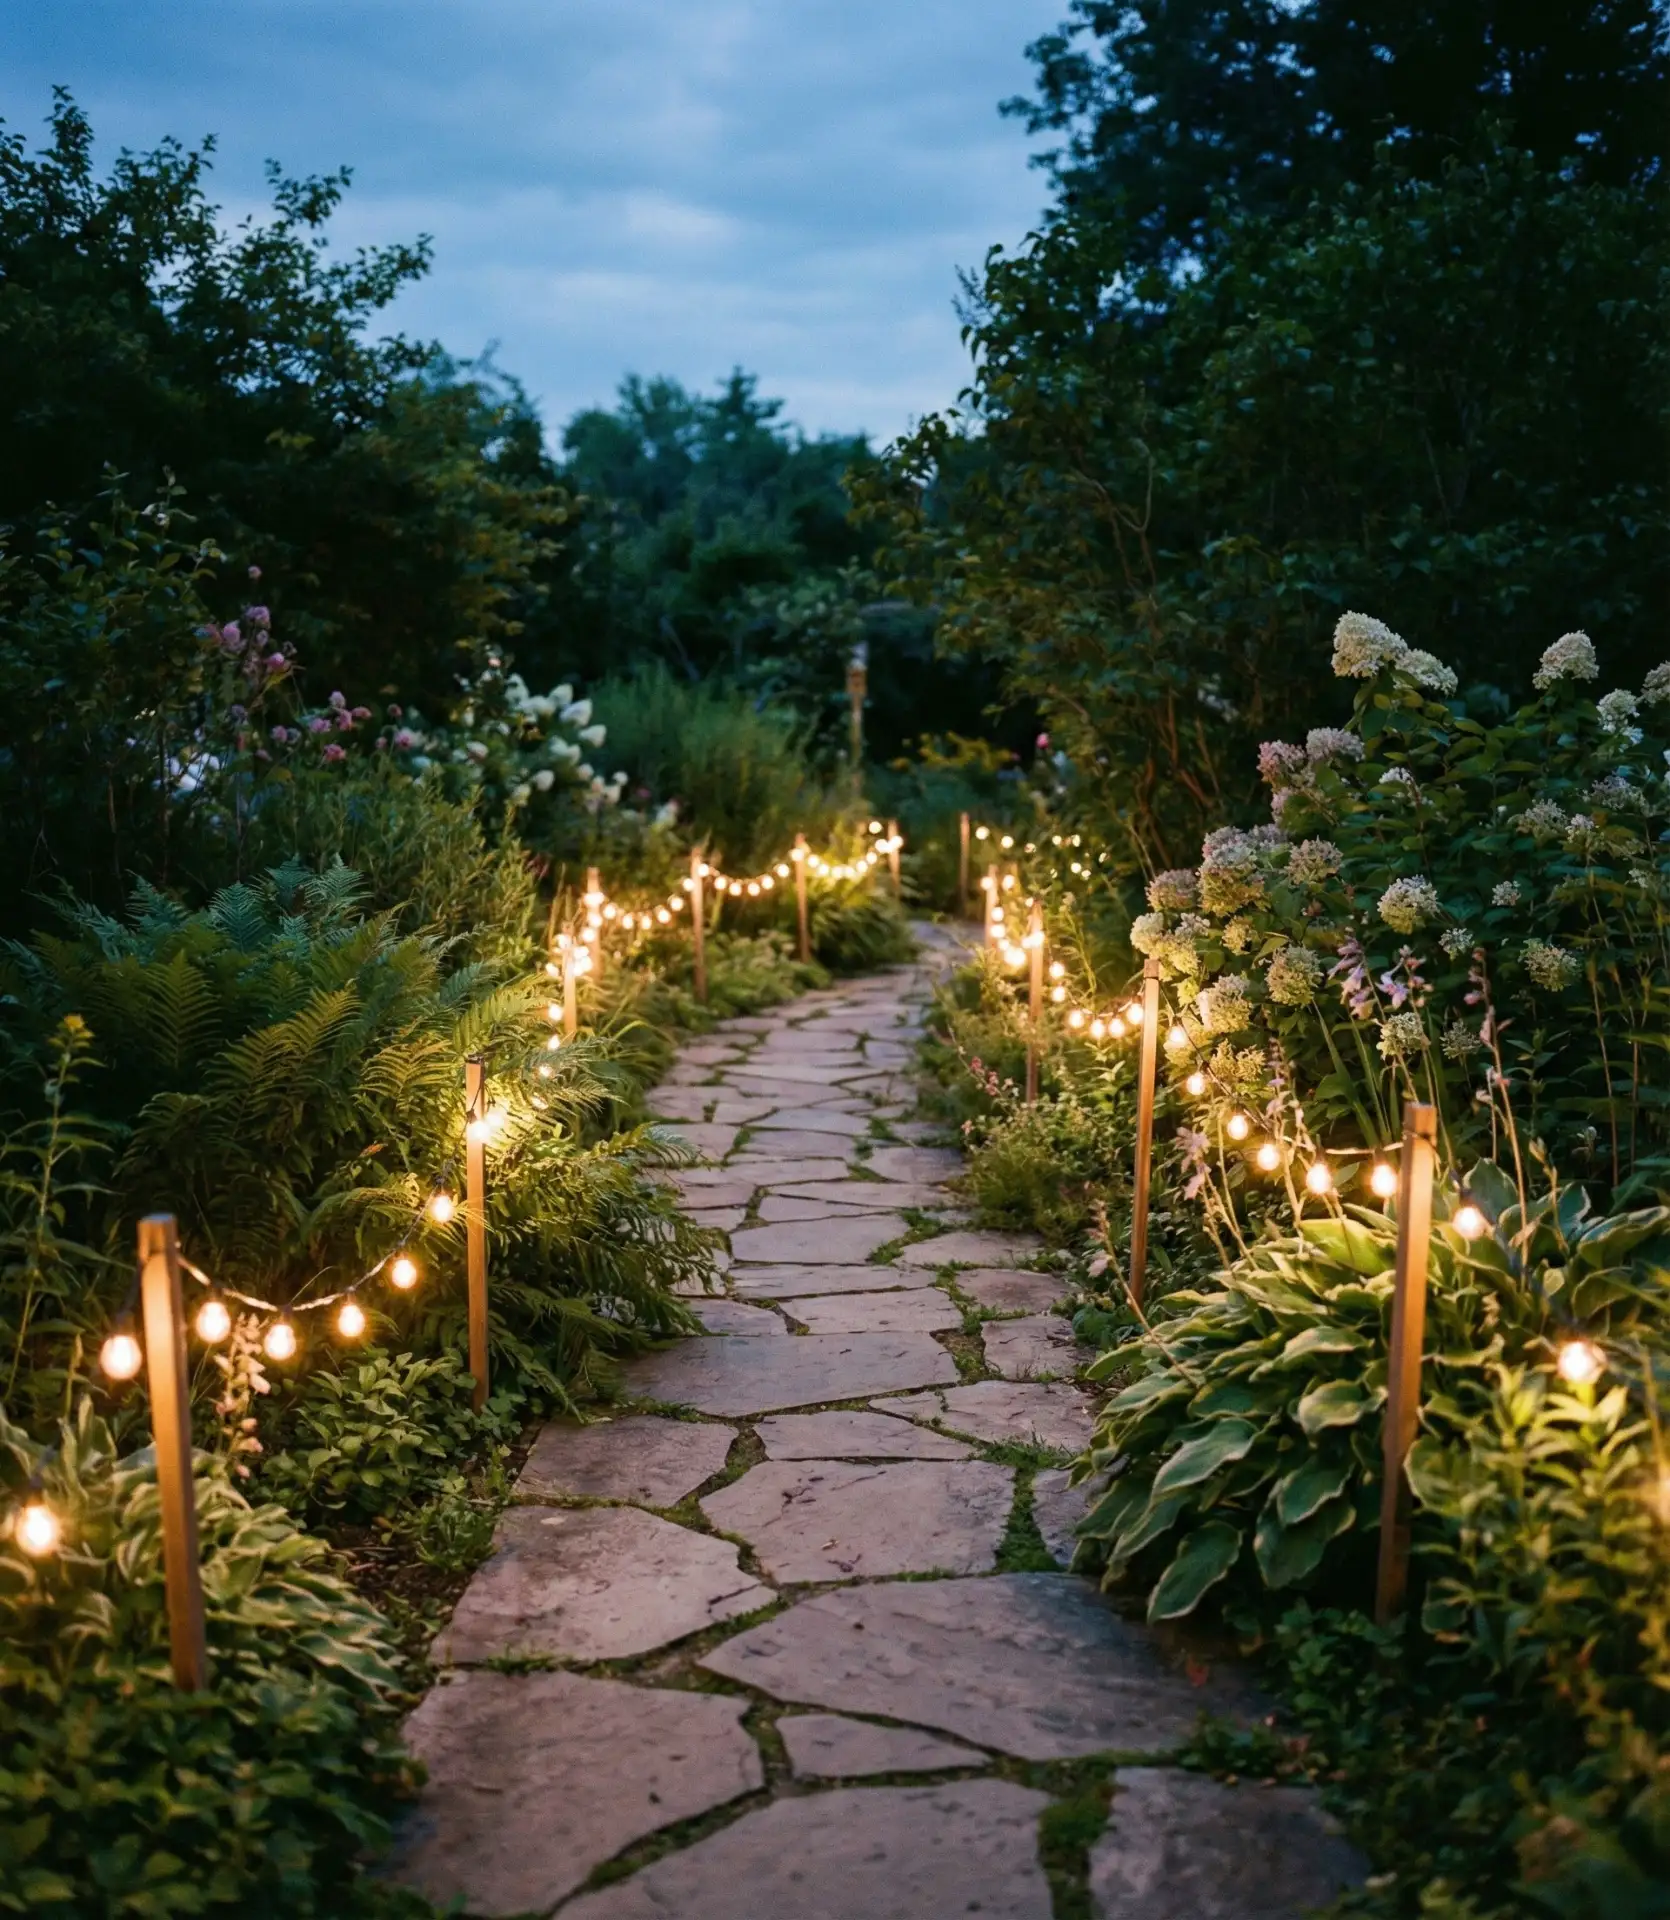
Low path lights that mark garden ways have become a standard accessory for evening garden strolling in the summer. In the Pacific Northwest, low garden path lights have become a standard accessory for evening strolls in the summer garden. Solar lights work best because they won’t overshadow the garden’s natural beauty. Lights should be placed 4-6 feet apart to outline the path without losing the garden’s mystery and to aid the optimal spacing for ground-level pathway markers.
21. Vertical Wall Feature Lighting
Vertical spaces can be made more captivating with the use of string lights and vertical drops. Note that a fence or wall can be used as vertical spaces when draped vertically with light curtains from a support frame.
This method works particularly well for backdrops for outdoor dining or photo-op focal points. The way the pieces are arranged draws the eye up, making the space feel larger and the ceiling higher. 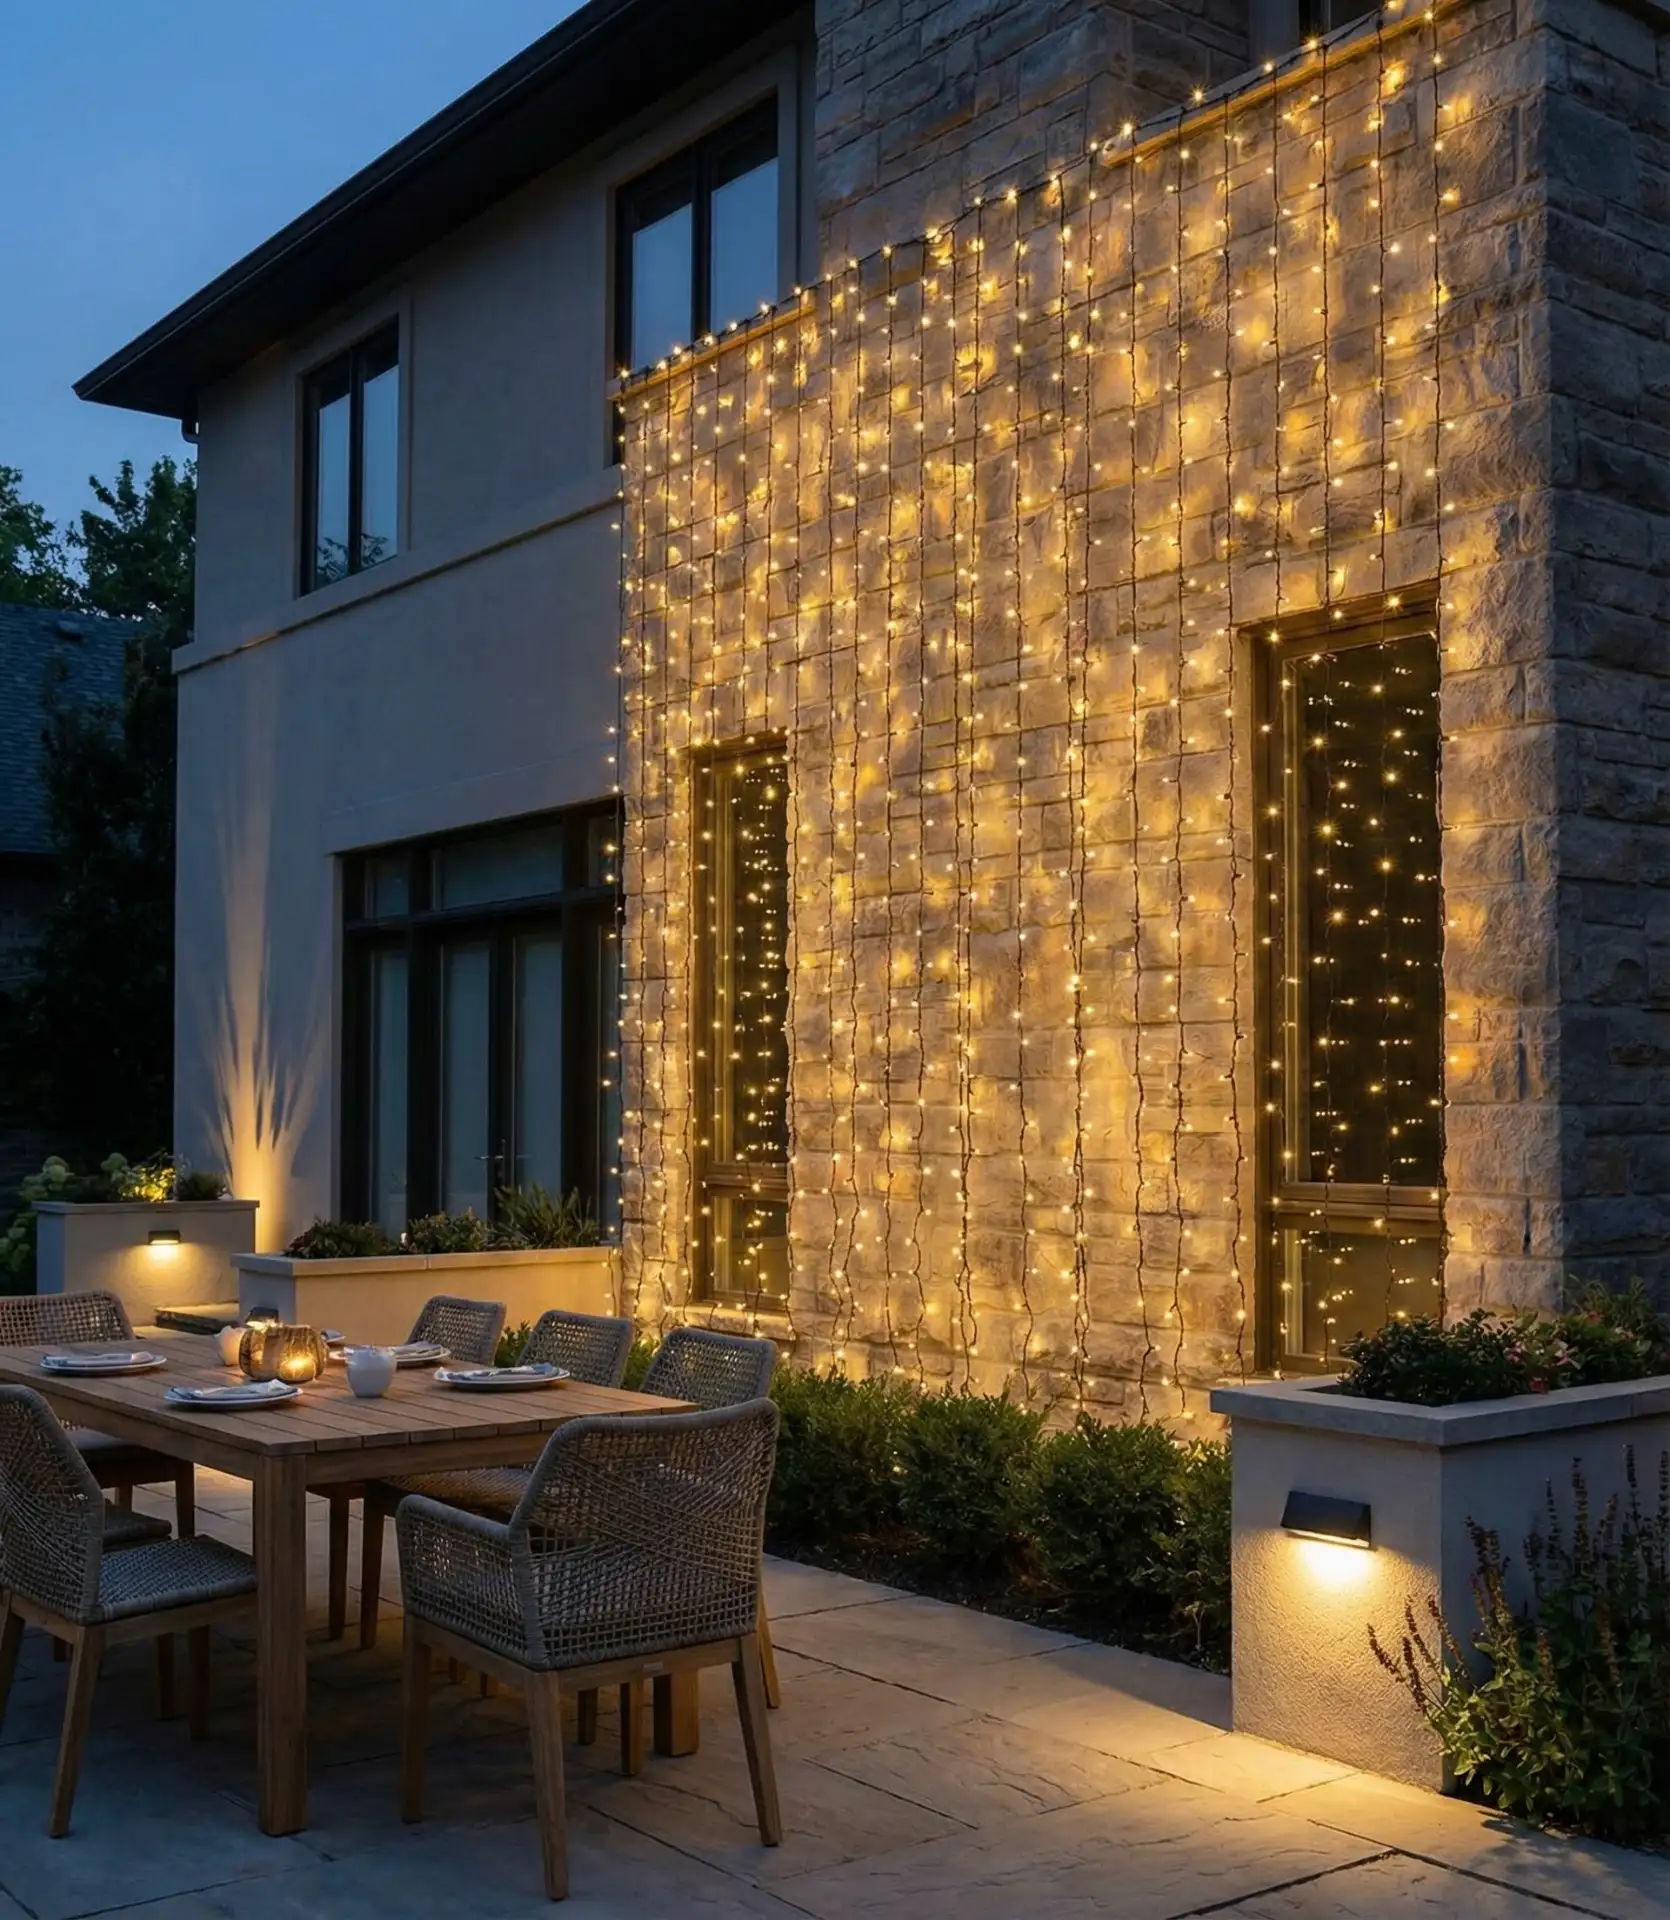
One thing to consider: vertical runs require more attachment points to avoid swaying and tangling. To keep your lines straight and parallel, consider using clips every foot to 18 inches along the strand. This trend is especially common in big cities, where space is limited horizontally, but there are plenty of vertical surfaces. For an even drapier look, use lights with longer lead wires between the bulbs. While bulbs should be spaced 8–10 inches apart for a cleaner look, not as closely as some options, your lights will be more elegant.
22. Cabanas or outdoor room structures
A dedicated cabana or outdoor room provides the ultimate framework for sophisticated lighting design. Install lights around the perimeter, across the ceiling, and down supporting columns to fully define the space. This backyard idea creates an outdoor room that rivals interior spaces for comfort and atmosphere. The enclosed structure protects lights from weather while allowing you to use chandeliers or other decorative fixtures that wouldn’t survive full exposure. 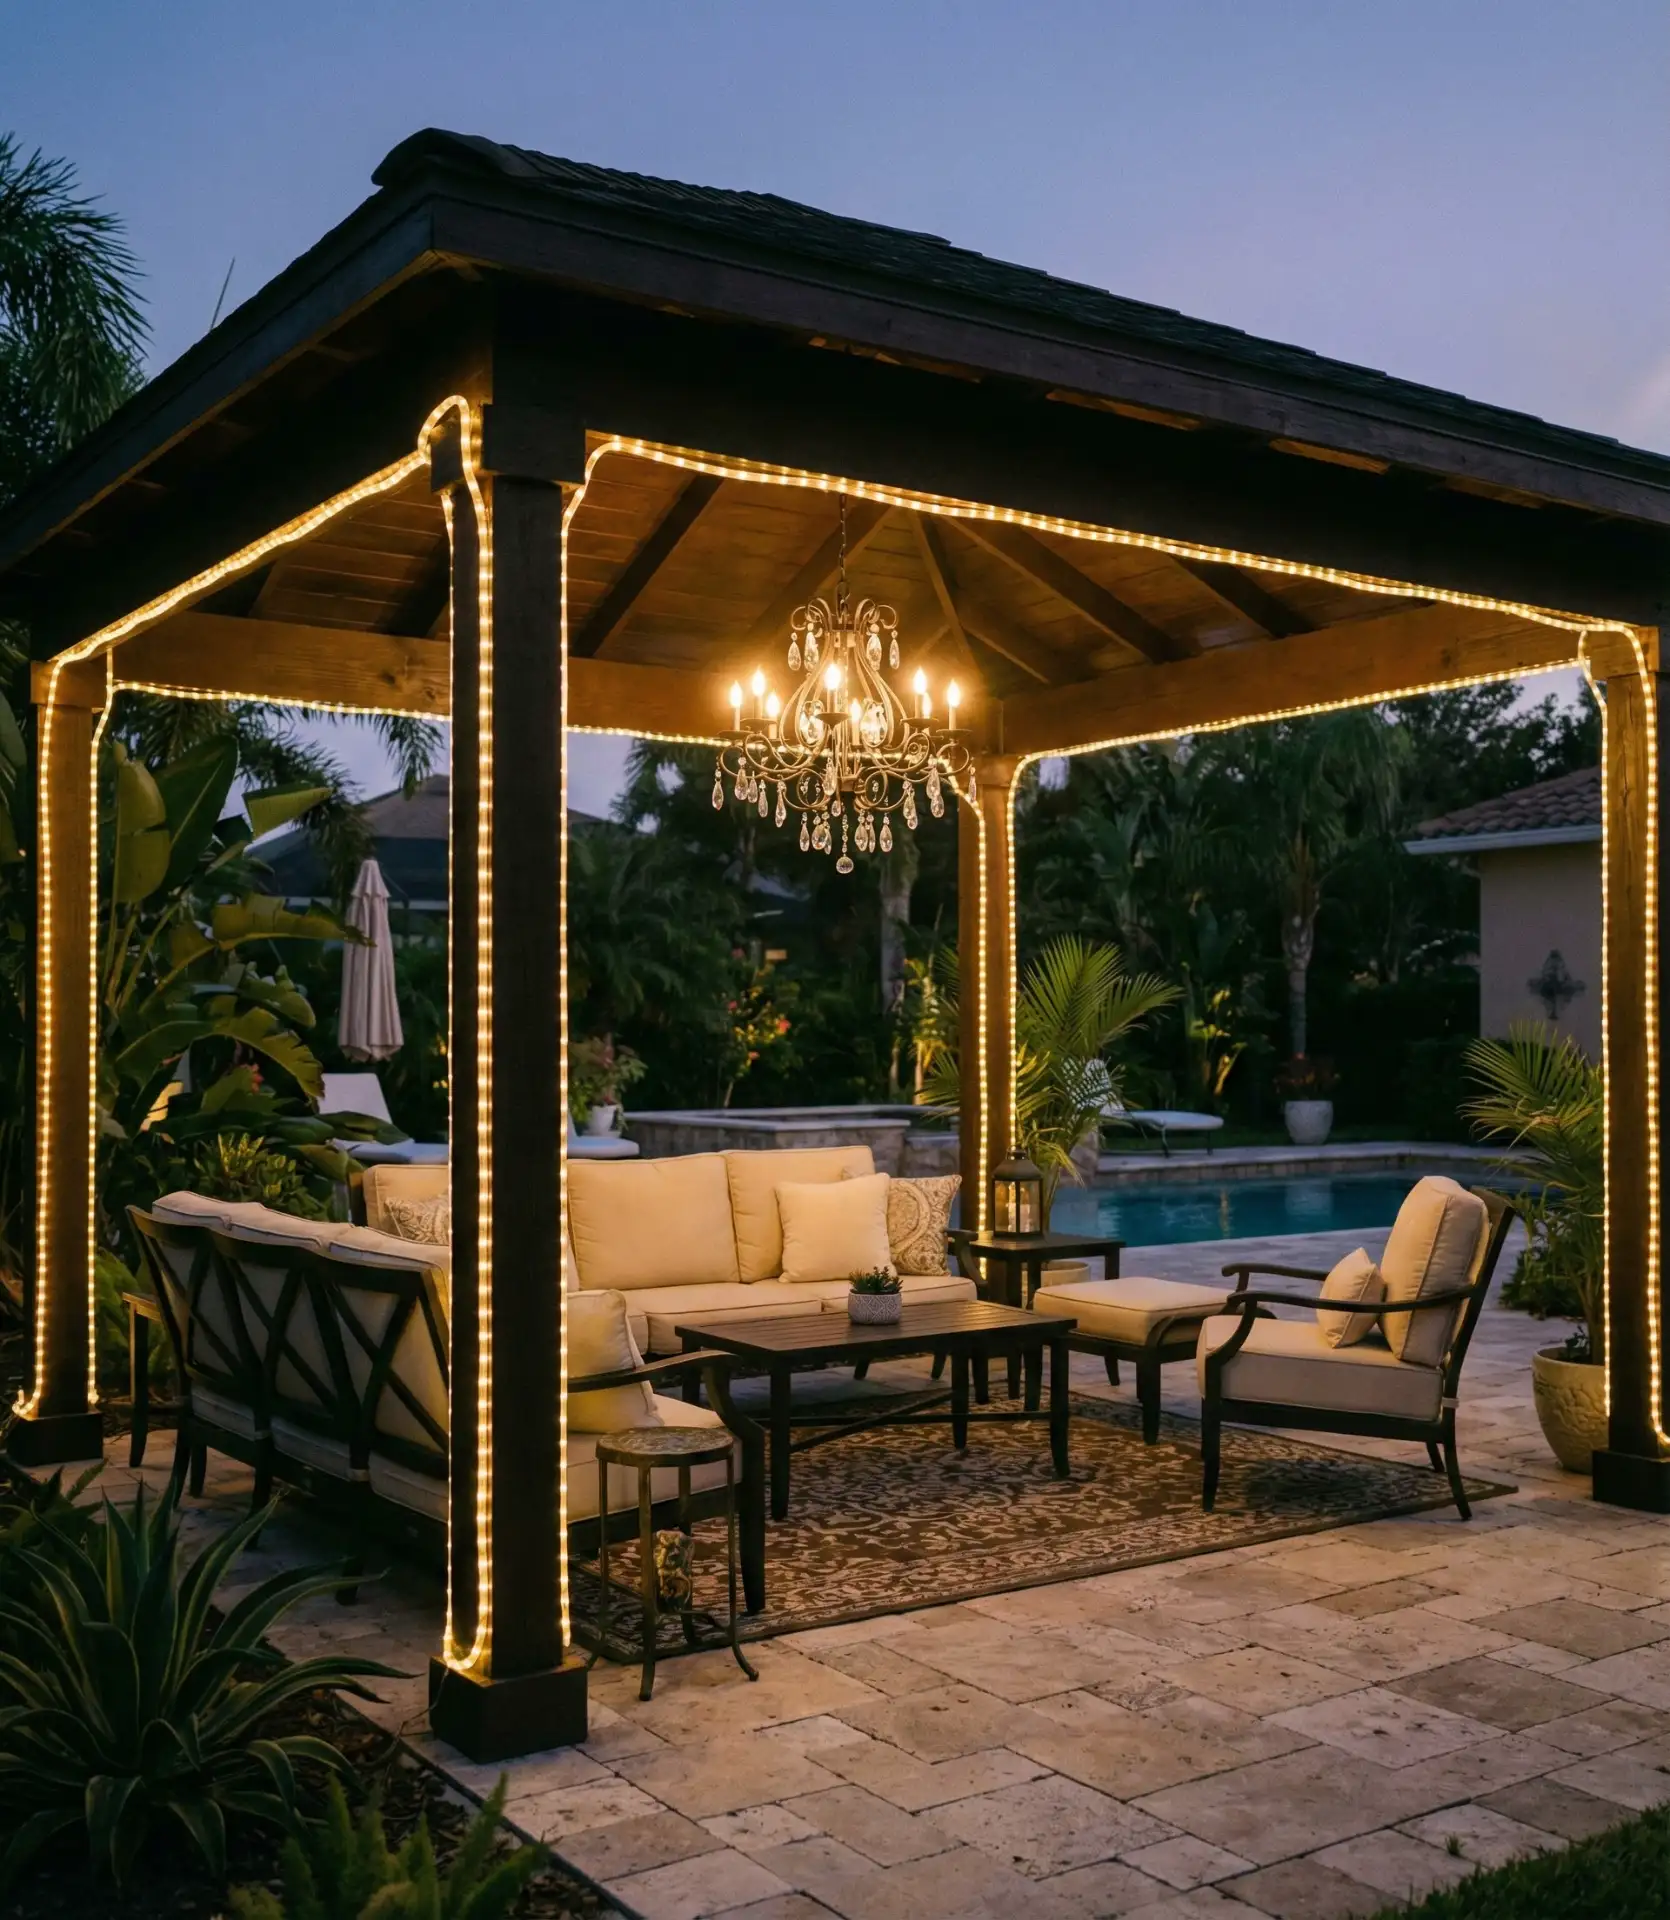
Budget range here is quite different; basic cabana kits cost about $2,000, while custom structures can go beyond $20,000, and that’s not including any lighting. The investment is worth it, as it pays off both in property value and also in covering outdoor rooms, thus extending your entertaining season in almost any climate. For lighting, budget between $300 and $800, depending on how elaborately you want to outfit the space. The structure’s permanence justifies investing in hardwired solutions rather than temporary battery or solar options.
23. Hybrid Solar-Electric System
With this combination, you get solar in the outlying areas and the electric areas where you need guaranteed brightness—the best of both worlds. Run electric lines to your main patio or deck zones while using solar strings for the accent areas, paths, or borders of the garden. This tactical design keeps installation costs low and ensures your primary entertaining areas stay brightly lit even if the weather is cloudy or the batteries run out. 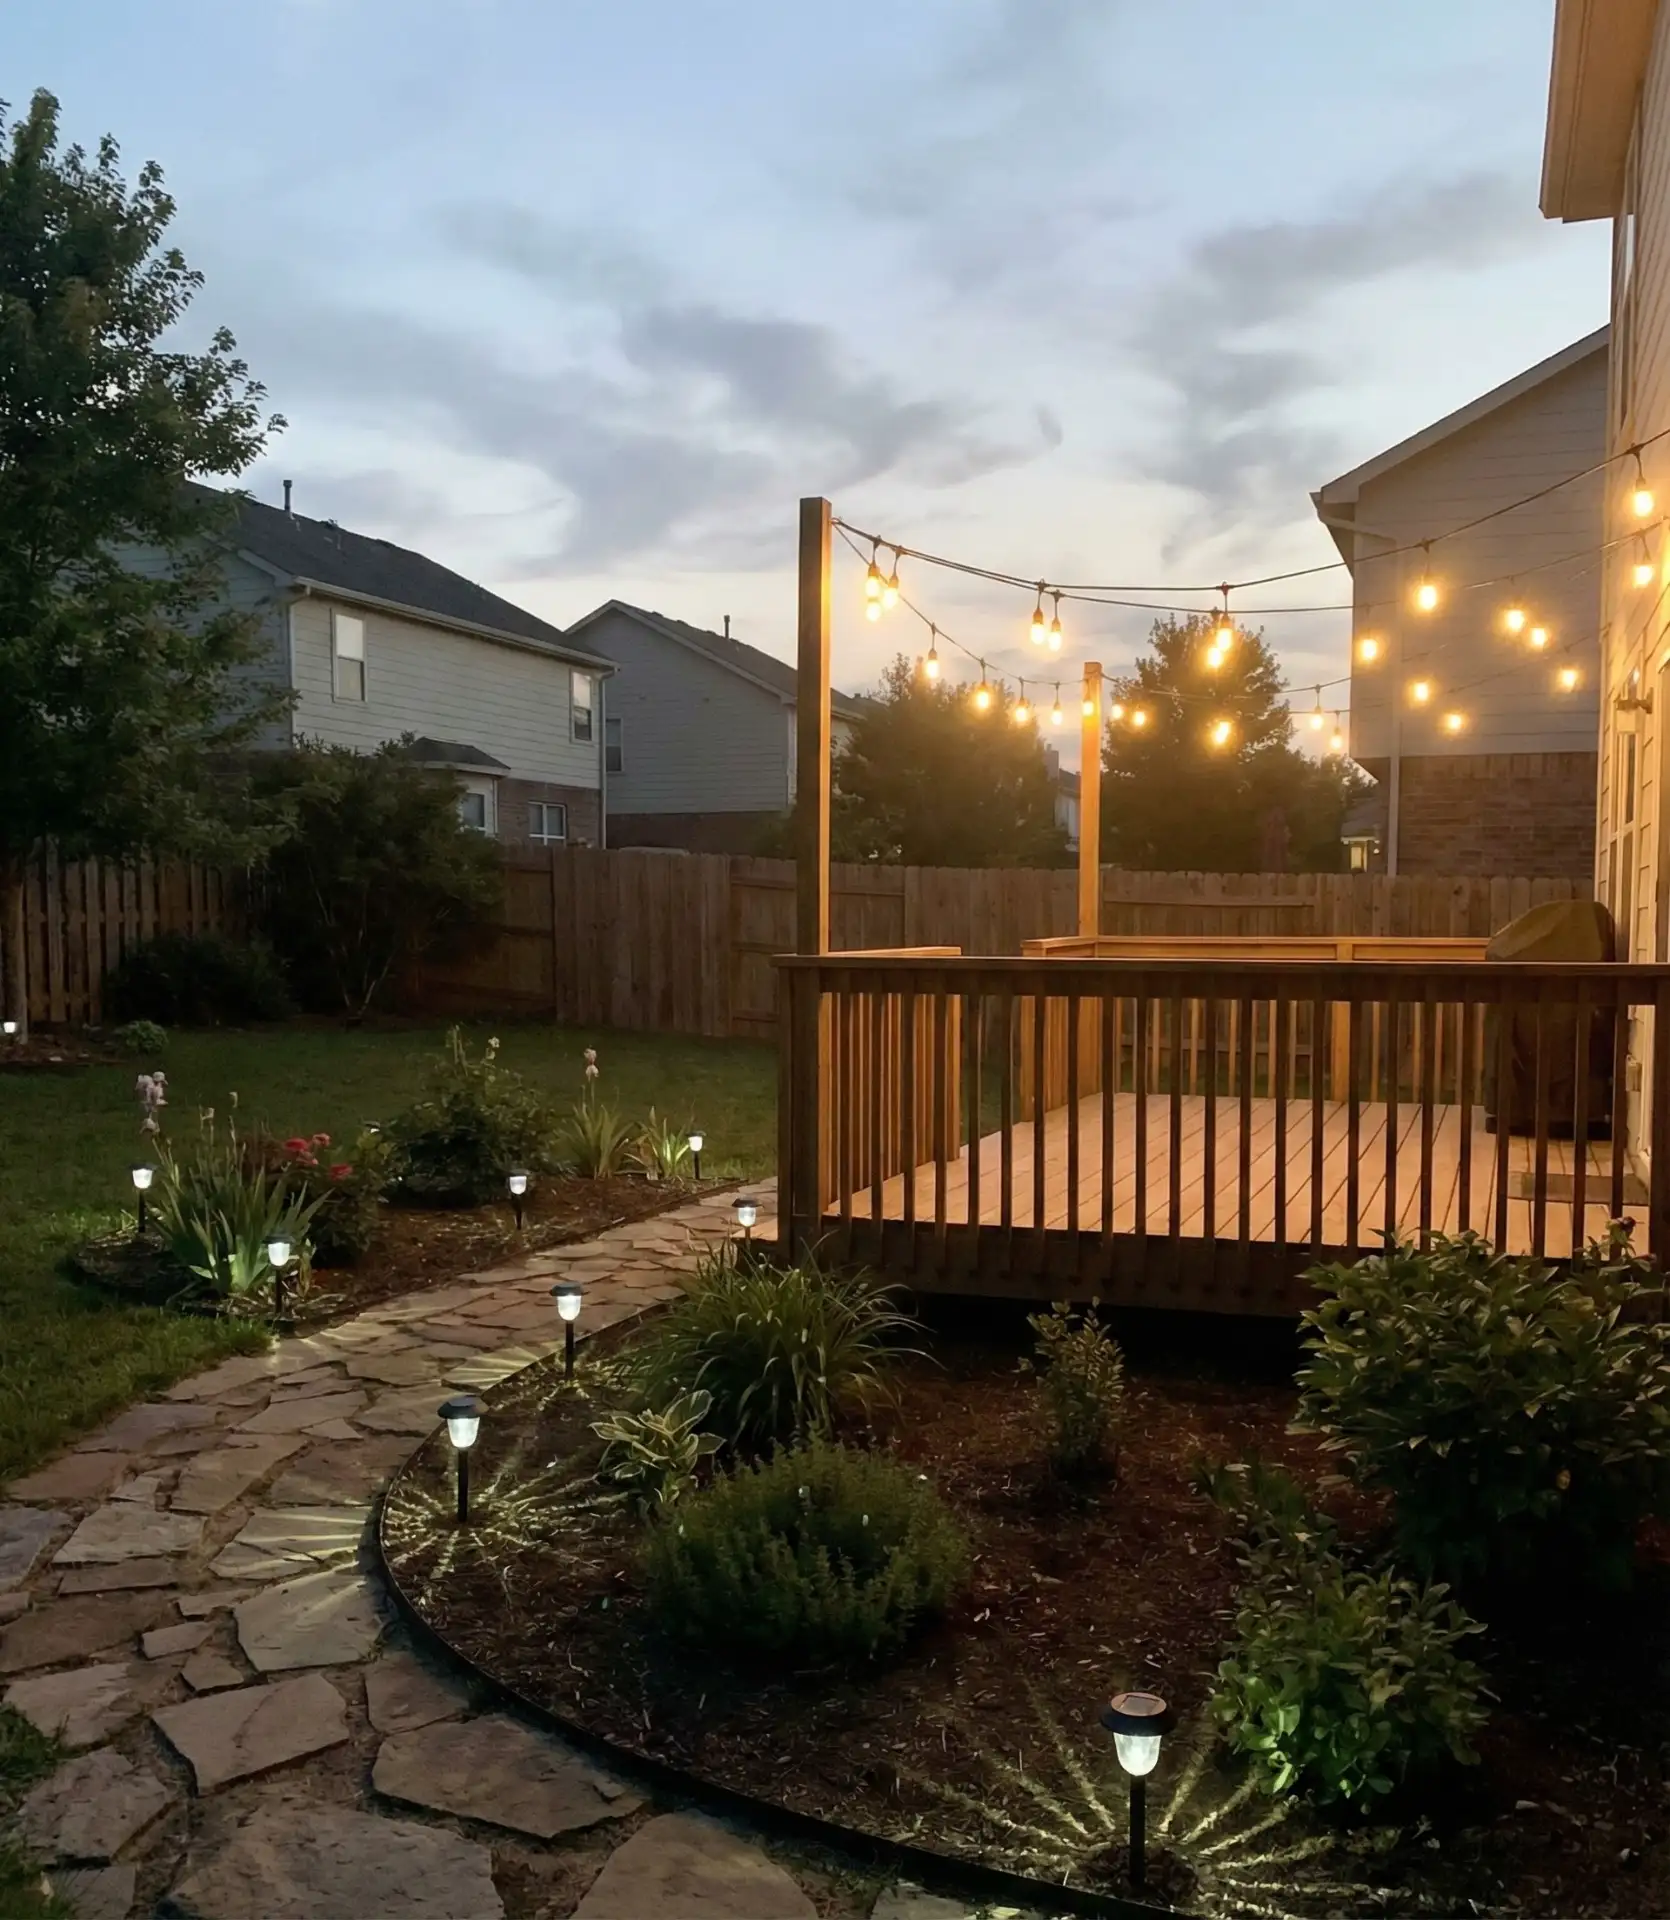
Real homeowner behavior demonstrates that people who install hybrid systems report higher satisfaction than those who commit fully to either option alone. Electric lights provide the reliability you want for primary spaces, while solar offers the flexibility and cost savings for experimental placements. Plan your solar panel locations carefully—they need southern exposure in northern climates and ideally should be adjustable seasonally to track the sun’s changing arc through the sky.
24. Seasonal Color-Changing Display
With the ability to change the colors, smart LED string lights make it easy to change your outdoor lights and make them fit the holidays or seasons or adjust them to your mood. You can create lights that change to any color and then set them to white and keep them year-round. You can change it to warm white for normal use, adjust it to orange for Halloween, or change it to red and green for Christmas or pink for Valentine’s during those times. You can change it to any color for special occasions. This use of technology makes it easy to shift, and it makes storing lights for the seasons unnecessary. 
Avoid this common mistake: Cheap color-changing lights are often color inaccurate and can flicker or lag when responding to app controls. Smart LED lights from big home brands are often more reliable and perform better. You can expect to buy strings that cost at least $150 if the quality is acceptable, and good-quality LED lights will last you longer. Integration can be done with homes’ smart assistants if you have them: Google, Apple, or Alexa. These smart LED strings can be set to turn on and off automatically. You are then able to use voice commands if your smart assistant is turned on. Voice commands trigger effortless use.
These solutions demonstrate that outdoor string lighting can be customized to suit individual circumstances, personal taste, budget, and lifestyle. From rustic shepherd’s hooks to high-end, color-changing smart technology, the goal is the same: to enhance outdoor environments, making them warm and welcoming after the sun goes down. What lighting solutions do you envision for your backyard? Tell us your favorite mixes and matches or your creative outdoor string lighting ideas in the comments!