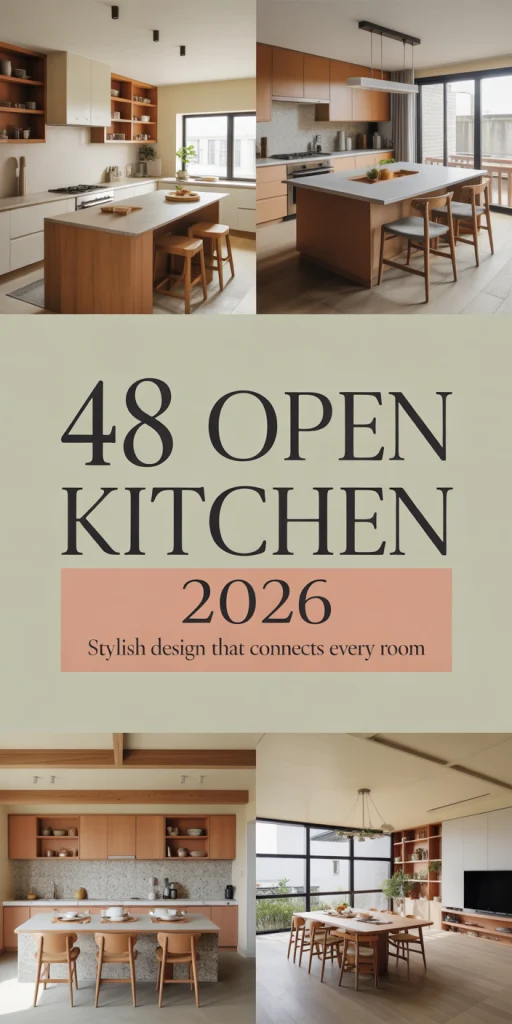
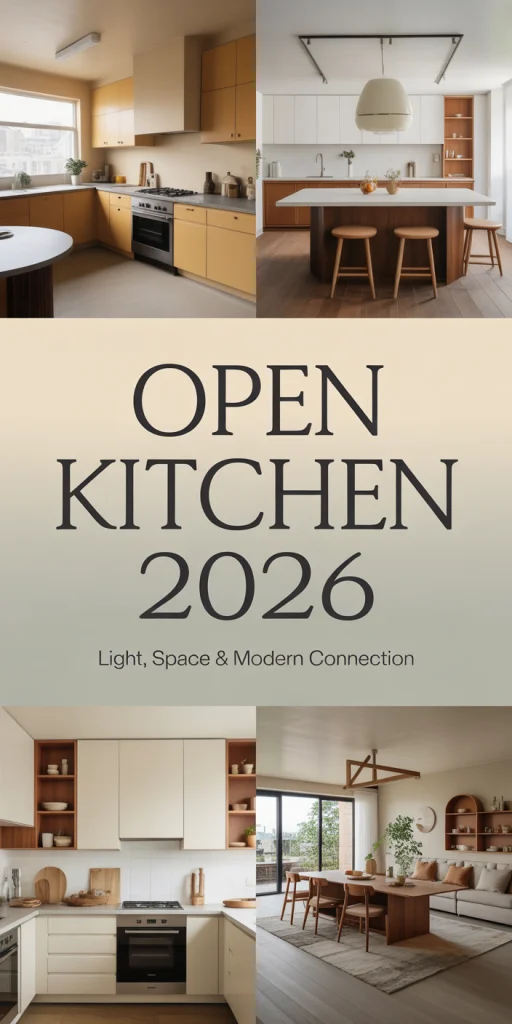
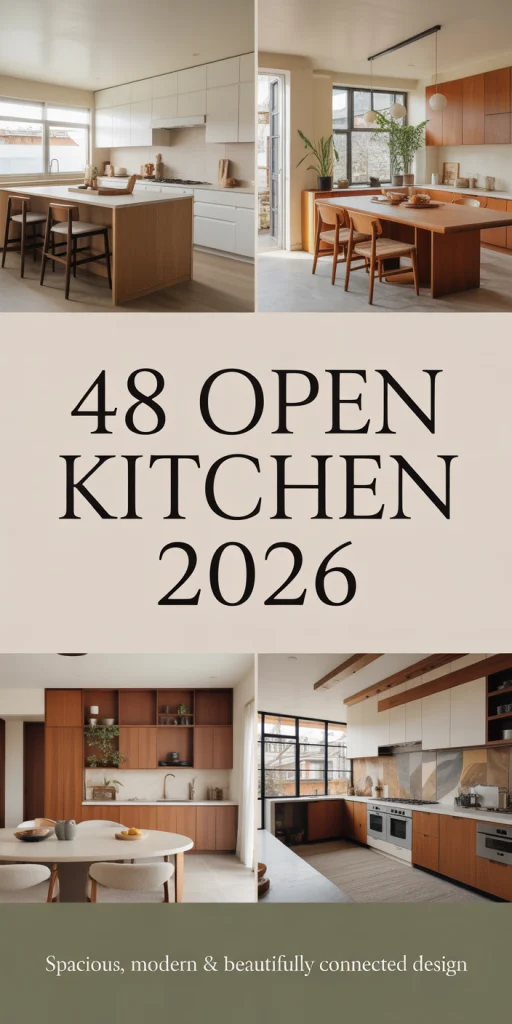
Open kitchens continue to dominate American home design in 2026, and Pinterest searches reflect this obsession with spacious, connected living. Whether you’re planning a full renovation or simply reimagining your current space, the latest open kitchen trends blend functionality with stunning visual appeal. From living room integration to clever partition ideas, this guide showcases inspiring approaches that real homeowners are embracing right now. You’ll discover practical layouts, smart storage solutions, and design strategies that work for every budget and square footage.
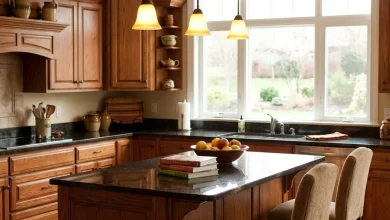
1. Floating Island as Room Divider
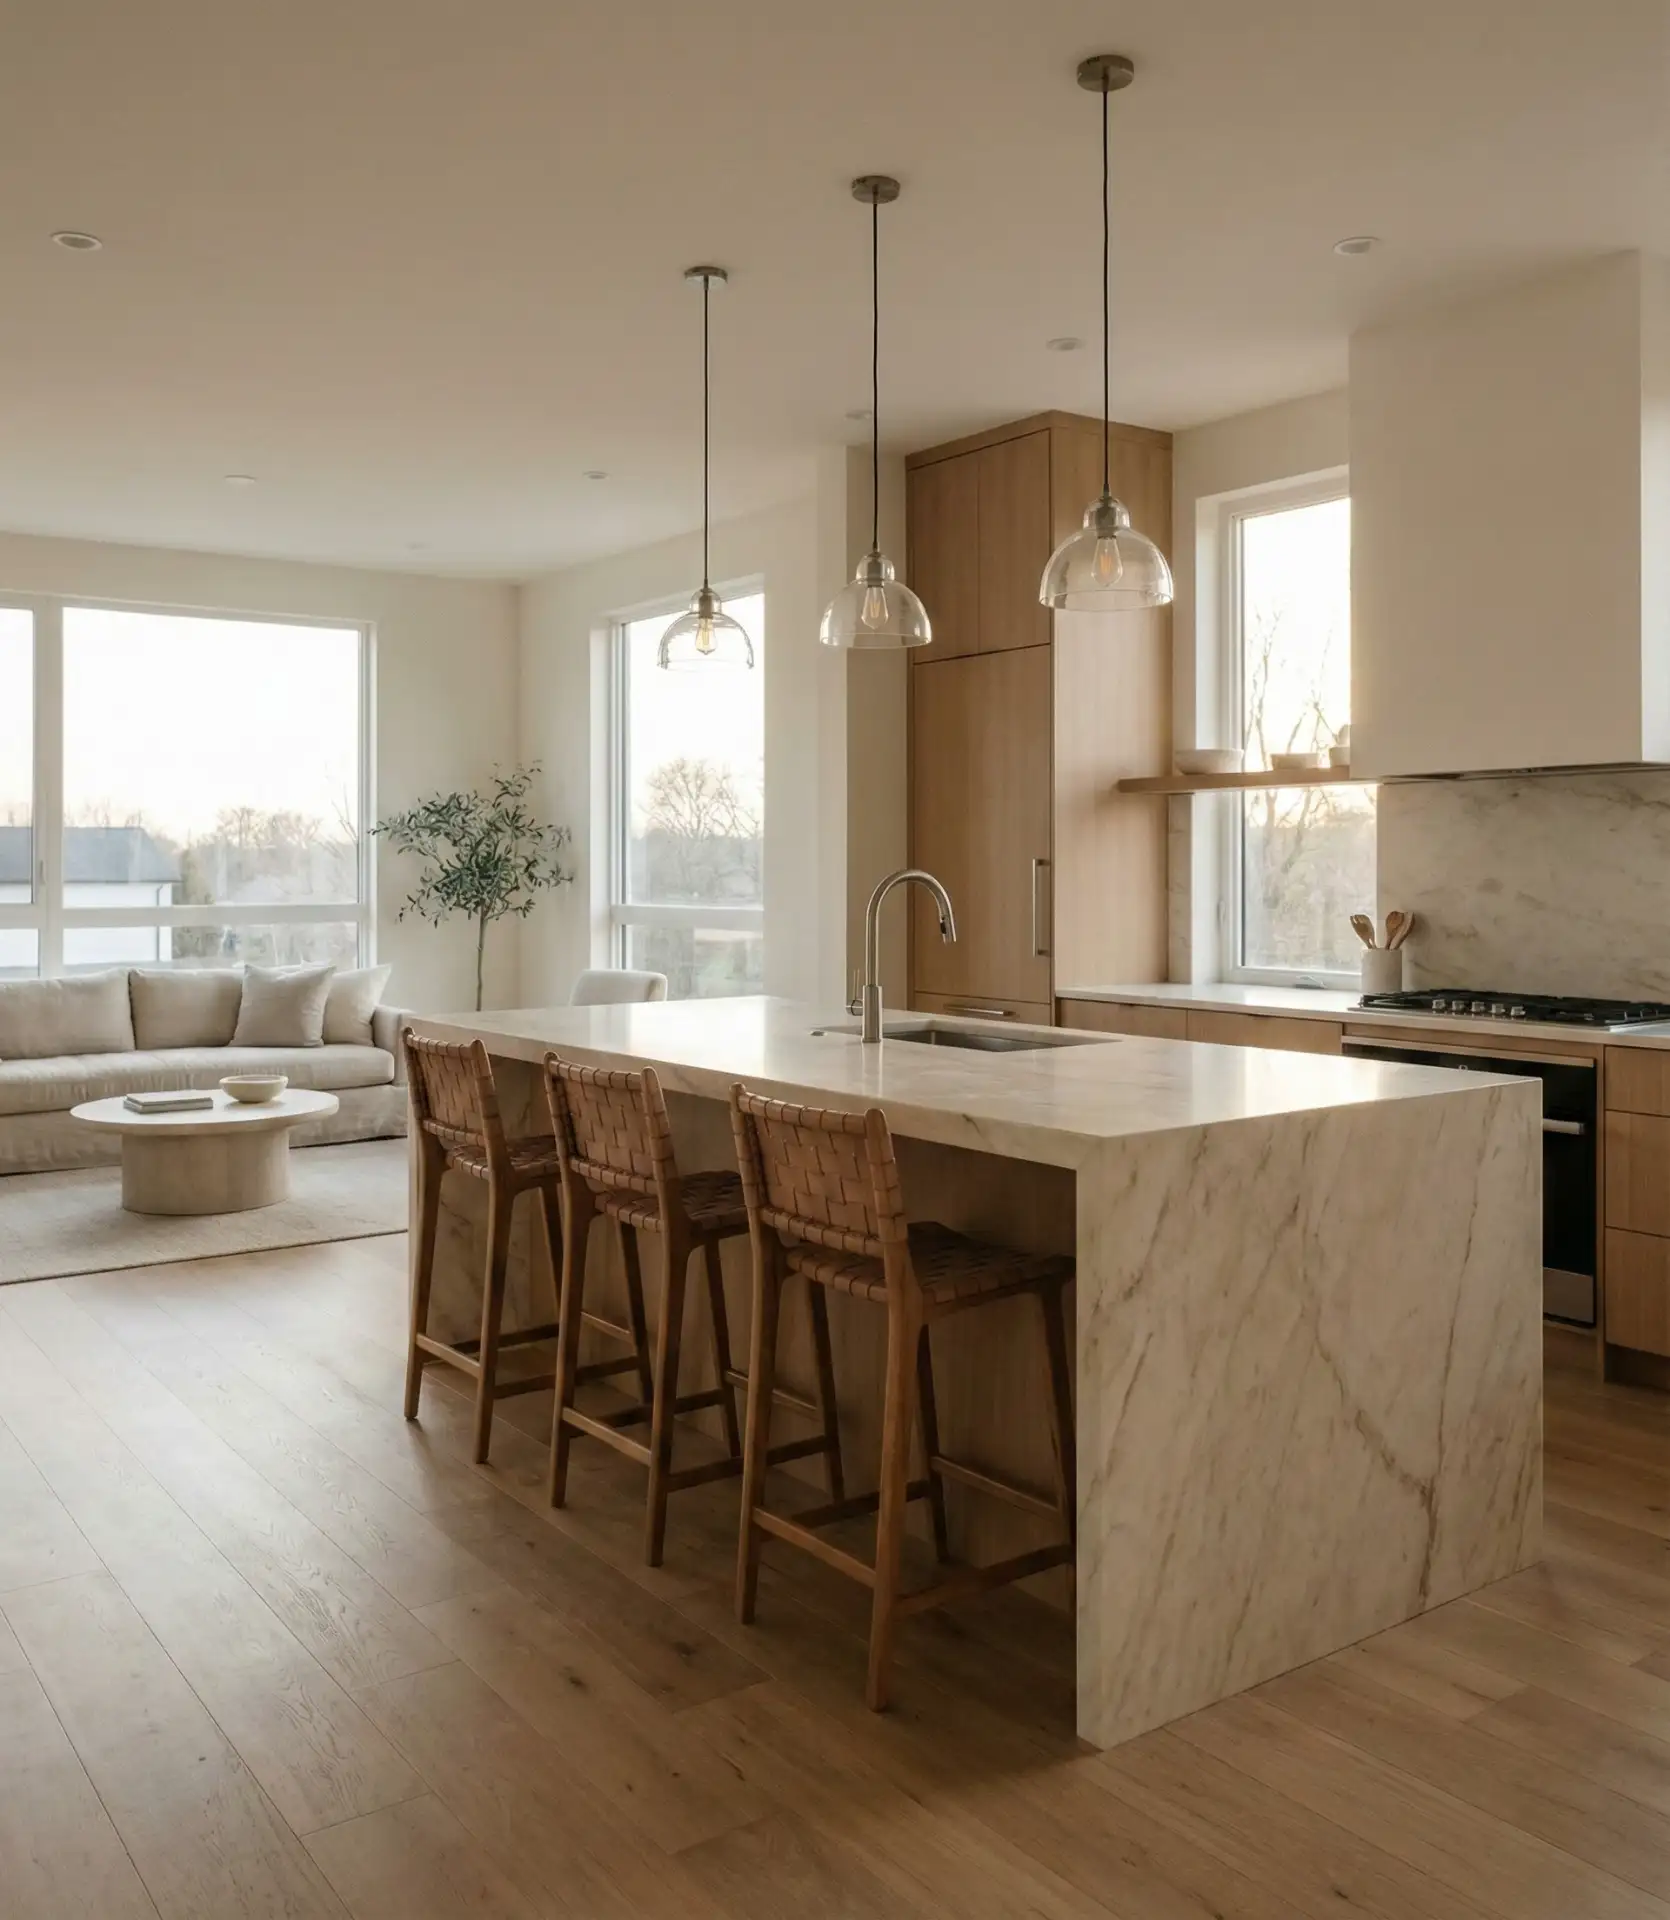
A freestanding island serves as the perfect partition between your cooking zone and living room, creating visual separation without blocking sightlines. This design works brilliantly in loft-style apartments or open-plan homes where you want distinct zones but can’t sacrifice natural light flow. The island becomes your prep station, breakfast bar, and social hub—all while maintaining that airy, connected feeling Americans love in modern homes. 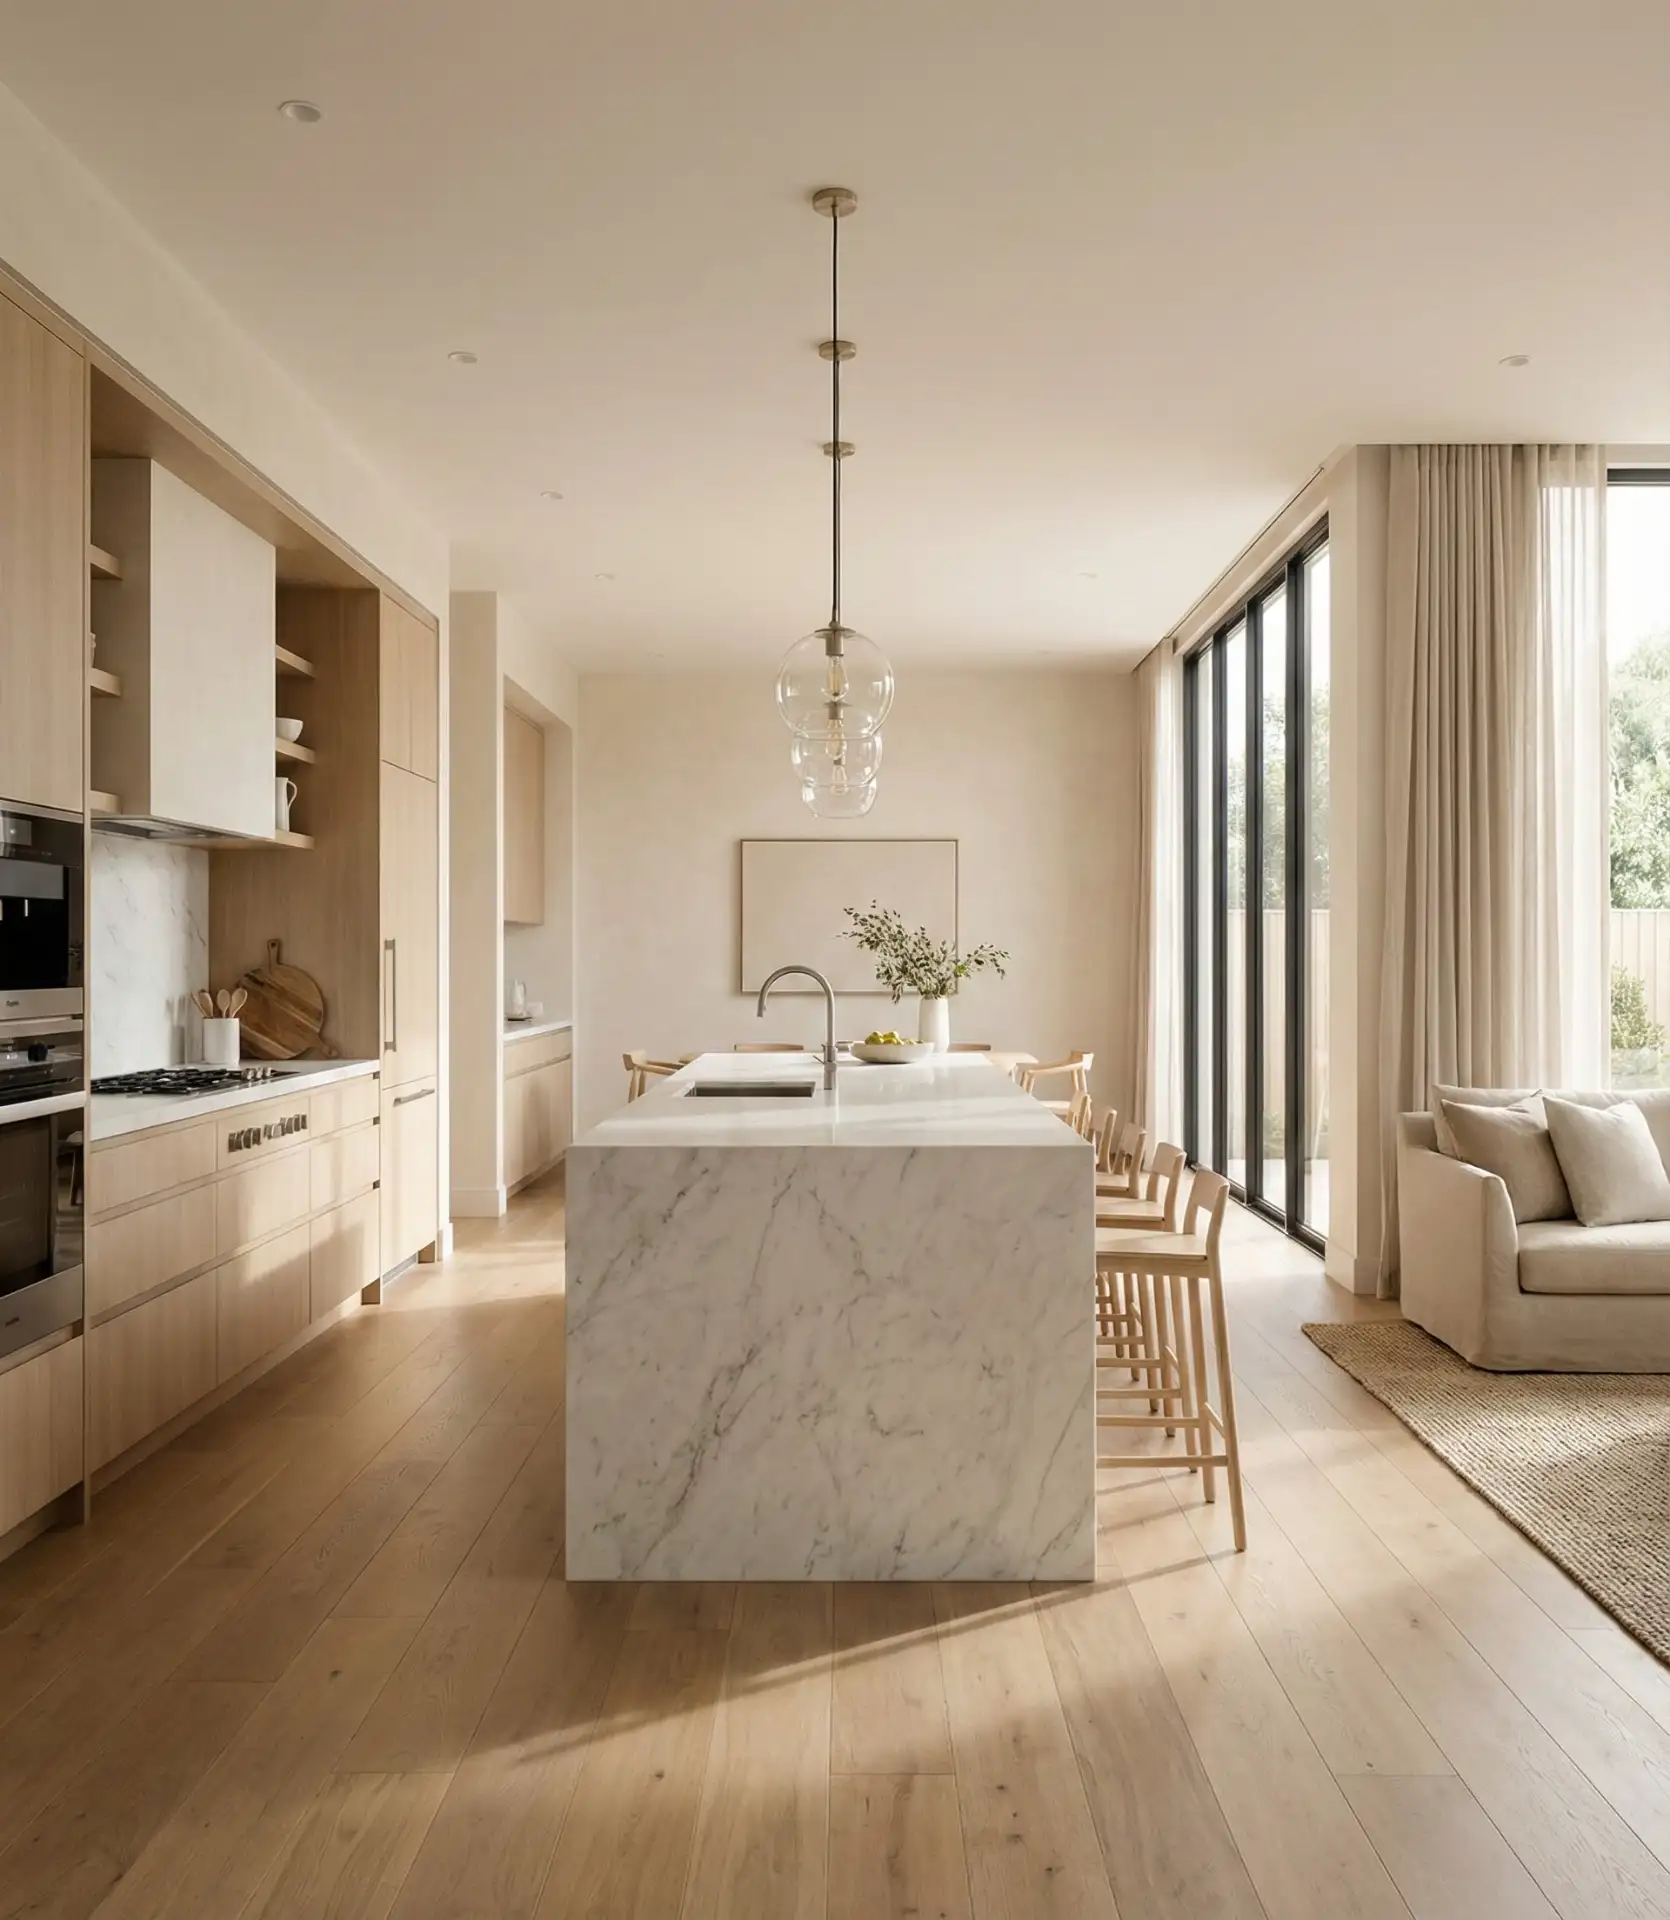
In Midwestern homes where family gatherings center around food, this layout lets the cook remain part of conversations happening in the adjacent living area. The island typically measures 7-9 feet long to accommodate seating on one side while providing ample workspace on the kitchen-facing side. Installing electrical outlets on the island’s sides adds functionality for small appliances without cluttering your countertops.
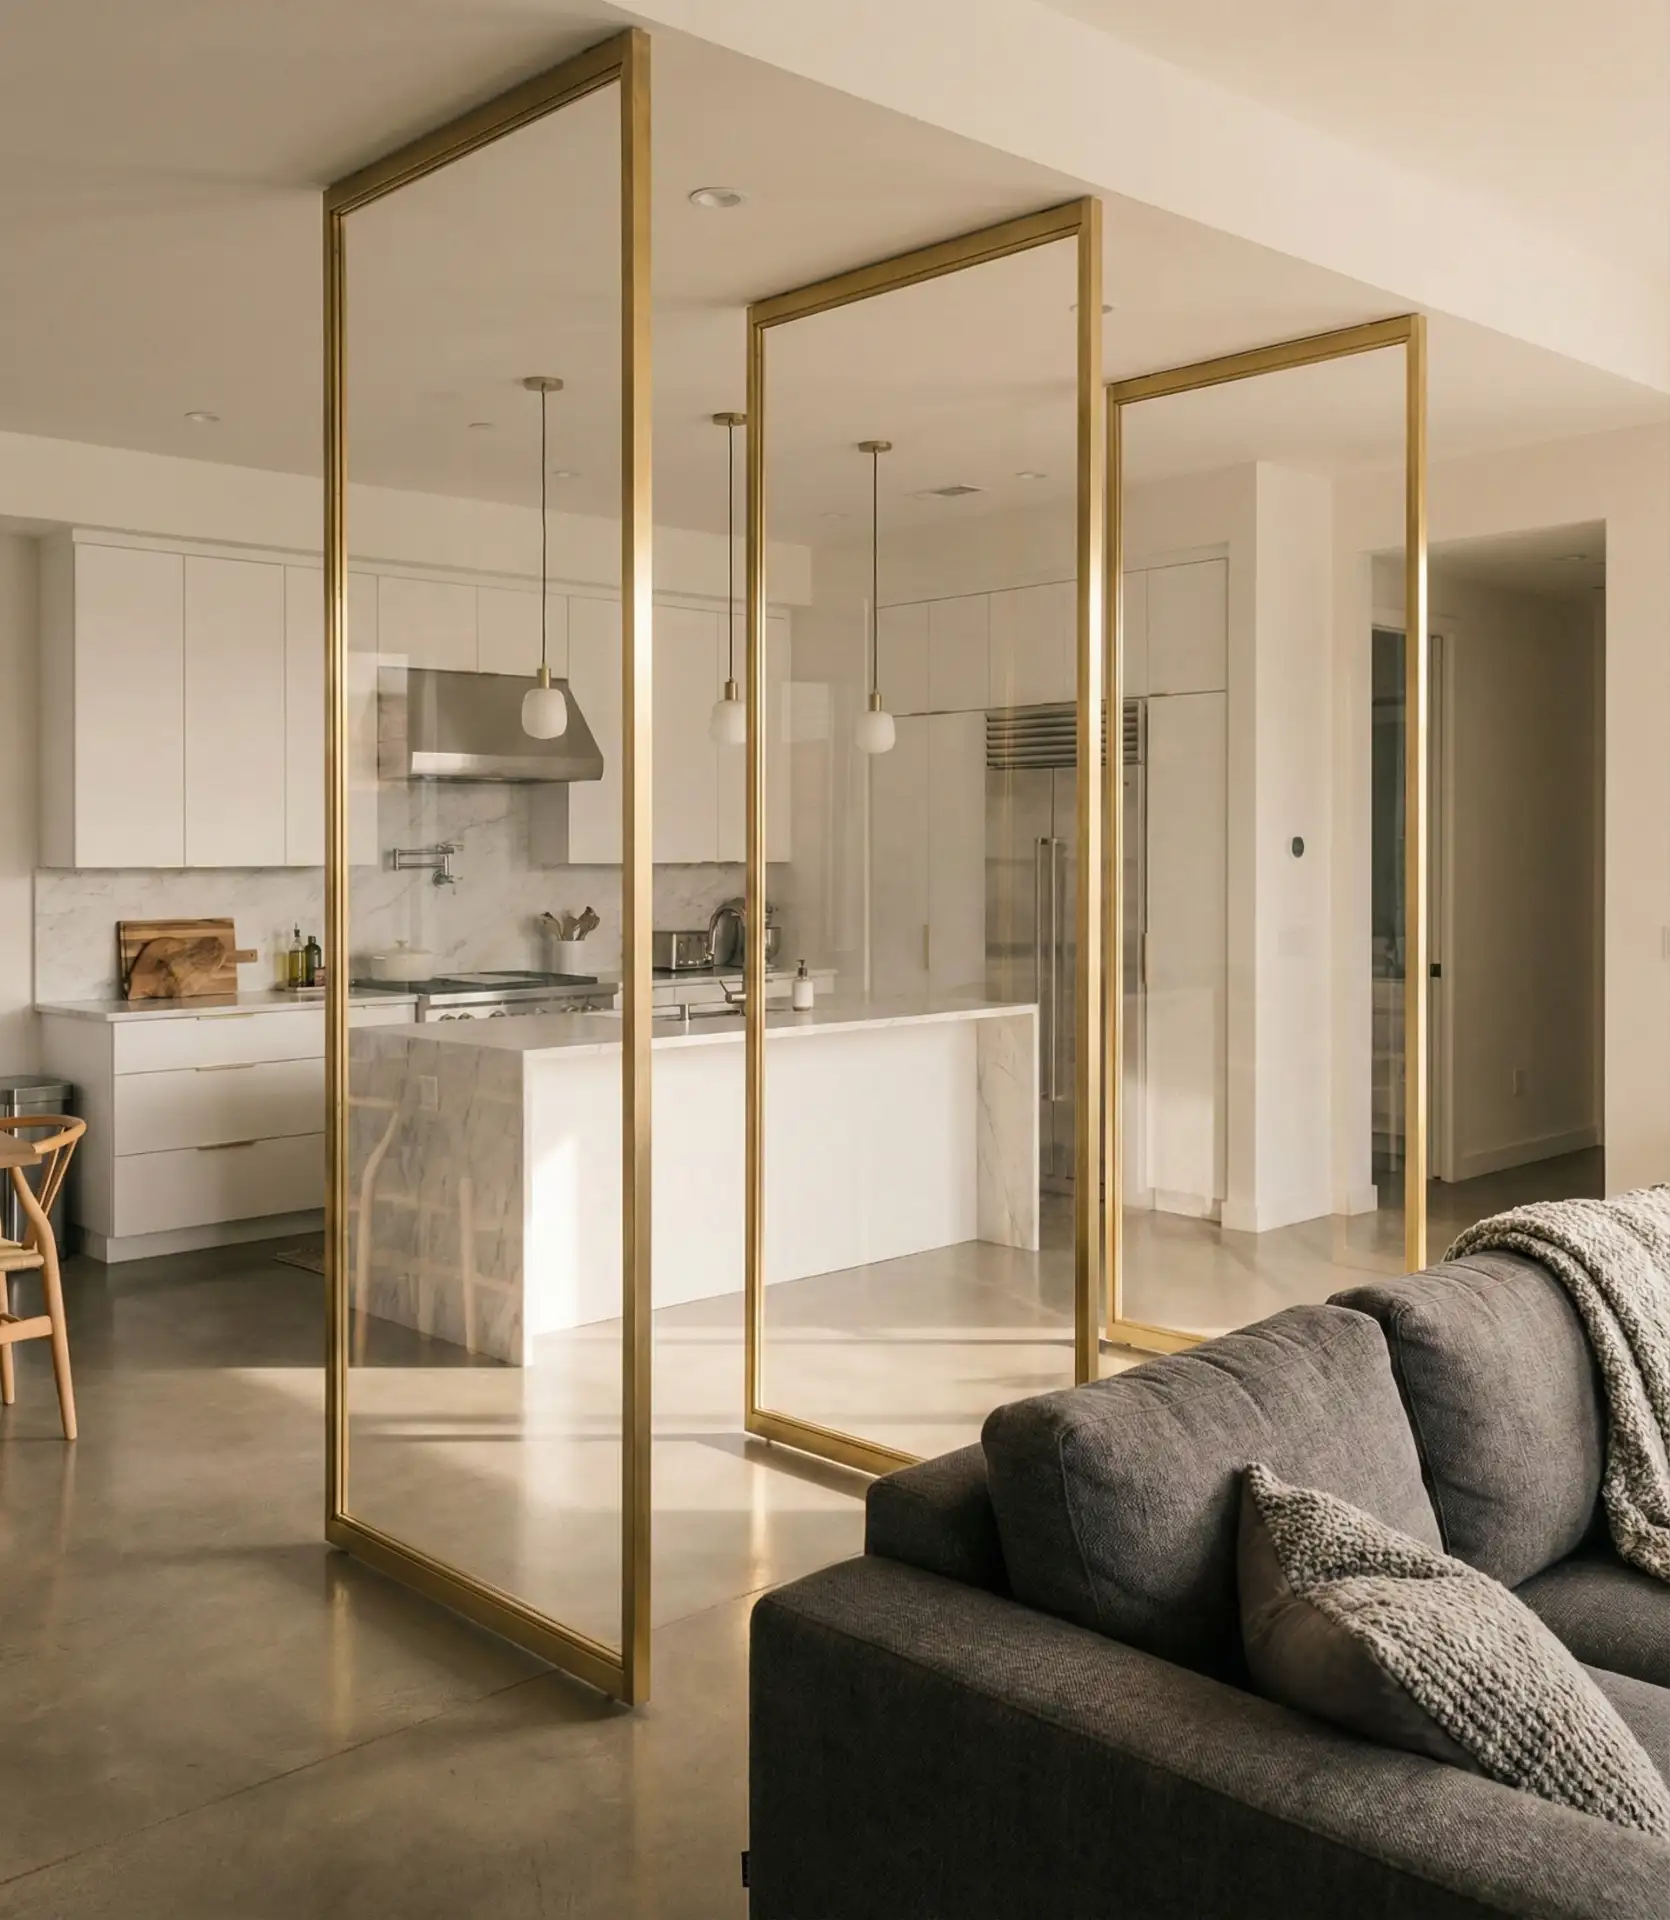
2. Glass Partition for Semi-Open Flexibility
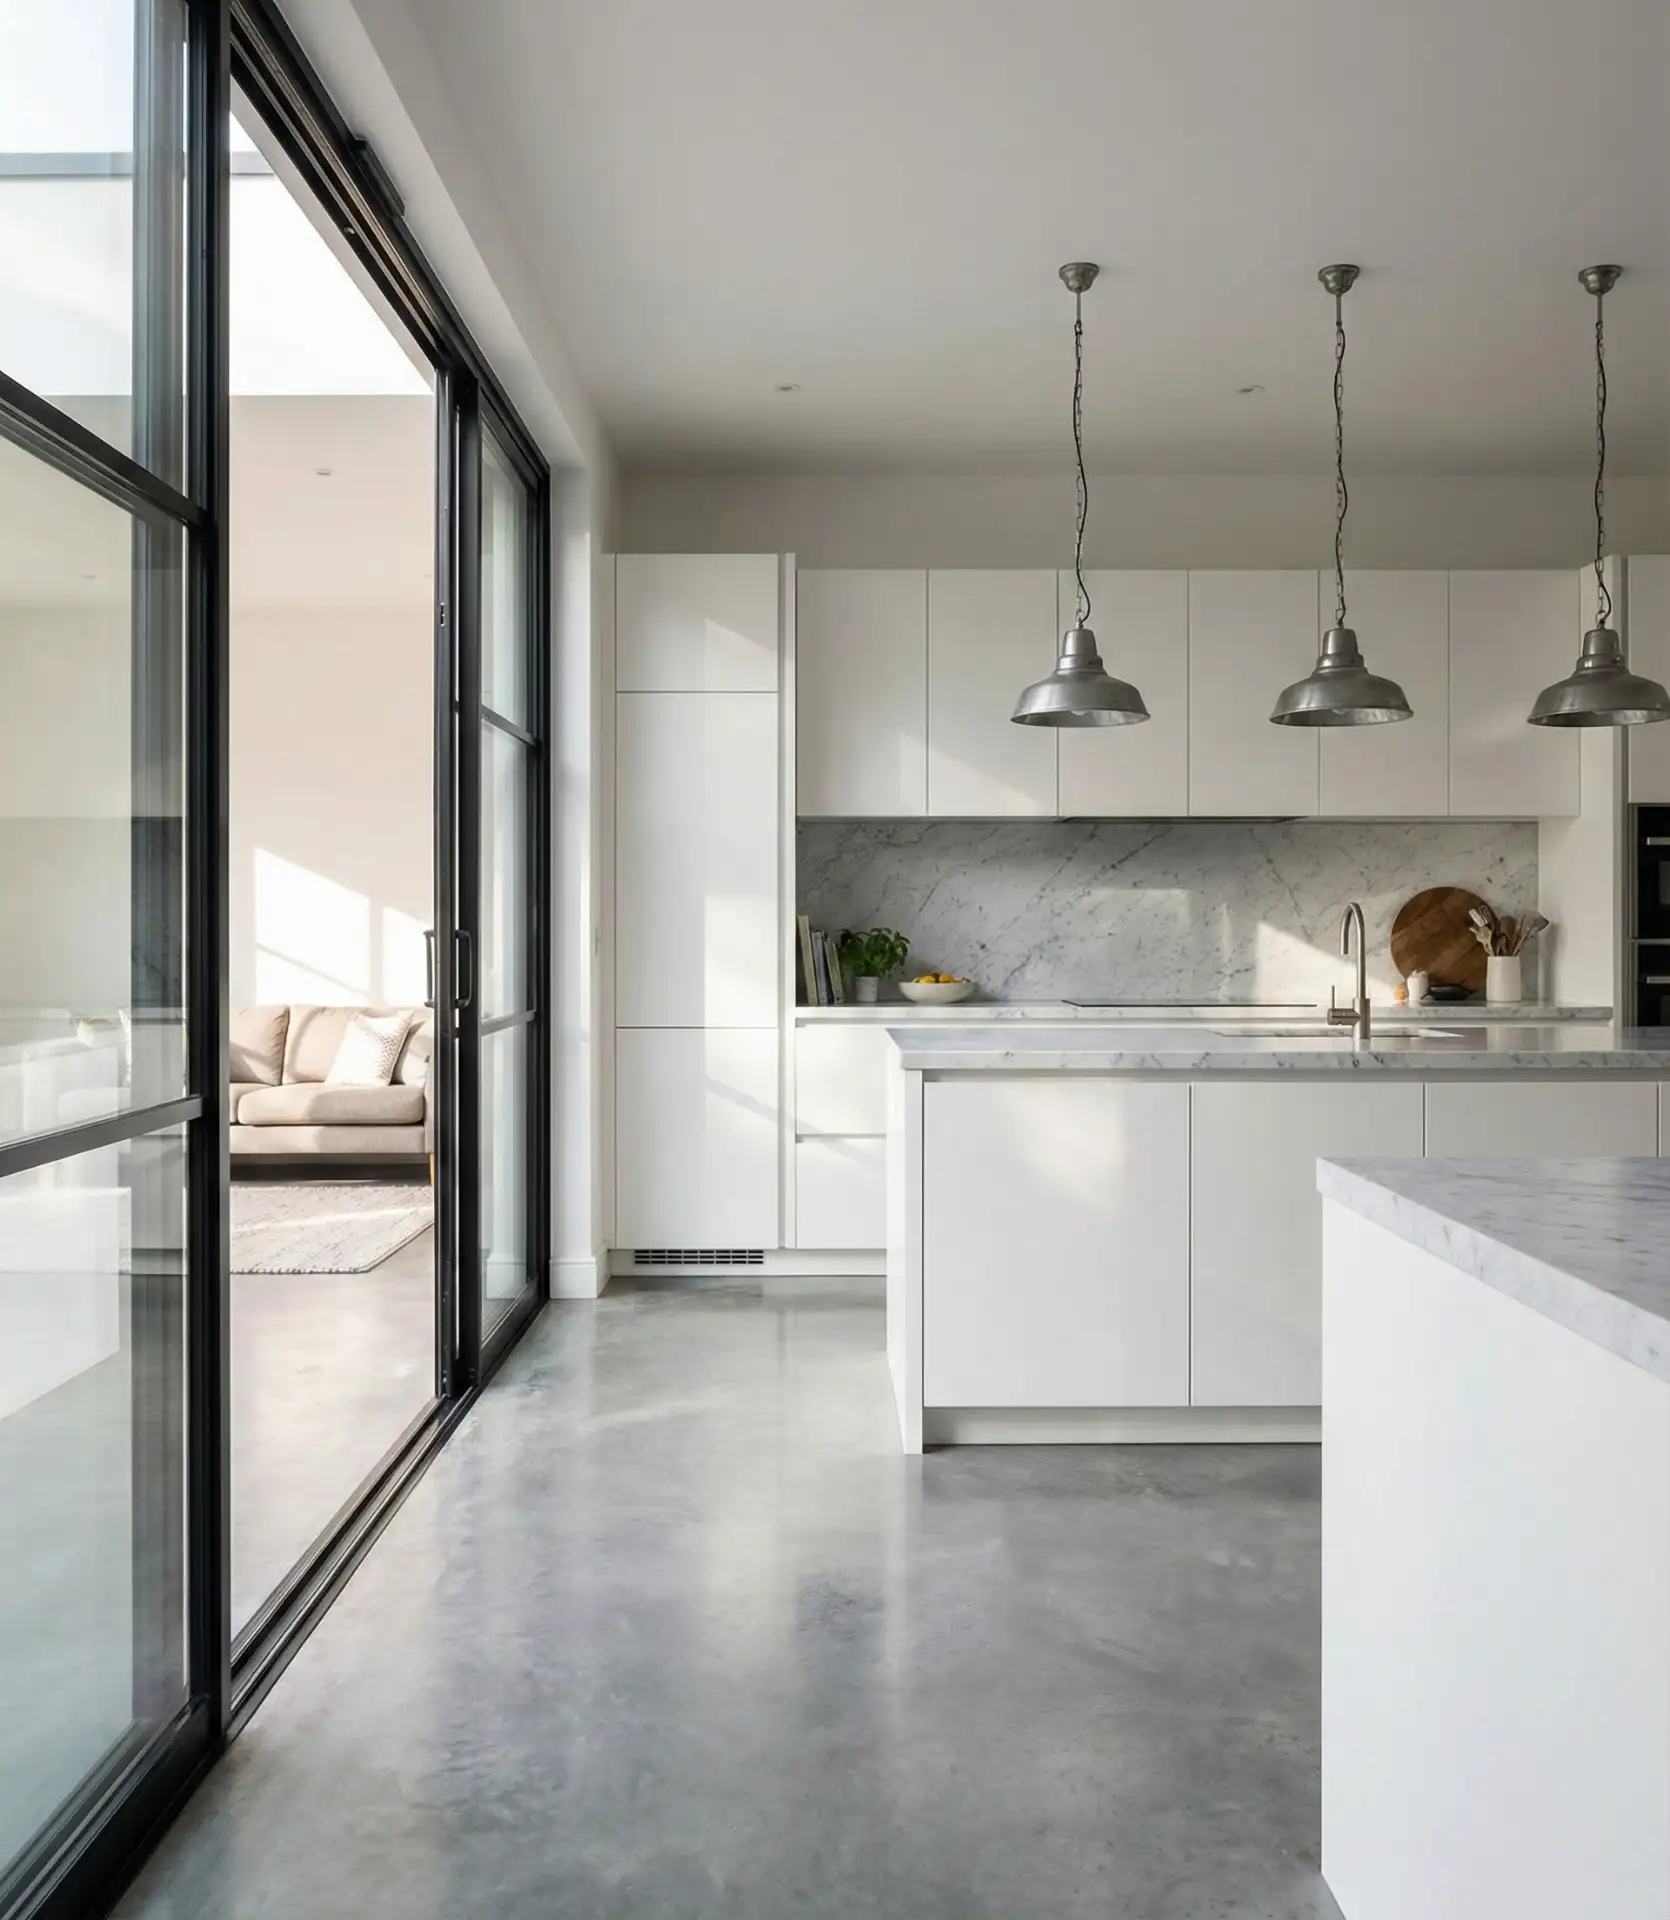
When you need the option to contain cooking smells or noise, a sliding glass wall creates a semi-open kitchen that adapts to your needs. This concept particularly appeals to urban dwellers who entertain frequently but also work from home and need acoustic control. The transparency maintains visual connection, while the retractable feature gives you complete flexibility—slide it closed during messy meal prep and open it wide for dinner parties. 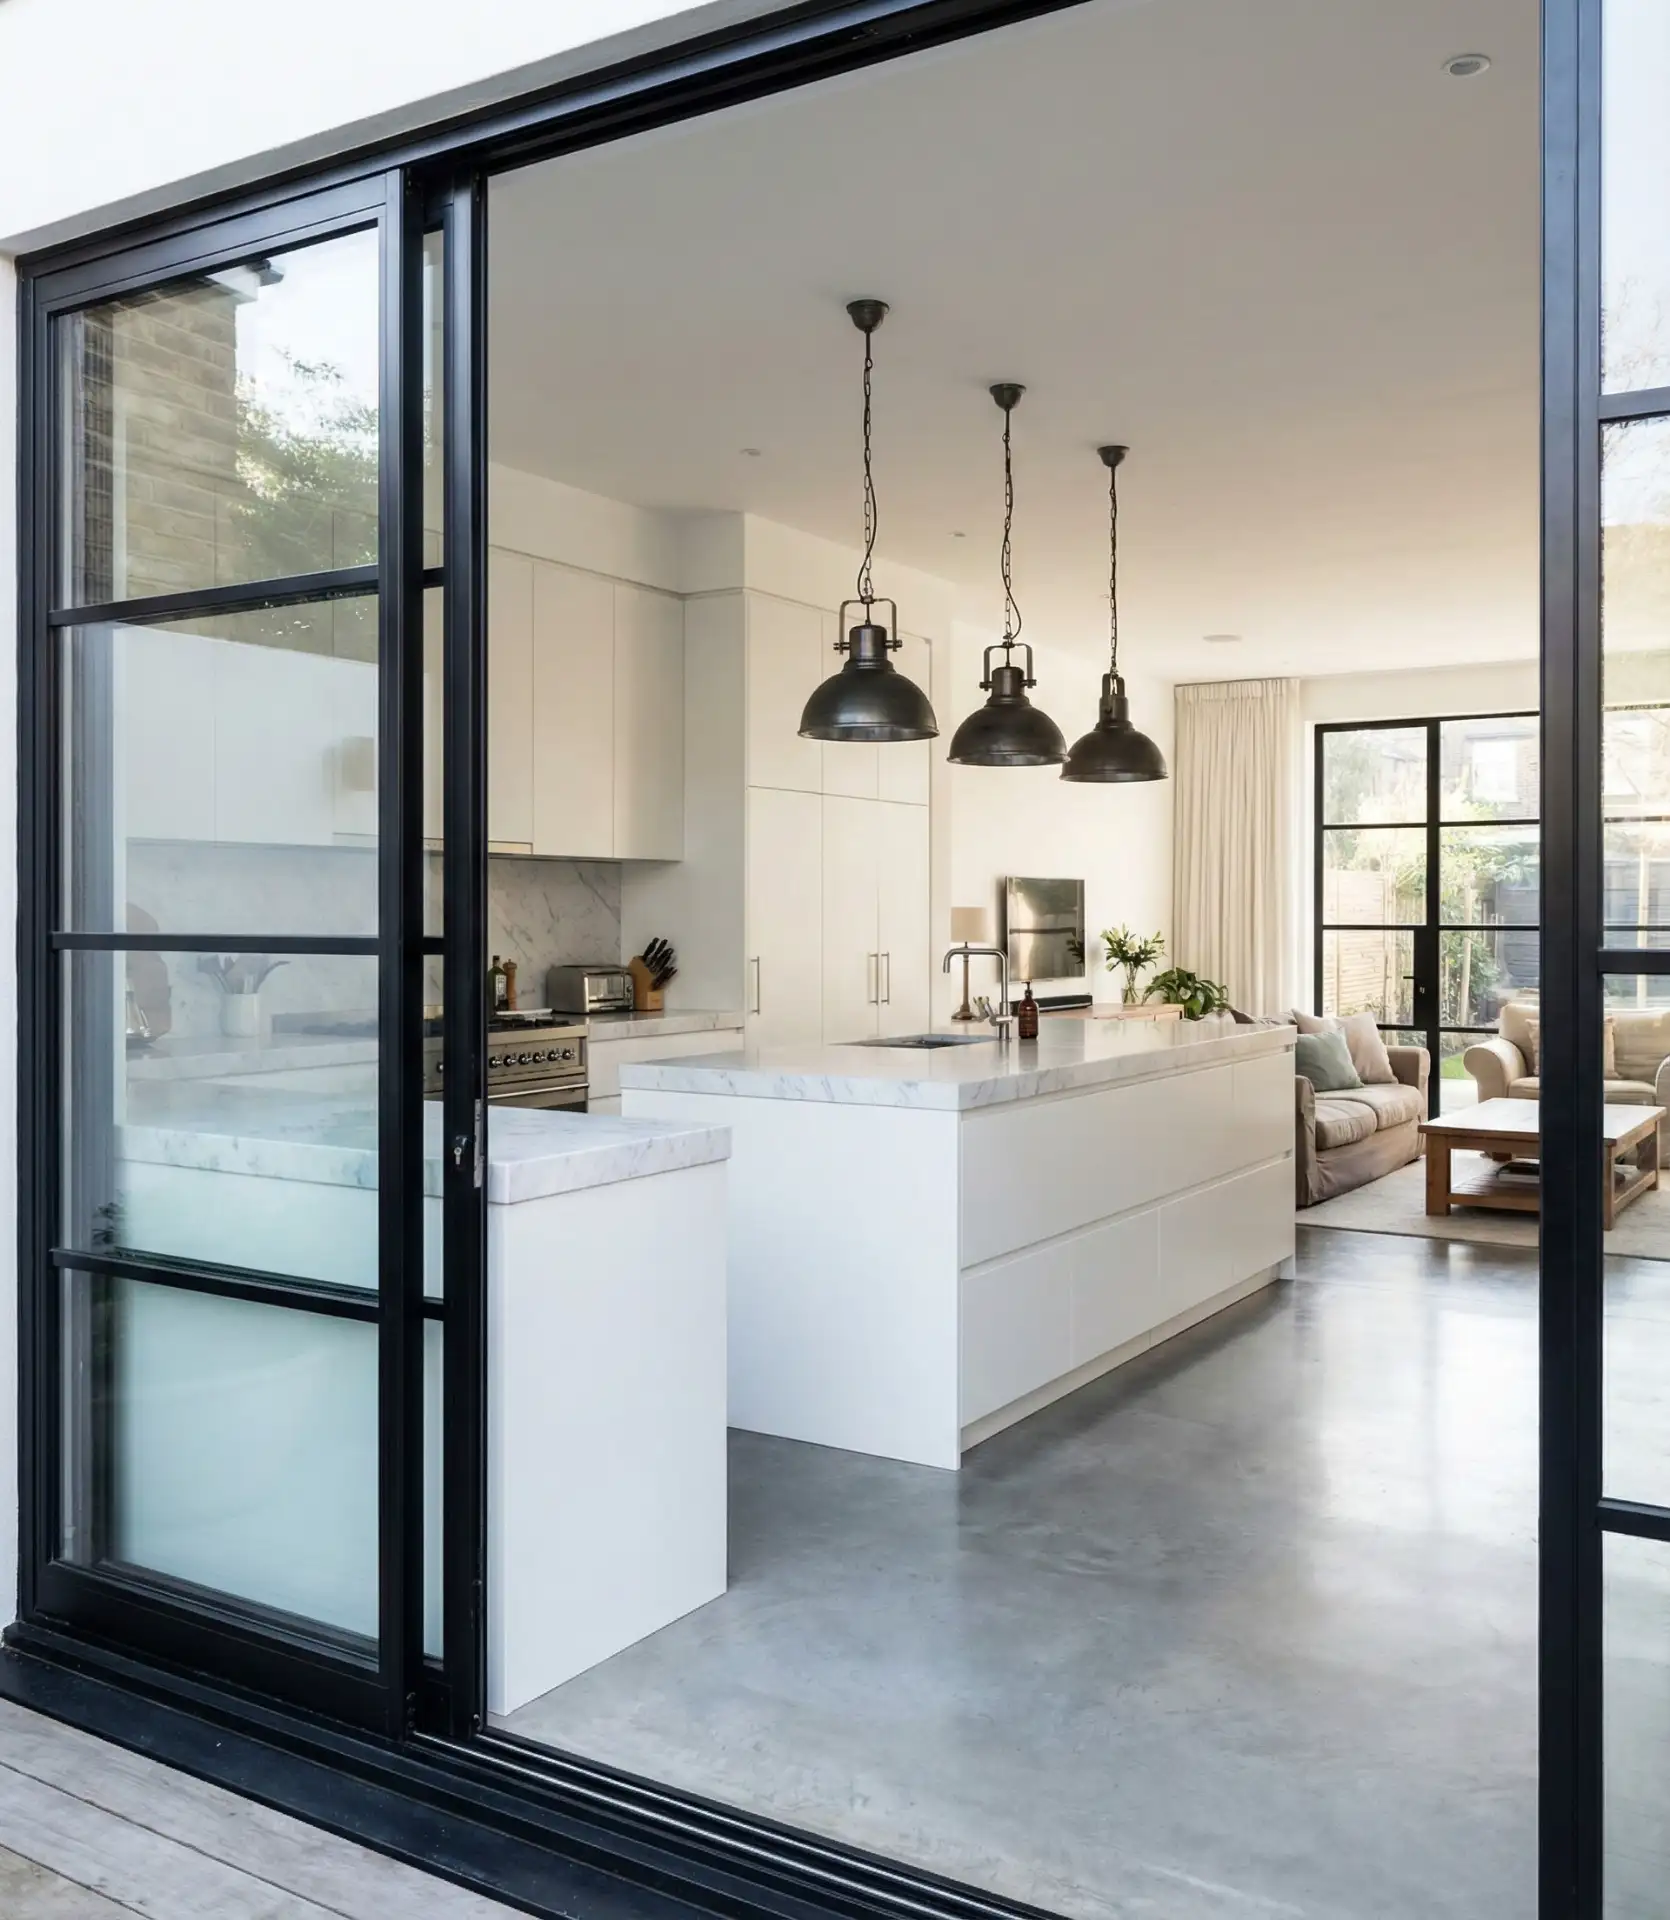
A common mistake is choosing frameless glass that shows every fingerprint and requires constant cleaning. Instead, opt for lightly frosted or fluted glass panels with sleek black or bronze frames—they hide smudges while adding architectural interest. Prices for quality sliding glass partition systems range from $2,500 to $6,000 installed, making this a mid-range investment that significantly boosts home value.
3. Restaurant-Style Pass-Through Counter
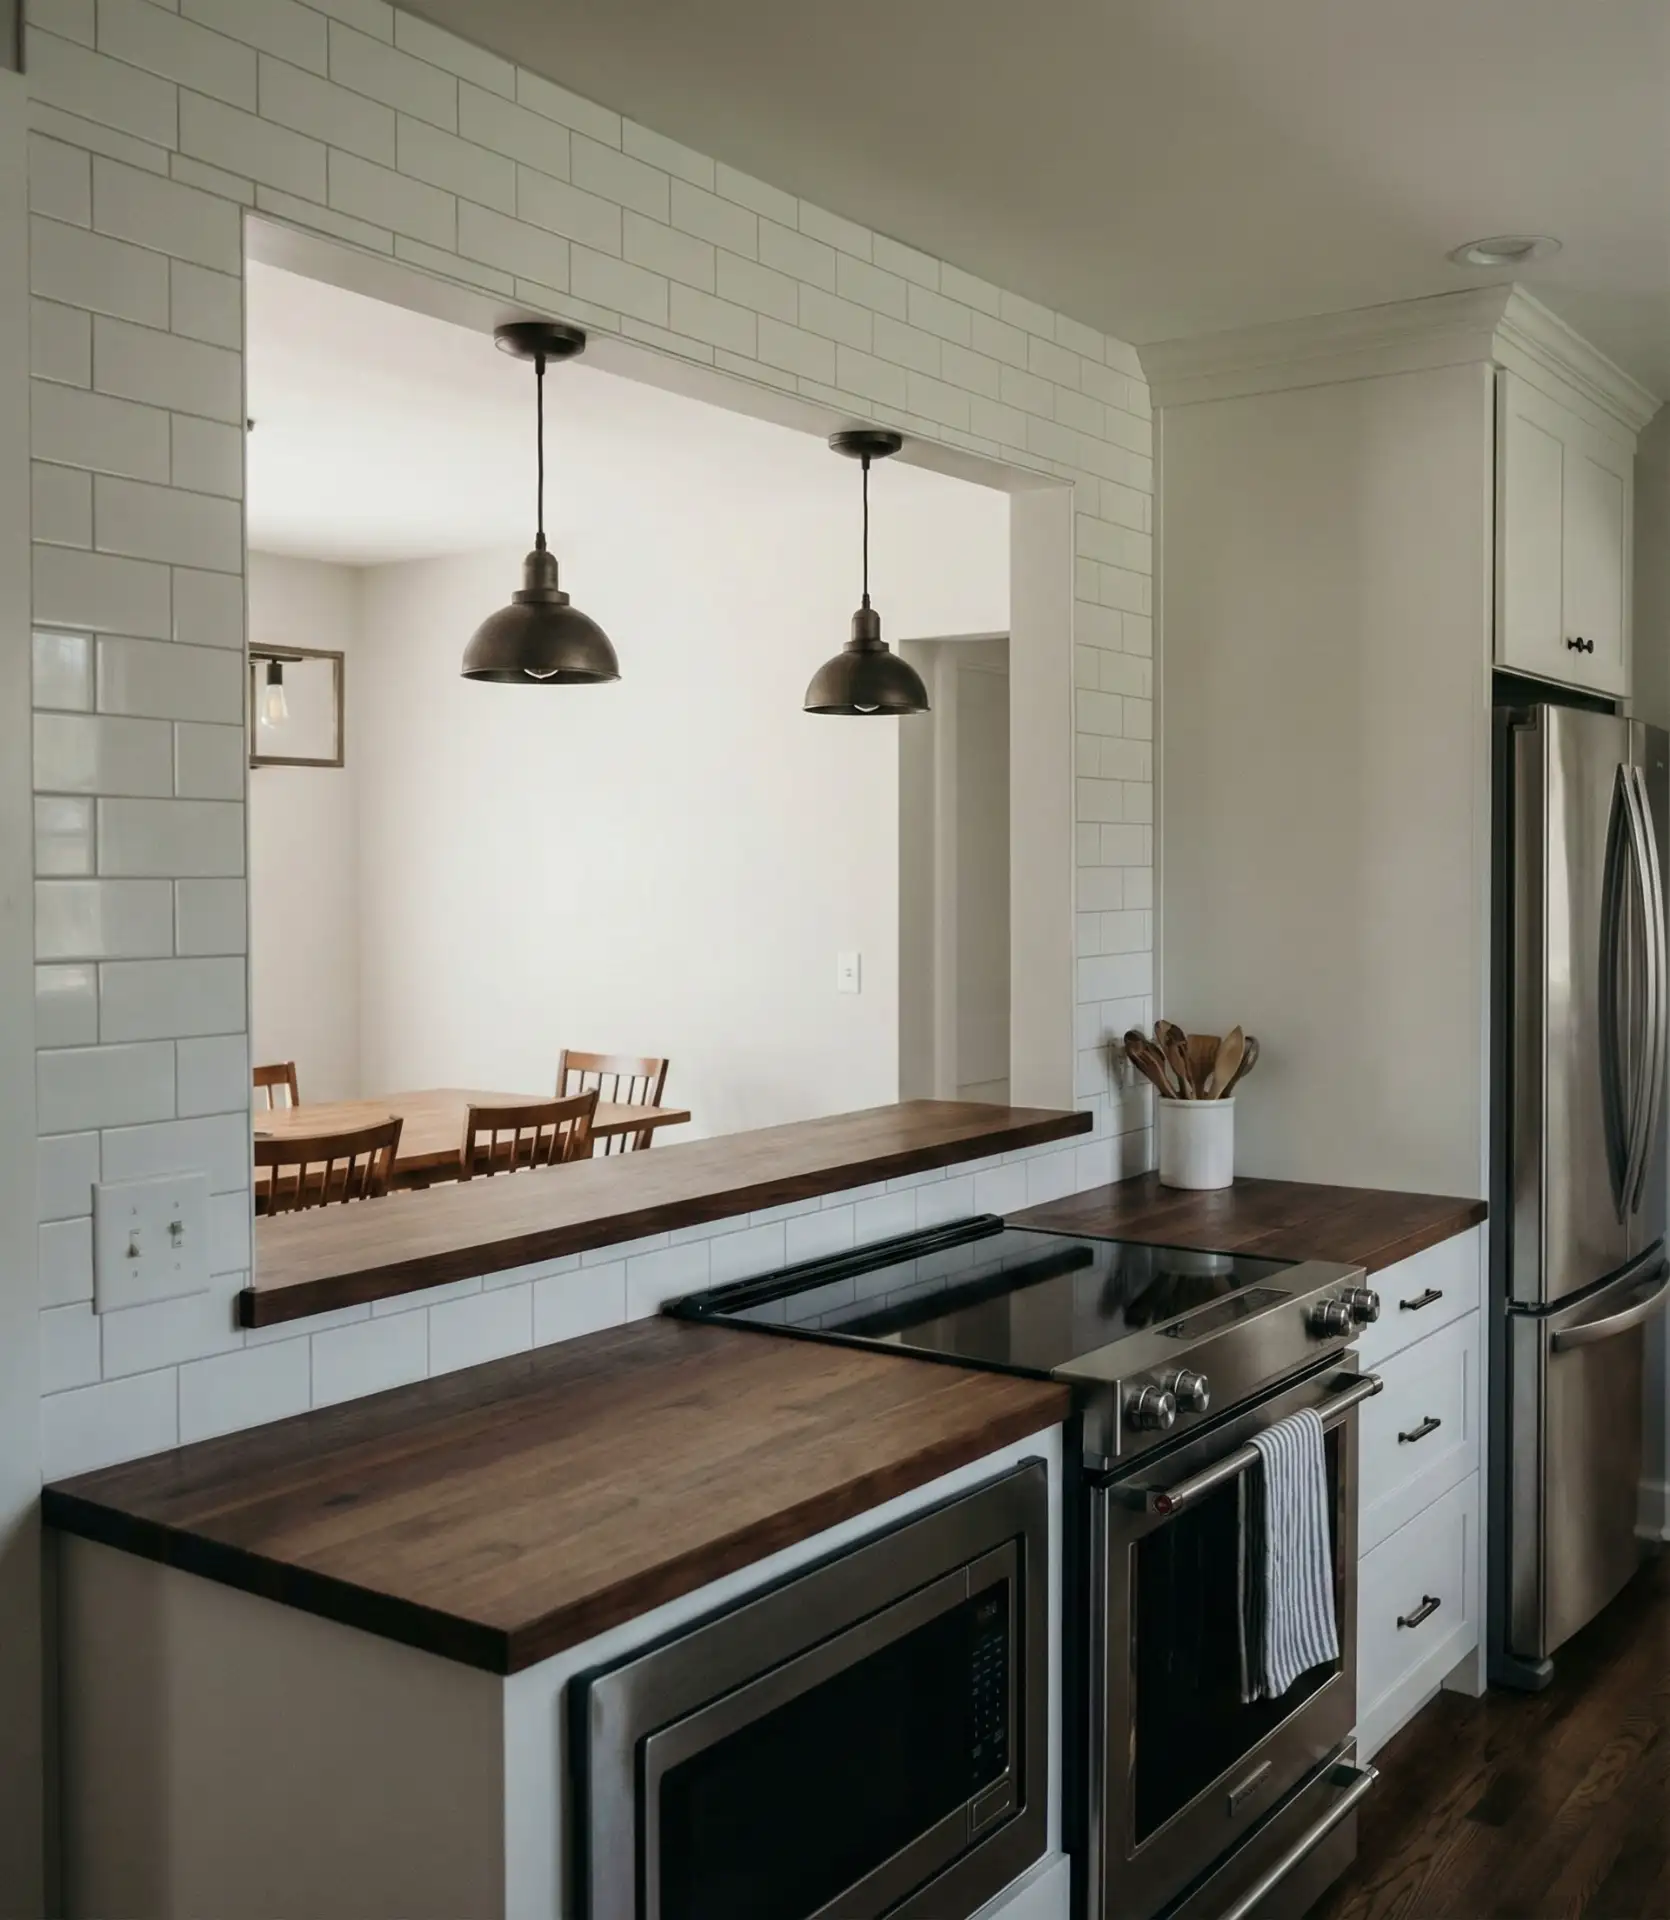
Borrowing from restaurant design, a raised pass-through counter creates an efficient serving station while maintaining separation between the working kitchen and dining area. This layout suits homeowners who love hosting but want to keep guests out of the cooking zone. The elevated counter—typically 42 inches high—provides a natural barrier that encourages interaction without inviting kitchen chaos into your entertaining space. 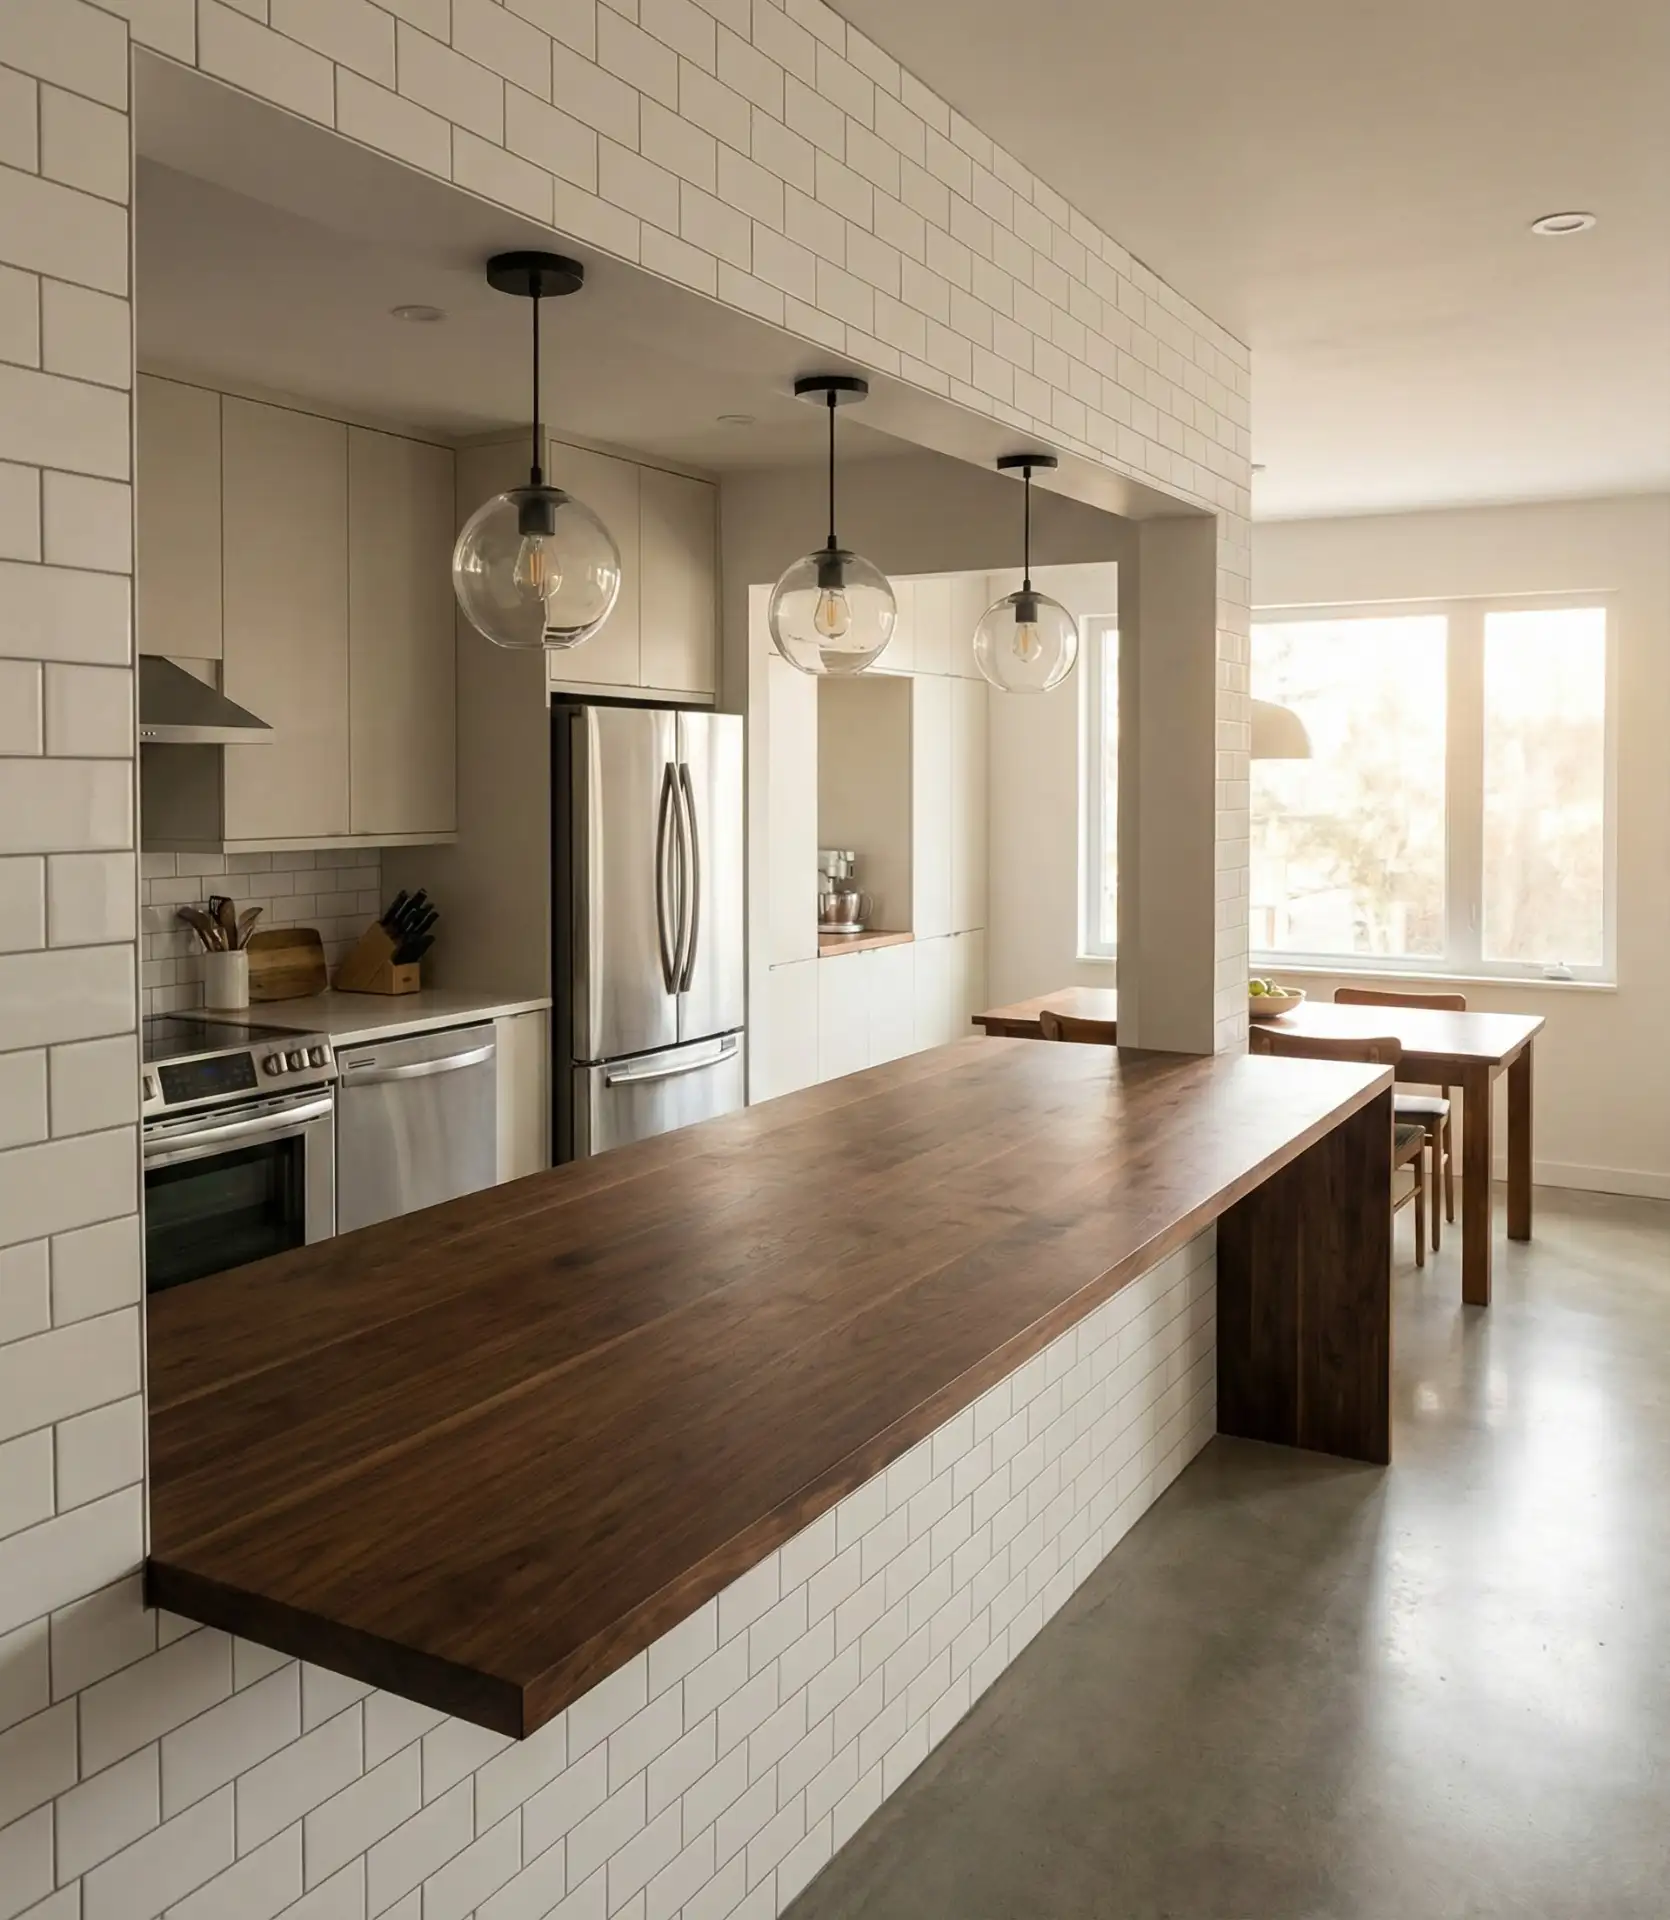
This setup works best in galley or U-shaped kitchens where one wall can be partially opened. Install shallow shelving on the dining room side of the pass-through to store serving dishes or display decorative items. My neighbor converted their 1970s closed kitchen this way last year, removing the top half of one wall—it completely transformed their entertaining flow without requiring a full gut renovation.
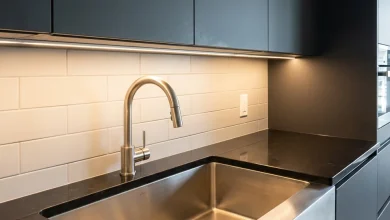
4. Open Shelving Instead of Upper Cabinets
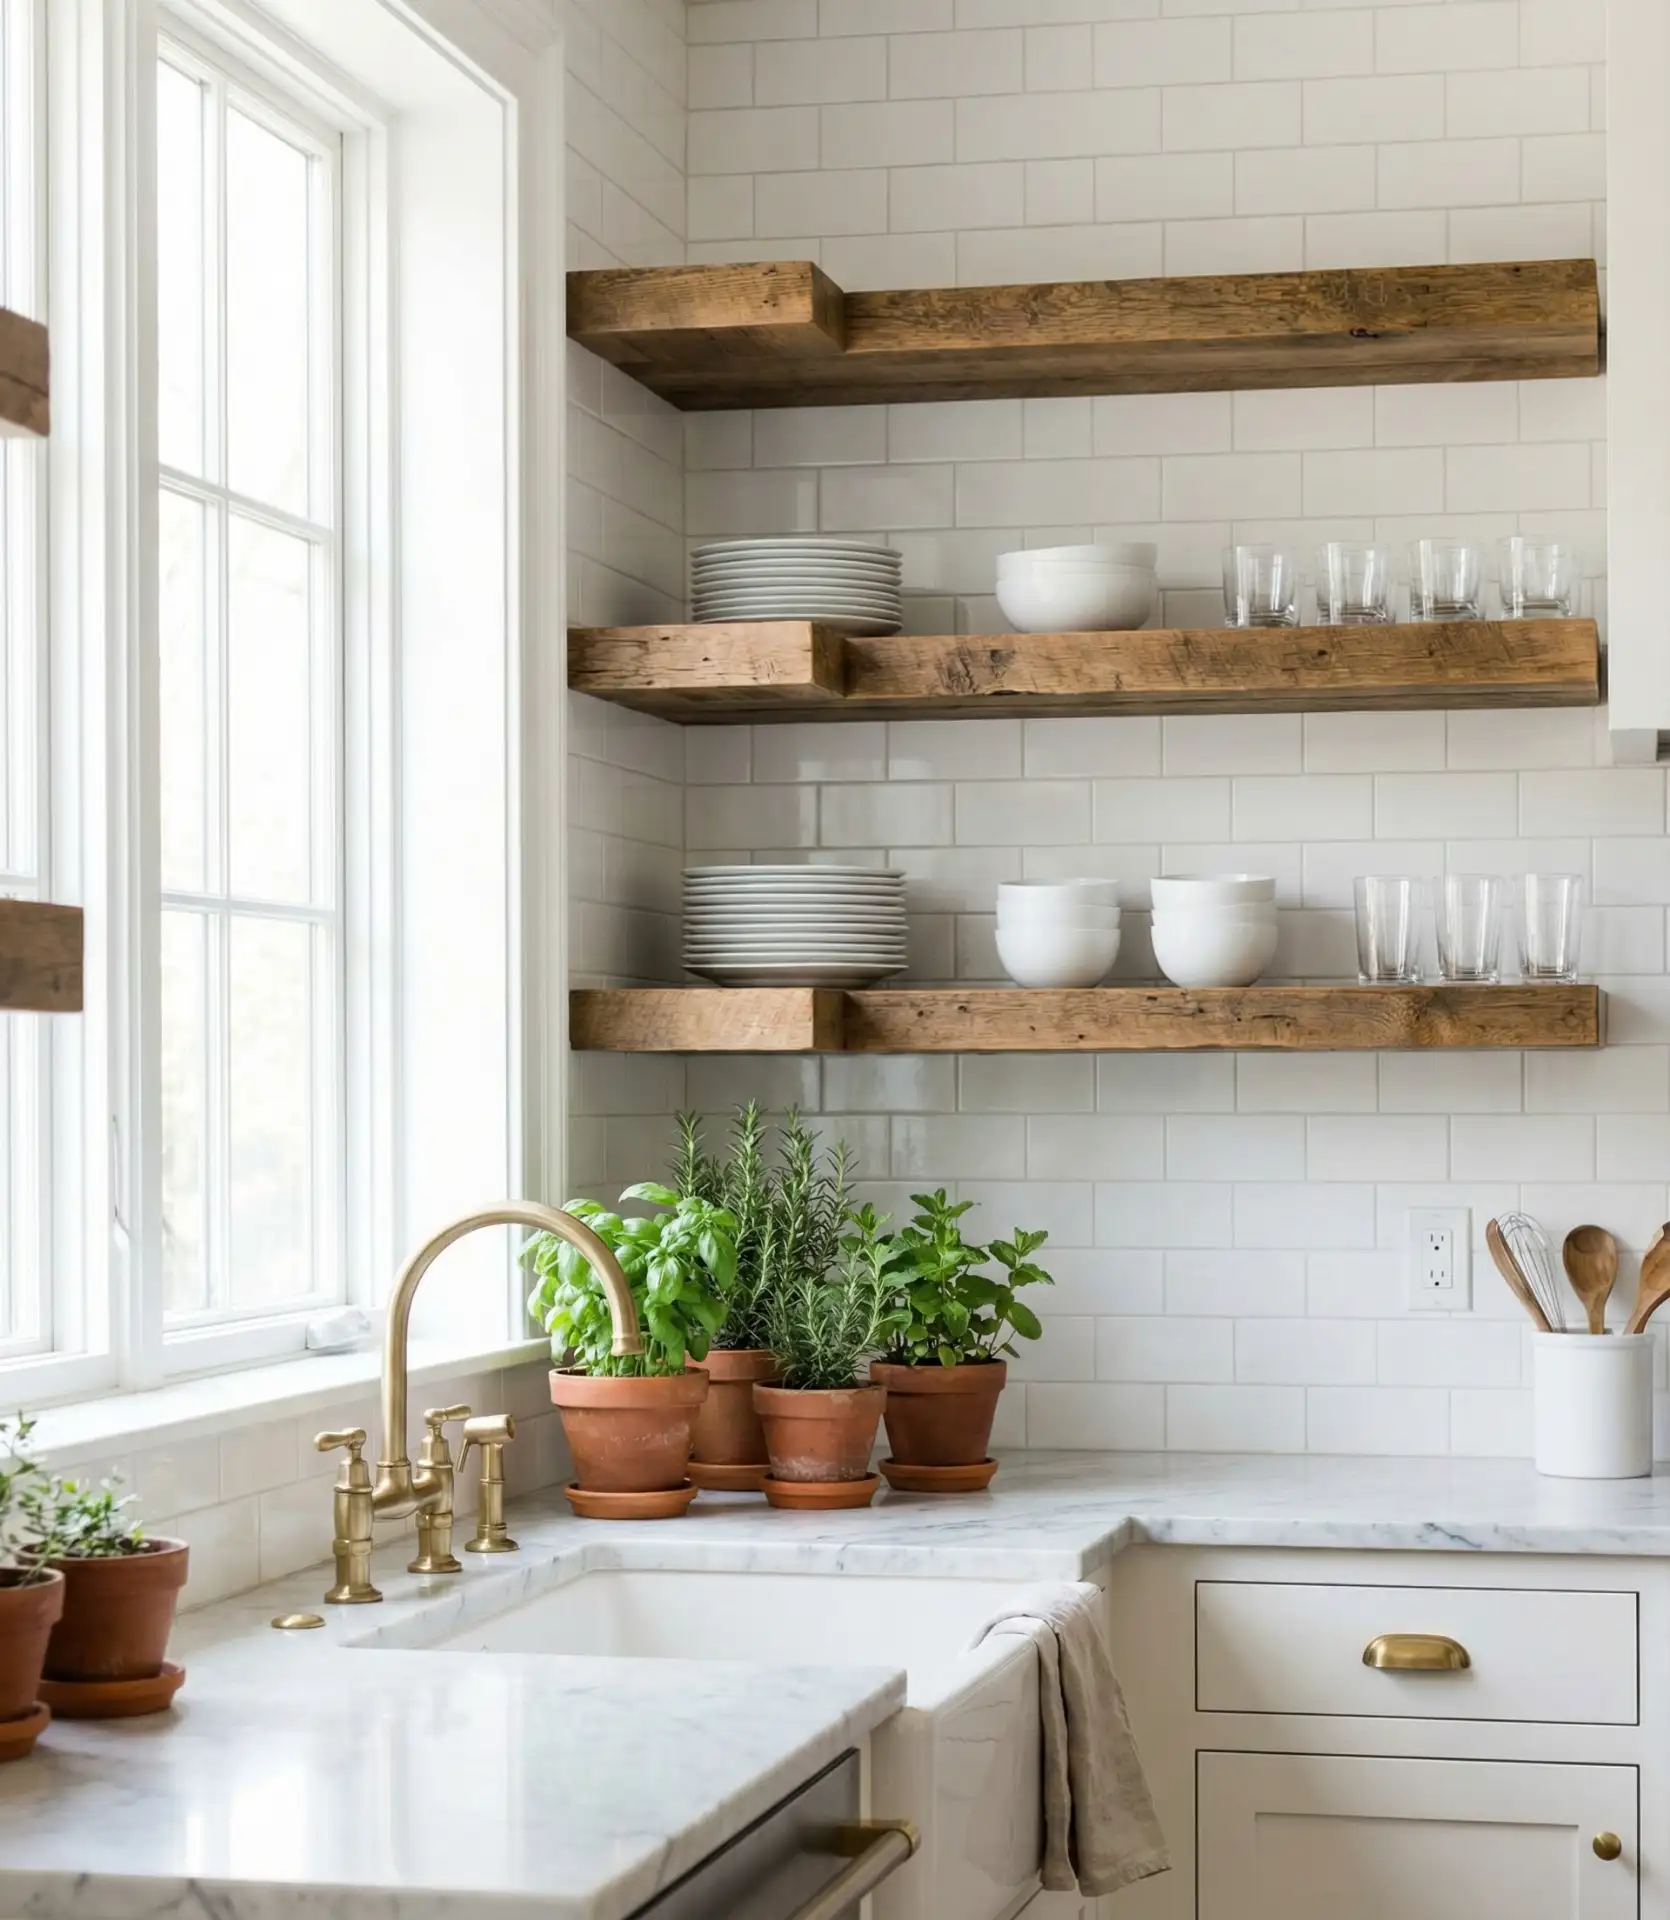
Replacing traditional upper cabinets with floating shelves instantly makes any kitchen feel more spacious and visually connected to adjacent rooms. This trend appeals to minimalists and those seeking an airy, modern aesthetic where everyday dishes become part of the décor. The exposed storage forces you to maintain organization, but it rewards you with effortless access and a gallery-like display that changes the entire room’s character.
In coastal California homes, this style works best with abundantly large windows that let the natural light pour in. The trick is to curate the display—mixing in a few tasteful decorative pieces, keeping a cohesive color palette, and dusting regularly since everything is exposed. This style is loved by budget-tight renovators because the quality of floating shelves ranges from $50 to $150 each, as opposed to the $3,000–8,000 it would take to install custom upper cabinetry.
5. Breakfast Counter Peninsula
A breakfast counter peninsula juts out from the main kitchen workspace, offering a casual, seated dining option that faces the living area while also defining the boundary of the kitchen. In smaller homes, where a full island would disrupt the flow of the space, this plan works exceptionally well. The peninsula offers just enough separation to contain any kitchen mess while keeping the cook engaged in family activities that may be taking place just a few feet away. 
Real homeowners typically choose a 24-inch depth for the seating side of the peninsula, allowing for comfortable legroom while still maintaining living space.
For the best integration of pedestrian traffic and movement across the space, the peninsular counter should be positioned at a right angle to the primary counter run to allow for unobstructed and clear traffic patterns. Incorporating under-counter storage to the living room’s full-height side of the counter removes the visual clutter while still maximizing the counter’s functional utility.
6. Half-Wall with Built-In Storage
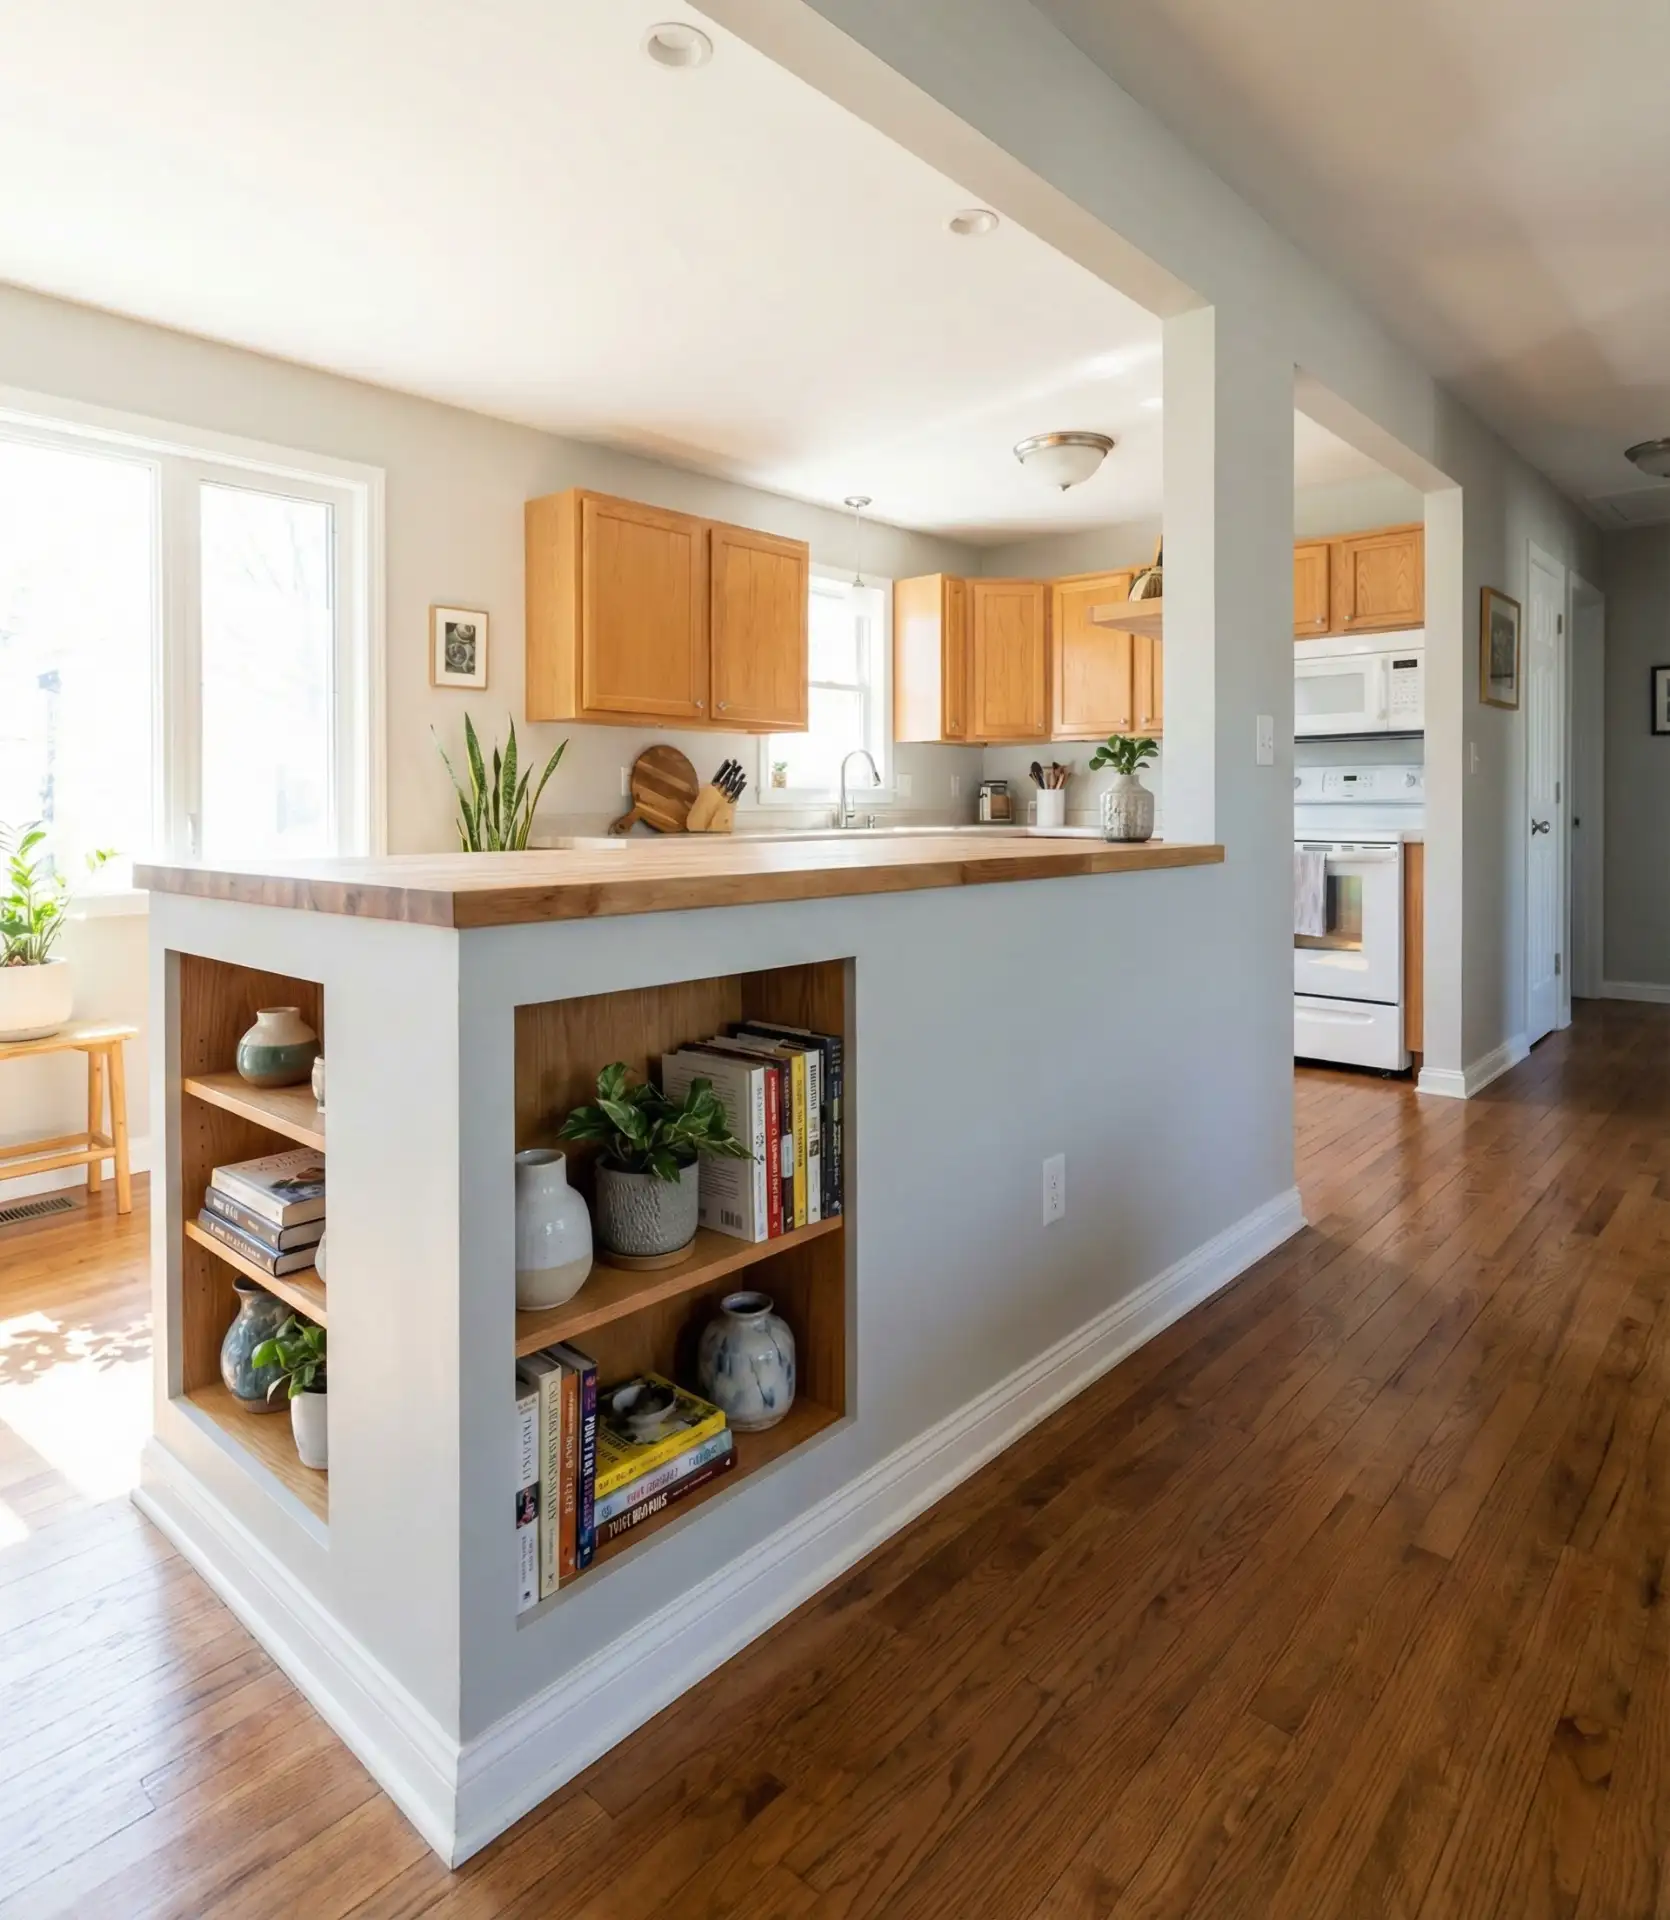
A half wall at counter height provides a transition while also offering two-sided storage to all users. This design strategy is common with the renovation of encapsulated framed single-story ranch homes to preserve structural framing while modernizing the interior layout. The top of the wall will typically be between 42 and 48 inches high to enable full conversational pass-through while also partially concealing the living room’s view of the counter clutter in the kitchen.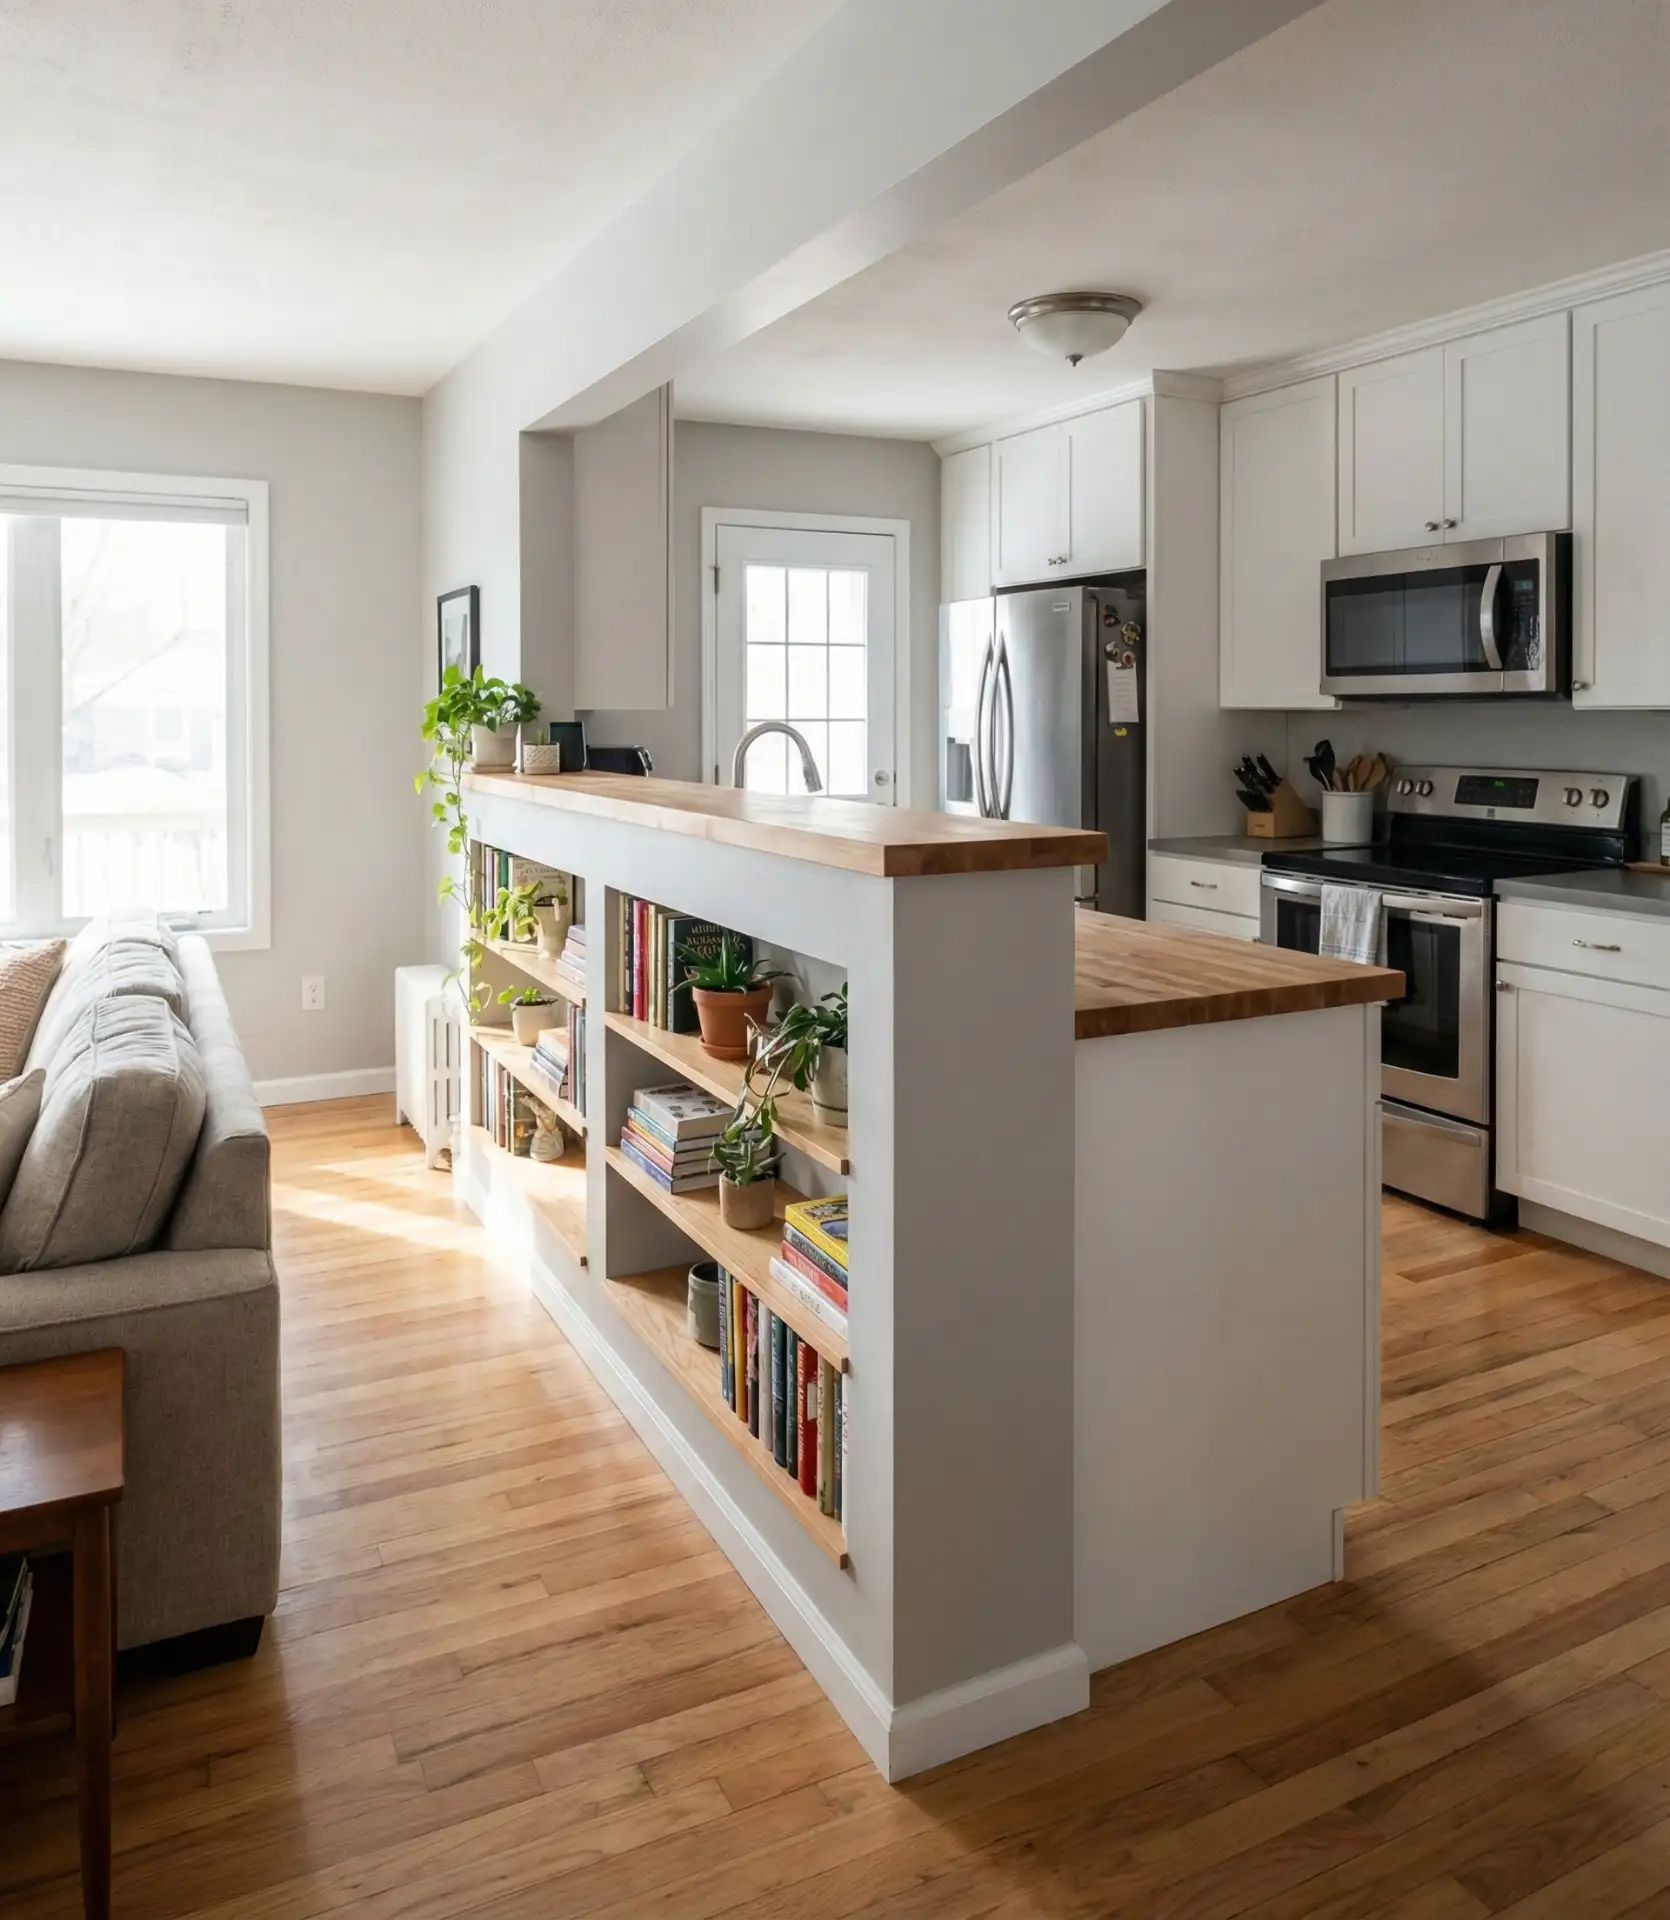
This technique is best suited to open-concept floor plans where the vast open area feels sterile, as the half wall adds architectural style and amenity without loss of a spatially open design. Added to the top are electrical outlets for portable apps and phone charging. This design element also serves as a room divider, with functional design and storage on the living room side, commonly closed cabinetry for ornamental storage, and open spaces for loose stackable storage typically containing cookbooks.
7. Cafe-Style Folding Service Window
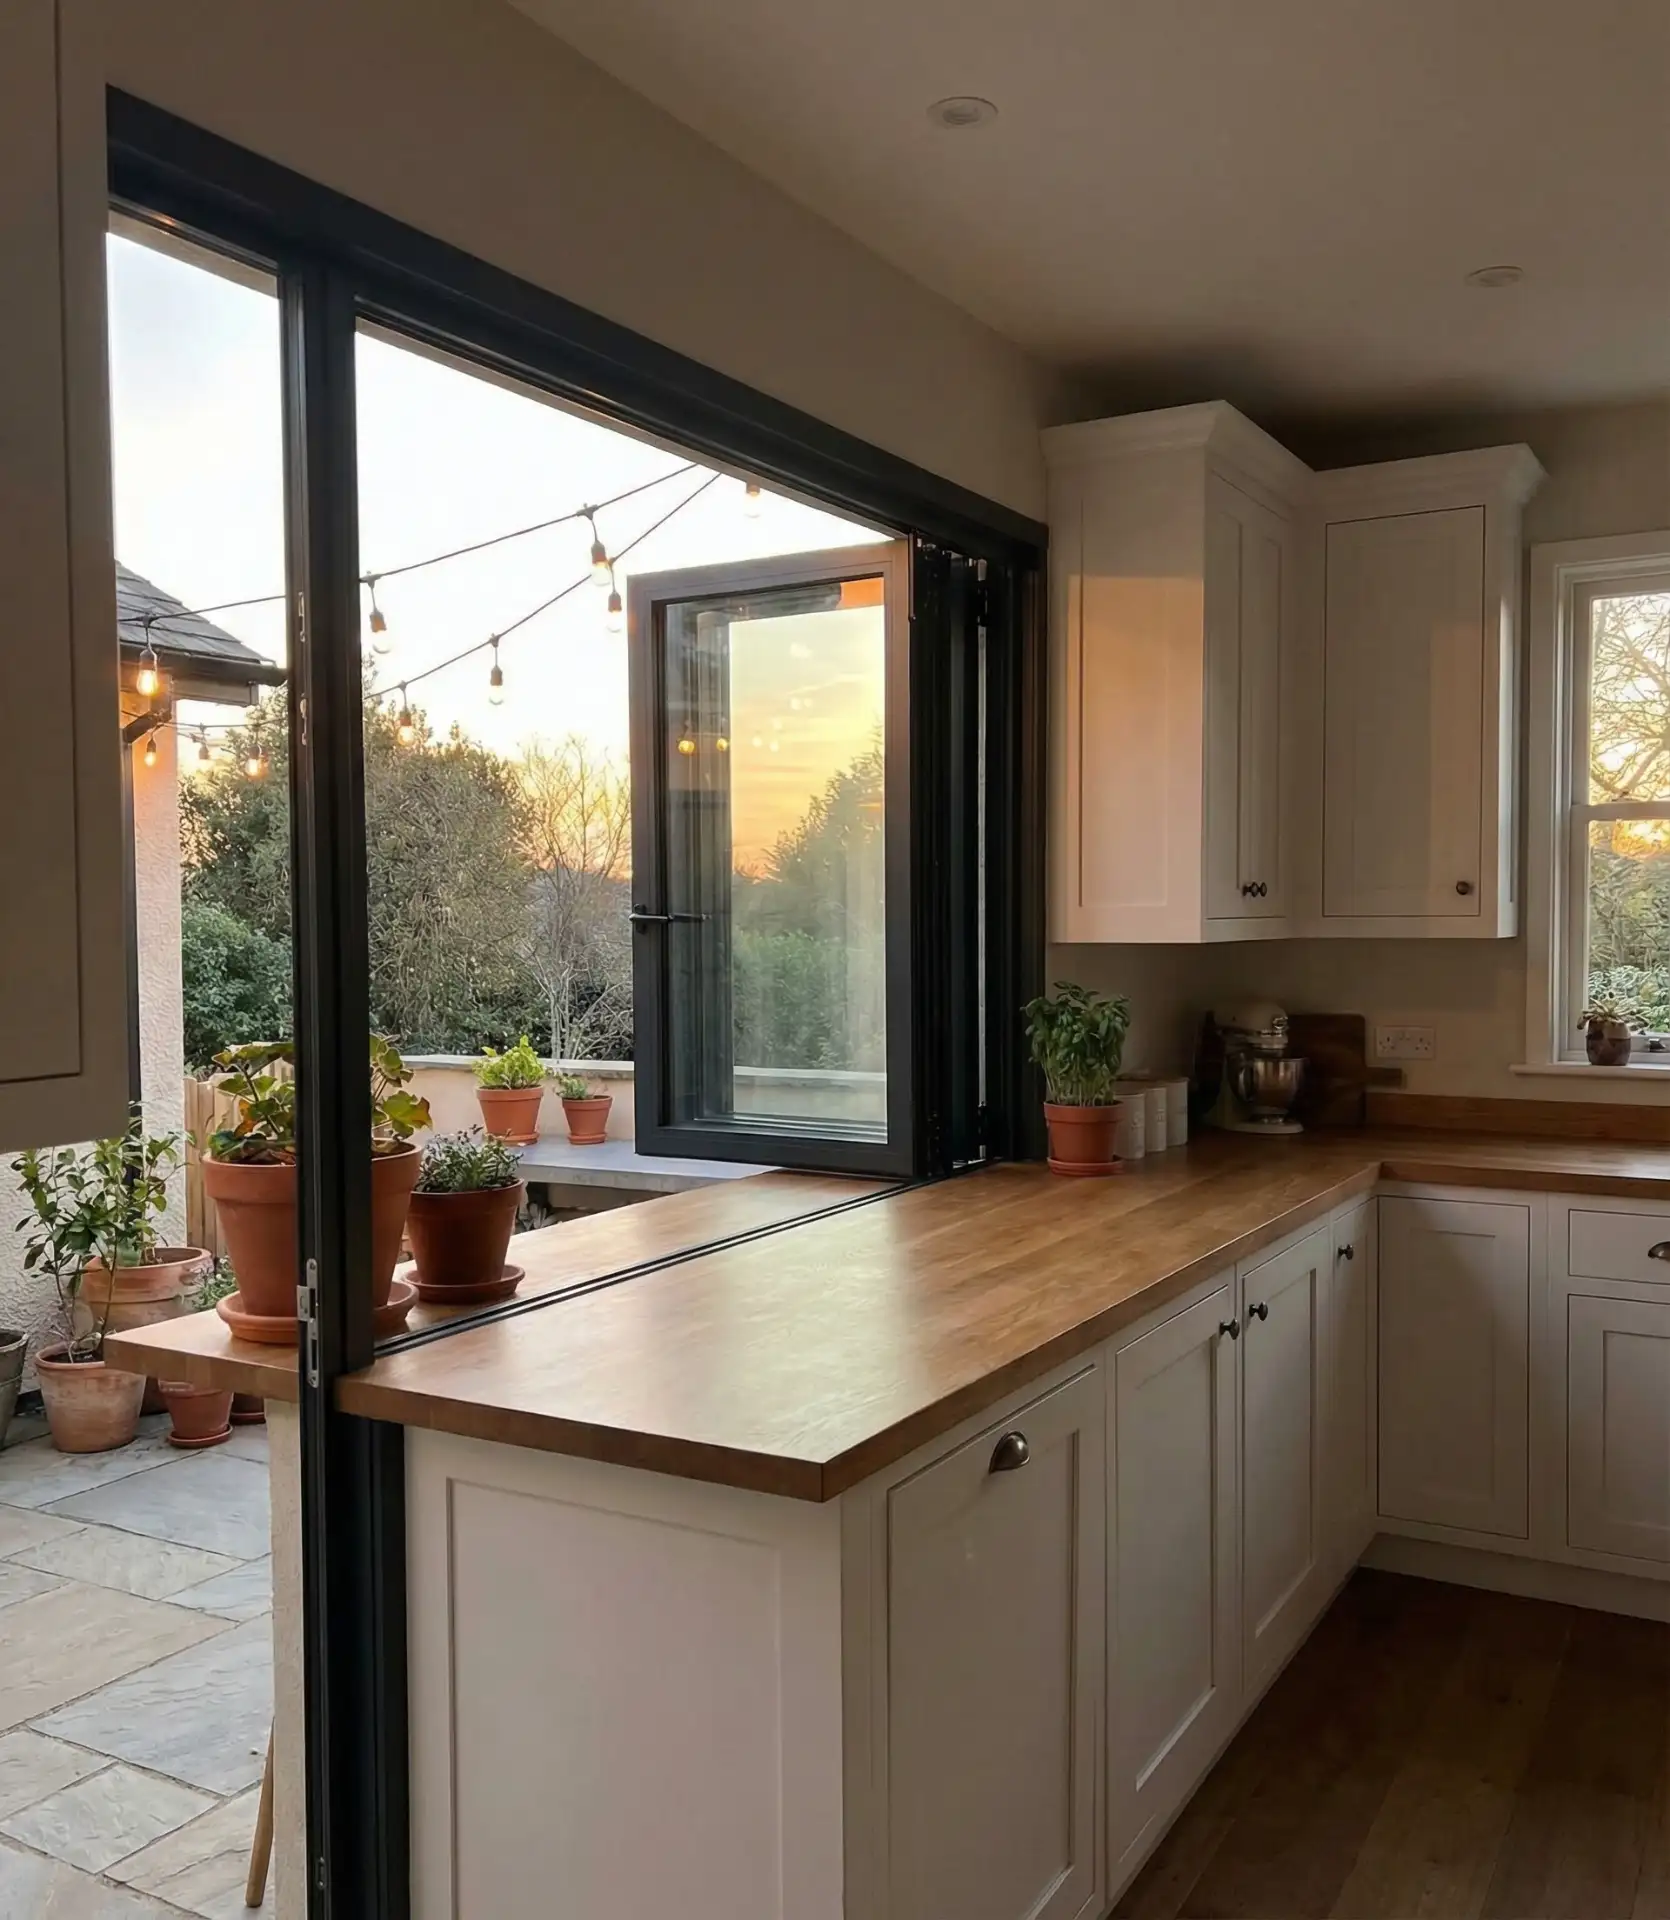
Inspired by trendy cafe culture, a fold-up window opening connects your kitchen to an outdoor patio or dining area, blurring the line between indoor and outdoor entertaining. This design idea has exploded in popularity across Southern states where year-round outdoor living is standard. The window lifts and props open, creating a seamless pass-through for serving food and drinks during backyard gatherings. 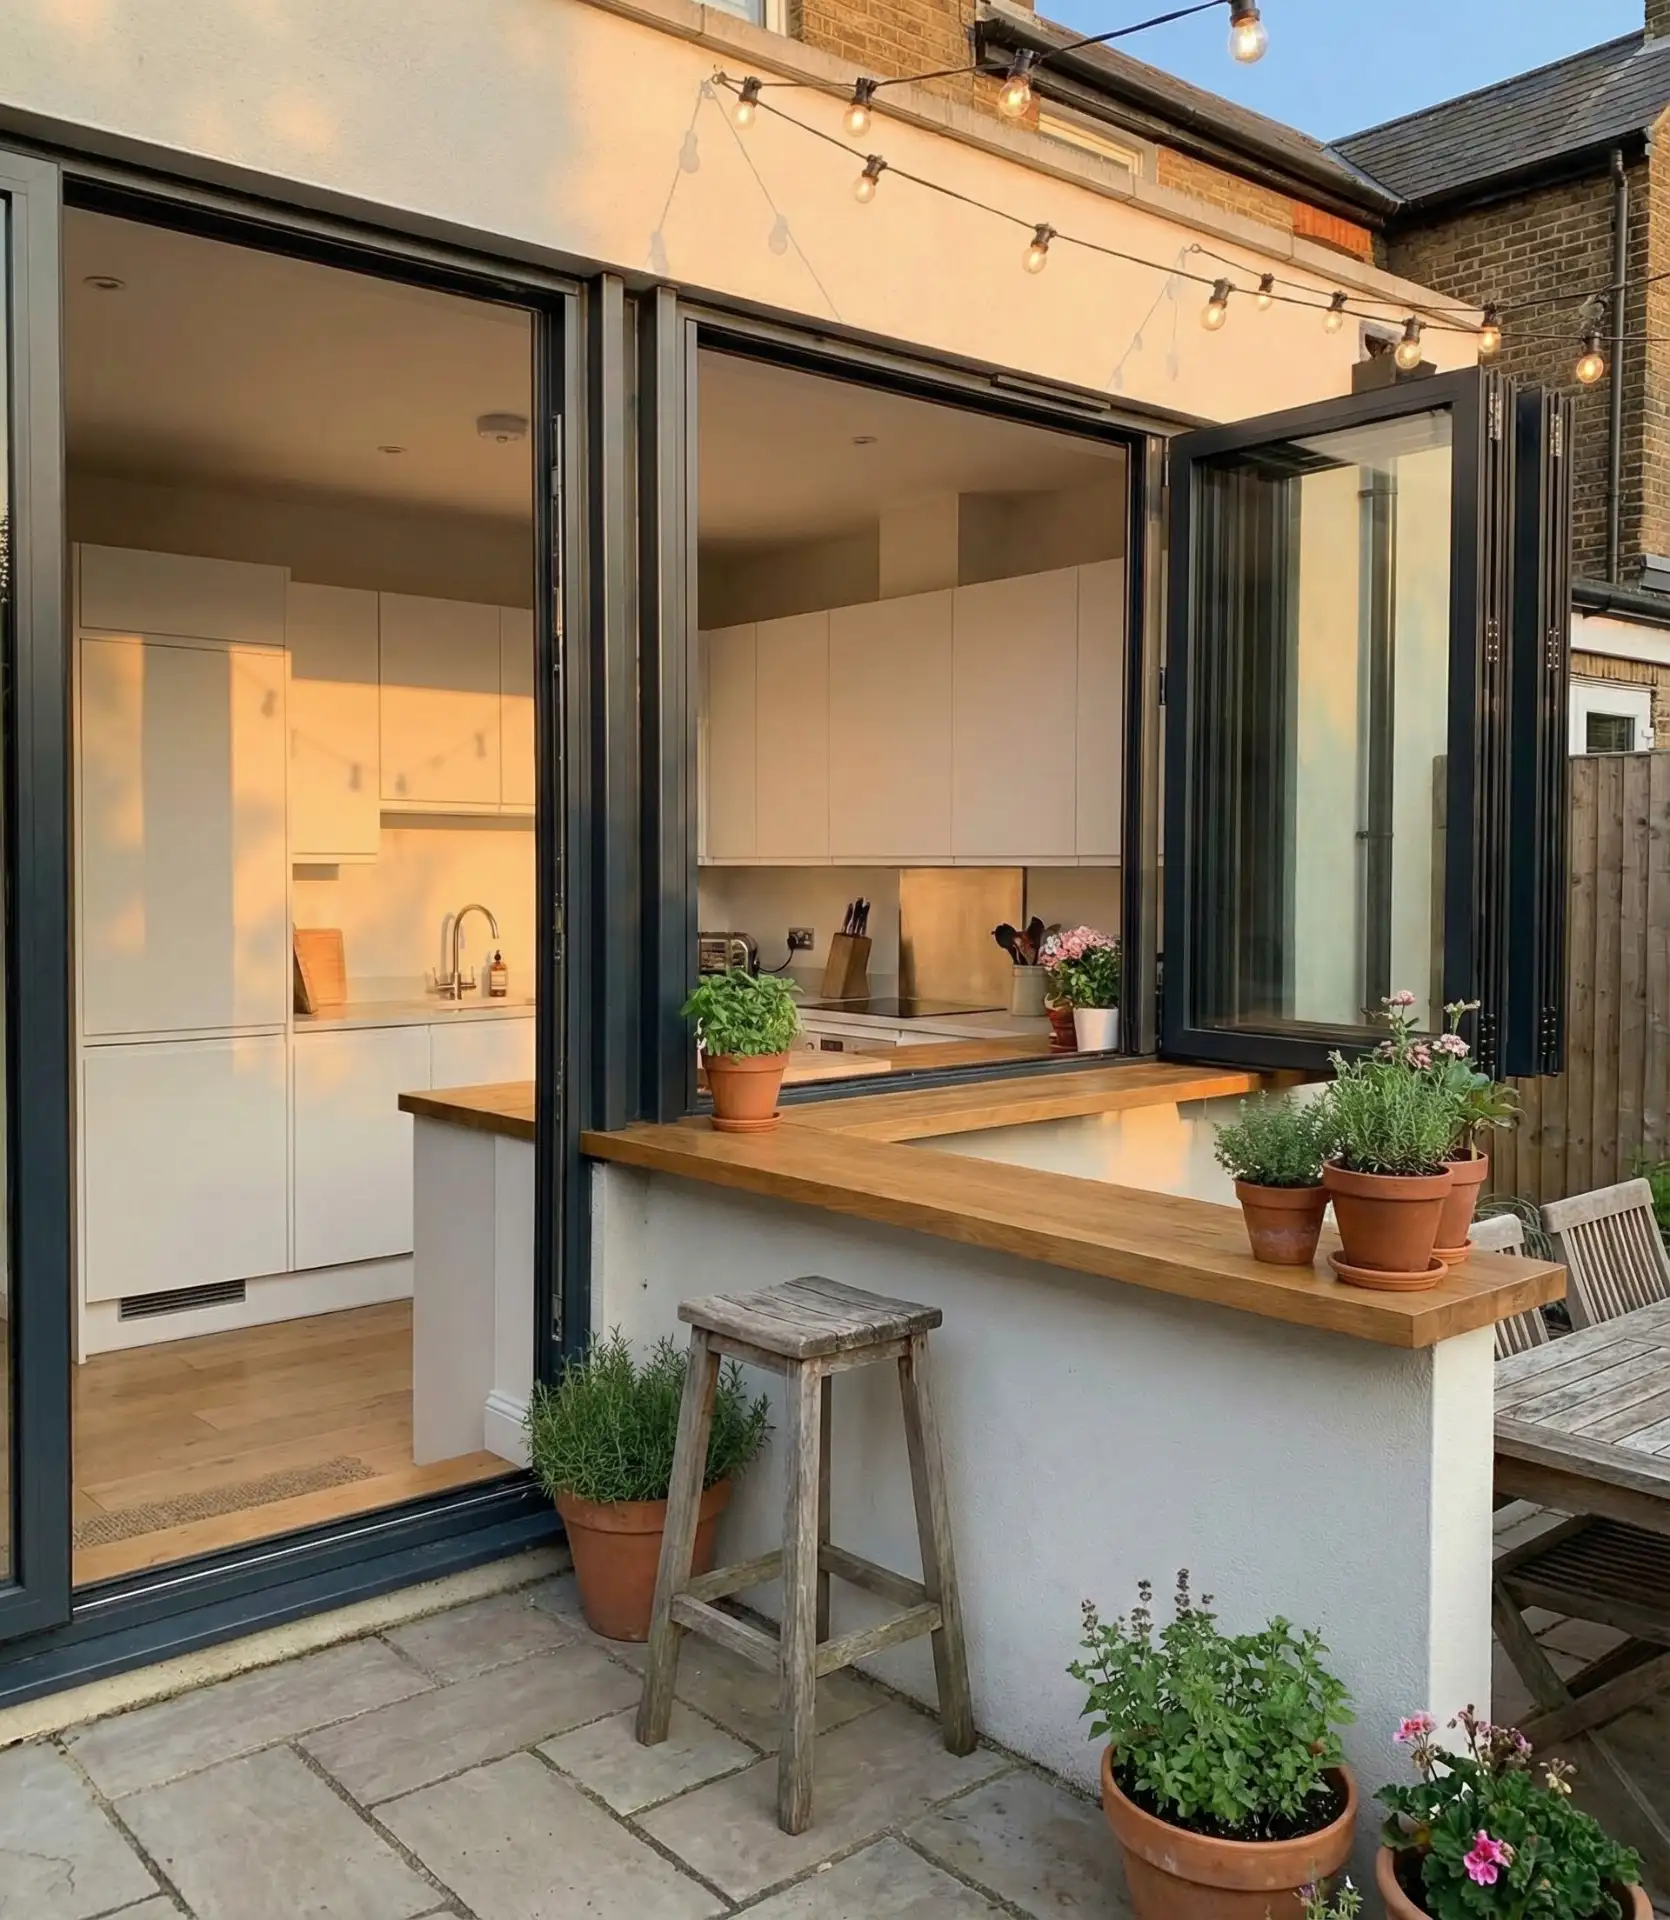
Expert contractors recommend positioning this window directly behind your sink or prep area so you can interact with outdoor guests while working. The mechanism requires professional installation—expect to invest $1,800-4,500 depending on window size and quality. Pair it with weather-resistant exterior cabinetry on the patio side to create a true indoor-outdoor kitchen experience that functions beautifully for everything from weekend barbecues to casual weeknight dinners.
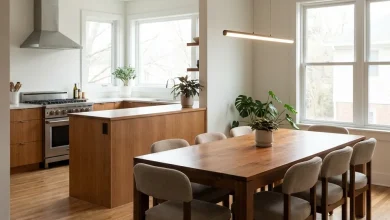
8. Integrated Dining Table Extension
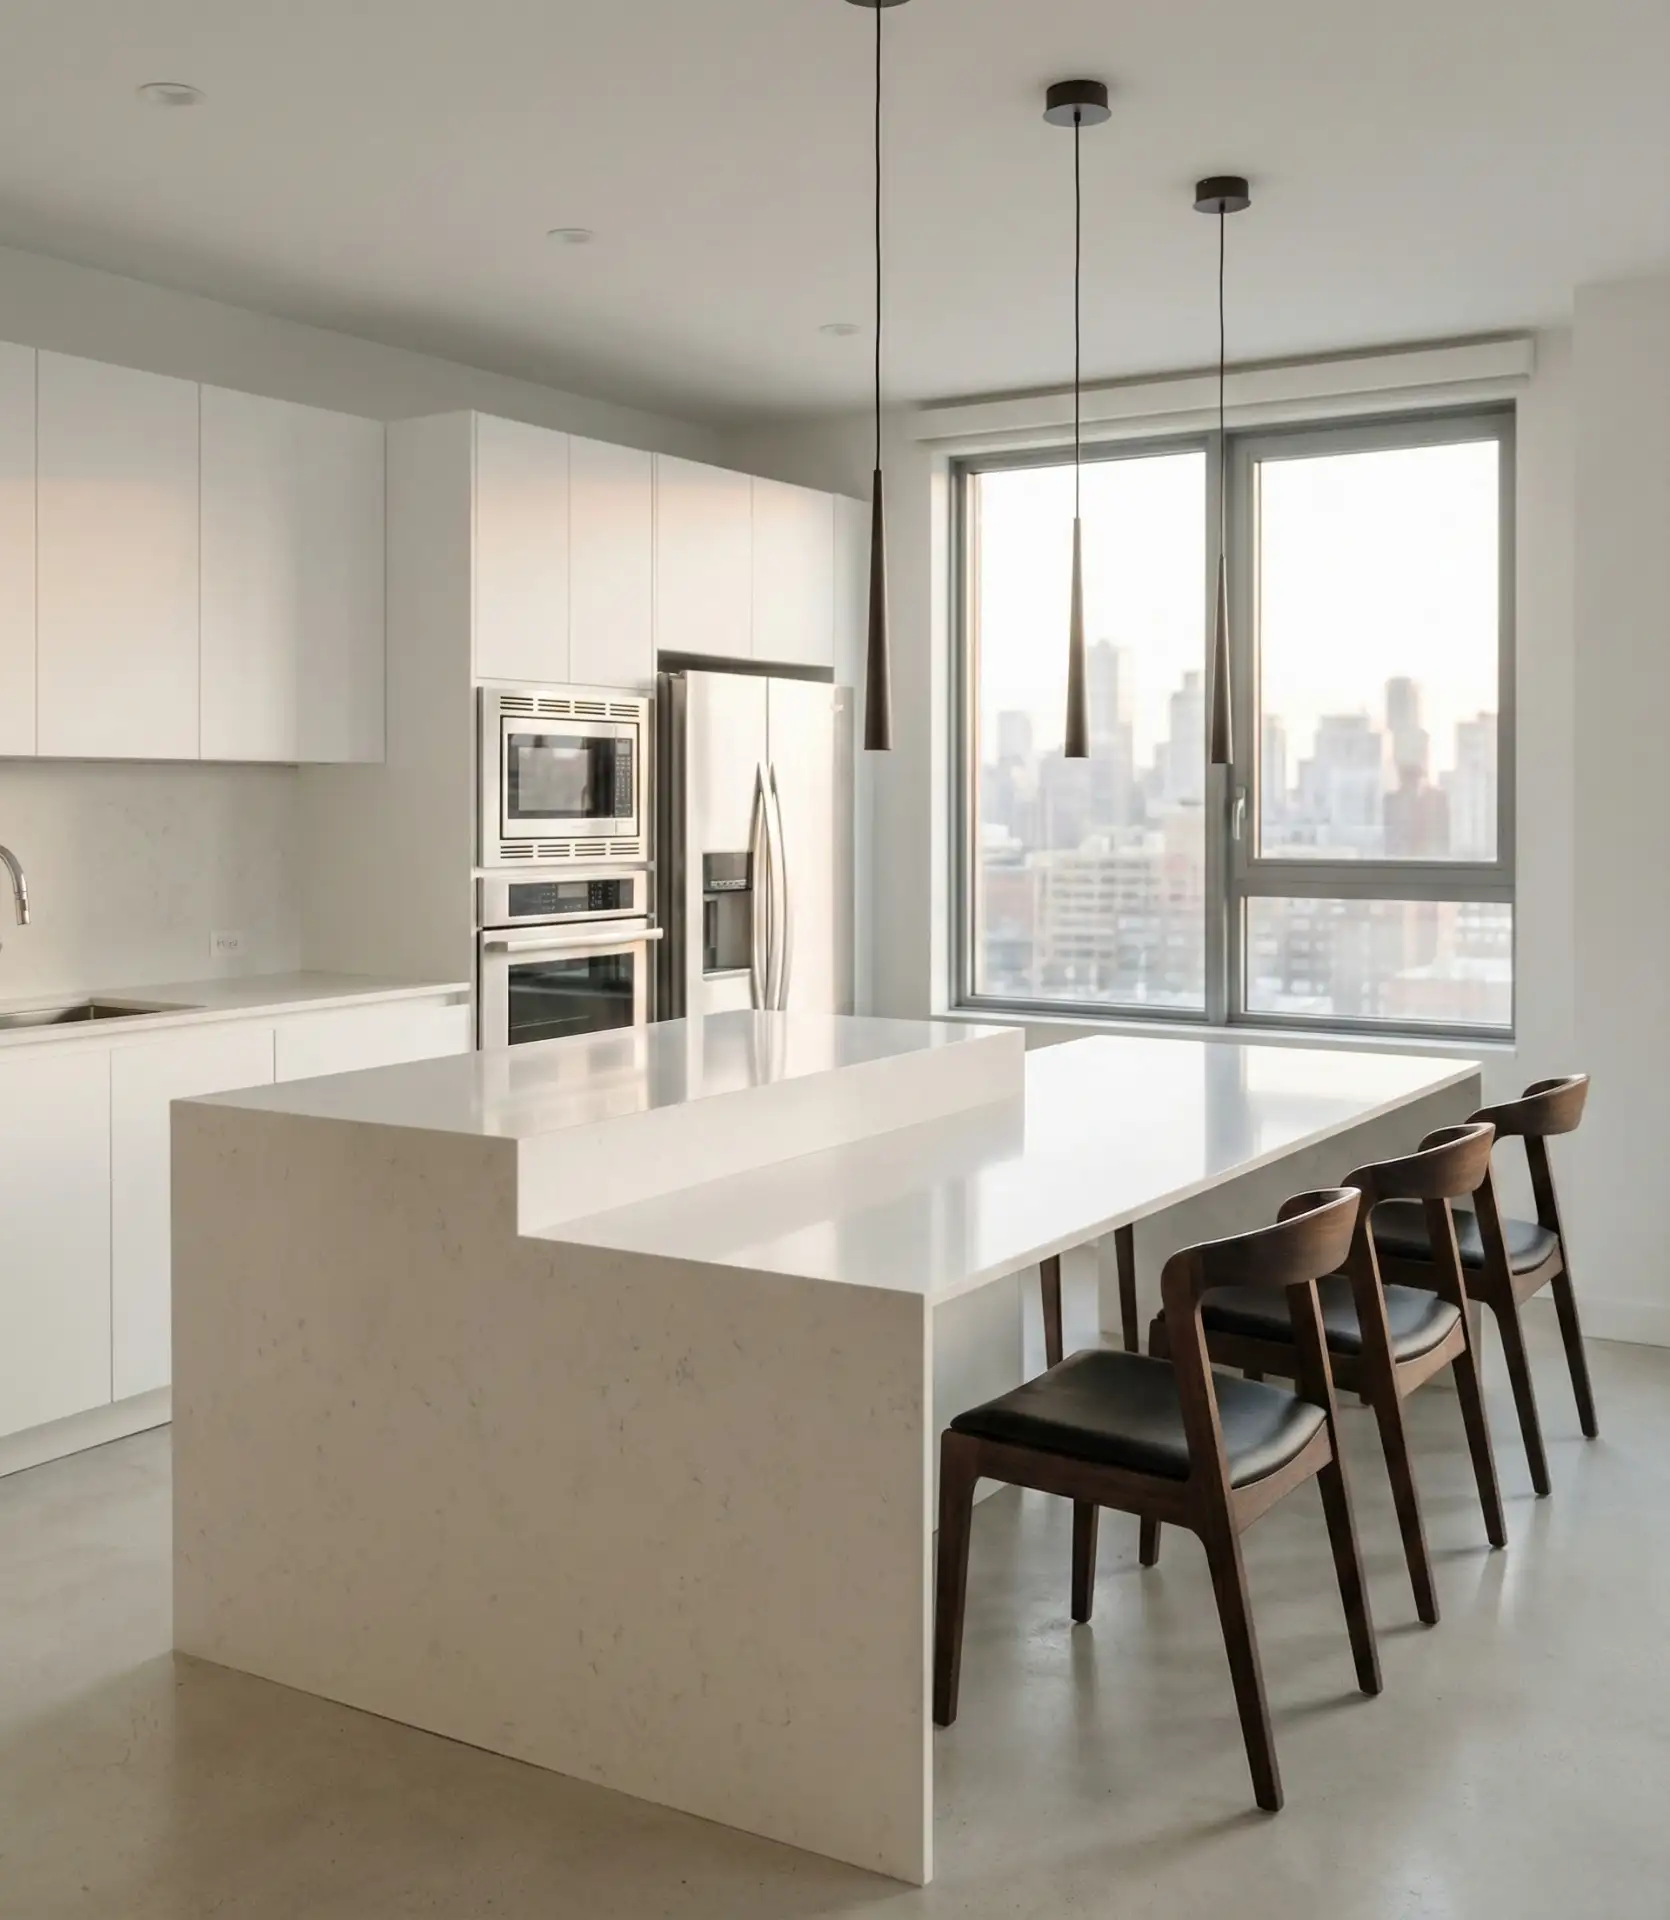
Rather than separate furniture, a dining table built as a direct extension of your kitchen counter creates ultimate flow between cooking and eating zones. This approach suits small space living, where every square foot counts and multipurpose design is essential. The integrated table maintains the same height and material as your counters, creating one continuous surface that visually expands both areas.
A common mistake is making the table portion too narrow—aim for at least 36 inches of depth to accommodate place settings comfortably. This configuration eliminates the awkward gap where crumbs collect between the separate island and table, making cleanup noticeably easier. Northeastern apartment dwellers particularly embrace this solution since it maximizes limited square footage while maintaining distinct functional zones for meal prep and family dining.
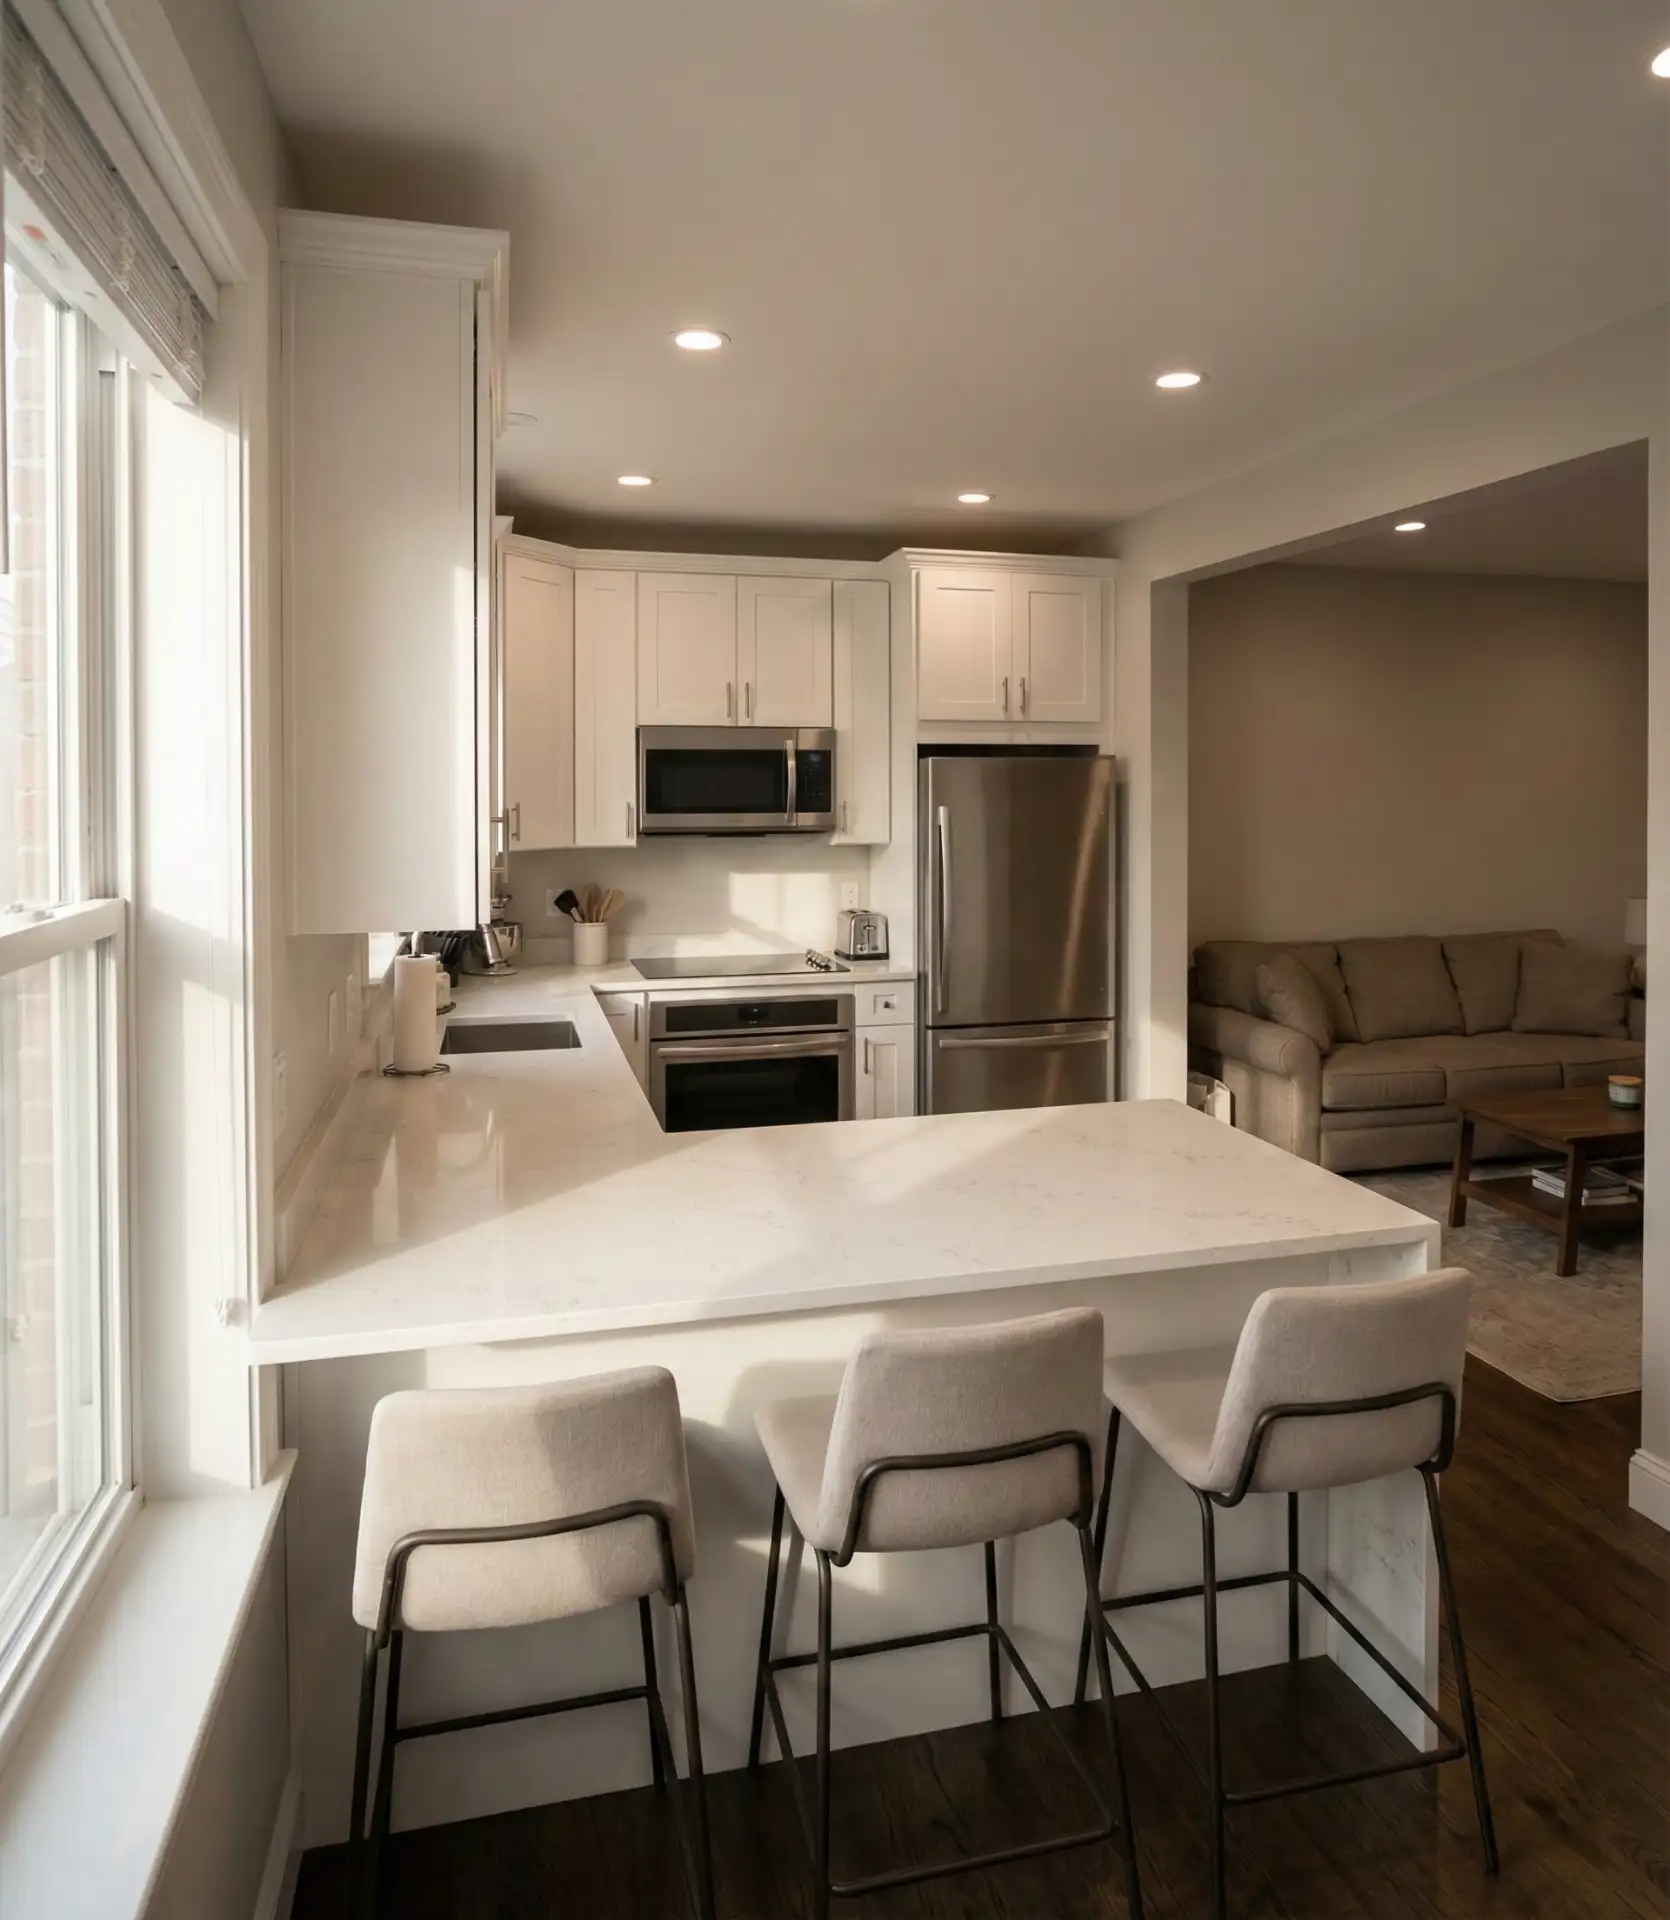
9. Open Kitchen with Living Room Seating Integration
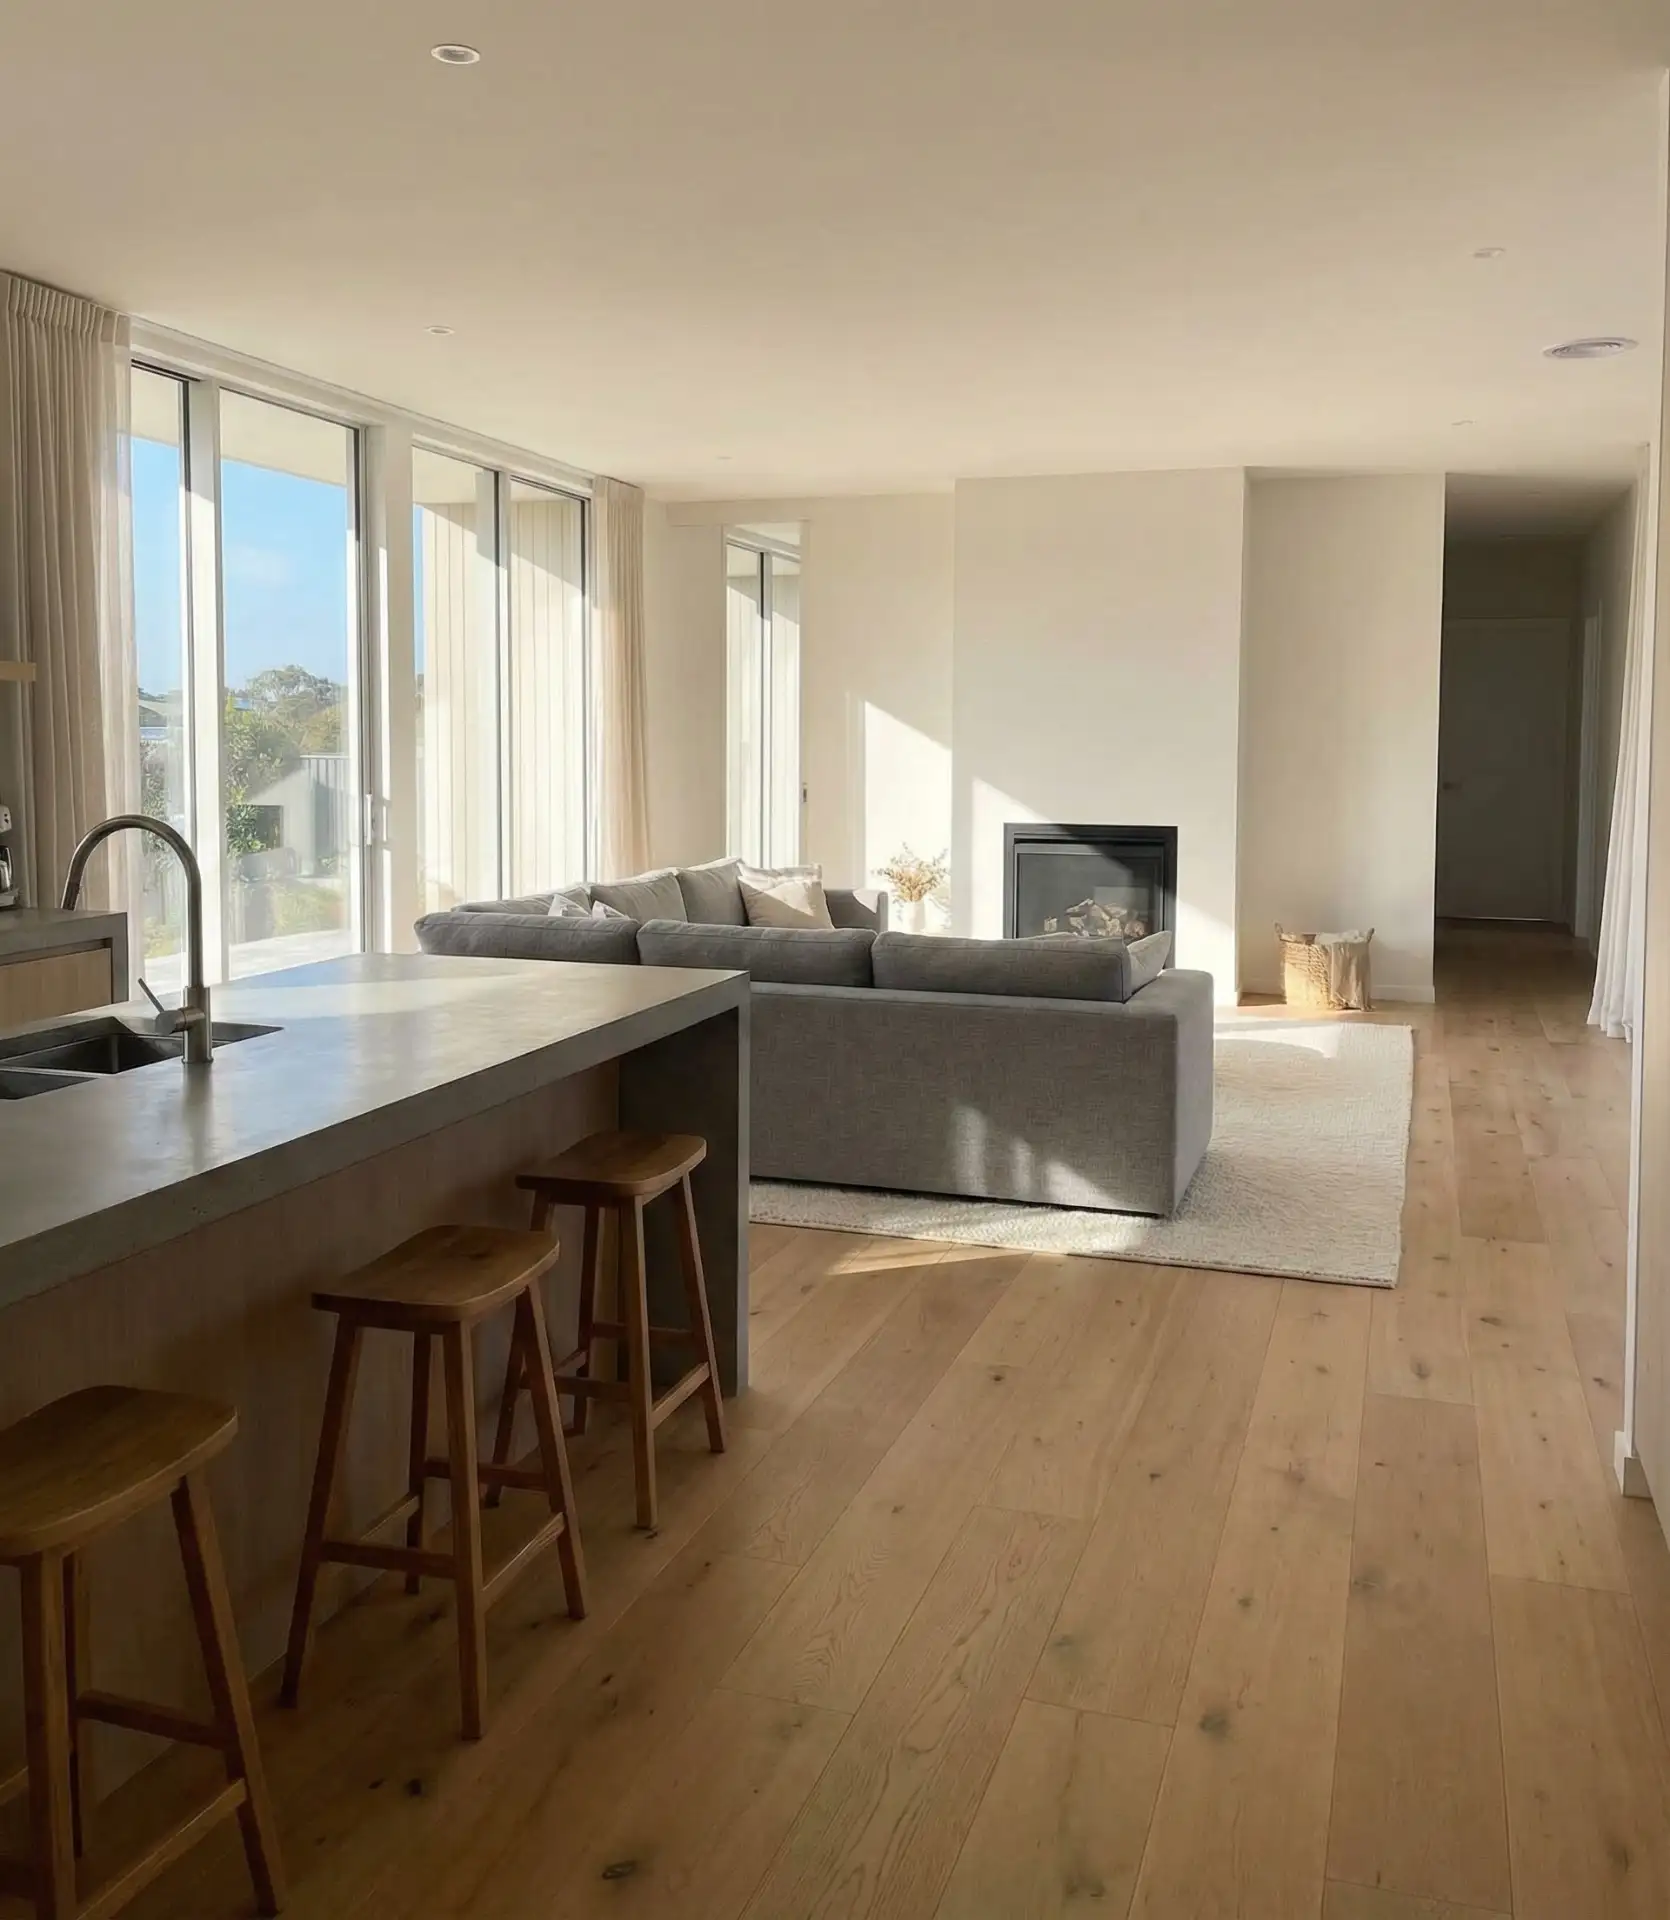
Position your living room with an island so that sofa backs or low bookshelves create implied boundaries without physical barriers. This dining and living room arrangement maximizes openness while providing psychological separation through furniture placement. The kitchen island serves as the anchor point, with living room seating positioned to face away from cooking activities, creating distinct zones through layout rather than walls. 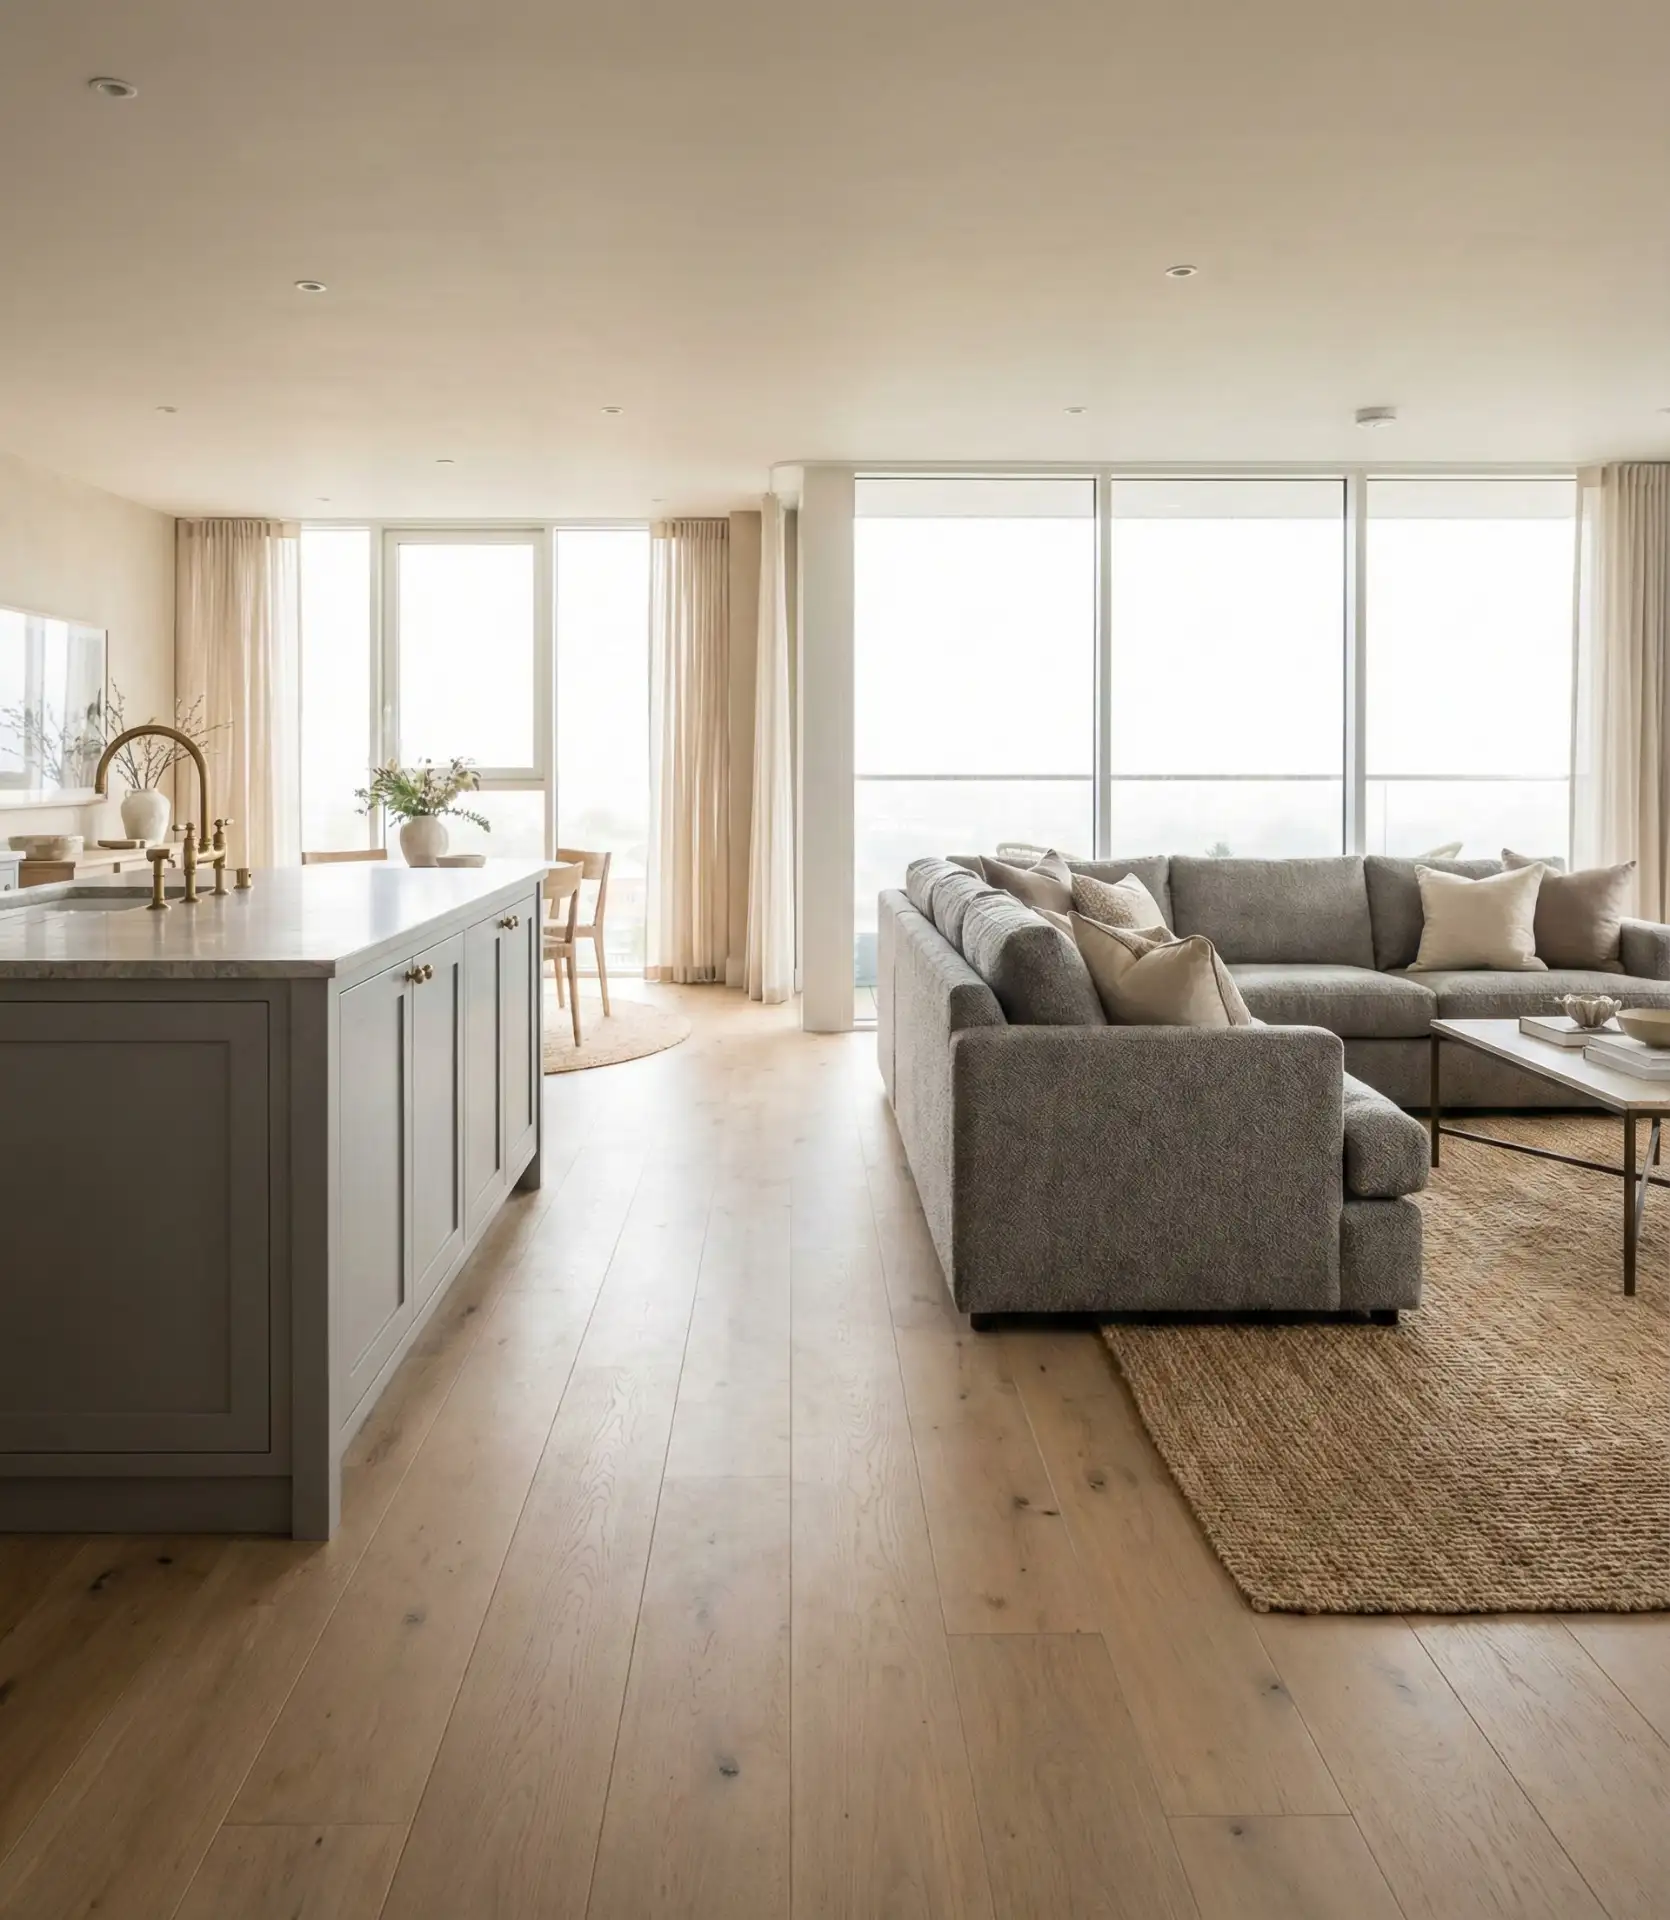
This combination works best in homes with at least 400 square feet of combined kitchen and living space—anything smaller can feel cramped rather than open. Use area rugs to visually define the living zone, and maintain a 3-4 foot clearance between the island and sofa back for comfortable traffic flow. West Coast homeowners often enhance this layout with consistent flooring material throughout, which amplifies the spacious, flowing feeling that makes open-concept living so appealing.
10. Double-Duty Dining Room Cabinetry
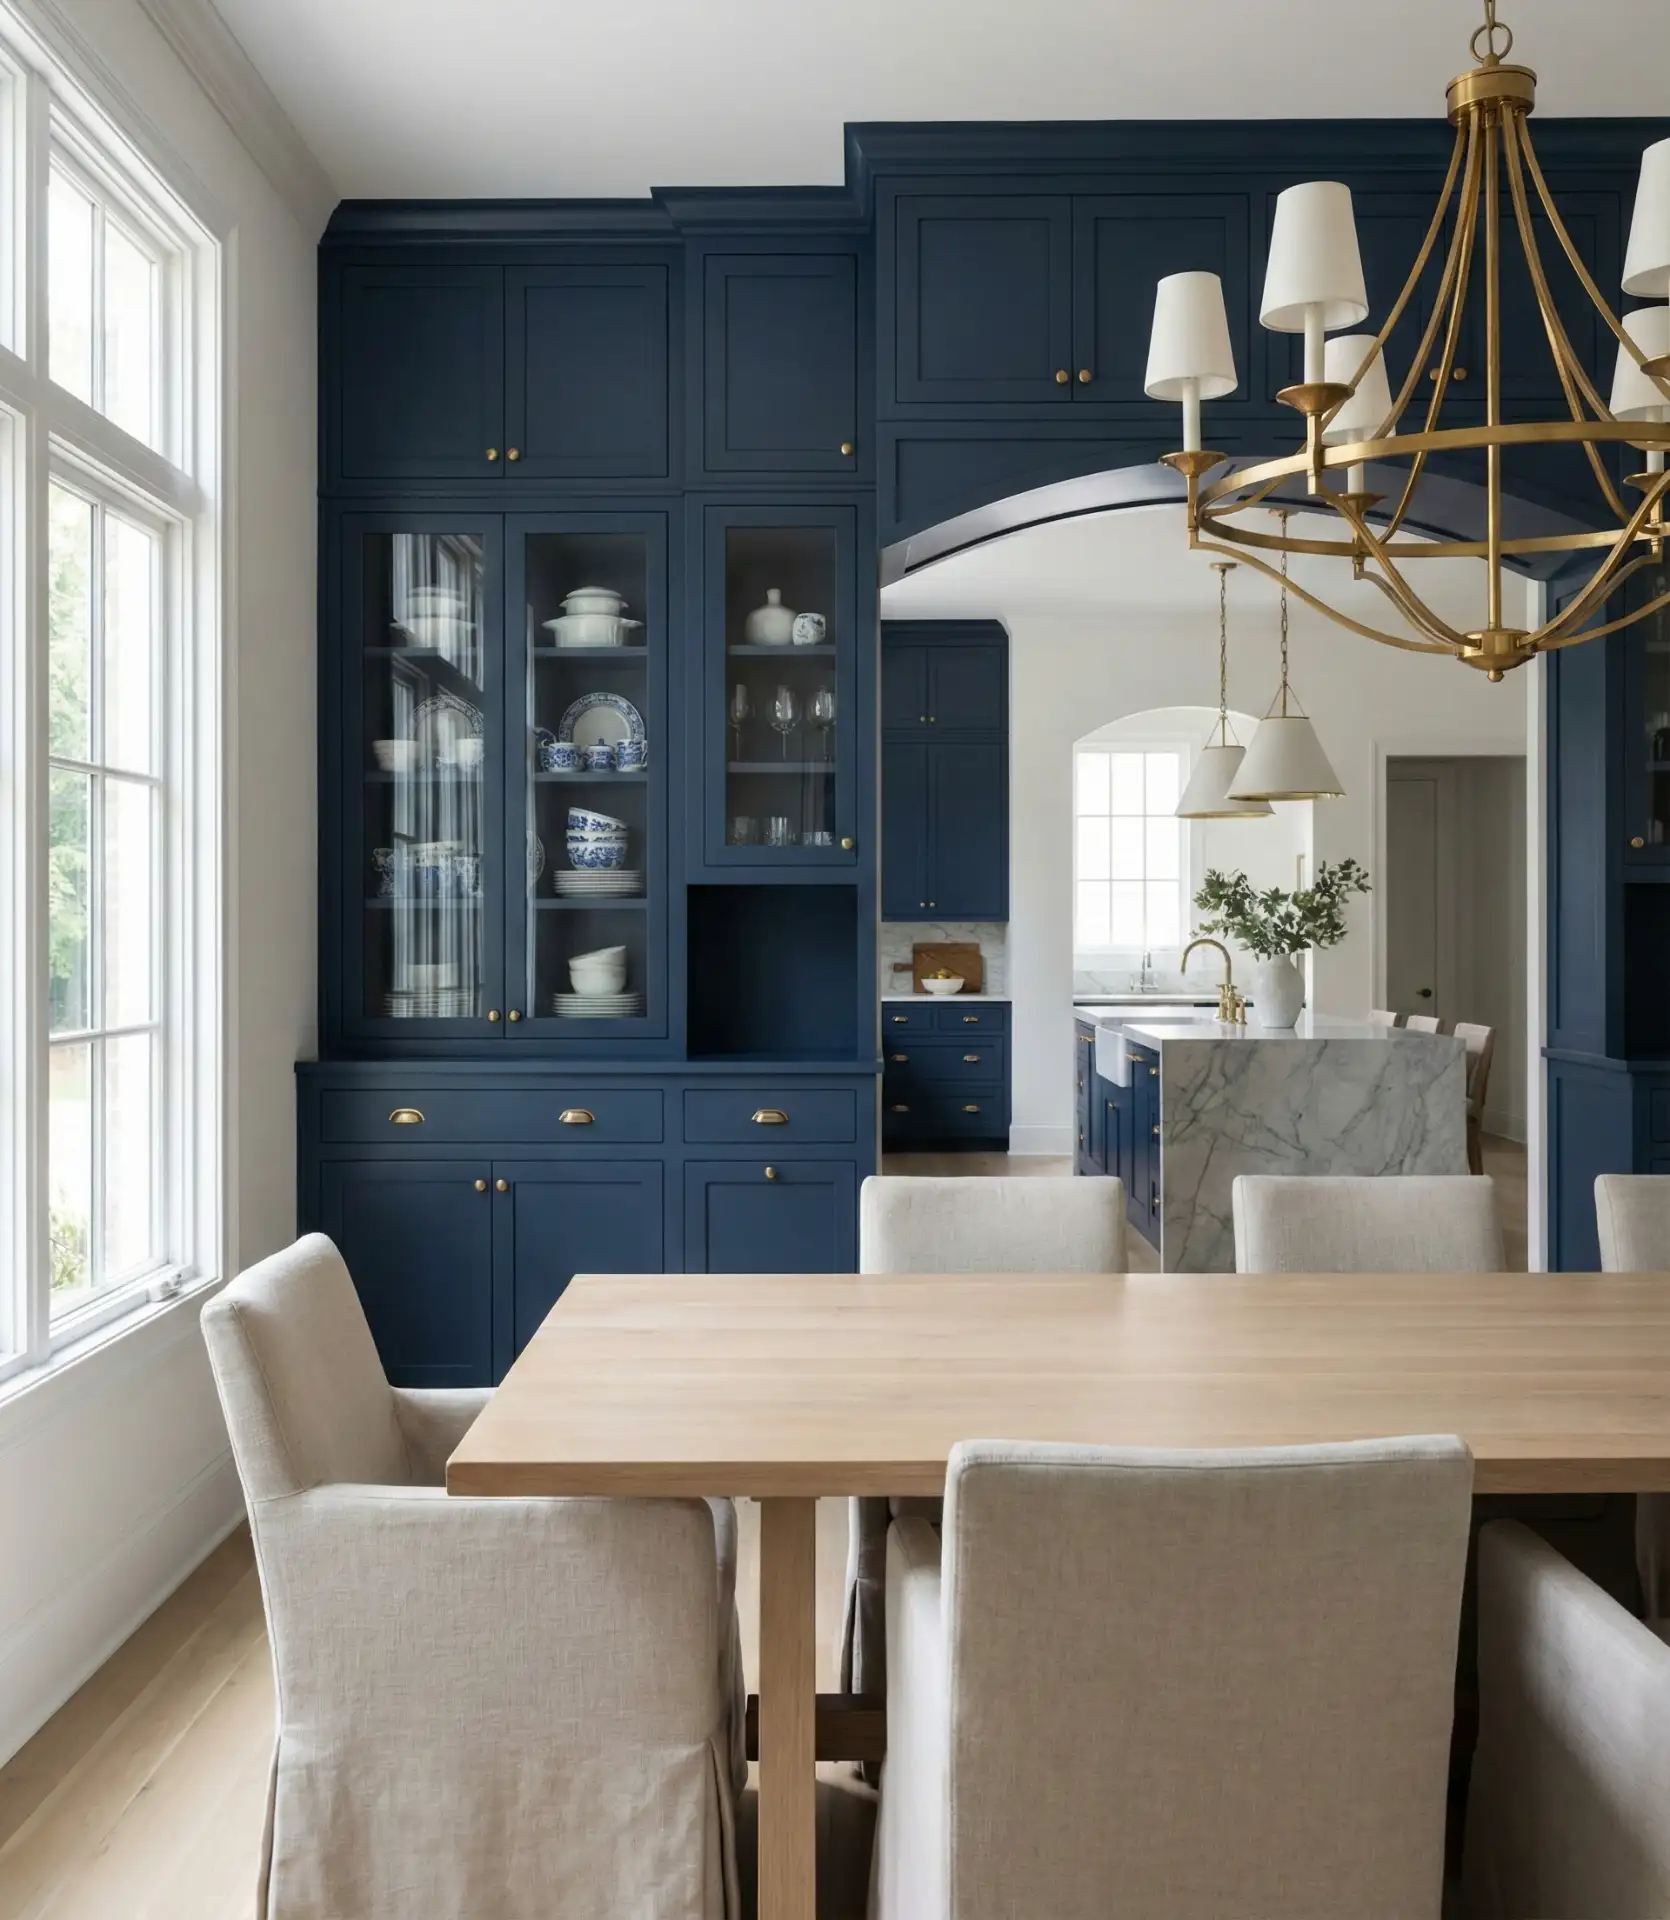
Extend your kitchen storage into the dining room with a built-in hutch or buffet that mirrors your kitchen cabinet ideas, creating visual continuity while adding functional storage. This design Indian homes have long embraced becomes increasingly popular as Americans seek to maximize storage in open layouts. The dining-side cabinetry stores serving pieces, linens, and barware—keeping items close to where they’re used without crowding kitchen workspace.
Budget-savvy renovators save 20–30% by ordering kitchen and dining room cabinets together in one package deal from the same manufacturer. Choose matching door styles and finishes, but consider varying the configuration—deeper base cabinets in the kitchen for pots and pans, shallower ones in the dining room for china and glassware. This thoughtful approach creates a cohesive look throughout your open-concept space while addressing each zone’s specific storage needs.
11. Stepped Floor Level Transition
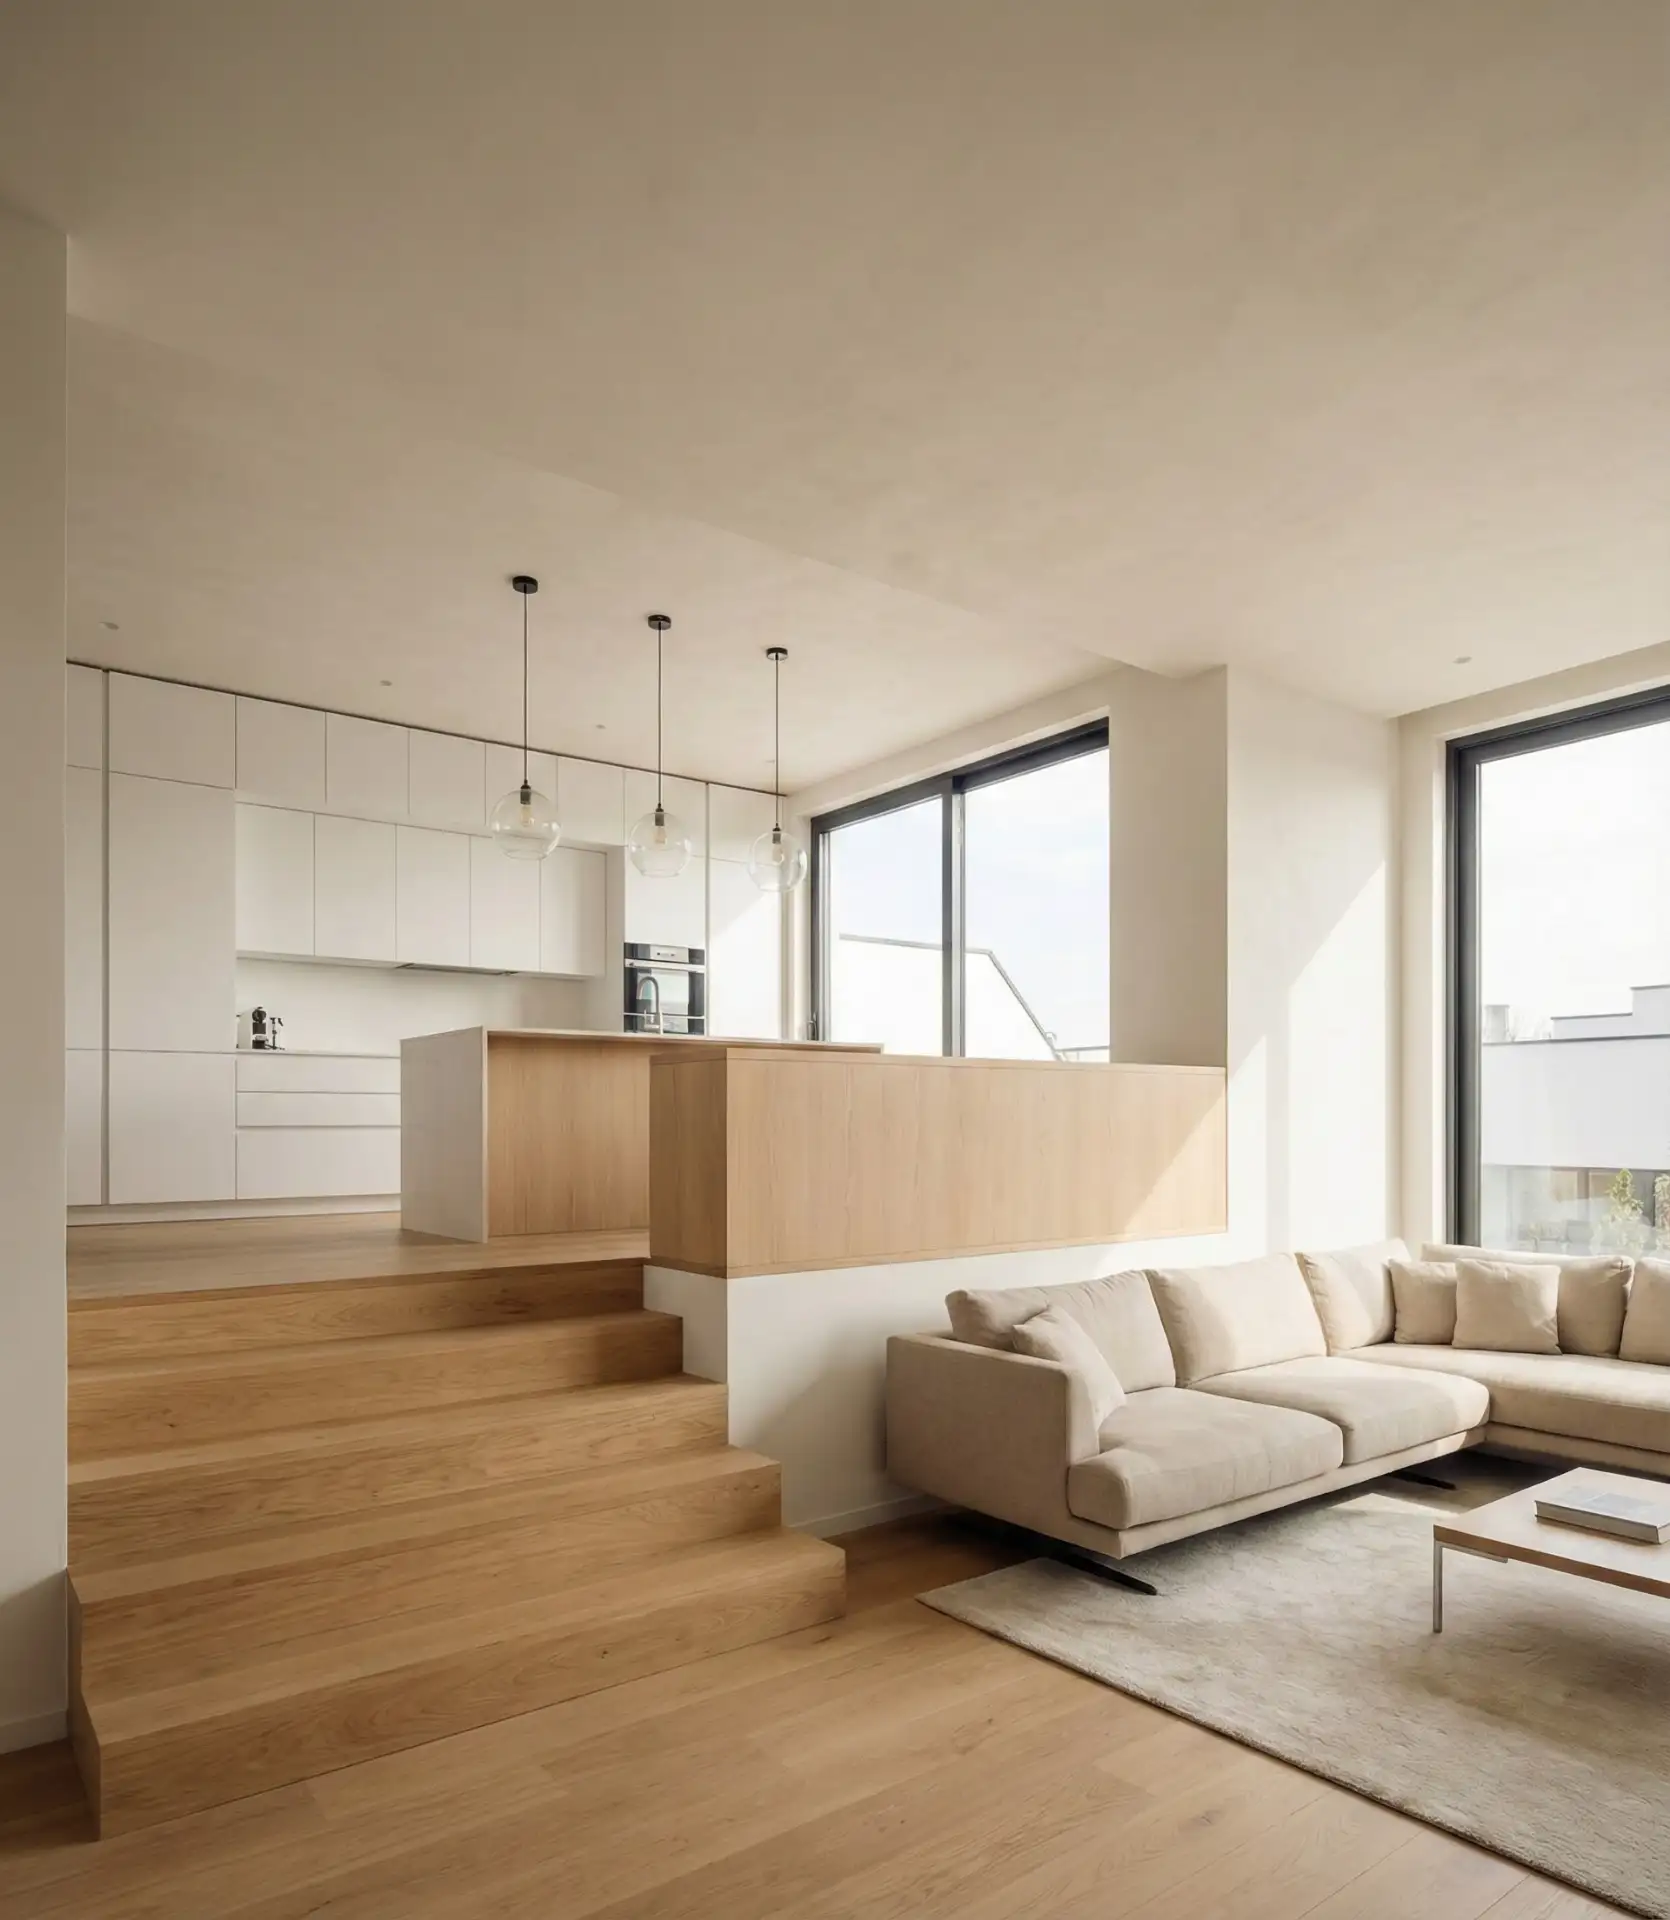
A subtle 4-6 inch floor-level change creates distinct zones without walls, with the kitchen platform elevated or sunken relative to the living room. This architectural concept works beautifully in new construction or major renovations where structural modifications are feasible. The level change provides a natural boundary that prevents kitchen spills from spreading while maintaining complete visual and acoustic openness between spaces. 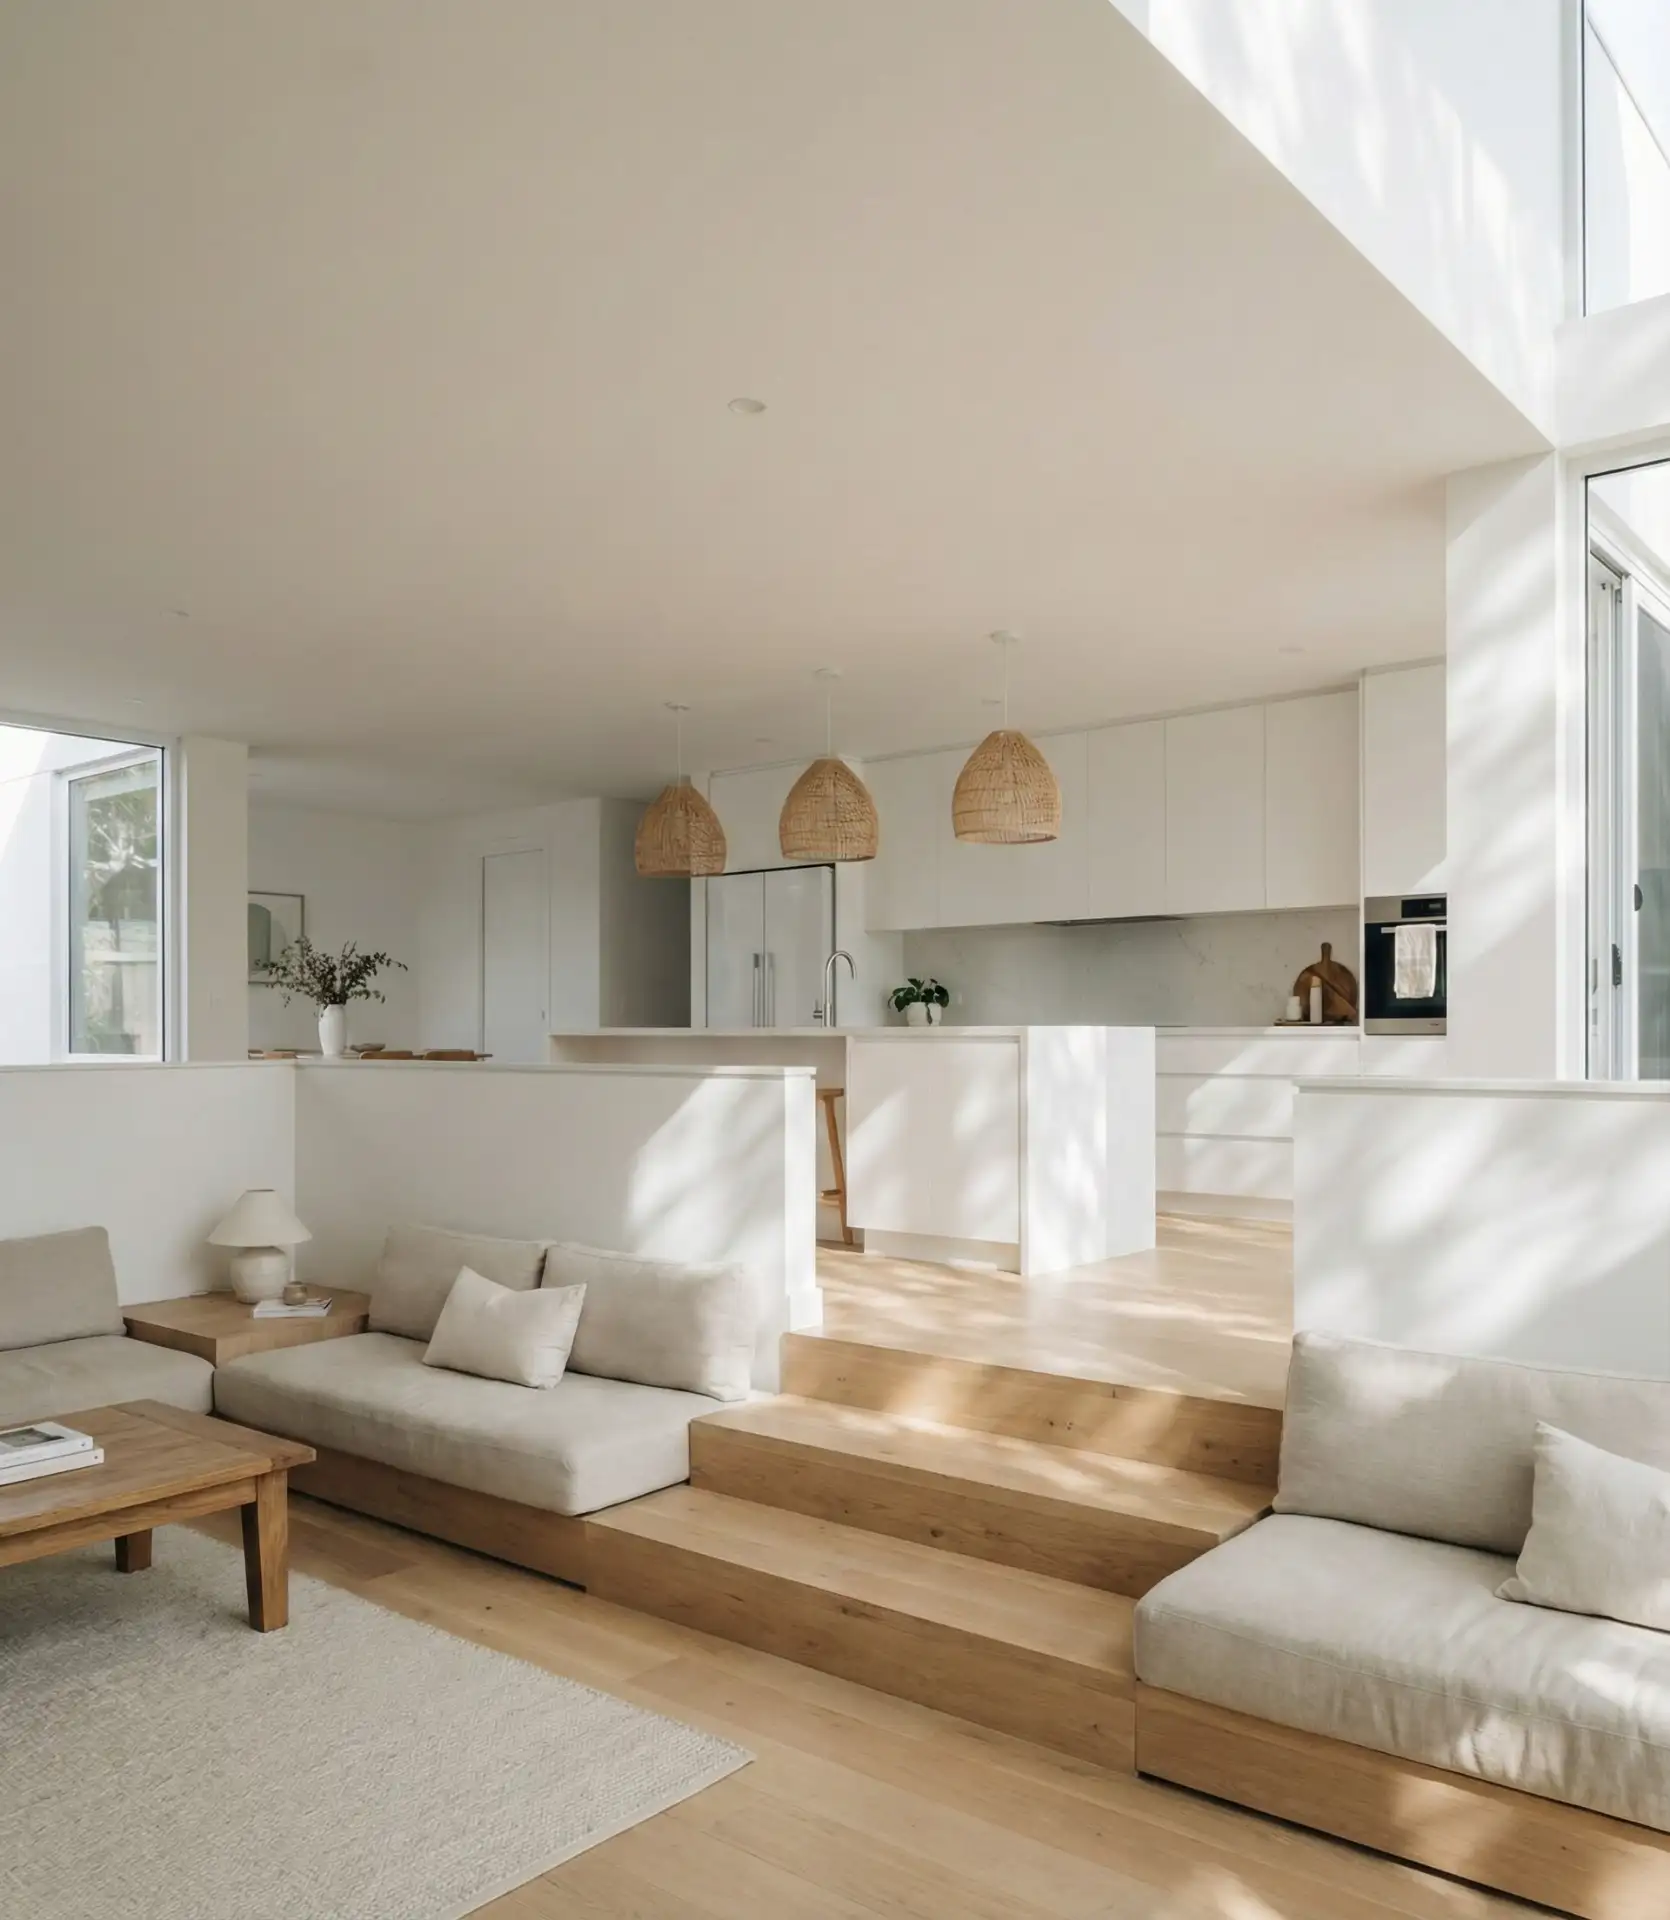
Where this style works best is in homes with high ceilings—at least 9 feet—so the level change doesn’t feel cramped. Colorado mountain homes frequently use this technique to create drama while respecting open sightlines to scenic views. Install LED strip lighting along the step edge for safety and visual interest. The construction cost adds $3,000–$7,000 to a renovation, but the architectural impact far exceeds simple room dividers.
12. Transparent Acrylic Room Divider
Freestanding acrylic panels offer a contemporary partition solution that maintains openness while subtly defining the kitchen boundary. This modern approach appeals to design-forward homeowners who want flexibility without permanent structural changes. The clear panels can be repositioned, removed entirely for large gatherings, or used to display hanging plants and decorative objects that become part of the overall aesthetic. 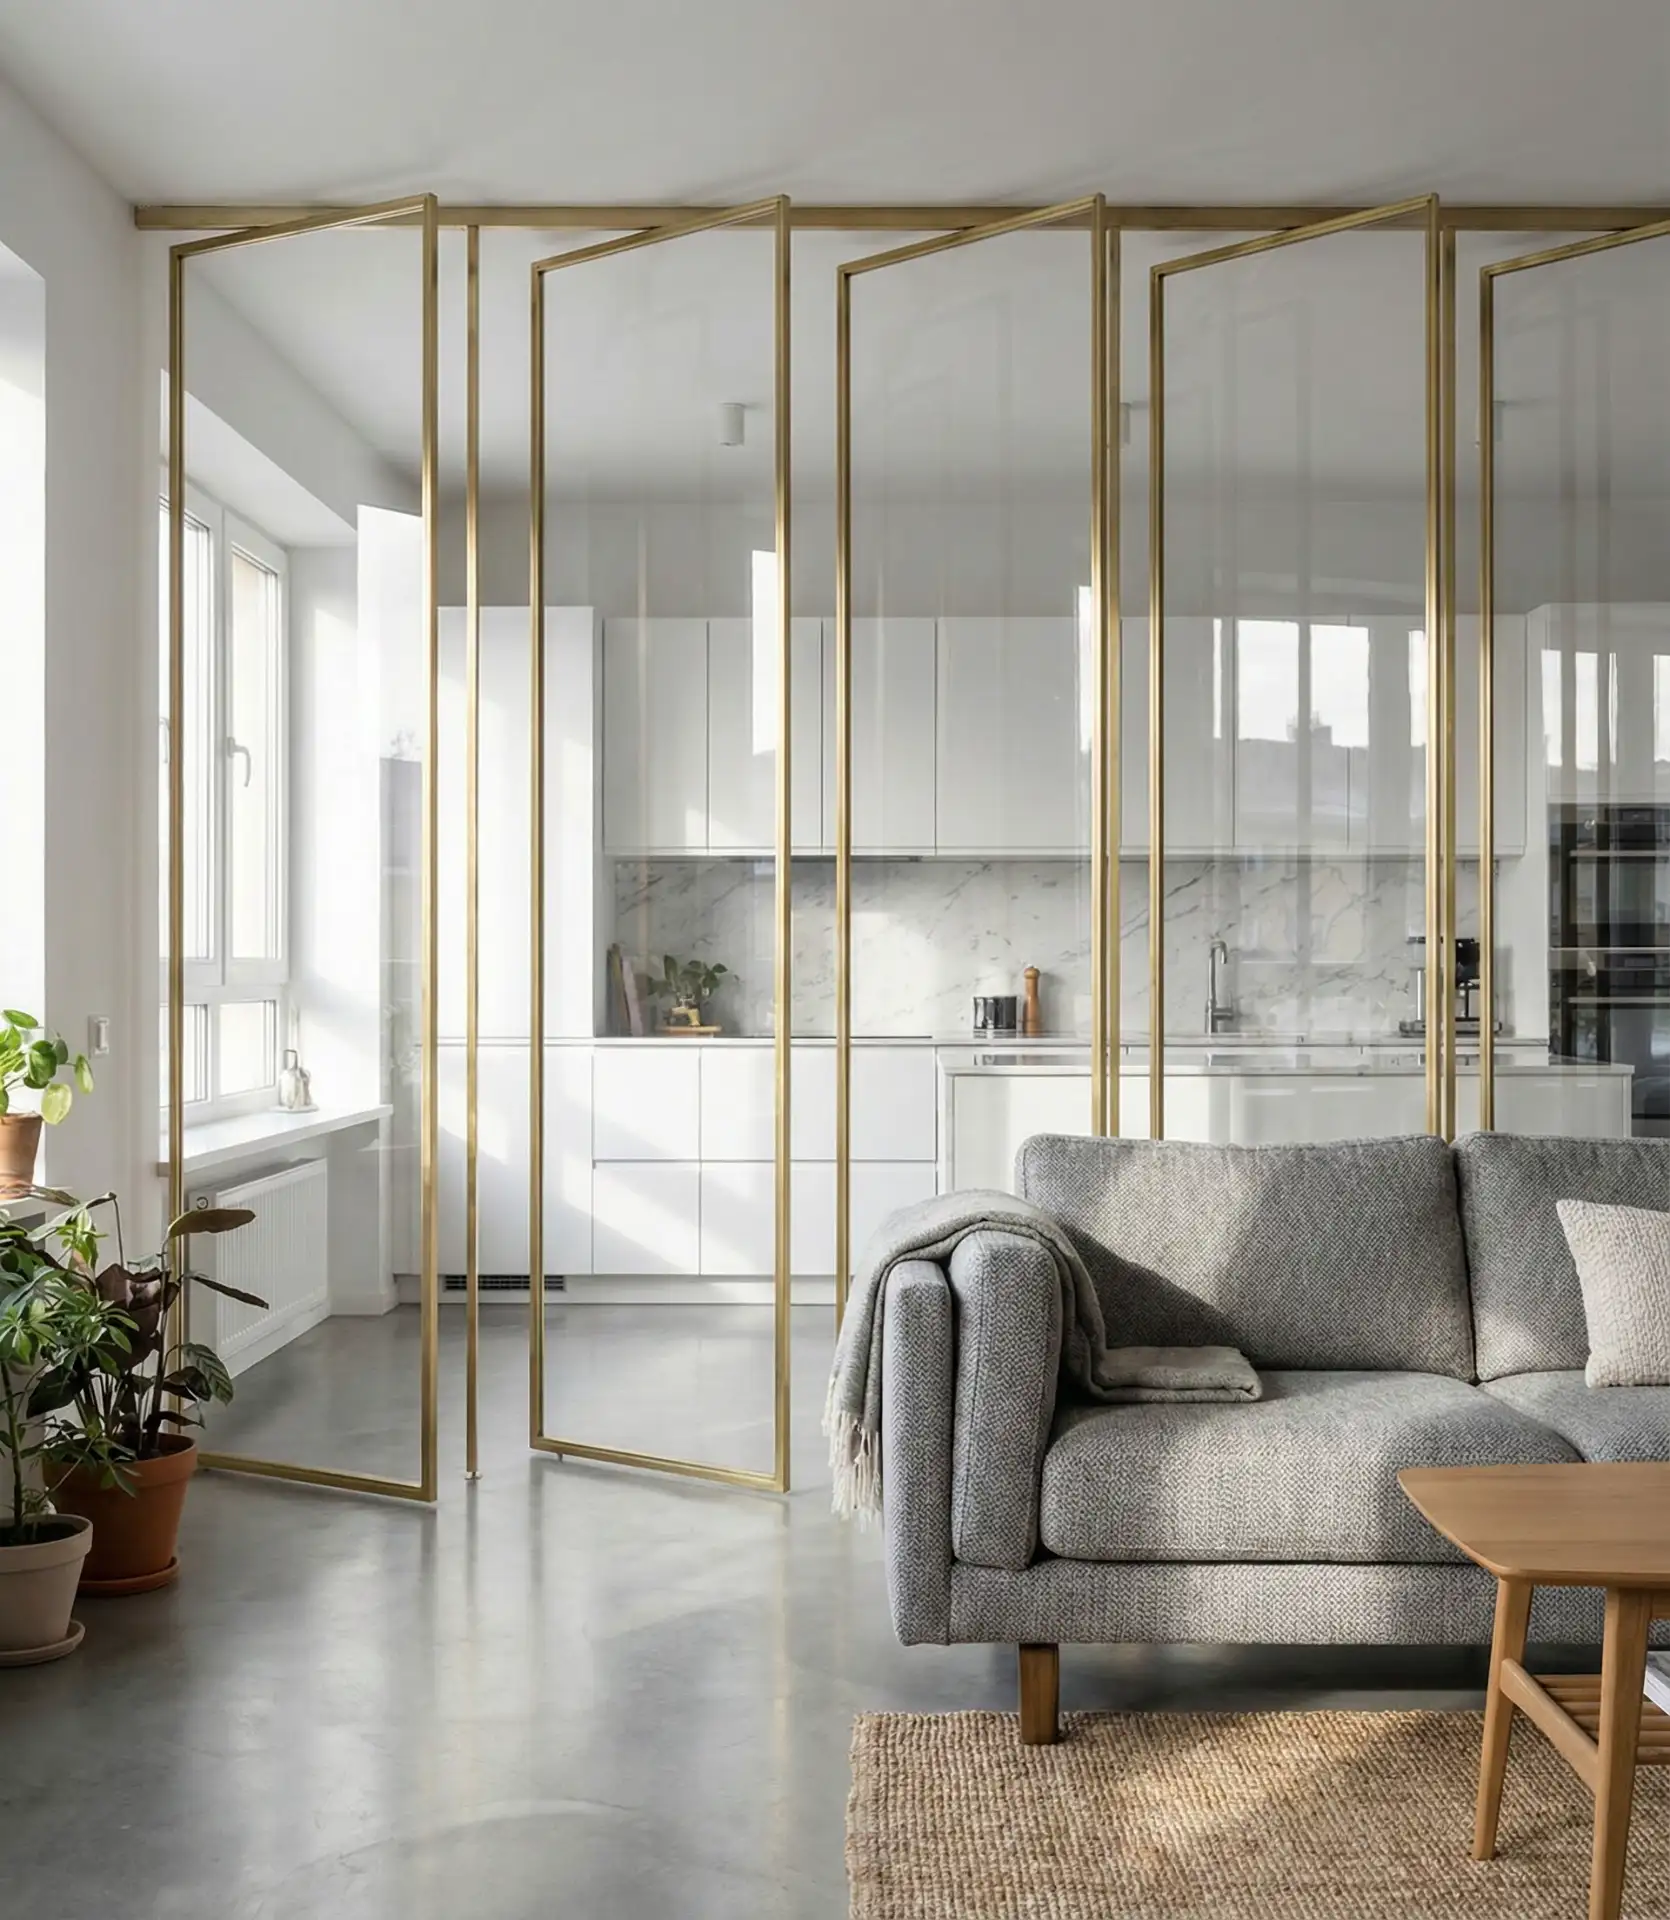
A common mistake is buying thin acrylic that bows or looks cheap—invest in 3/8-inch or 1/2-inch thickness for stability and premium appearance. Quality acrylic dividers range from $800 to $2,500 depending on size and frame material. My colleague installed one in her Brooklyn loft last spring, and she loves how it contains cooking odors during meal prep while disappearing visually when she wants the space to feel completely open.
13. Industrial Pipe Shelving System
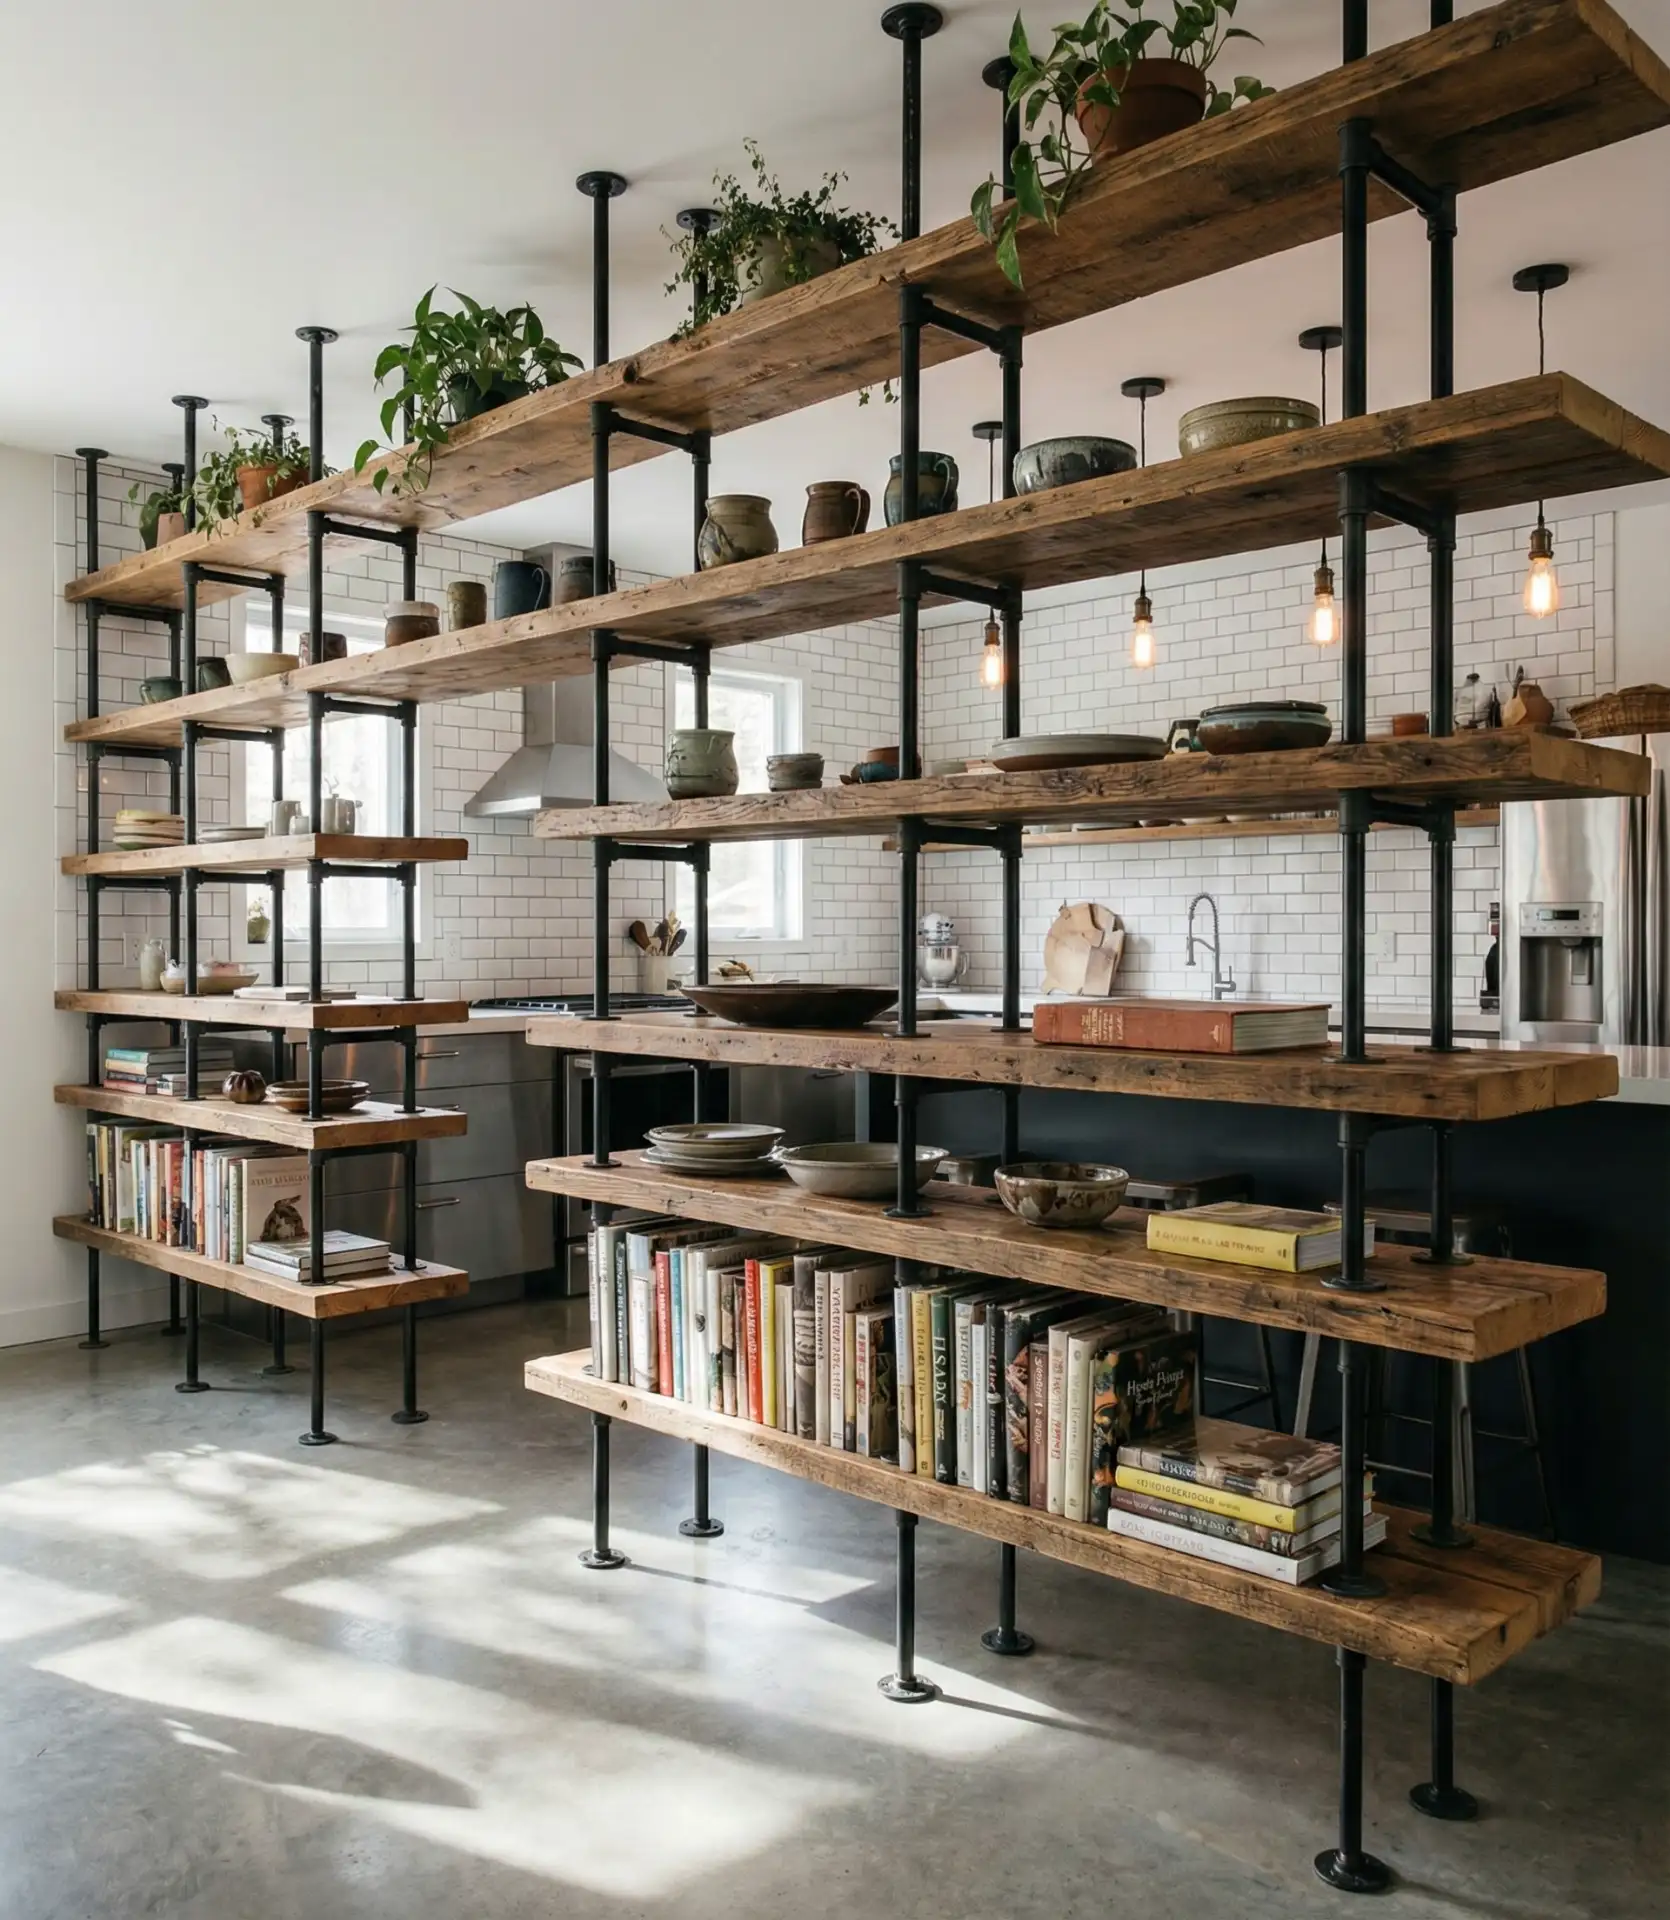
Black iron pipe shelves create an open storage wall that separates spaces while maintaining transparency and industrial charm. This design trend thrives in converted lofts and urban apartments where raw, authentic materials complement exposed brick and concrete. The pipe framework holds wooden shelves at varying heights, storing cookbooks, plants, and decorative items while creating a semi-permeable boundary between the kitchen and adjacent rooms. 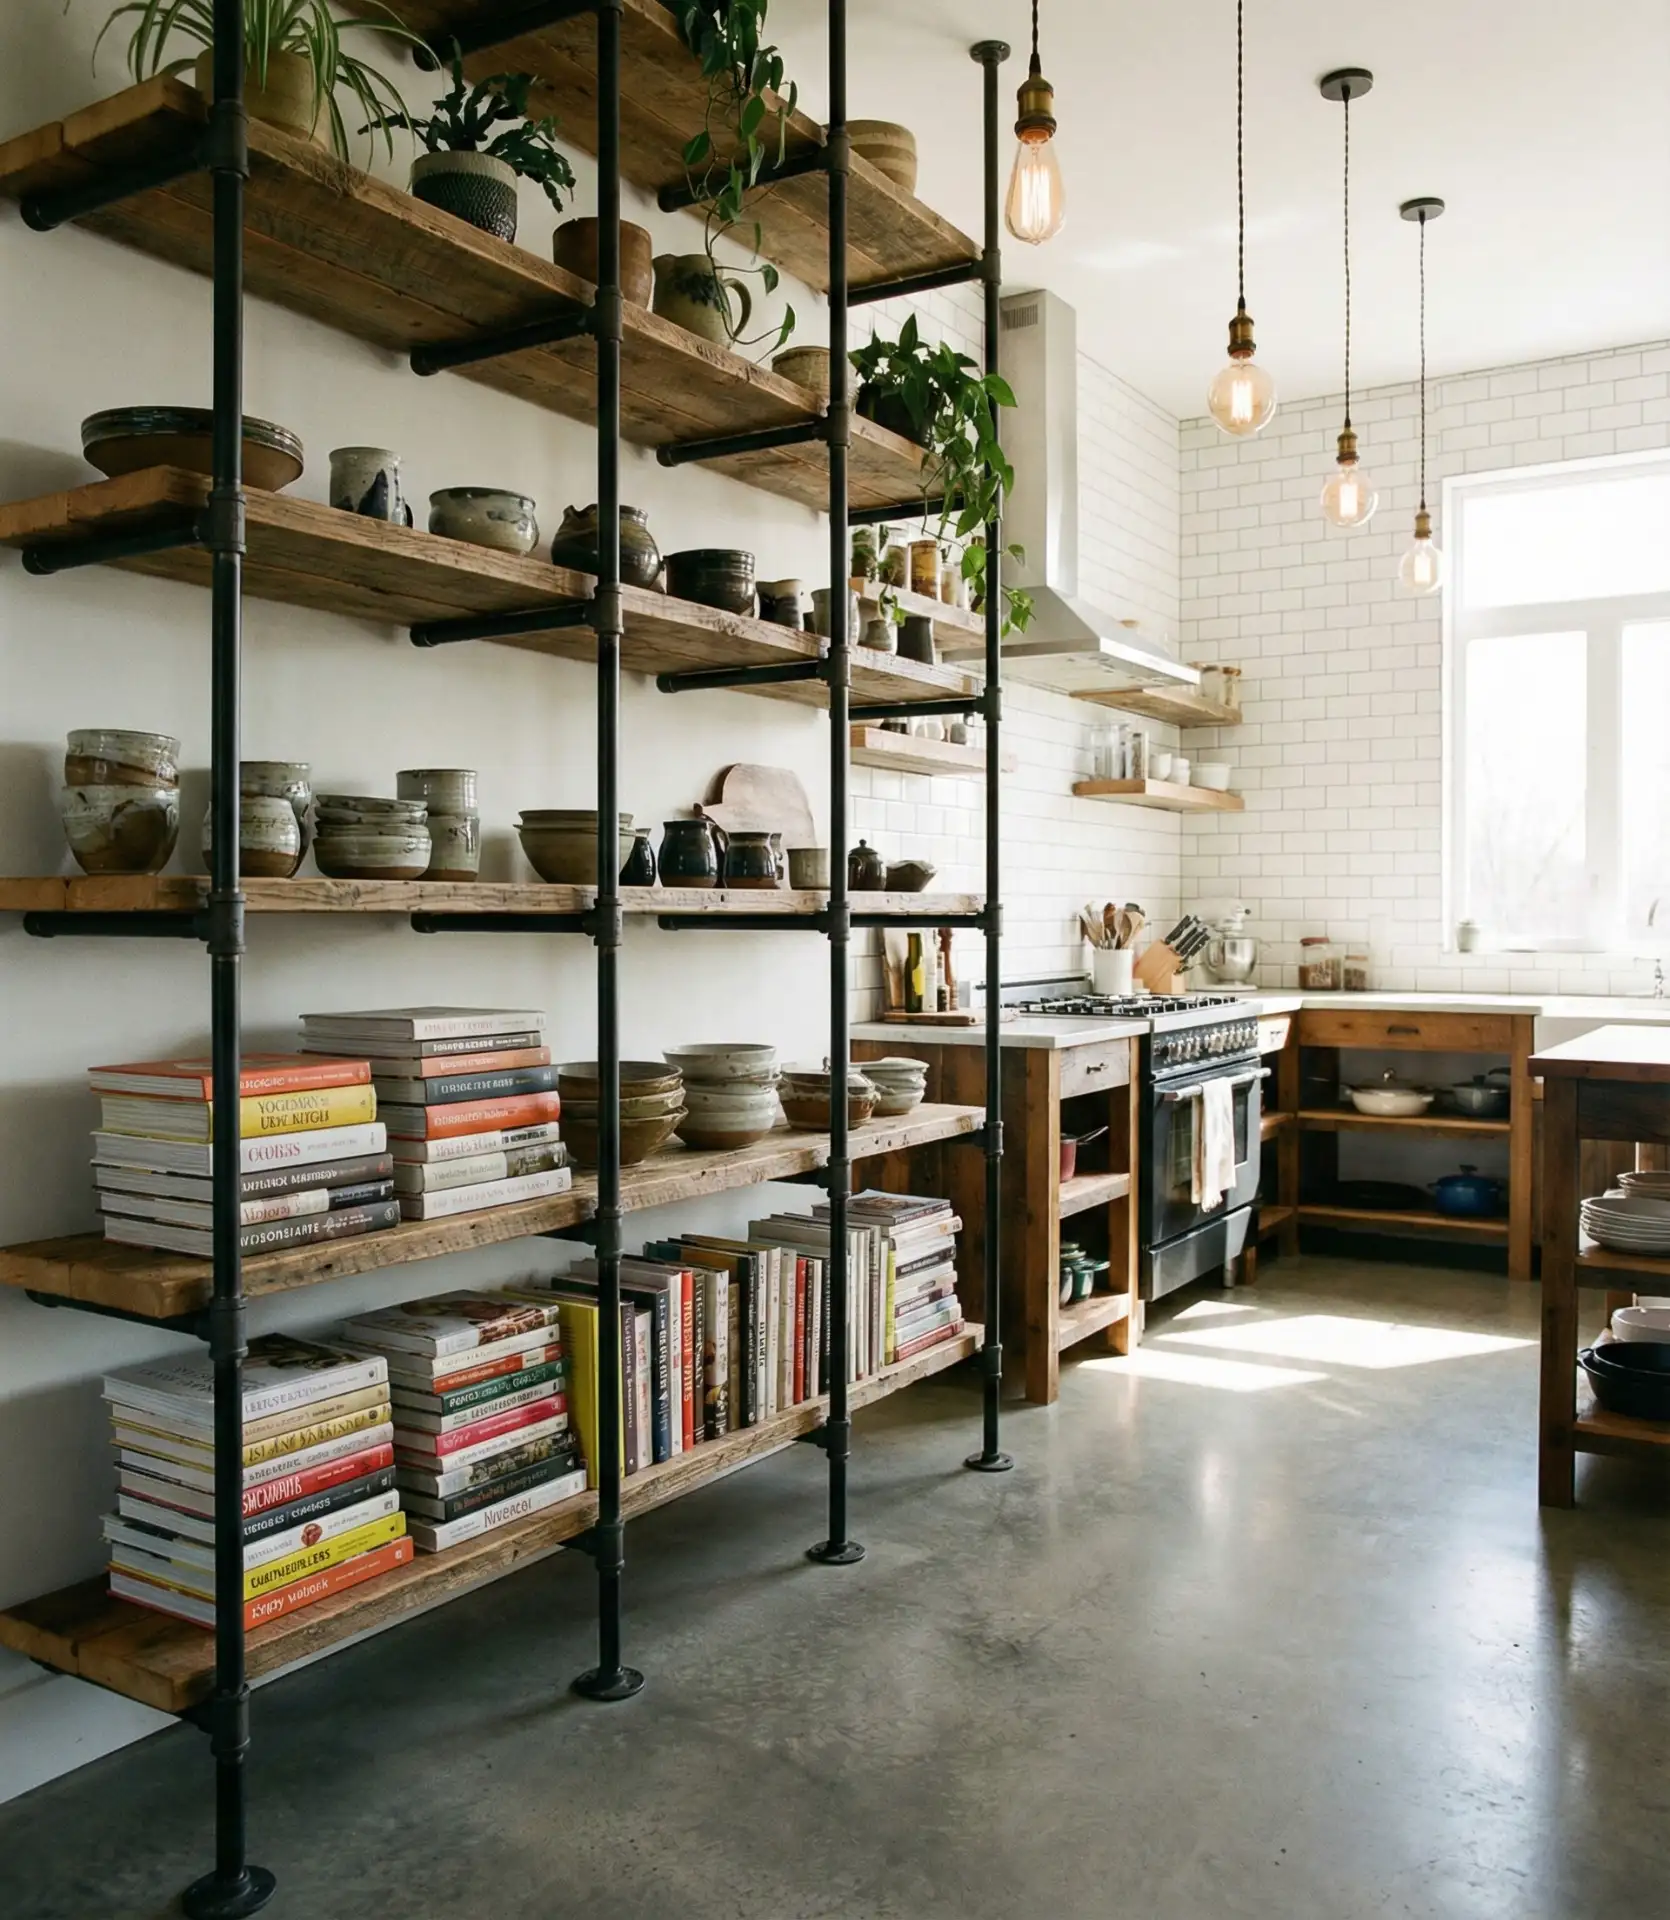
For homes in the Pacific Northwest, the pipe structure is a DIY-friendly option that costs between $300 and $900 in materials and is a weekend project for those homeowners with the skills. The trick is to securely anchor the pipes into the wall studs, using flanges every 4 feet to add stability. Leave 12–16 inches between the shelves to leave room for items of varying heights. The industrial aesthetic goes well with the more rustic elements. The look includes butcher block countertops and vintage rugs, which add a layered visual interest to the overall design.
14. Sliding Barn Door Closure
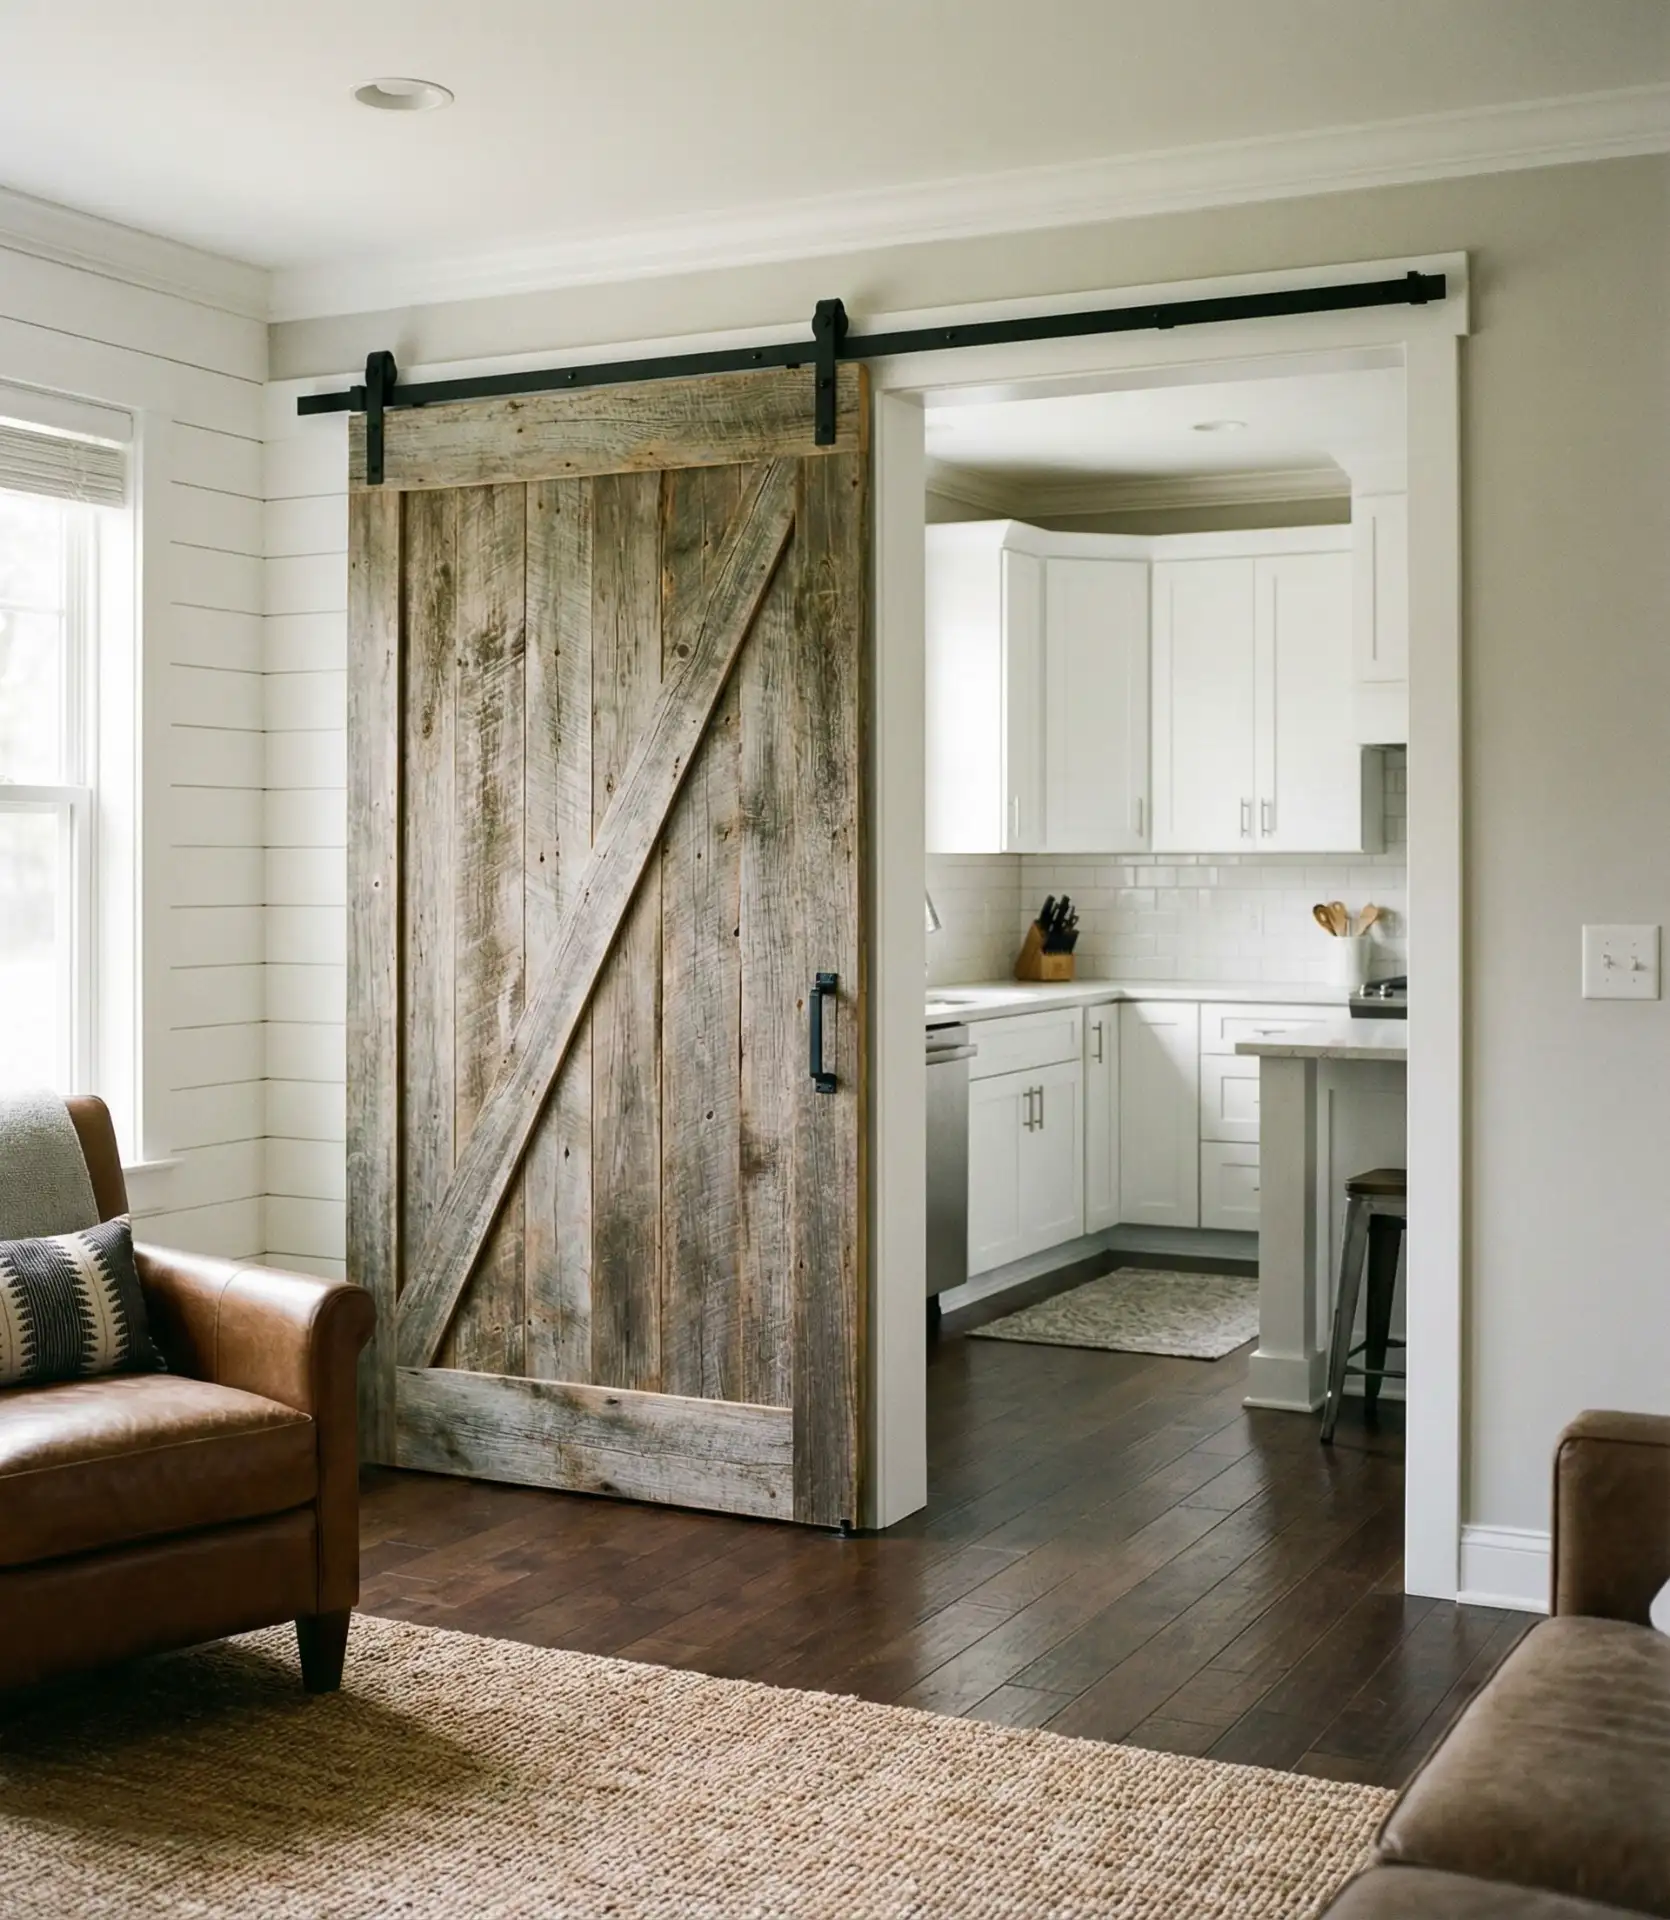
An oversized sliding barn door provides the option to completely close off your kitchen when needed while adding rustic architectural character. This semi-open solution works particularly well in homes where kitchen visibility isn’t always desirable—perhaps you’re staging for a home sale or hosting formal events. The door slides along a ceiling-mounted track, tucking against the wall when open and creating a dramatic focal point when closed.
Expert installers emphasize measuring carefully—your door should overlap the opening by at least 2 inches on each side when closed. Hardware kits run $200-600, while custom barn doors range from $500 to $3,000 depending on size and wood type. Texas homeowners particularly embrace this solution, appreciating how it honors farmhouse heritage while providing modern flexibility. Keep the door open 90% of the time to maintain flow, closing only when circumstances demand privacy.
15. Breakfast Bar with Waterfall Edge

A dramatic waterfall edge on your breakfast counter creates sculptural separation between kitchen and living zones while showcasing premium stone or quartz. This design idea elevates the humble breakfast bar into a statement piece that anchors the entire open space. The vertical edge conceals under-counter storage or appliances from the living room view, maintaining clean lines, while the horizontal surface provides casual dining and workspace. 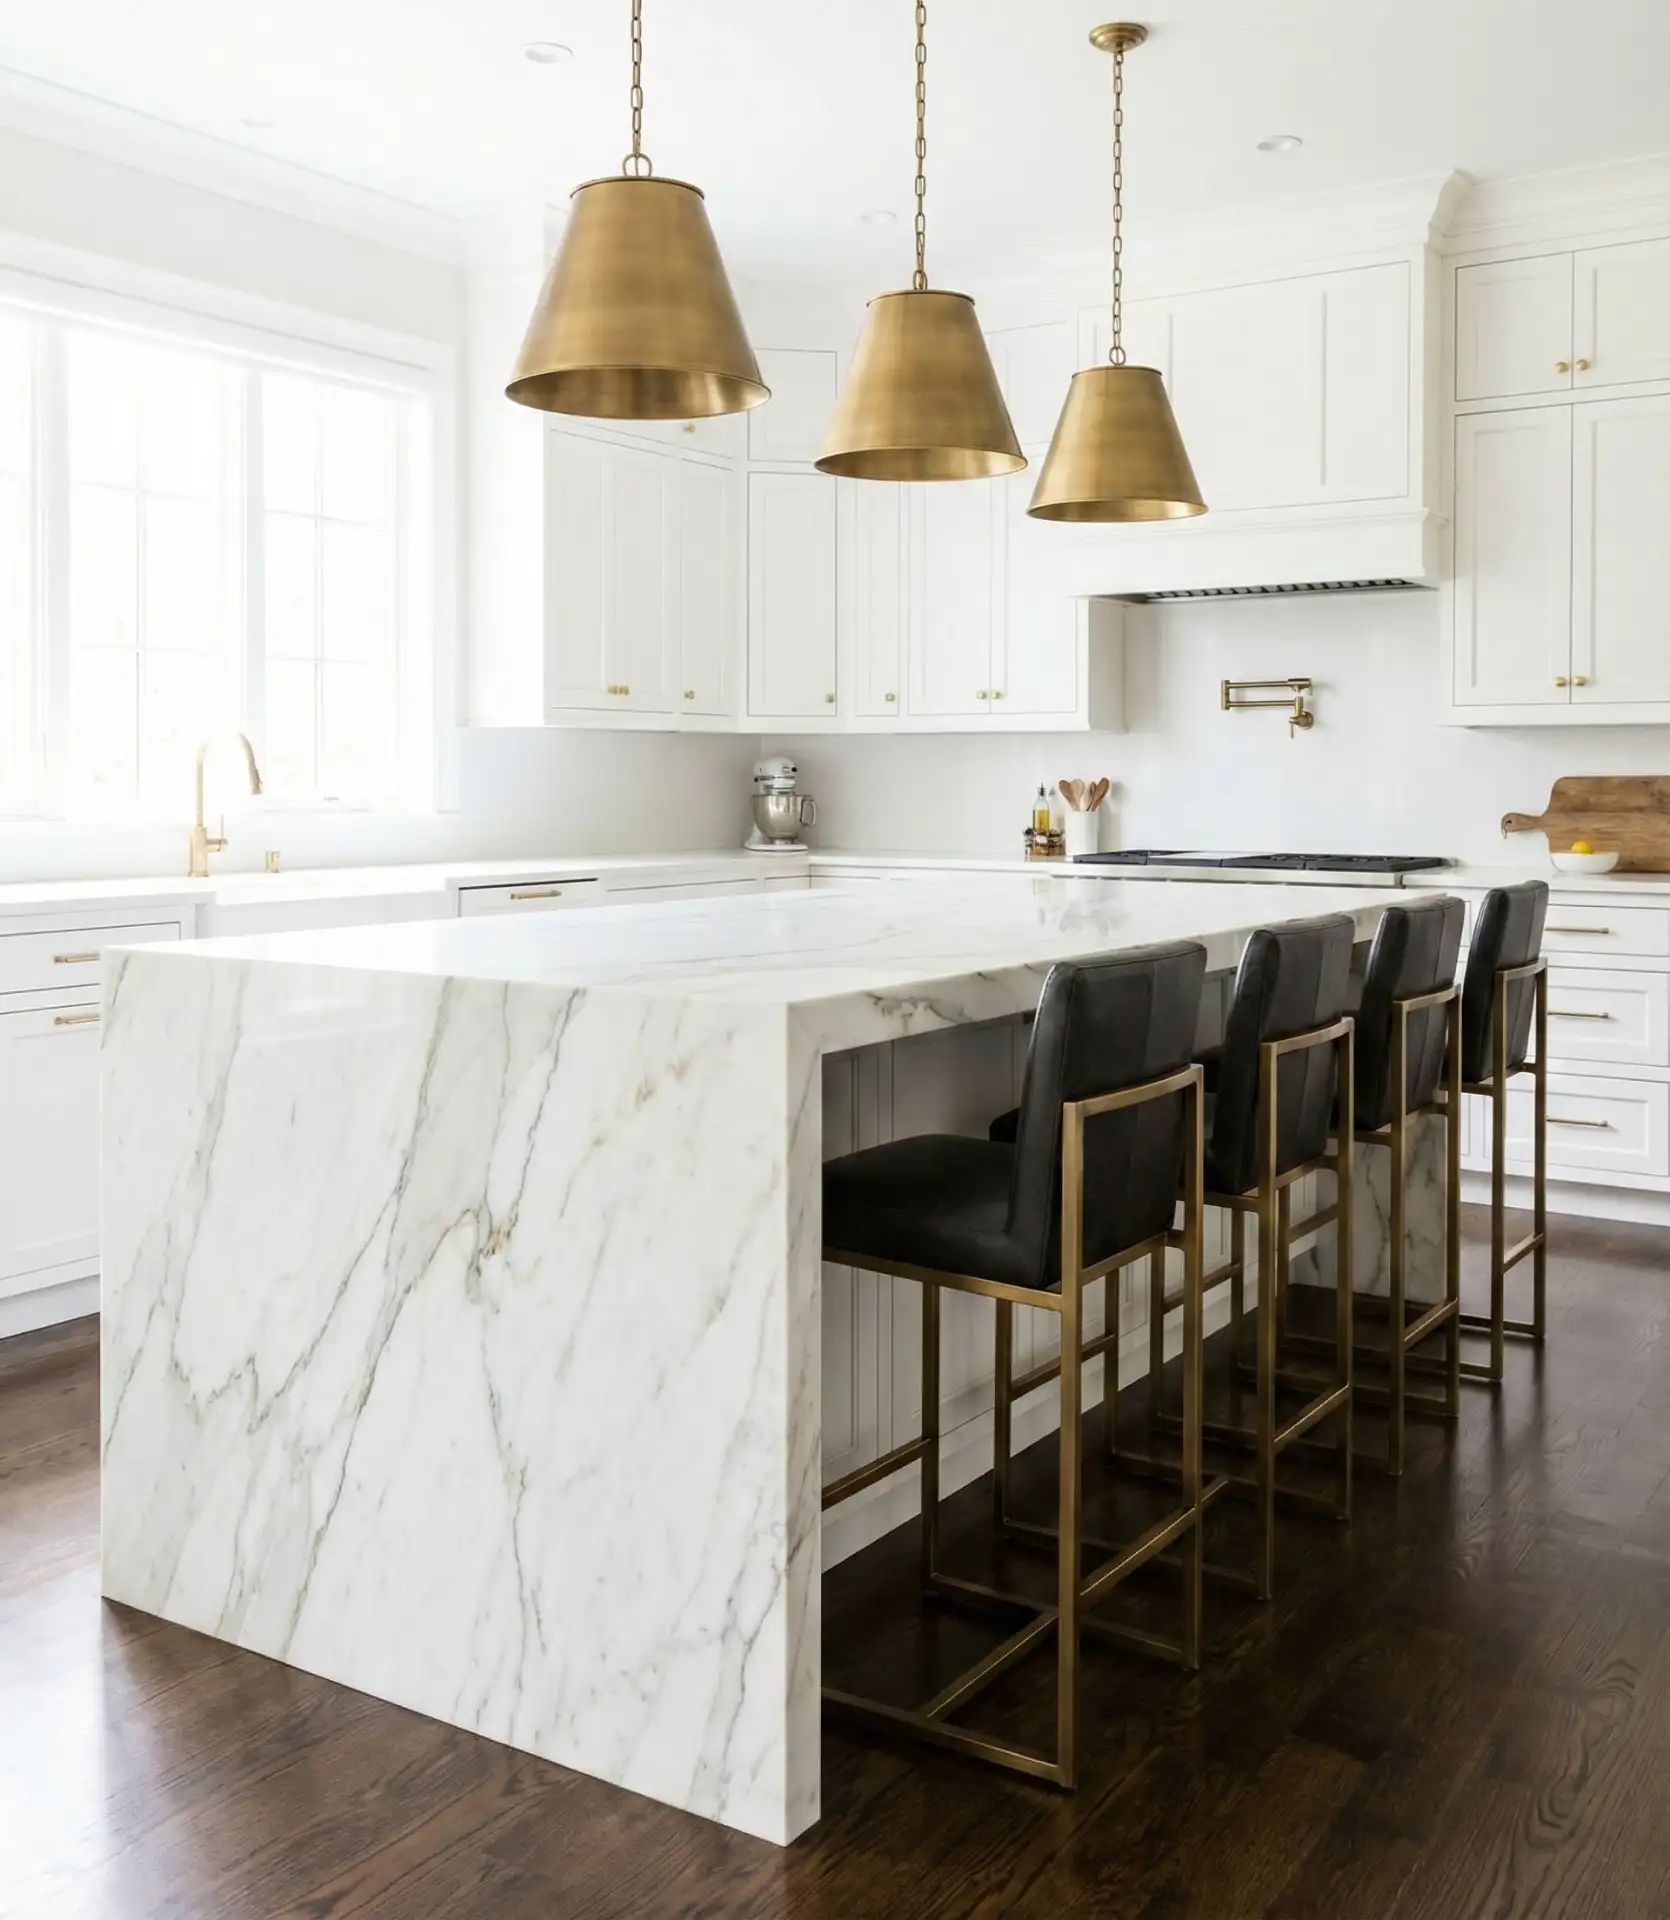
Real homeowners often underestimate the cost—waterfall edges add $1,200-3,500 to your countertop budget due to the extra material and precision fabrication required. The investment pays off in visual impact and resale value, particularly with striking materials like book-matched marble or bold veined quartz. Position the waterfall on the living room-facing side only to save money while achieving the desired effect of hiding kitchen clutter from main sightlines.
16. Vertical Garden Wall Divider
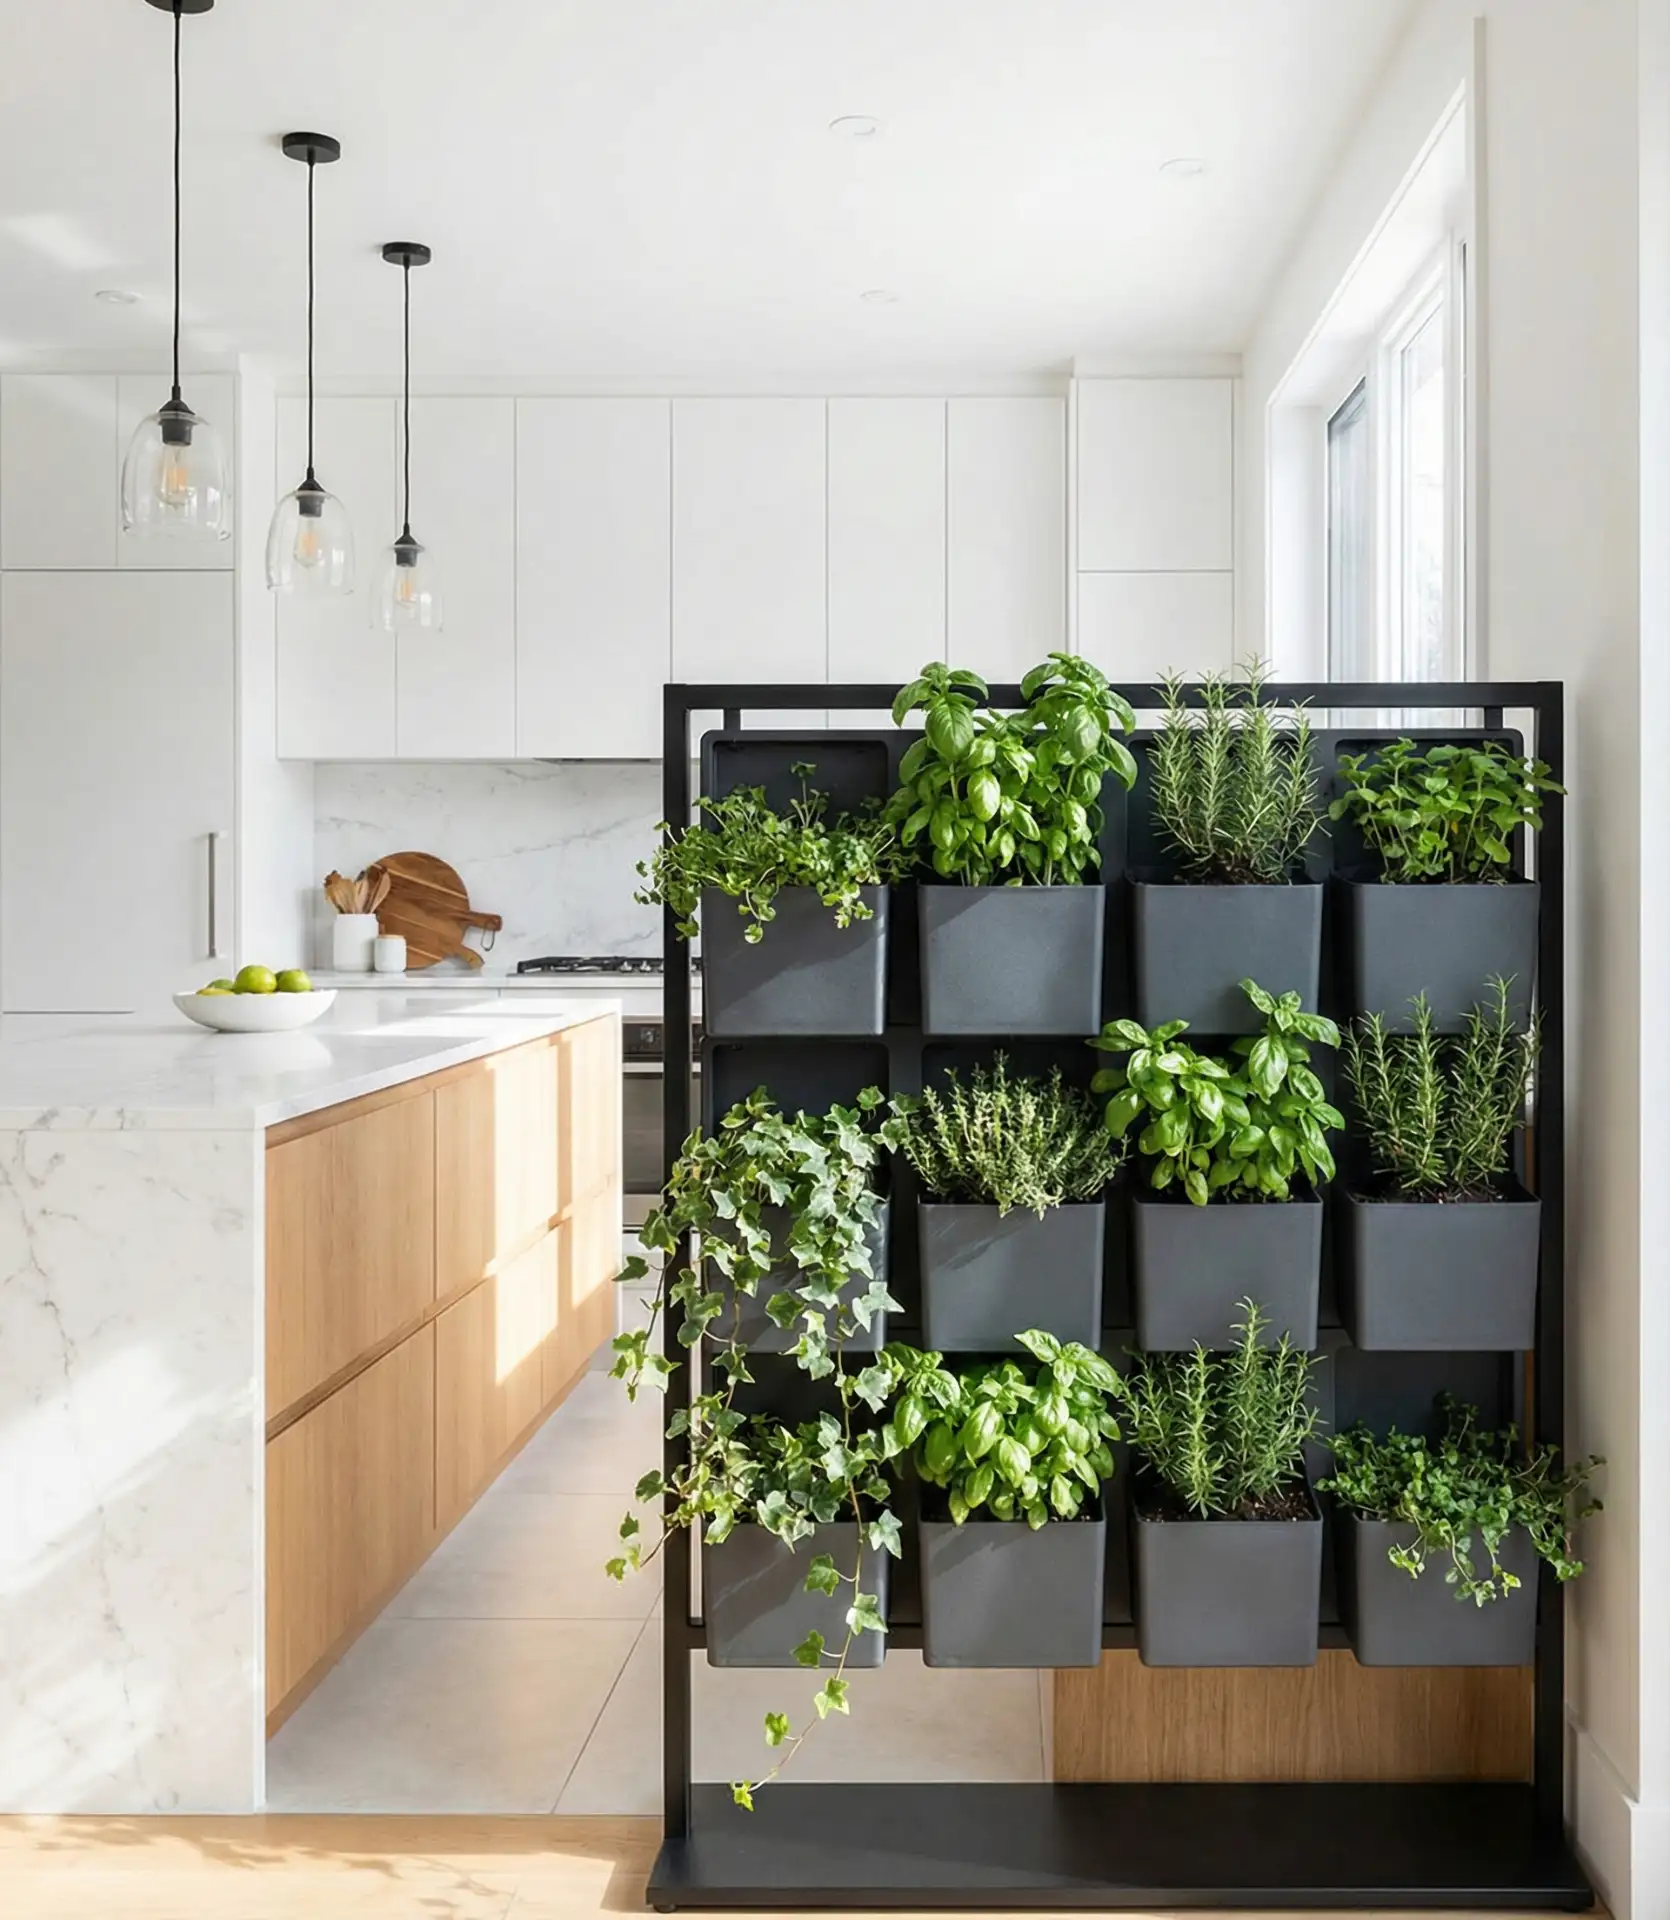
Having a plant wall gives you a natural way to partition your space while also getting some natural wellness benefits. This biophilic design trend highlights both the increasing American appreciation of indoor biophilic design and the indoor air quality crisis. The vertical garden also serves as a permeable and dynamic room divider while providing fresh ingredients. Adding moss panels, potted herb systems, and hydroponic installations is a wonderful way to add some texture to your space and also provide air filtration.
This biophilic design feature works best in homes and spaces that have plenty of natural light and a compatible climate. California residents favor this design, which also hosts the majority of automated drip irrigation systems. Modular systems go for pre-made systems ranging from 400 to 2000 dollars. For custom systems, the price is 2500 to 8000 dollars. The payoff is a divider that improves air quality, lowers stress, and also provides you with fresh ingredients.
17. Restaurant Pass-Through with Chef’s Window

The design gives a strong theatrical quality to mealtime by allowing chefs to serve plates to individual diners and talk to them directly. A large destination is a counter at the pass-through window so diners can interact with the chef. The opening measures approximately 4–6 feet wide and features a counter-height ledge for staging and passing food along, along with a removable integrated shelving unit and custom, preset overhead lights. 
Those on a budget should be aware that this option is comprised of merely opening a wall, cutting a window, and adding a frame for around $1,500–4,000 and is therefore significantly cheaper than full wall removal. This option is ideal for home chefs who want to highlight their culinary skills while also enjoying the privacy of a semi-closed-off cooking area. When the kitchen is messy, you can simply remove the sliding panel, which adds flexibility to the space.
18. L-Shaped Counter Embracing Dining
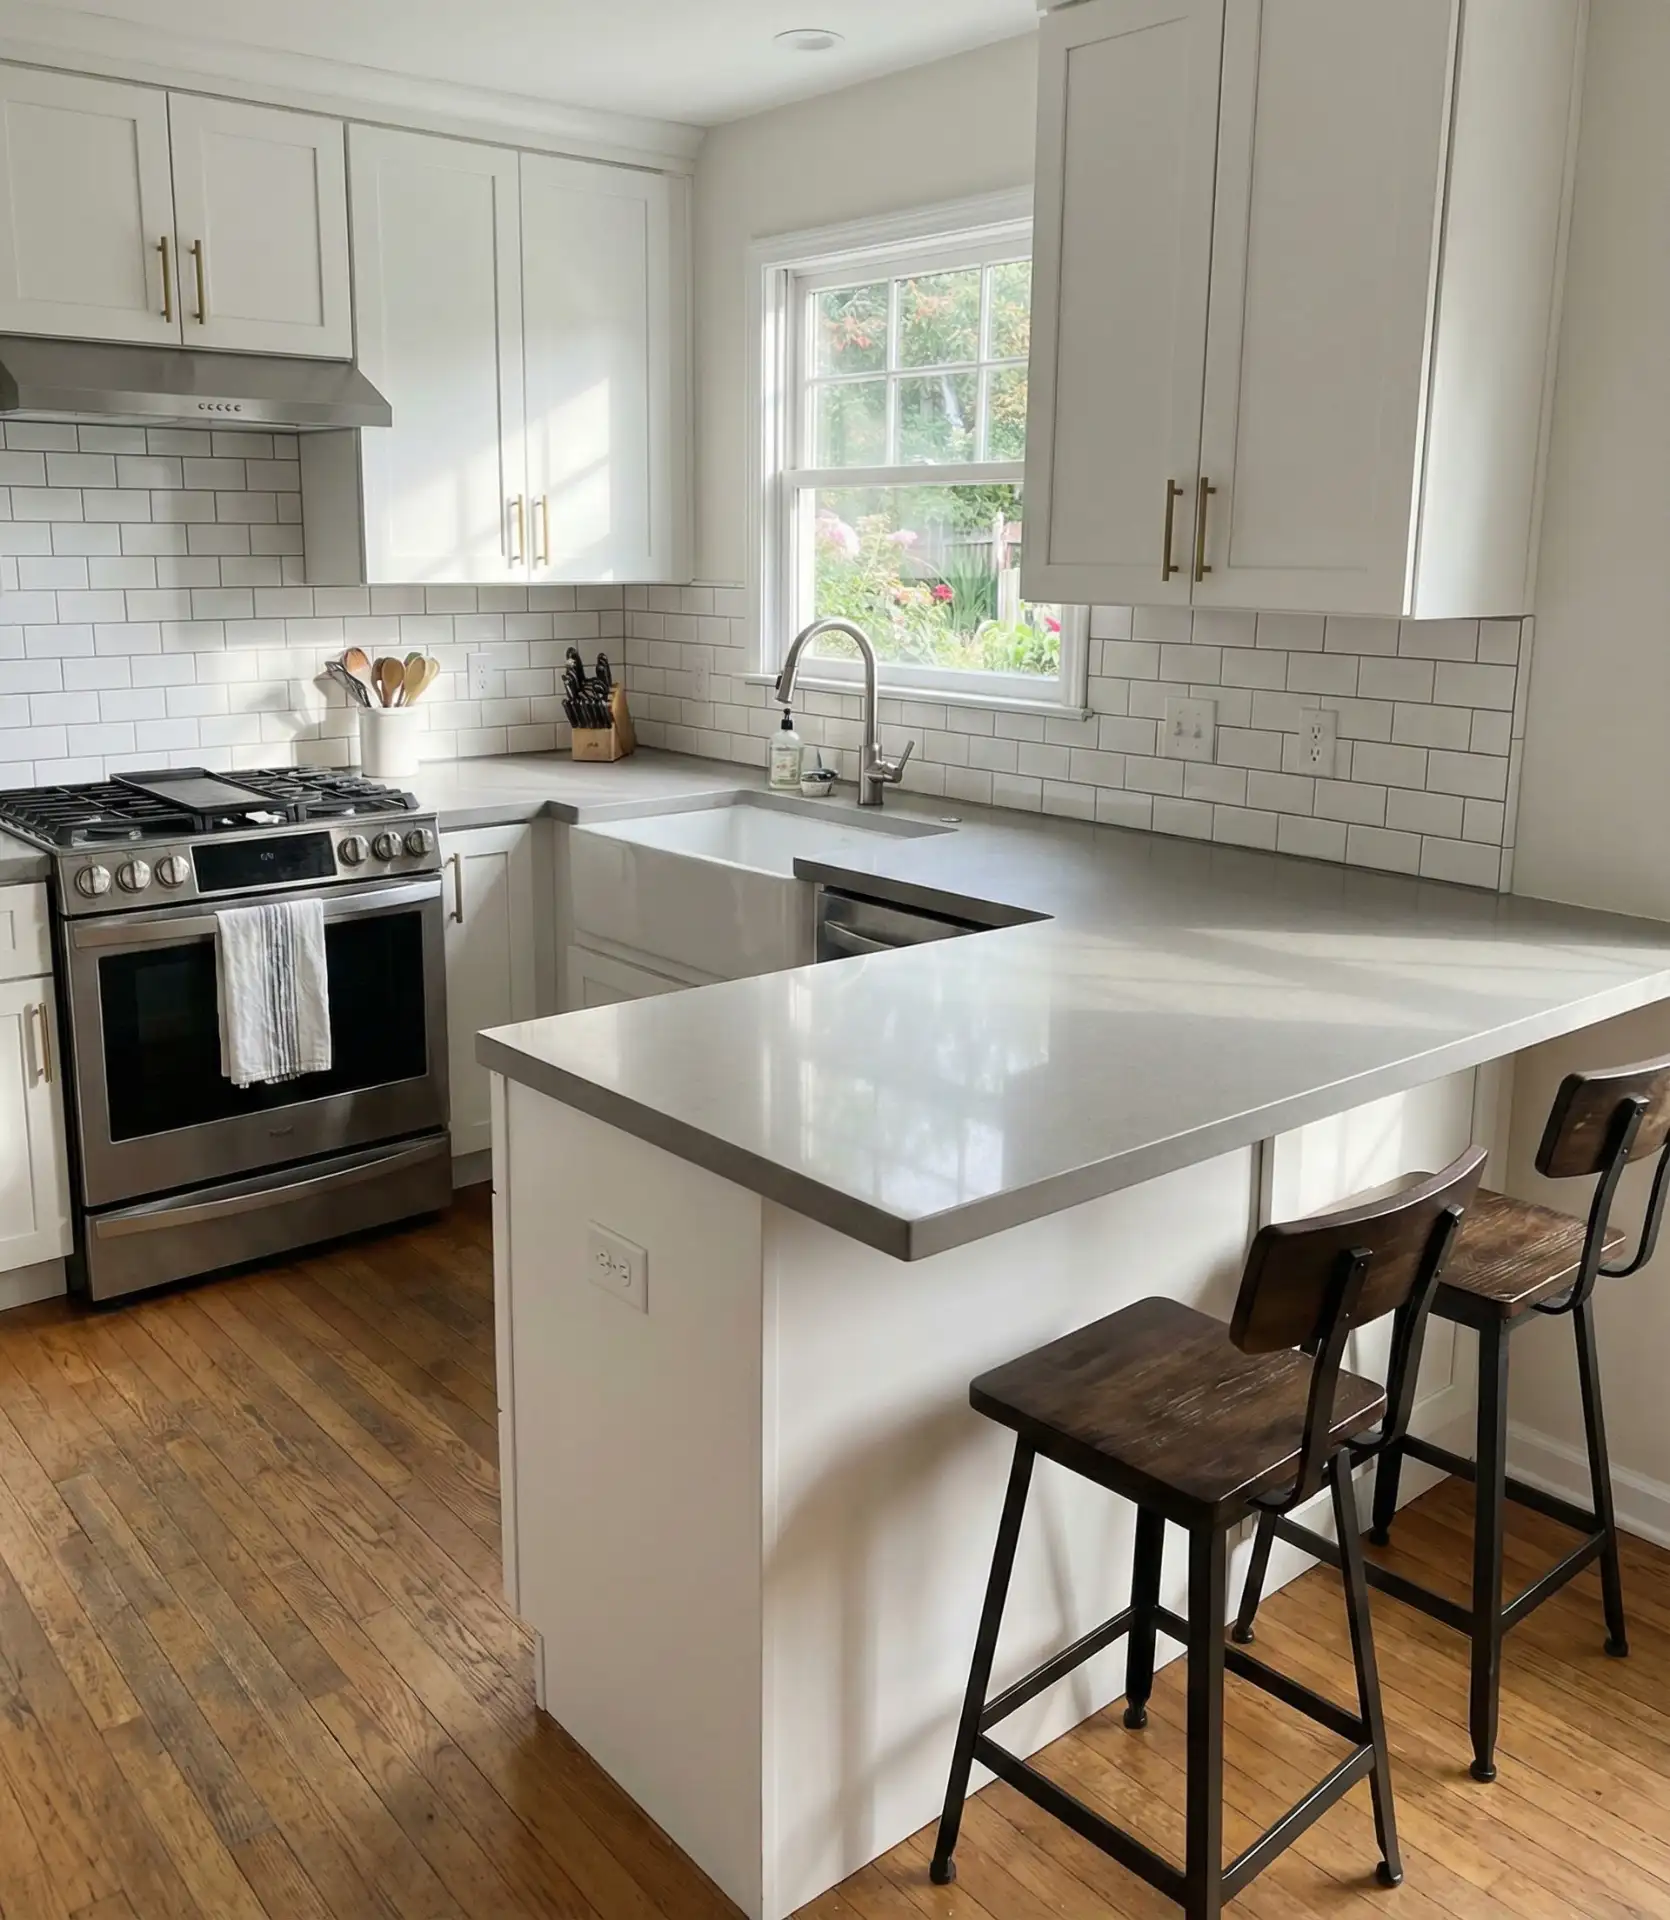
An L-shaped counter configuration surrounds your dining area and creates an embracing design that keeps diners engaged with the kitchen. This design works best in tight areas where a conventional island wouldn’t fit. One leg of the L houses cooking appliances and a sink, while the other runs perpendicular to it and includes a bar-height counter that can seat 3-4 people comfortably. 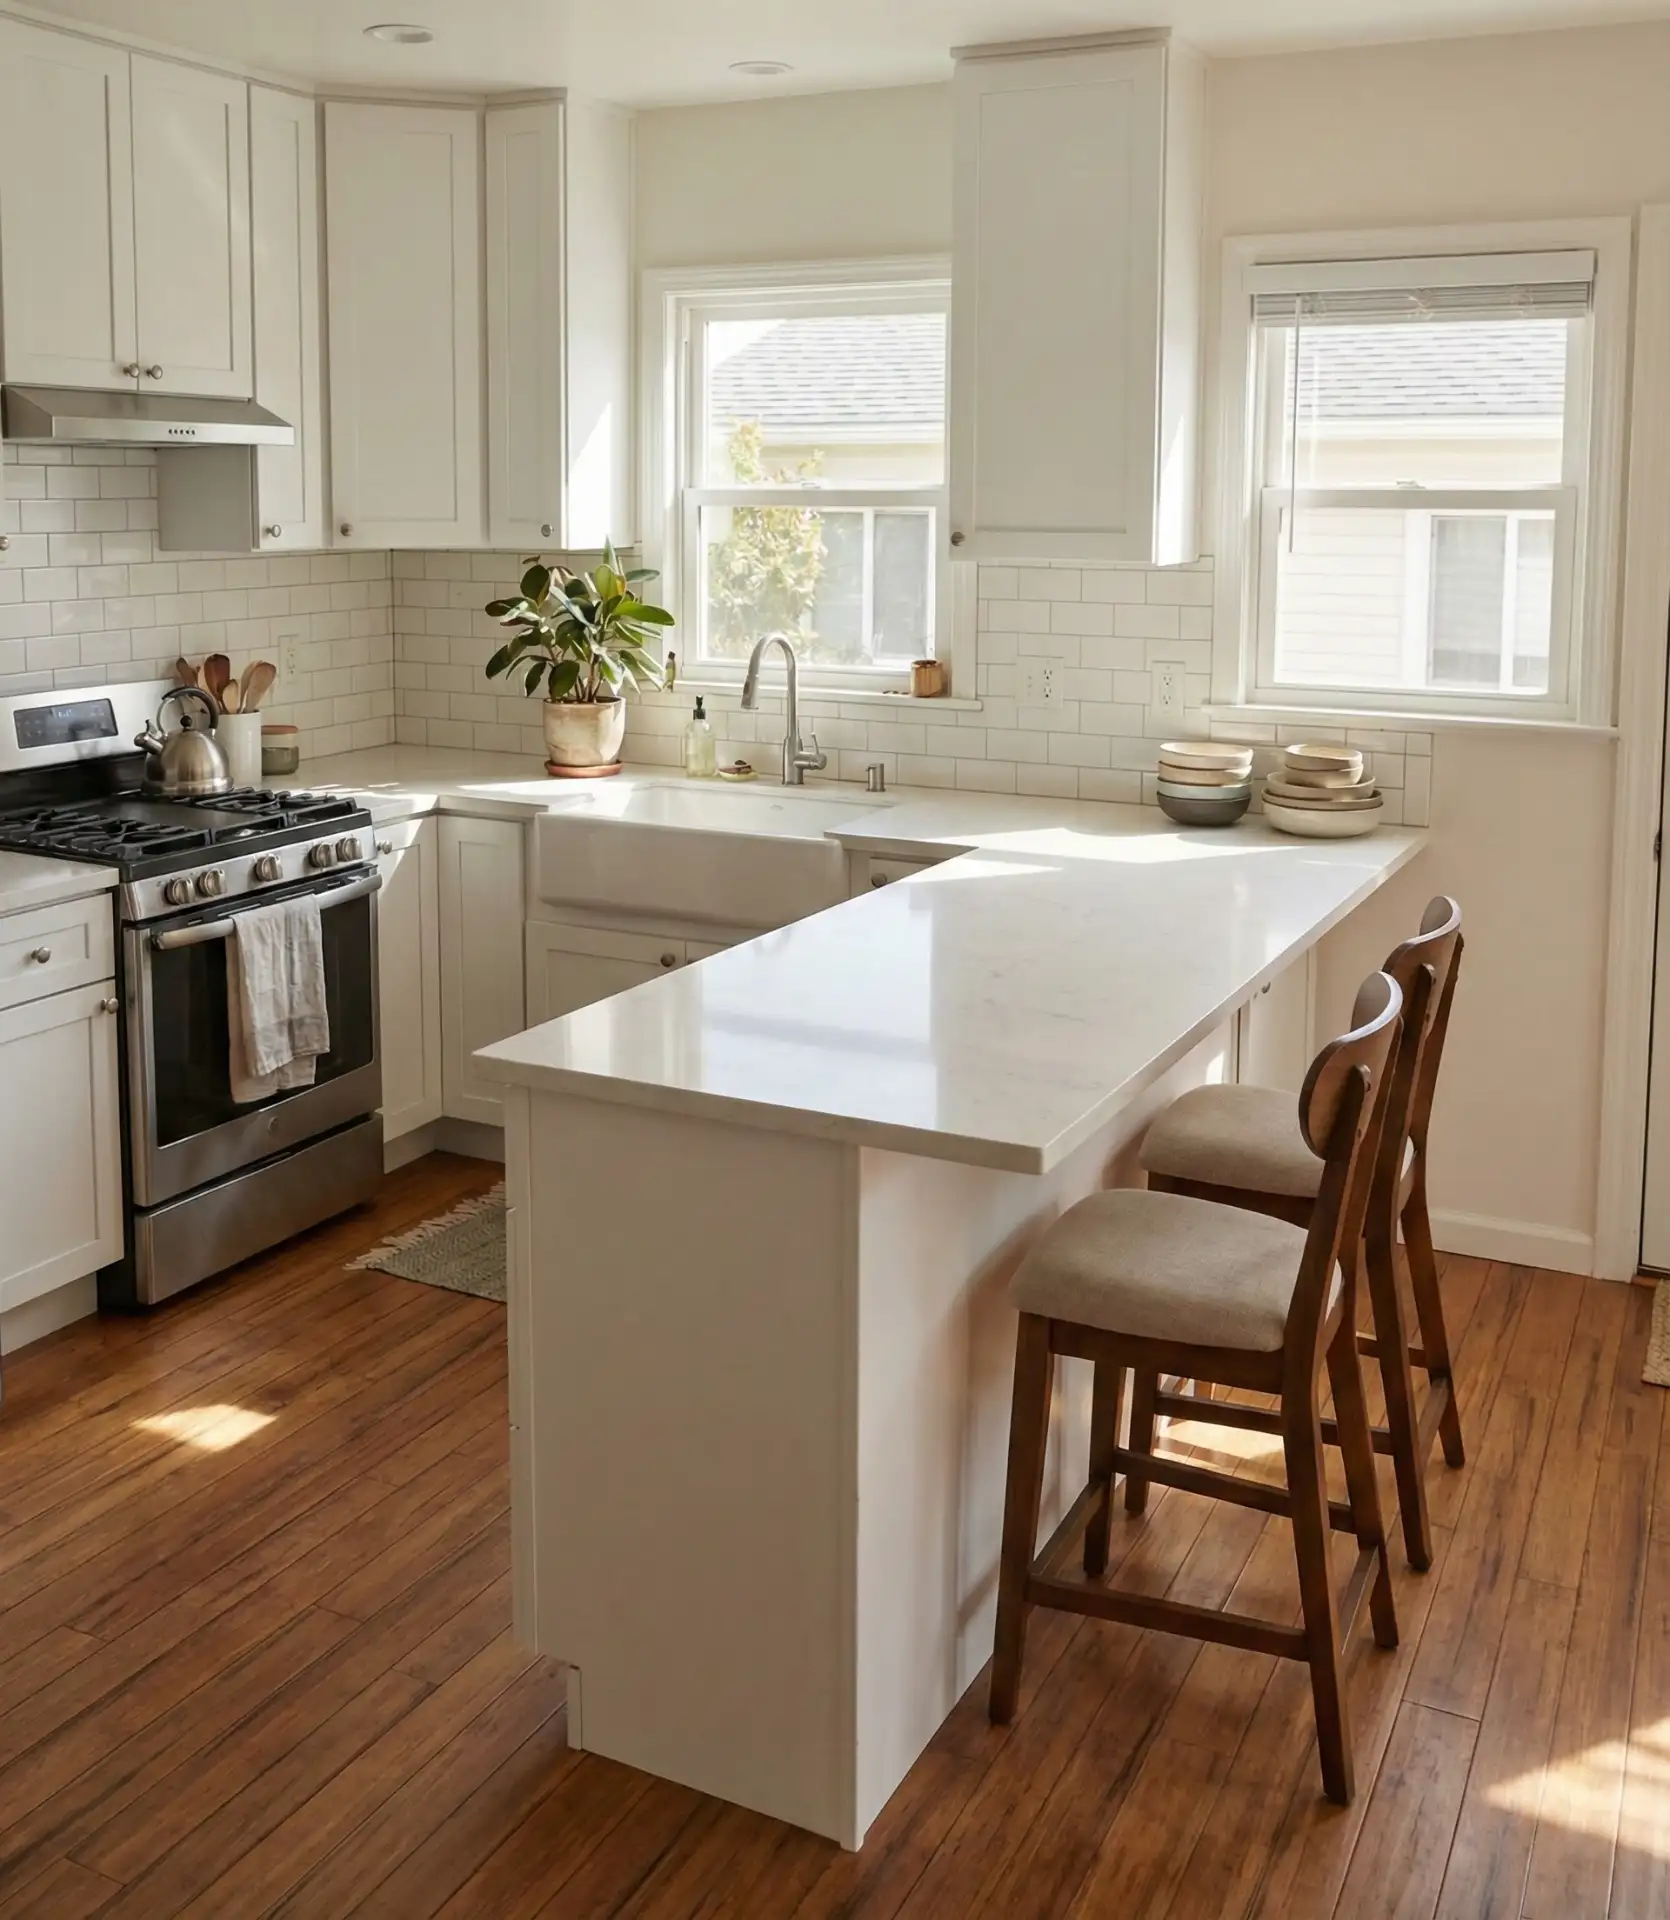
In Northeastern rowhouses and narrow urban condos, this layout maximizes limited square footage brilliantly. The key is maintaining 42 inches of clearance in the L’s interior corner for comfortable movement. A common mistake is making the dining extension too short—aim for at least 5 feet to accommodate three stools with adequate elbow room. This configuration typically costs no more than a standard kitchen layout but delivers significantly enhanced functionality and openness.
19. Folding Glass Wall System
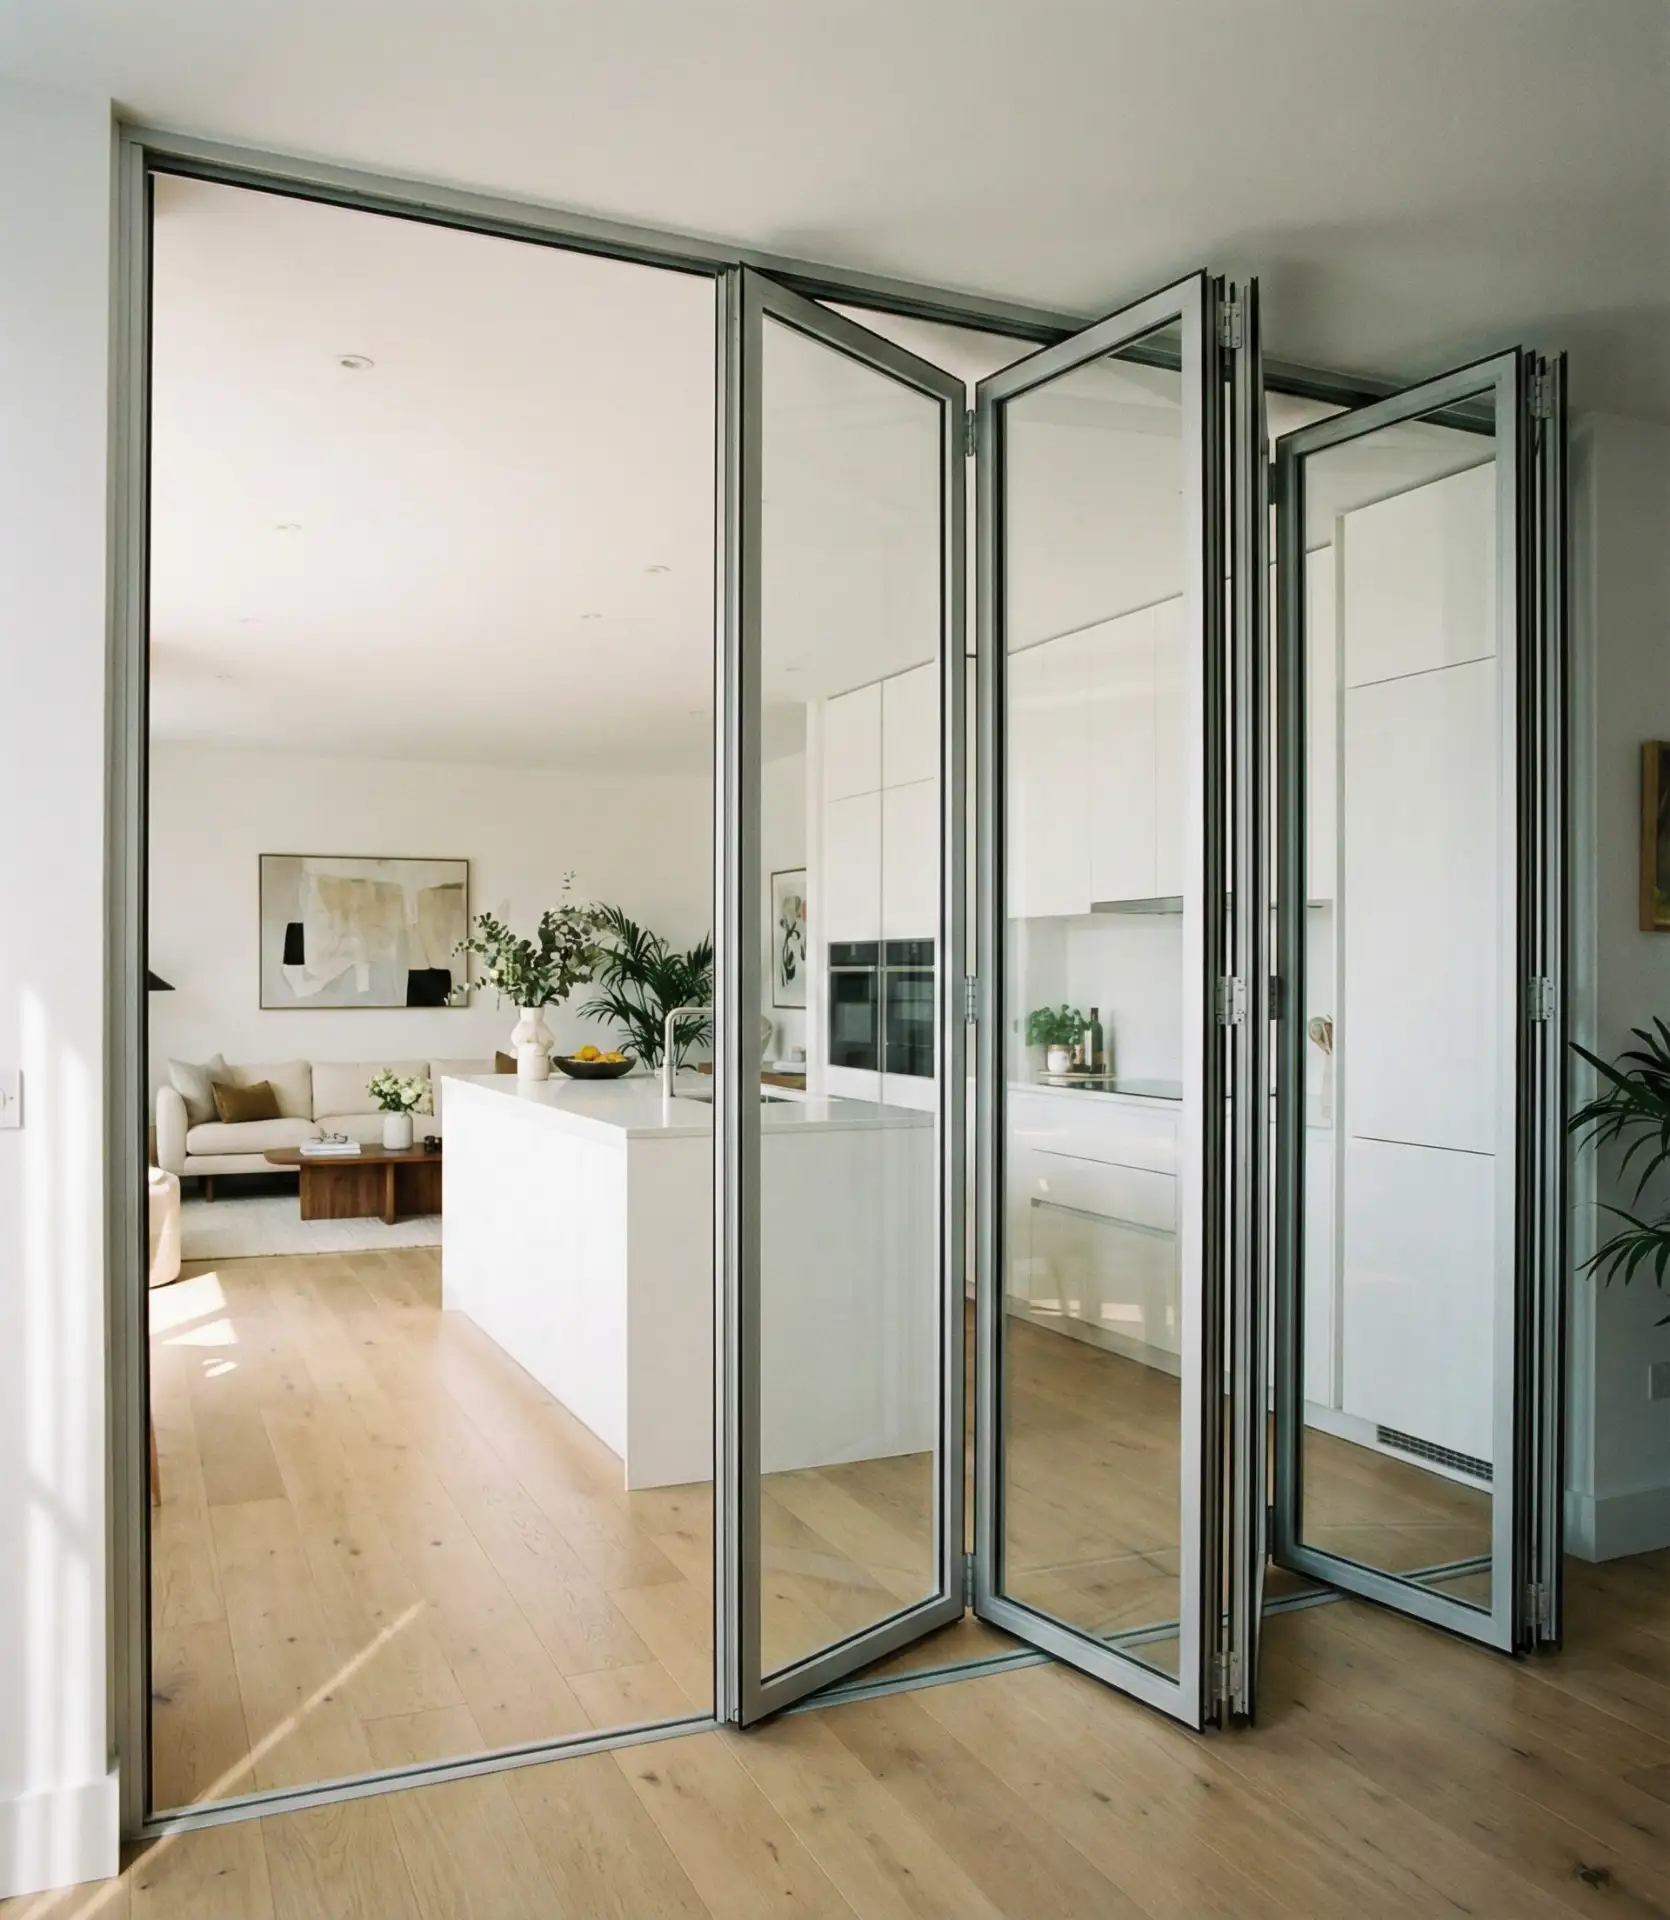
Accordion-style folding glass panels offer ultimate flexibility, transforming your kitchen from completely enclosed to fully open in seconds. This high-end semi-open solution appeals to homeowners who want options—close the glass during heavy cooking to contain smells and mess, and fold it completely away for entertaining. The panels stack neatly against one wall, essentially disappearing when not in use. 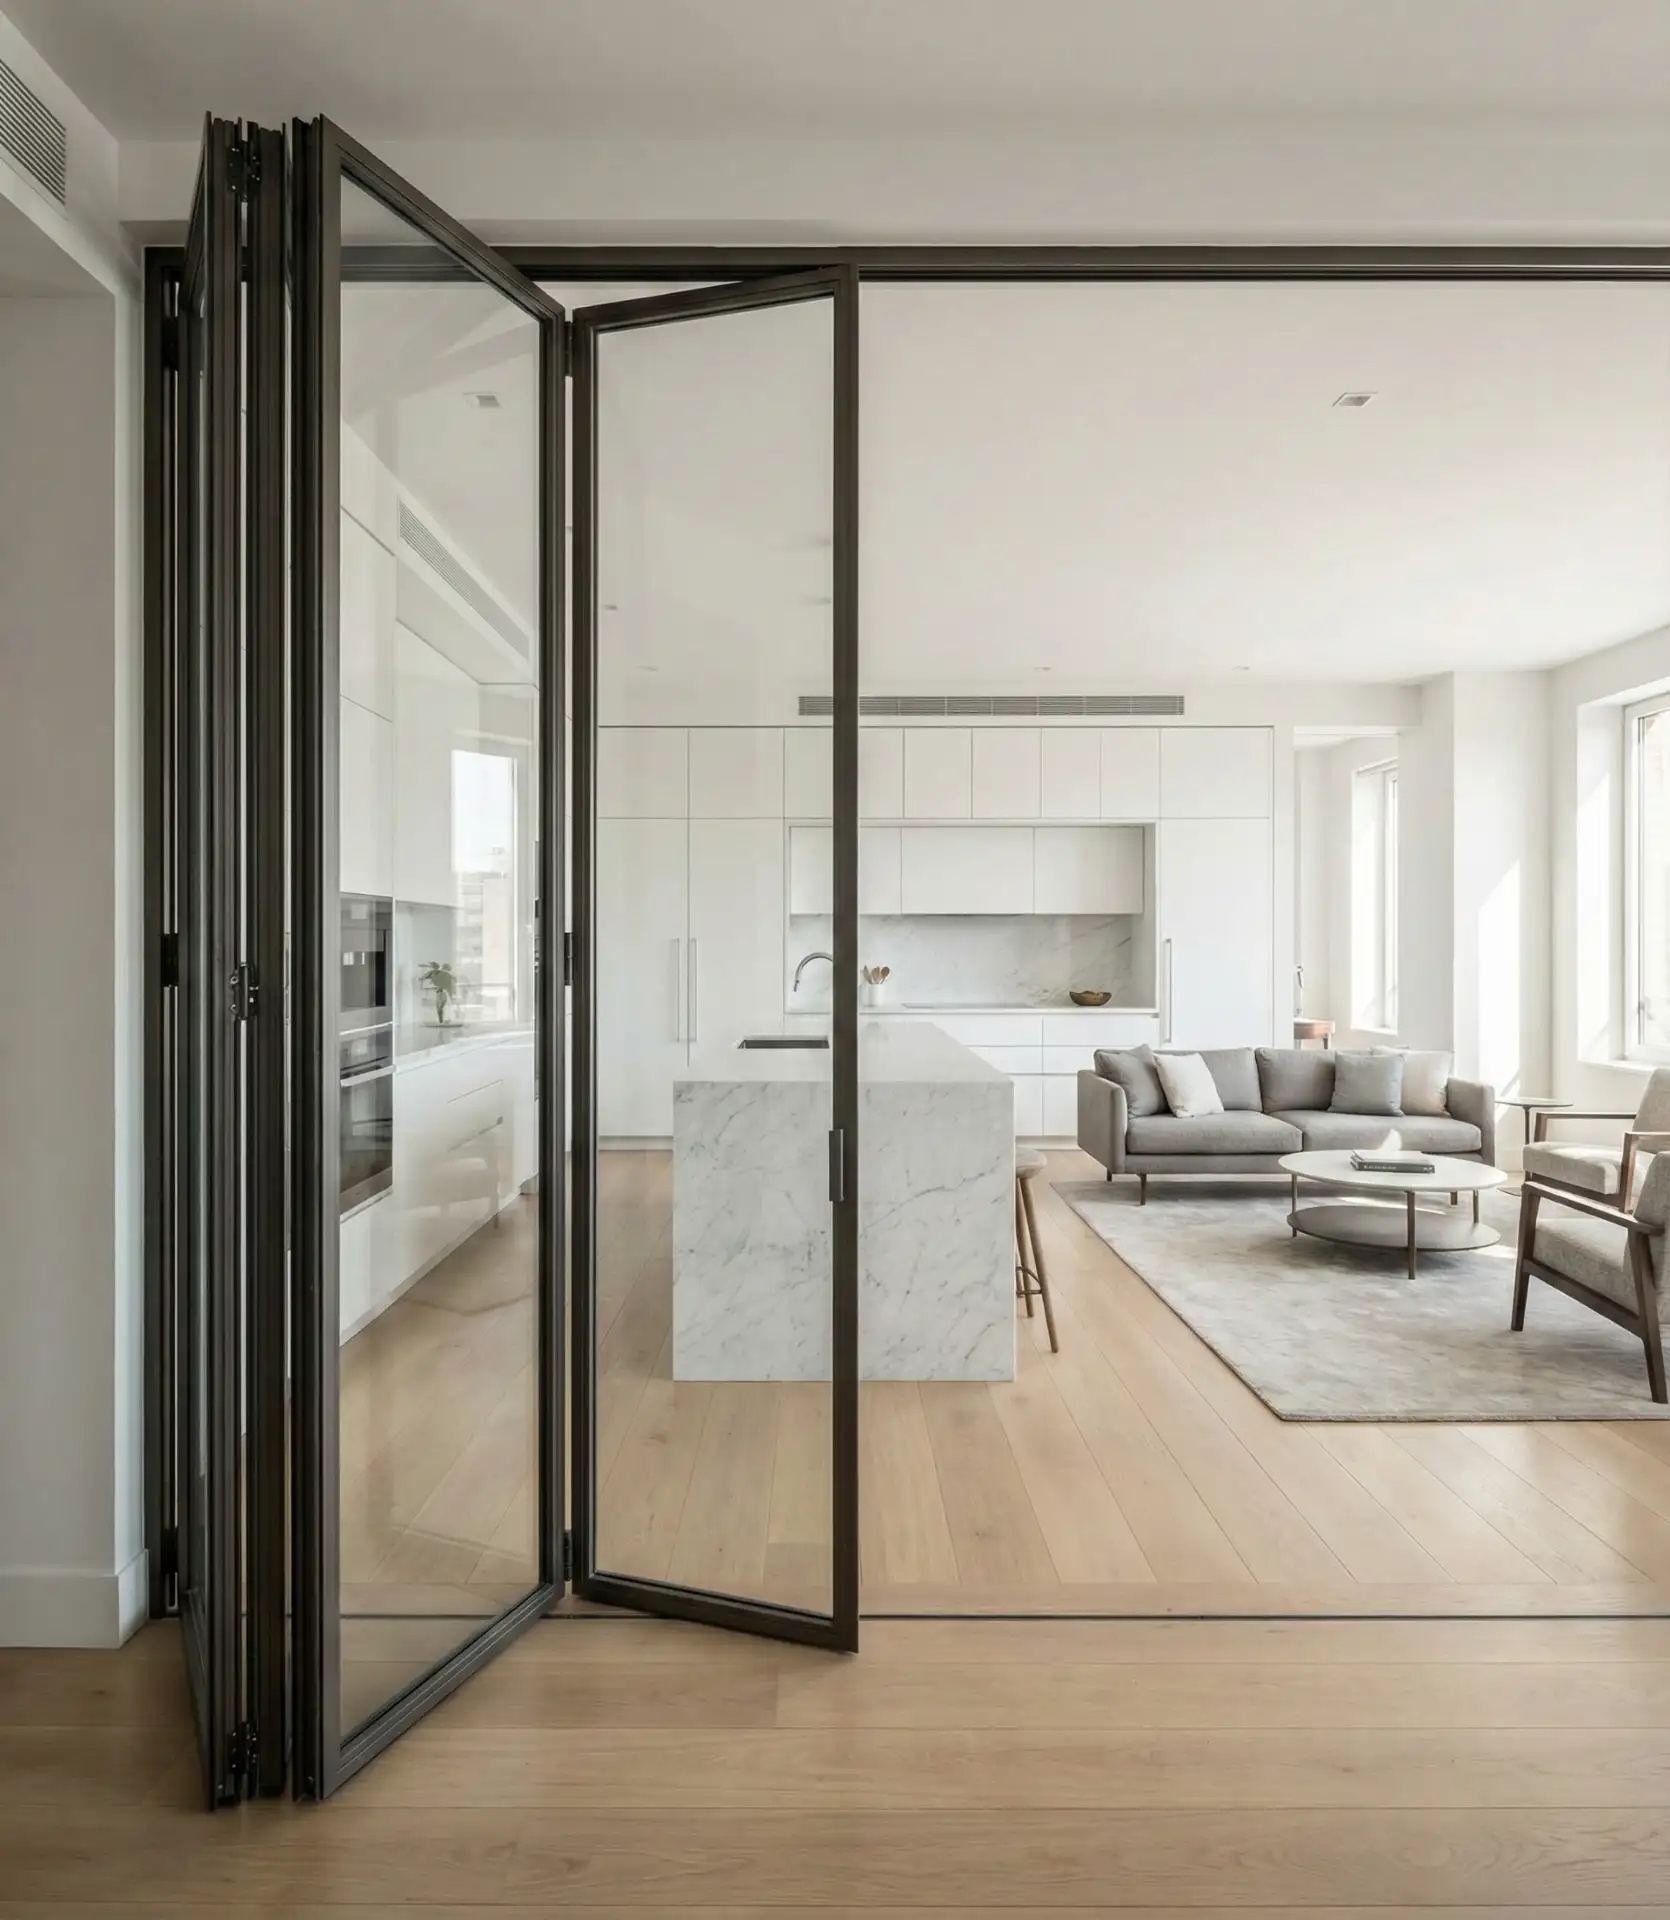
Expert designers recommend budgeting $4,500-12,000 for quality folding glass wall systems depending on opening width and glass type. This system represents a significant investment but delivers unmatched versatility. Miami and Phoenix homeowners particularly value this option, using it to manage climate control while maintaining the option for complete openness. The panels operate smoothly with minimal maintenance, typically requiring only track cleaning quarterly.
20. Cantilevered Counter Overhang

The counter in your kitchen base will appear floating while providing overhang seating, which does not clutter floor space with leg supports. This engineering feat visually lightens cramped environments that may otherwise feel lifted with traditional island supports. The overhang usually reaches 18 to 24 inches, with invisible steel supports or integrated cabinets engineered below. 
Real homeowners often worry about structural integrity, but normalization of usage in well-engineered cantilevered counters is completely fine. Professional installation and adequate bracing within hidden cabinets are key aspects of this process. Due to its visual impact, this technique requires homeowners to pay a premium of an additional $800 to $2000 to stone fabricators, on top of the standard countertop costs. The extra expense is worth it, especially in modern and minimalist interiors, due to the clean visual lines and primarily uncluttered floor spaces.
21. Curved Counter Peninsula Flow

A gently curved peninsula replaces harsh right angles, creating organic flow between your kitchen and living room while softening the entire space. This sculptural design approach appeals to homeowners seeking something beyond standard rectilinear layouts. The curved edge invites movement around it, eliminates dangerous corners in family homes, and creates a sophisticated focal point that immediately elevates your kitchen’s visual appeal. 
In coastal California homes, curved counters have become a signature of contemporary luxury design. The fabrication requires skilled craftsmen and costs 30-40% more than straight countertops—expect to pay $4,500-9,000 for a curved peninsula depending on material. Position the curve so it guides traffic flow naturally around the kitchen perimeter. My sister installed one in her Austin home last fall, and the curved counter completely transformed how guests interact with the space during gatherings.
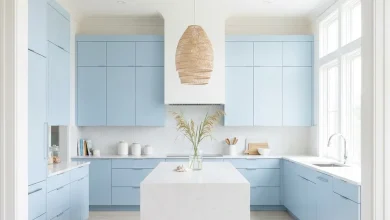
22. Two-Tone Cabinet Separation
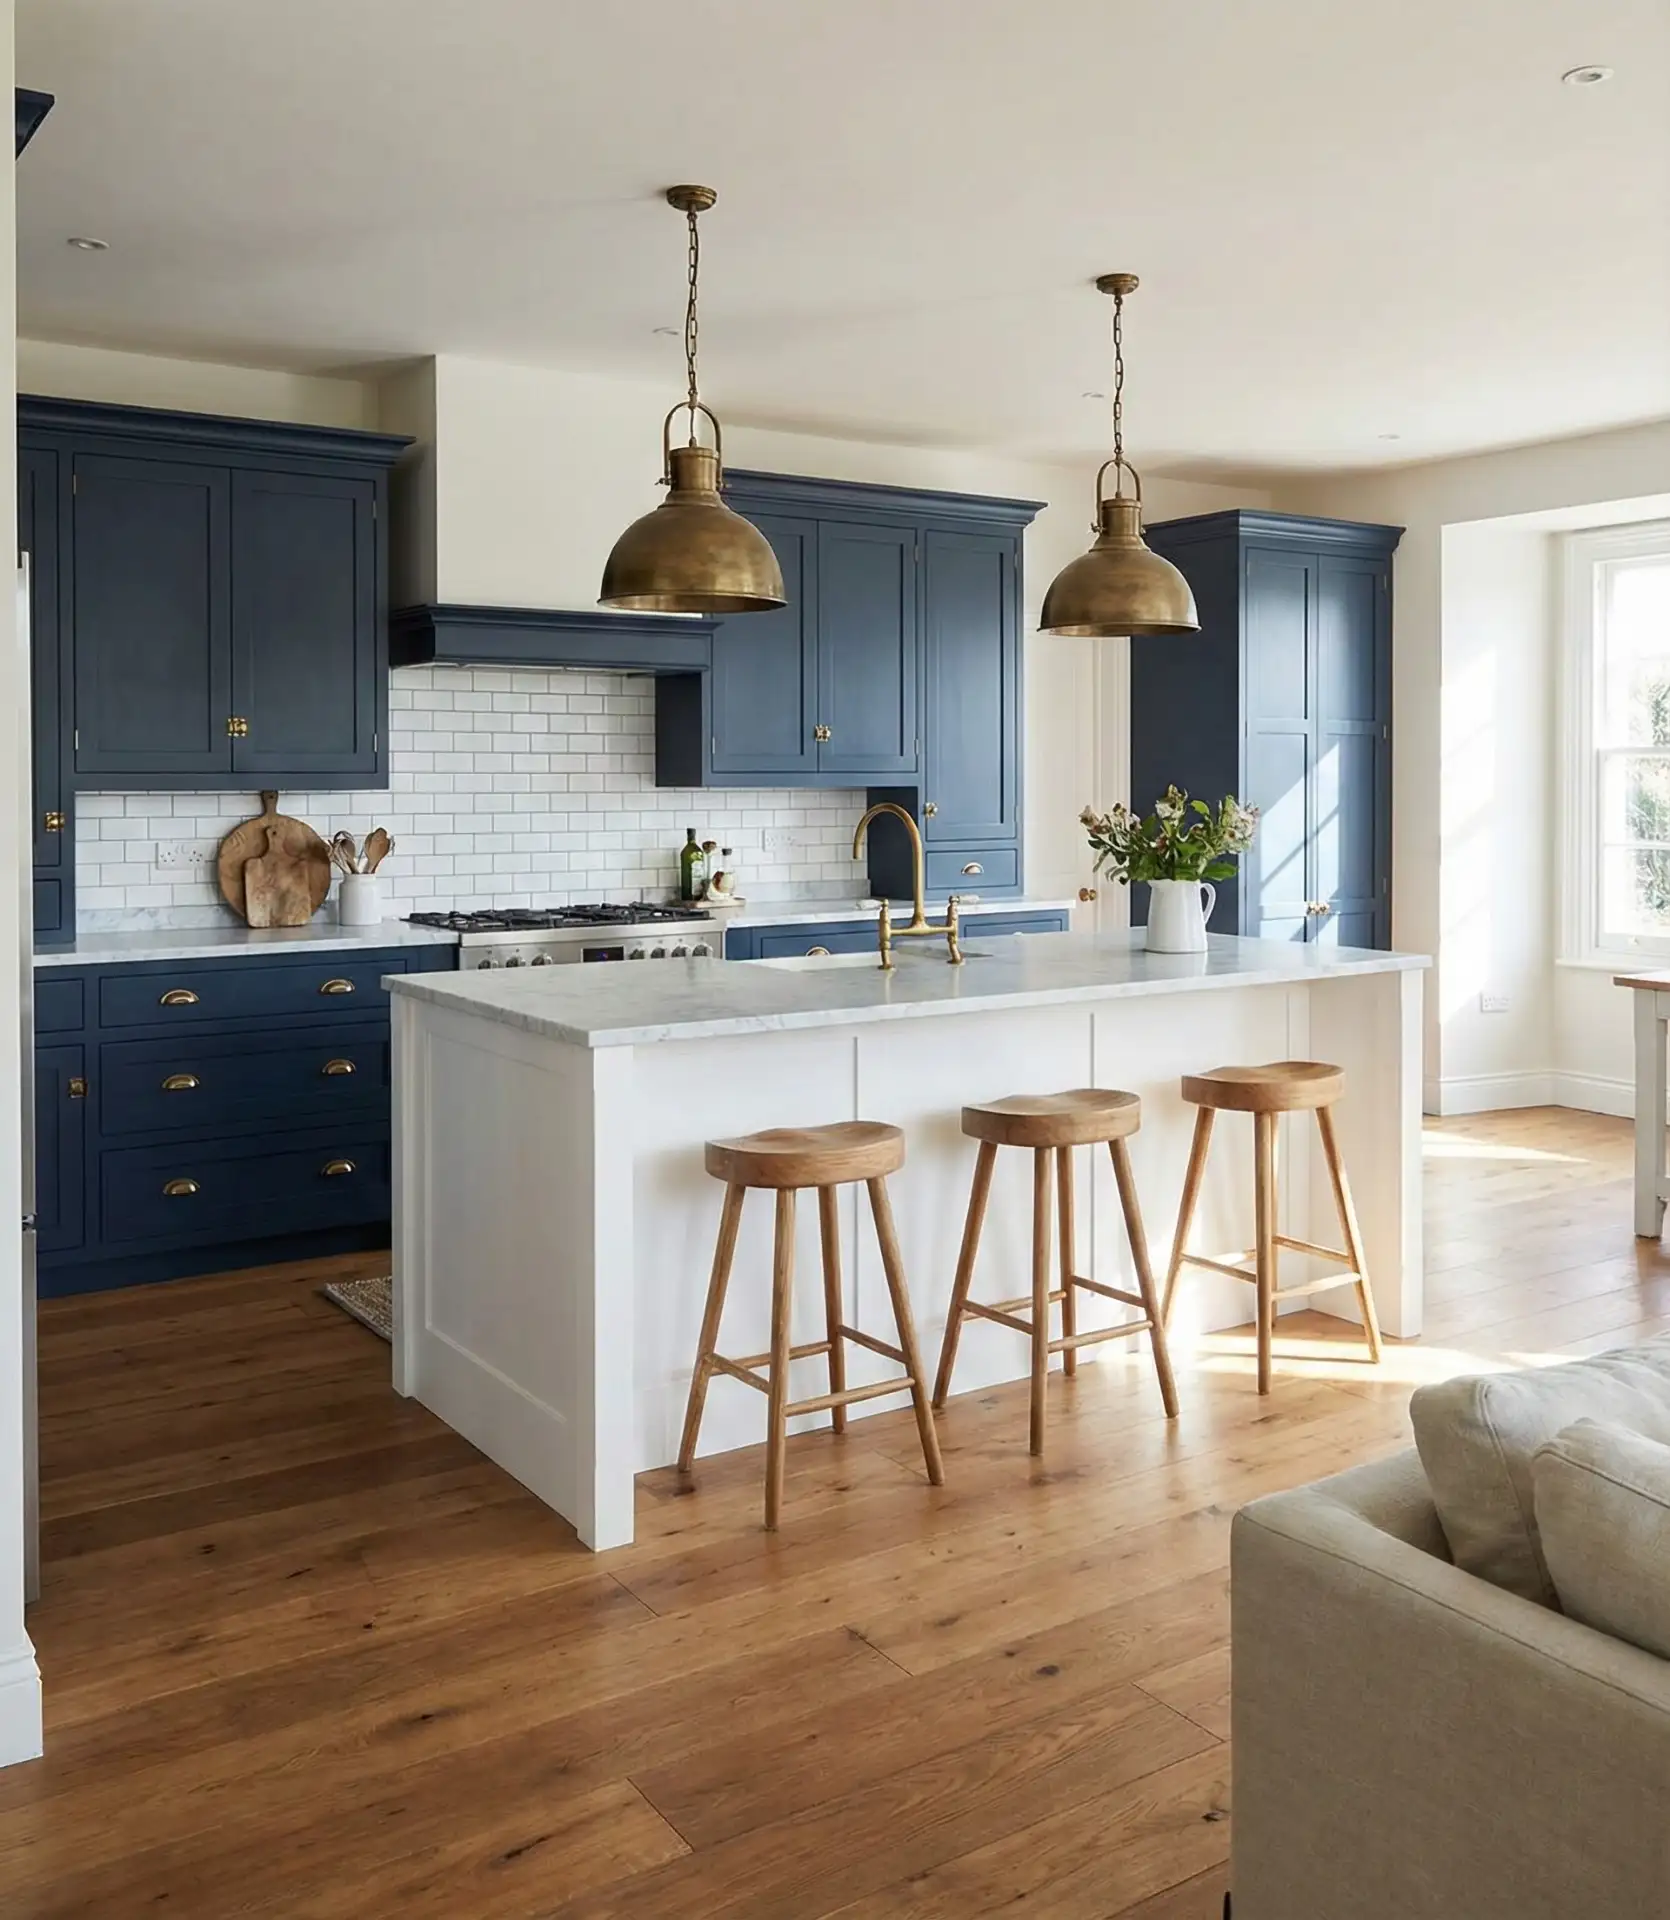
Using contrasting cabinet colors creates visual zoning without physical barriers—dark perimeter cabinets define the working kitchen, while a lighter island or peninsula opens toward living areas. This color-blocking technique has exploded on Pinterest as homeowners discover how paint creates separation for under $1,000. The darker tone anchors the cooking zone against walls, while lighter cabinetry on the room-facing side maintains airiness and connection. 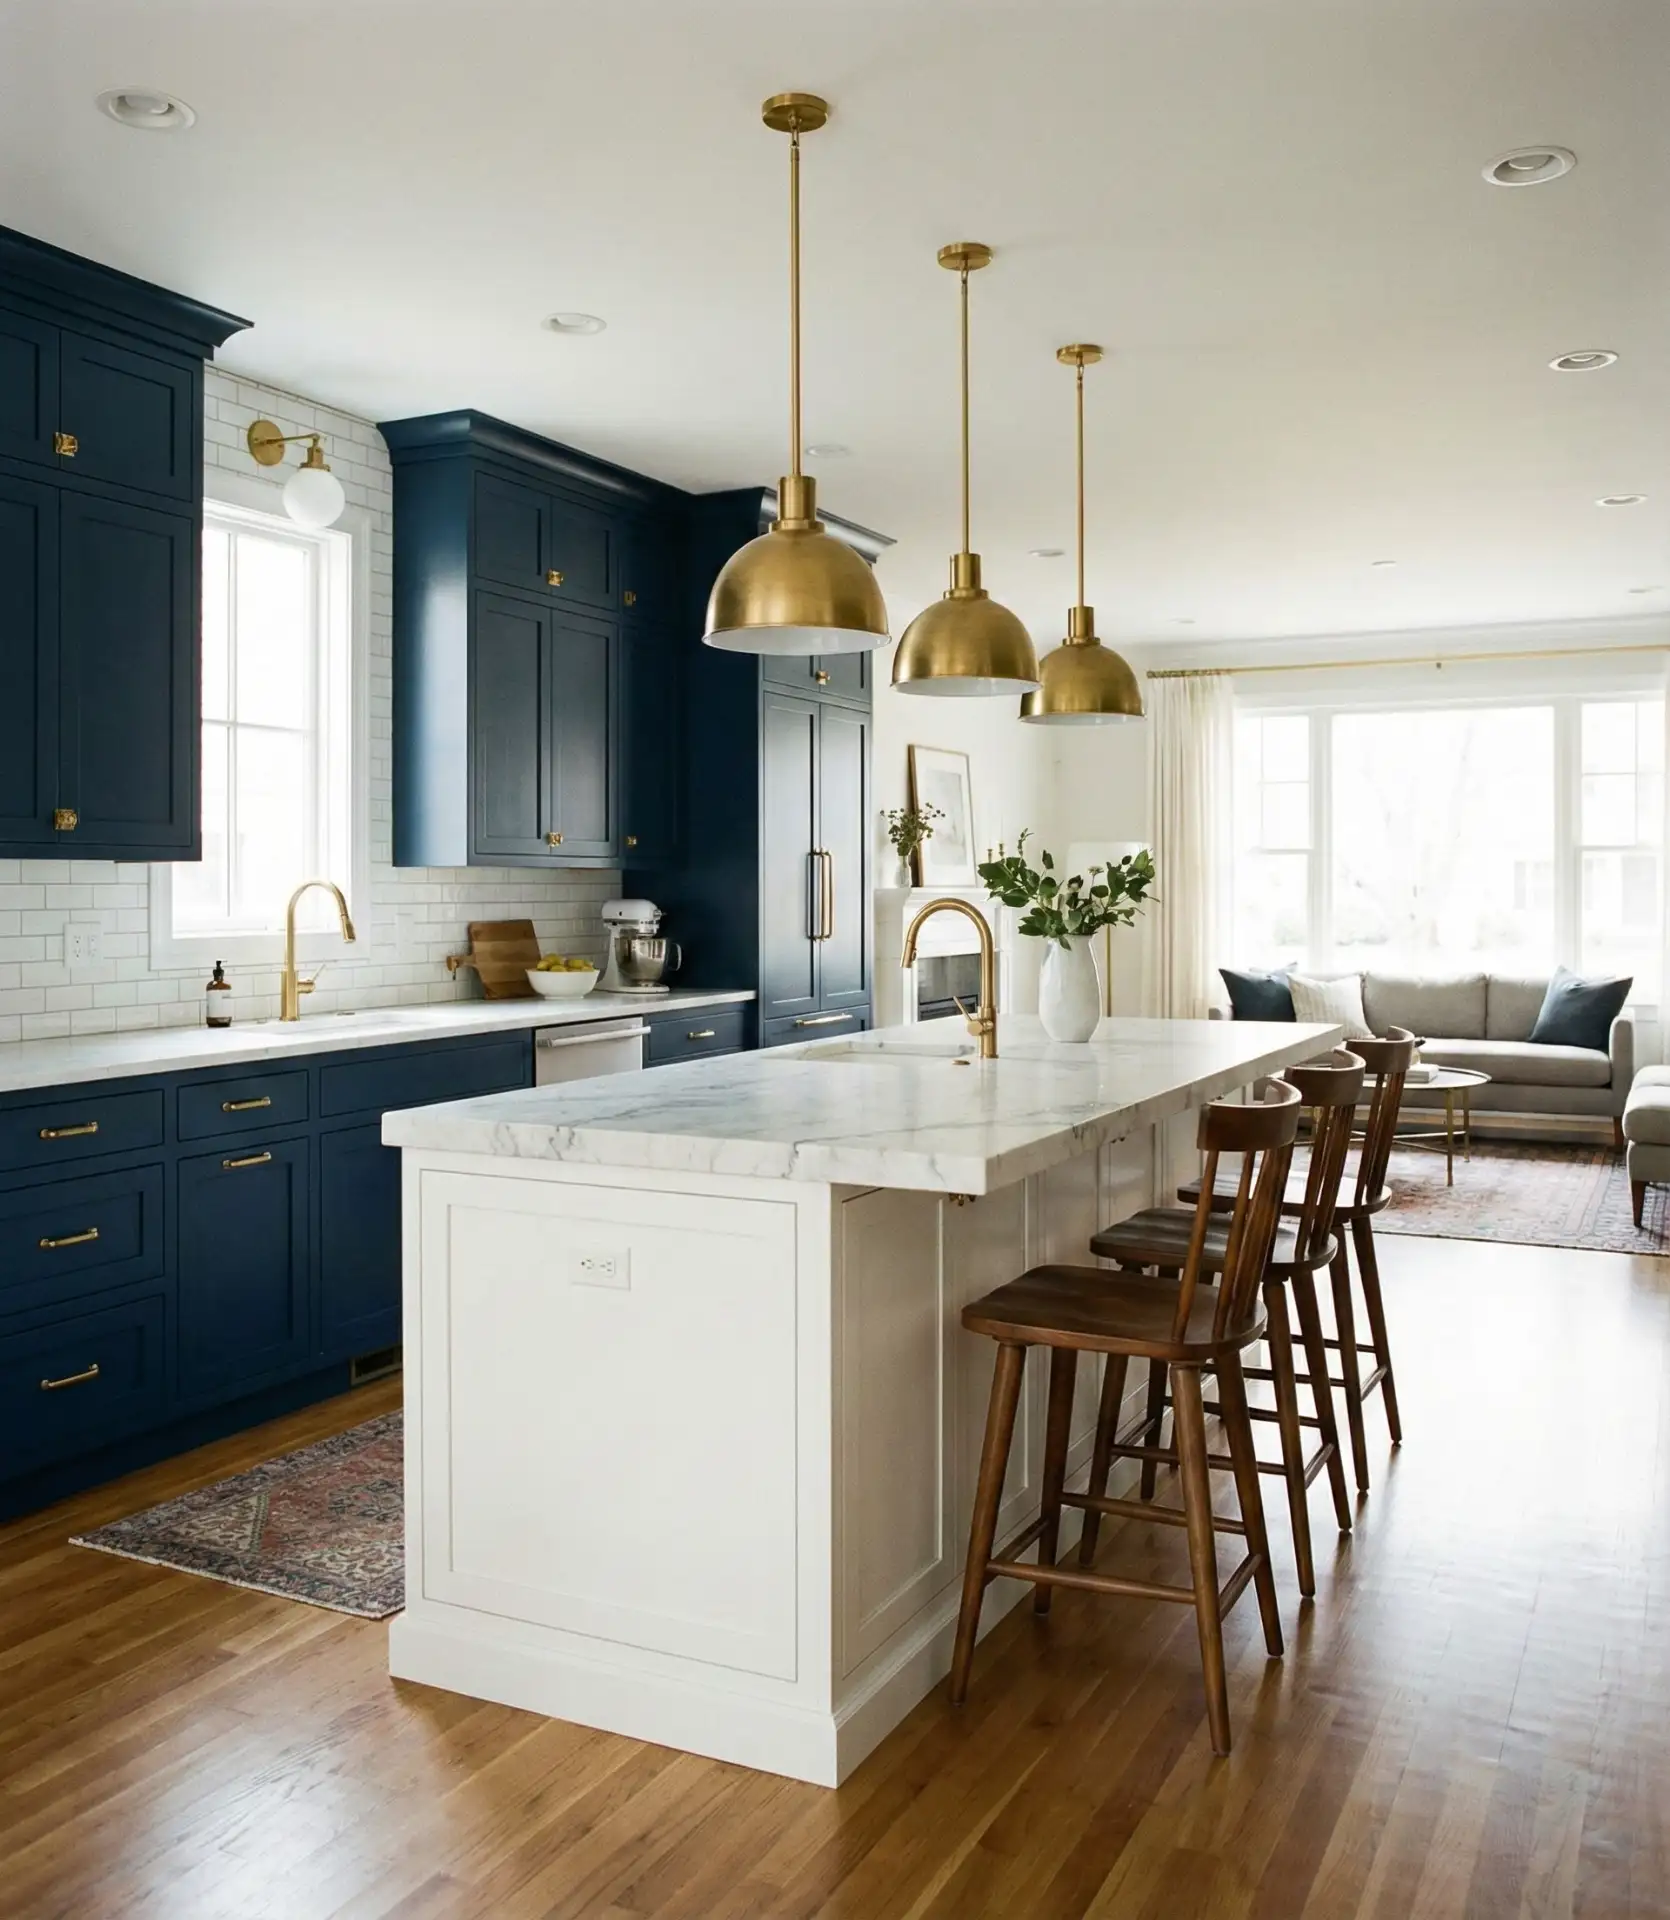
Where this look works best is in L-shaped or U-shaped kitchens where the island naturally faces outward. Popular combinations include navy and white, forest green and natural wood, or charcoal and light gray. A common mistake is choosing colors too similar in value—ensure enough contrast so the zones read distinctly. Budget-conscious renovators love this approach because existing cabinets can be professionally painted for $2,000–5,000, delivering a dramatic transformation without full replacement costs.
23. Overhead Pot Rack Boundary
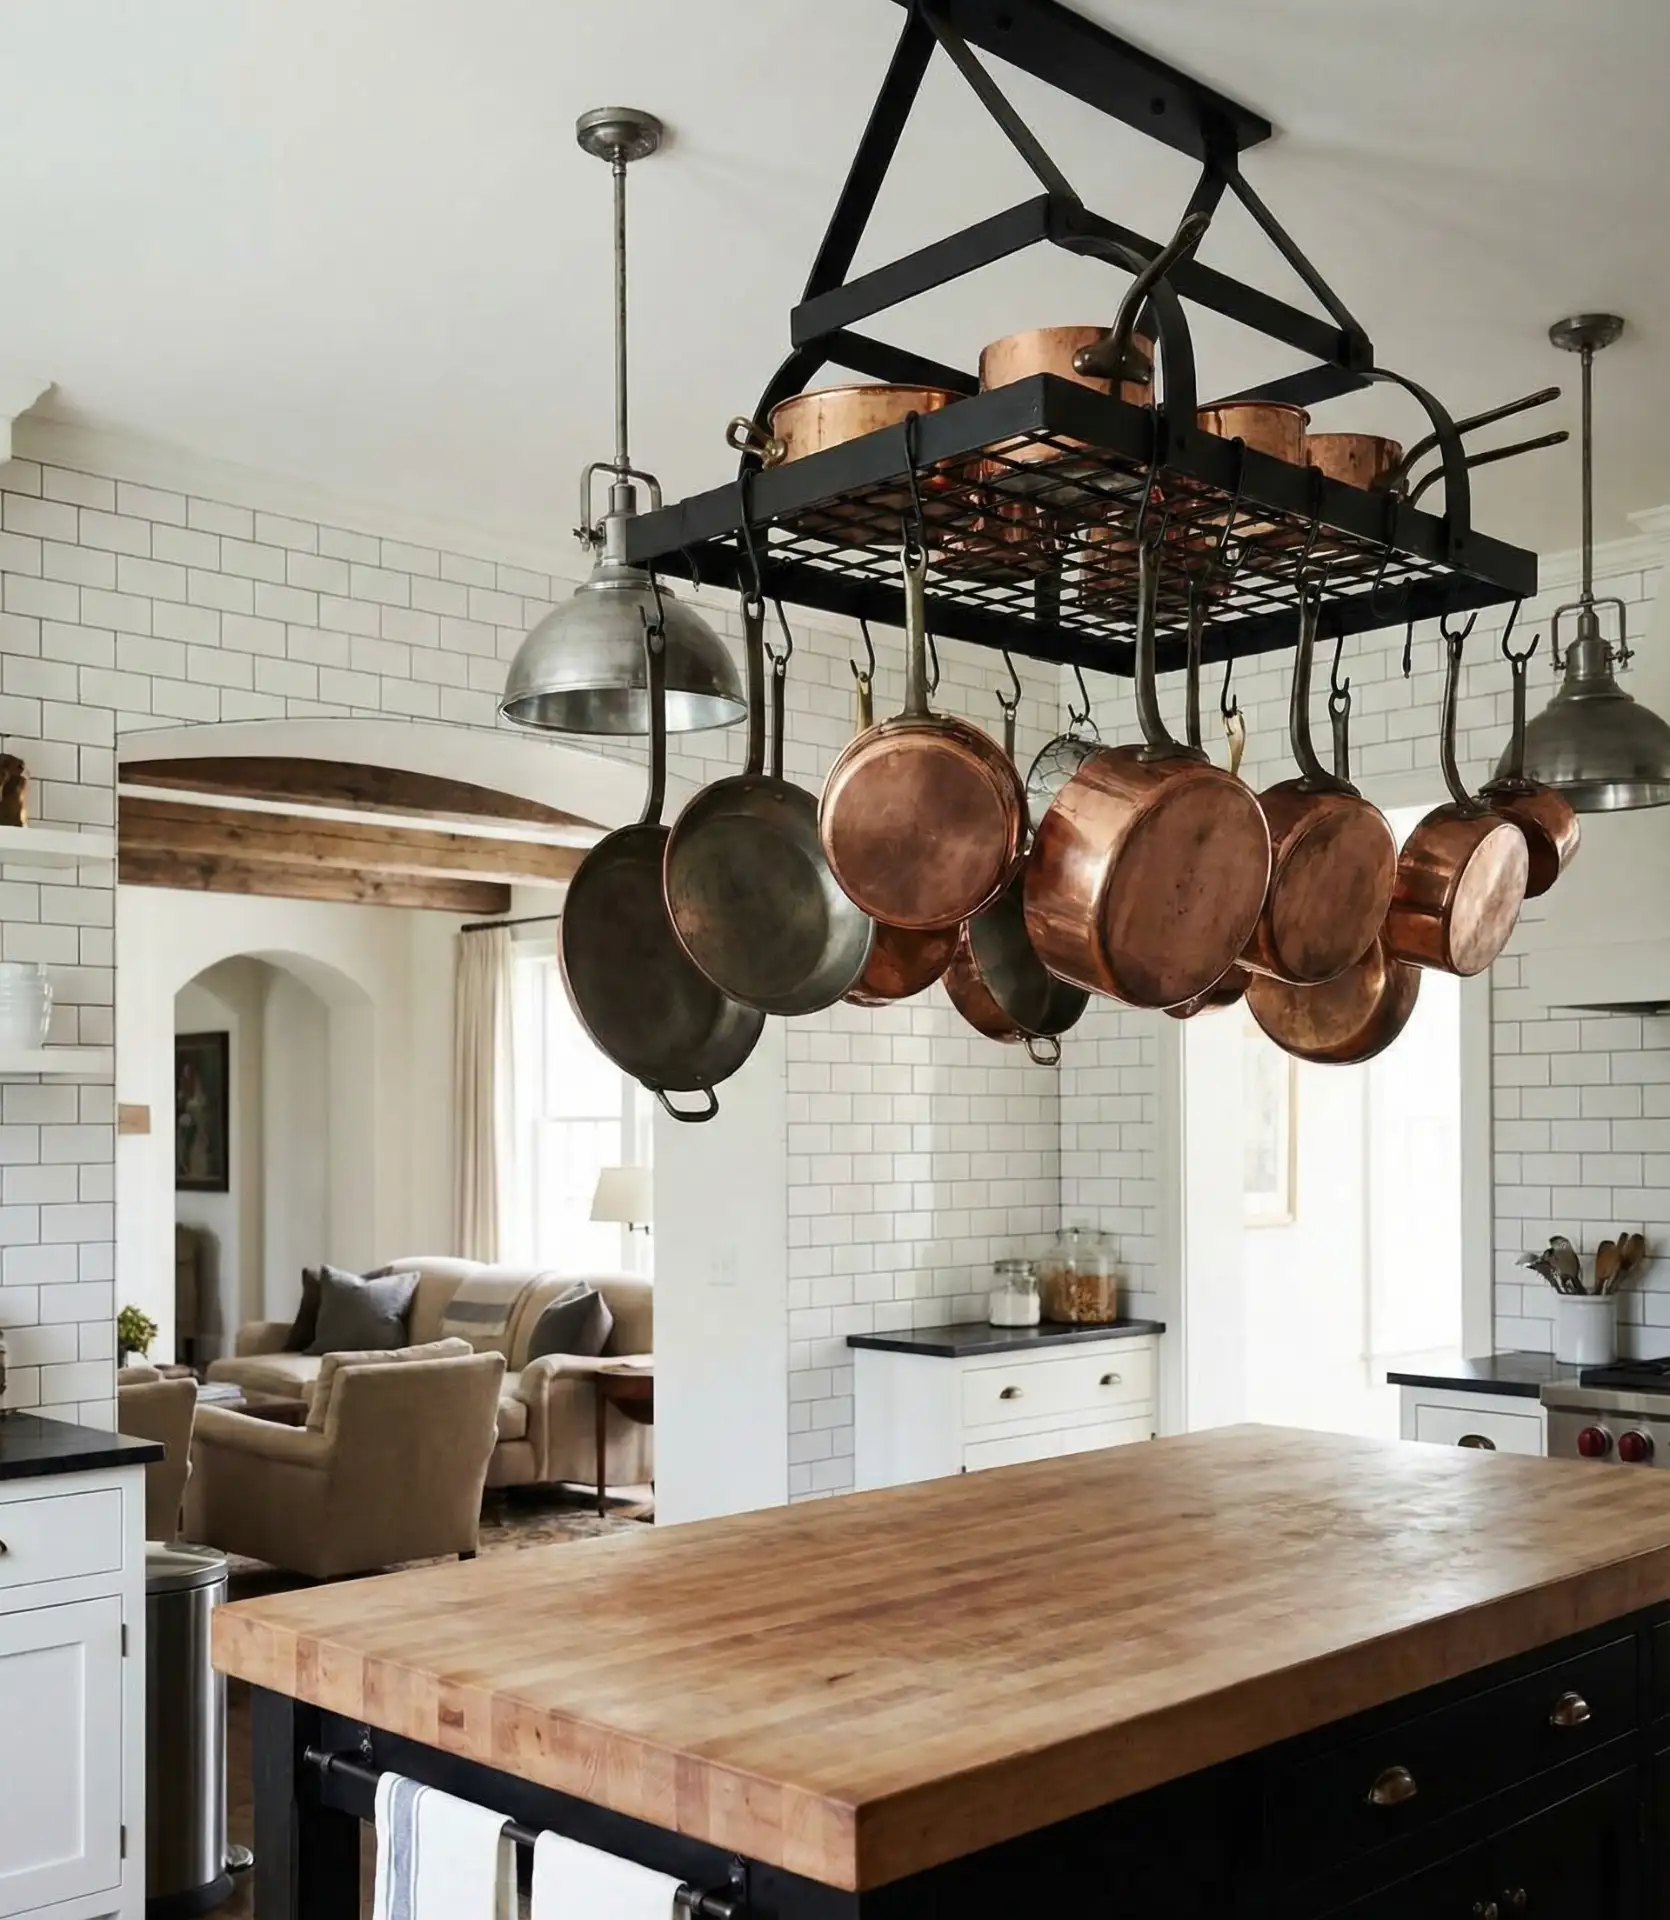
A massive pot-hanging pot rack creates a definable space over your island without obstructing visibility. This adds a European farmhouse appeal while defining the space for the bulky cookware. The rack can be positioned at 7 feet, with the hanging cookware becoming art above the zone for the cooking utensils.
Expert installers emphasize anchoring into ceiling joists—these racks hold significant weight when fully loaded. Quality pot racks cost $300-1,200 depending on size and finish, with installation running another $200-400 if you hire professionals. Midwestern farmhouse enthusiasts particularly embrace this solution, appreciating how it honors traditional kitchens while serving modern open-concept spaces. Keep displayed cookware clean and polished since it’s constantly visible from living areas.
24. Breakfast Nook Built-In Banquette
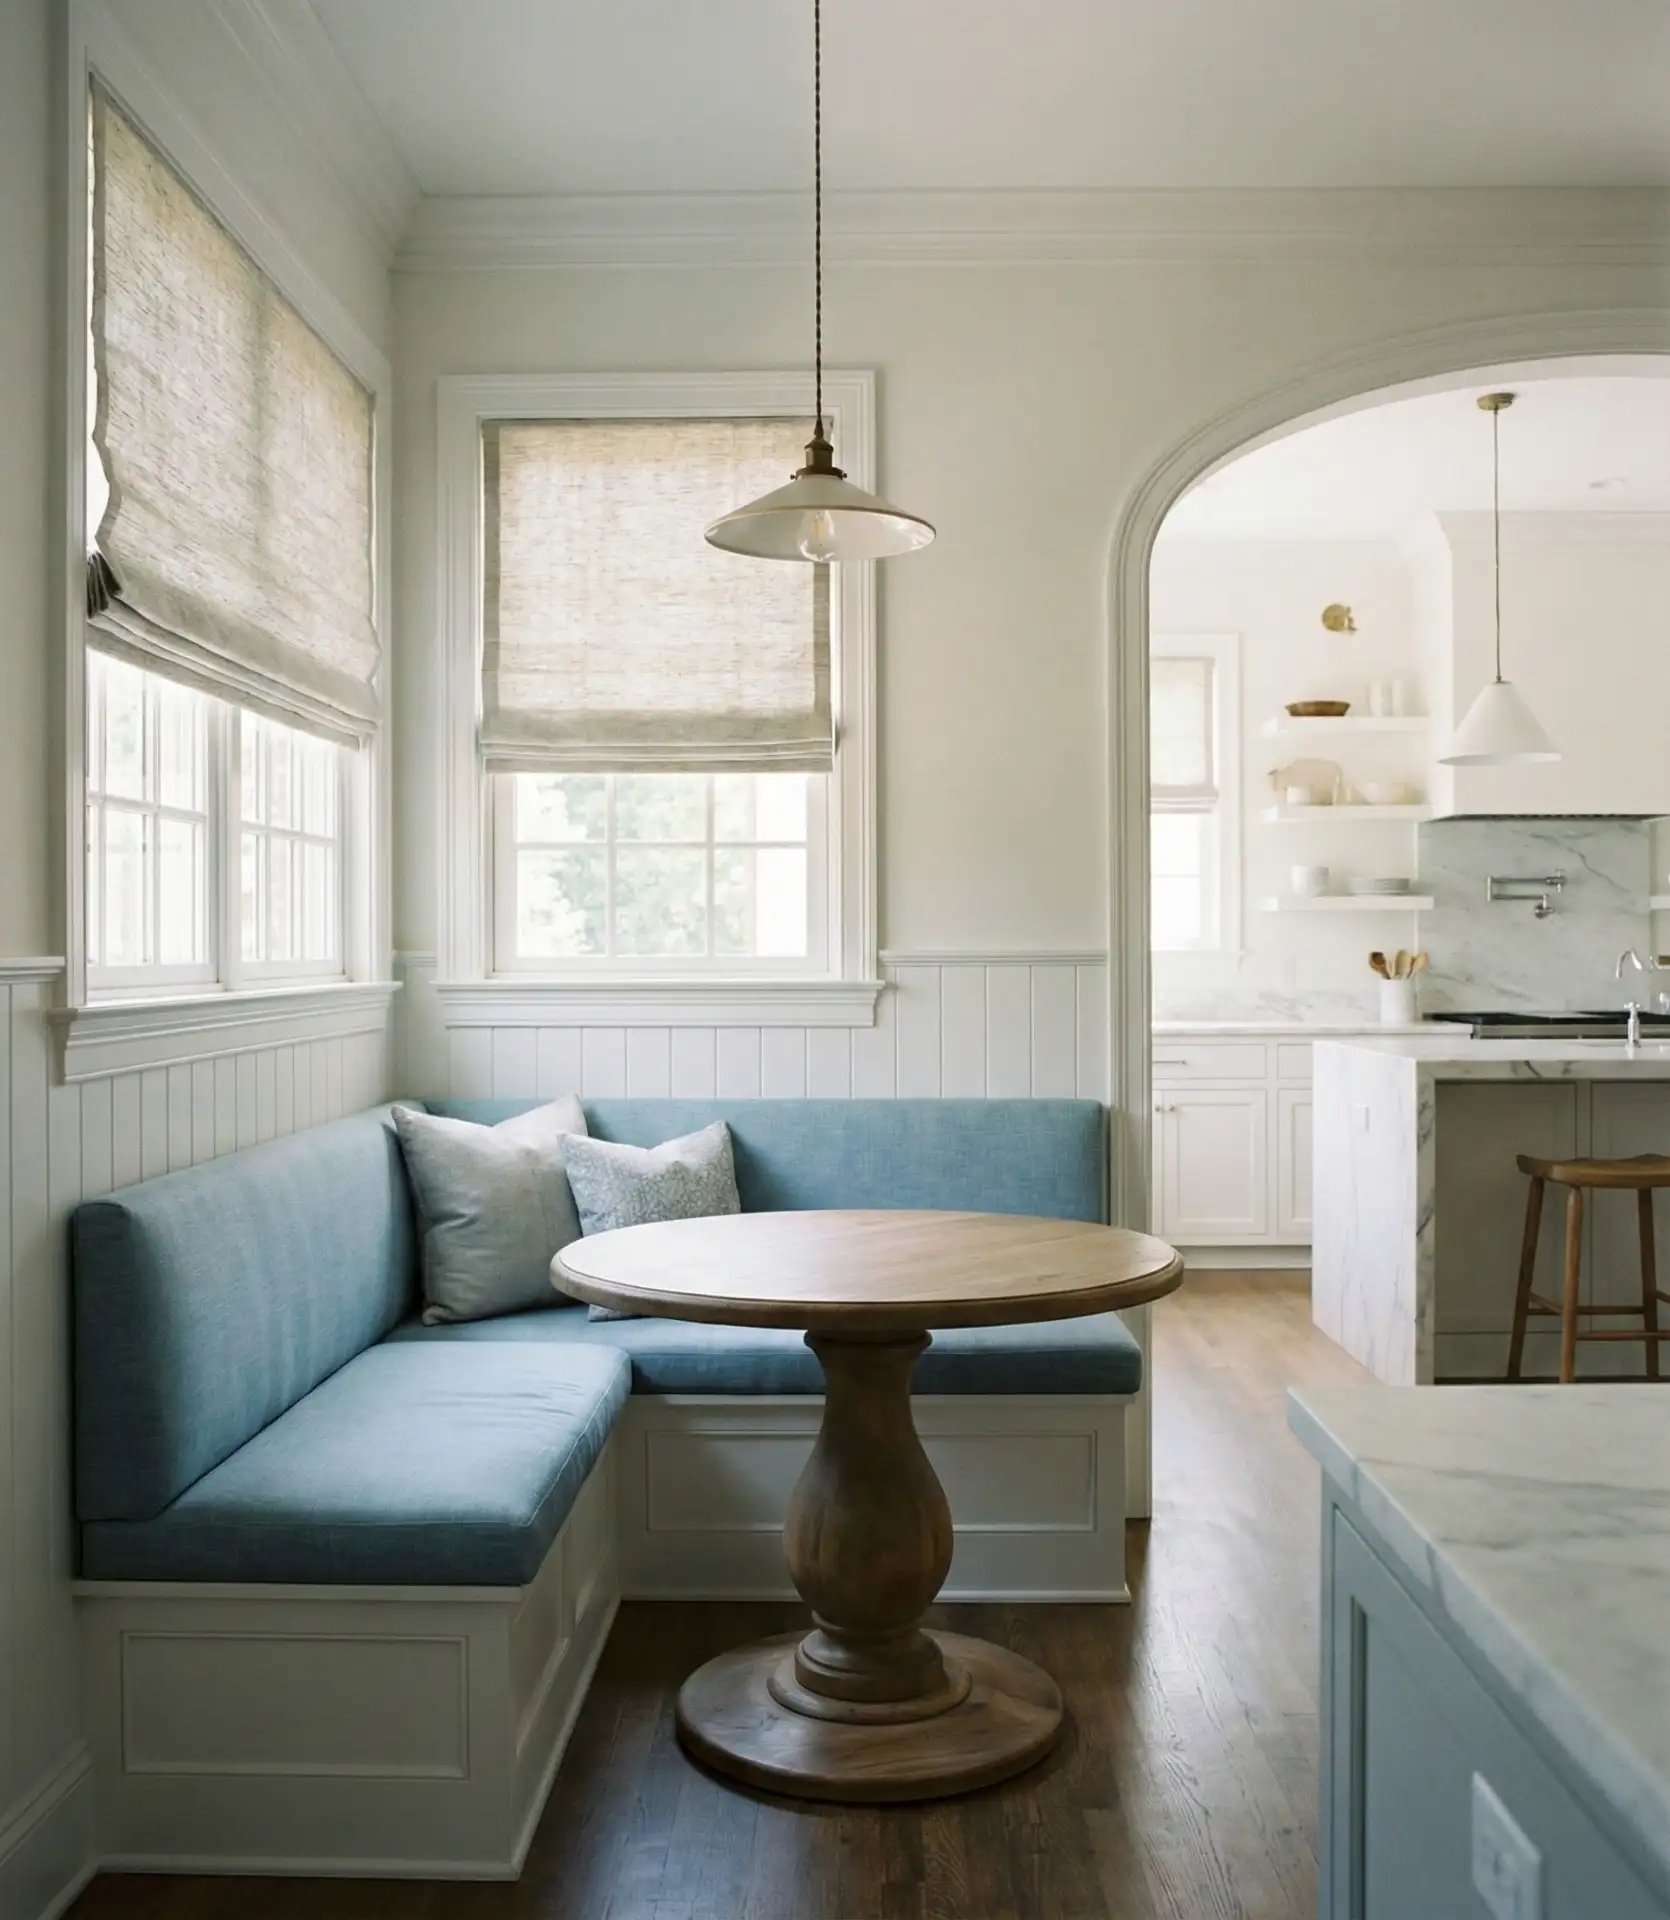
A built-in breakfast banquette tucked into a corner or bay window creates cozy dining separation from the main kitchen workspace. This layout maximizes seating in minimal square footage while establishing a distinct eating zone. The L-shaped or U-shaped bench seating wraps around a table, often with storage underneath, creating an intimate gathering spot that feels separate yet remains visually connected to kitchen activities. 
Real homeowners consistently report that banquettes accommodate more people than individual chairs in the same footprint—you can squeeze in 6-8 people where four chairs would typically fit. Custom built-ins cost $2,500–7,000, including upholstery, while DIY-savvy homeowners build basic frames for under $1,000 plus cushions. New England colonial homes particularly suit this approach, but the concept adapts beautifully to any style when executed with appropriate materials and finishes that complement your overall kitchen aesthetic.
25. Open Shelving with Back Panel Divider
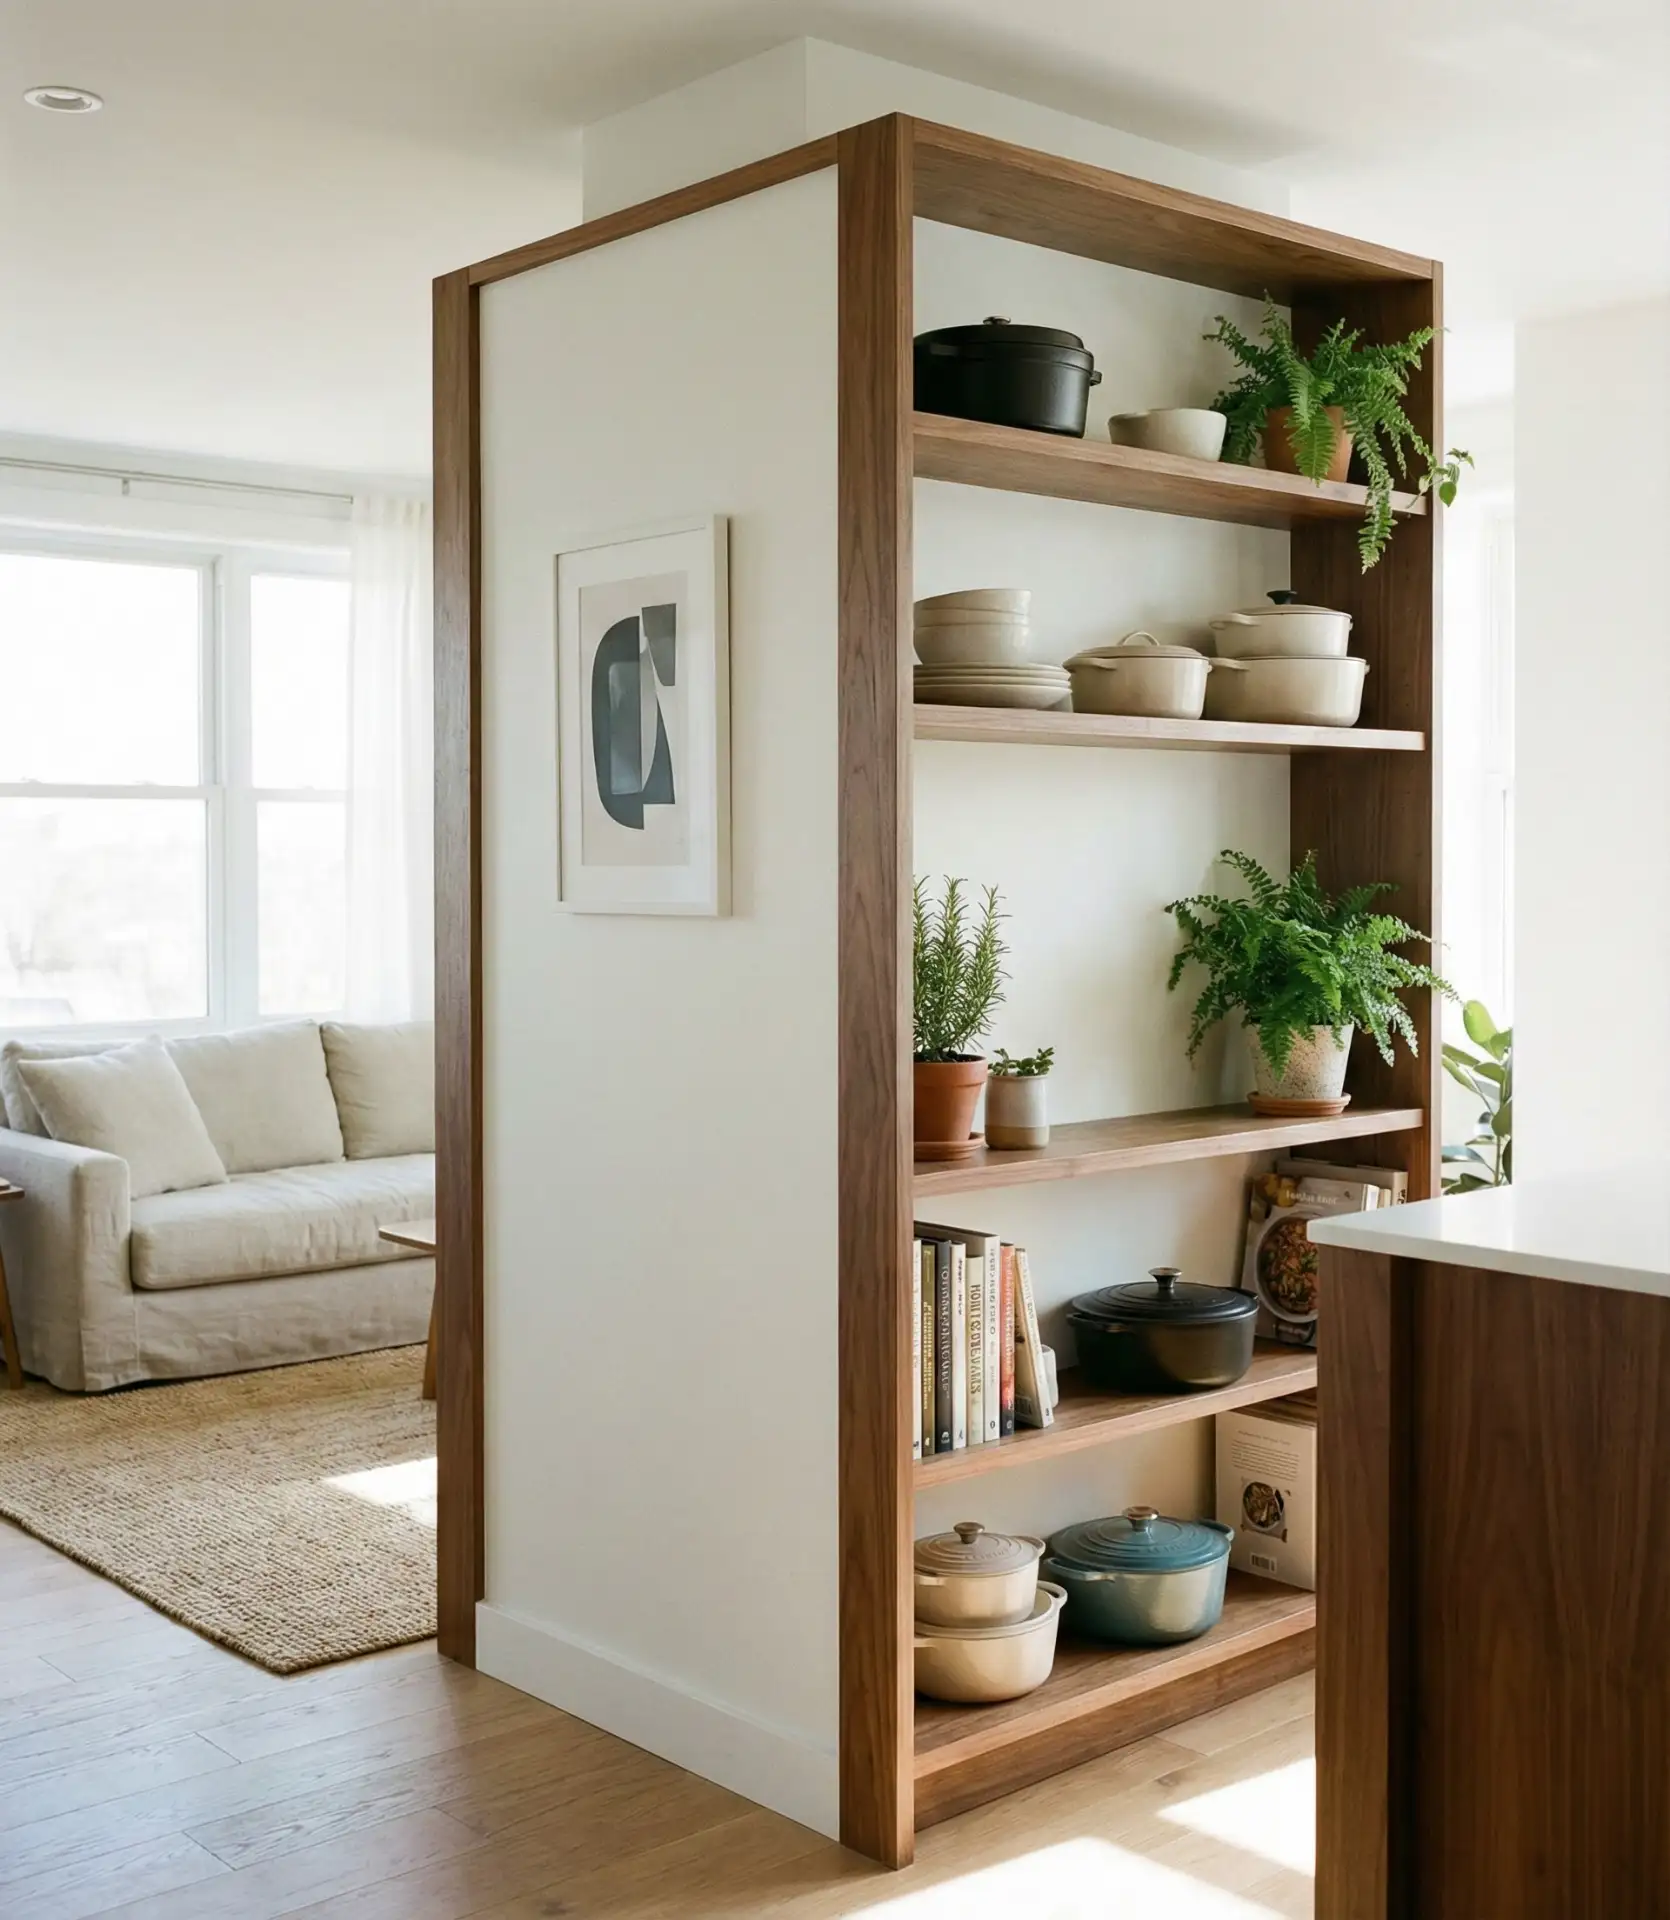
Freestanding shelves with a solid back panel create a permeable room divider that displays items from the kitchen side while providing a finished surface facing the living room. This dual-purpose design element stores cookbooks, dishes, and decorative objects while defining space boundaries. The unit typically stands 6-7 feet tall, wide enough to create presence but with enough open shelving to maintain visual flow between rooms. 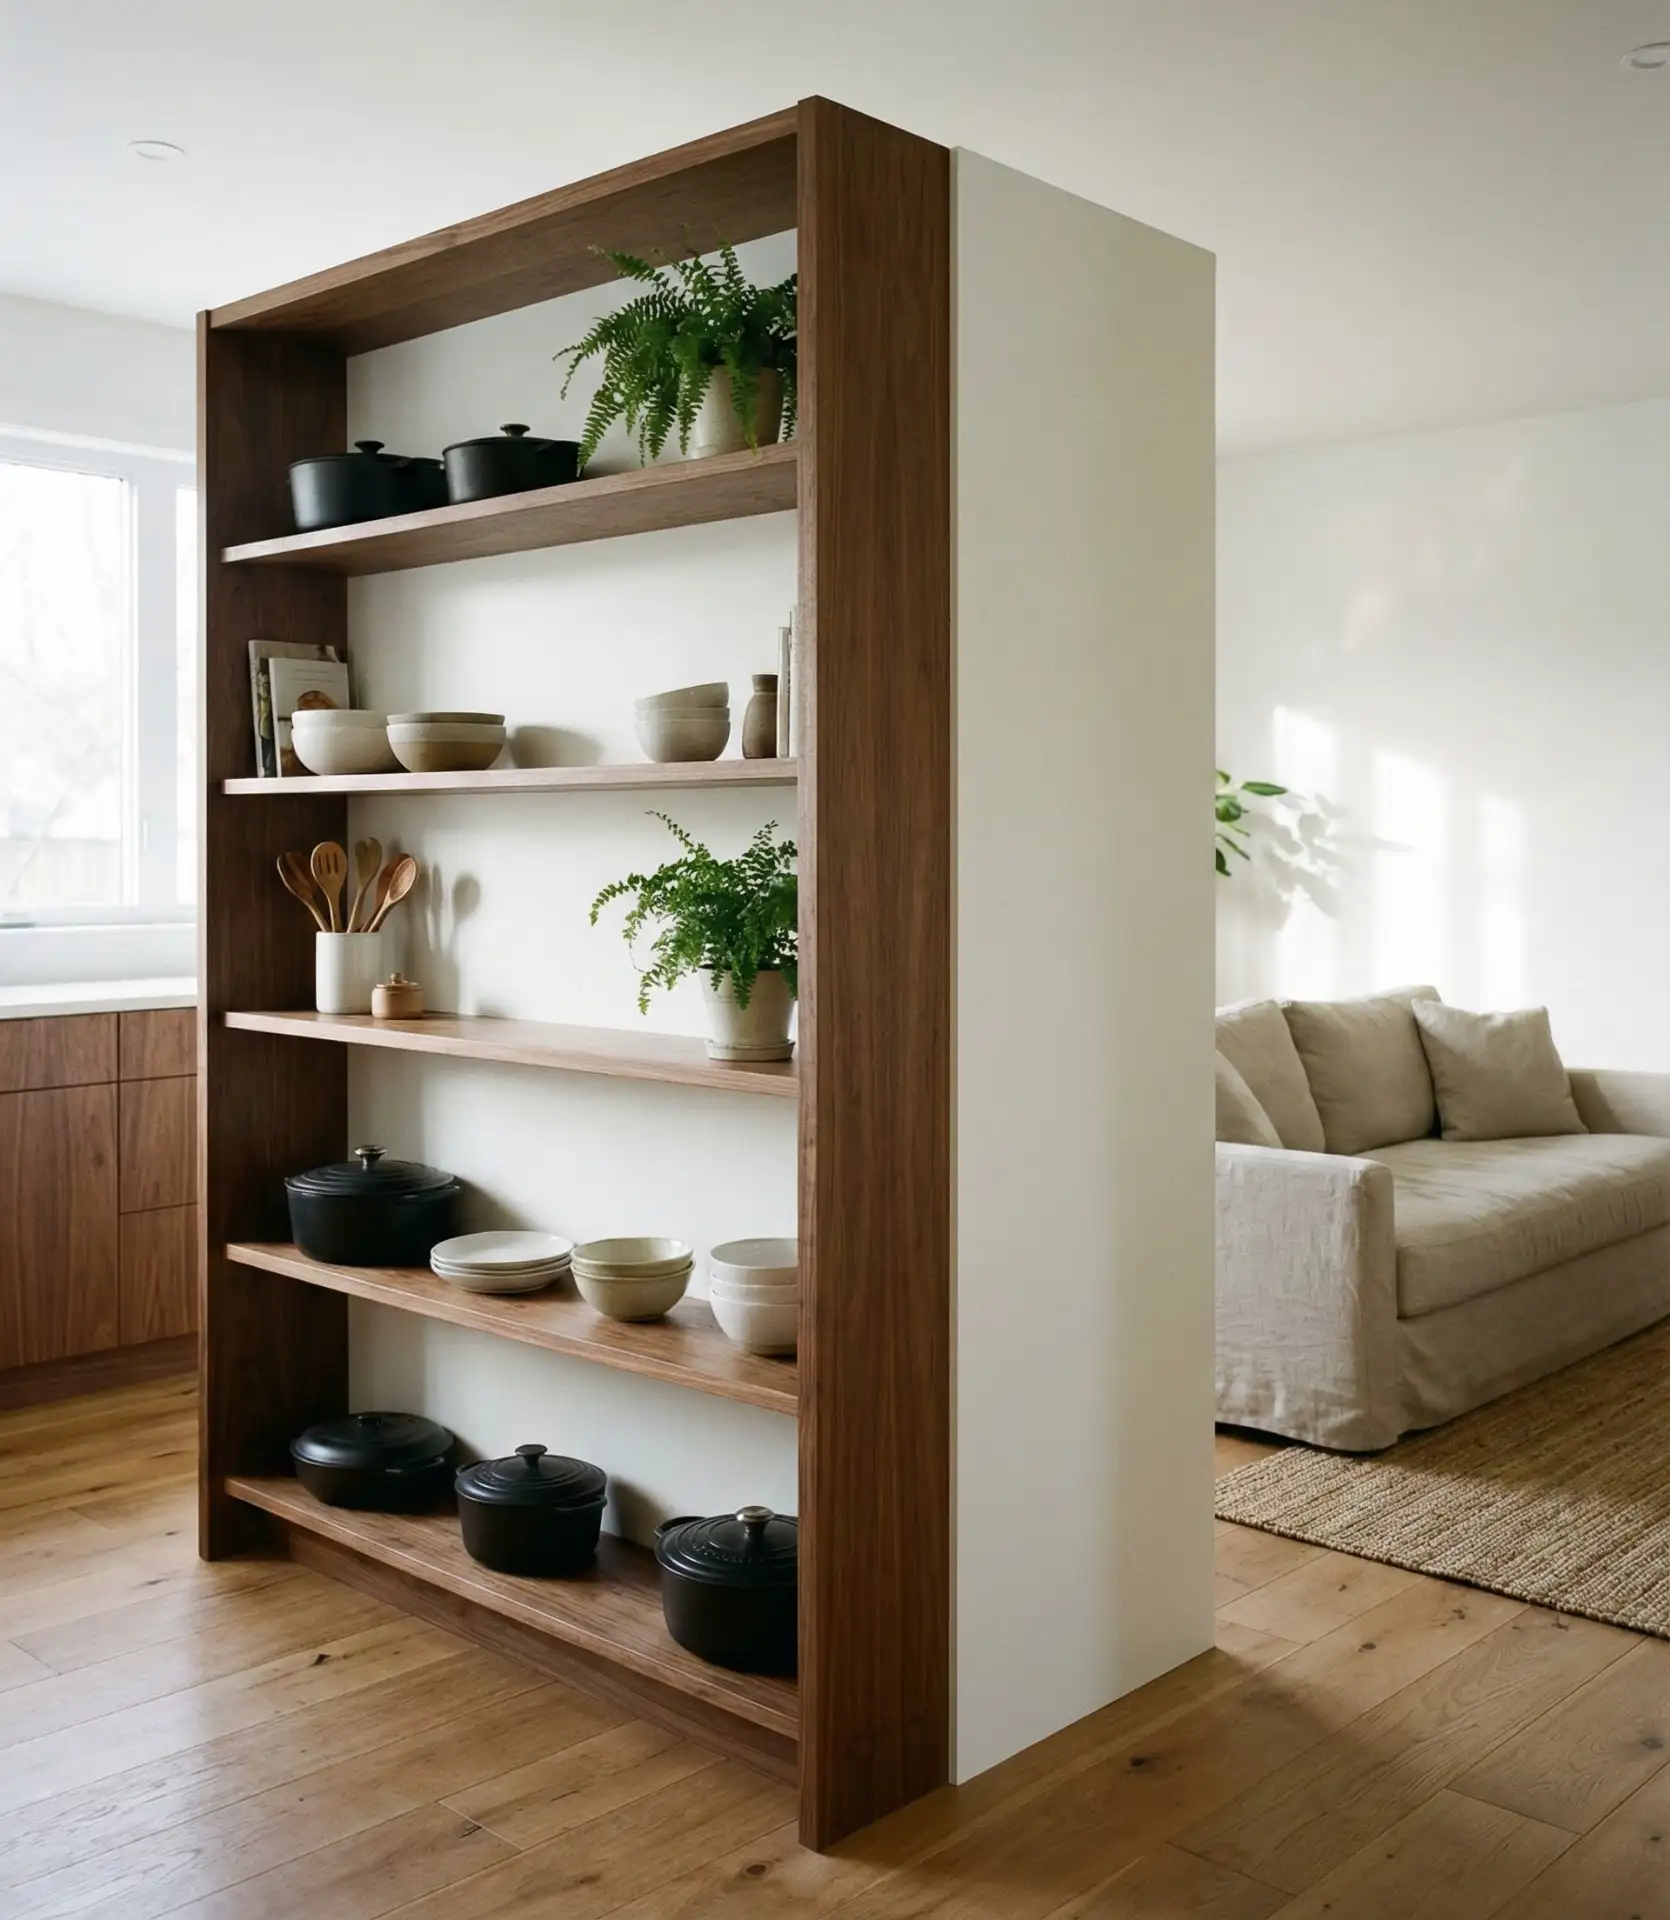
A mistake that happens with these dividers is making them too wide, 6–8 feet is a good measurement to avoid overwhelming while still providing a good separation of spaces. The backside can be painted like the walls of the living room so that it can be a seamless background for some art or a TV situated on that wall. The Pacific Northwest has crafted these styles of homes and appreciates the dividers for how they honor the era’s built-in cabinetry while also being able to serve the modern needs of an open-plan living space.
26. Extended Counter Workspace with Seating

A good multifunctional space is created when there is a wide counter extension that serves as a space for meal prep, working on a laptop or homework, and casual dining. It’s a space that serves as a blended area for family activities and recognizes that the modern kitchen is no longer just a space for cooking but a room that serves as the ‘command center’ of the home. The counter extension is generally 8–12 feet and serves as a space for multiple activities at the same time, while also accommodating everyone in the same space, creating a connected environment. 
Where this approach works best is in family homes where parents want to supervise homework while cooking dinner—the extended counter keeps everyone together. Install electrical outlets every 3–4 feet along the counterback for charging devices and small appliances. Homeowners typically dedicate one section for permanent seating with stools, leaving the remaining length flexible for various tasks. This approach costs no more than standard countertops but delivers exponentially more functionality for busy American families.
27. Statement Lighting Overhead Zoning
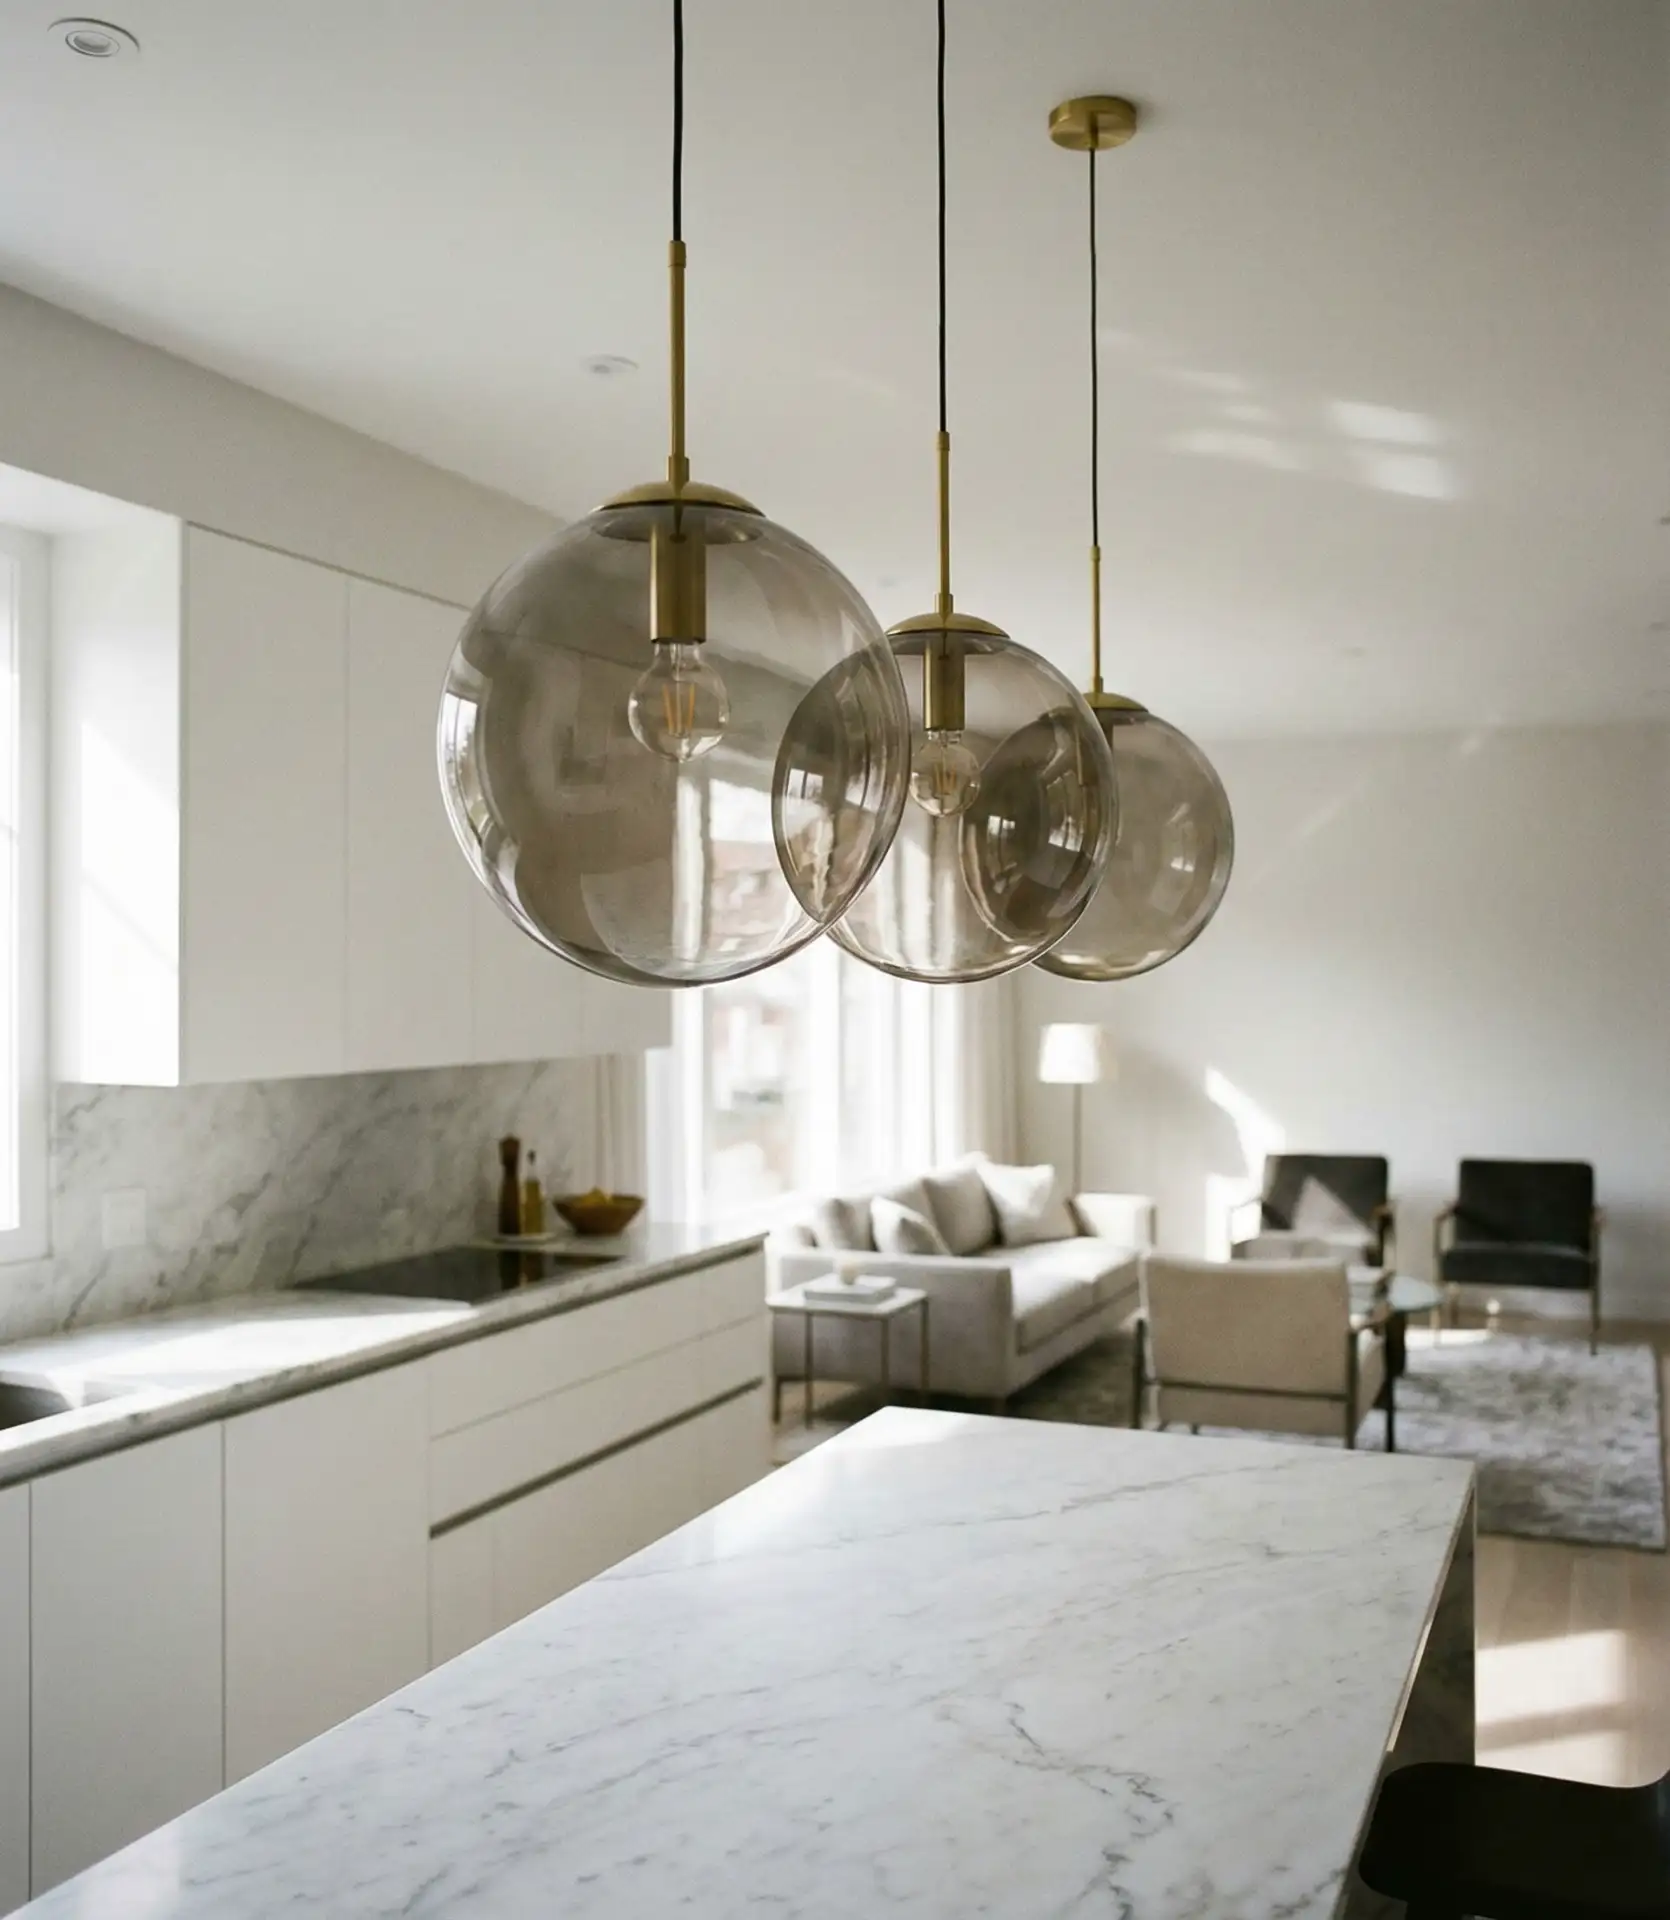
Dramatic pendant lights or a linear chandelier suspended over your island or dining table creates overhead definition that zones spaces through light rather than walls. This designer interior design strategy costs far less than construction while delivering immediate visual impact. The lighting fixture becomes a focal point that draws the eye upward, psychologically defining the kitchen or dining area below while maintaining complete physical openness. 
Expert lighting designers recommend hanging pendants 30–36 inches above counter height for optimal illumination without blocking conversational sightlines. Statement fixtures range from $500 to $3,000, with installation adding $200-500. Chicago loft conversions frequently use this technique, choosing industrial-scale pendants that honor the building’s warehouse heritage while defining intimate zones within vast open spaces. Layer this overhead task lighting with recessed ceiling lights and under-cabinet strips for a complete, flexible lighting scheme that adapts to different times of day and activities.
Open kitchens in 2026 represent far more than a passing trend—they reflect how Americans genuinely want to live, cook, and connect with family and friends. These design ideas demonstrate the remarkable versatility of open-concept living, from subtle modifications that preserve existing architecture to bold transformations that reimagine entire floor plans. Whether you’re drawn to the clean lines of modern minimalism, the warmth of farmhouse charm, or the edgy appeal of industrial design, there’s an open kitchen solution that aligns with your vision and budget. The key is choosing approaches that honor your home’s unique character while supporting your daily routines. Start with one or two elements that resonate most strongly—perhaps opening a pass-through window or installing a statement island—and let your space evolve organically from there. Remember that the best open kitchens balance beauty with practicality, creating spaces where real life happens comfortably. We’d love to hear which ideas inspired you most, what challenges you’re facing in your own space, or how you’ve successfully implemented open kitchen design. Share your thoughts, questions, and experiences in the comments below—your insights help fellow readers navigate their kitchen journeys.