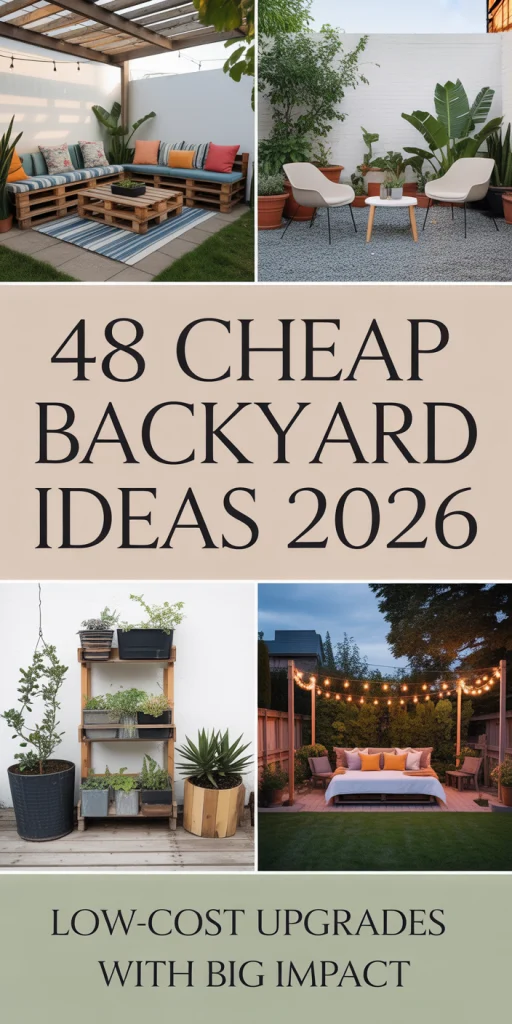
48 Cheap Backyard Ideas 2026: Budget DIY Projects and Easy Landscaping Tips for Stunning Outdoor
Moving into 2026, homeowners in the U.S. are starting to redesign their outdoor living spaces. Pinterest has documented a large number of searches to find affordable ways to not only redesign their backyards but also extend their living space in the outdoors. If you are looking to do a DIY project or are concerned about budget but want to create something beautiful, outdoor spaces can be created using just your budget, a little imagination, a plan, and some work.
1. Reclaimed Pallet Vertical Garden
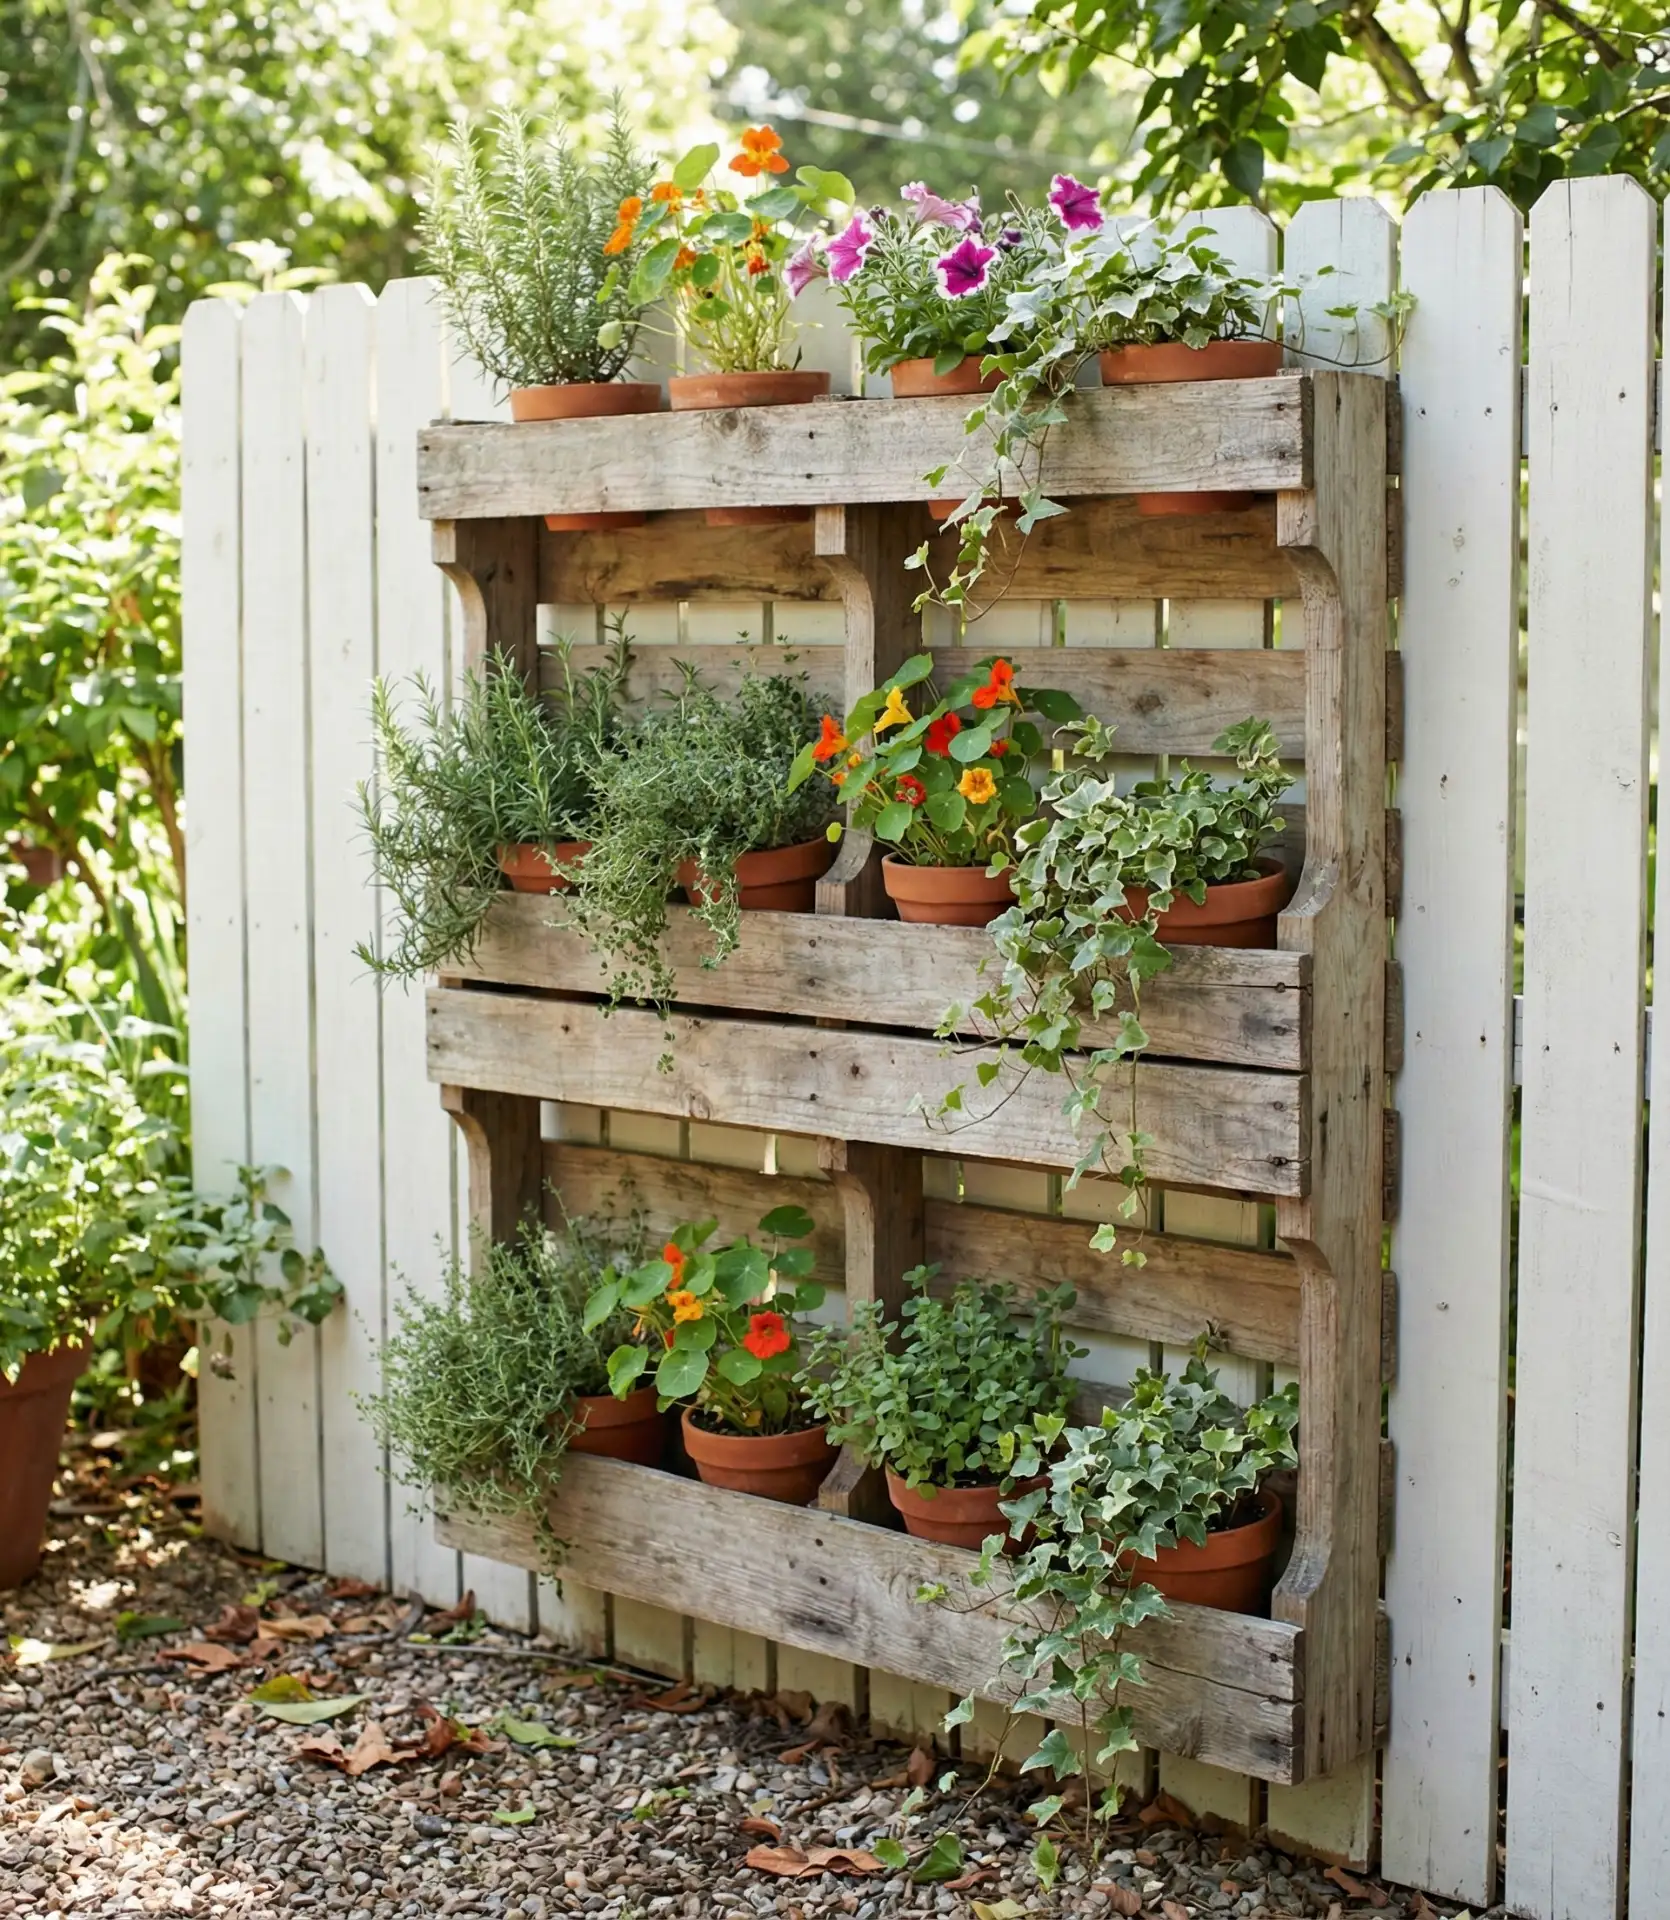
With a little creative work, a free or very cheap wooden pallet can be made into a vertical garden bed. This is a wonderful DIY project that is ideal for small yards or small gardens. This structure works beautifully for herbs, succulents, and flowers. To do this project, you only need a wooden pallet, soil, and some sandpaper to smooth off the rough edges. Add some landscaping fabric to the back and soil, and plant. A pallet garden is a wonderful project for the weekend or the week if you want to complete a small outdoor project. A pallet garden is a simple project that is stunning and has little cost. 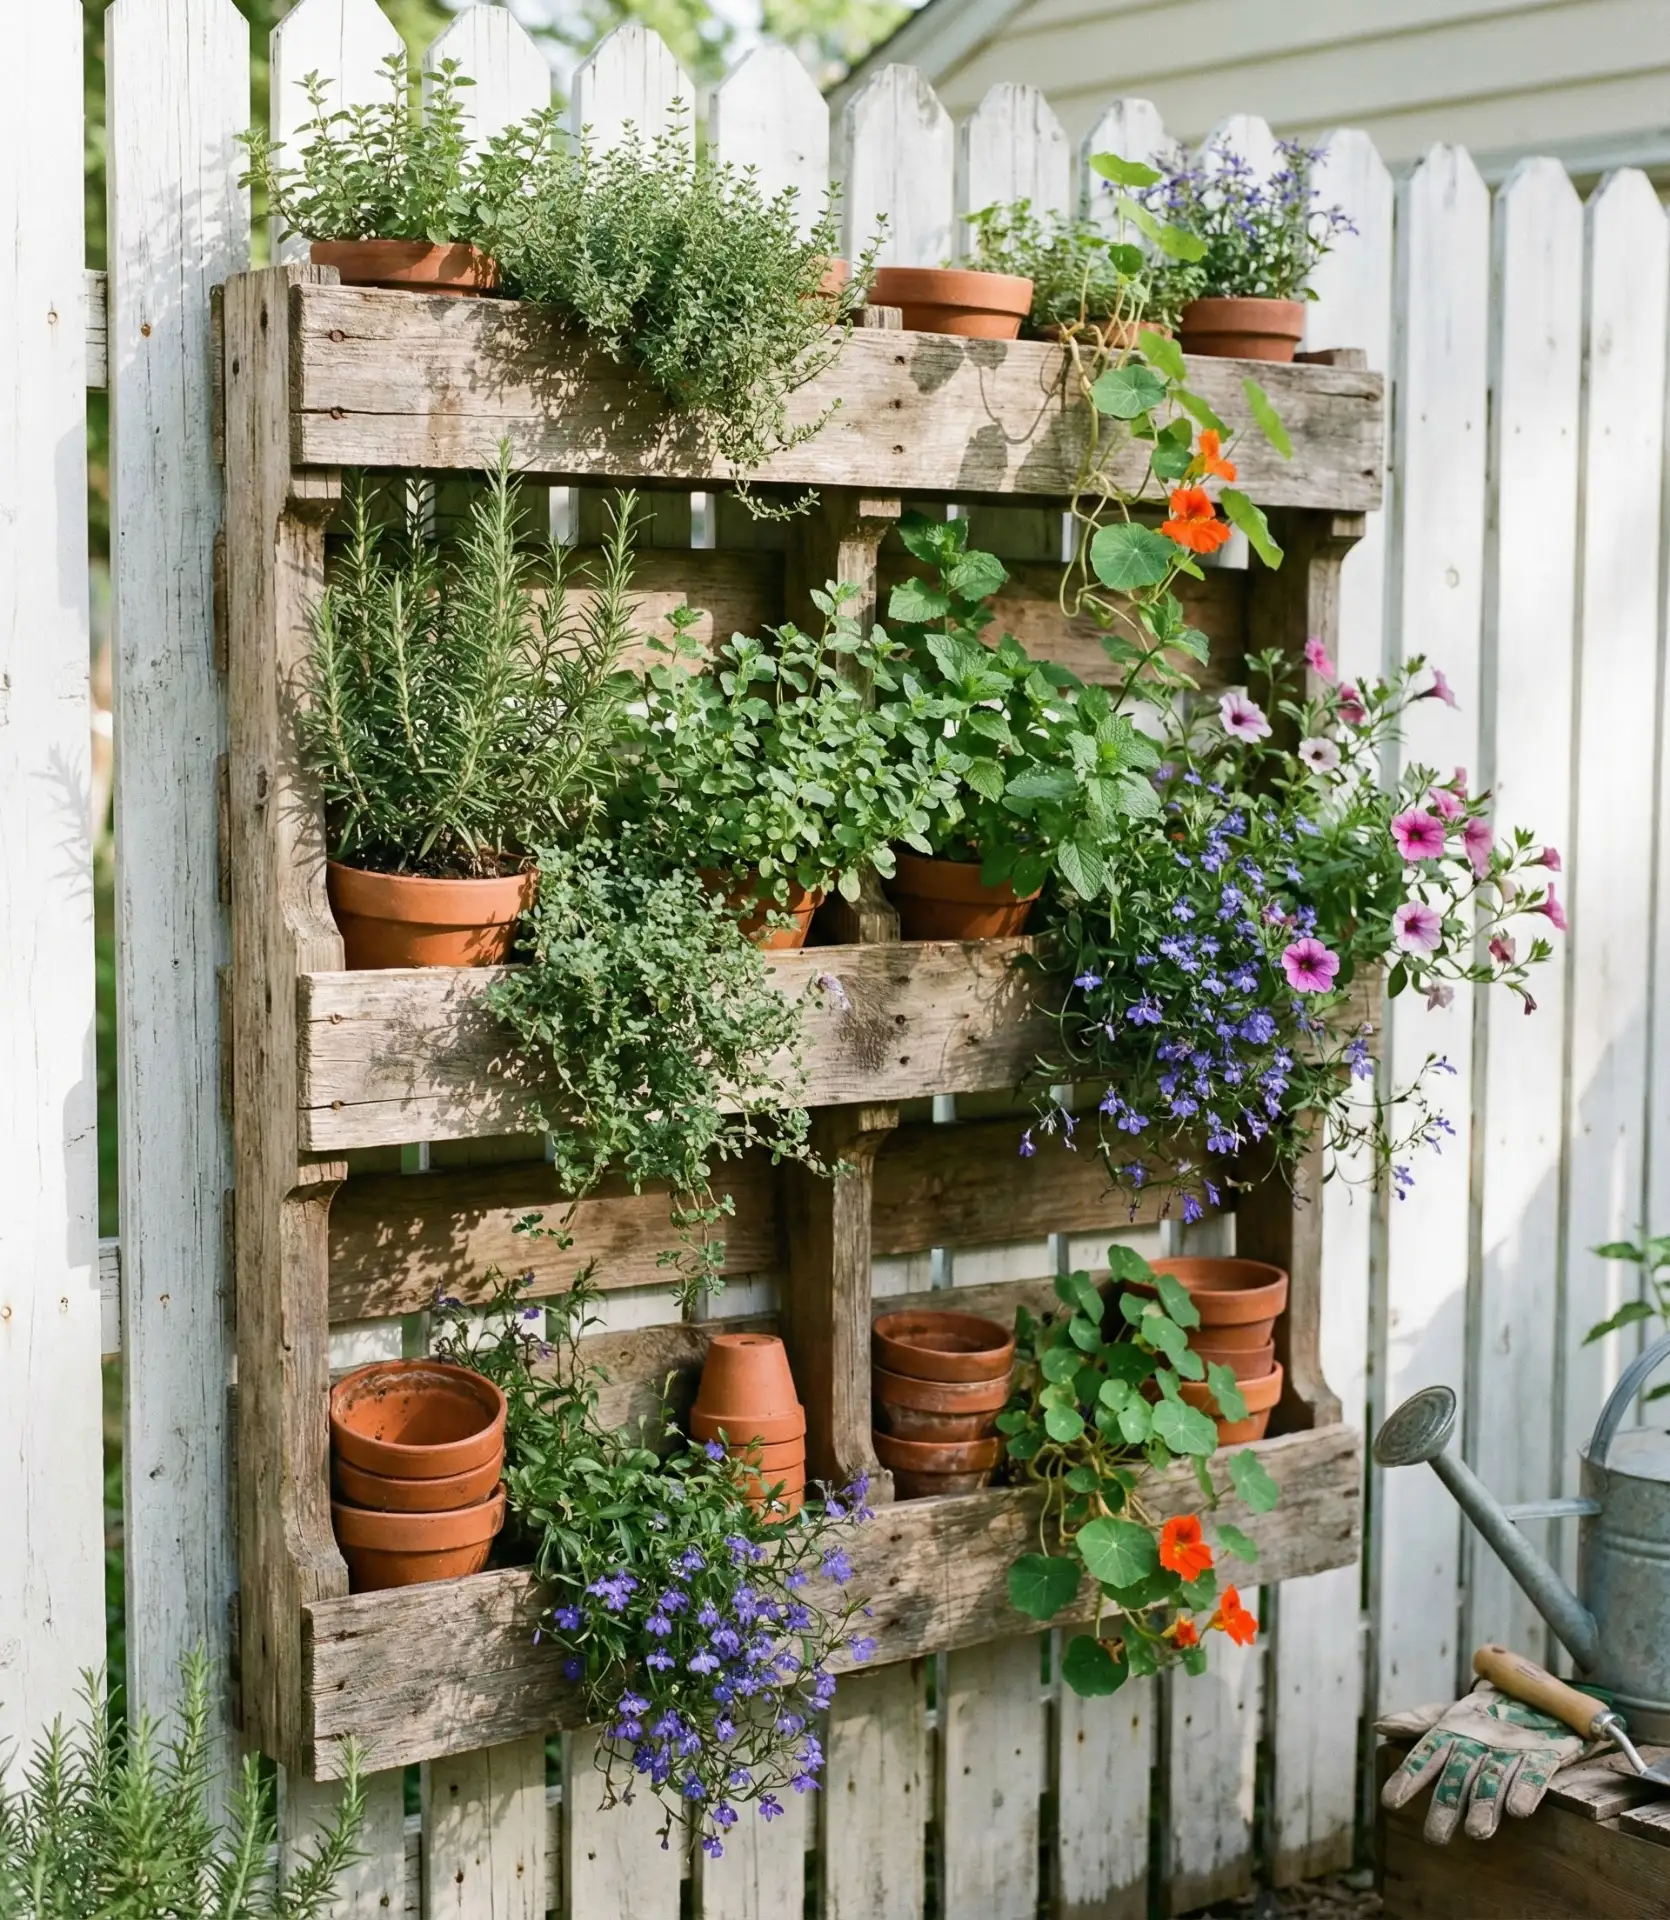
Pallet garden verticals shine in urban neighborhoods where the outdoors has a lot of vertical space but little horizontal space to fill. This project is ideal for renters and for backyards with little horizontal space to fill. Because it is vertical, it can also be moved easily to create a beautiful garden. To get free pallets, people can usually find them at local businesses. This option is ideal for DIY vertical garden builders that need to stick to a budget.
Water naturally permeates the Wooden Garden Planters to avoid root rot, a common problem in many container gardens.
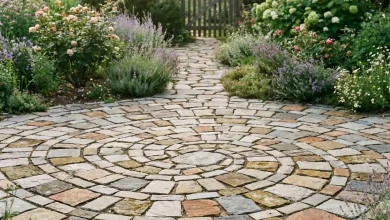
2. Gravel Fire Pit Zone
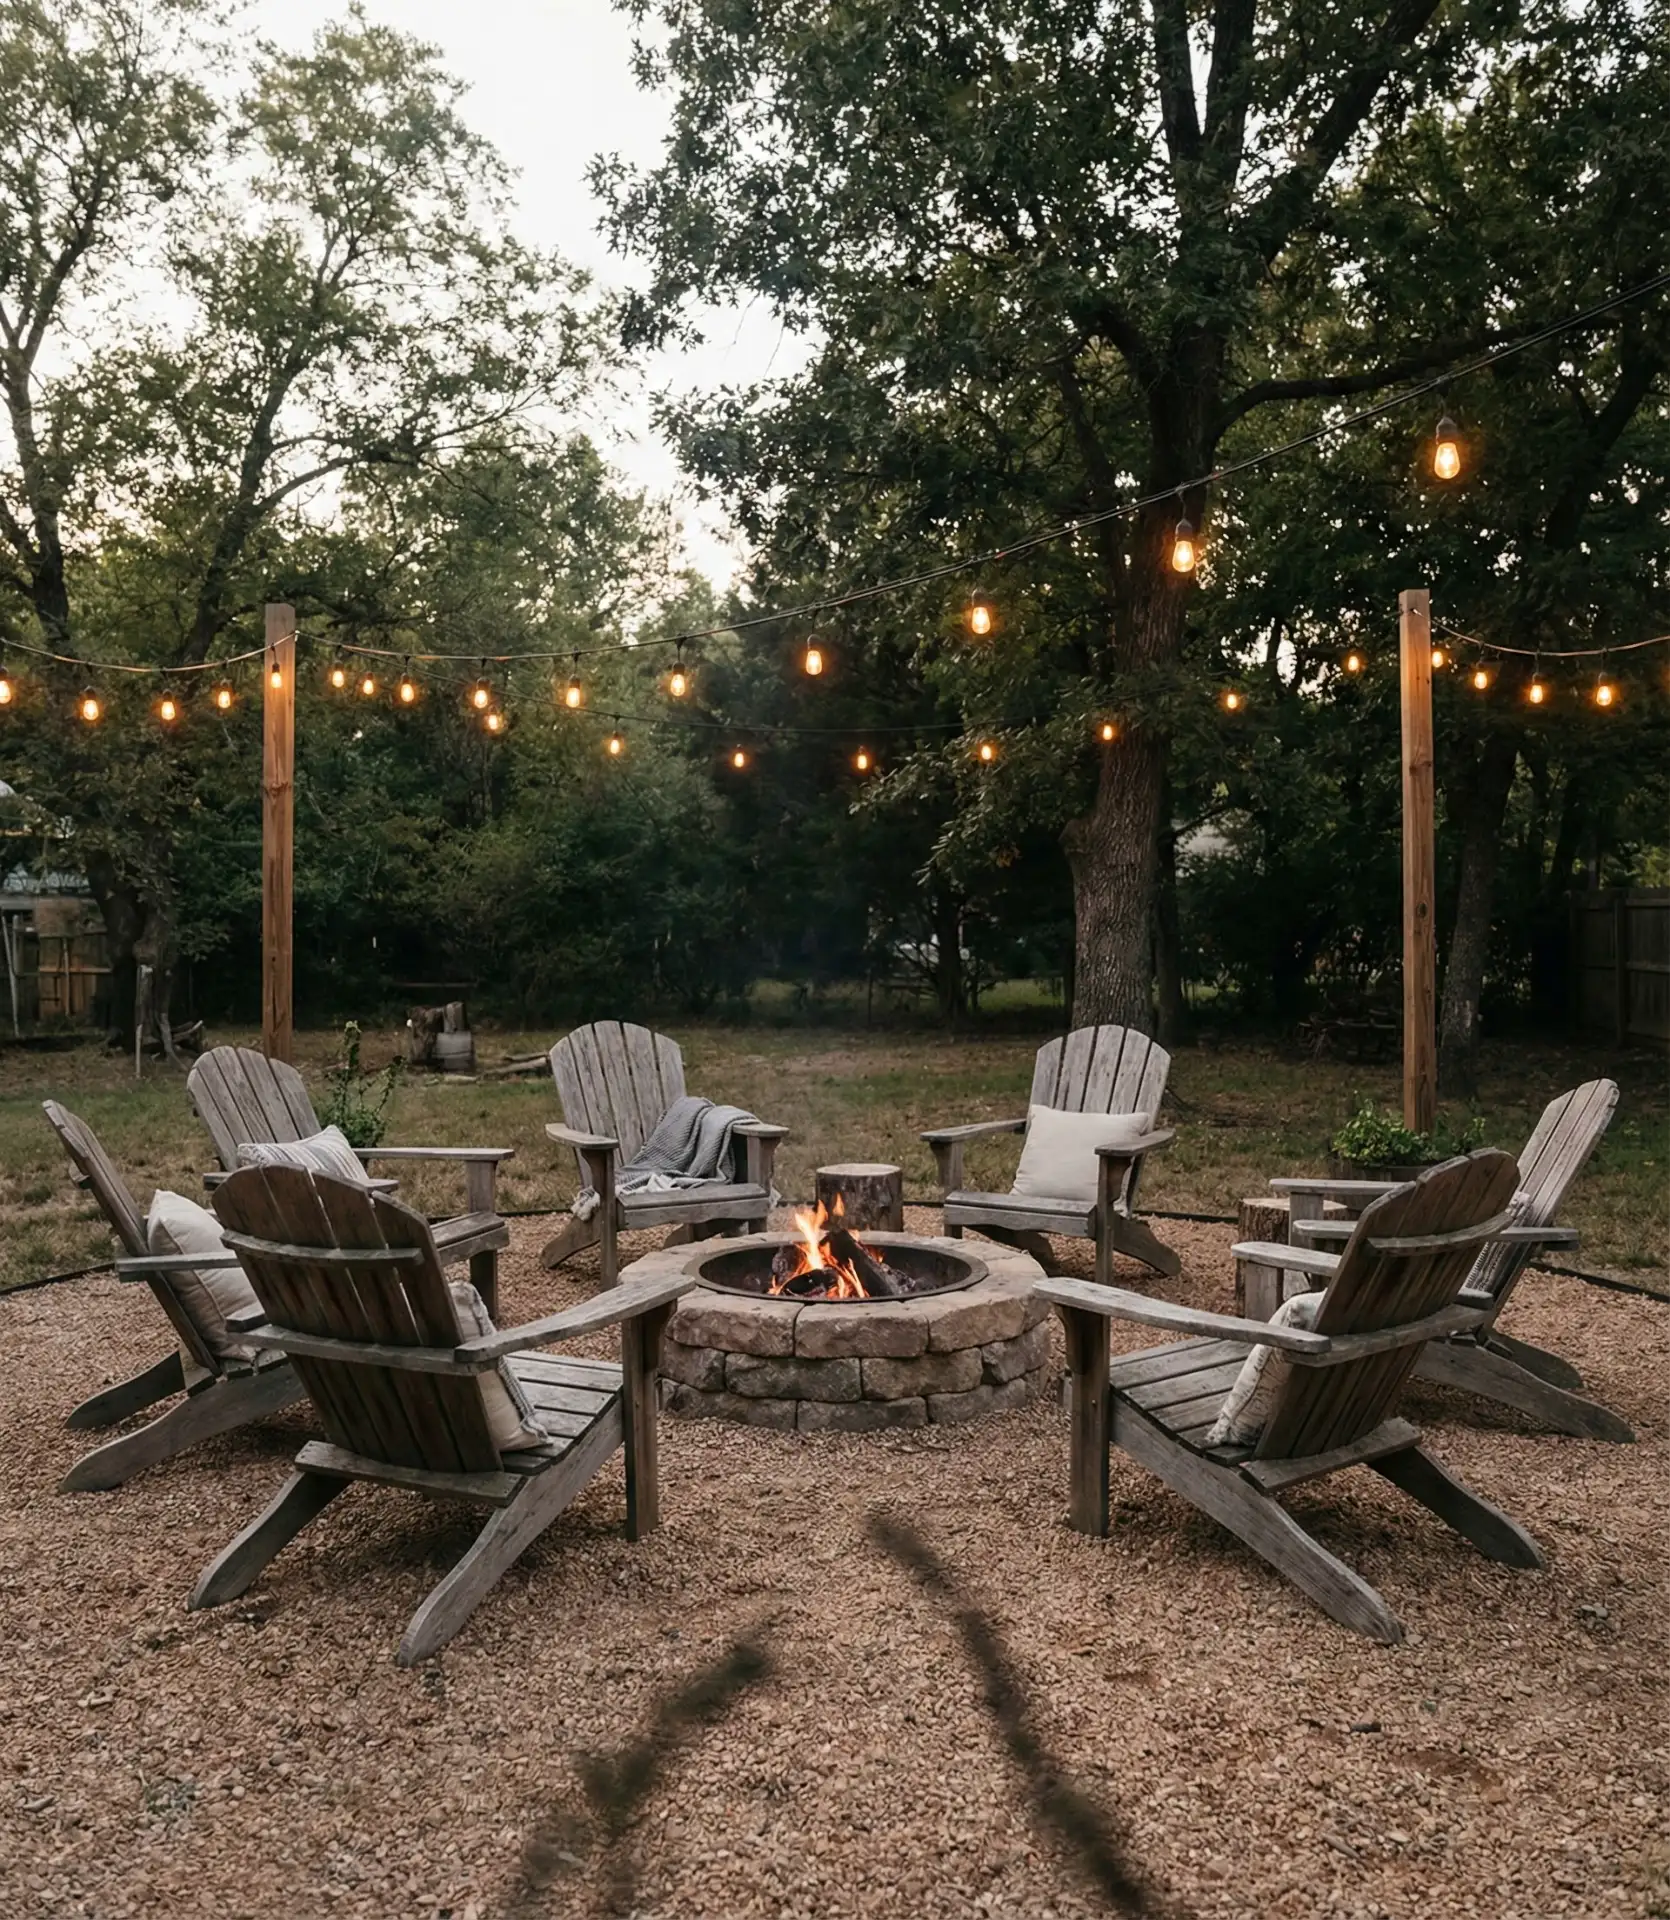
Build an attractive bonfire pit area with a budget gravel base rather than pricey pavers or concrete. This landscaping style beats traditional hardscaping budget-wise, plus it provides excellent drainage. Use a rustic gravel circle around your fire pit, and put some aged Adirondack chairs or tree stumps around for seating. You’ve crafted a communal space that exudes a deliberate design, rather than a budget-conscious approach.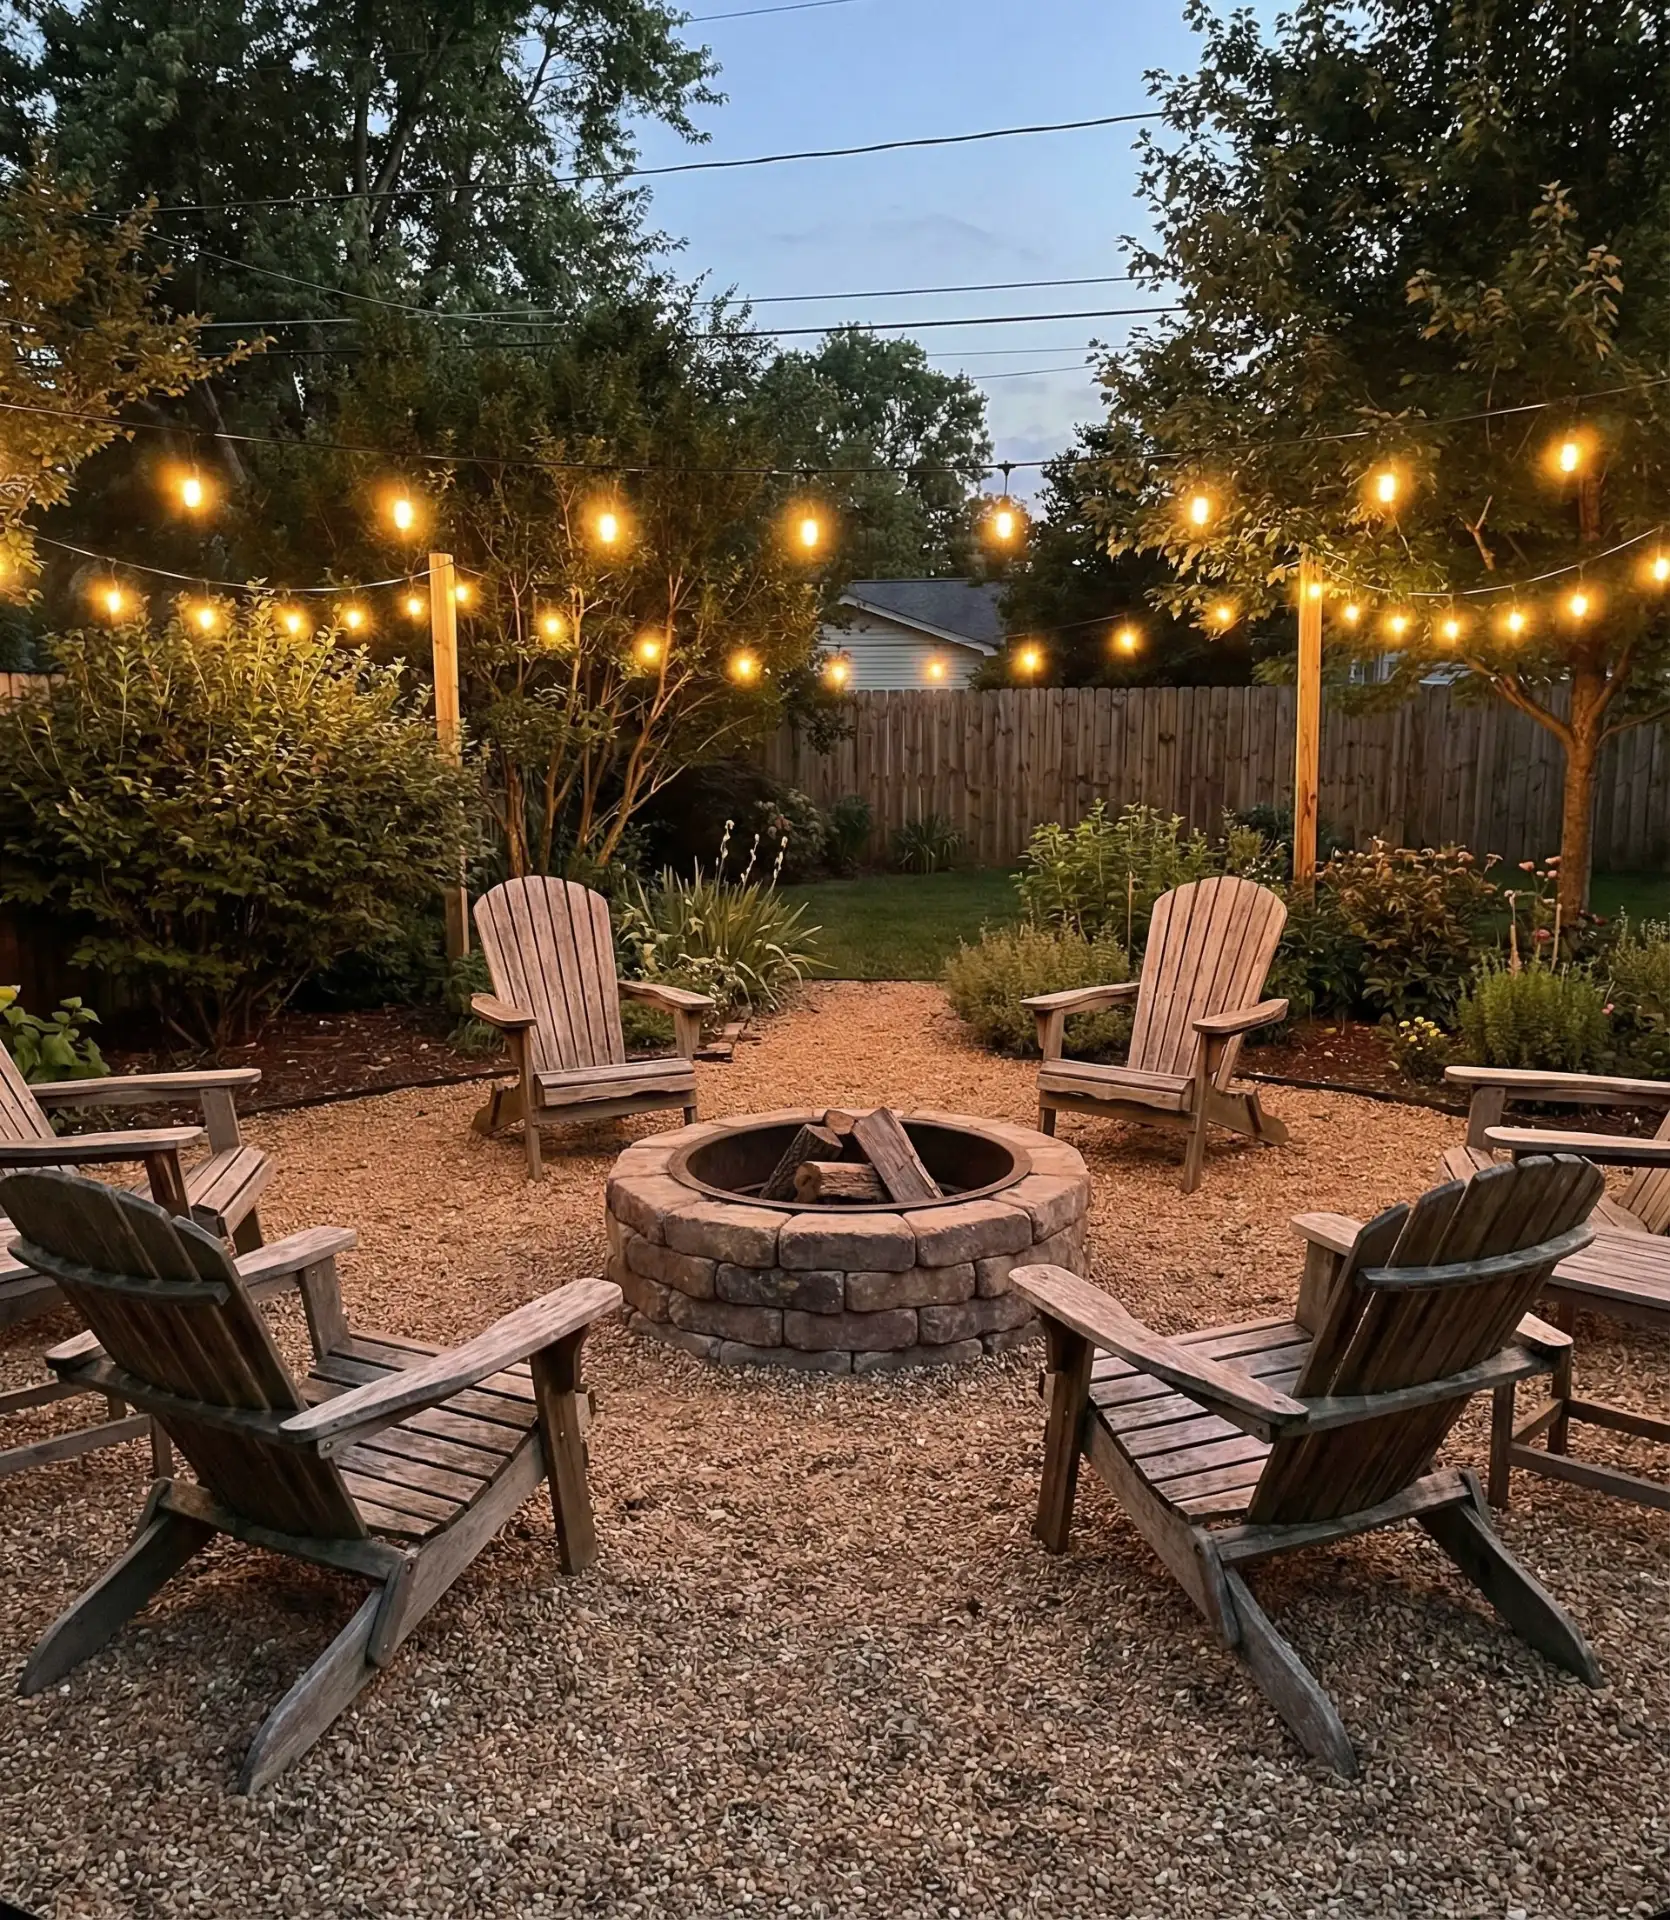
In the Midwest and South, where summers mean outdoor entertaining, this setup has become a staple for households that value function over flash. Typical costs for a cubic yard of gravel are $30 to $50. For the best budget gravel border, use the landscape stones or bricks you have lying around. The gravel suppresses weeds naturally and never needs mowing, which are two wins for busy homeowners.
3. String Light Canopy Over Existing Patio
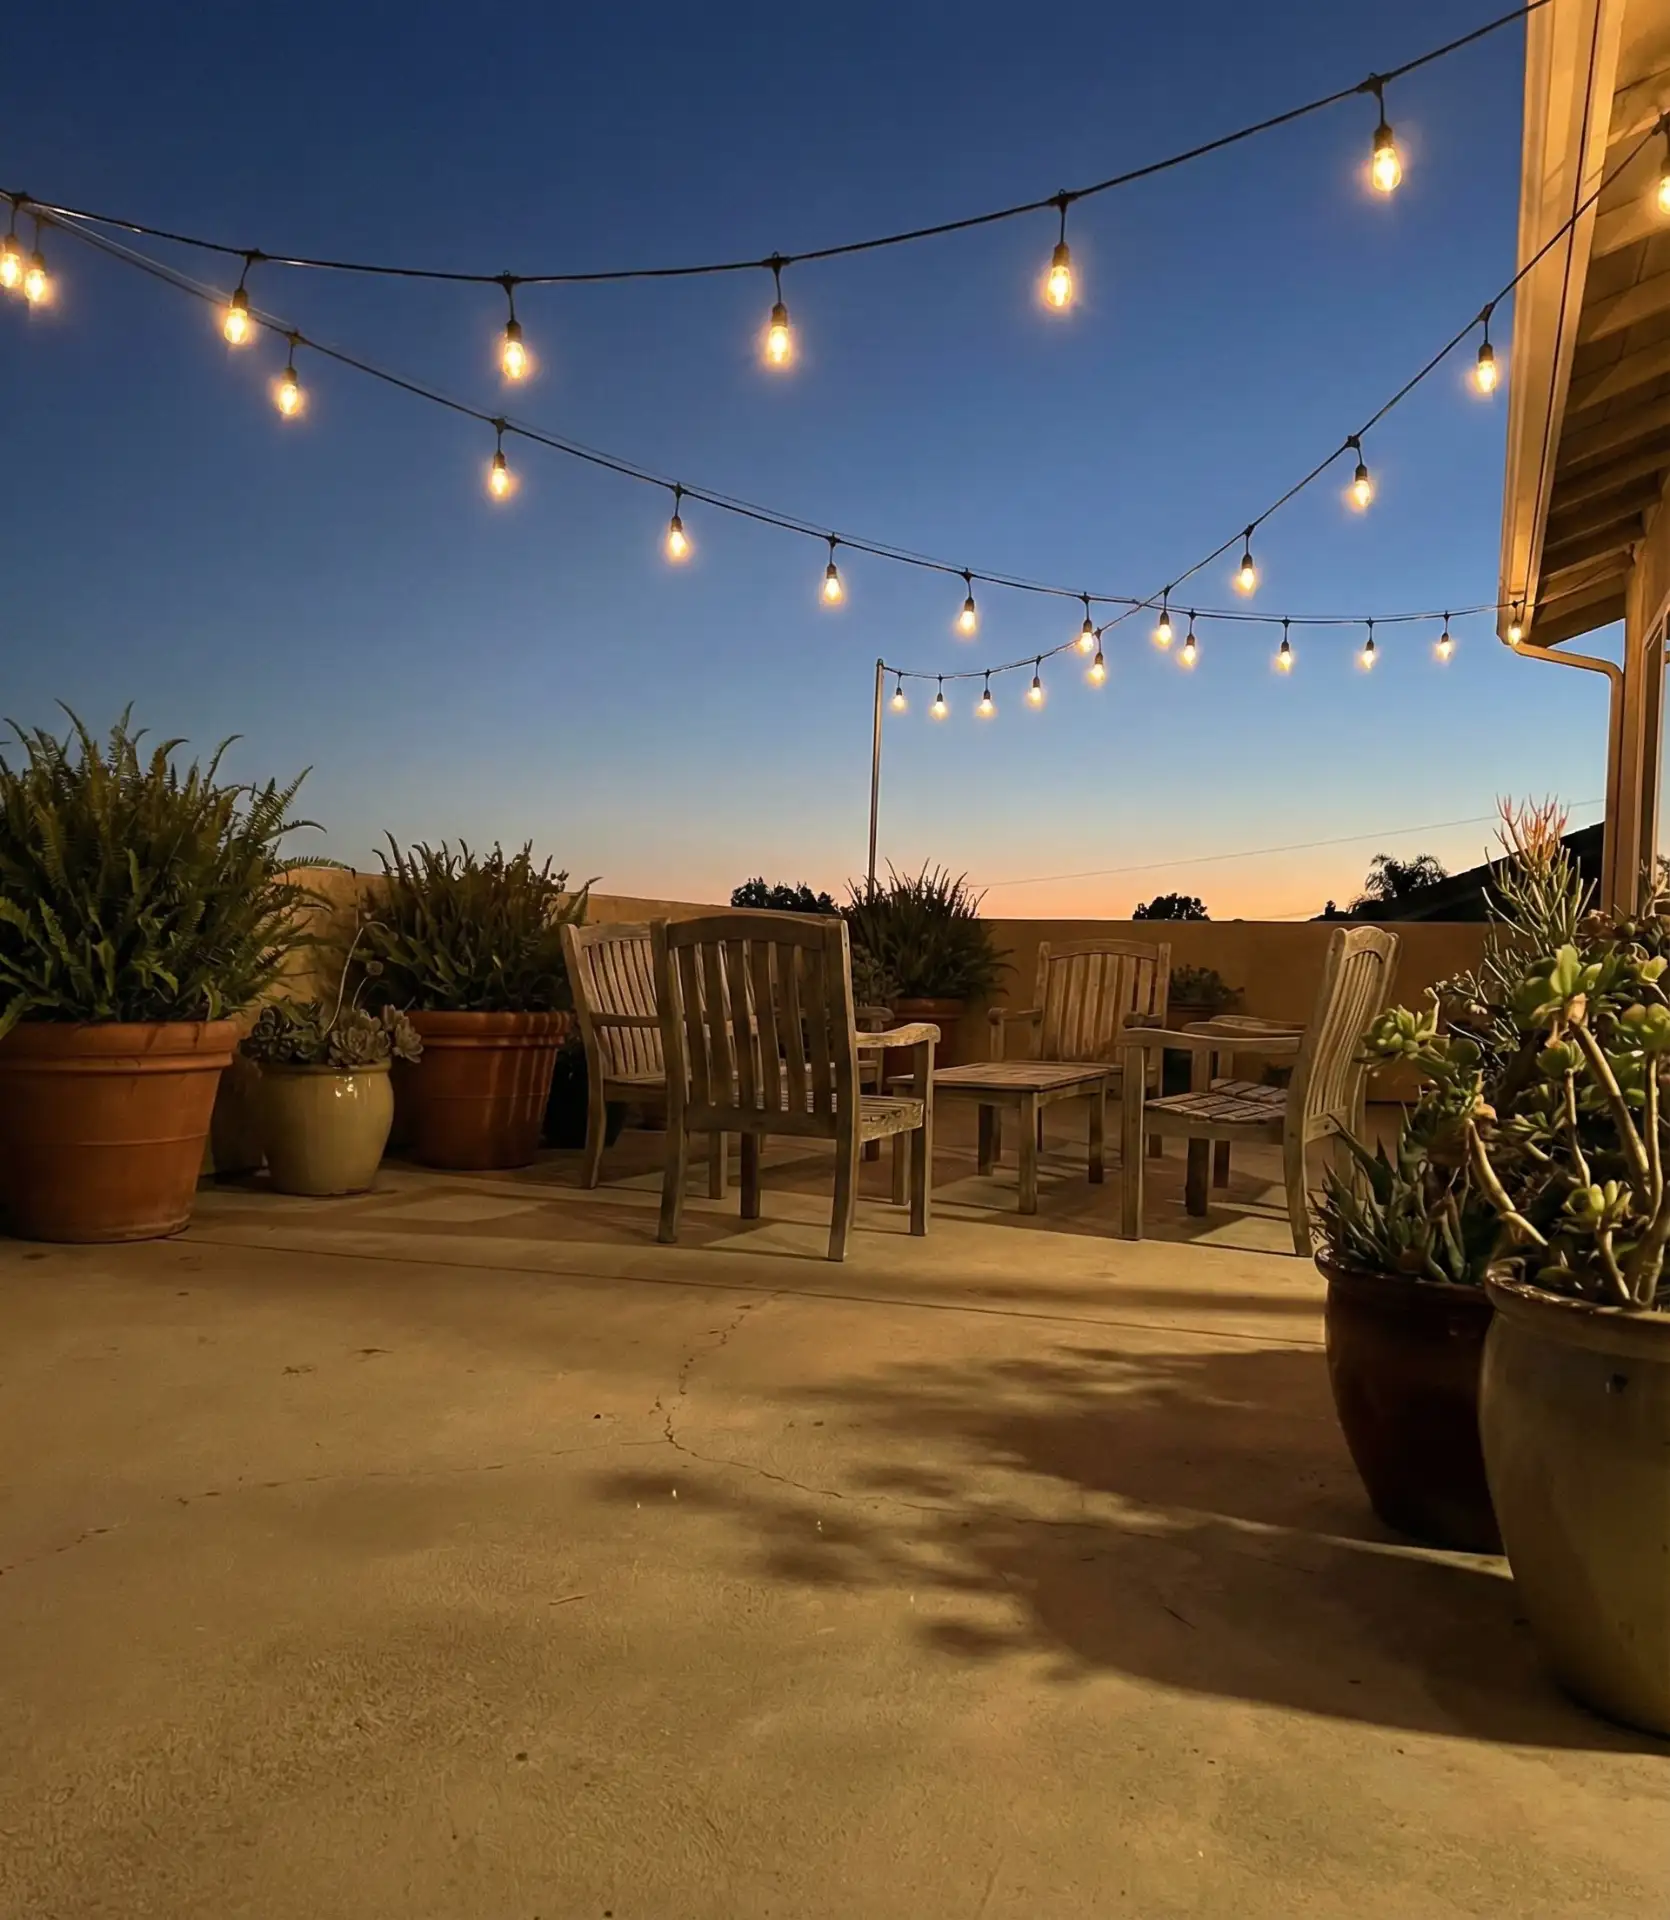
Before spending lots of money on a pergola, try this lighting idea that instantly defines your patio and makes it usable into the evening.
During the summer months,, use the fencing, shepherd’s hooks, or even L-brackets mounted to the house to create an anchor point, and to create a rustic, professional ambiance, spend under $100 to create your own string light canopy. The warm light glow is sure to delight, especially when you catch a deal online or at the local hardware store. 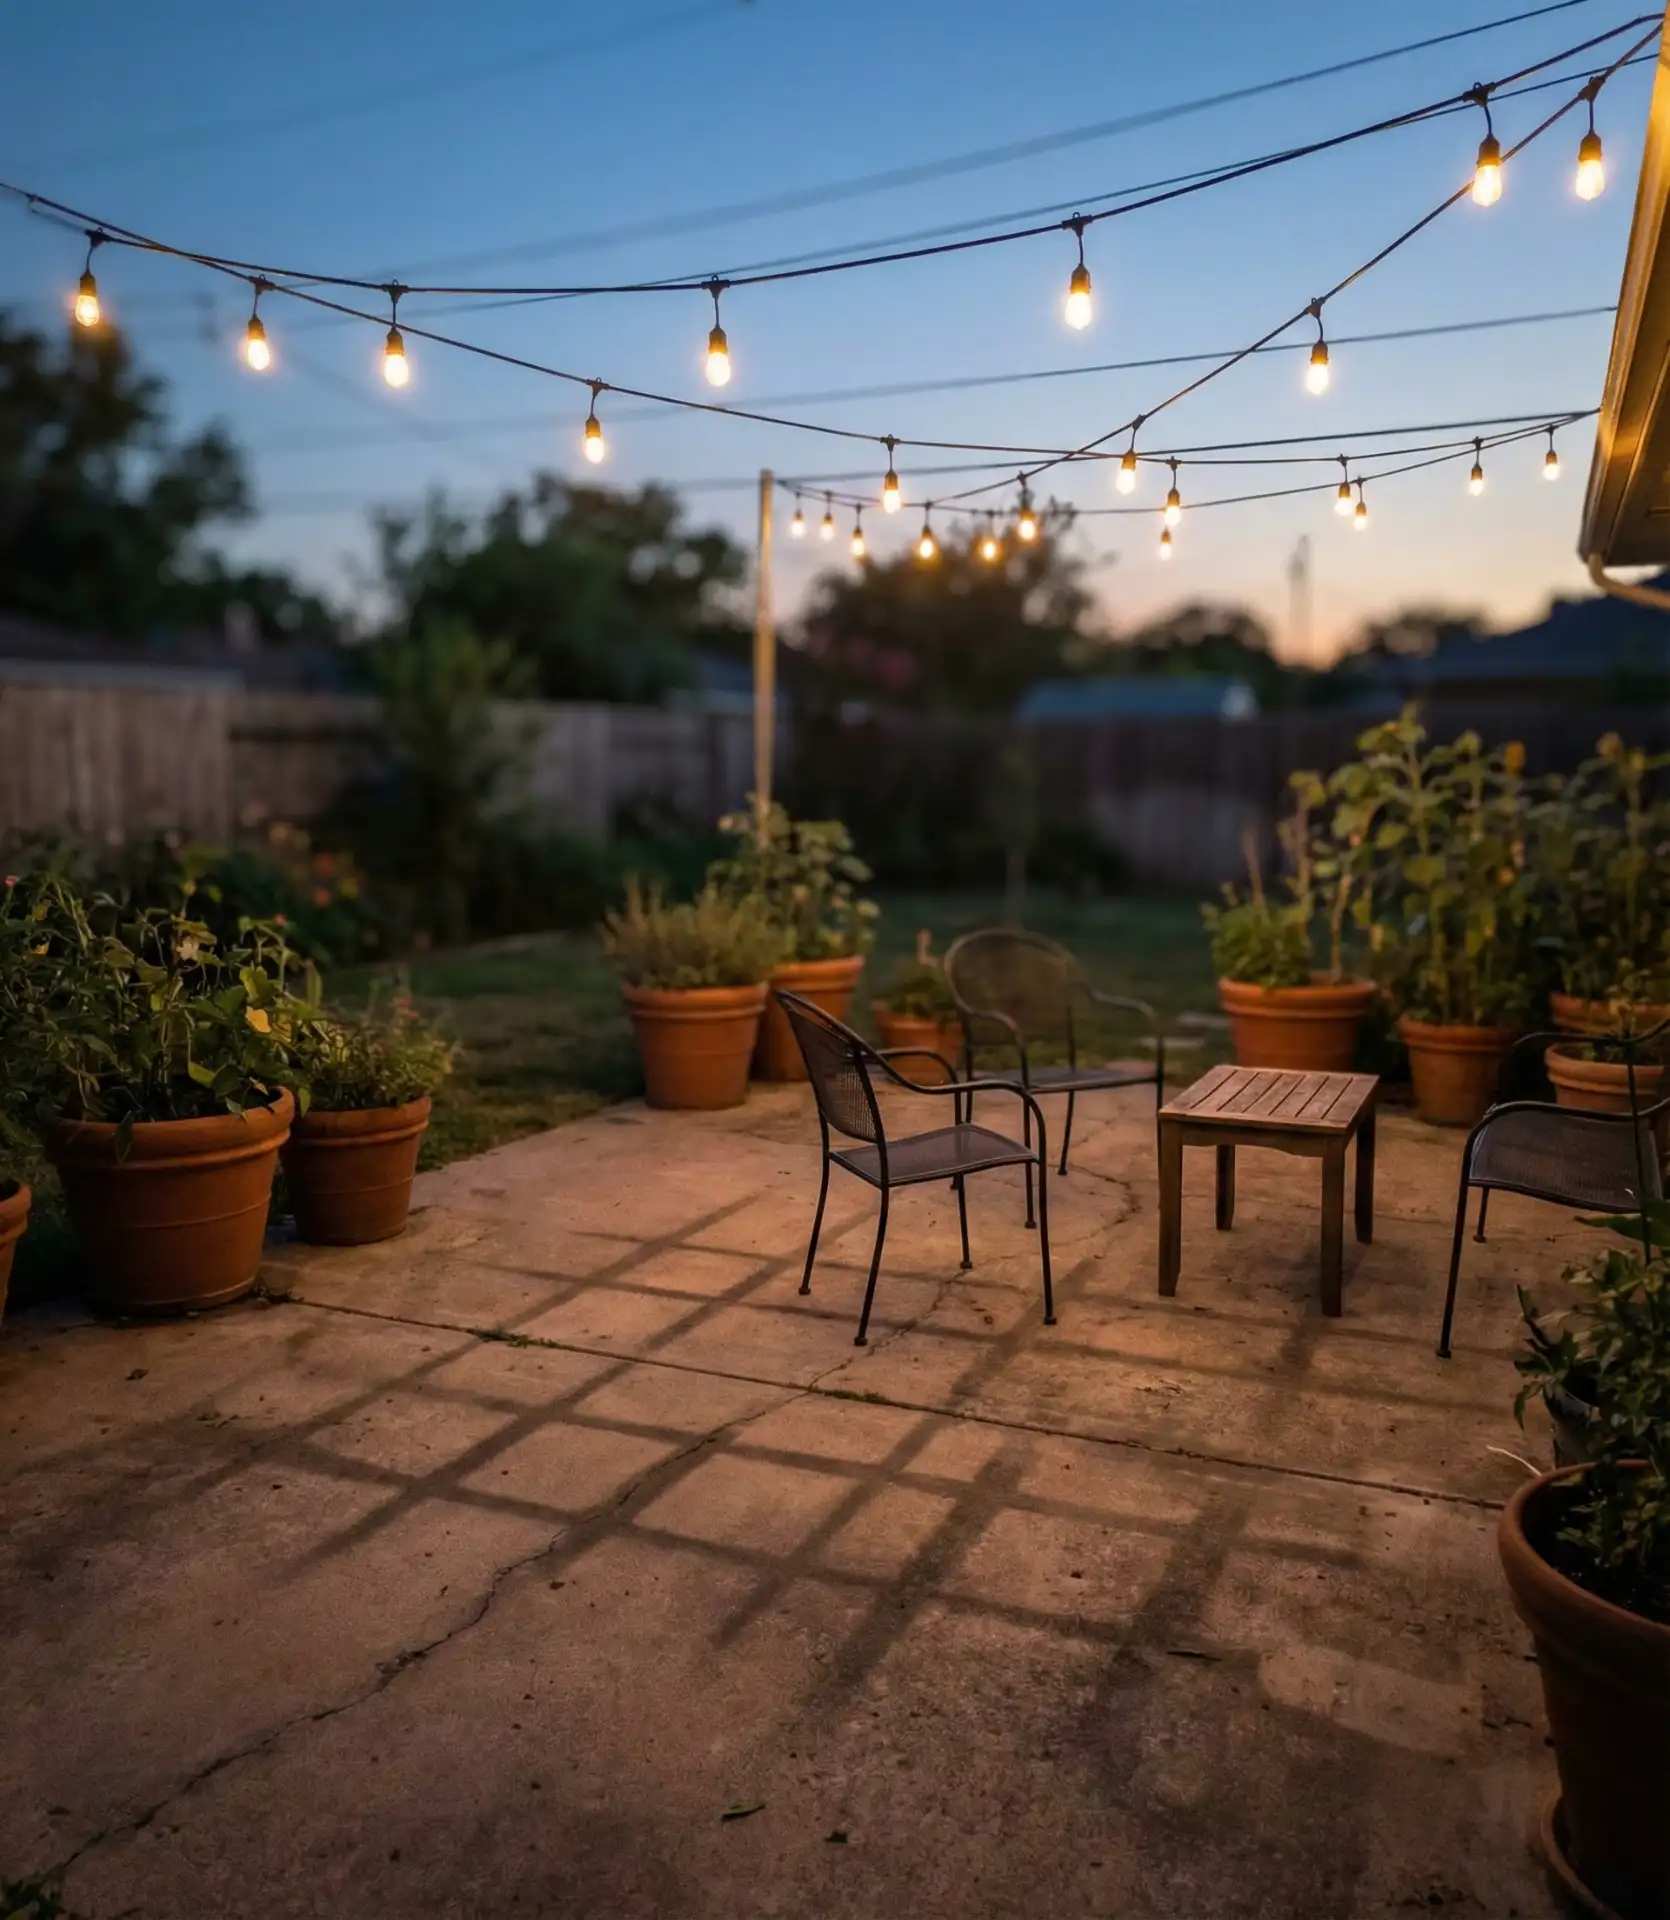
Correct placement of canopy lights creates an incredible look, but a common mistake is using too few strands and spacing them too far apart. The real ambiance is created when you use a suitable number of strands and aim for an overall dome shape. To create a romantic outdoor restaurant feel, ideally space the strands 18 to 24 inches apart and set them at different heights. Make sure to use LEDs to save on energy and for a longer-lasting canopy. This type of installation is perfect for renters because most landlords allow non-permanent fixtures.
4. Painted Concrete Slab Makeover

Your creativity, along with some concrete paint or stain, can soften the bland, gray, and boring concrete slab in the yard. Your imagination, a few stencils for a faux-tile pattern, a bold geometric design, or a solid color will paint the slab of your choice. Investing in these materials, which range from $50 to $75, will enable you to transform your backyard in a weekend, giving it an immediate sense of completion and refinement.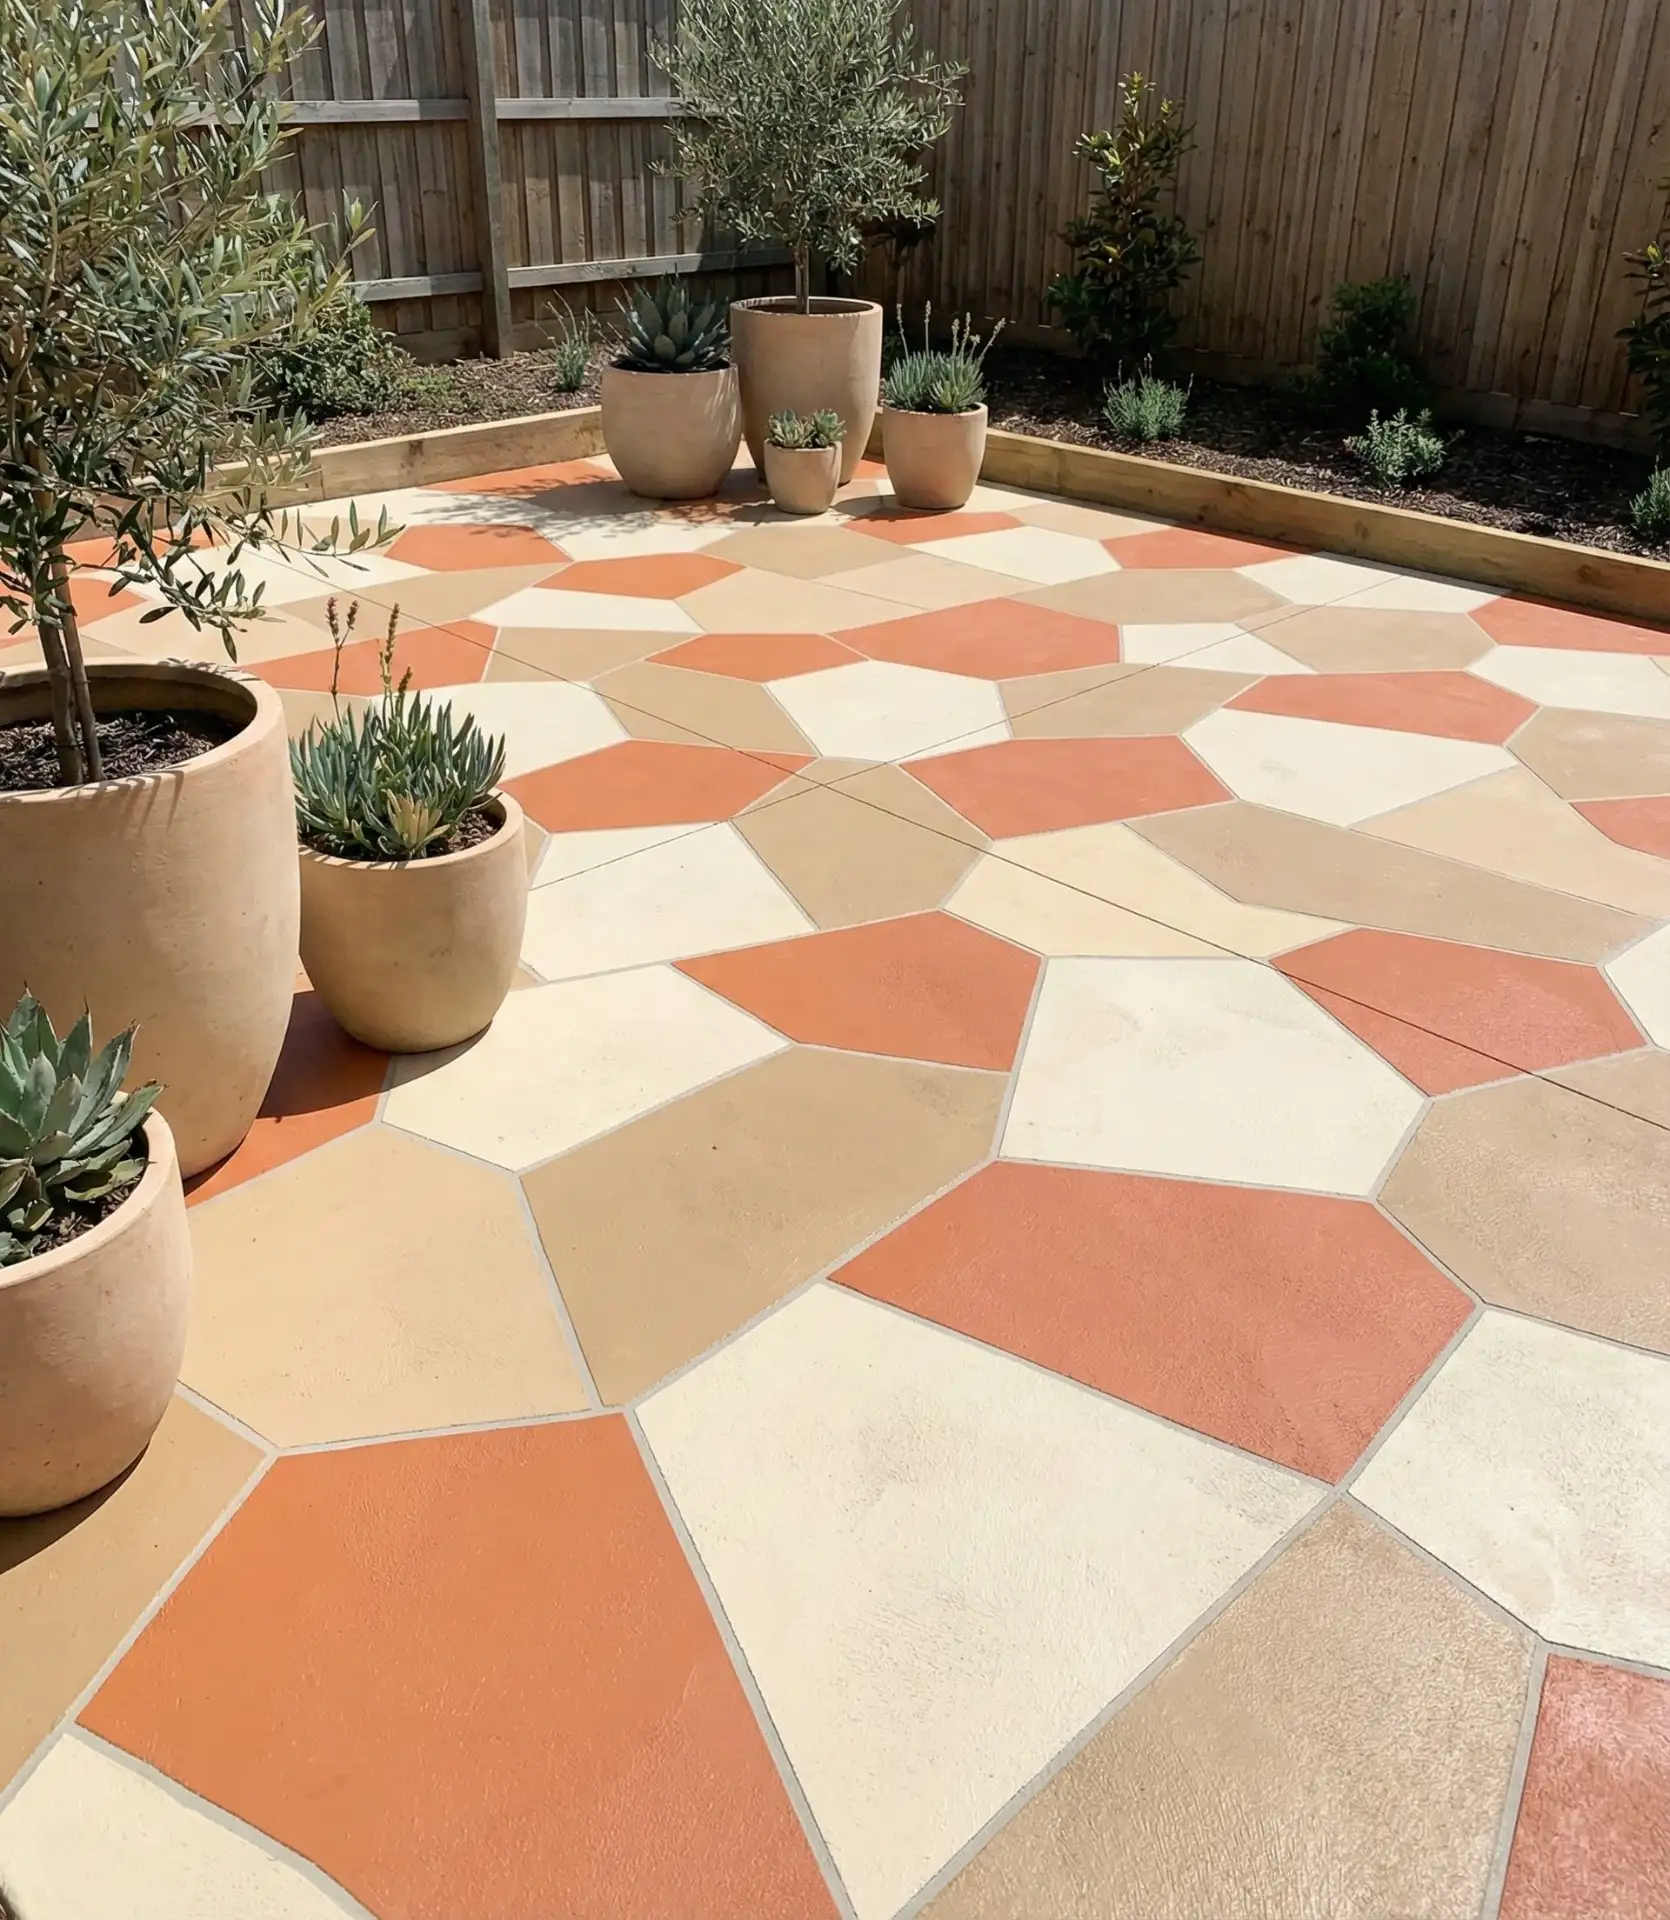
Homeowners in the Southwest have painted outdoor concrete patios for decades due to the strong sunlight and limited freeze and thaw cycles. Prep is essential: clean and etch glossy surfaces, and use a concrete-specific paint or stain rated for pedestrian traffic. Seal each year to keep the finish. This procedure is a wonderful option for those on a budget who want the visual appeal of pavers or stamped concrete for a fraction of the $5,000+ cost.
5. DIY Shade Sail Installation
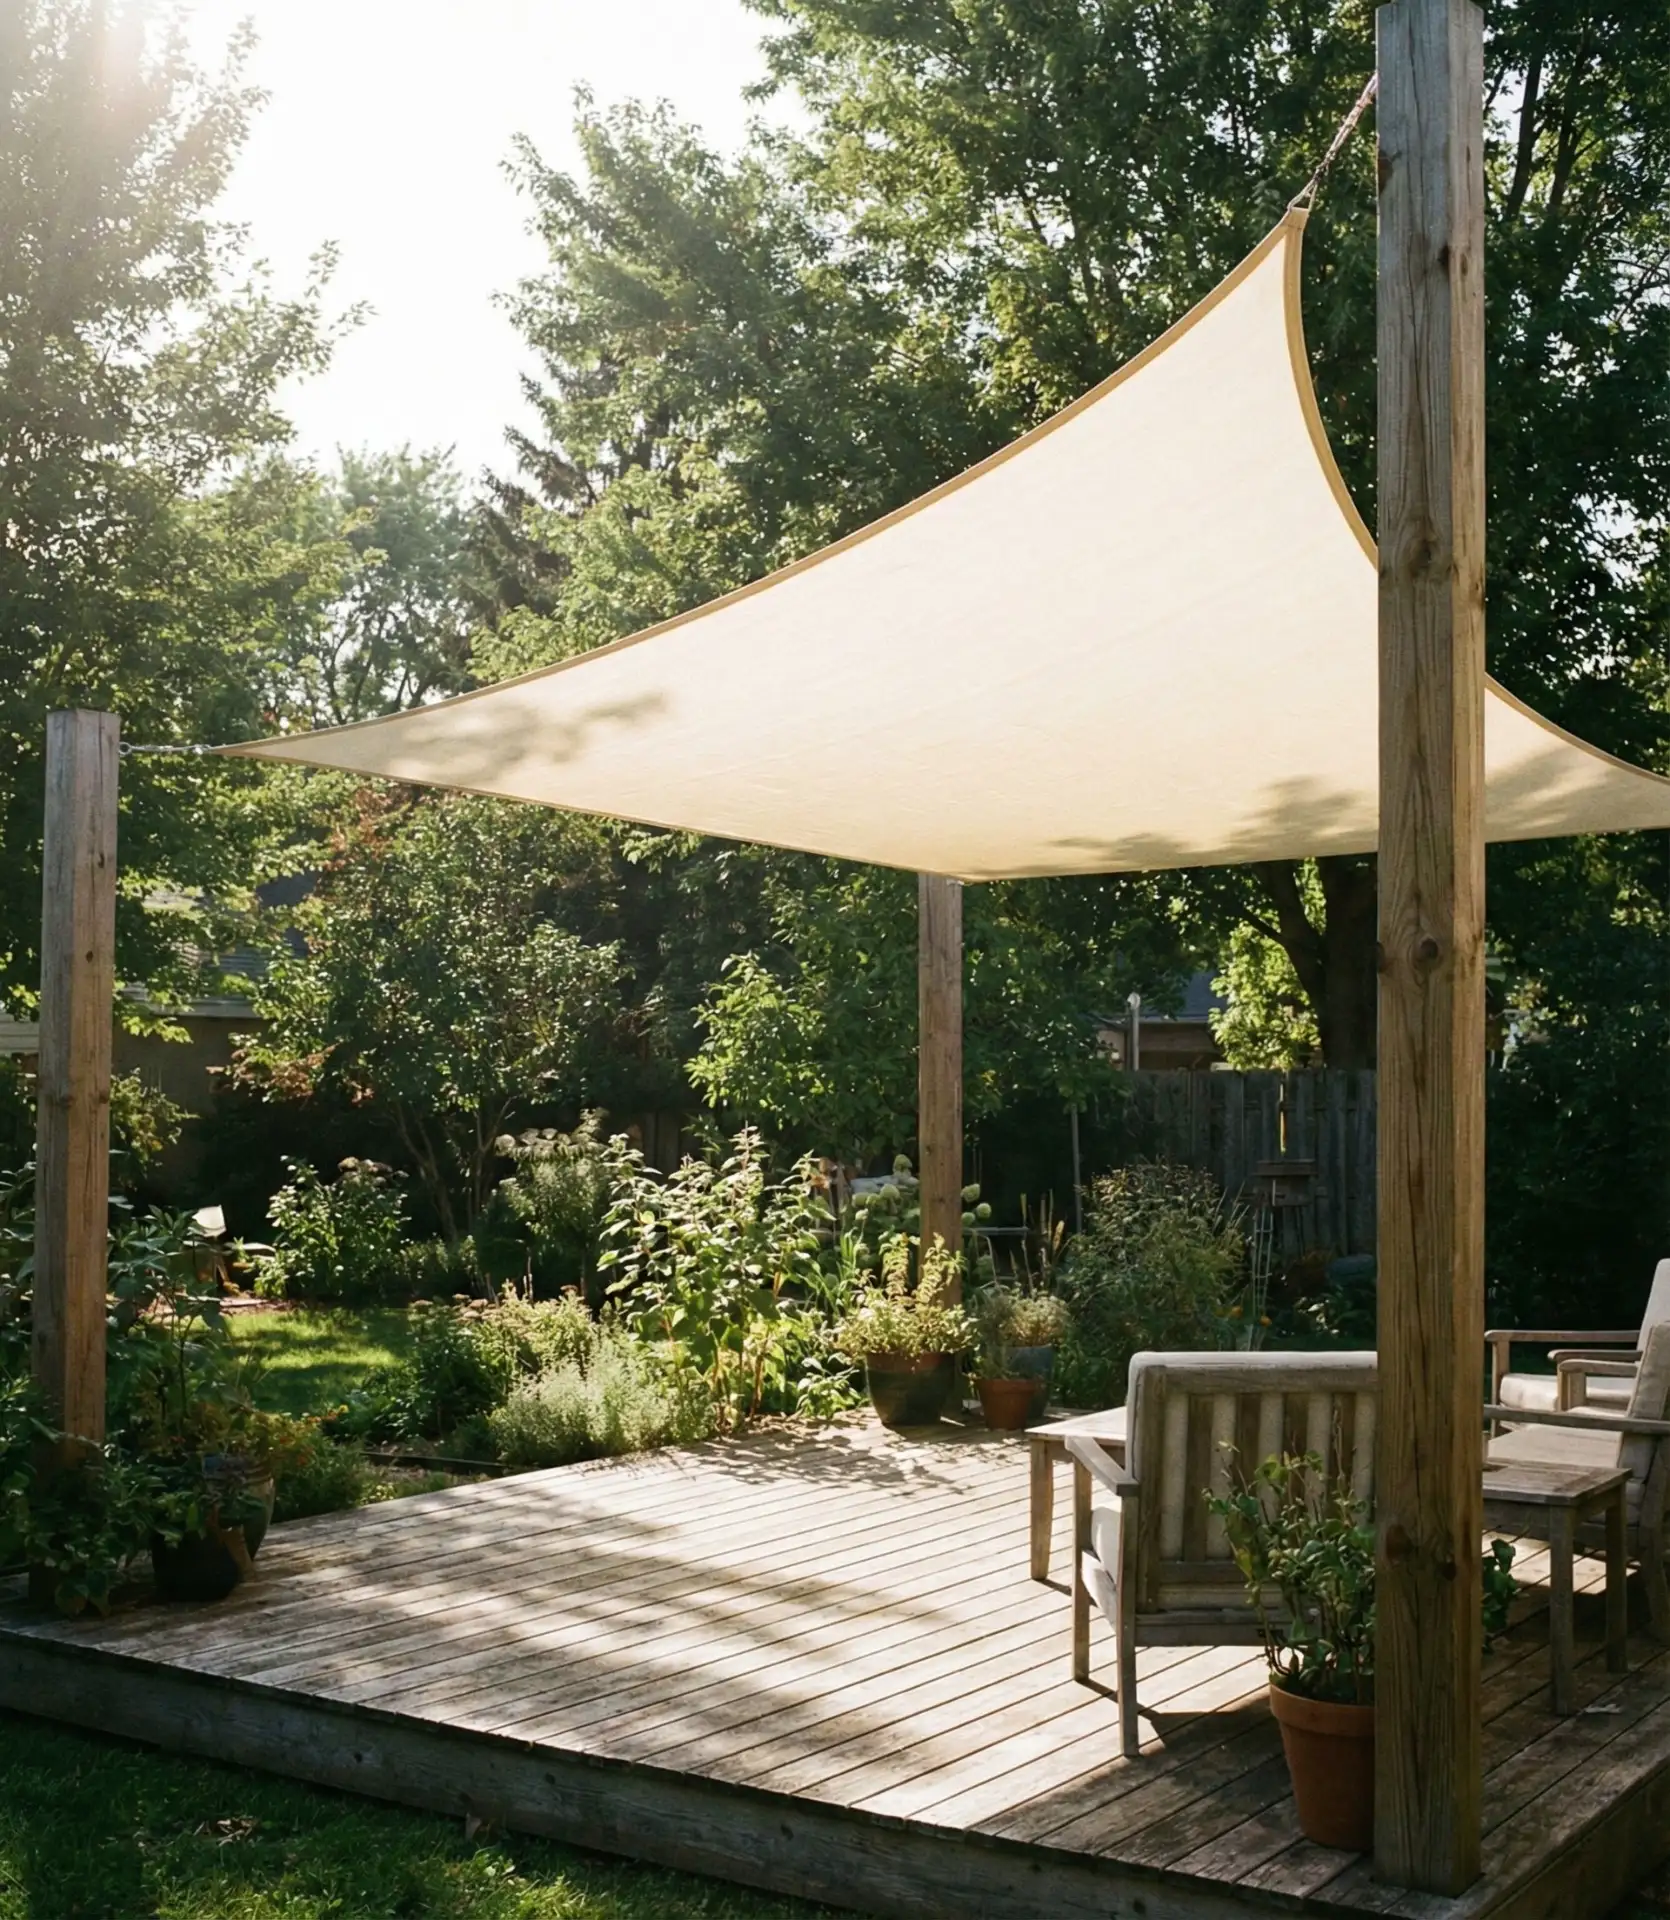
Relax under a built-in shade sail. The triangular and rectangular shapes offer a modern alternative to wooden structures, and built sails cost much less than a pergola. Attach the sails to posts, walls, or trees, and enjoy the coverage they offer. These are excellent for structure and design. UV protective shade sails cost $40-$150 depending on the size and are an easy DIY for beginners. 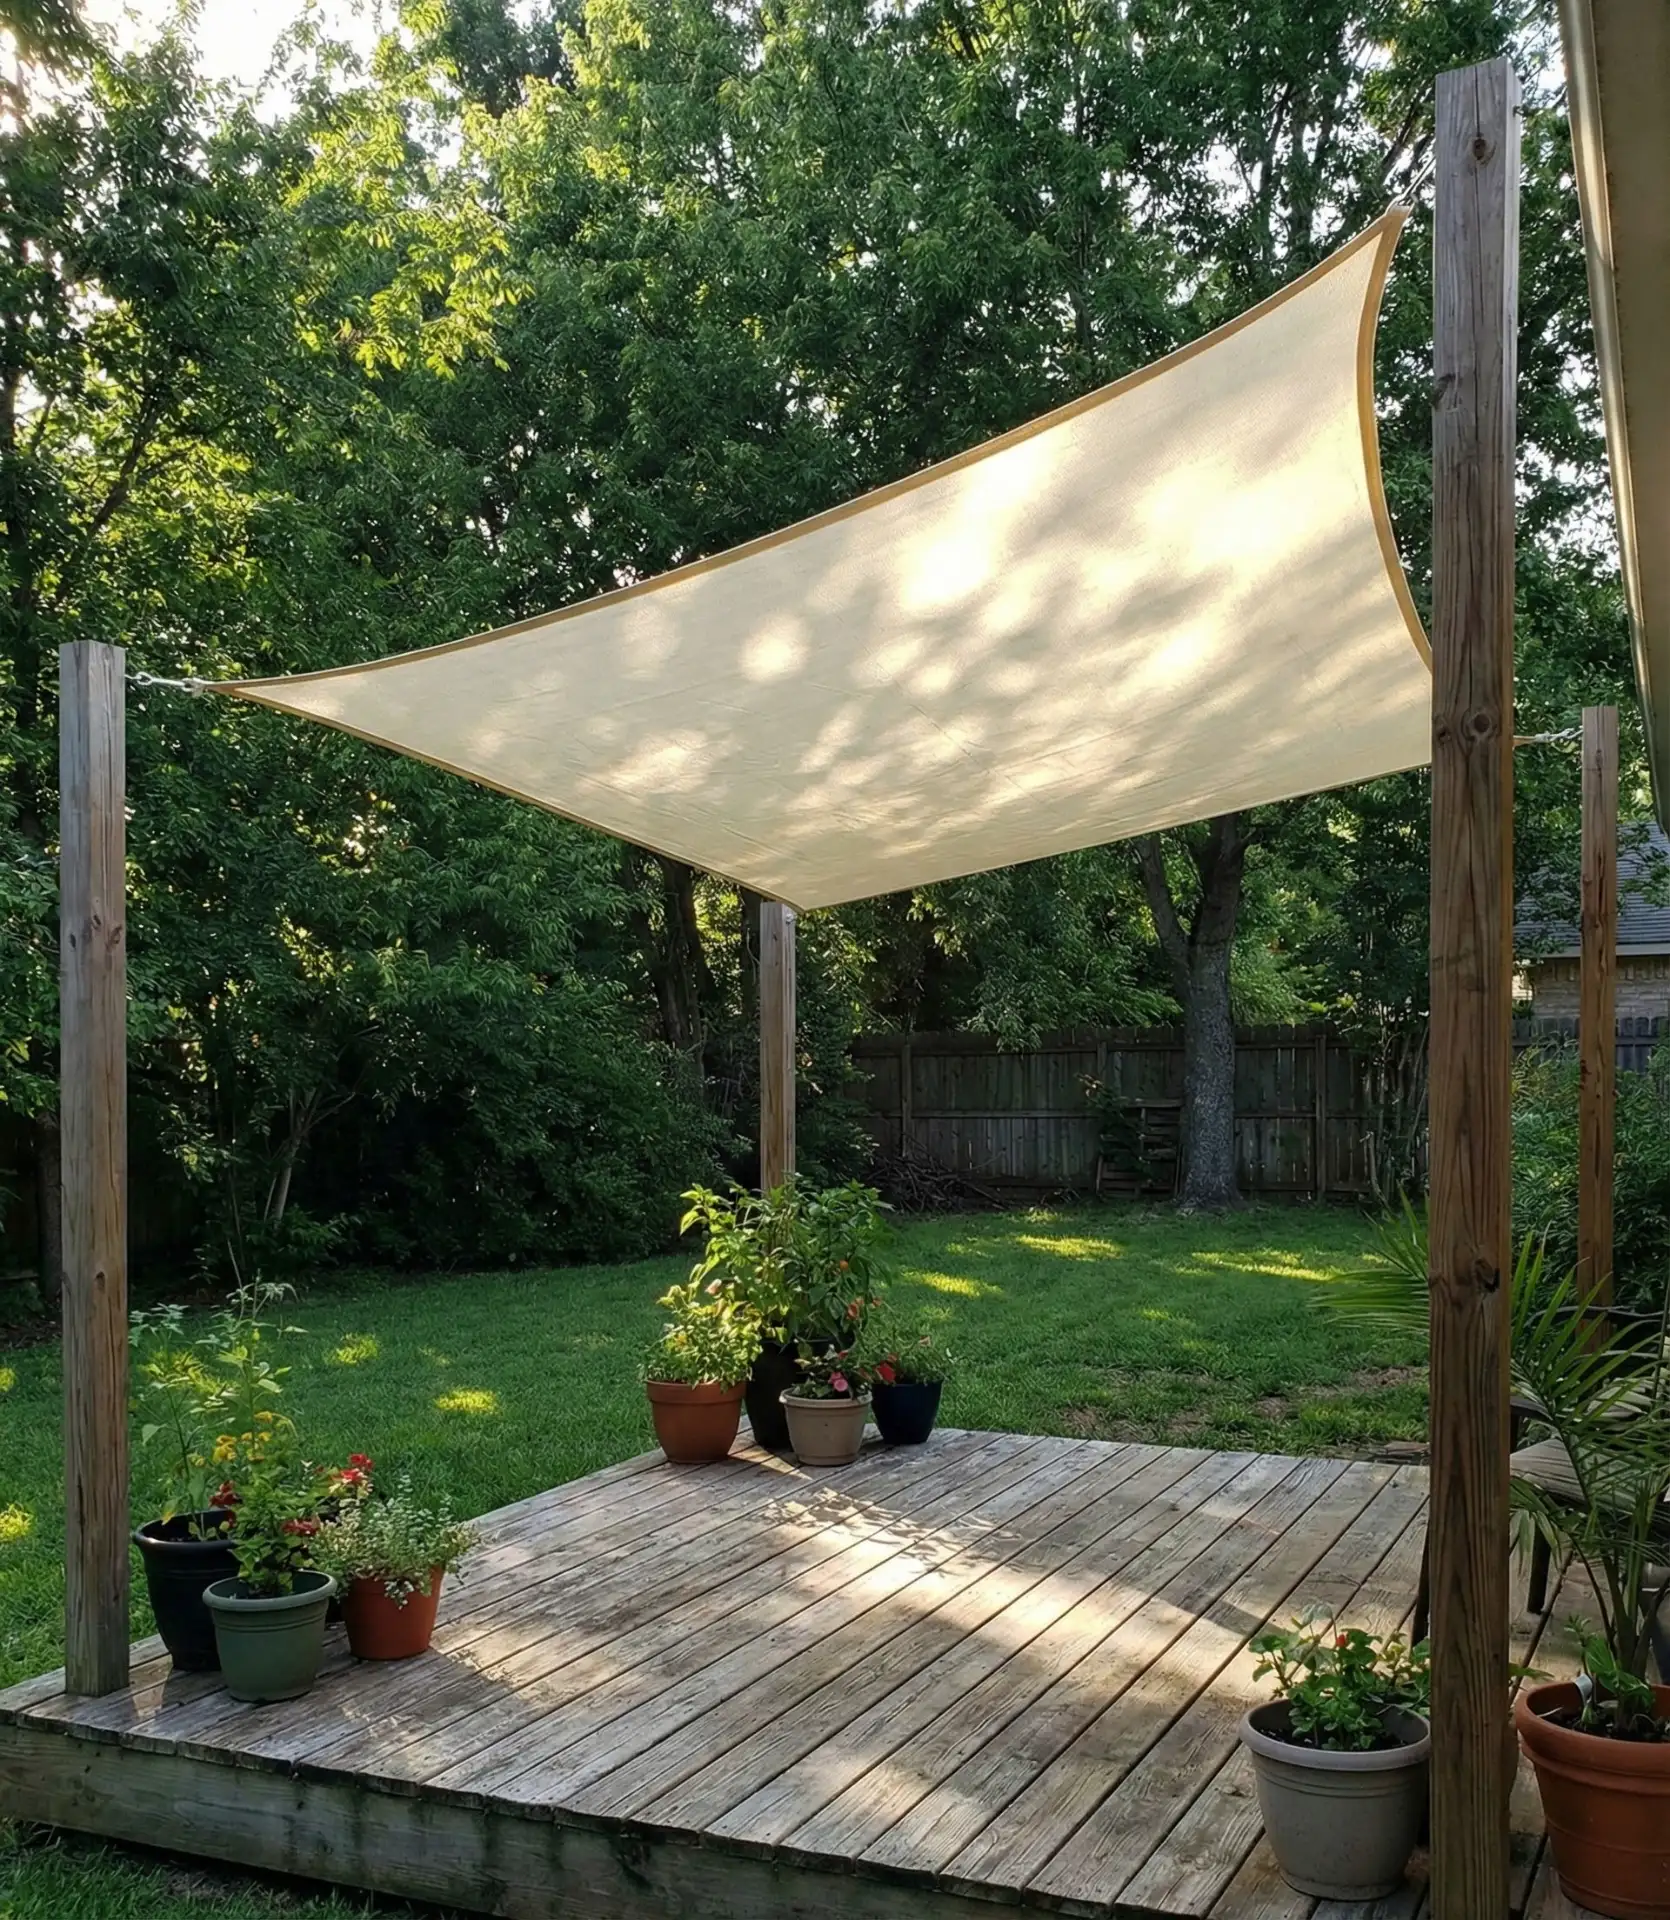
Extreme sunlight exposes Arizona, Texas, and California, making shade sails an ideal choice for these states. These sails block 95% of UV rays and are great to stay cool under. Unlike solid roofs or umbrellas, these sails allow airflow.
The main point is to have the right amount of tension: sails should be angled to cleat water and avoid responsibility in case they are sagging. Most municipalities don’t need permits for temporary shade structures, which makes this ideal for renters and the avoidance of pesky bureaucratic entanglements.
6. Repurposed Window Frame Greenhouse
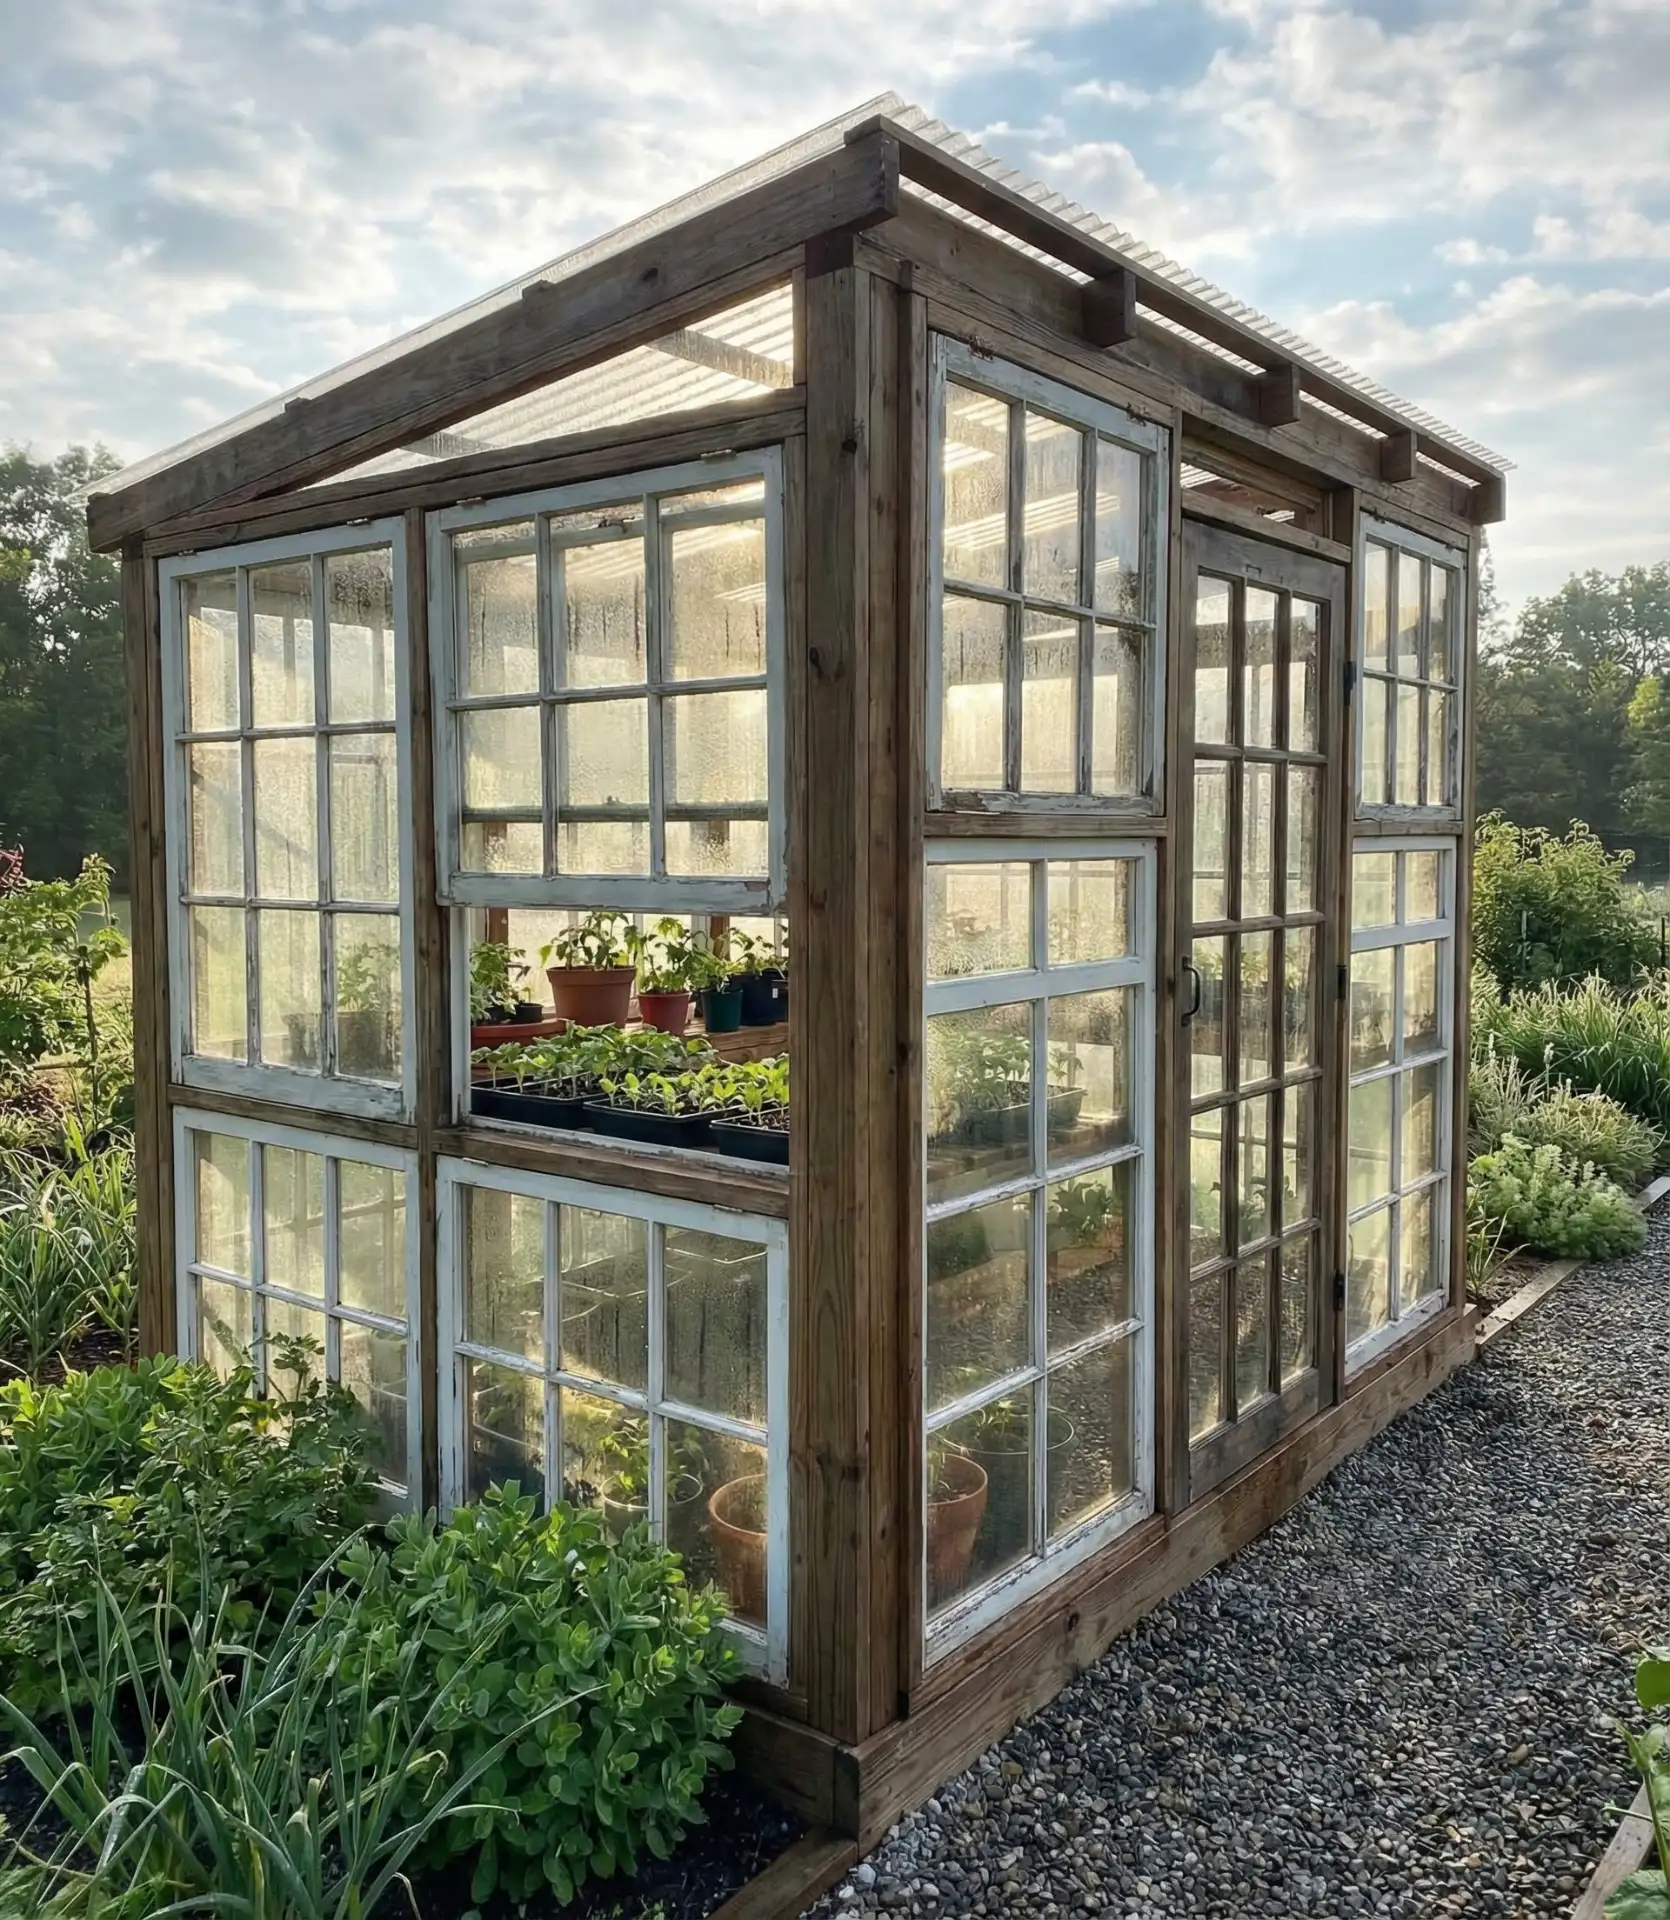
You can create a lovely, small greenhouse with repurposed windows obtained from sites of renovations, Habitat ReStores, or websites that list materials for purchase and sale. Using a simple wooden frame of your own construction sized to your windows and attaching the repurposed windows as walls and a roof, you can create a protected growing space for under $100. Structures like this can serve as your own DIY project, enhancing both the simplest yards and your interest in greenhouses. In addition to extending your growing season, this do-it-yourself structure gives even the most unremarkable yard architectural interest.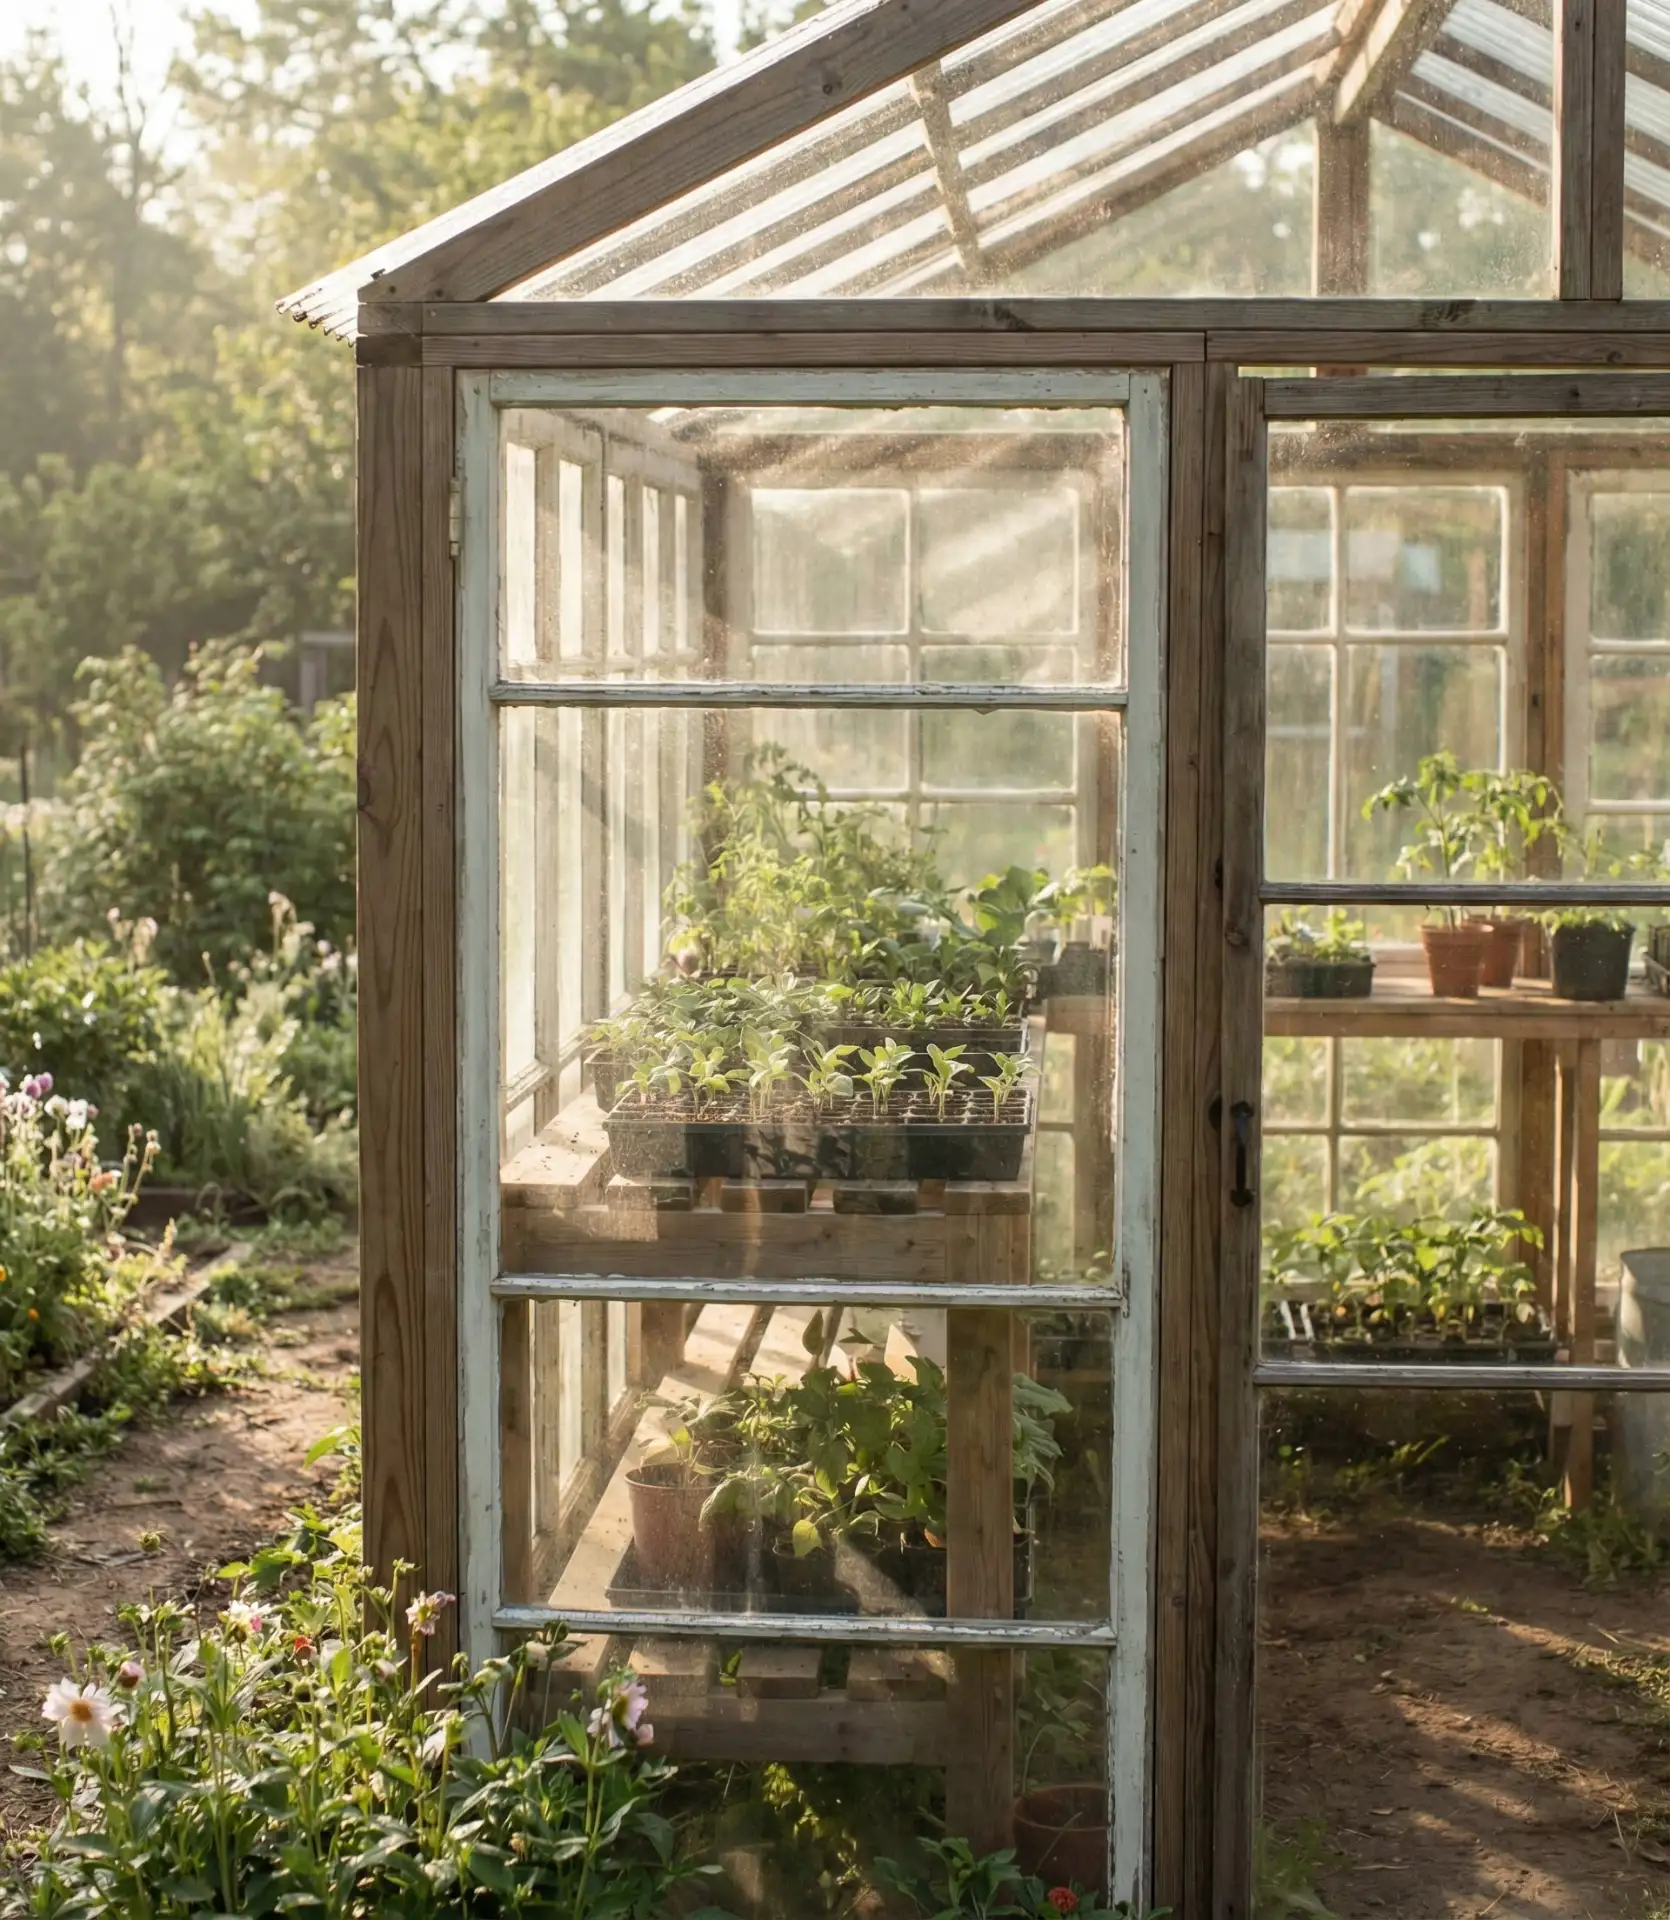
The greenhouse is also useful in the Northern climates because extending the growing season is the circumstance that allows you to harvest tomatoes in September rather than watching them die with the first frost. Aim your greenhouse to catch the most southern sunlight and add a small thermometer inside. Cooling is necessary, so keep one or two windows open on warm days to keep it from overheating. The vintage look of the old mismatched windows adds charm rather than looking chaotic.
7. Cinder Block Raised Garden Beds
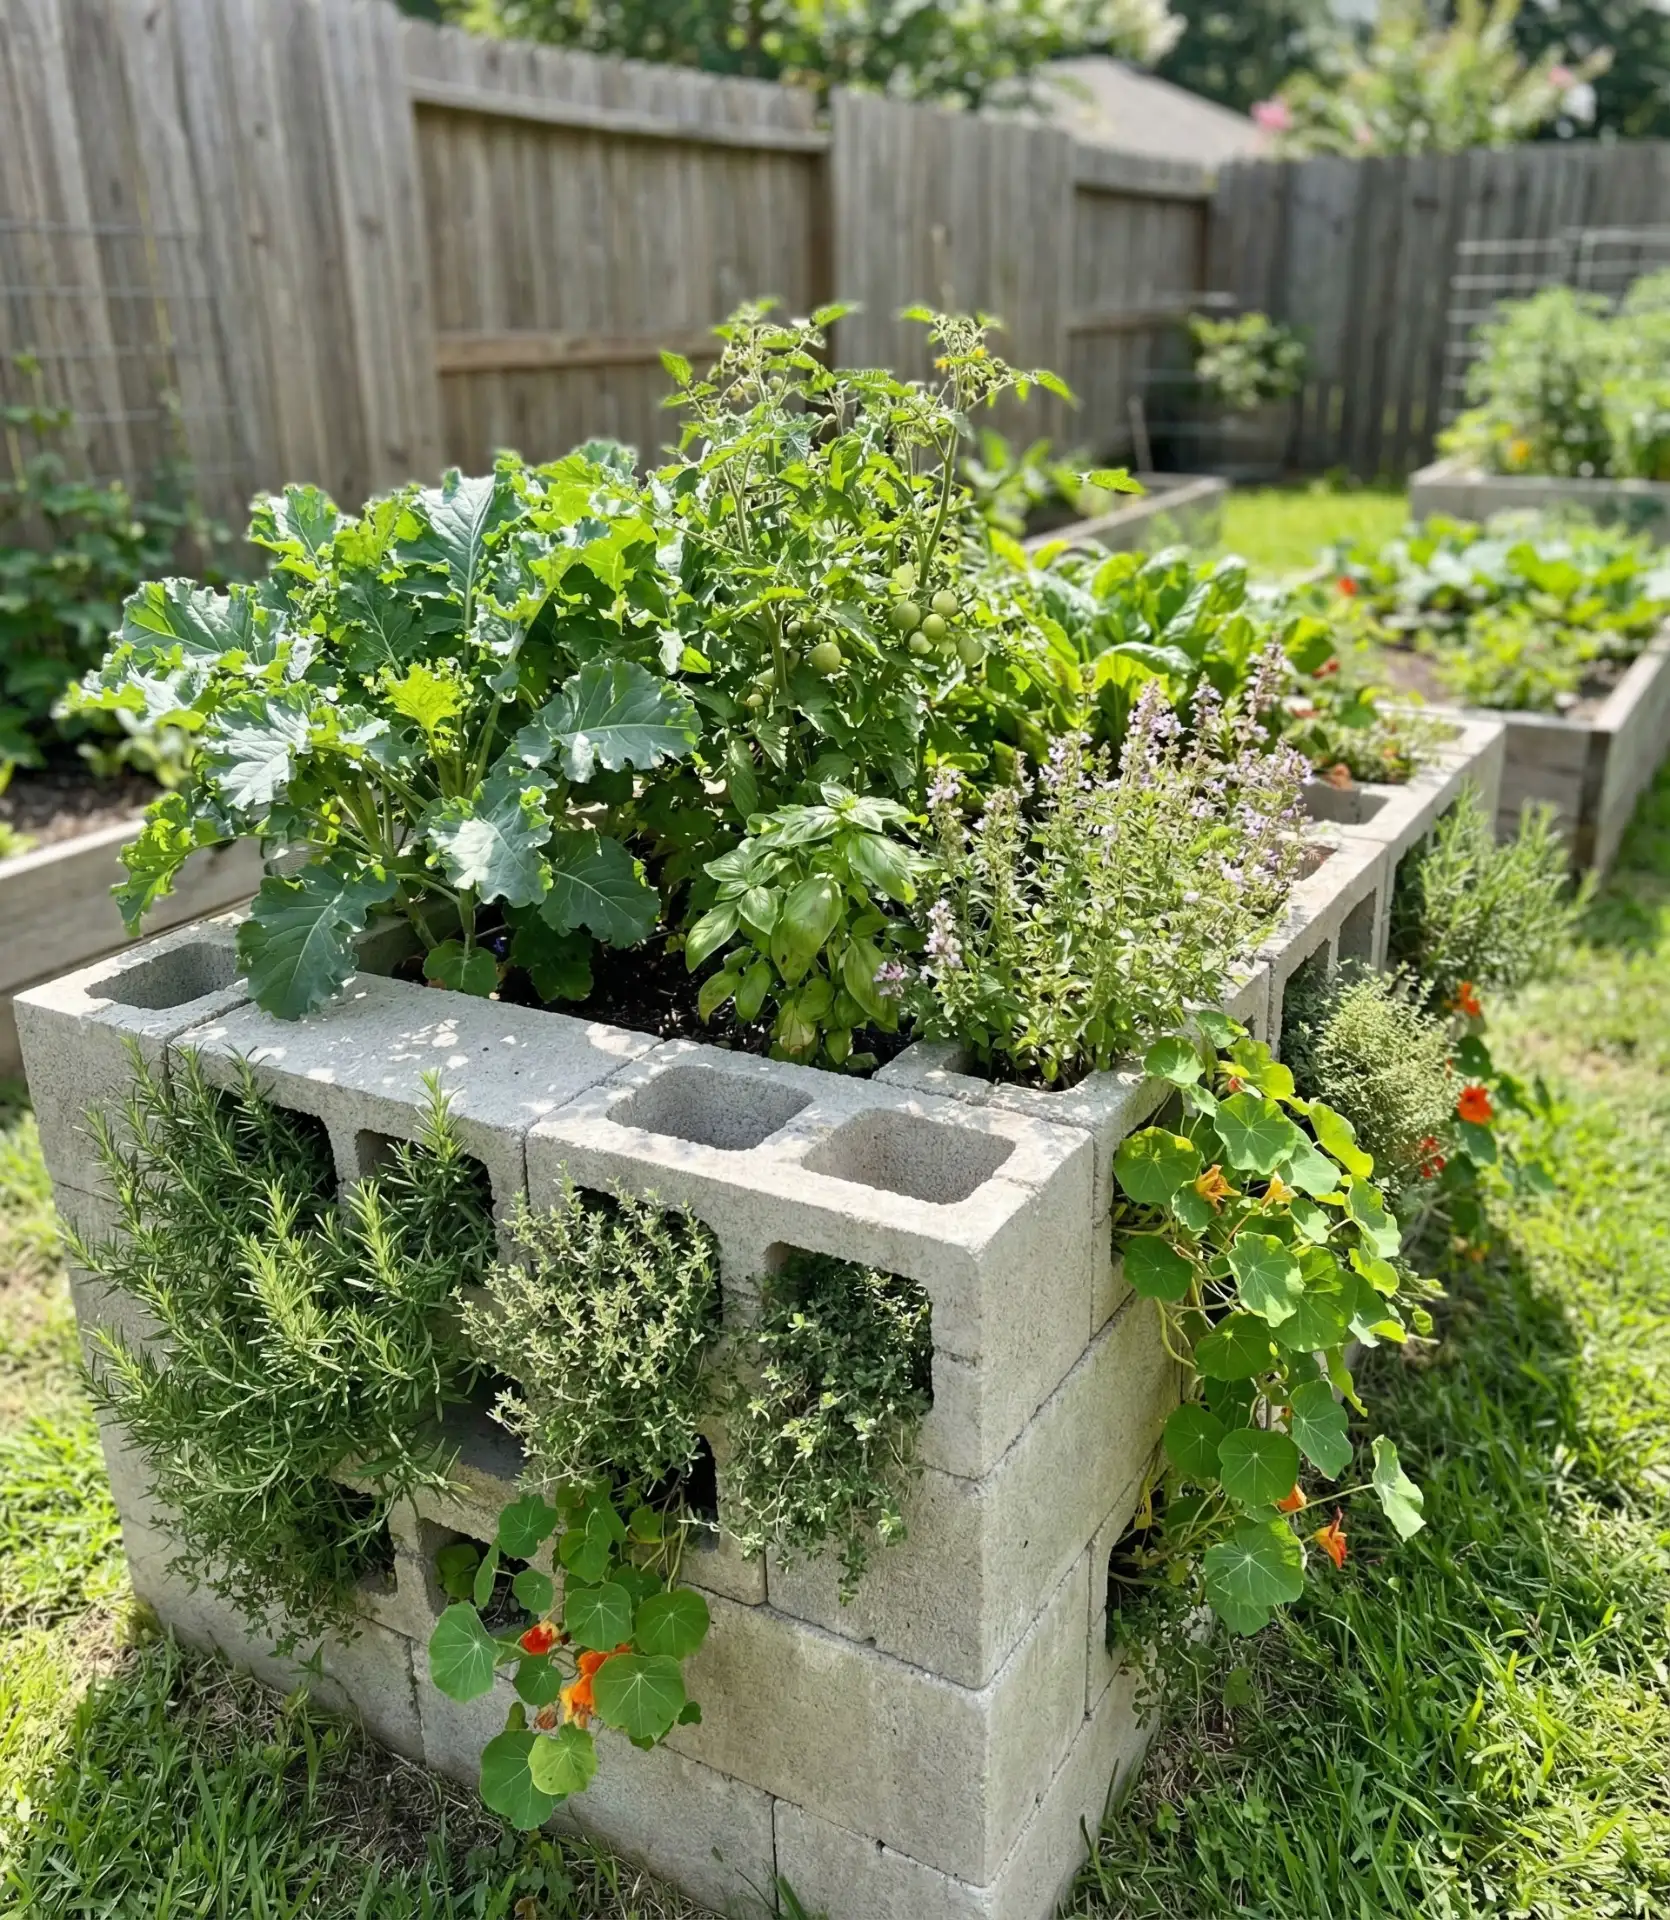
For a reconfigurable and inexpensive raised bed solution, stack cement blocks into empty rectangular frames, and fill the center sections with soil to create spaces for the planting of herbs and flowering plants. Adjustable garden beds can be built for as little as $30 to $50, with each block costing around $2. These garden beds can also be moved and re-stacked into a different configuration. 
Last spring, one of my neighbors built three of these instant beds, and within six weeks, he was harvesting some of the most delicious lettuce. The elevated height of these beds makes planting them easy on the knees and backs. The blocks warm up faster than the soil, giving a jumpstart to the plants on them. For best results, fill with a quality soil mix rather than plain topsoil. If the intention is to add some color to the garden, you can paint the blocks. Filling the blocks with soil is more likely to provide a modern aesthetic; leaving the soil unsplattered is more likely to provide an industrial vibe.
8. Thrifted Outdoor Furniture Revival
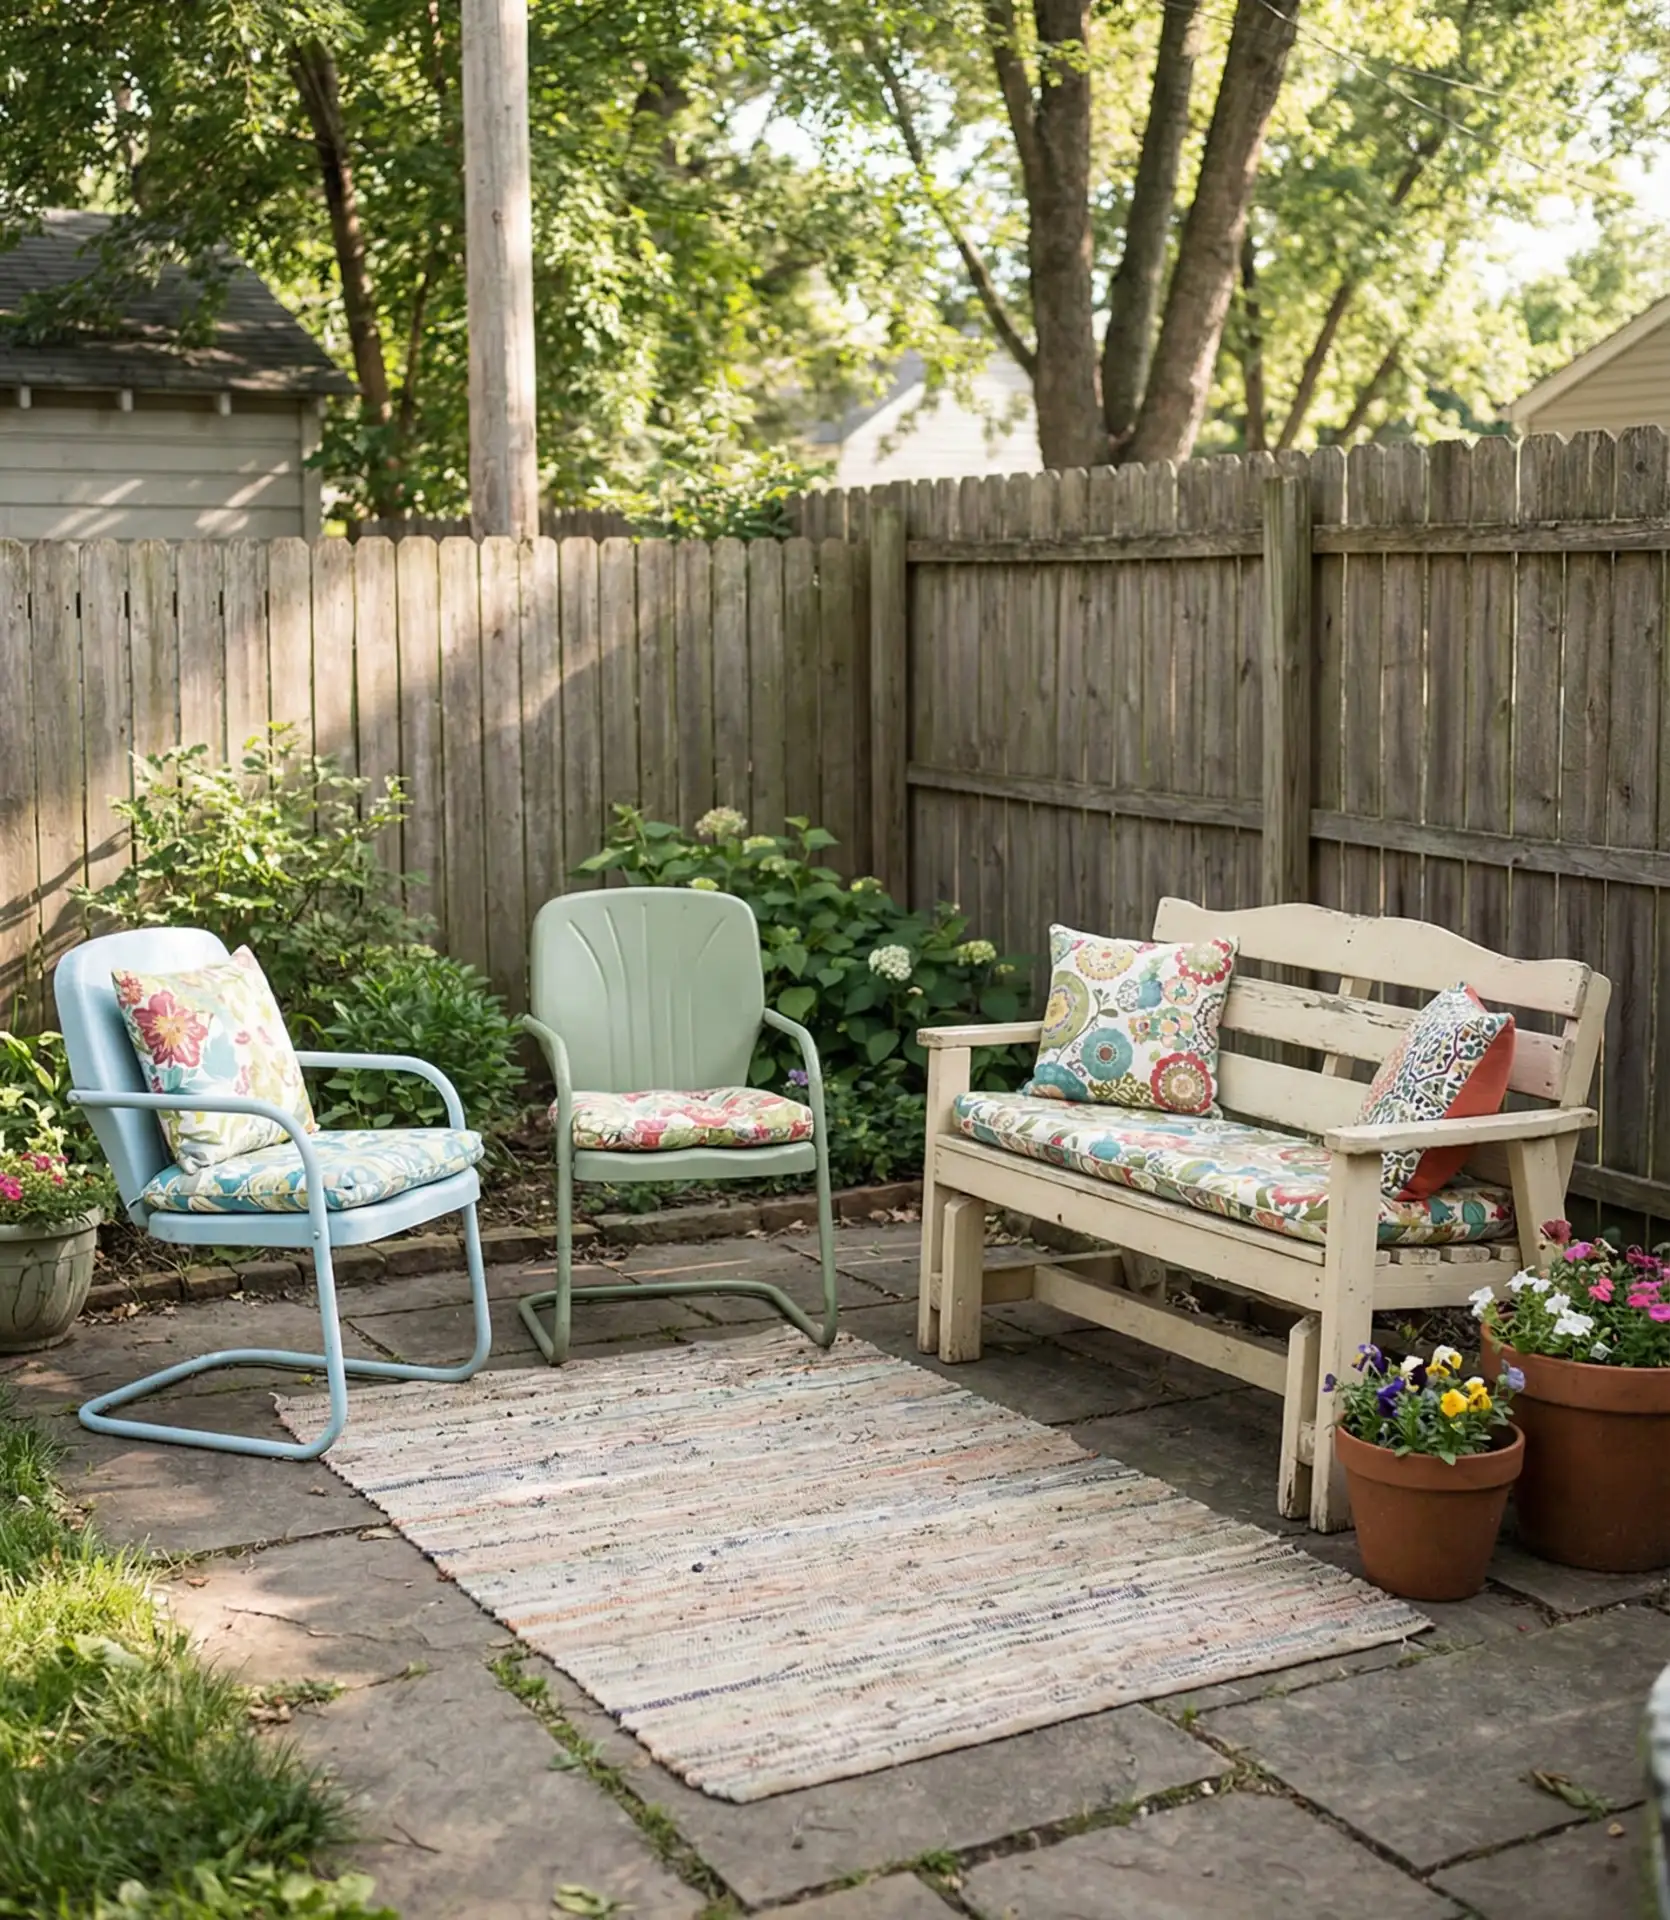
Look for worn outdoor furniture at estate sales, thrift stores, and Facebook Marketplace, which you can revitalize with spray paint, new cushions, or resin wicker repair. A $20 rusty metal chair becomes a design statement with high-quality outdoor spray paint. Old wooden benches get new life with sanding and exterior stain. This approach lets you furnish an entire patio for what a single new piece might cost, and the eclectic mix often looks more collected and intriguing than matching sets. 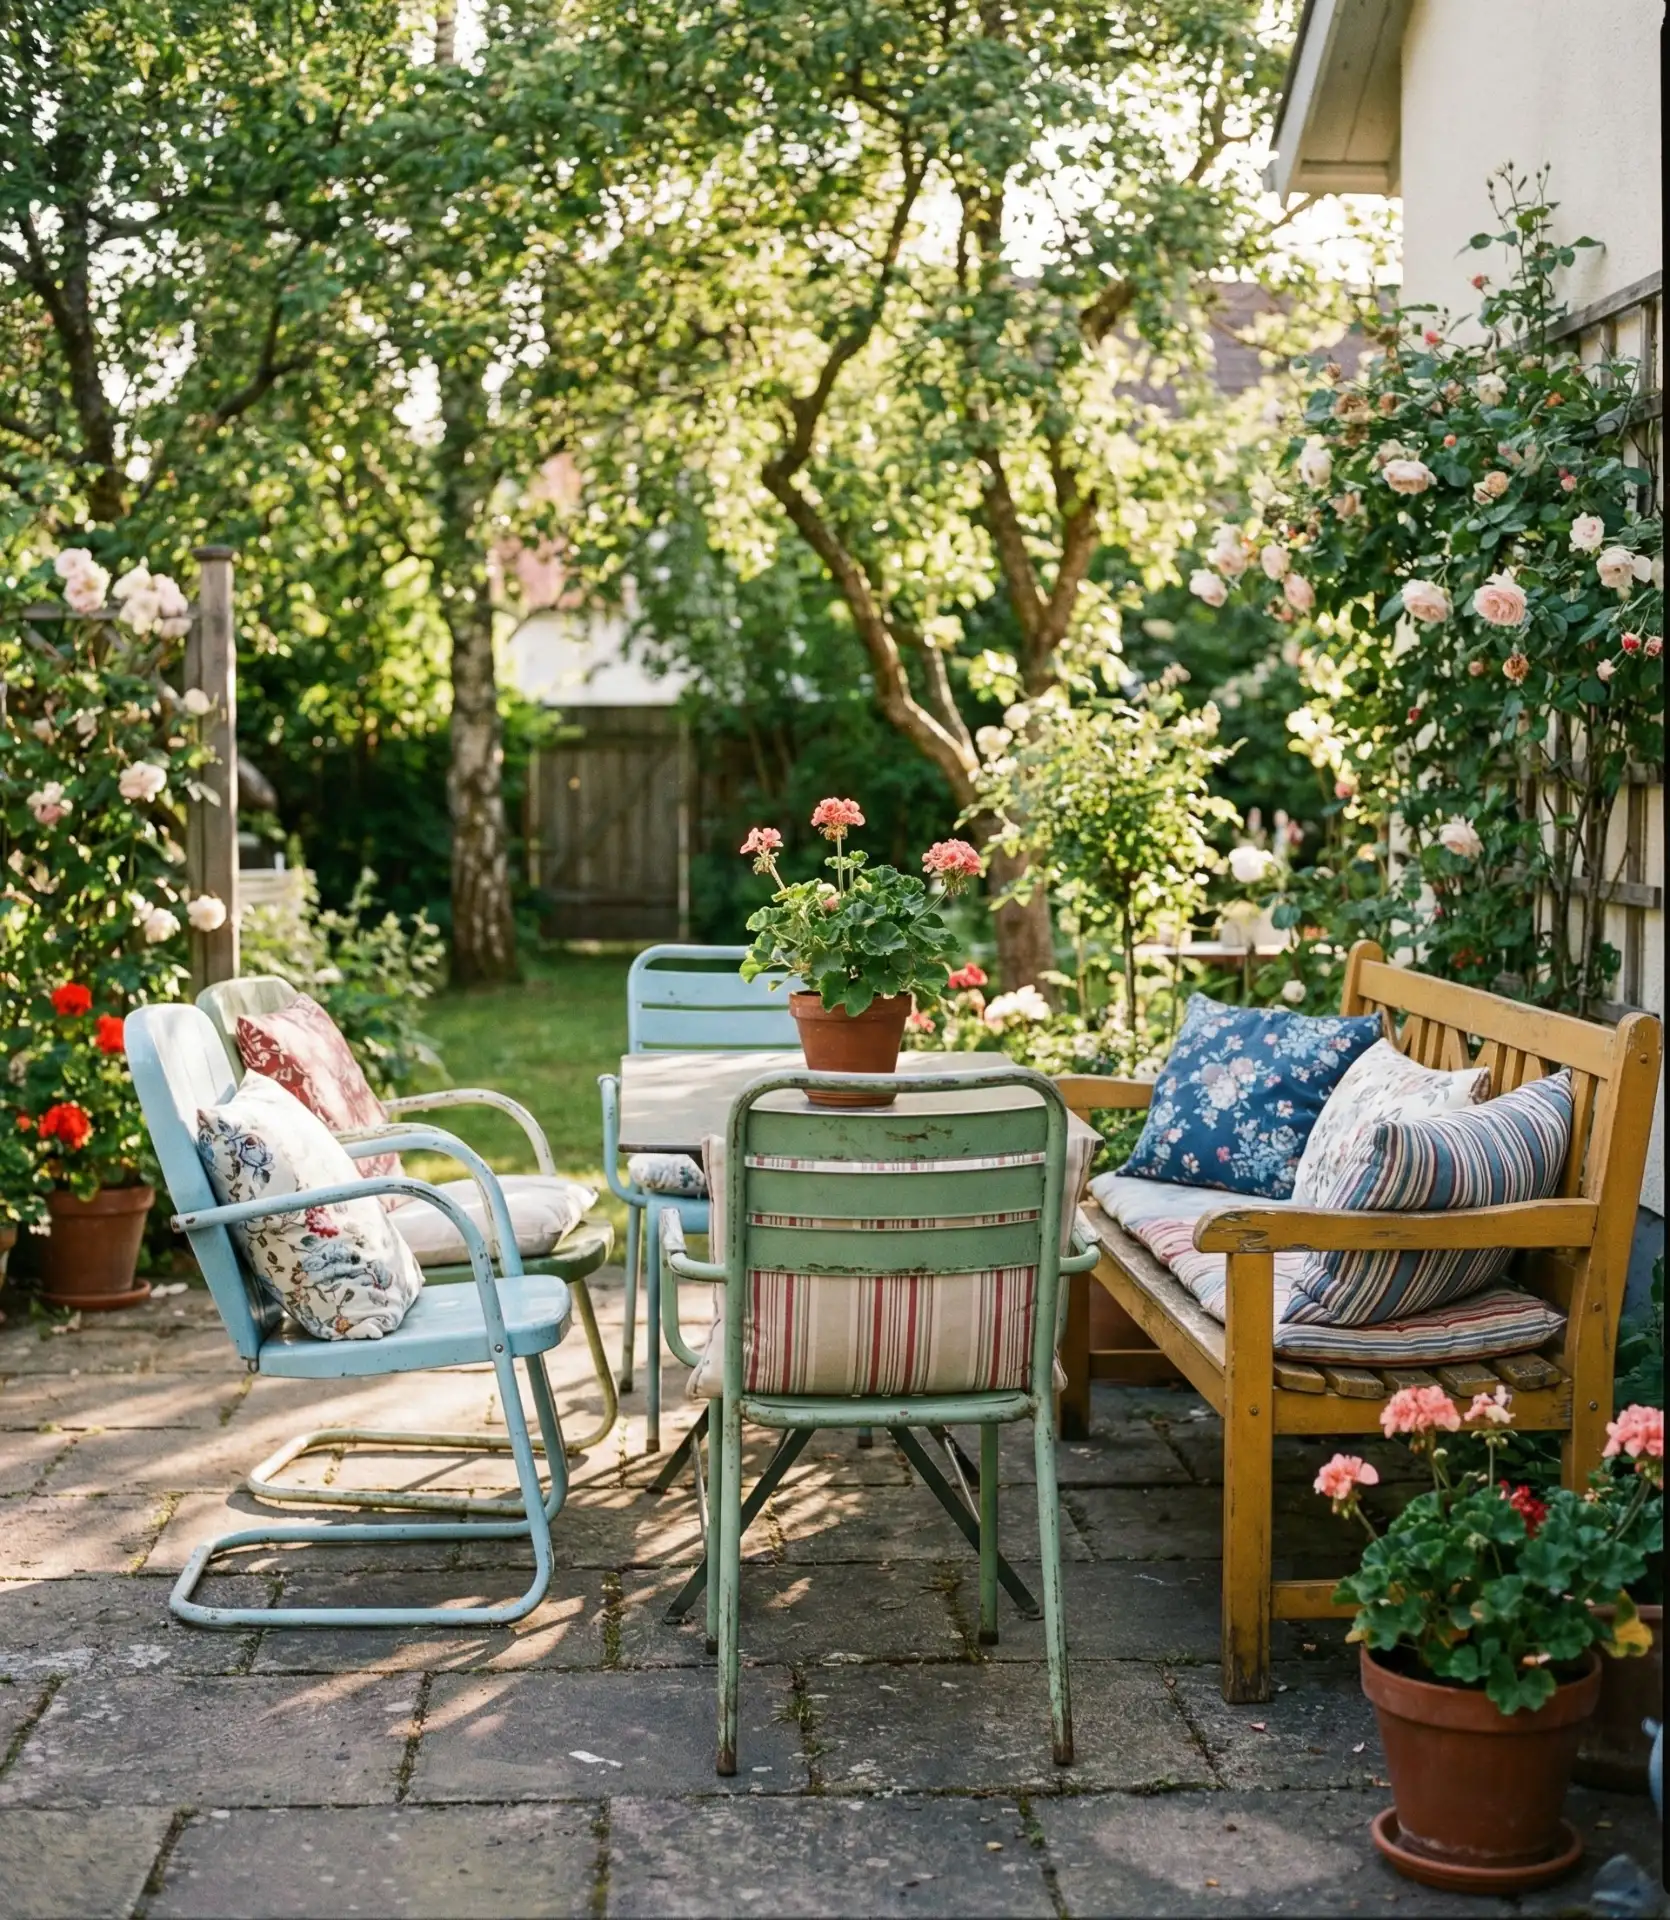
Homeowners in the Pacific Northwest are often successful furniture restorers, due in large part to the constant presence of rust. The complete process includes rust removal with a wire brush, the application of rust converter if necessary, priming, and the use of multiple thin coats of paint to ensure proper coverage. For wooden pieces, pressure washing is required. The procedure must be followed by complete drying, sanding of any rough spots, and the application of two coats of exterior stain or paint. Plan on spending $15 to $30 for each piece of furniture to obtain your supplies. These expenses will still be significantly cheaper than the cost of buying new furniture.
9. Natural Stone Pathway From Foraged Materials
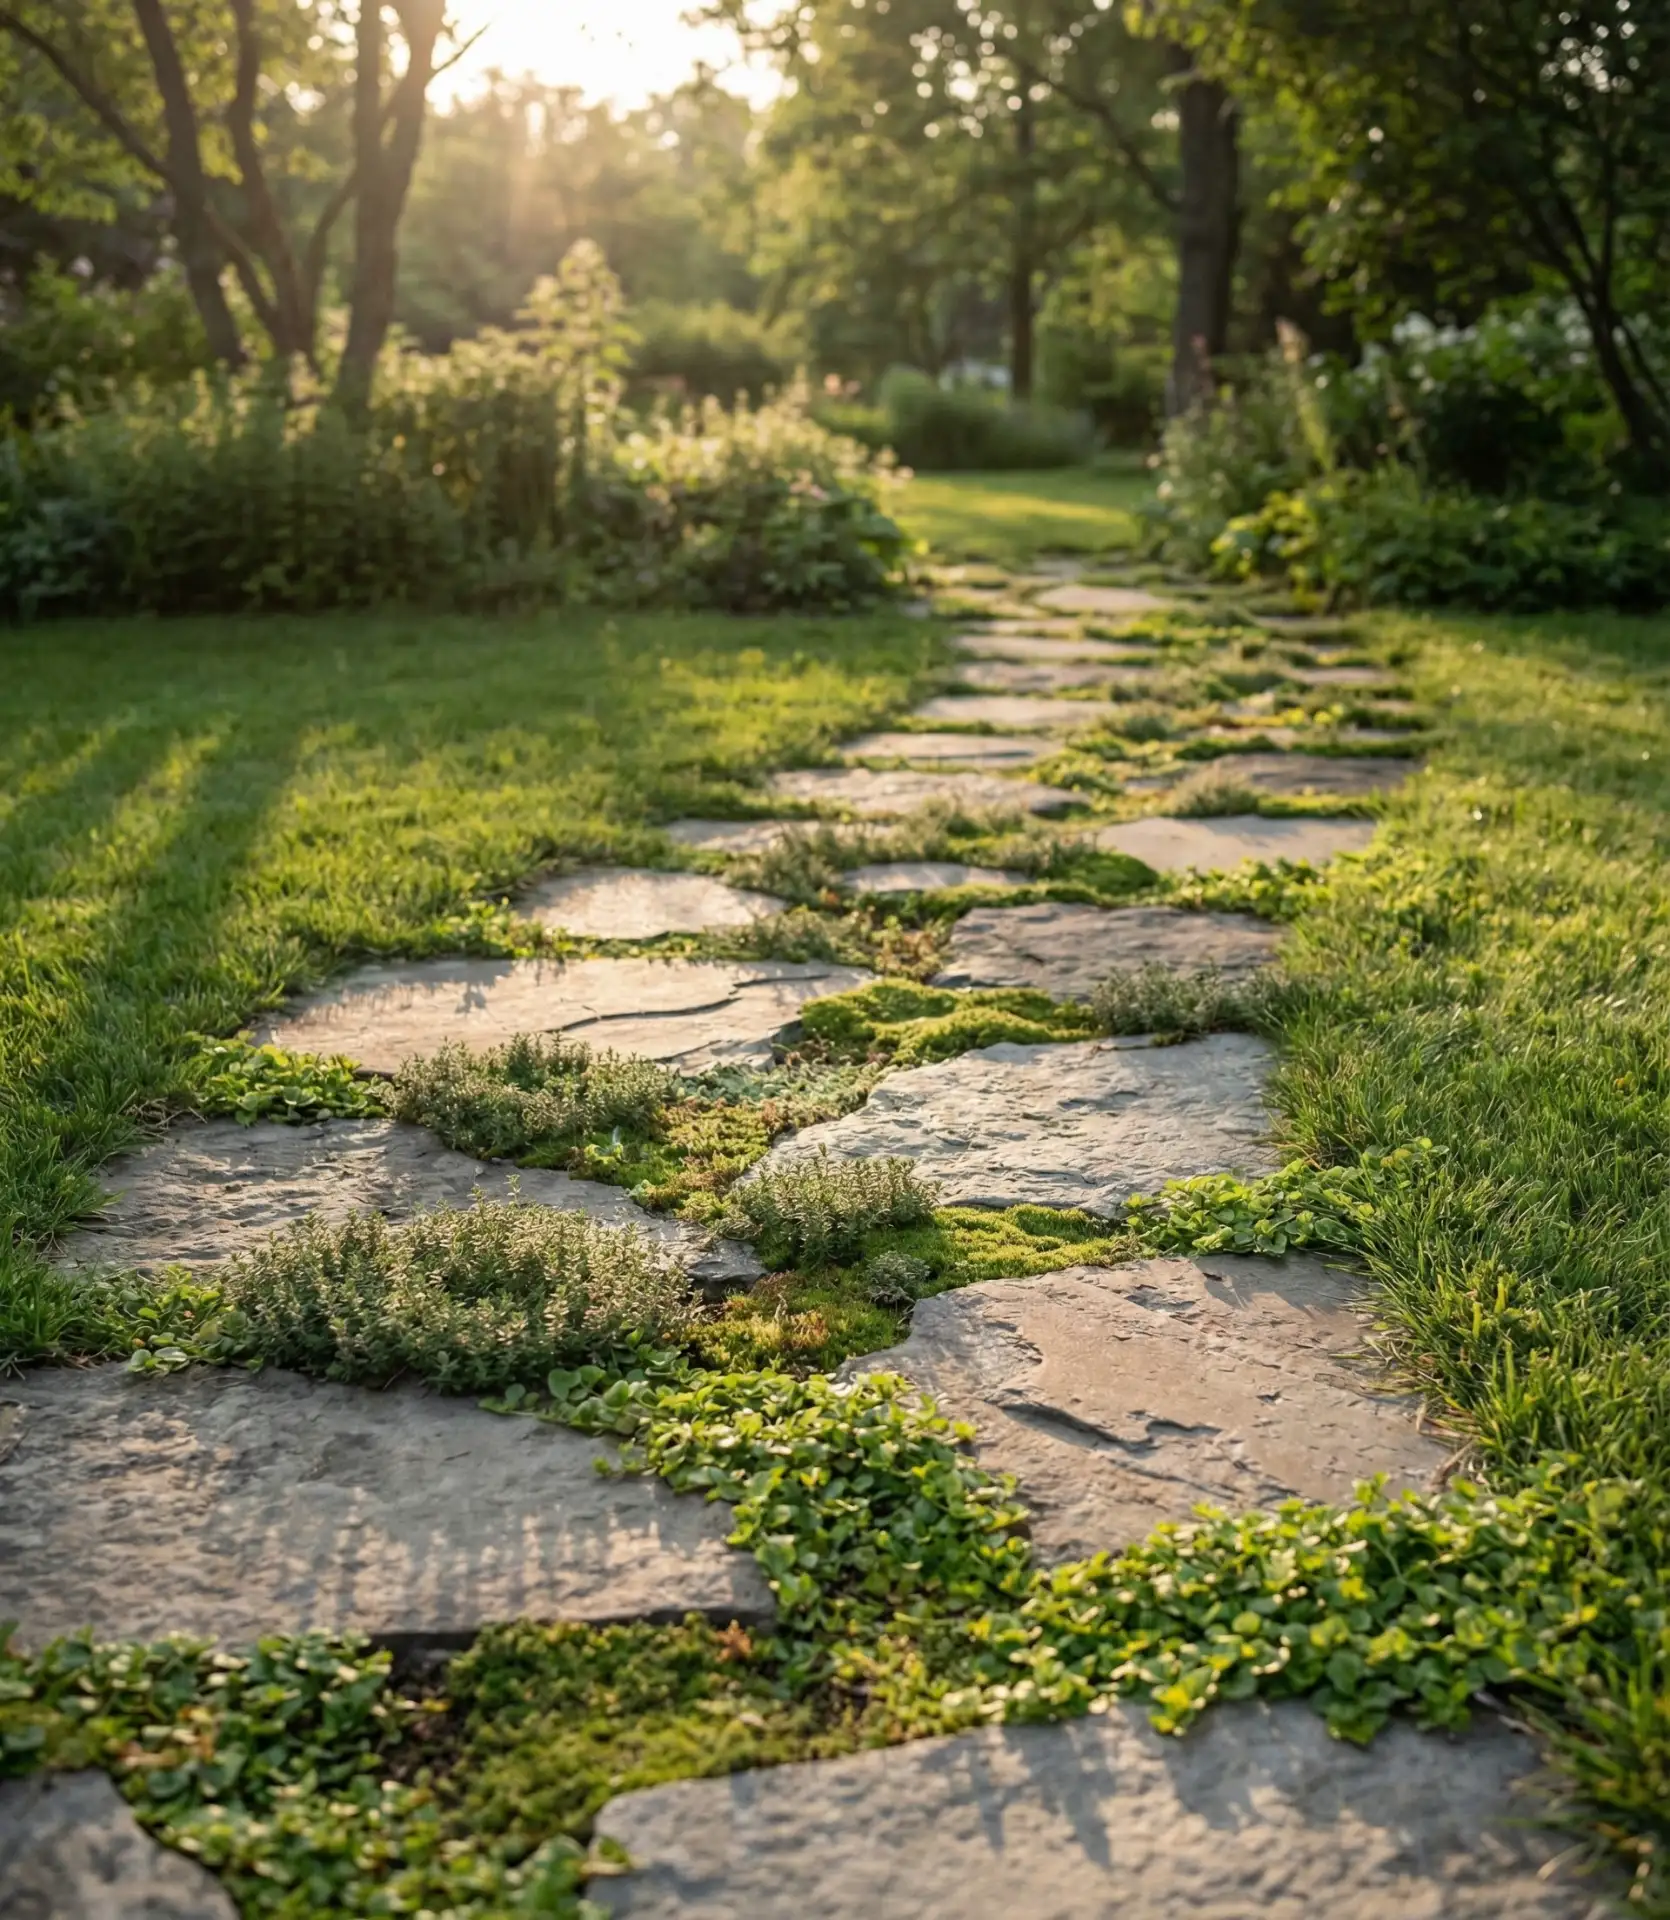
Collecting flat stones for a winding garden path is an excellent way to build it. You can find stones in creek beds (make sure this is legal in your area), and some construction sites allow stone collection as long as you have permission. Landscape suppliers also sell stones in small quantities.
Place them in the lawn with gaps for grass or moss to grow between, to create an organic look that feels like it’s always been there. This landscaping trick costs little besides your time and adds structure to open lawn areas and directs people to your garden bed displays. 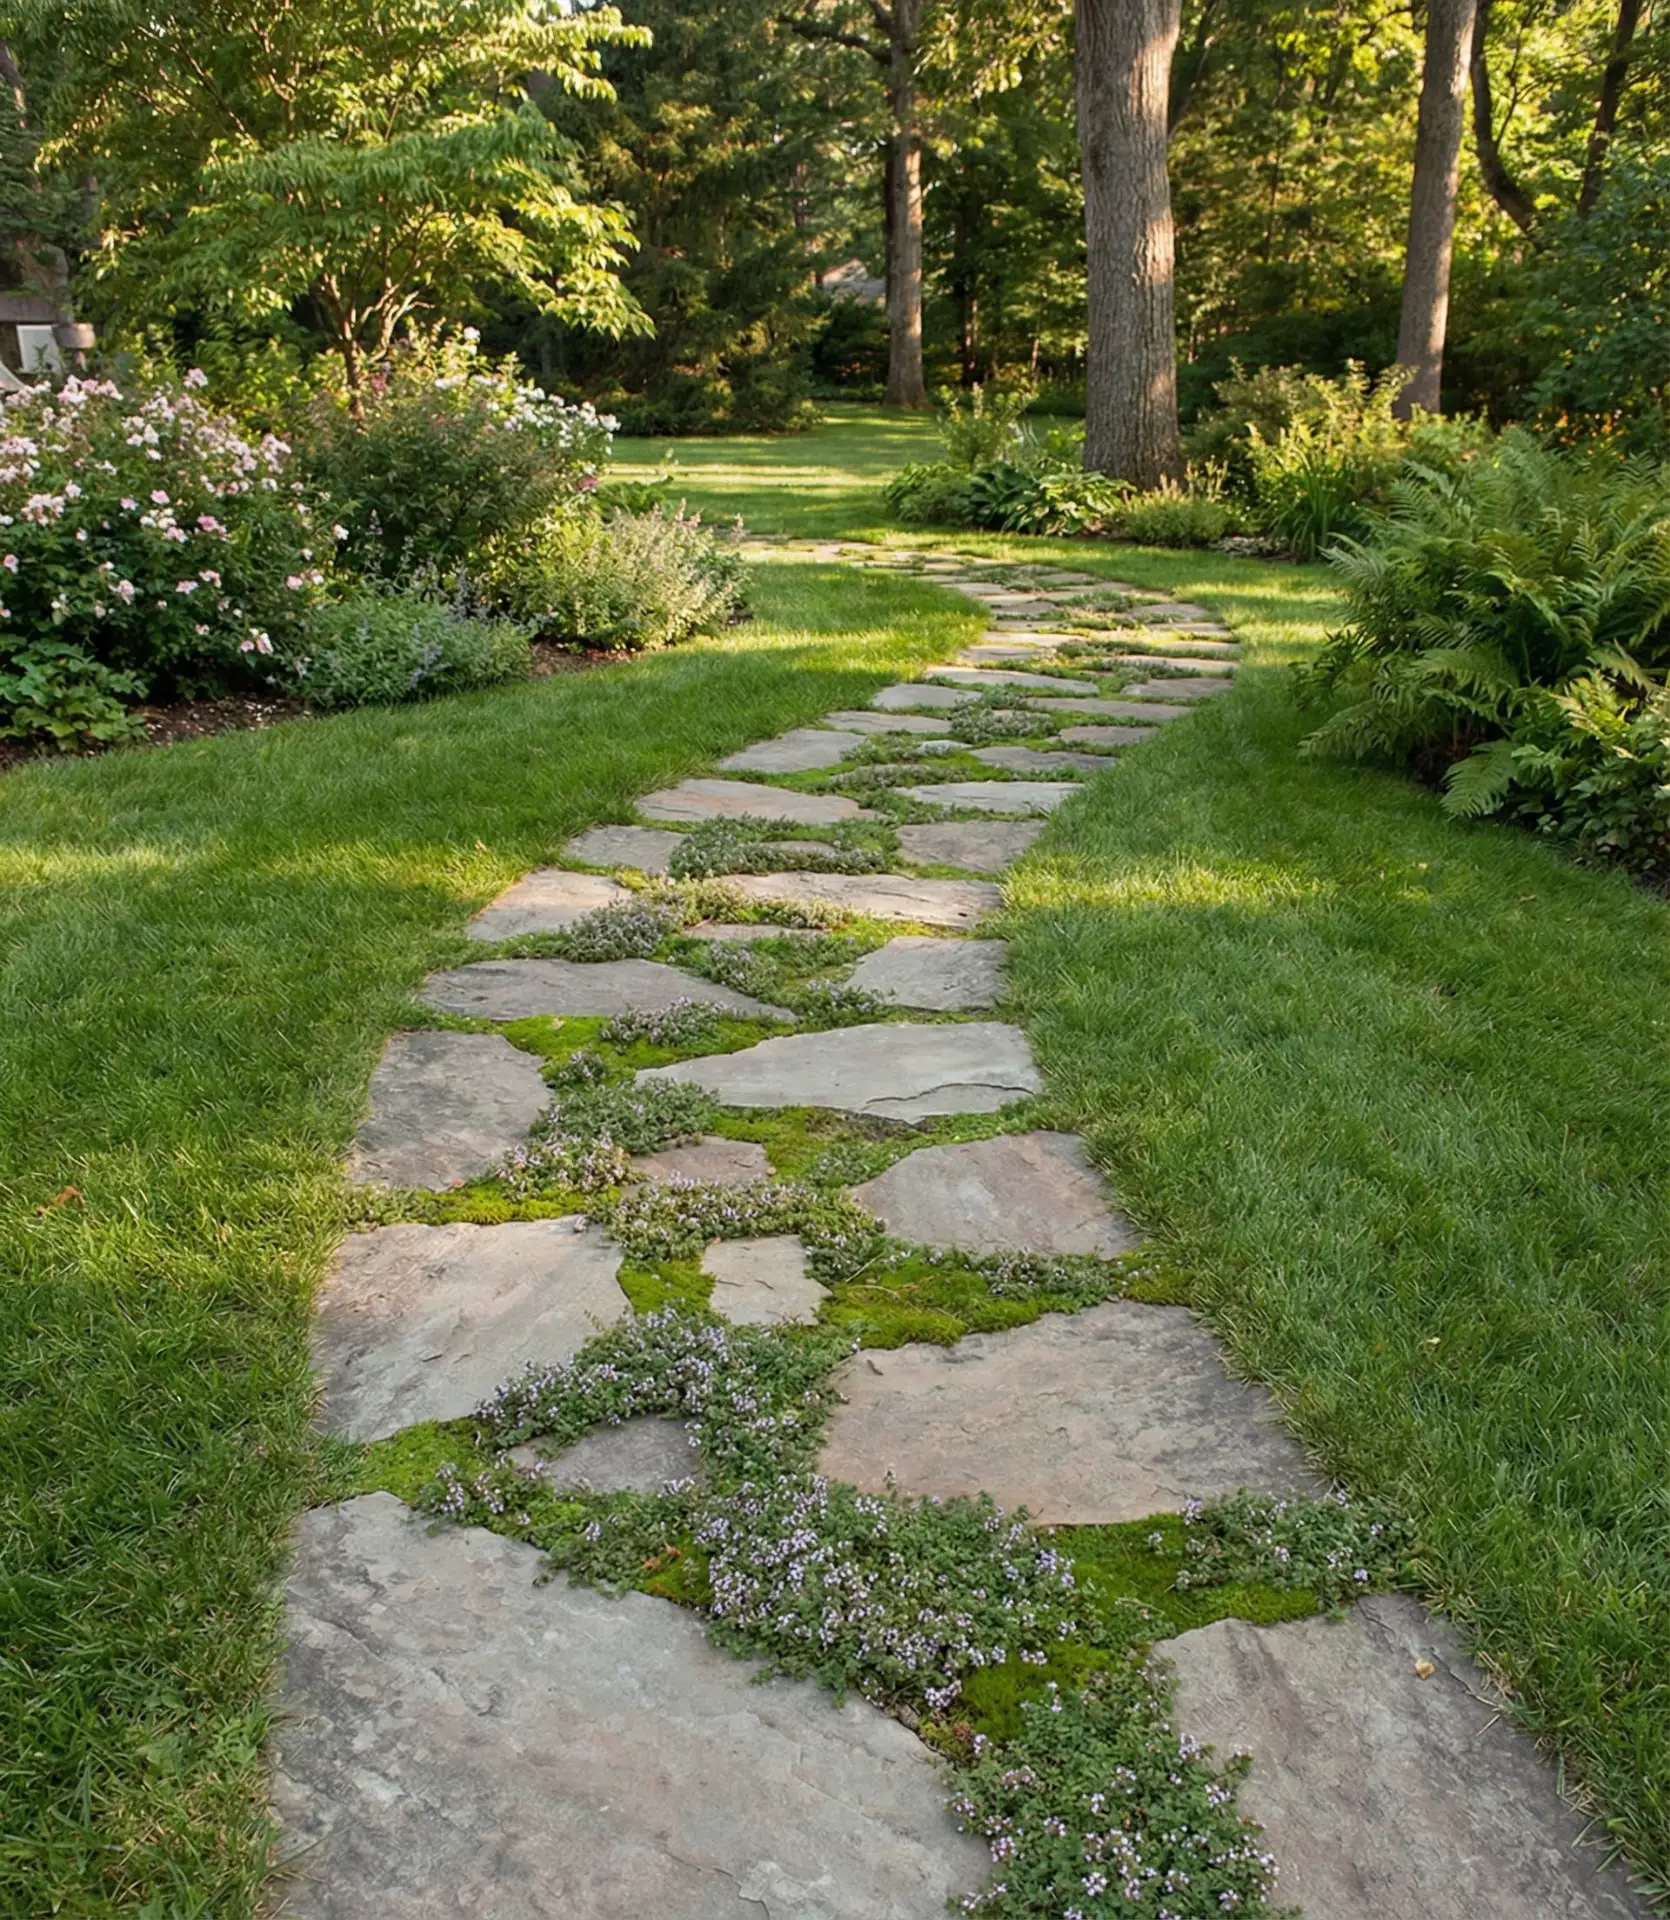
The method works well in places where there is naturally occurring stone, like Pennsylvania, Colorado, or Tennessee, where fieldstone is found in the landscape. For stability, lay the stones on a one-inch base of sand and space them based on your stride so that it feels comfortable for walking. Expect the path to settle over the first season, so you may need to add sand and relevel a few stones. For renters, this type of landscaping is less ideal since it can be a lot of work to remove, but in owned homes, it’s a permanent improvement that adds value to the property.

10. Upcycled Tire Planters

Transform free tires from auto shops into surprisingly stylish planters with some paint and creativity. Stack them for height, paint them in bold colors or patterns, fill them with soil, and plant flowers, vegetables, or herbs. This super cheap solution repurposes waste material while creating conversation-piece containers. The rubber holds heat well for plants that love warmth, and drainage is naturally excellent since you control where water escapes. 
Before dismissing this method as too rustic, consider that tire planters have won over even design-conscious homeowners when executed well. The key is high-quality exterior paint in sophisticated colors—think matte black, sage green, or soft gray rather than primary colors. Clean tires thoroughly before painting, use primer, and finish with outdoor sealer. These work particularly well for heat-loving plants like tomatoes, peppers, and sweet potatoes since the black rubber absorbs and retains warmth.
11. Bamboo Privacy Screen
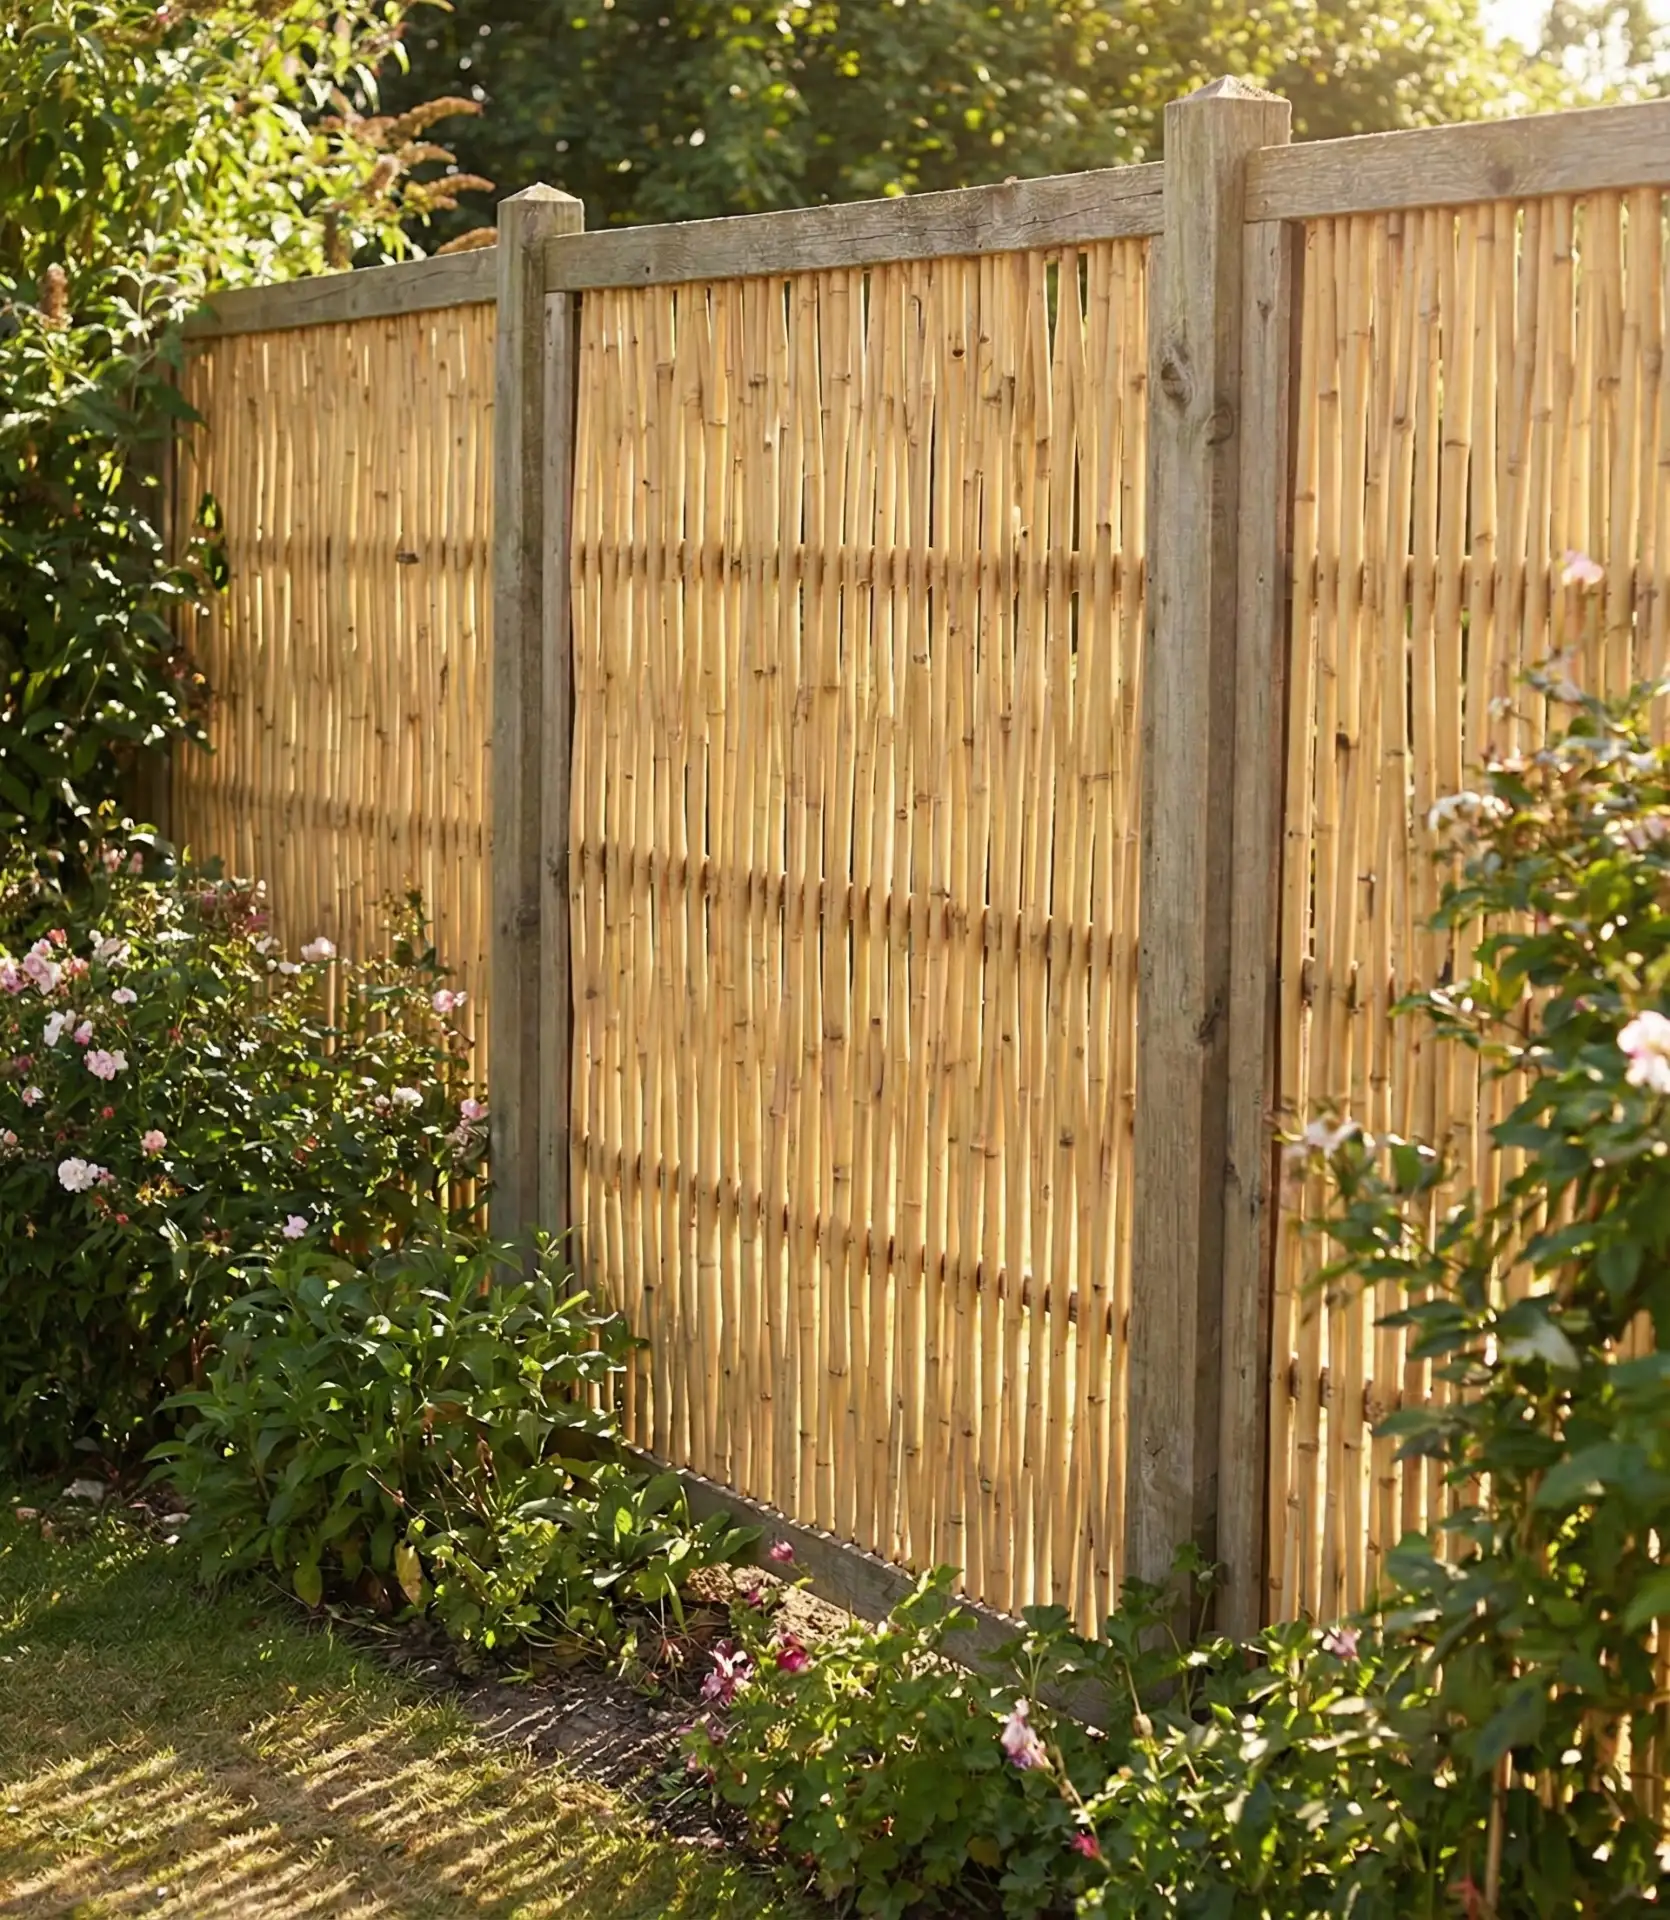
Install pre-made bamboo fencing panels along property lines or to create intimate zones within your yard without the expense of building a traditional fence. These panels cost $20–$40 each at home improvement stores and attach easily to existing posts or DIY wooden frames. They provide instant privacy, filter wind, and bring a natural organic texture that softens hard landscapes. Renters appreciate that panels are easy to install and remove without damaging property. 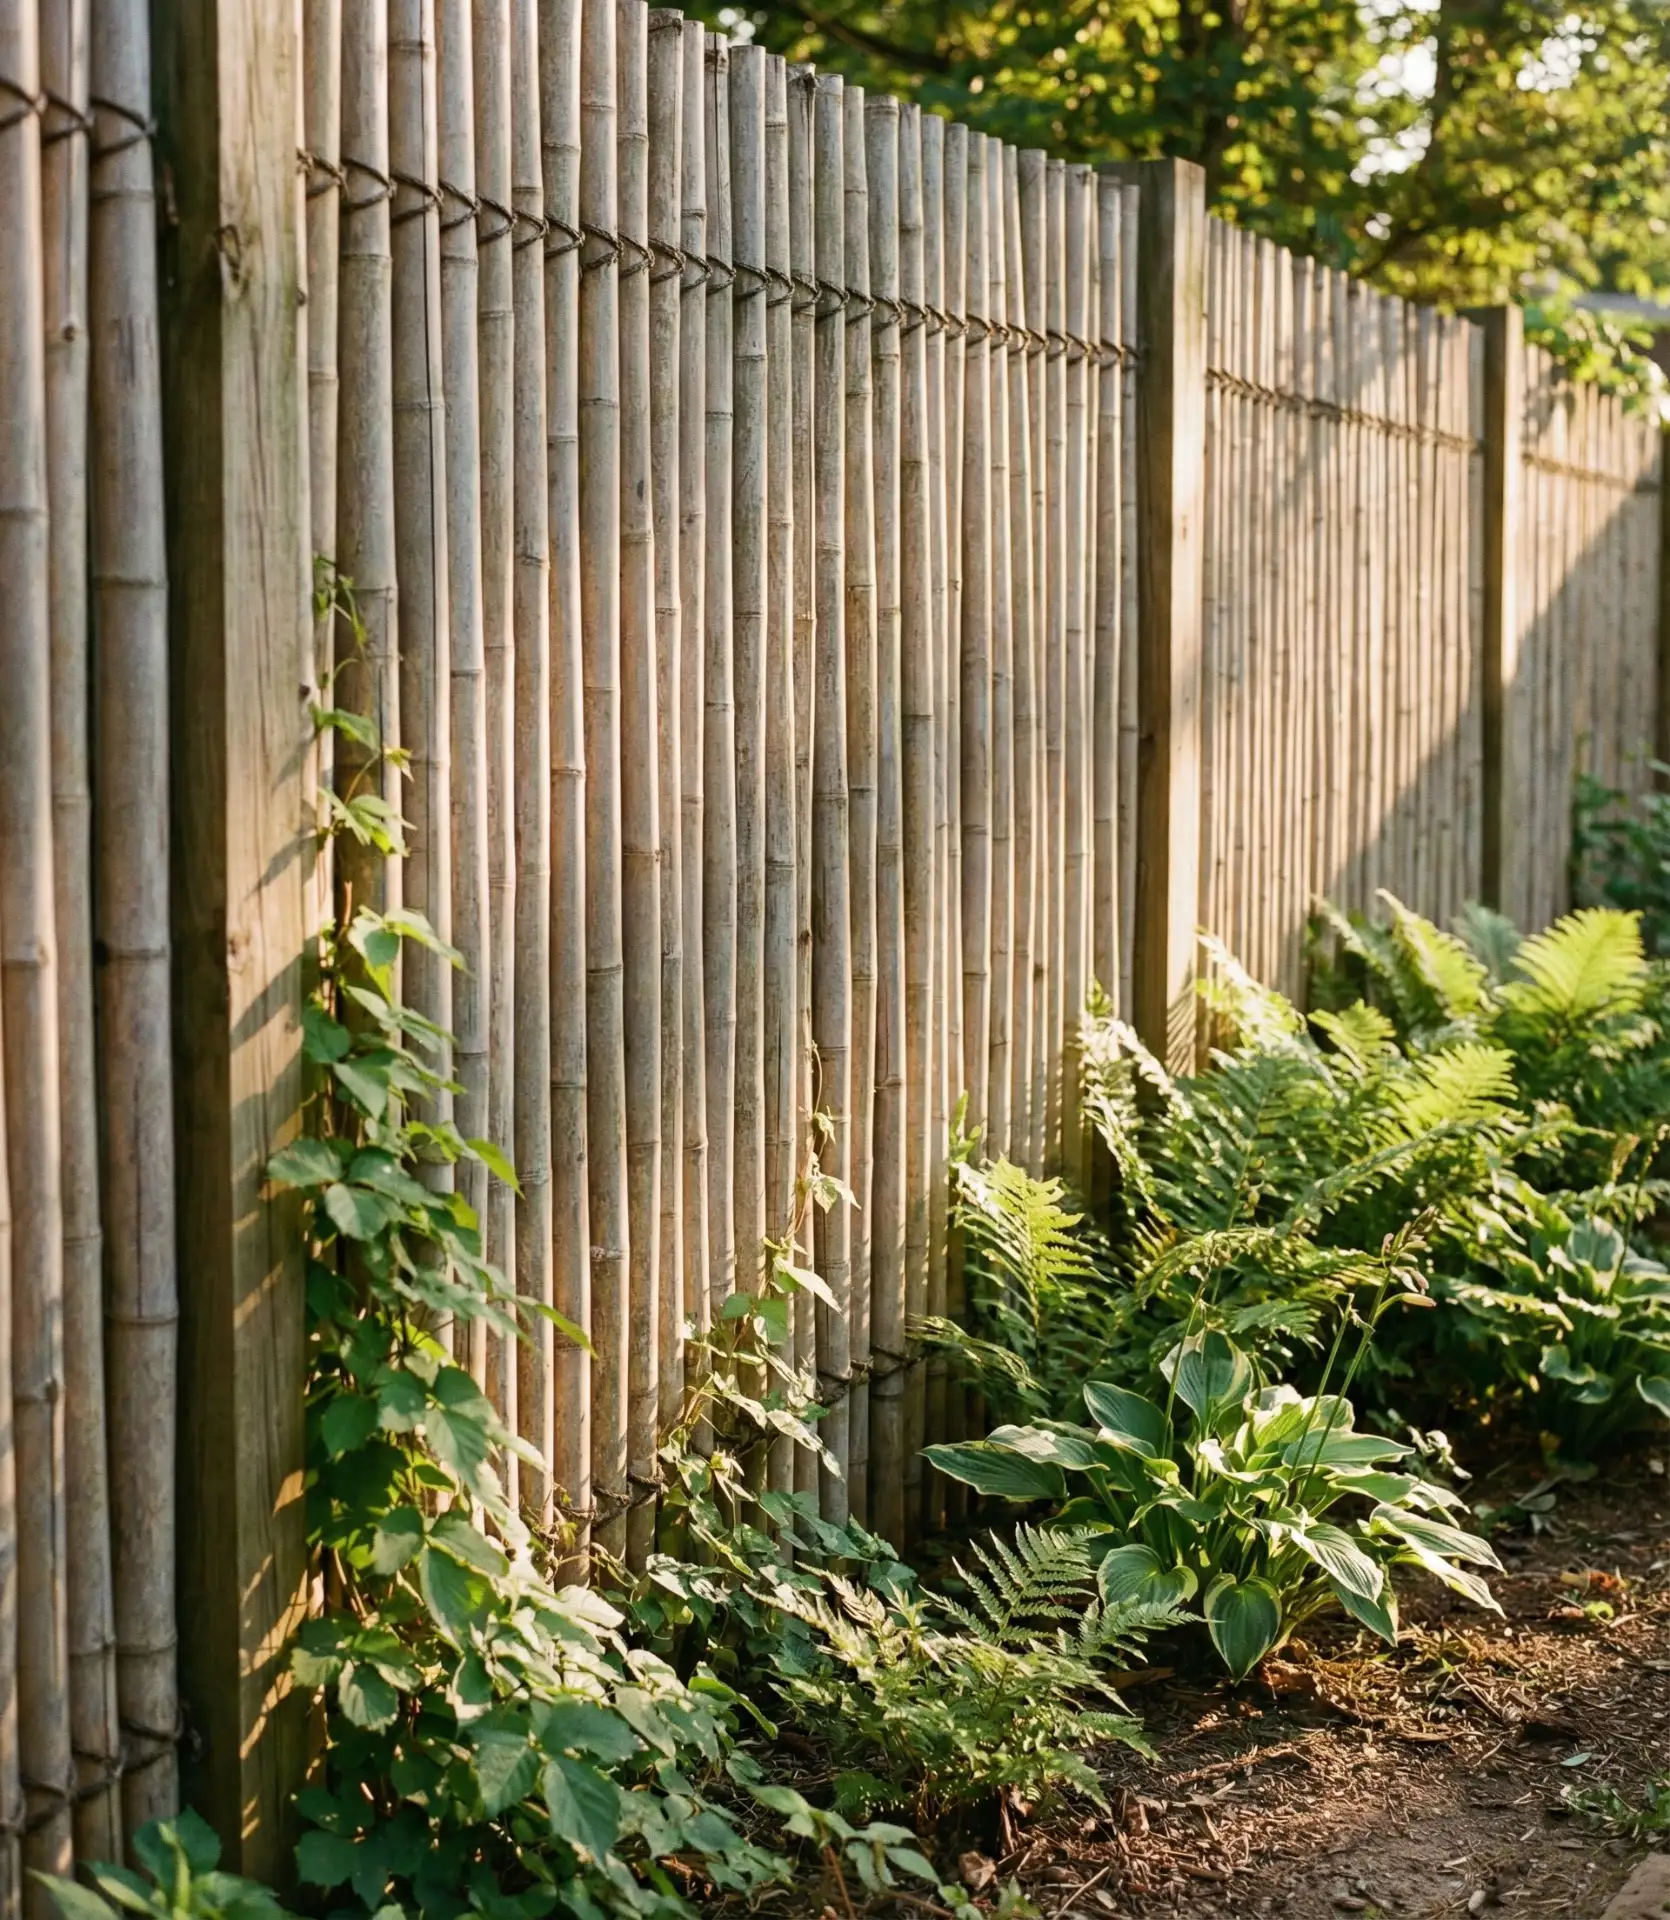
One of the best settings for our bamboo screens is in situations like the Portland Bungalow or Baltimore Row House. Here, dwellings are stacked closely. Bamboo is better than PVC because it allows air and light to pass through and offers an unobscured view. For our screens, the long-lasting gray is very appealing to some, and it is optional to stay golden with an annual wood sealer. They are not as long-lasting as composite or PVC screens, but bamboo screens, at their replacement cost every 5–7 years, are acceptable. It is better than bamboo because it is a composite, AND PVC is a better long-term option.
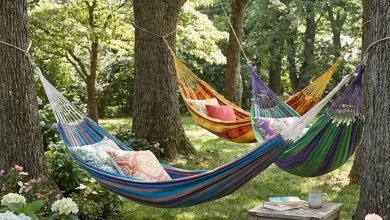
12. A simple two-post hammock stand
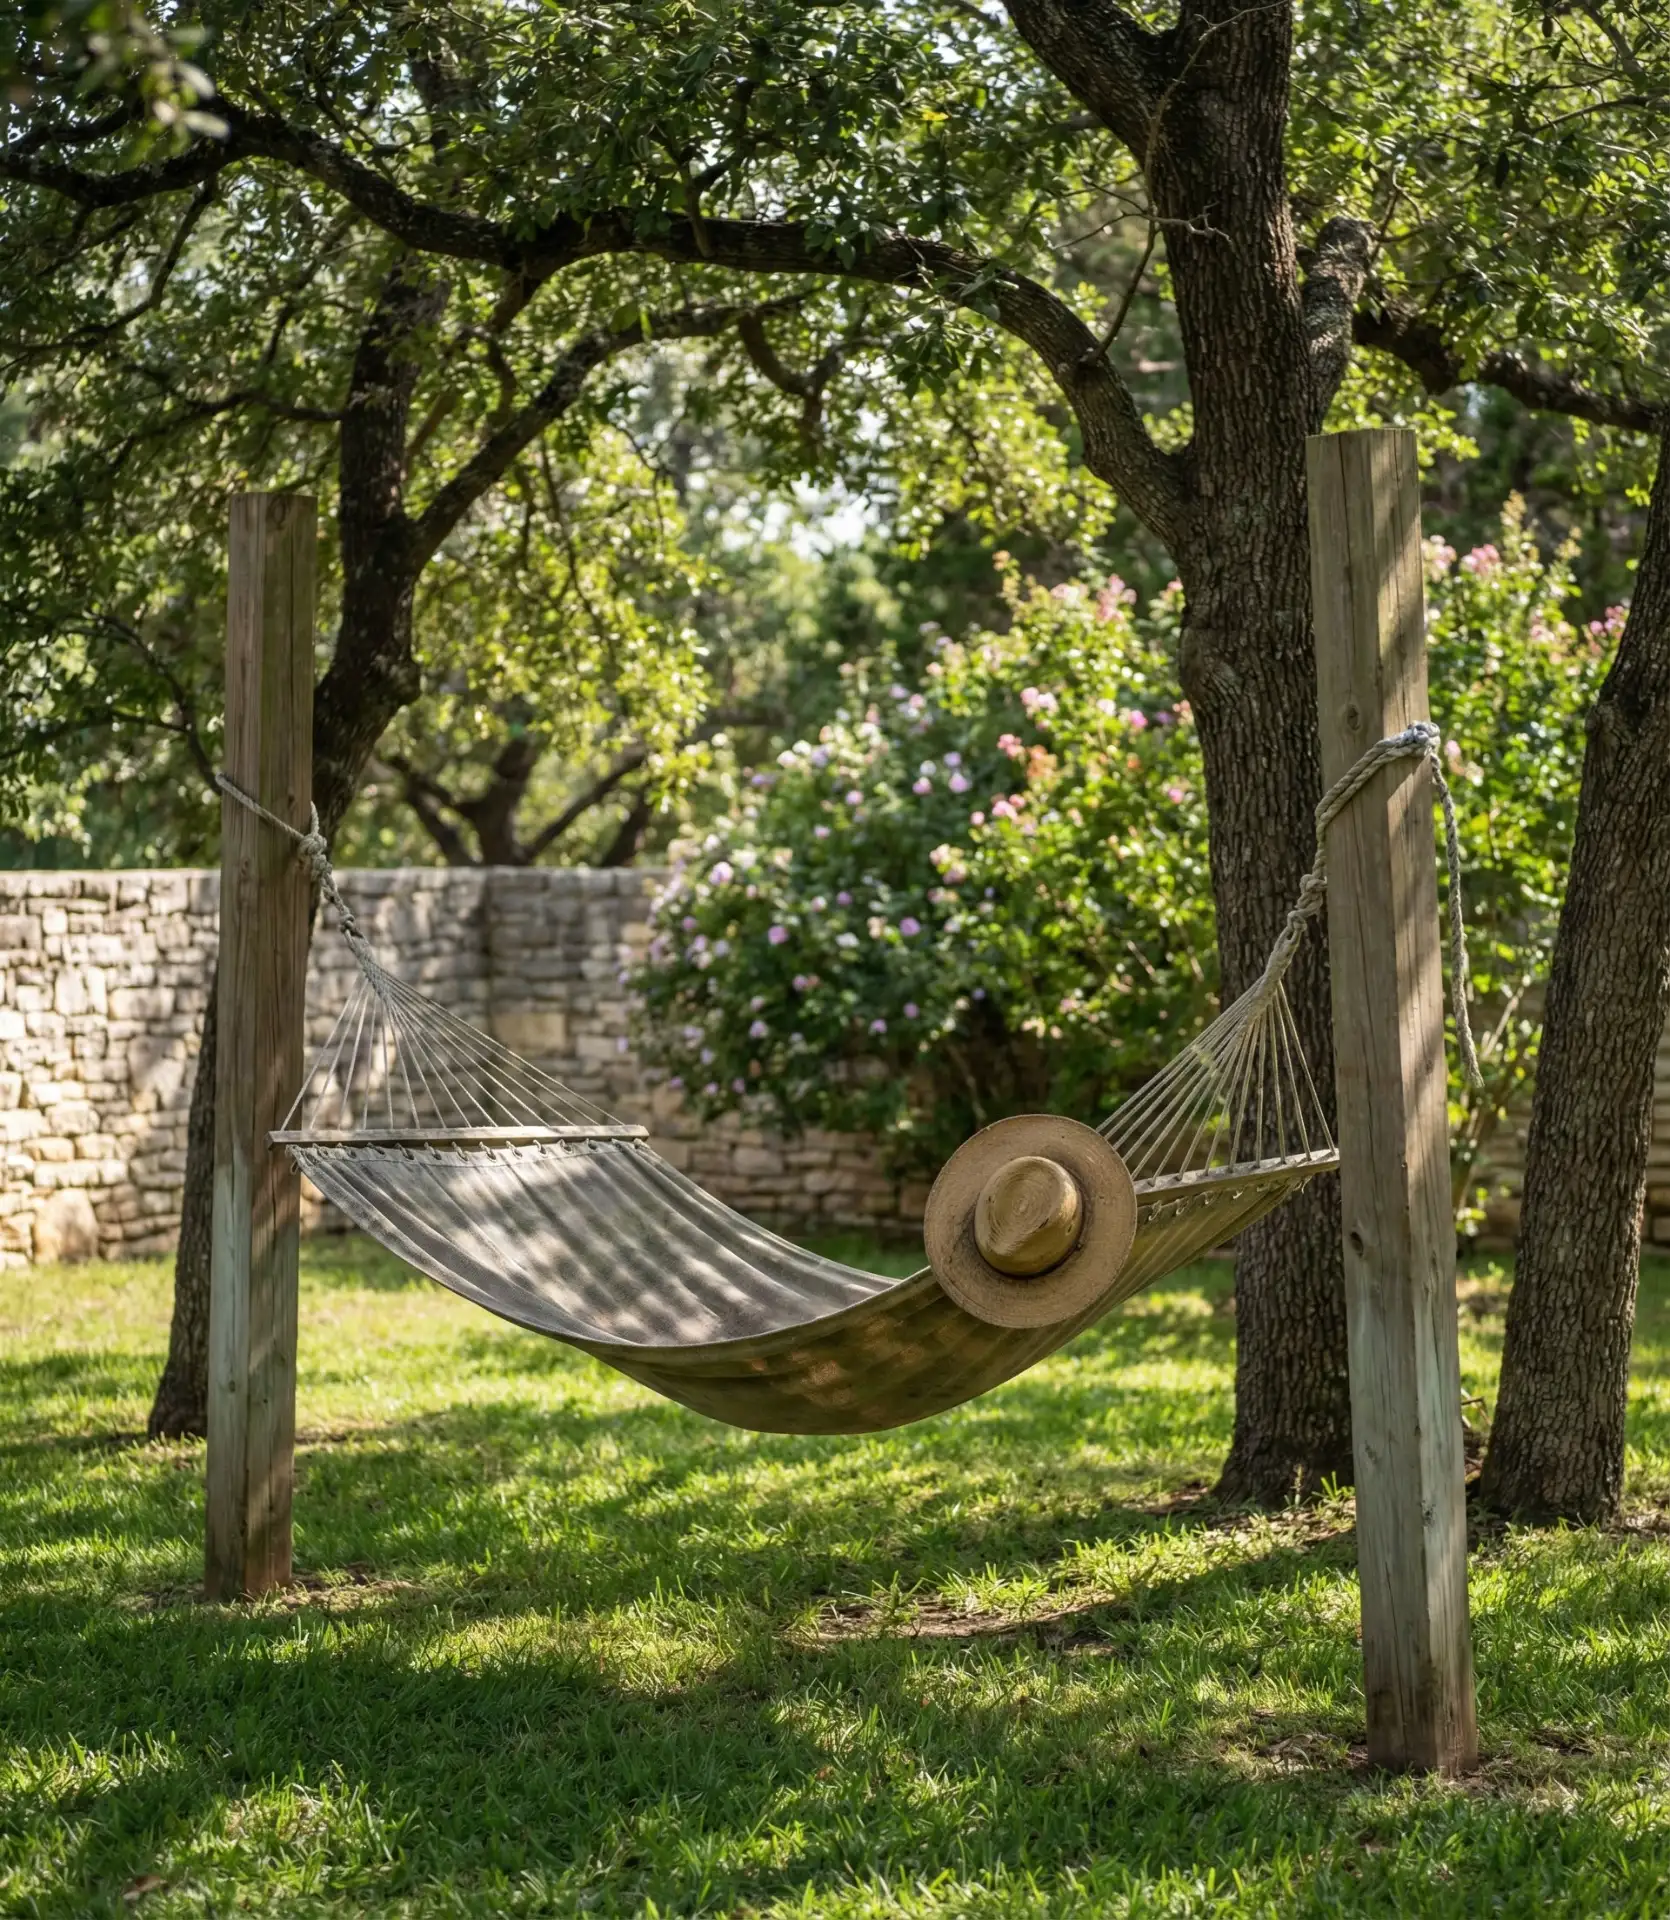
Sink two sturdy posts into concrete footings spaced appropriately for your hammock length, creating a permanent relaxation spot without relying on mature trees. Use 6×6 pressure-treated posts, set them 2-3 feet deep in concrete, and install heavy-duty eye bolts for hammock attachment. This DIY project costs $80 to $120 in materials and transforms an unused corner of your yard into the most coveted lounging spot. It’s fun to build and even more fun to use. 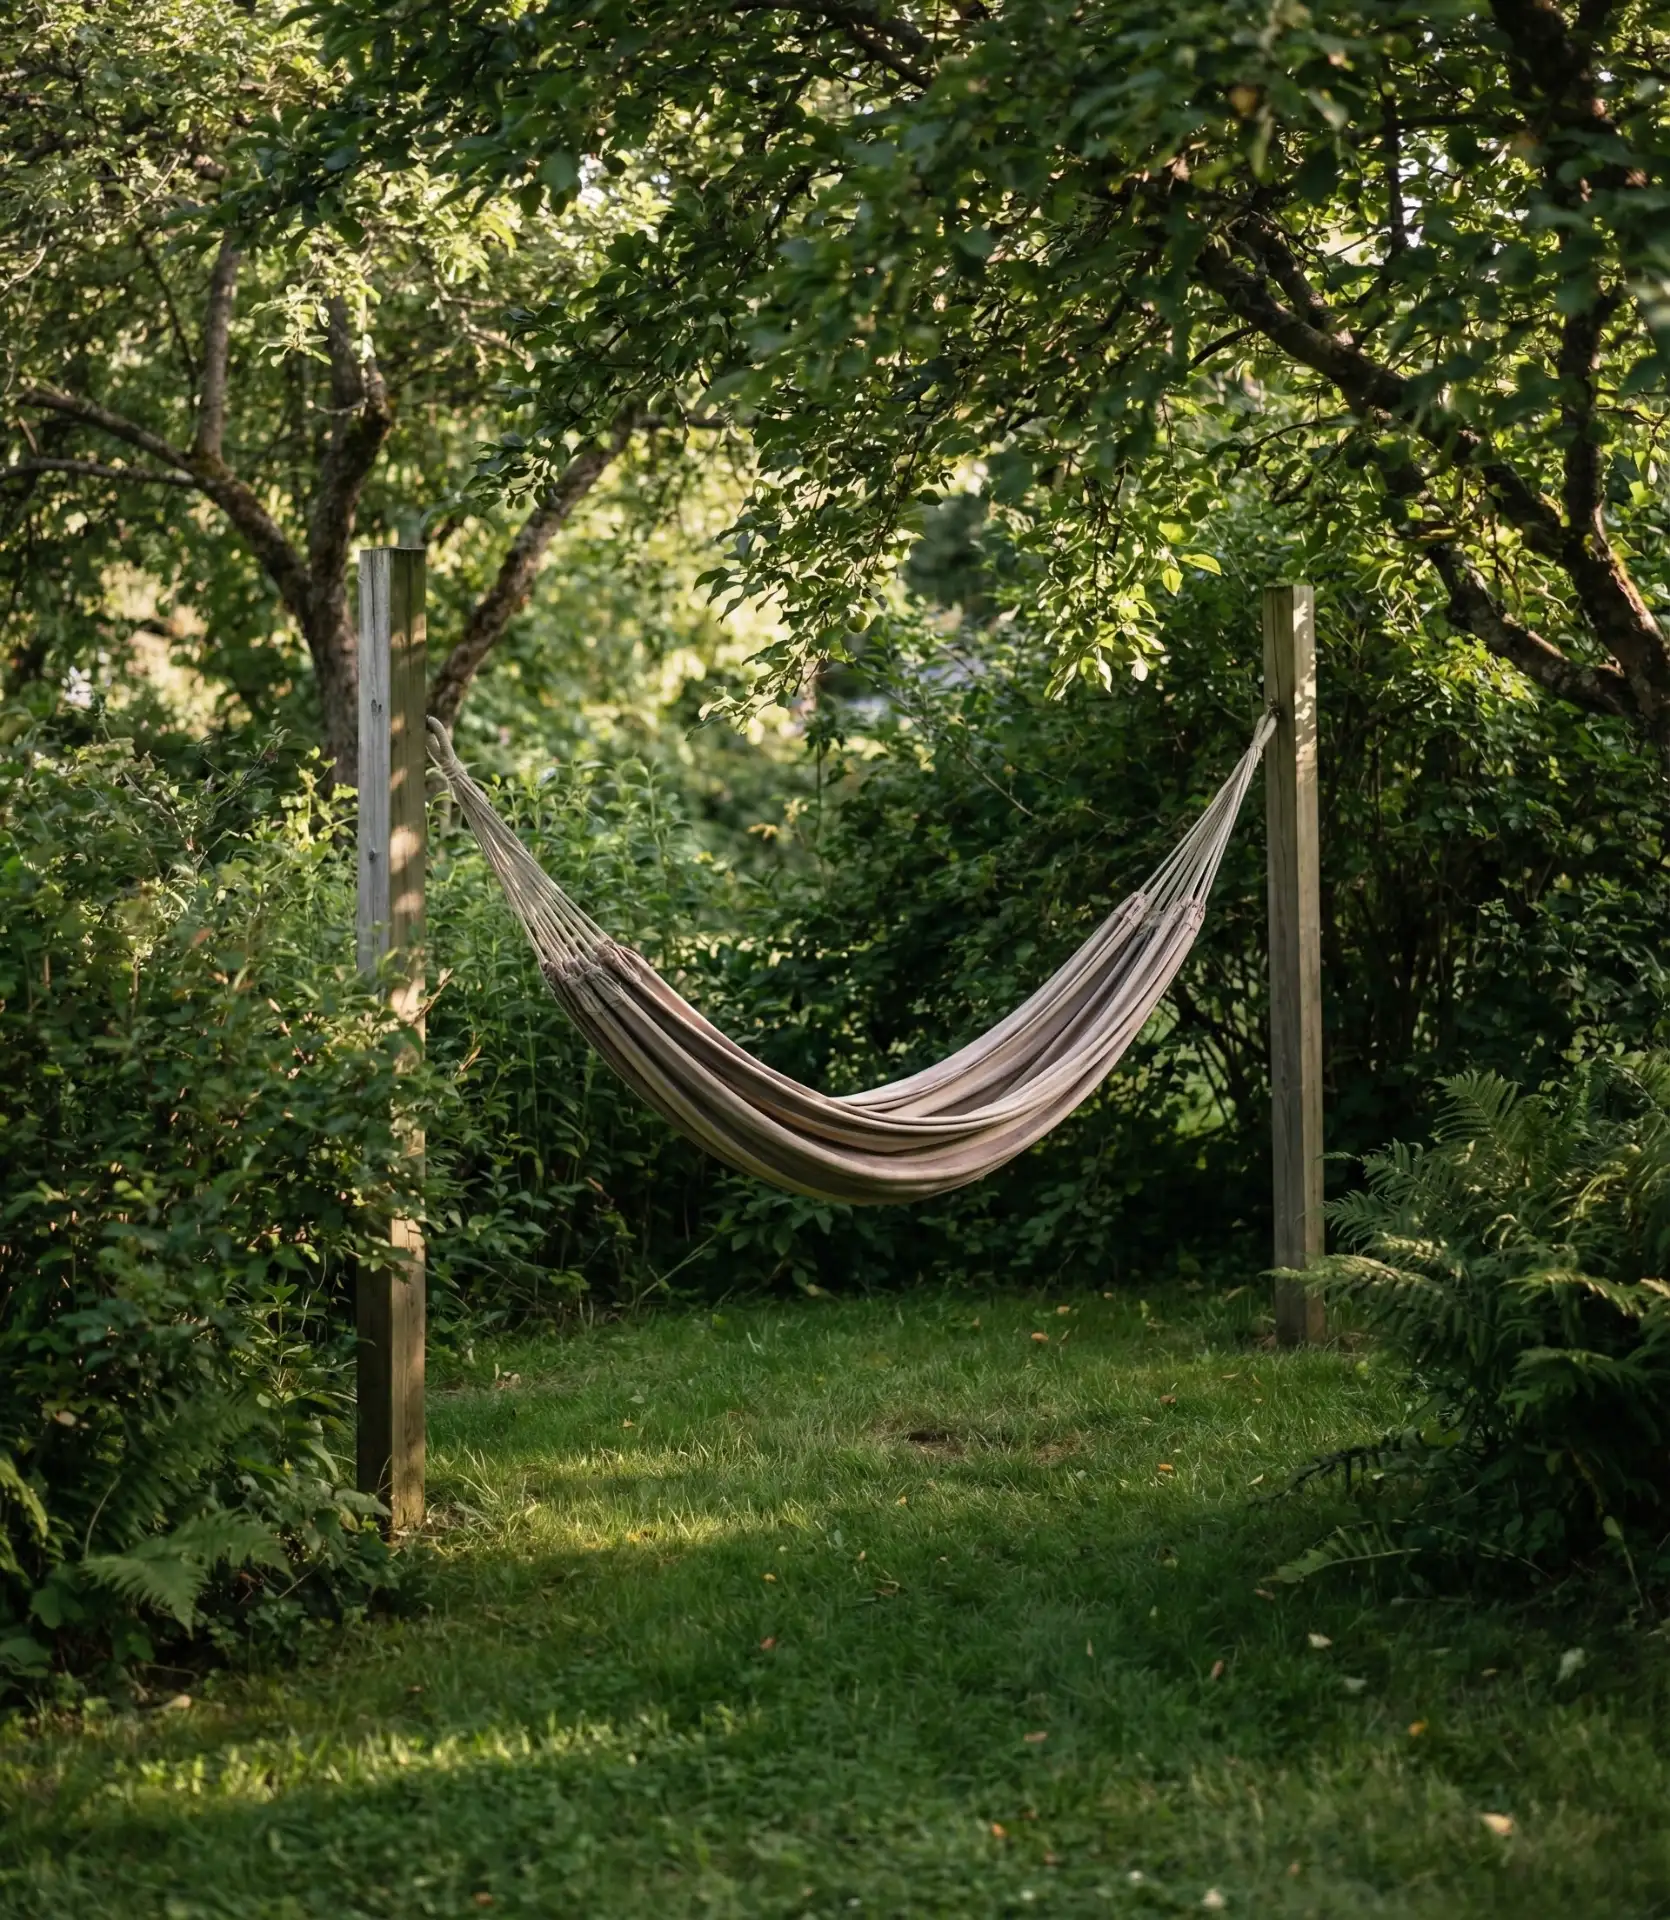
Expert tip: position posts so the hammock hangs with about a 30-degree angle from horizontal for optimal comfort—too flat and you’ll fold uncomfortably, too steep and you’ll slide to the middle. Space posts 12–15 feet apart for an 11-foot hammock. Stain or paint posts to match your home’s trim for a cohesive look. This setup works brilliantly in yards without trees or where trees aren’t positioned correctly for traditional hammock hanging, solving a common frustration for hammock lovers.
13. Pallet Wood Potting Bench
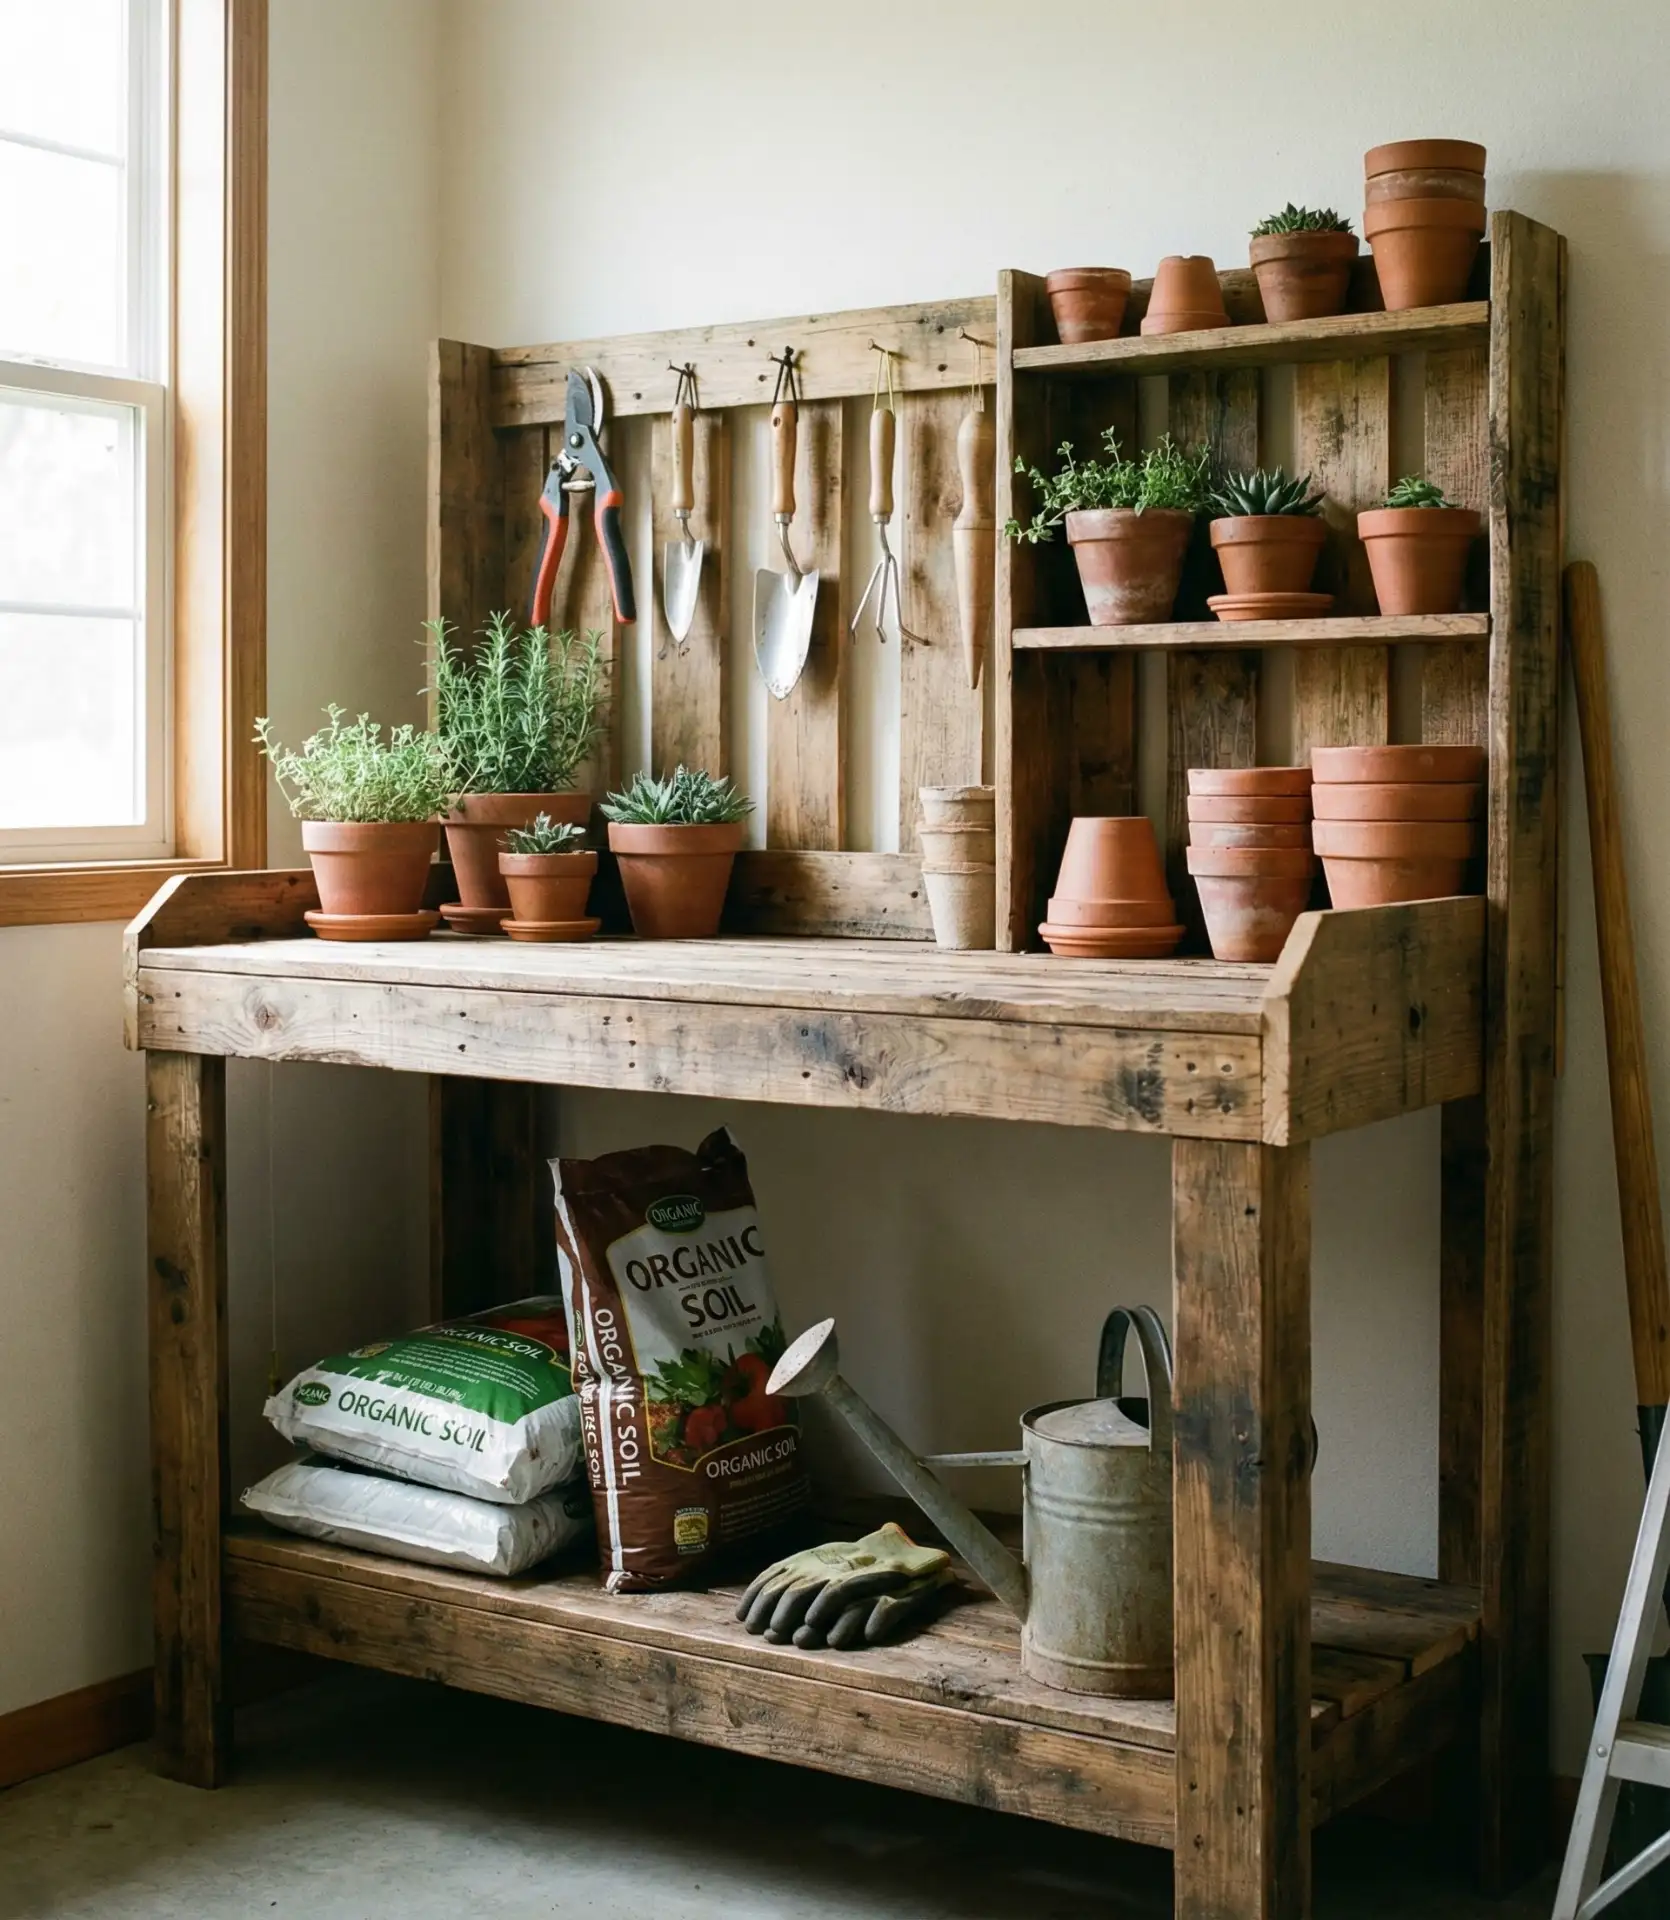
Modifying disassembled pallets creates a new potting workbench; no lumber purchases are required. Construct a lower shelf for soil bags and pots, a work surface at a comfortable height, and tool storage hooks. This basic bench build is almost free if pallets can be obtained at no cost. A dedicated workspace outside is much more enjoyable for outdoor projects. 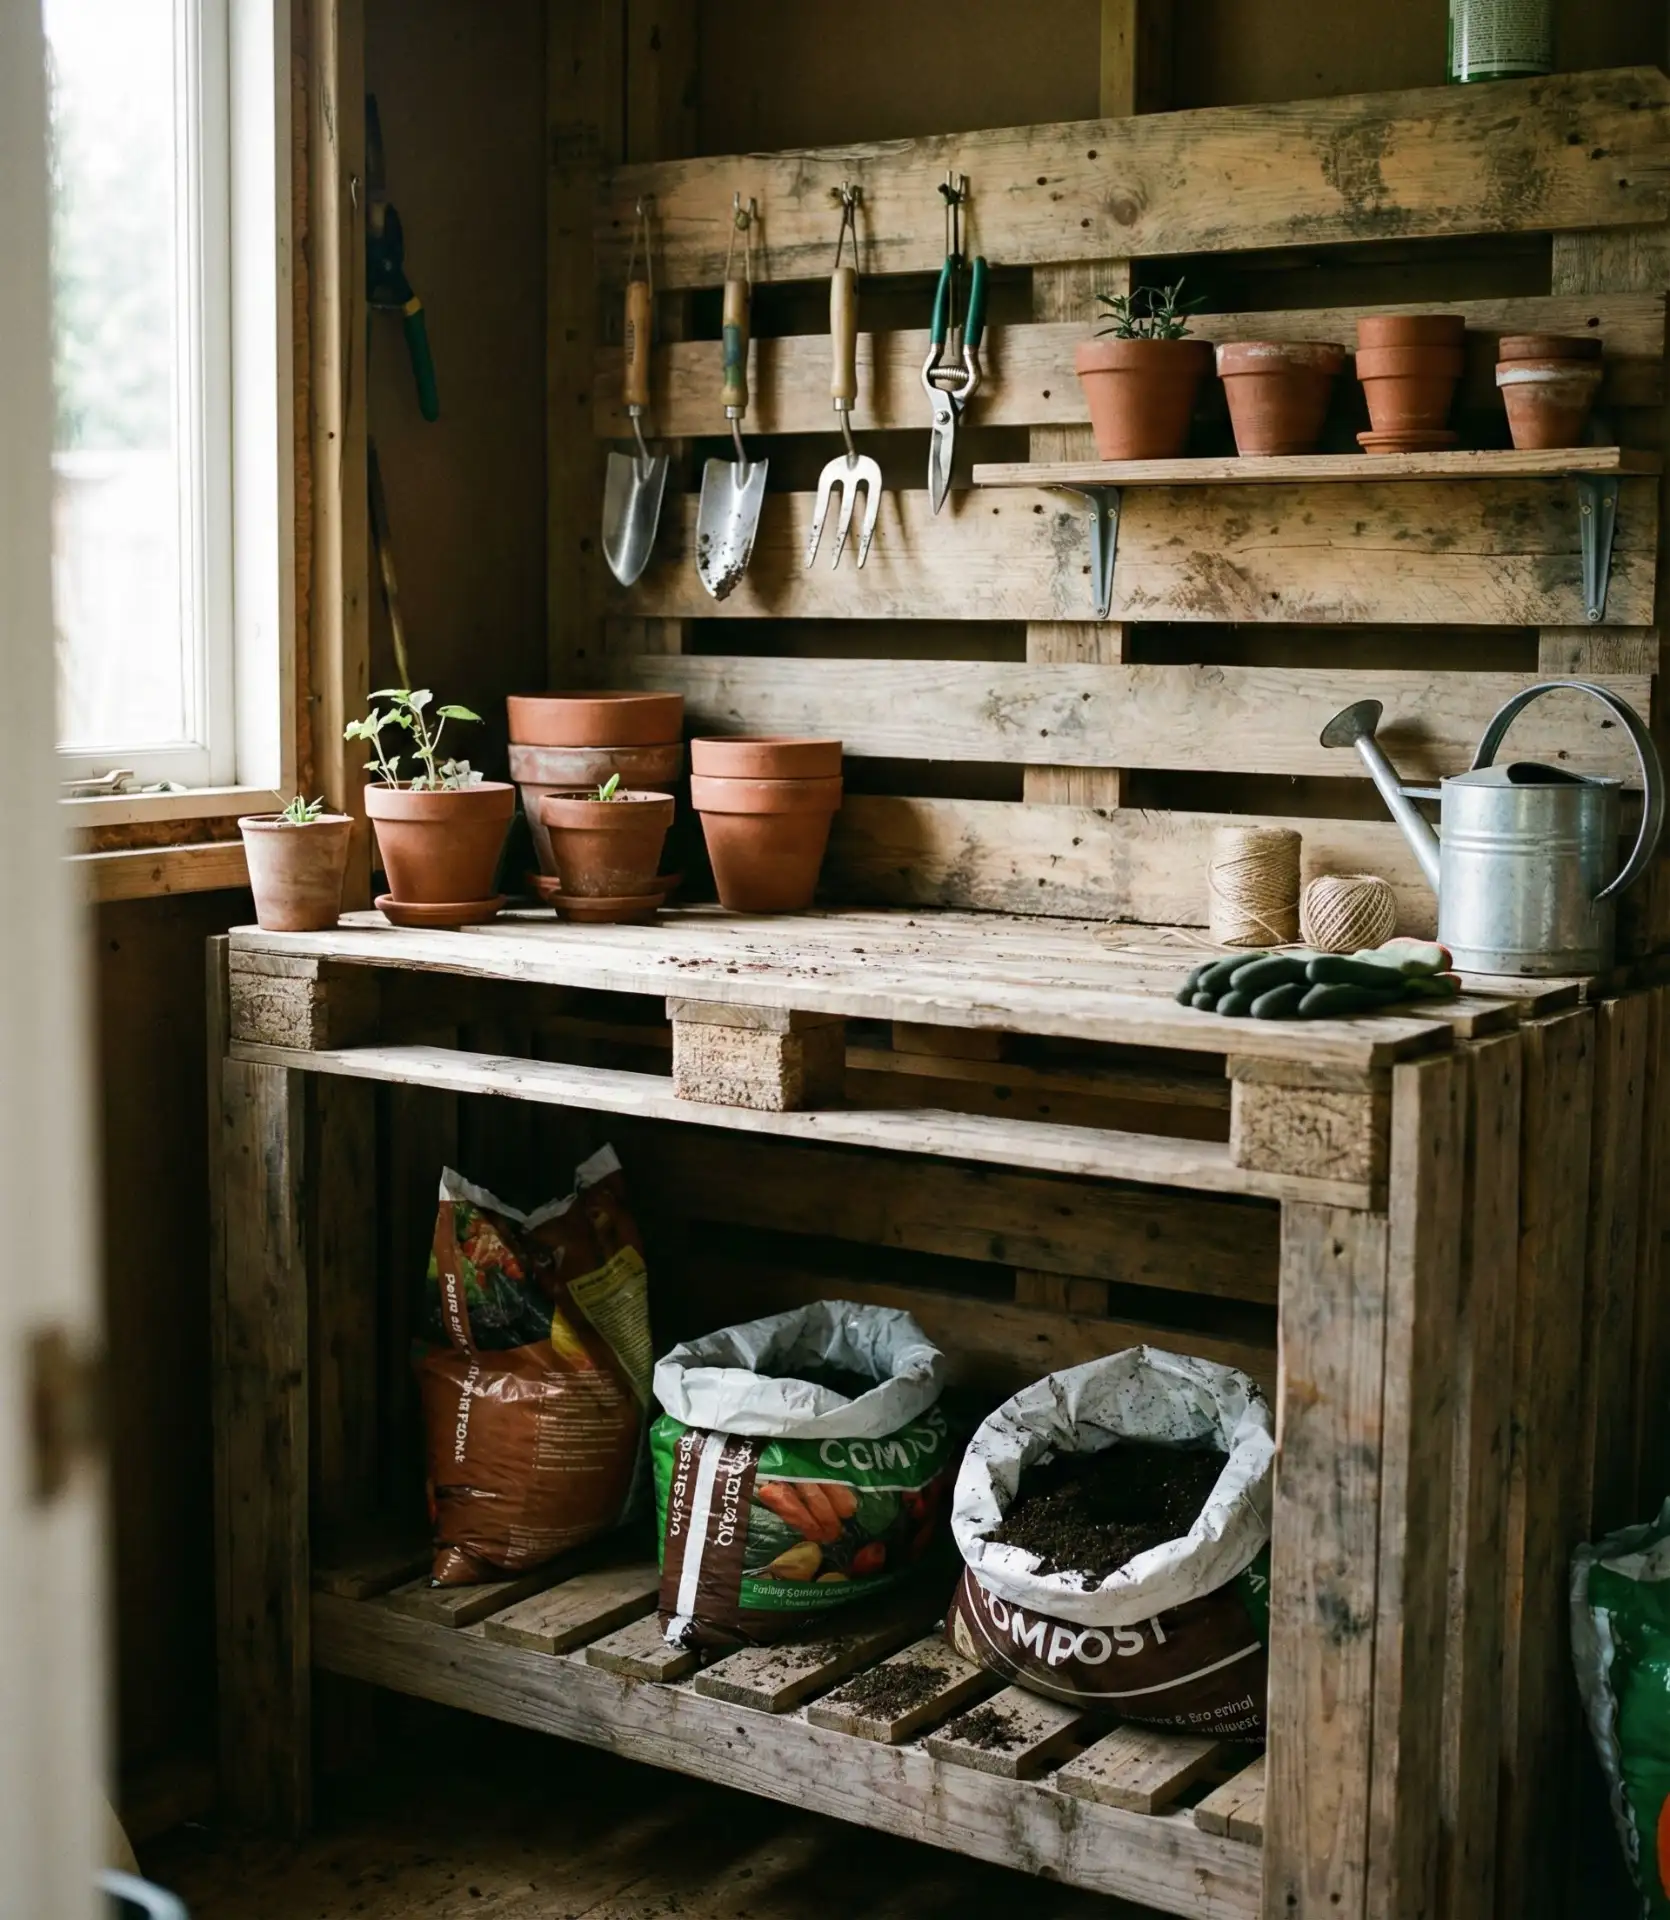
One common mistake is building benches too low—standard kitchen counter height (36 inches) saves your back during extended potting sessions. Add a galvanized metal top or leave the wood surface rustic depending on your aesthetic preference. Position the bench under an eave or in a covered area to extend its lifespan. Avid gardeners swear by dedicated potting stations because they keep soil and mess contained in one area rather than migrating across the entire patio or deck.
14. Painted Rock Garden Border
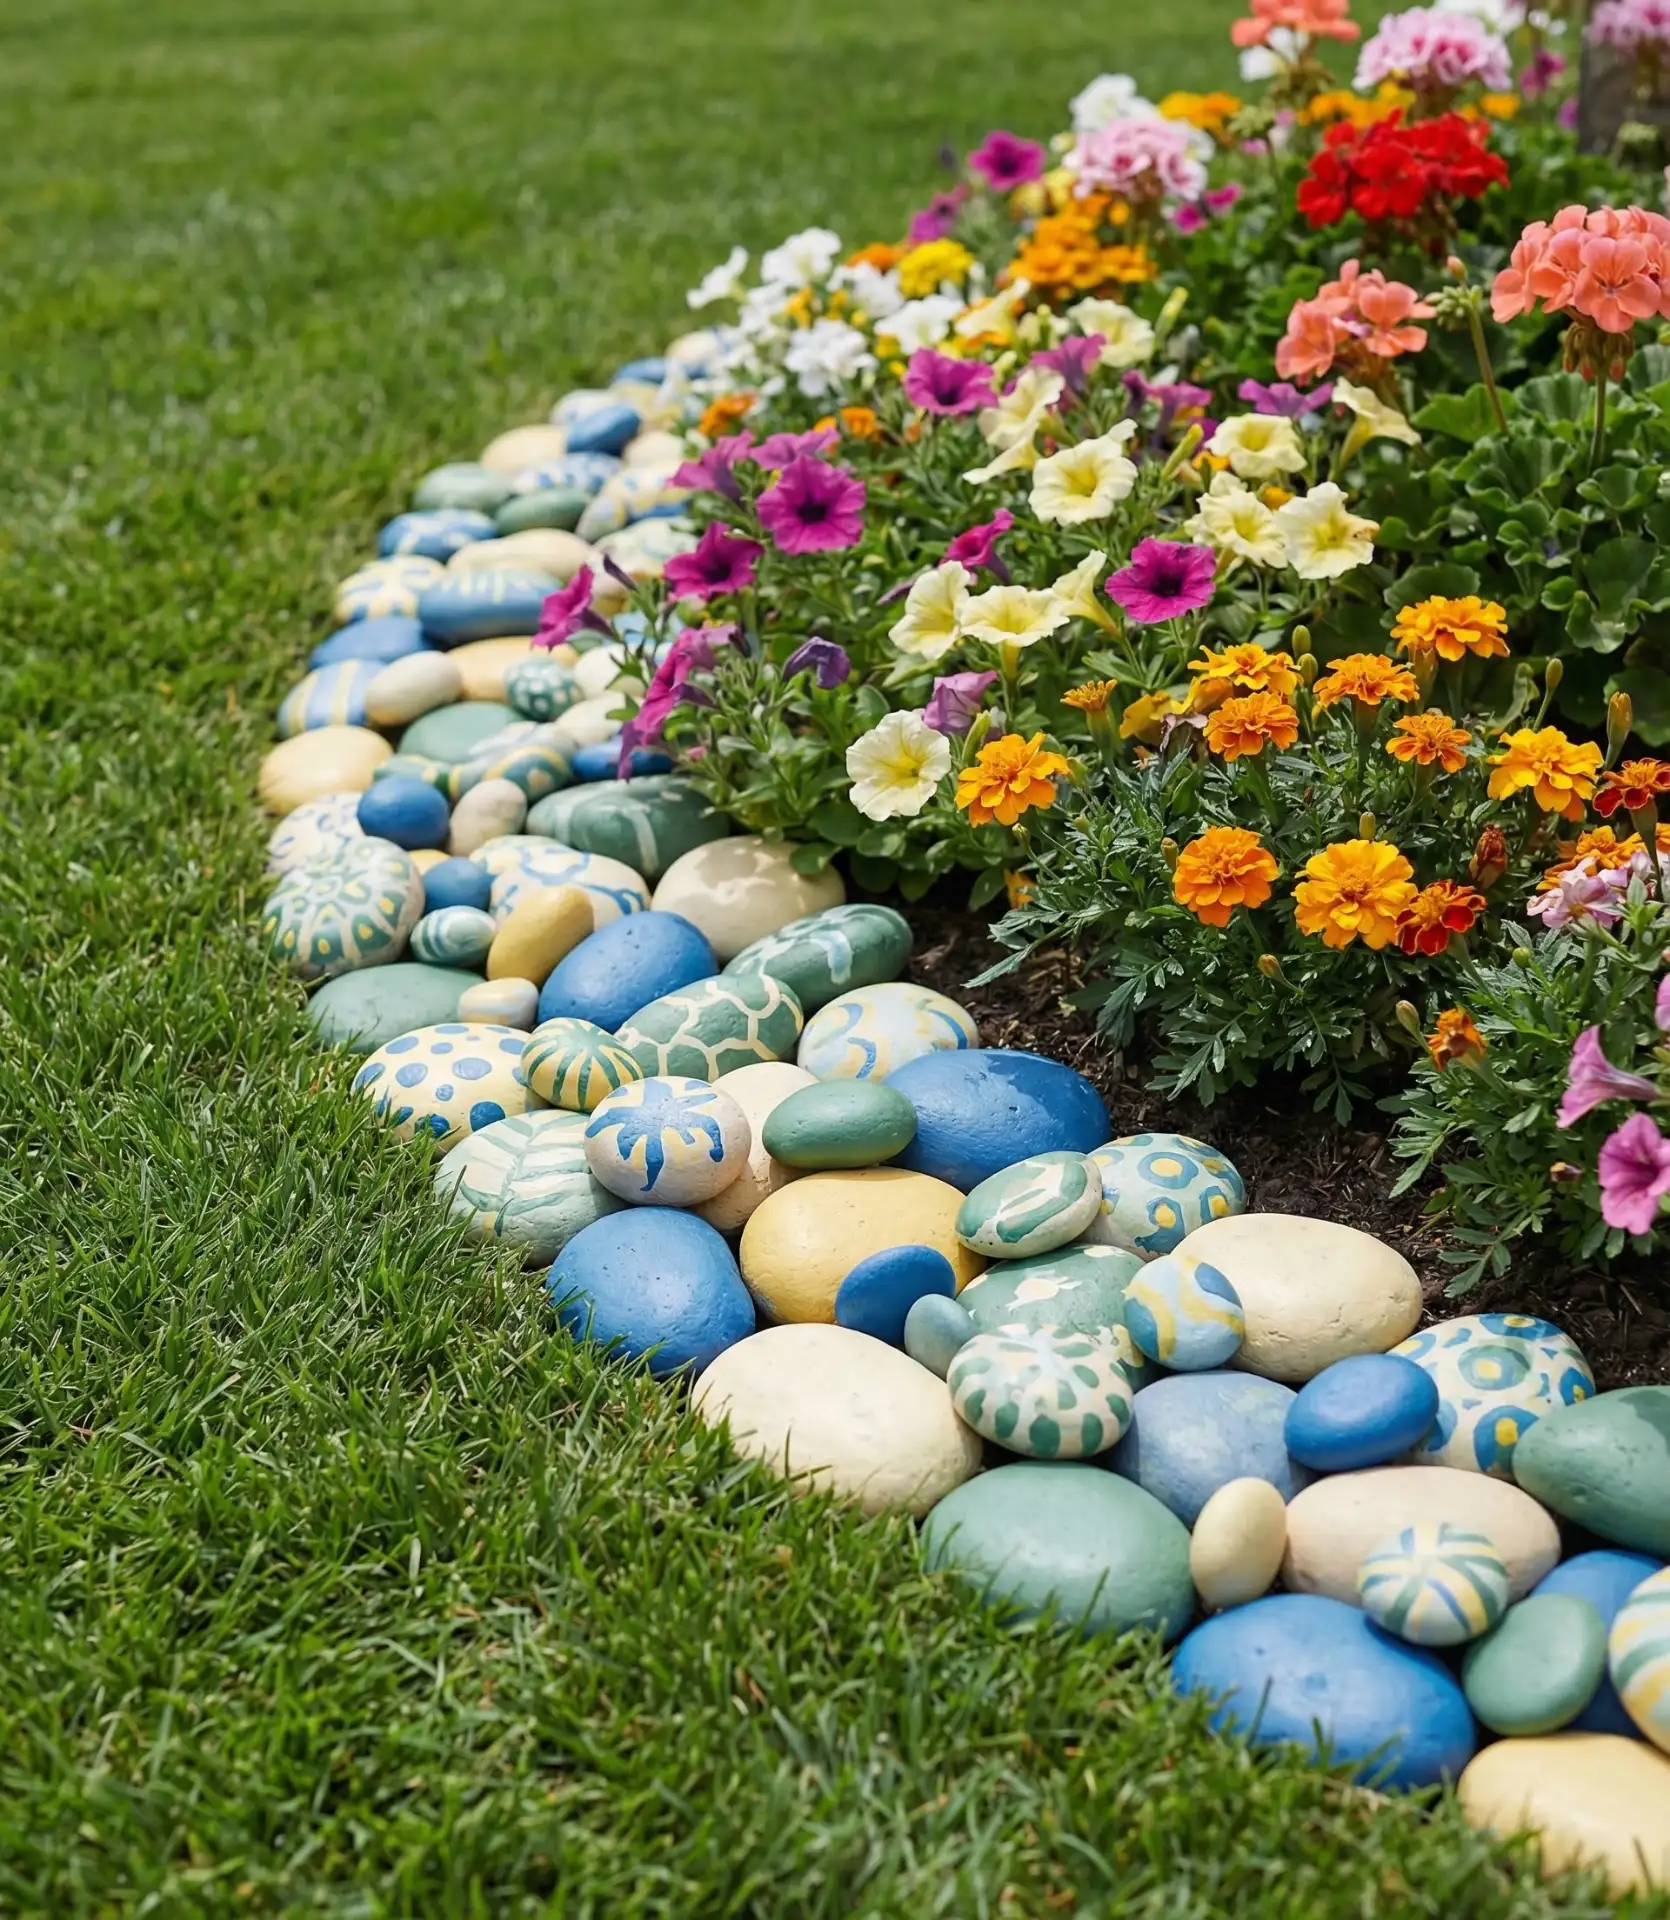
Edges of your flower beds can be lined with smooth river rocks and painted in colors that are adapted to the plant colors or the color of the house that the rock garden is next to.
This landscaping budget solution clearly defines bed edges while adding an artistic touch kids love to help create. Collecting rocks is often free, and all you need is a few dollars’ worth of outdoor acrylic paint. The painted edges provide winter interest when perennials die back, as well as marking bed boundaries, making mowing easier. 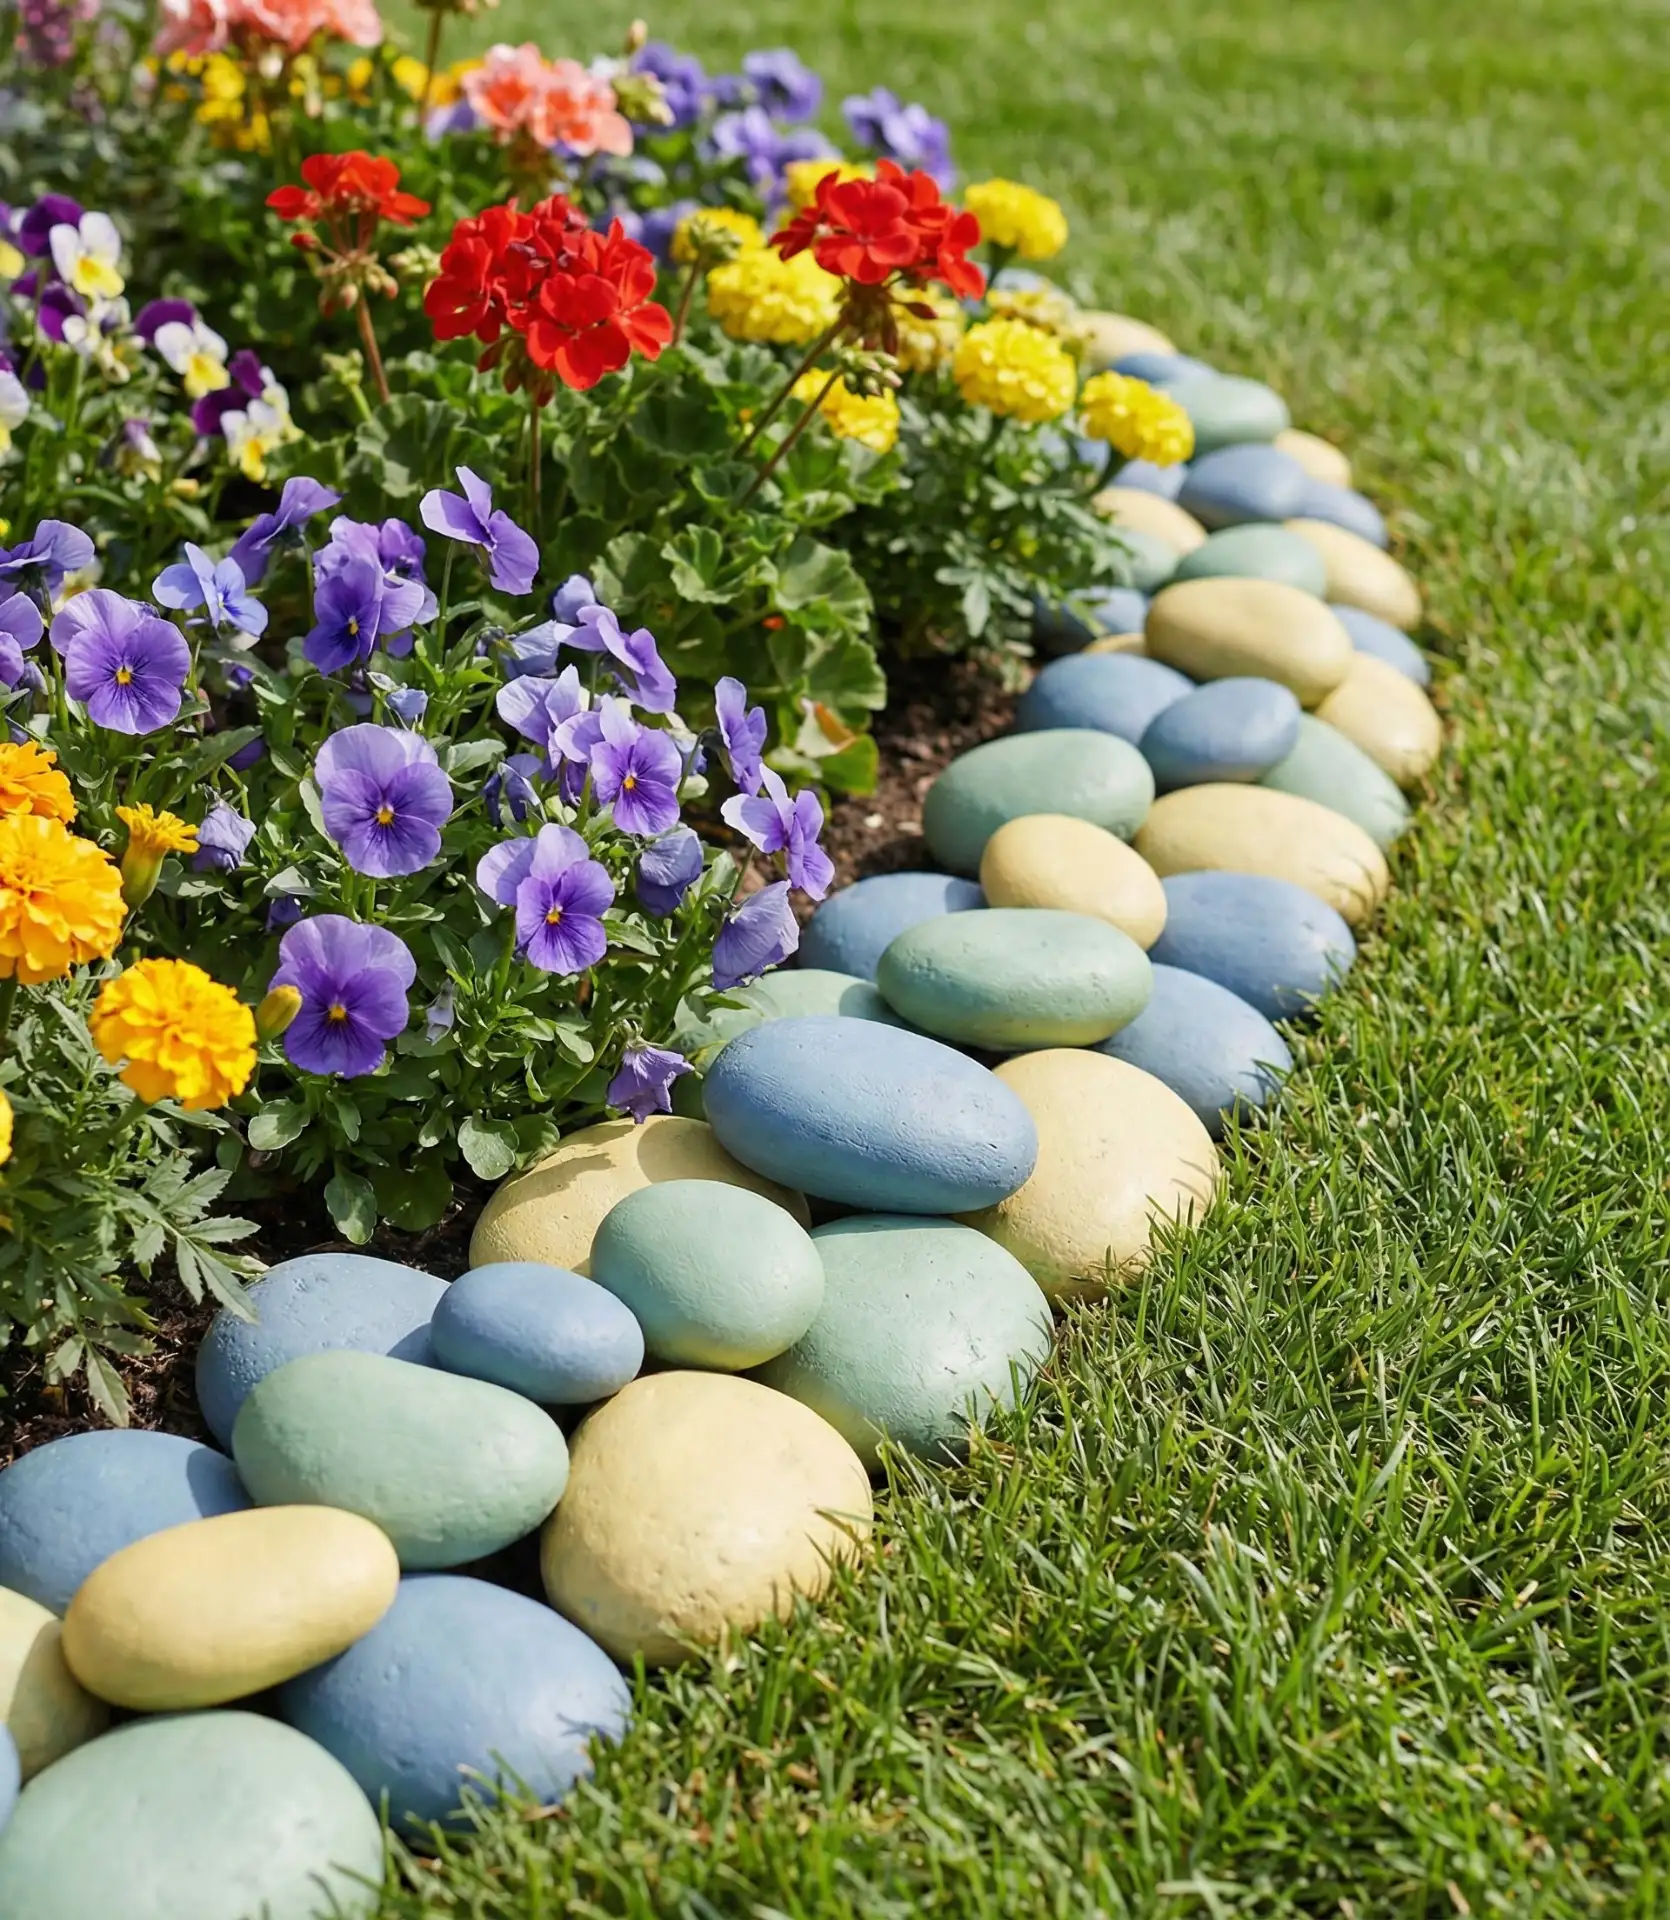
This approach particularly appeals to families with young children who need outdoor projects that welcome their participation. Seal painted rocks with clear outdoor polyurethane to prevent chipping and fading. Some homeowners create themed designs—all blue stones for a coastal vibe, earth tones for natural settings, or rainbow colors for playful cottage gardens. The technique works best in areas with defined beds rather than naturalized plantings, where the formality would clash with the aesthetic.
15. Simple Wooden Playhouse Frame
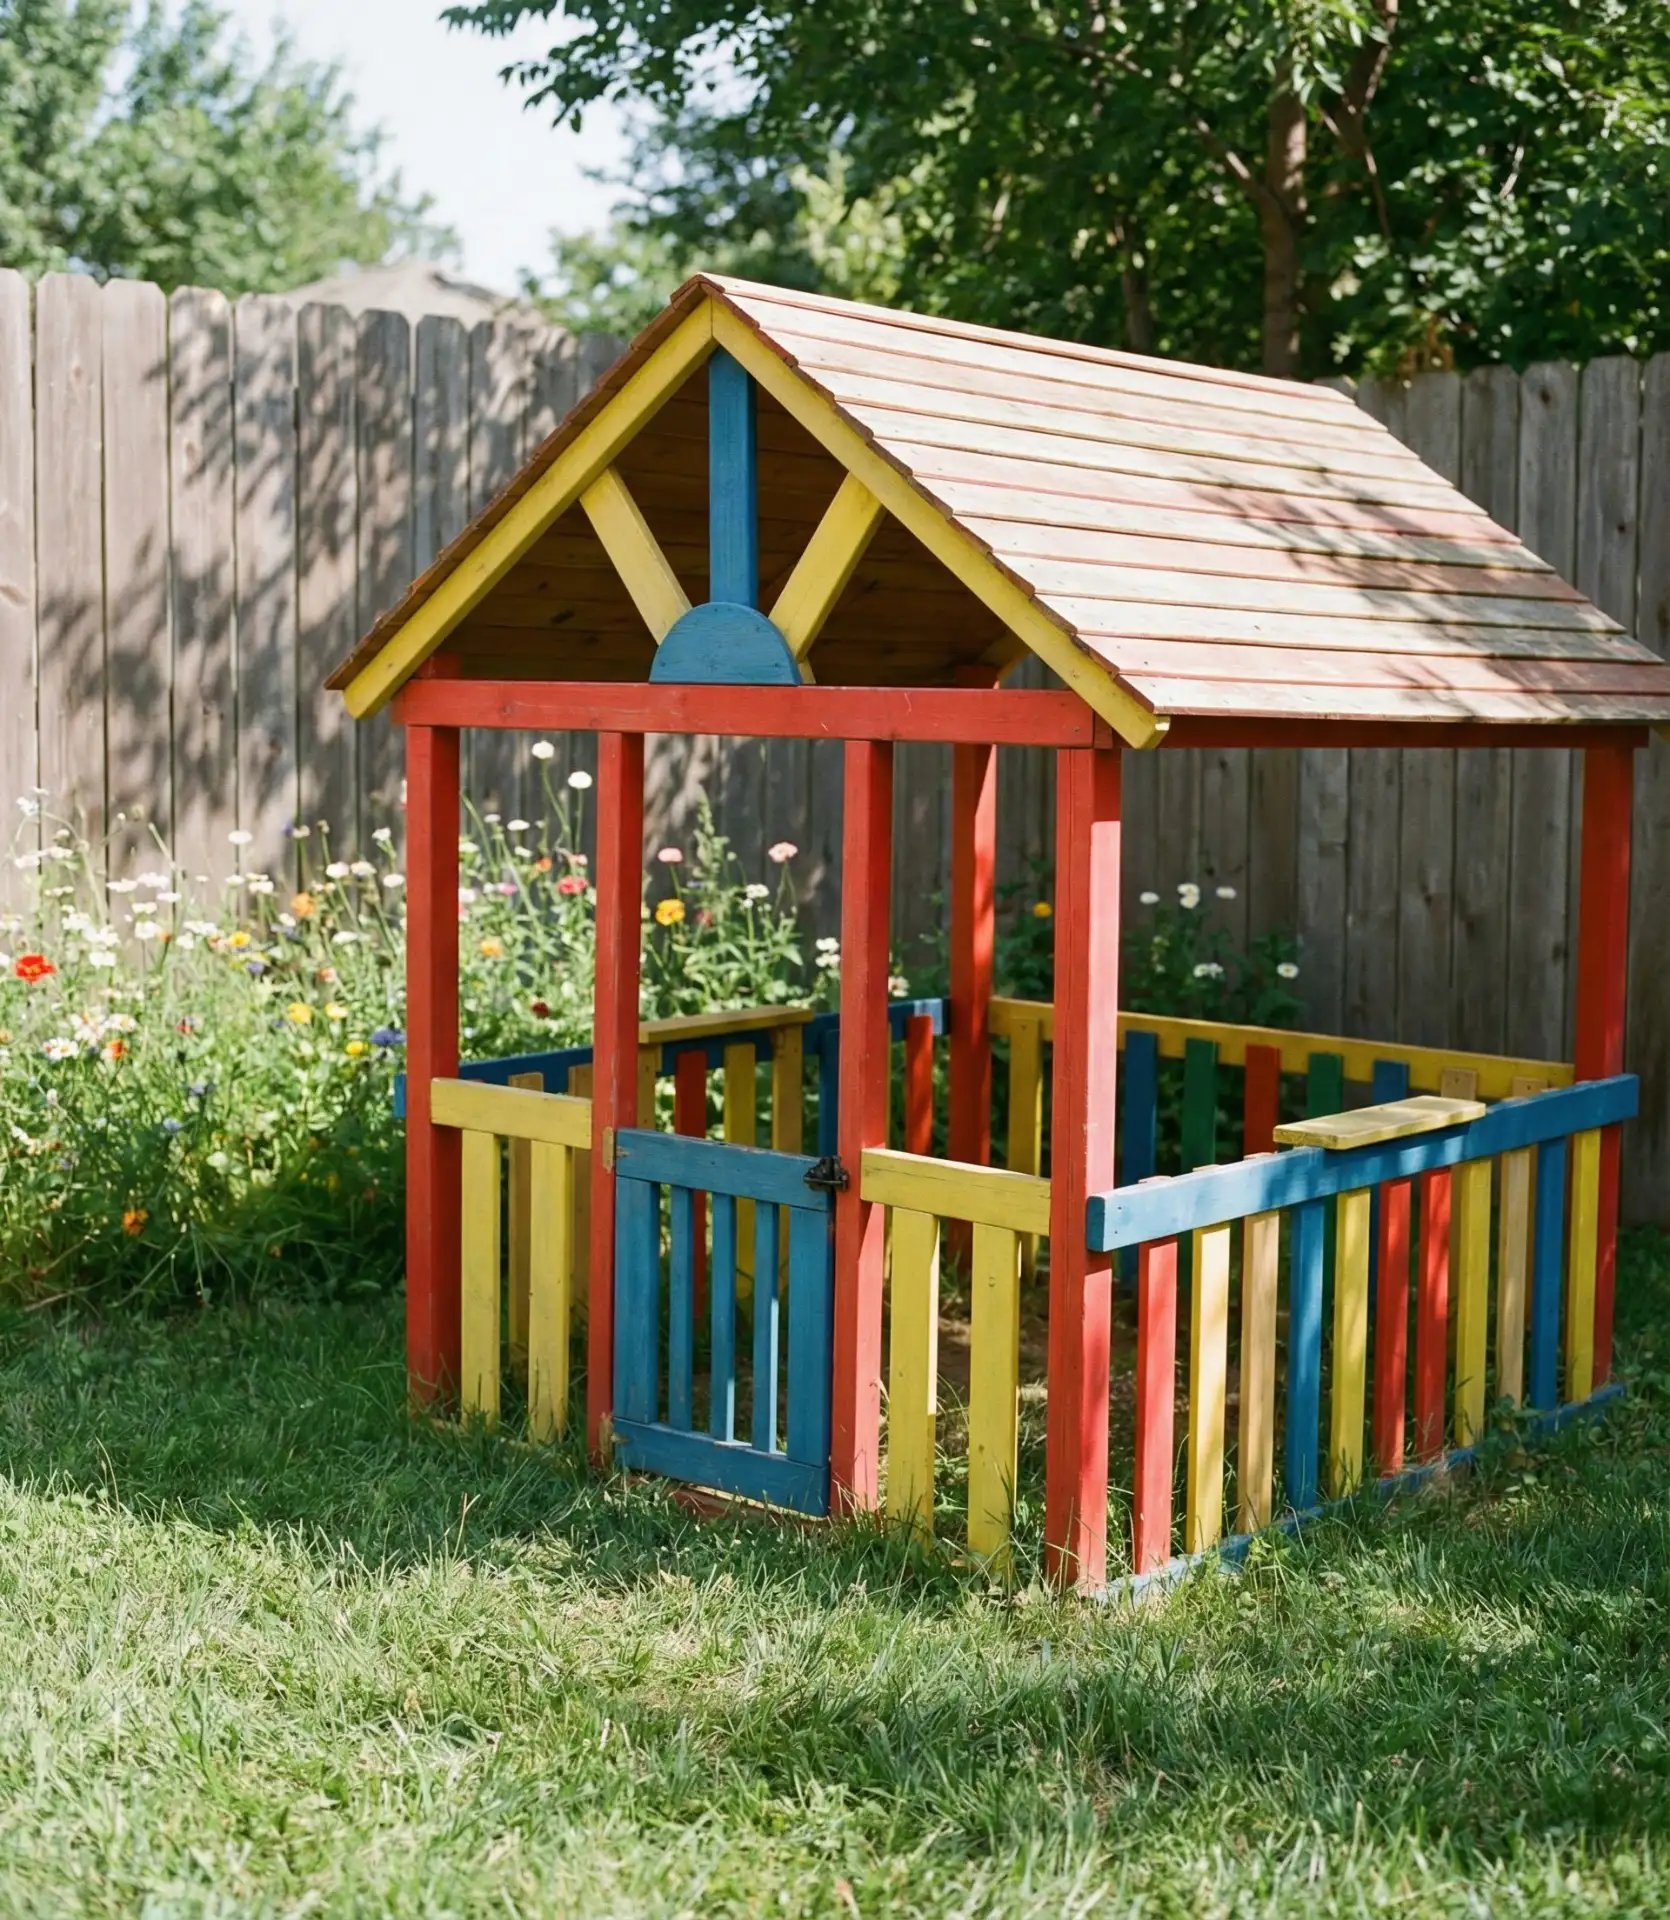
Build a basic playhouse outdoor structure using 2x4s and plywood that provides kids with their own backyard space without the $1,000+ price tag of prefab models. A simple A-frame or box design with open walls (add fabric panels later if desired) creates a fort-like structure that encourages imaginative play. Use leftover exterior paint for decoration, and let children help with design choices to increase their investment in the space. 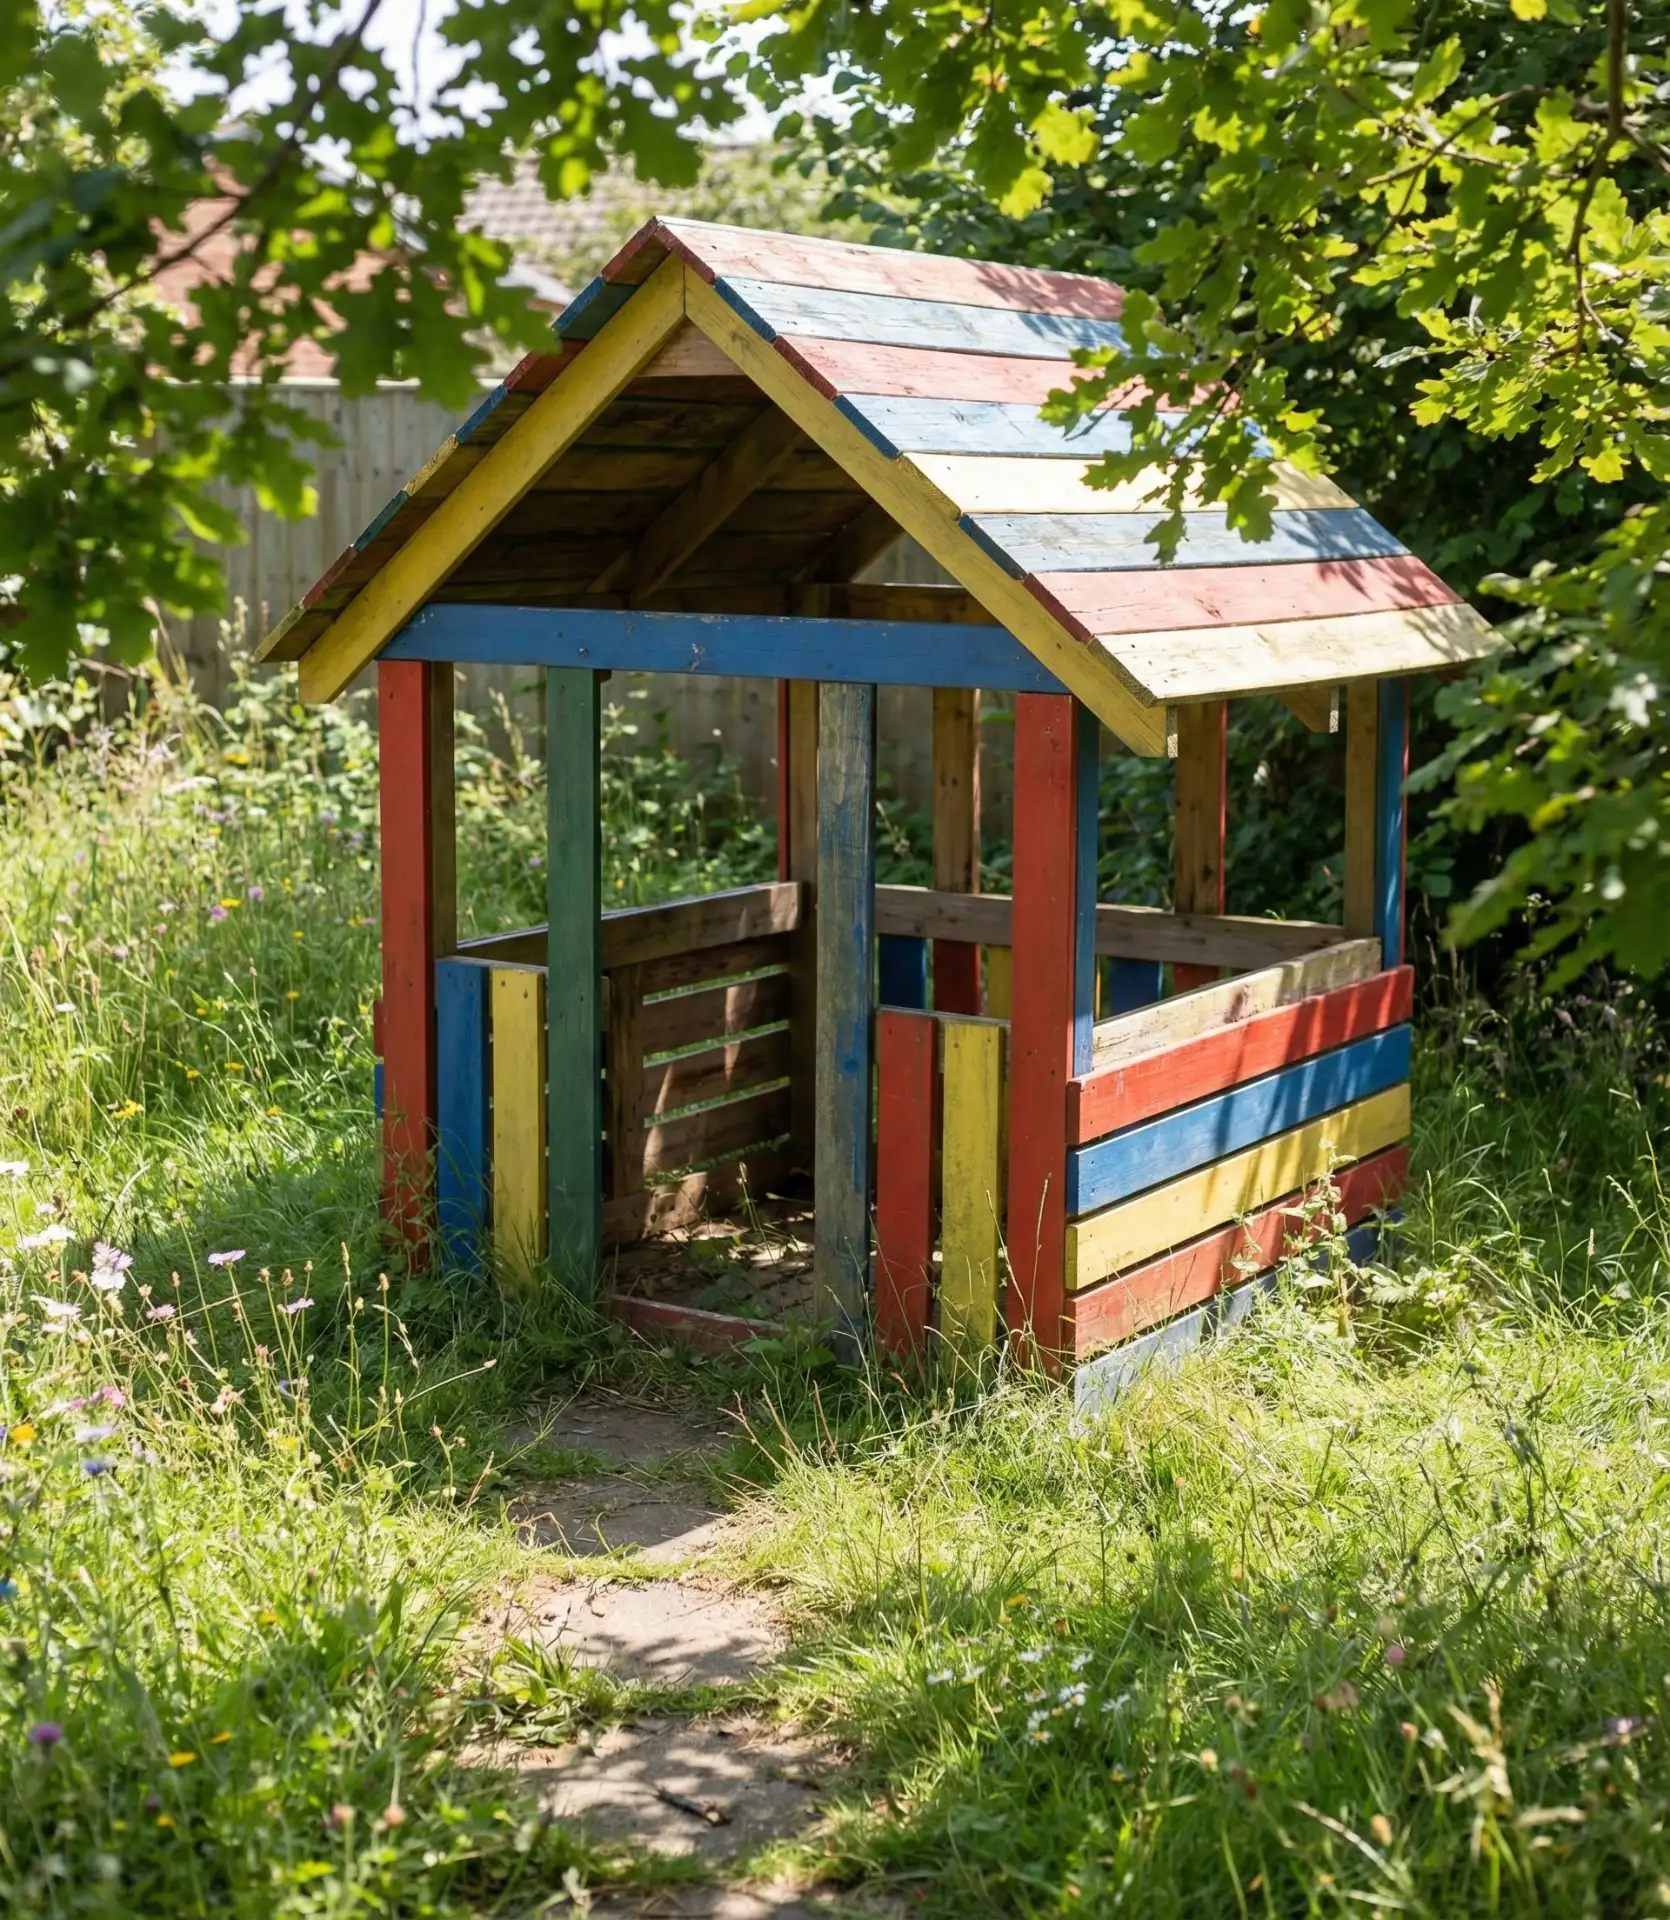
Building a playhouse is one of the more affordable ways to complete the backyard look and is a common feature in suburban American homes. A 6×6 playhouse with no floor costs about $200–$300 for new materials (or even less using a reclaimed material source). You can let grass grow and provide drainage and a softer surface to play on. A couple of add-ons, like a little window and a Dutch door, will make your playhouse rival the store-bought versions. These play structures last for years and often get repurposed as garden sheds or meditation spaces.
16. Stock Tank Pool installation.
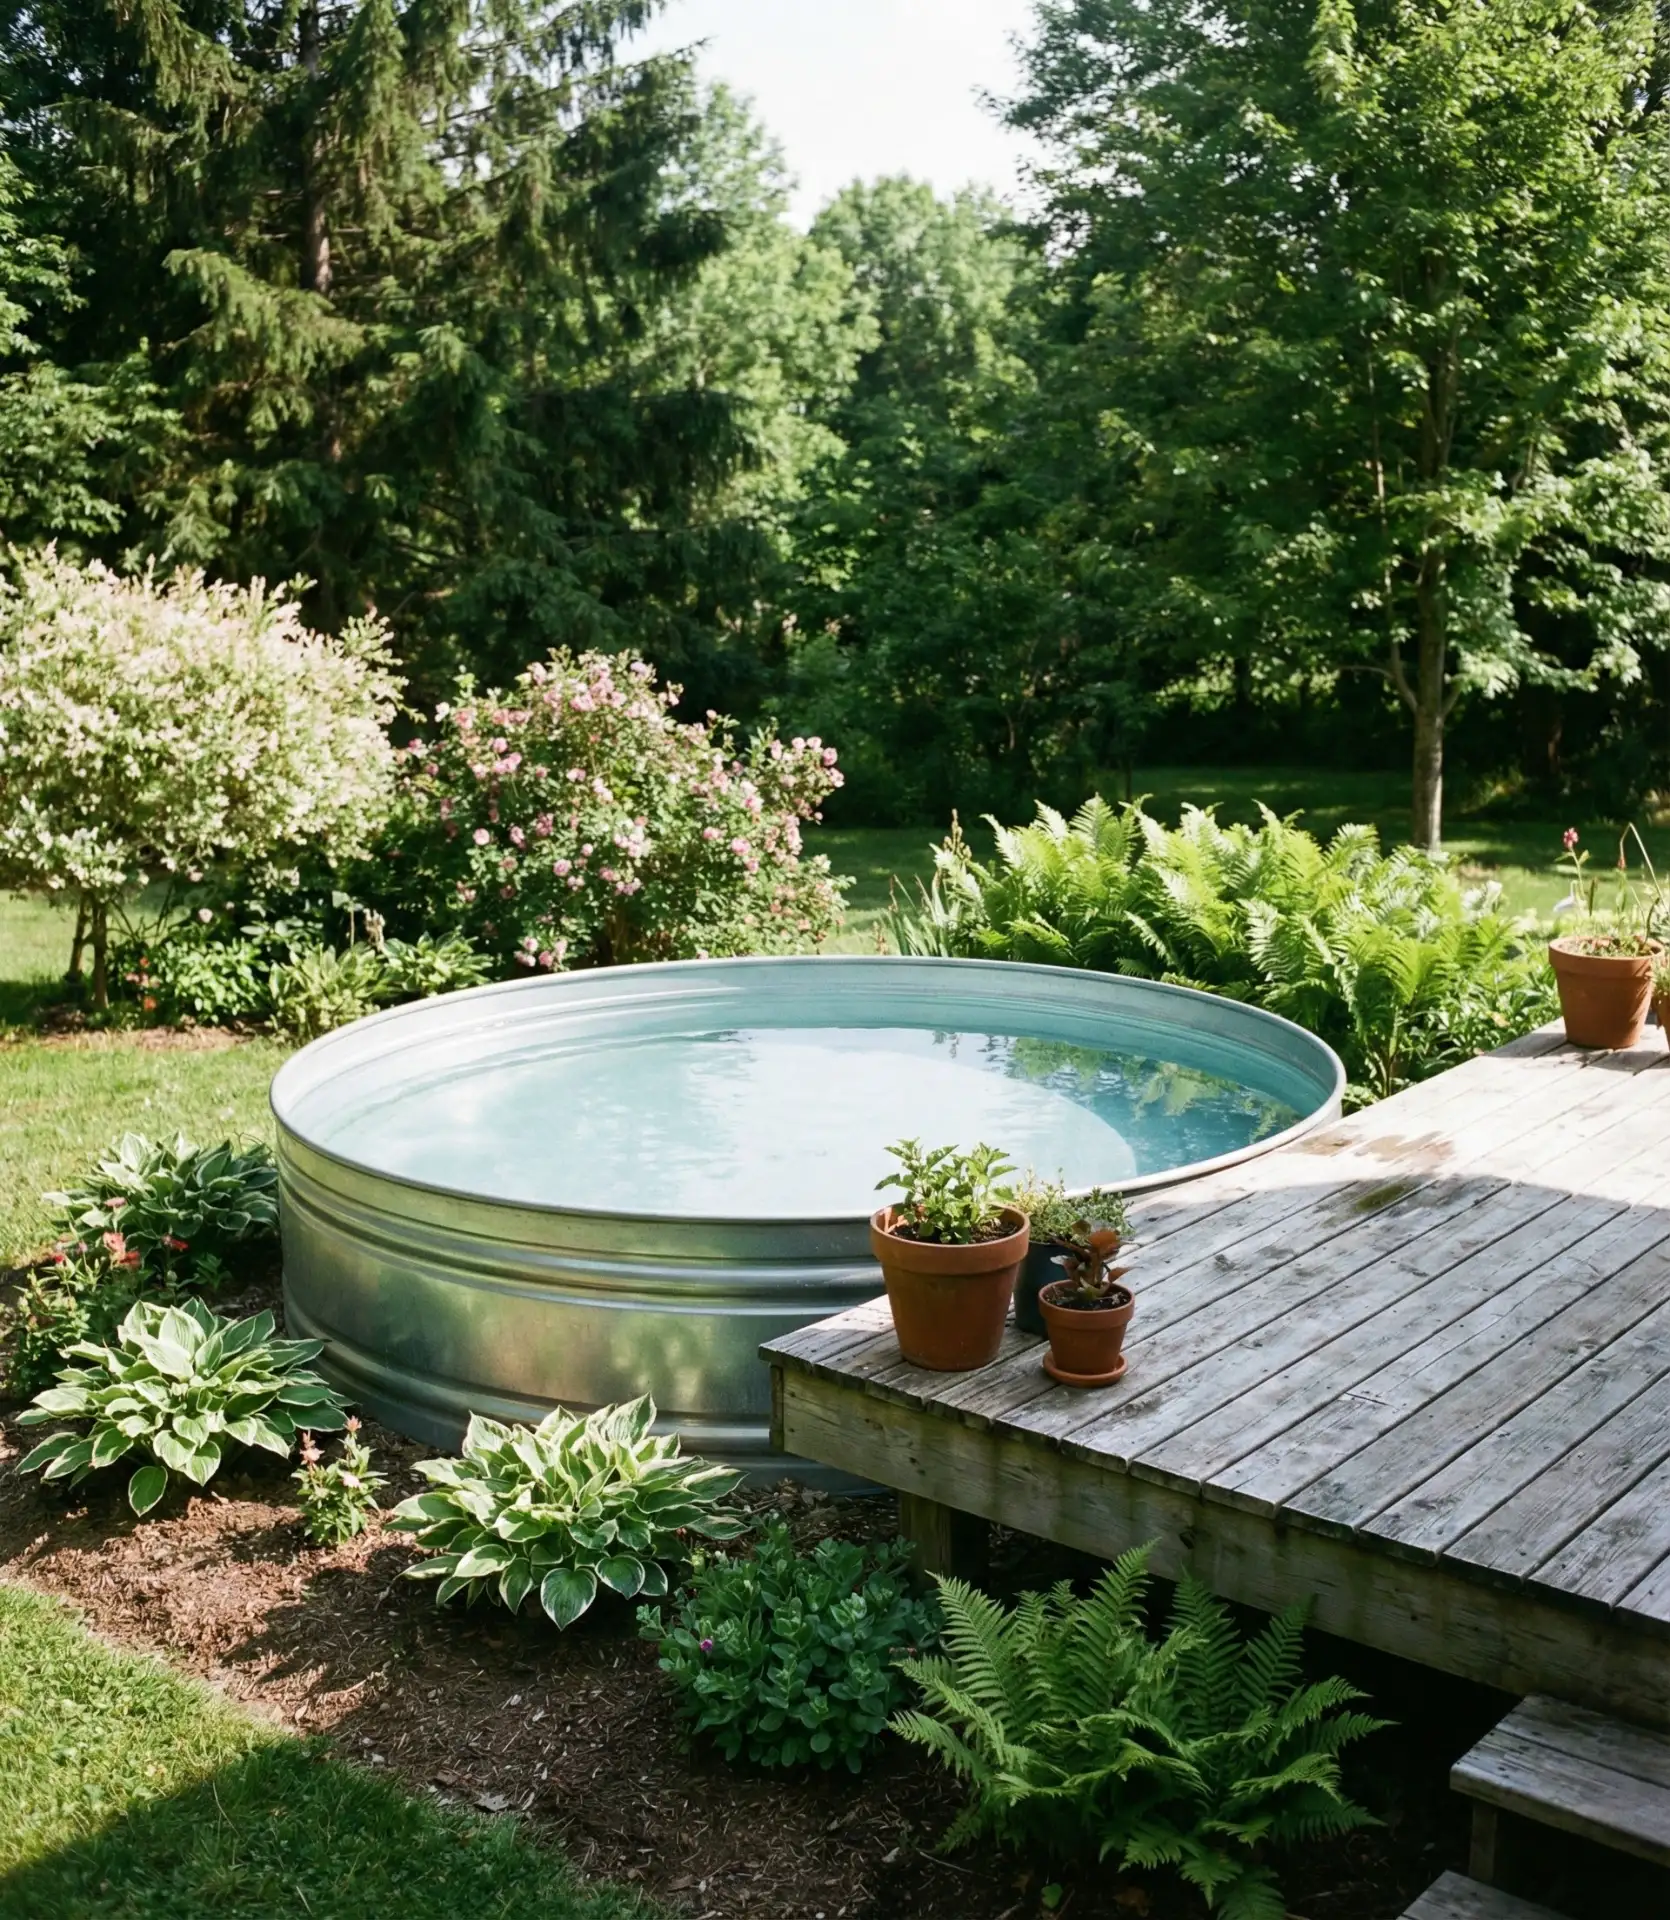
Install a galvanized stock tank as an affordable above-ground pool alternative that keeps the family cool for $200-$600, depending on size. These agricultural tanks from farm supply stores have become design darlings, offering the refreshment of a pool without the $20,000+ installation cost. Add a simple pump and filter system, and you’ve got a functional swimming solution that works for adults and kids alike while adding unexpected style to your backyard. 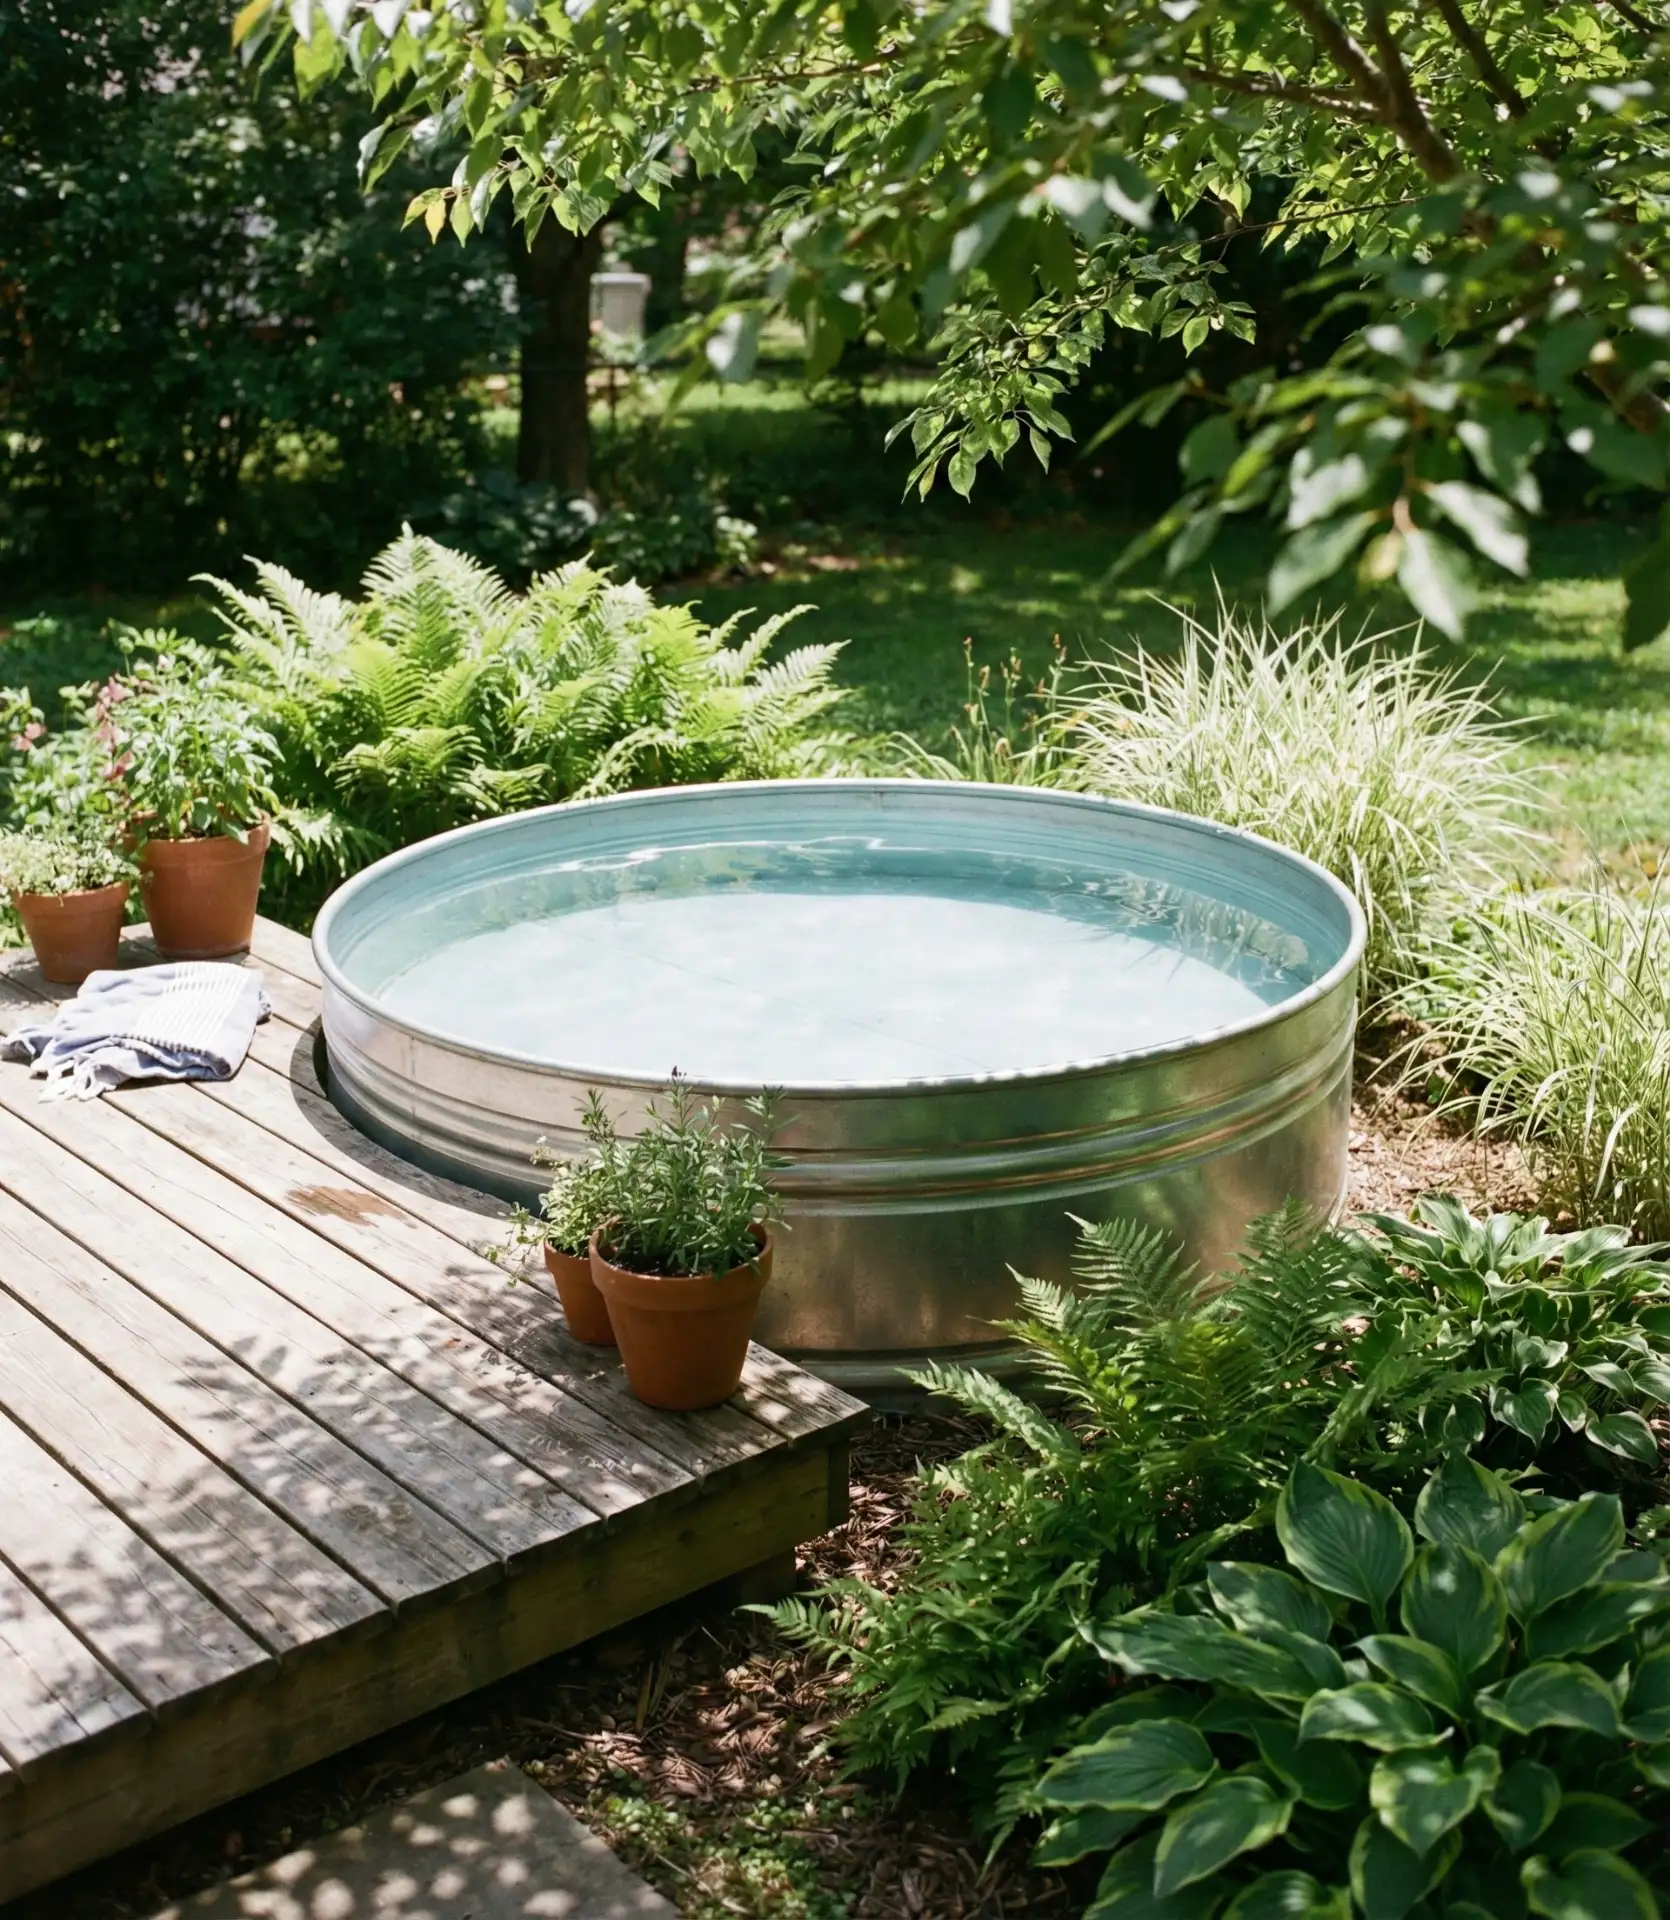
Pools have become an affordable option for families in the Southwest US, and in particular, Texas and Arizona. Summer heat becomes unbearable, and most household pools are too expensive. Each adult fits comfortably in the standard eight-foot pool, which holds 700 gallons. Before installation, make sure to level the ground thoroughly. Think about using a gravel base for drainage. Plan to drain and refill the pool every couple of weeks, or invest in a more costly filtration system. Since metal conducts heat, select a position for the pool to get afternoon shade so the water stays cooler.
17. Layered Ground Cover To Replace Lawn
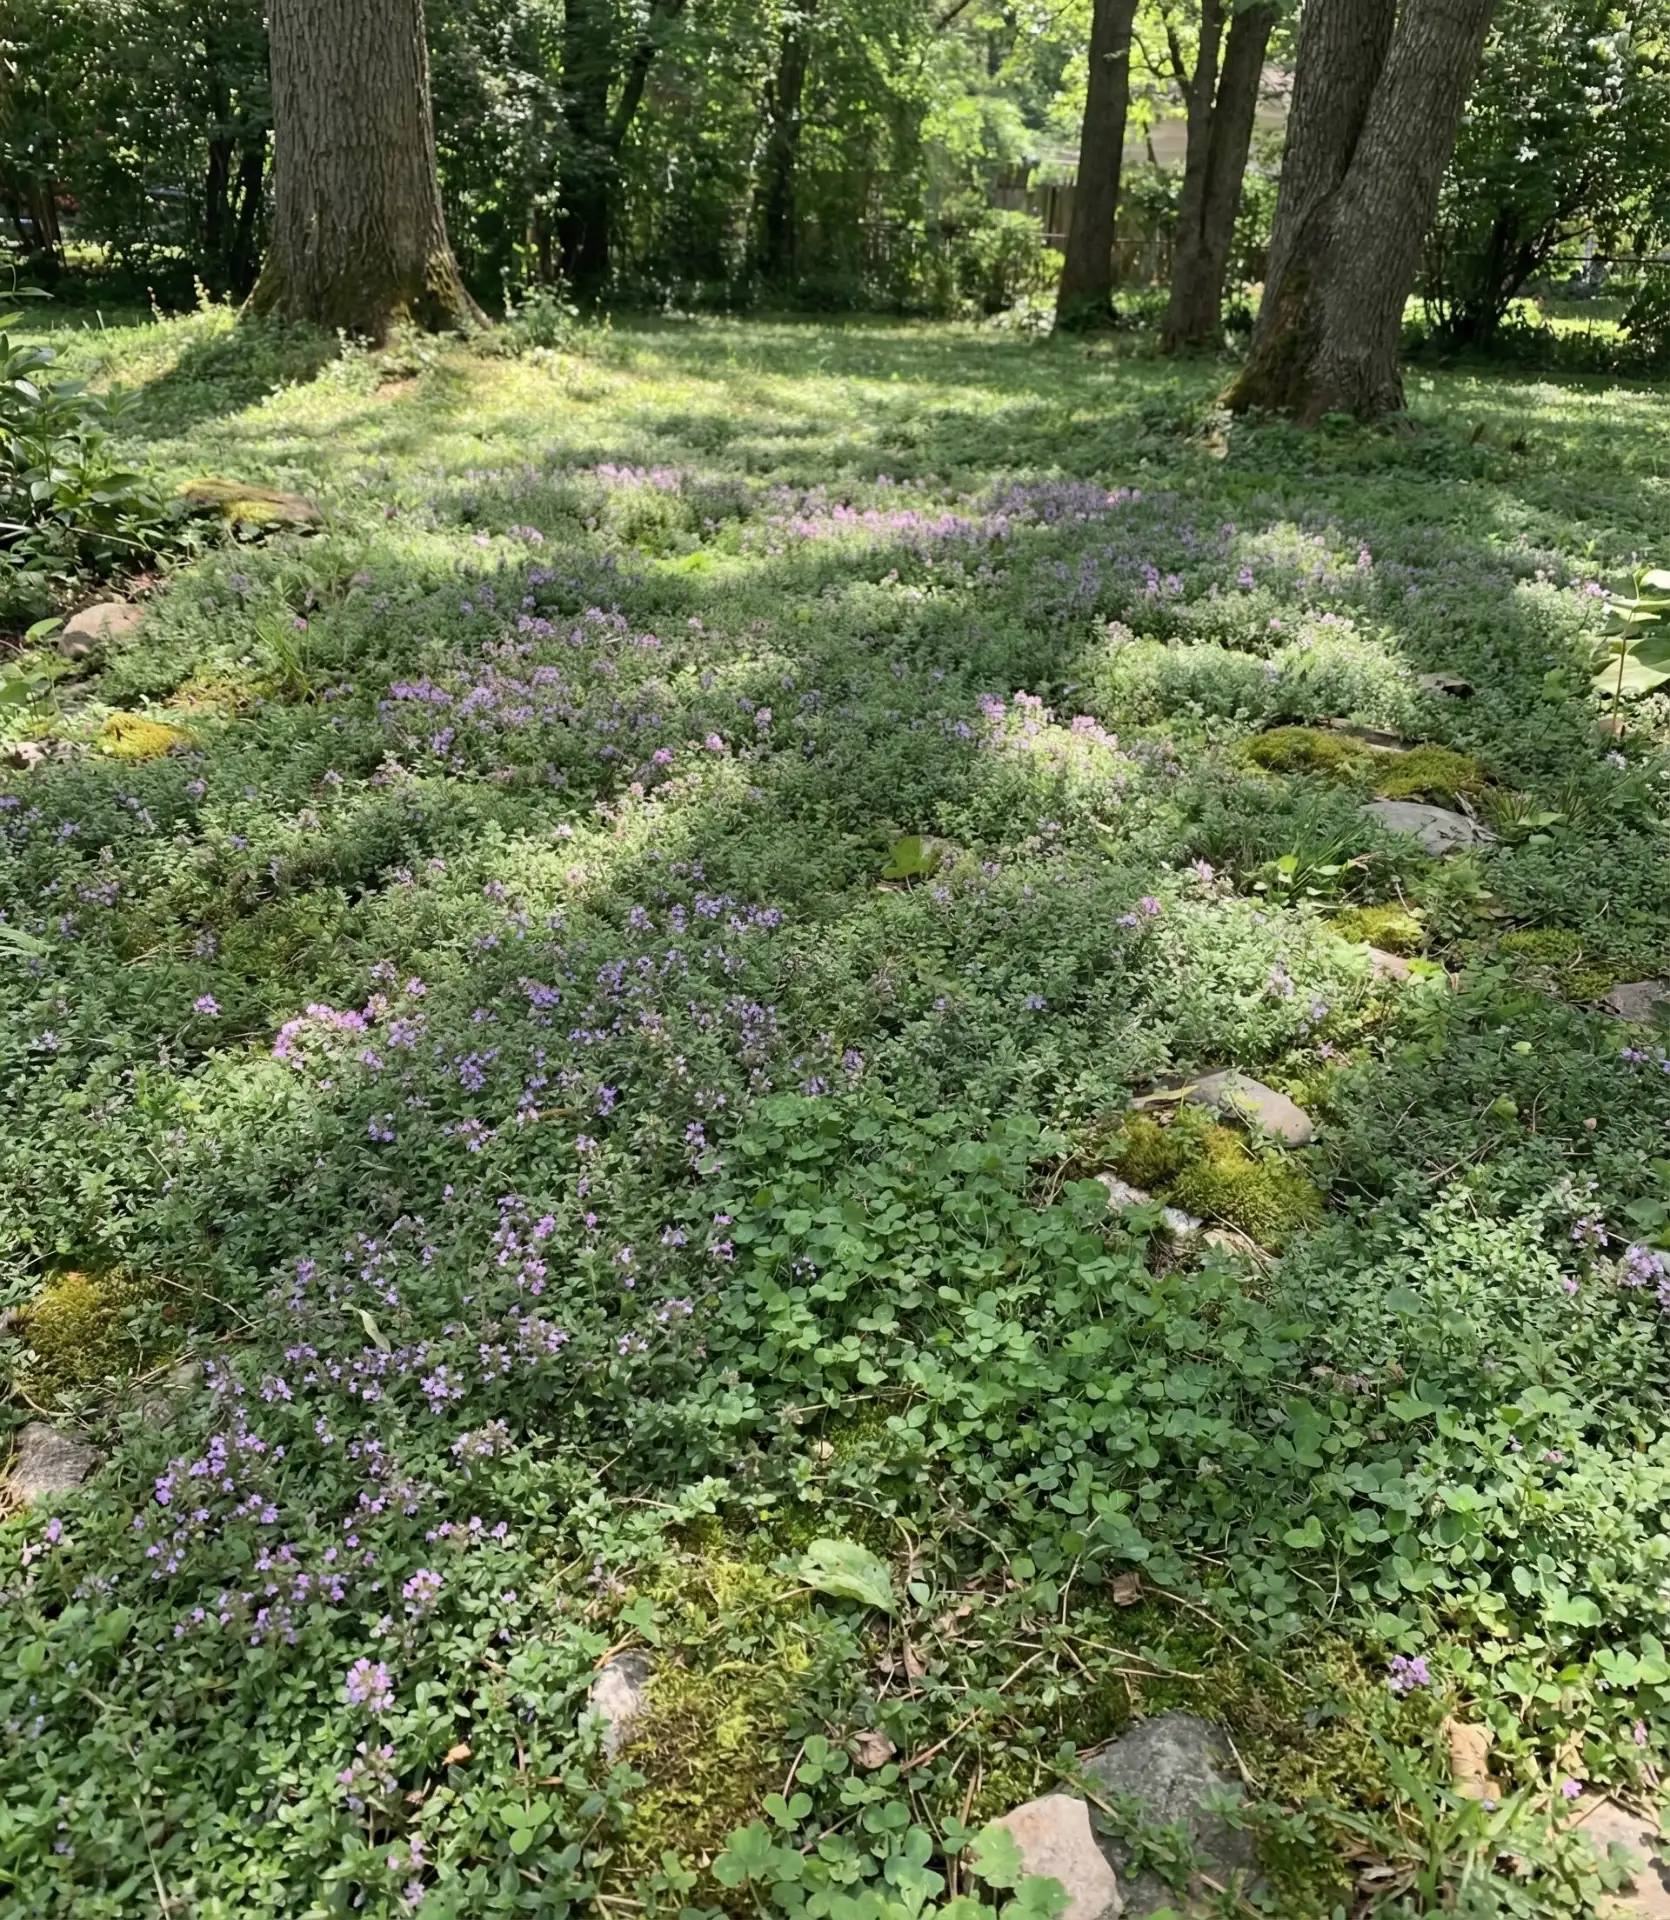
You can replace difficult lawn areas with creeping thyme, clover, or sedum as low-maintenance cover options that eliminate the need to mow and water and just cover the bare soil. This solution is easy and very effective for landscaping problem zones, such as shaded areas under trees, steep slopes where mowing is dangerous, or dry patches where grass won’t grow. It’s an inexpensive solution for about $30 to $60, and the plants fill in the area and spread over time. 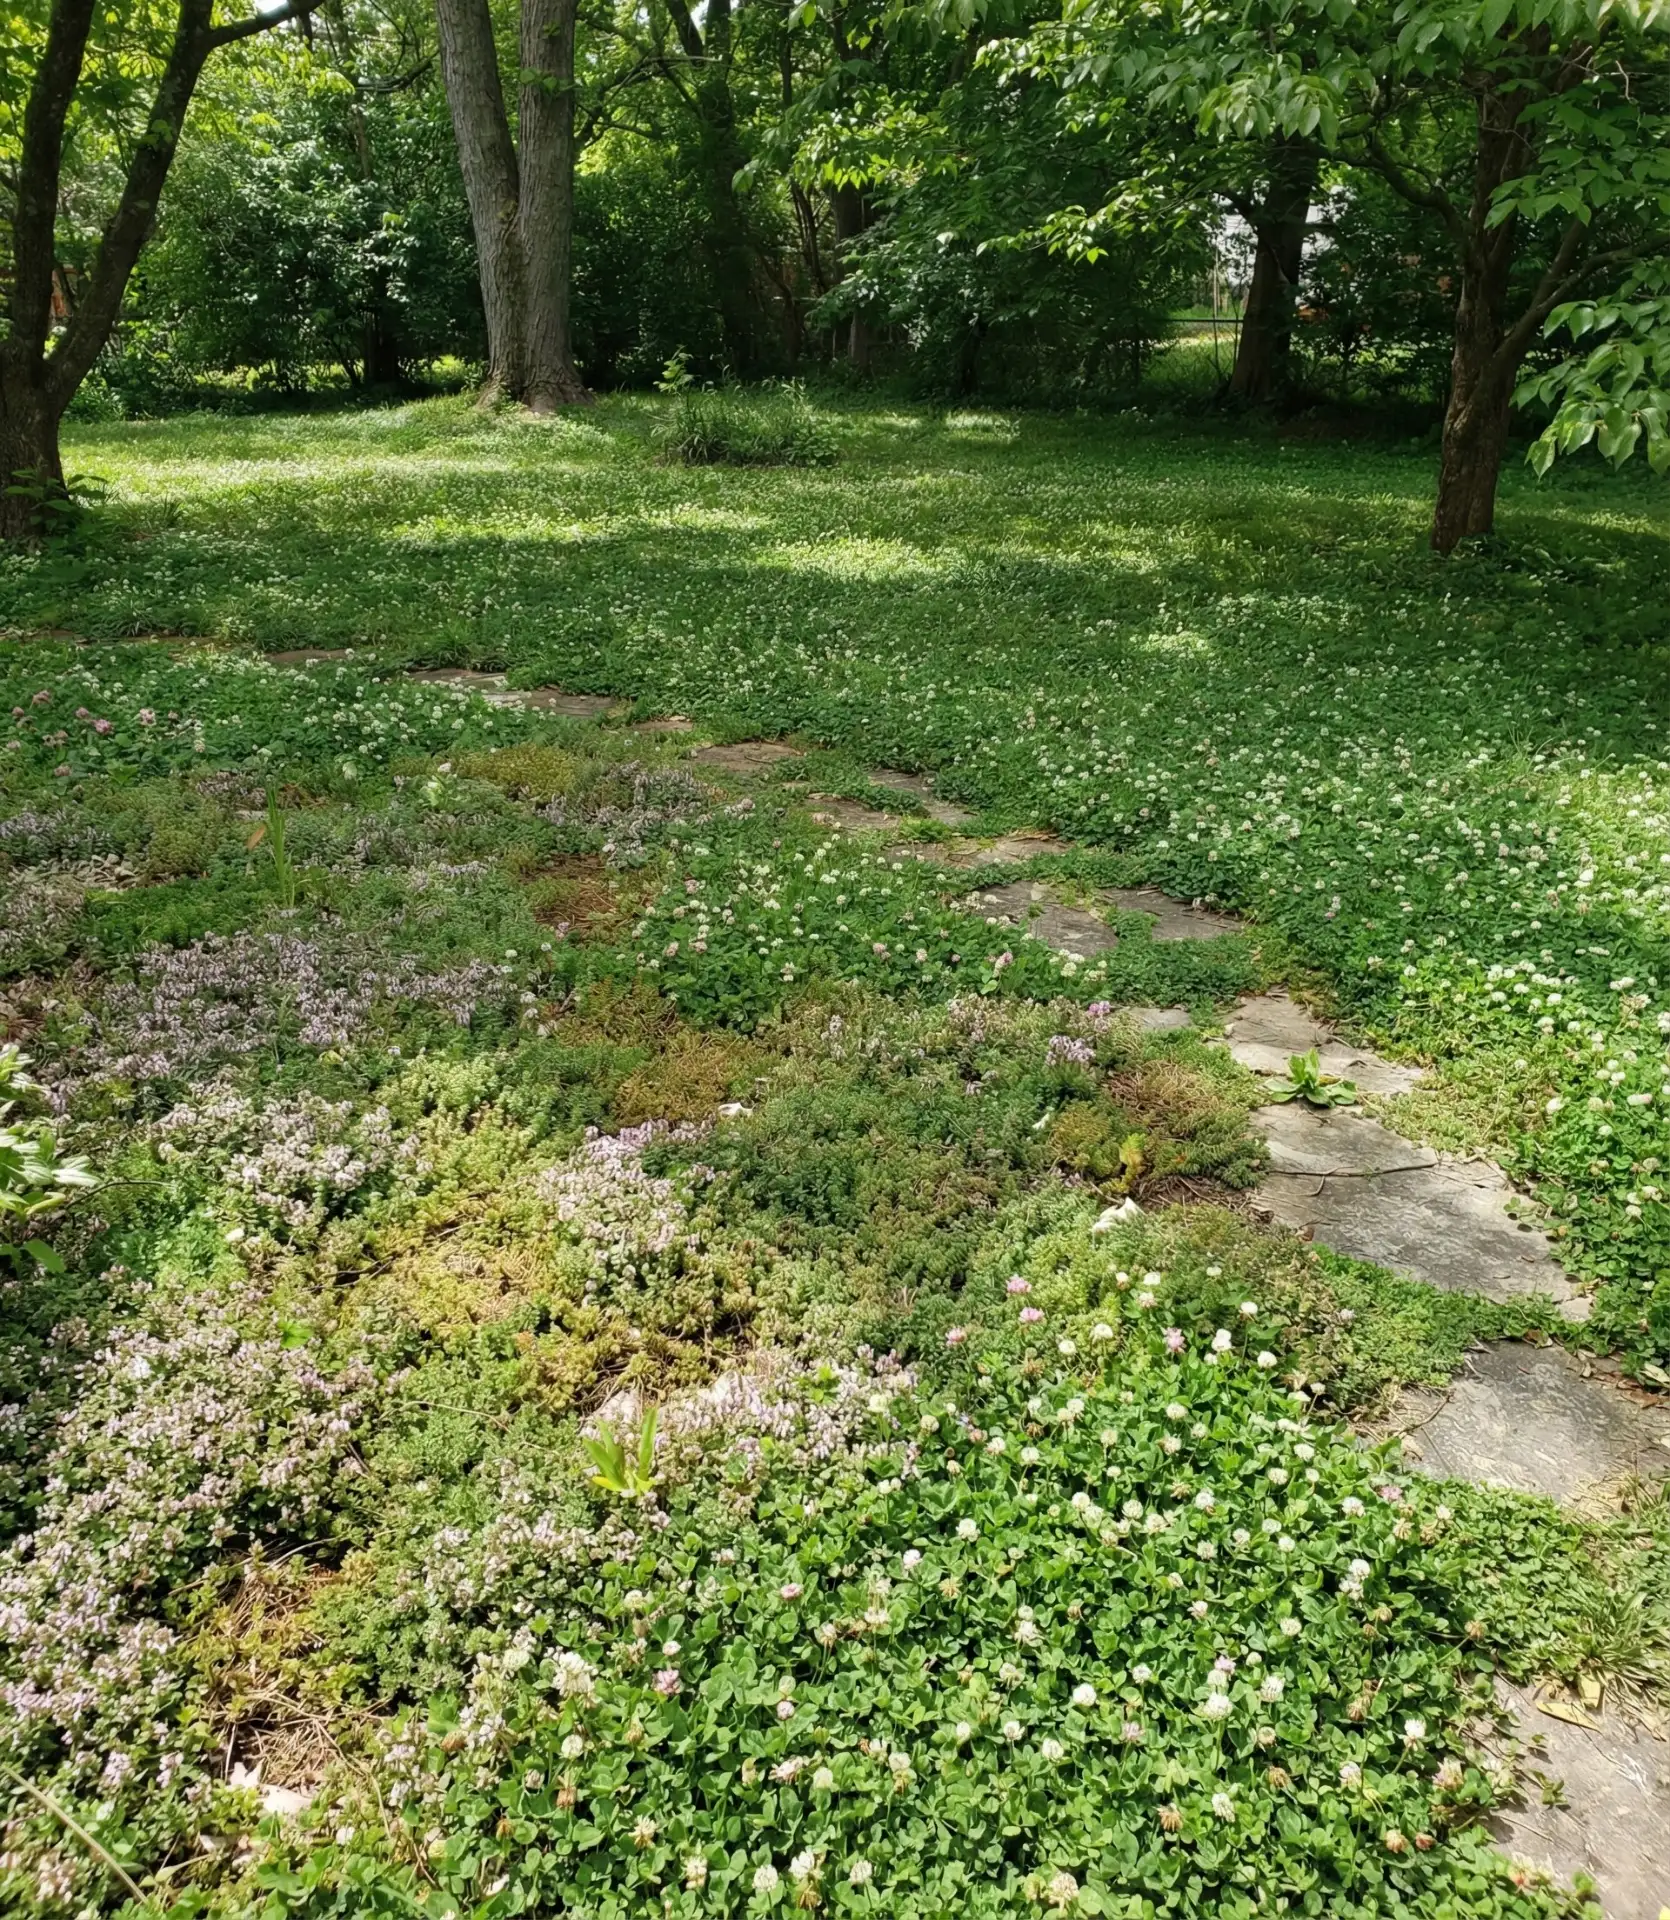
Using cover ground conversions offers the most insight into real homeowner behavior, as starting with one problem patch is tiny, and then they add more as it becomes clear how much easier maintenance is.
Creeping thyme has a pleasant aromatic scent when stepped on that makes a lovely addition for walkable spaces. They also have a complementary purple blooming season. Clover stays green during droughts. It also enriches the soil it grows in by naturally fixing nitrogen. Clear the planting location of all current vegetation, add a layer of compost, and plant the seedlings in a grid pattern. Make sure to water them for the first month and then enjoy the greenery.
18. DIY Cedar Planter Boxes
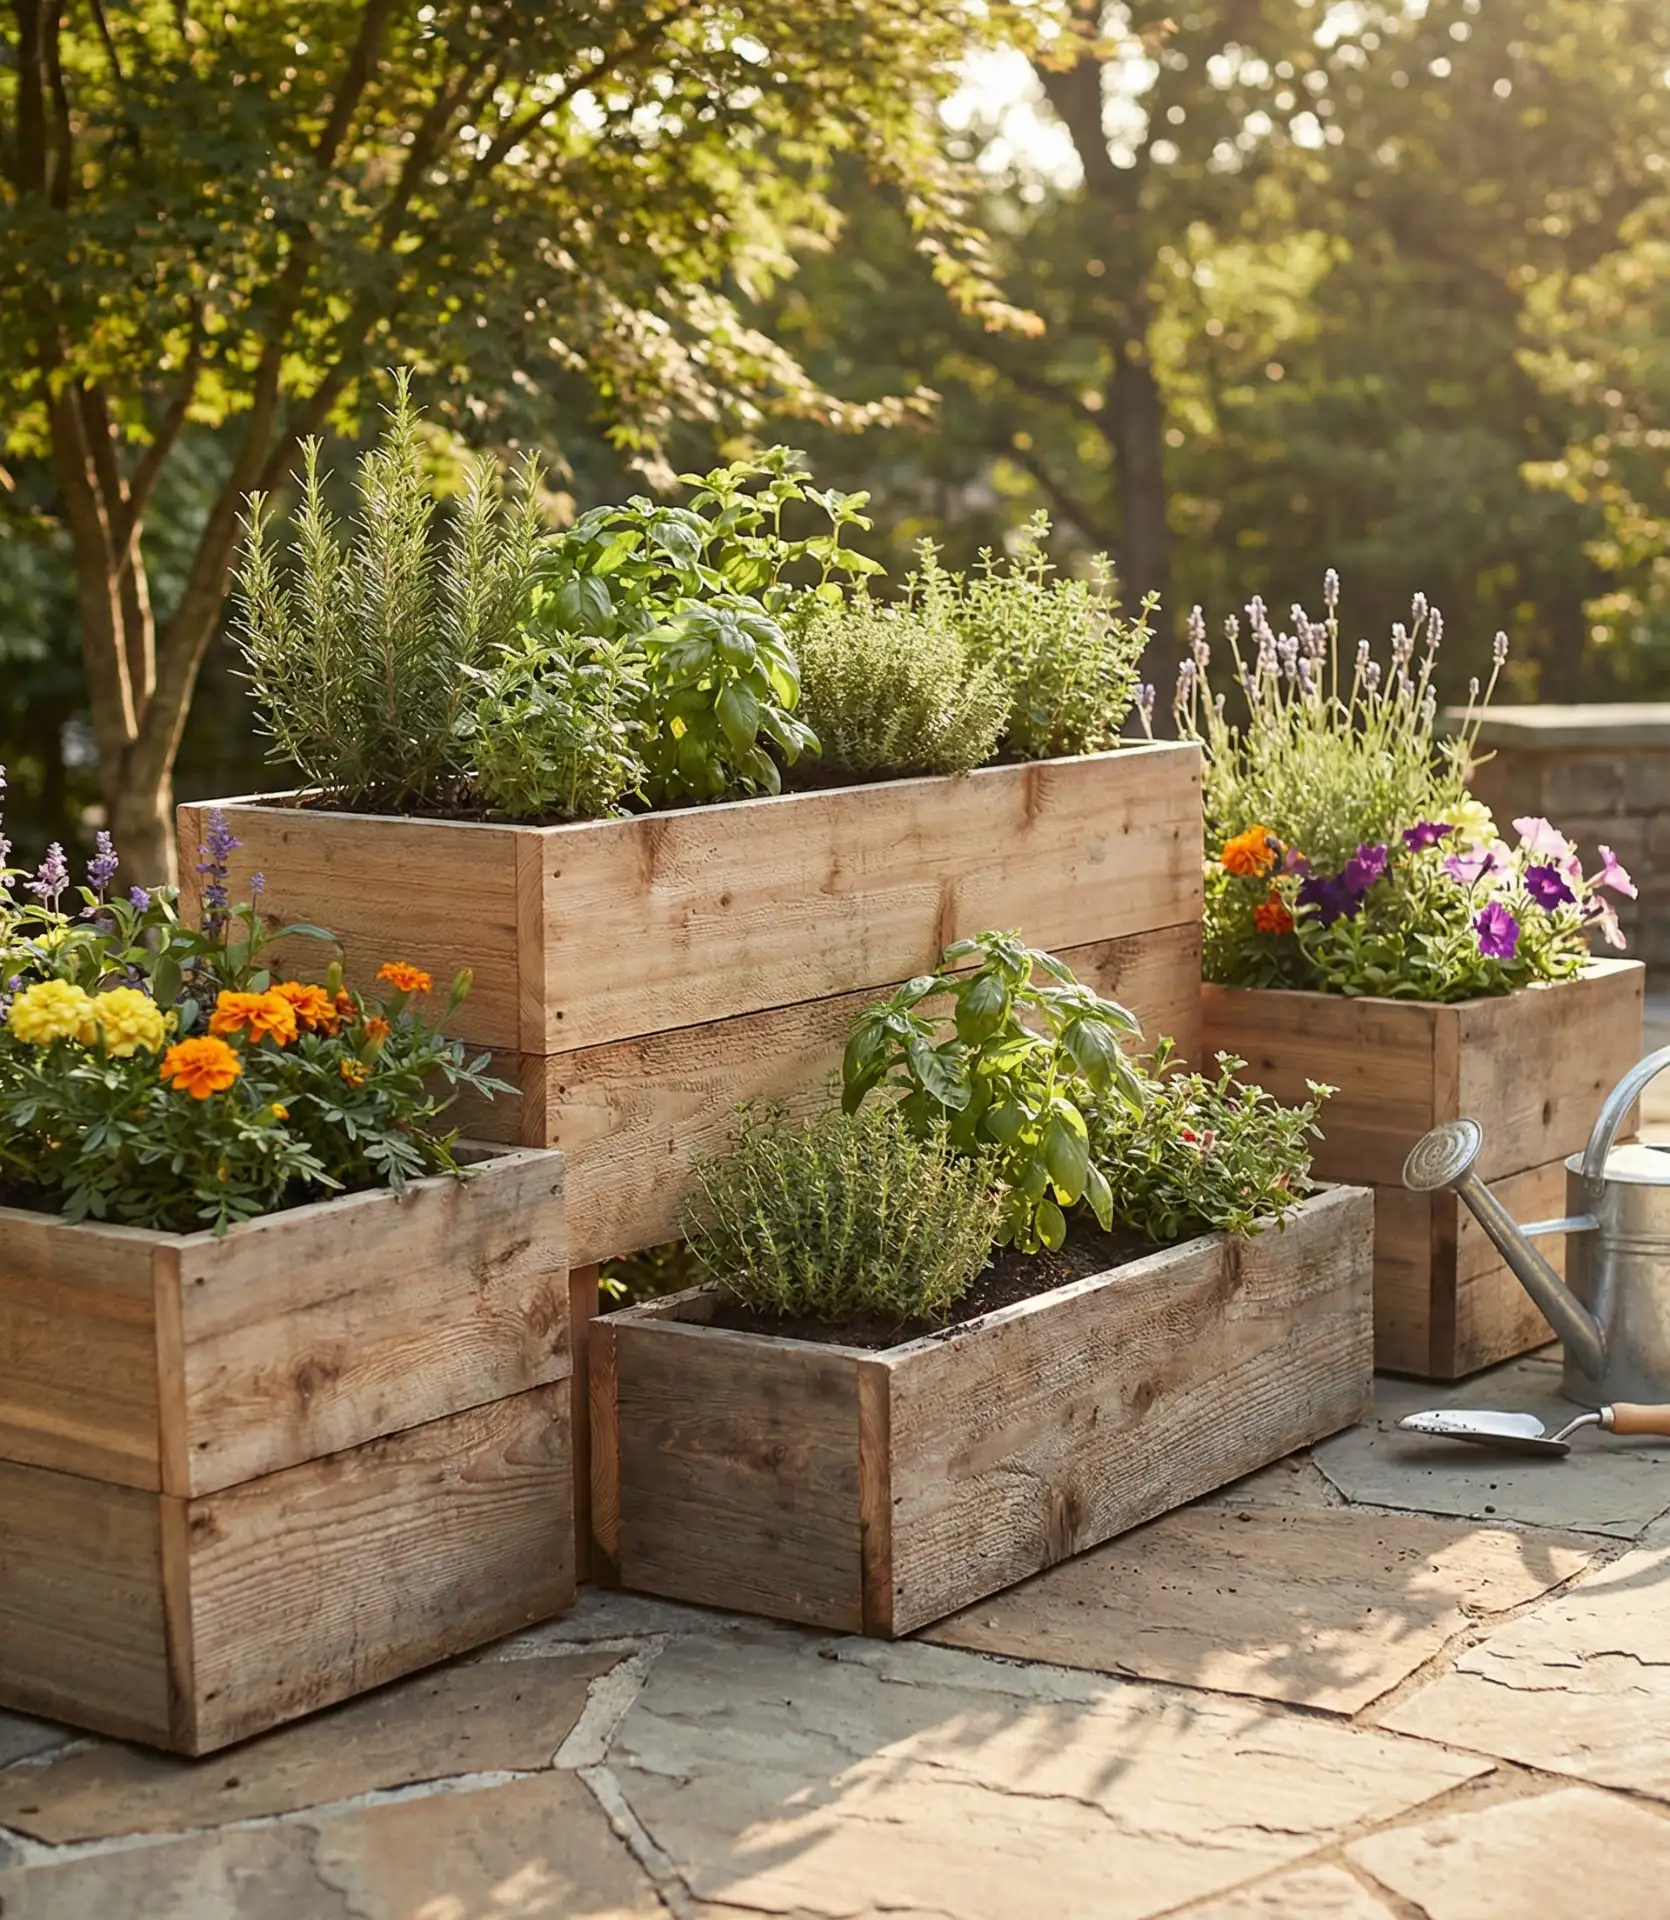
Create your own professional-looking cedar planters at a fraction of the cost. You can pour out cedar, and the durability will also not cost you like other treated wood. You can use a simple layout of 1×6 or 1×8 to craft elegant containers for $25 to $40. To reduce the cost of plant containers, line the insides with landscaping fabric and make sure to include drainage holes. 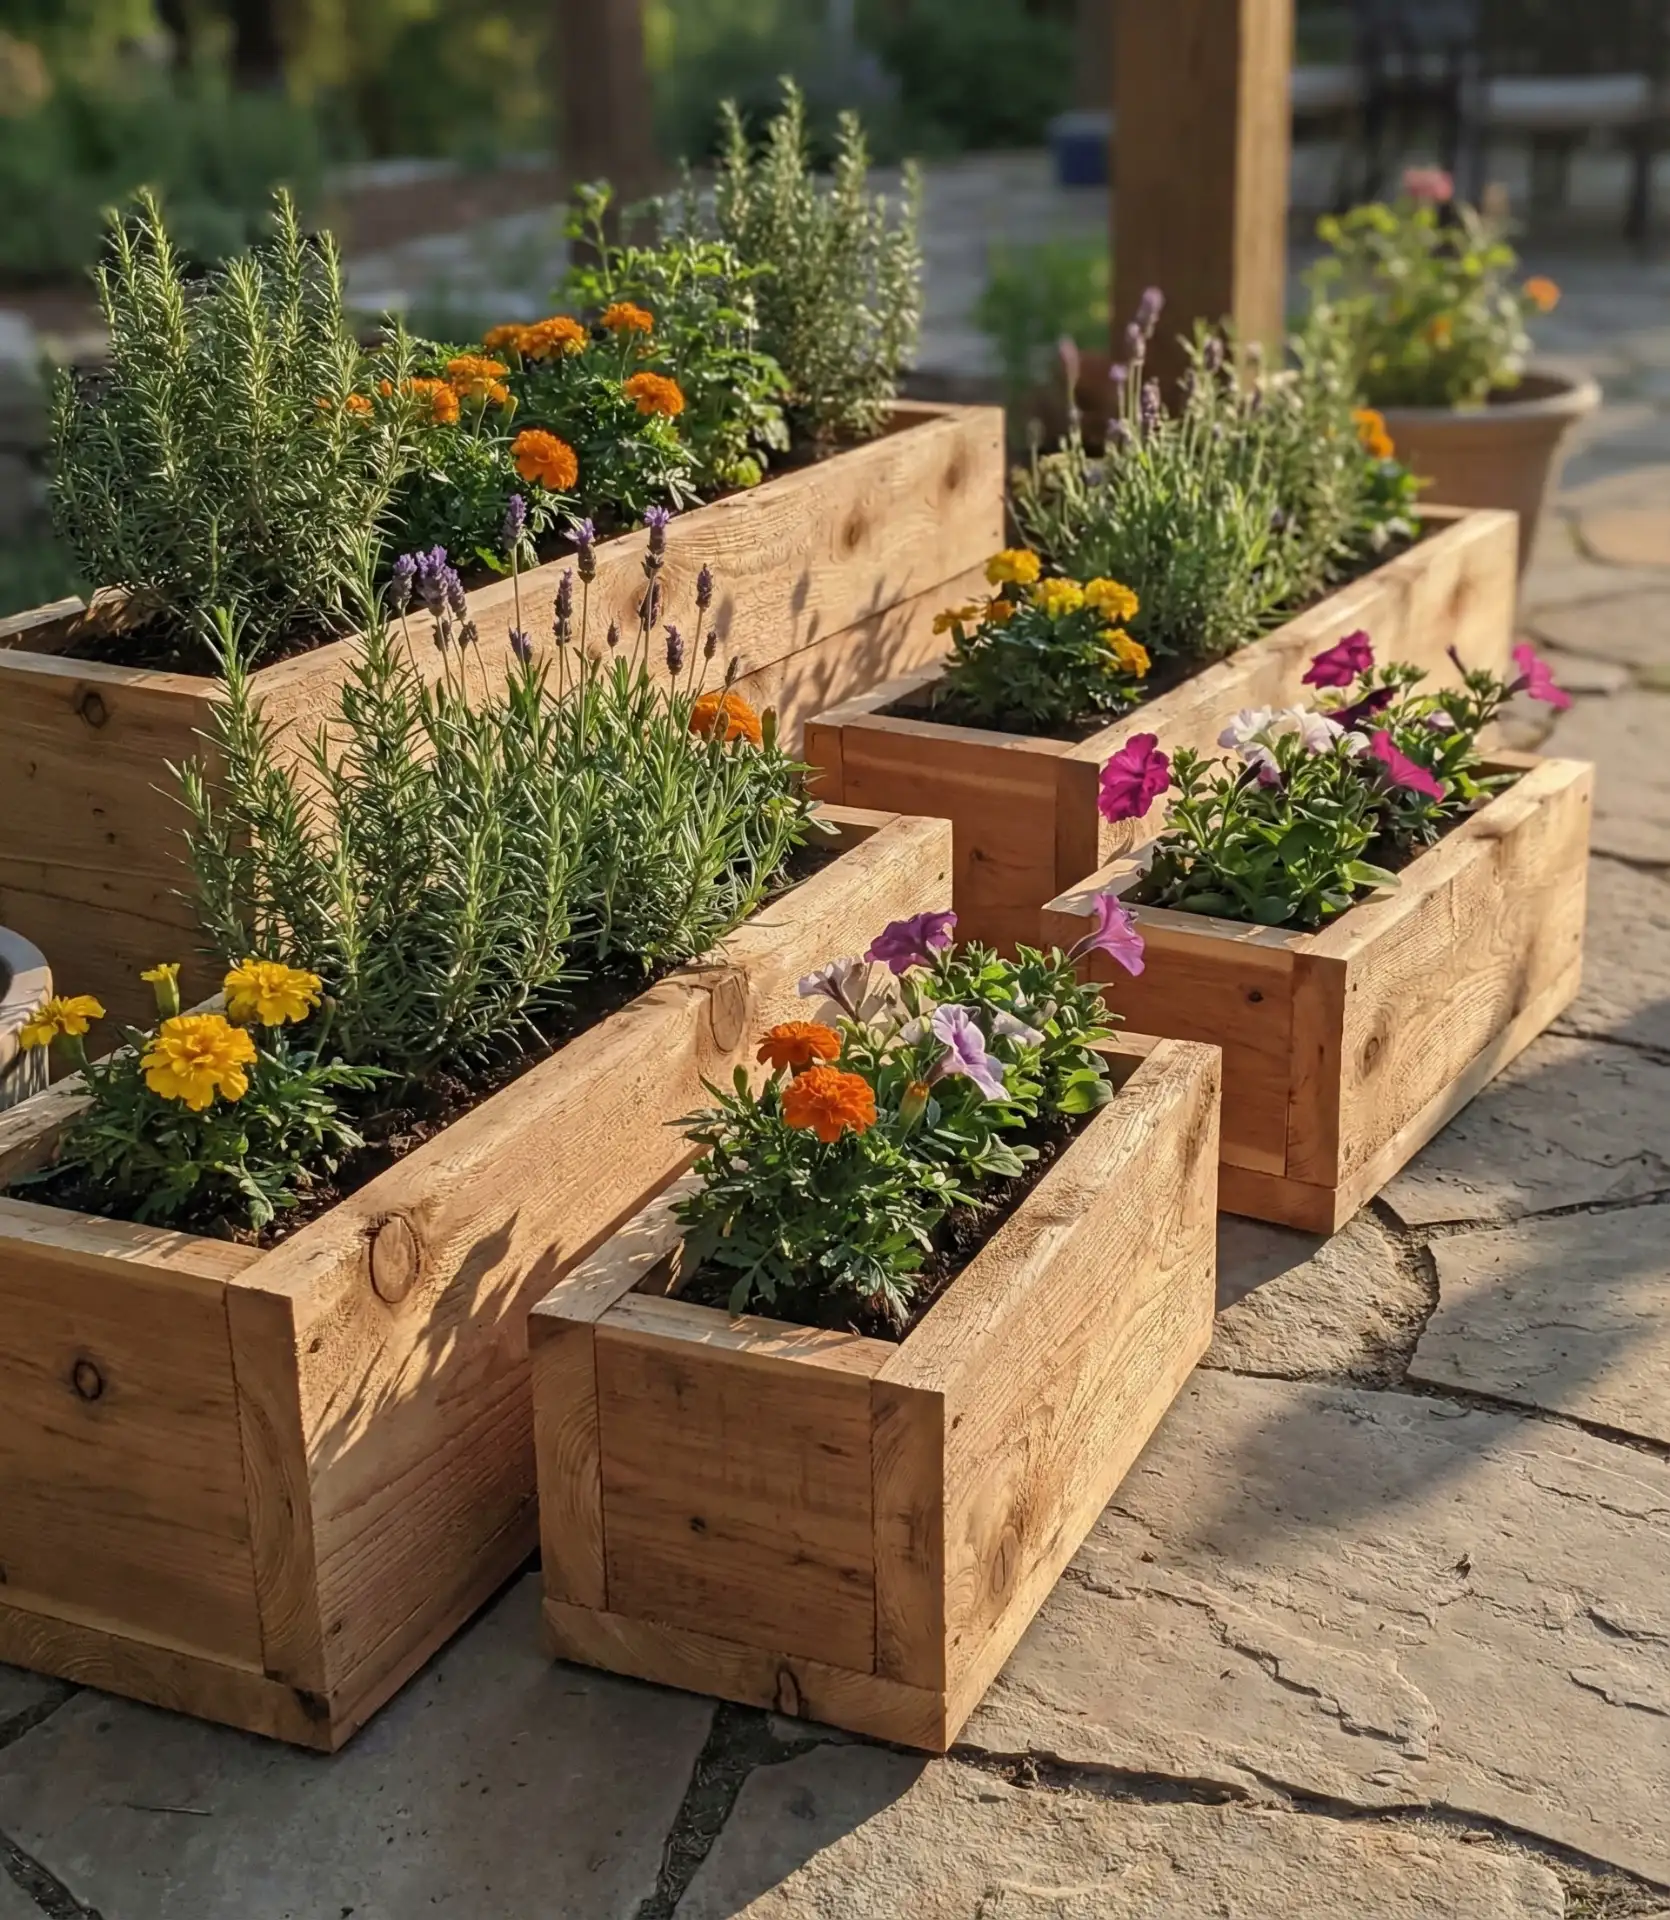
Cedar has proven itself as the smart choice for DIY builders, even with materials as rough as those found in the Northeast and the Pacific Northwest. Let cedar age naturally to a silvery patina, or apply a clear sealer to maintain its warm honey color.
When constructing planters, contemplate incorporating detail casters to enable them to adapt to the sun’s rays and remain shielded from harsh weather conditions. The clean lines of simple cedar boxes complement any architectural style from farmhouse to contemporary.

19. Gravel And Paver Patchwork Patio
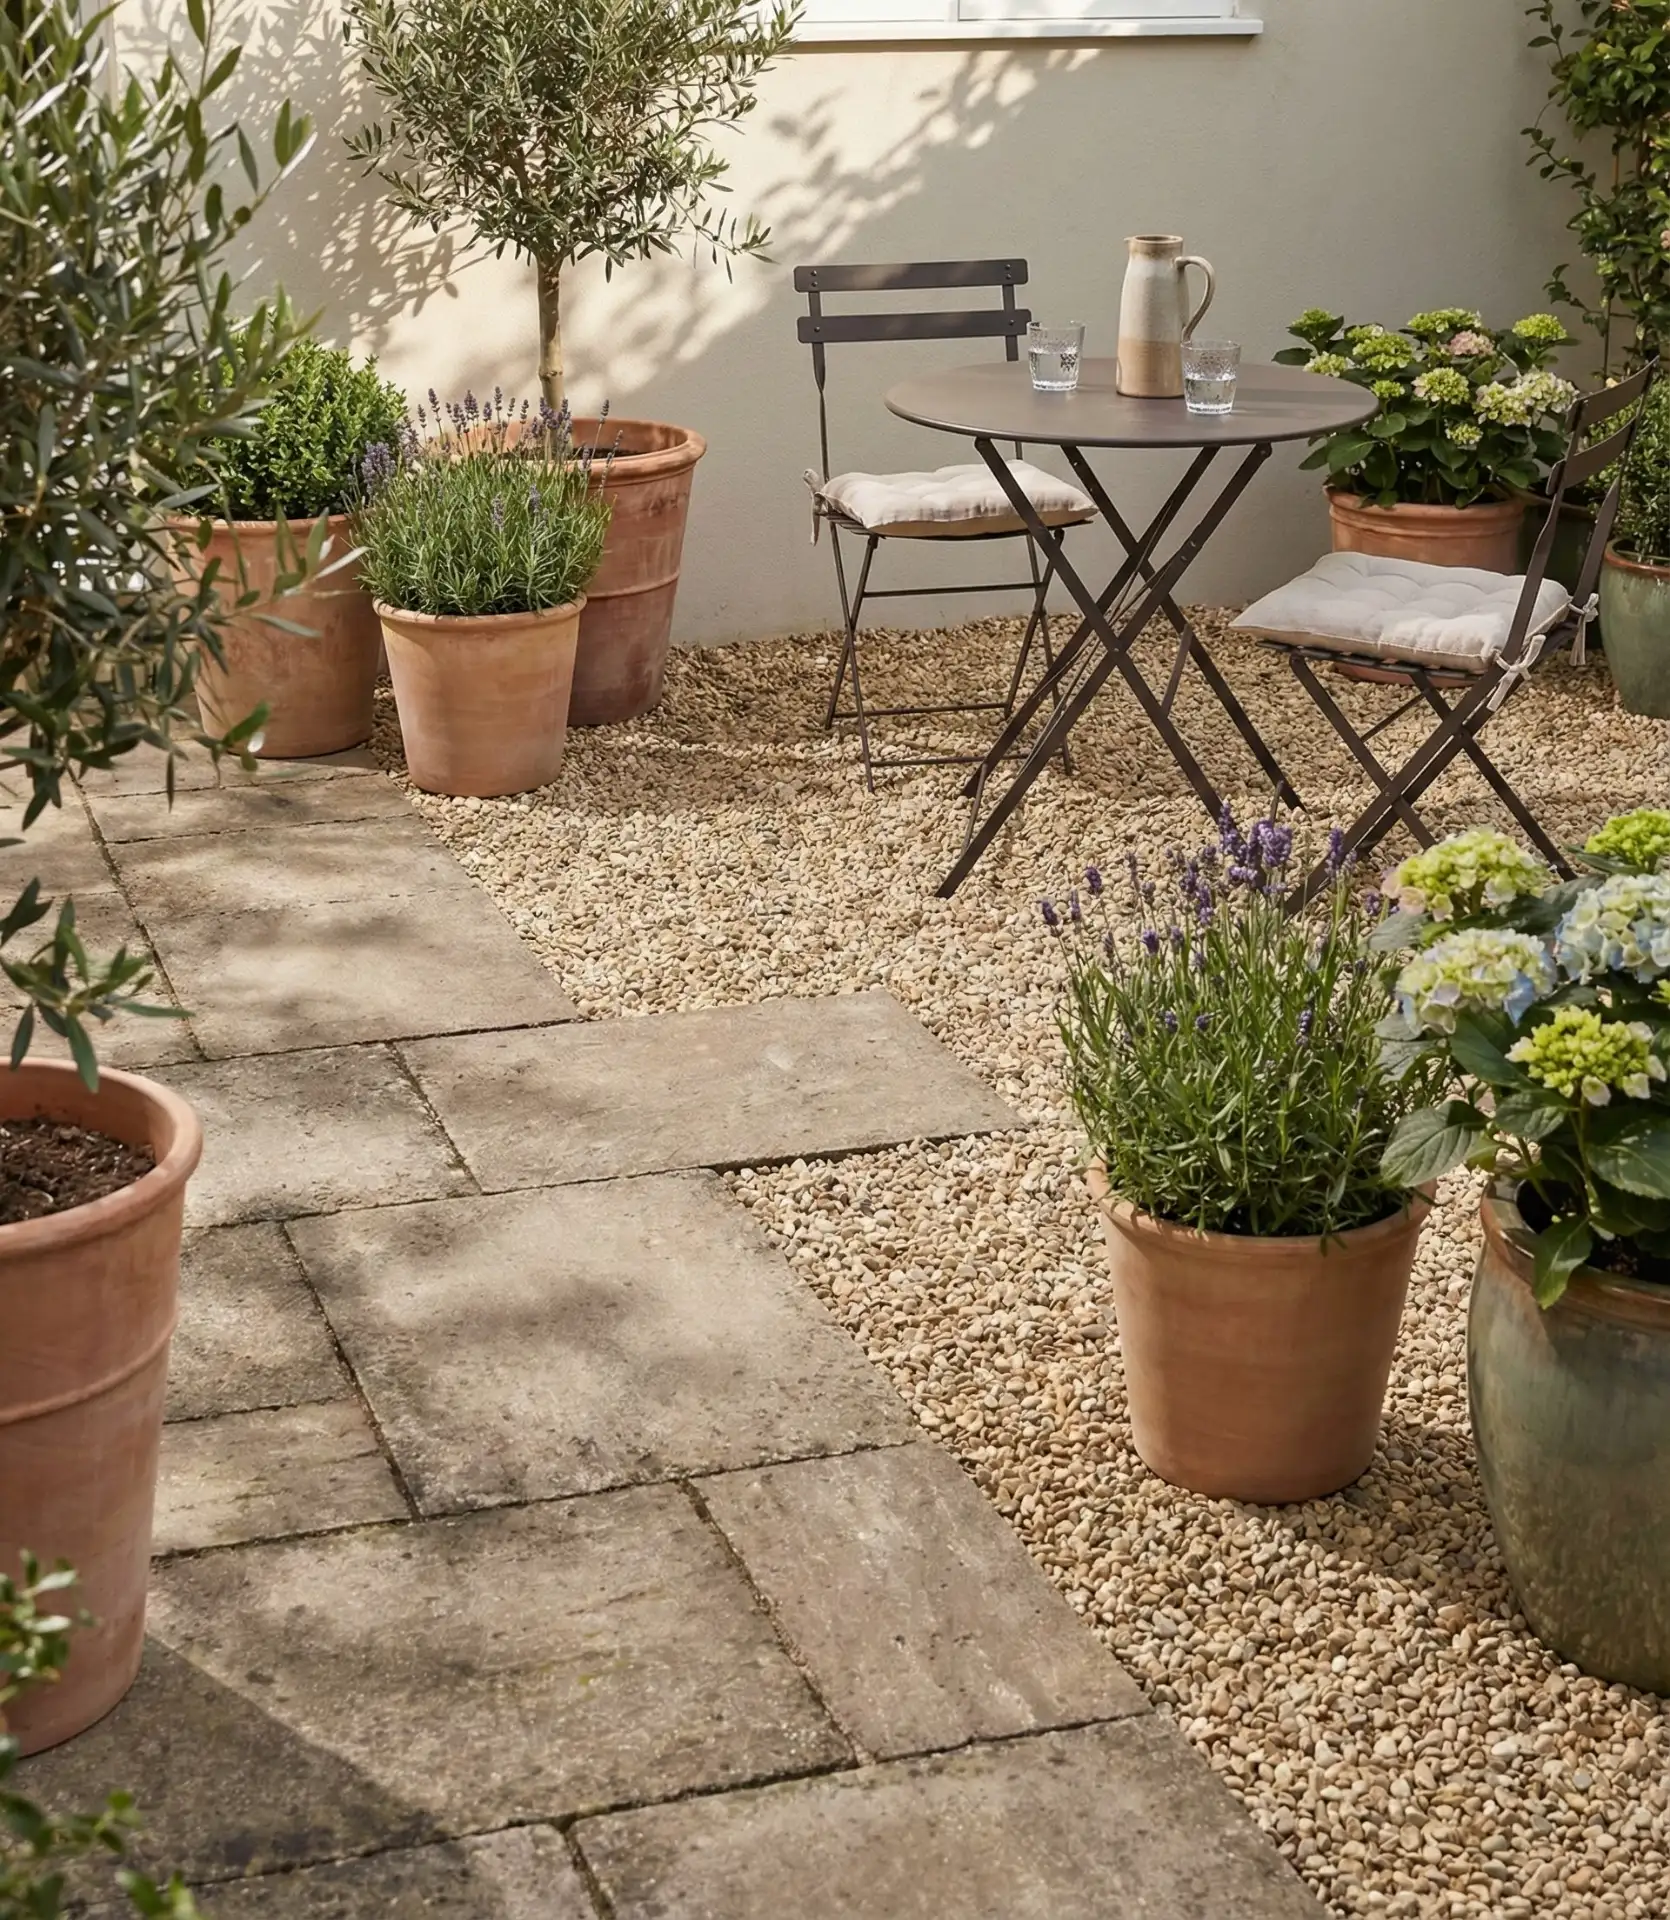
Create a combined material patio using affordable pavers and pea gravel. Even though the materials may be considered budget, the end result can be a high-end and purposely designed look. Pavers can be spaced with gaps, and gravel can be added to those gaps. Such techniques can also create high-end-looking sections for your patio. A dining section with surrounding gravel pathways can center the patio and help define parts. This arrangement adds to and increases the desired appearance of the patio, while also decreasing the quantity of pavers needed to achieve the space. 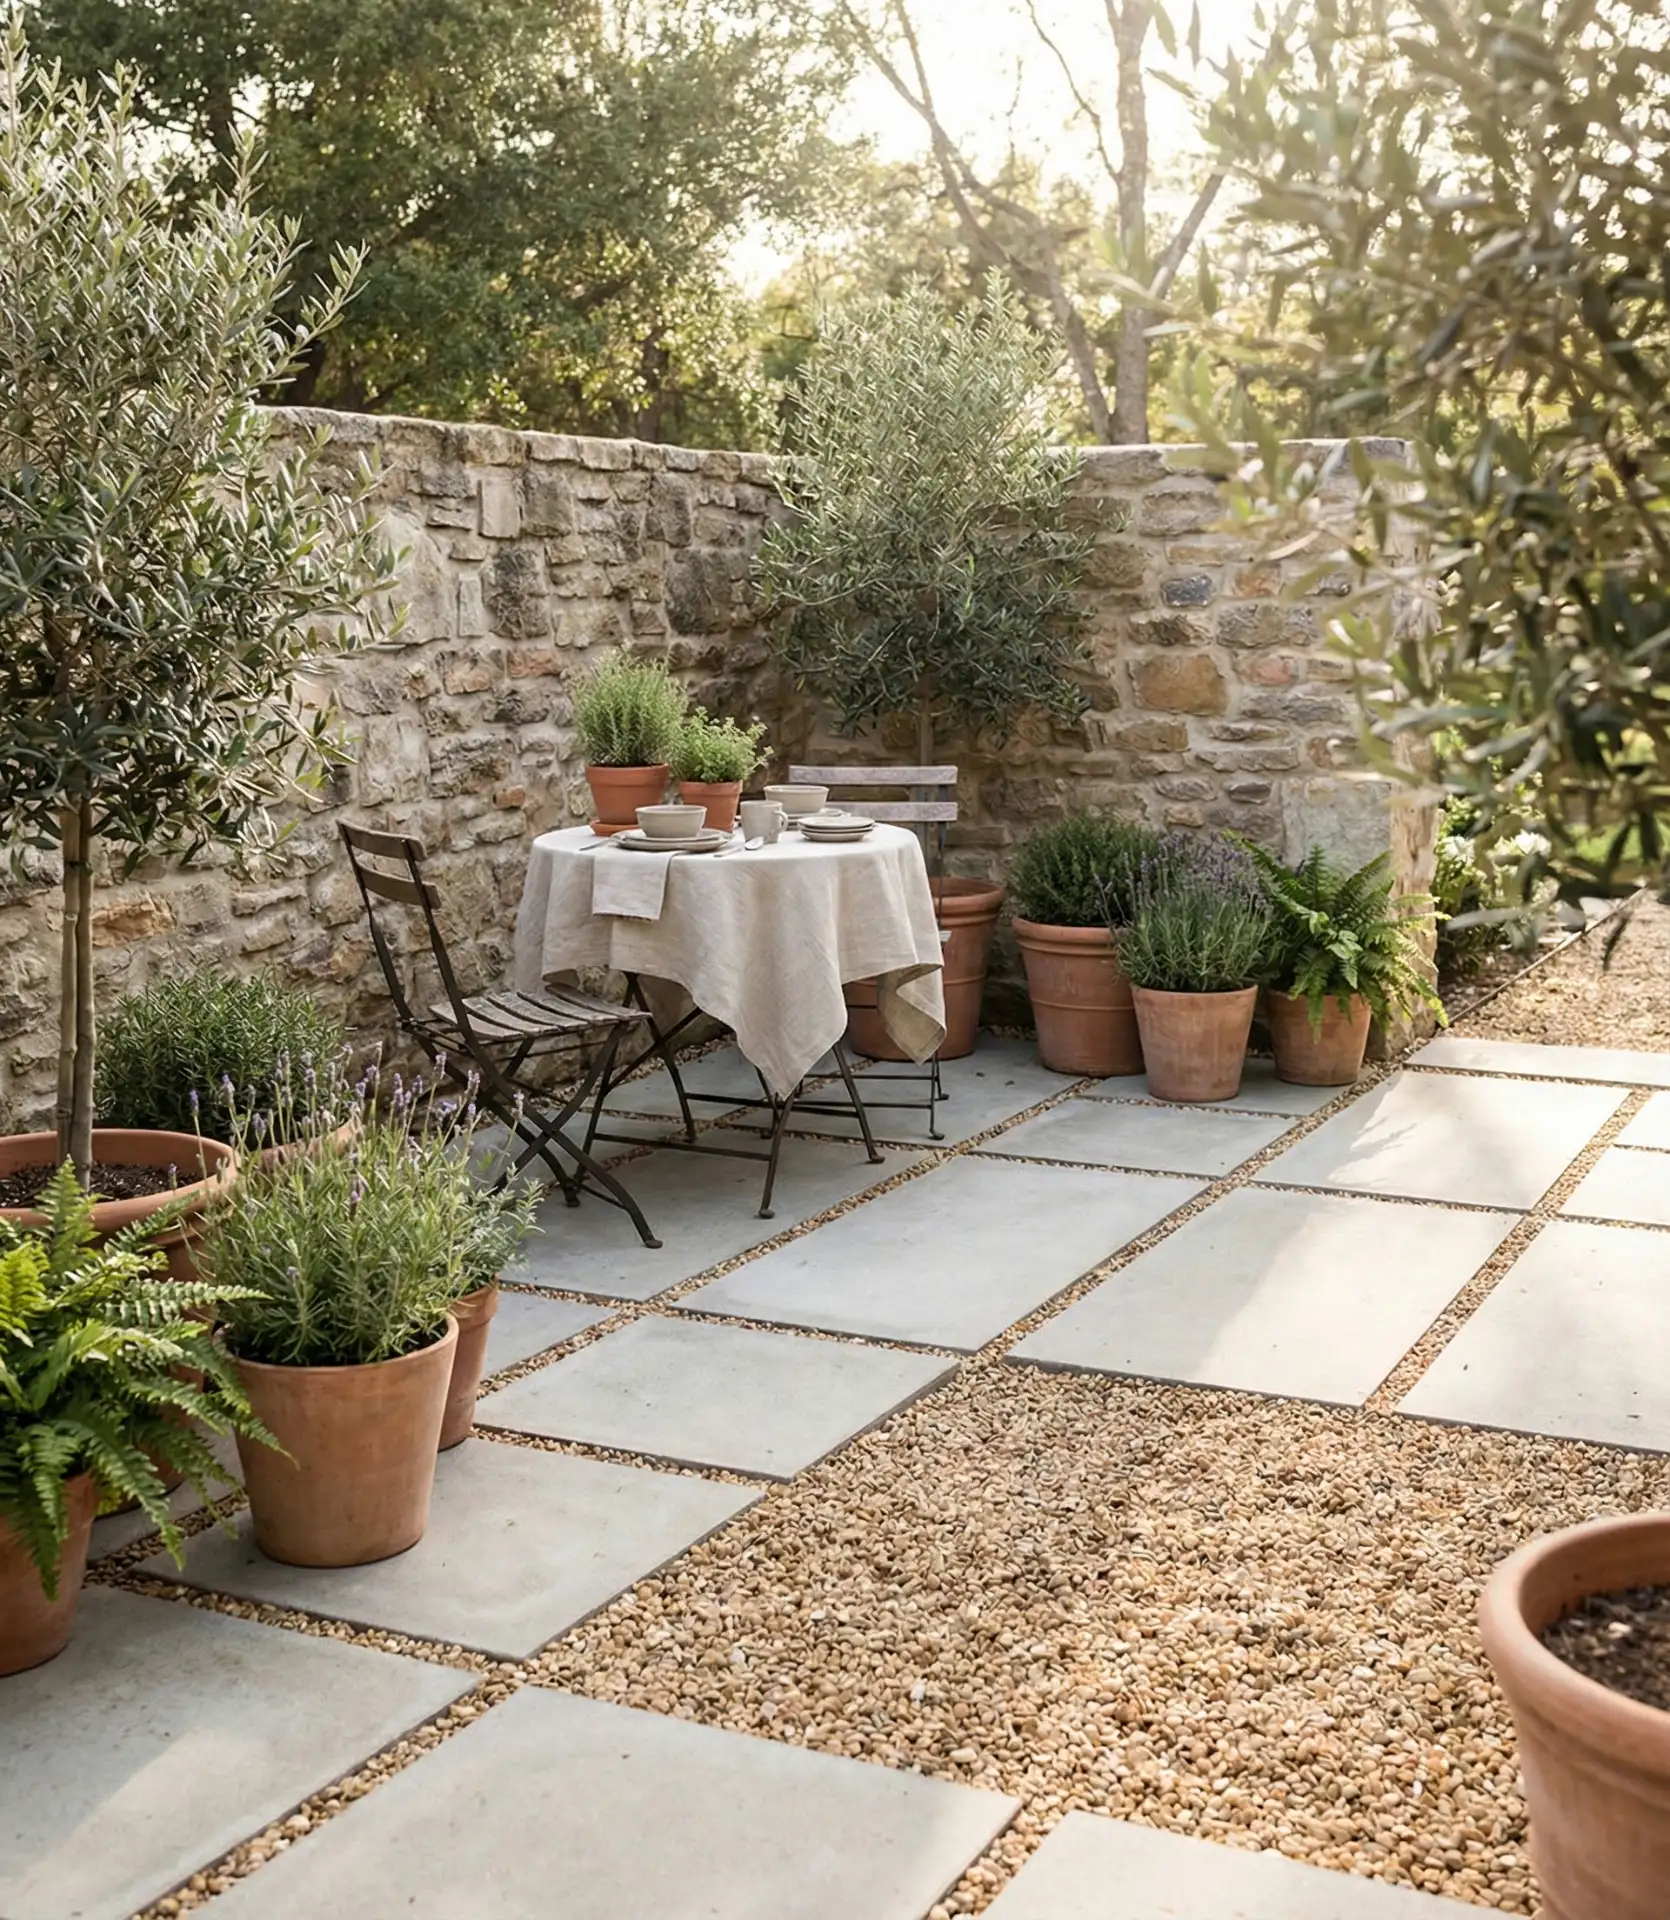
This design strategy stretches materials further—a full paver patio might cost $3,000, but this hybrid approach delivers similar functionality for $800-$1,200. Excavate 4-6 inches, add a compacted gravel base, top with sand, set pavers level, then fill spaces with decorative gravel. The key is proper base preparation to prevent settling. This technique works exceptionally well in cottage-style or informal landscapes where the textural variety feels appropriate. Gravel sections also provide excellent drainage, preventing puddles that plague solid patios.
20. Repurposed Ladder Plant Display

Lean an old wooden ladder against your fence or house wall and use the rungs as shelves for potted plants, creating vertical interest without building permanent structures. This simple solution works for renters since nothing attaches permanently to the property. Paint the ladder to coordinate with your color scheme, or leave it weathered for rustic charm. Each rung holds multiple small pots, maximizing growing space in a small footprint while adding architectural dimension to flat surfaces. 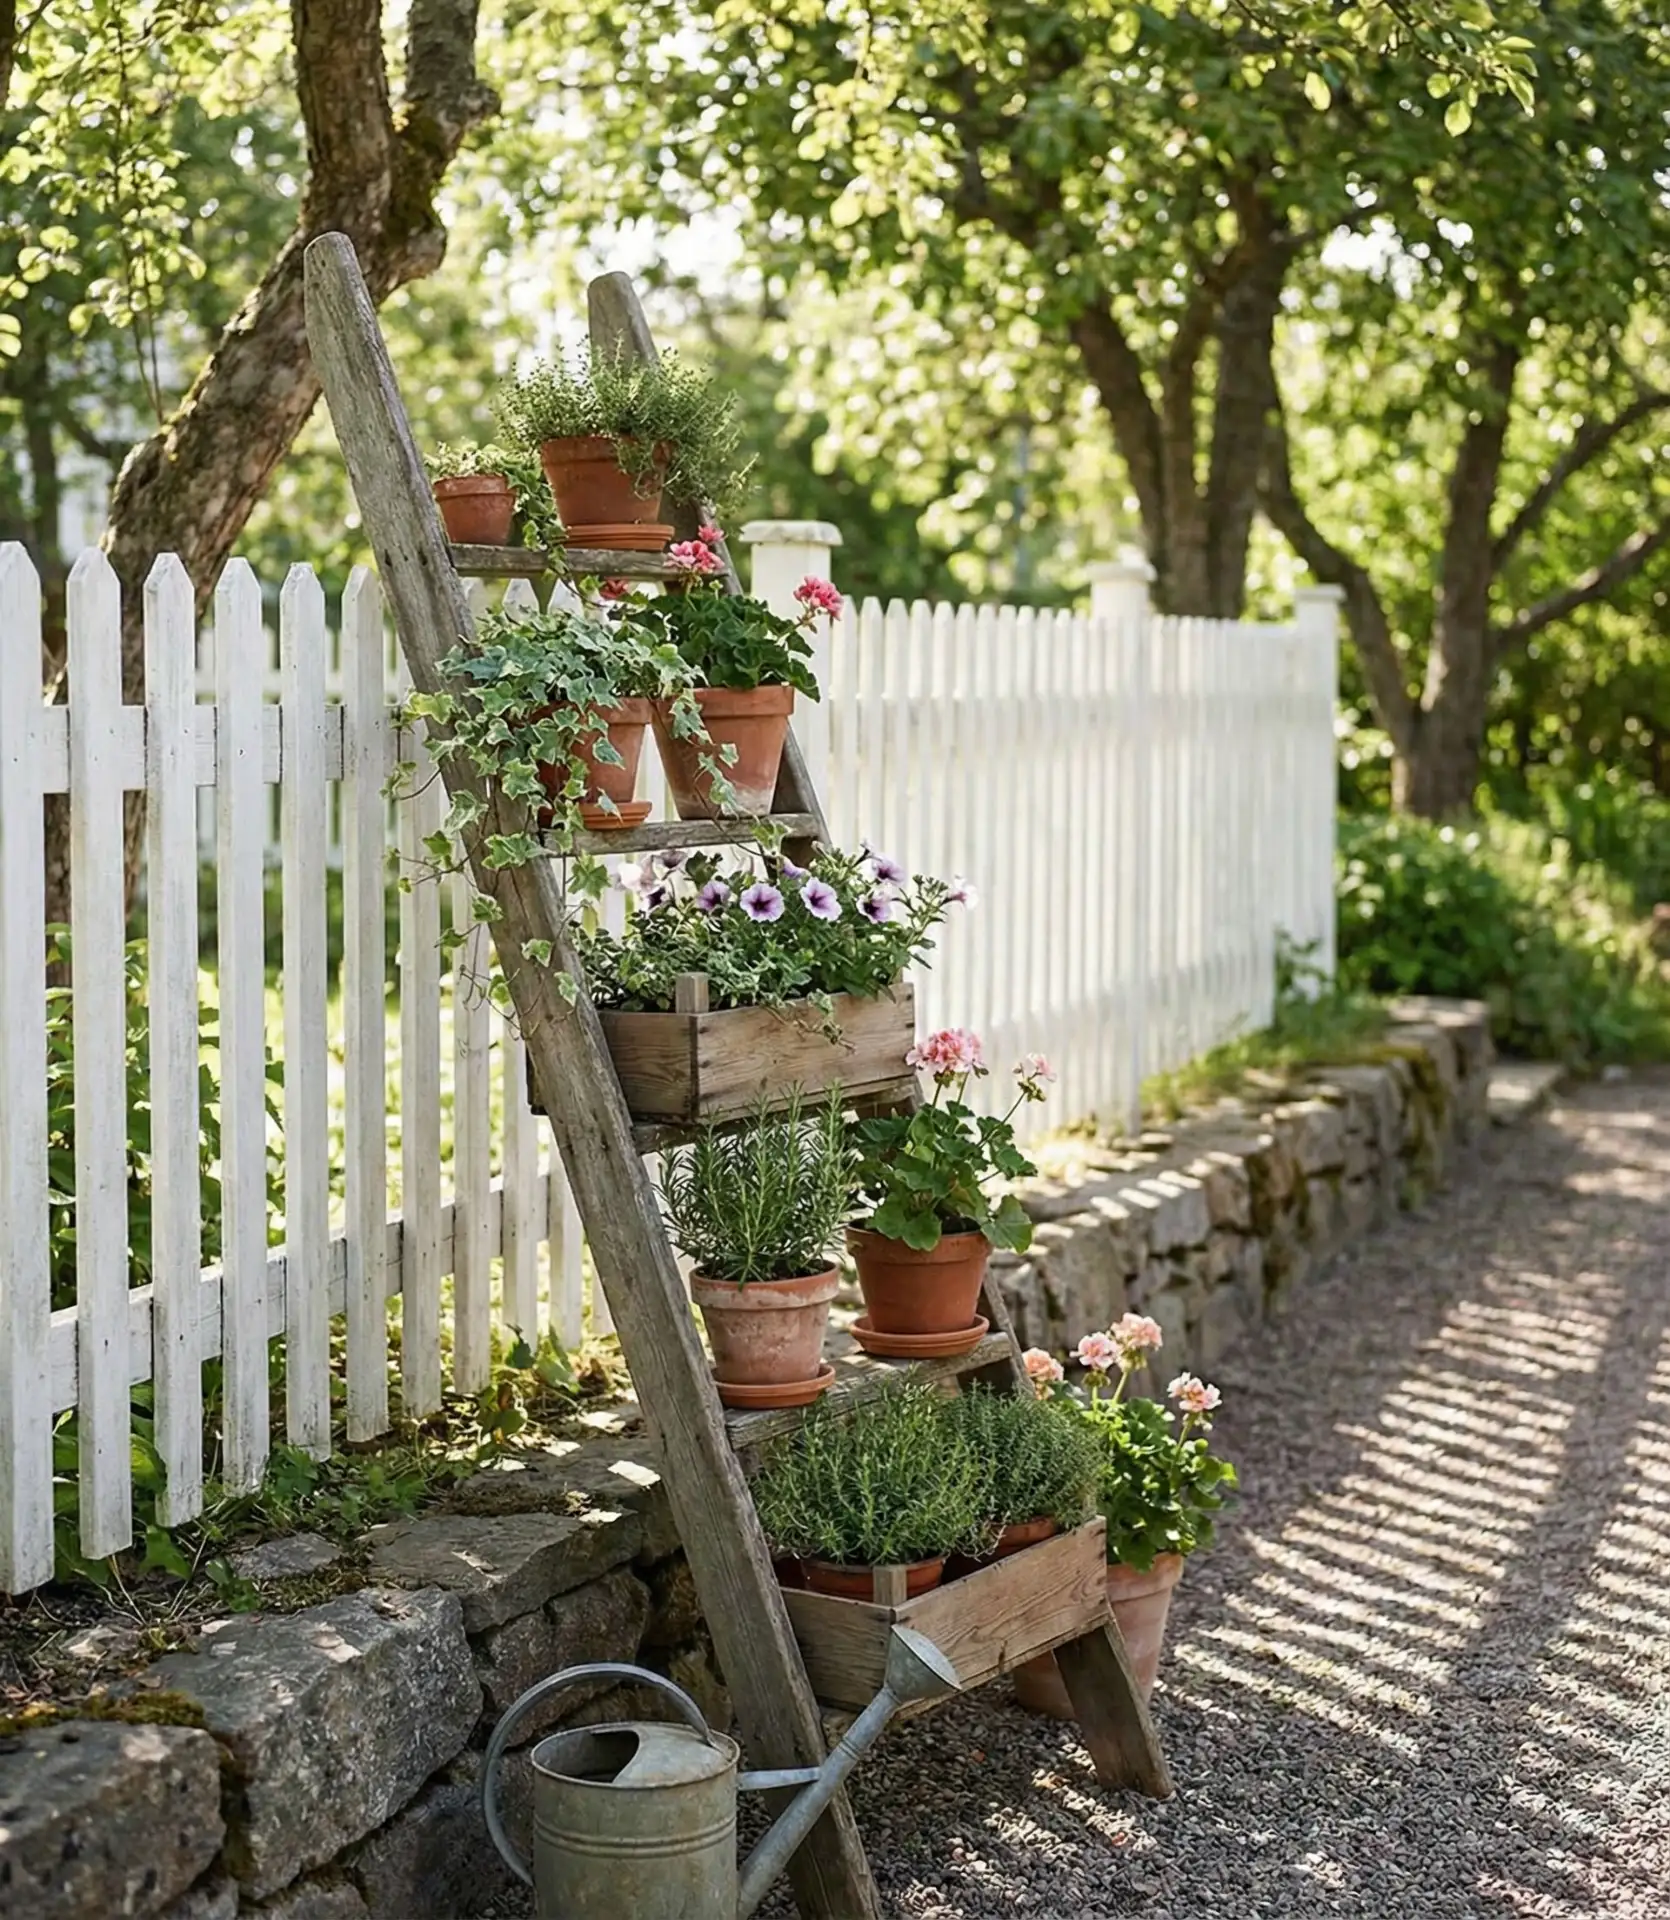
A design-conscious friend in Brooklyn transformed a $10 flea market ladder into her patio’s focal point—proof this technique works in urban settings where vertical space is premium real estate. Secure the ladder base if kids or pets might knock it over, and choose lightweight pots to prevent stress on rungs. This display method makes watering easy since plants are eye level rather than ground level. Rotate plant placement seasonally—spring bulbs, summer herbs, fall mums—keeping your outdoor space dynamic throughout the year.
21. Simple Gazebo Frame With Fabric Top
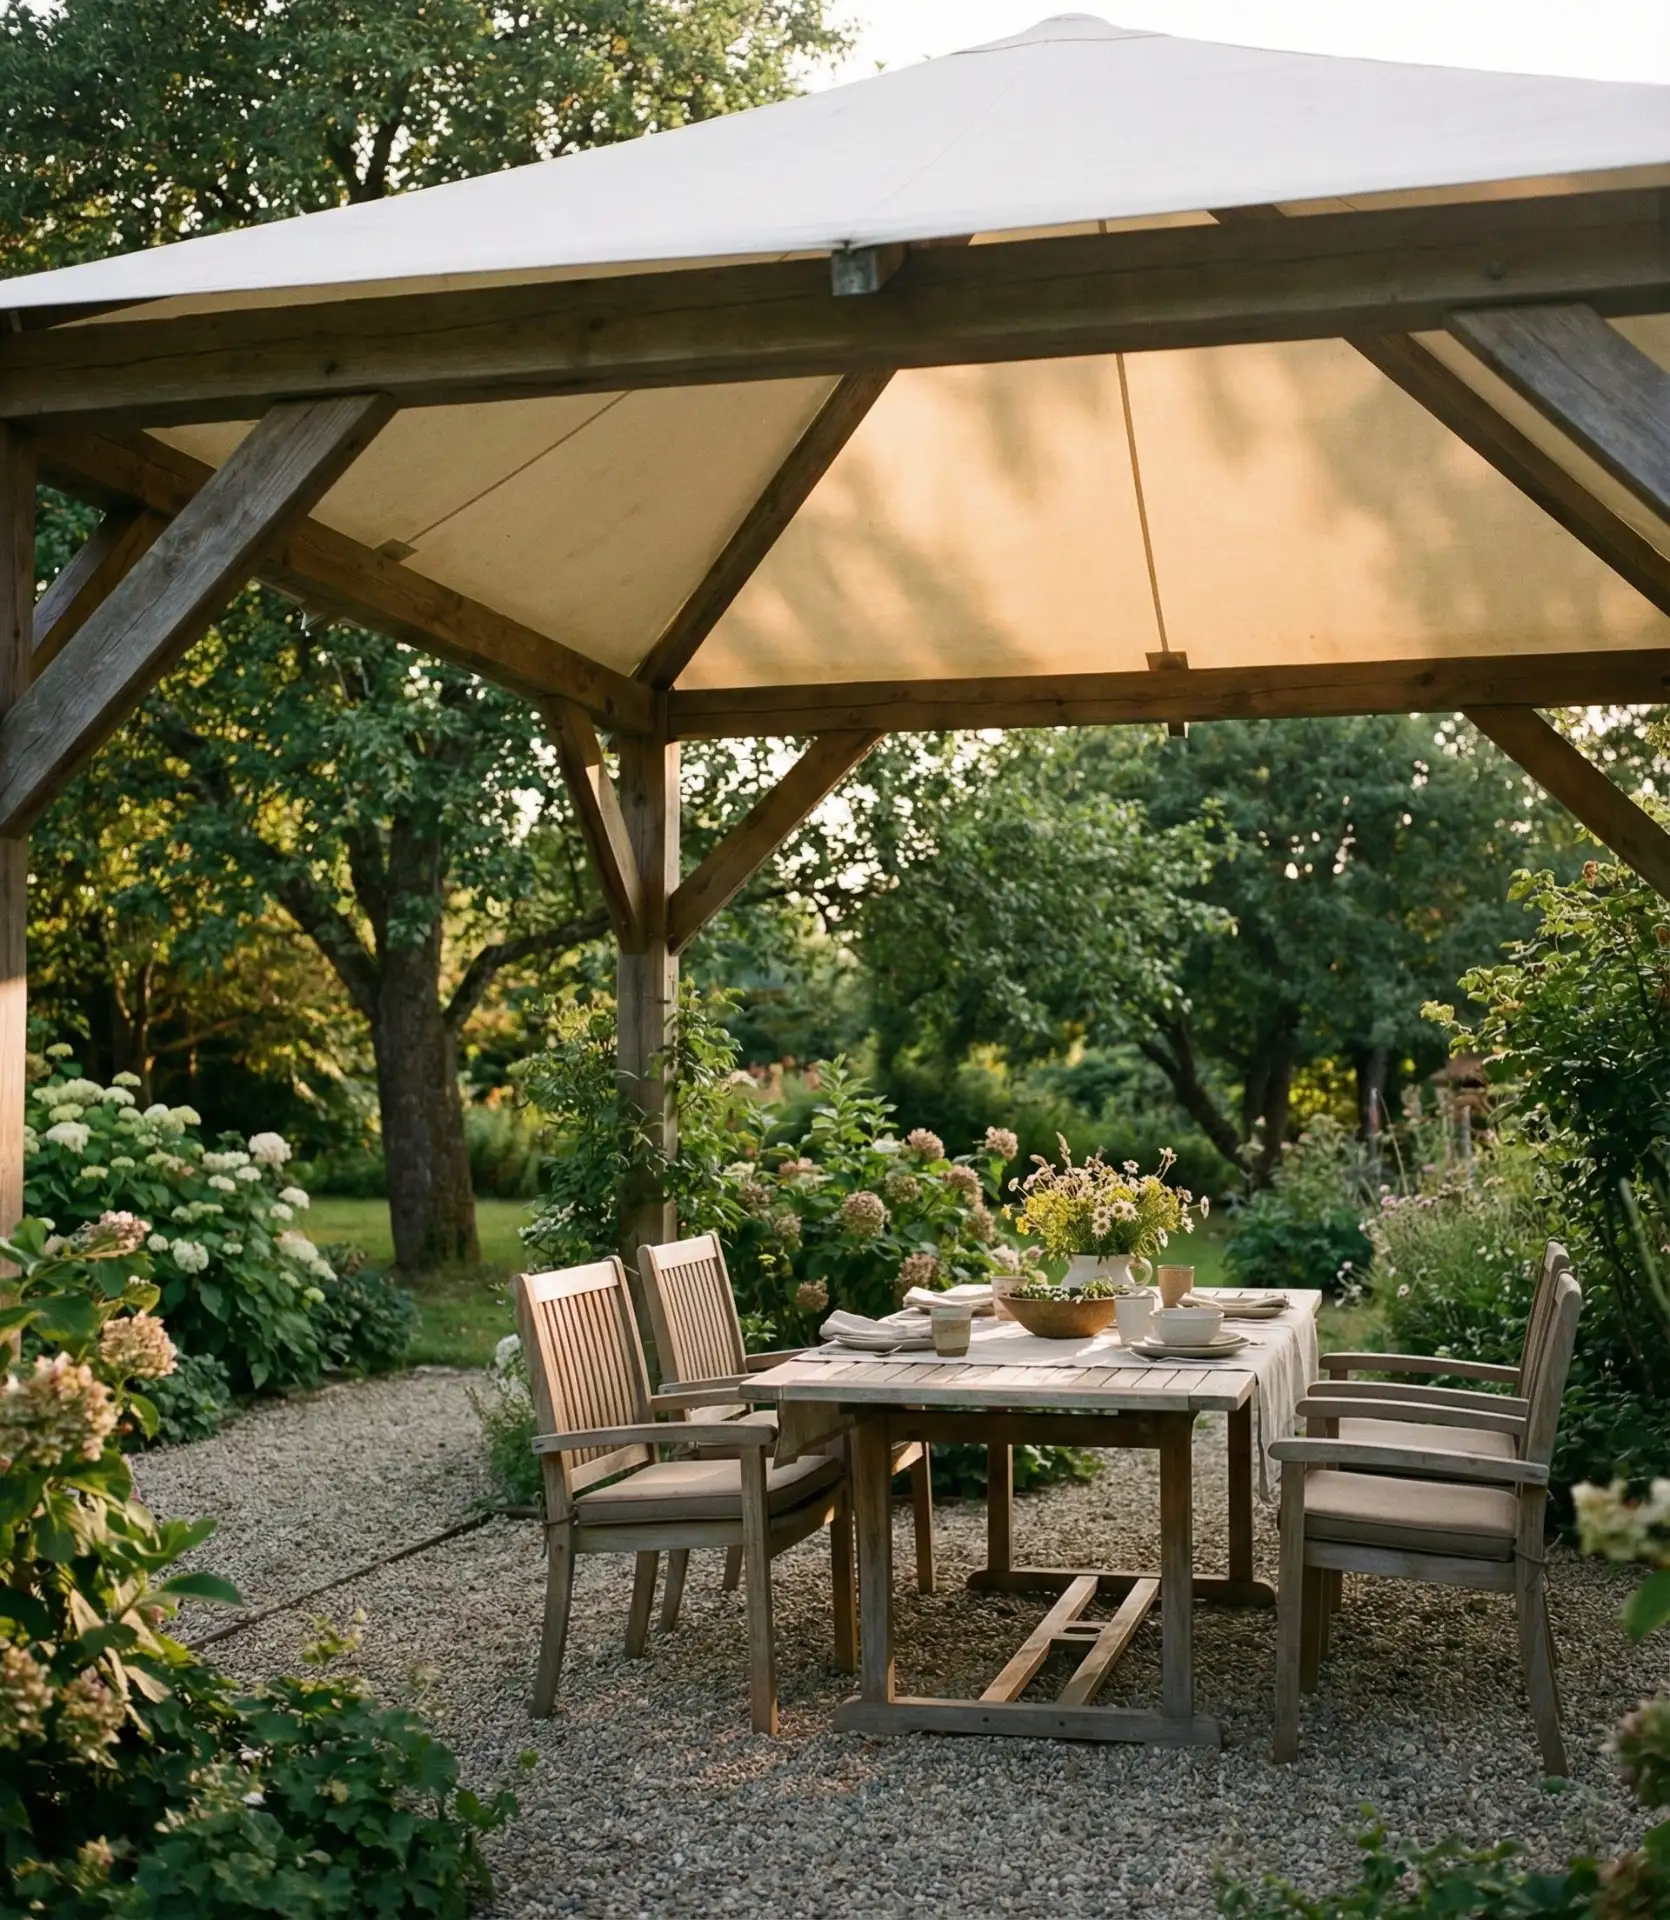
Build your own gazebo by using 4×4 posts and 2×4 beams and then cover it with weather-resistant fabric instead of pricey roofing materials. This gives you a “room” outside for $200–$350 and keeps the gazebo light and airy. The fabric will offer shade and light rain protection and won’t need the engineering or permits that solid-roof structures demand. 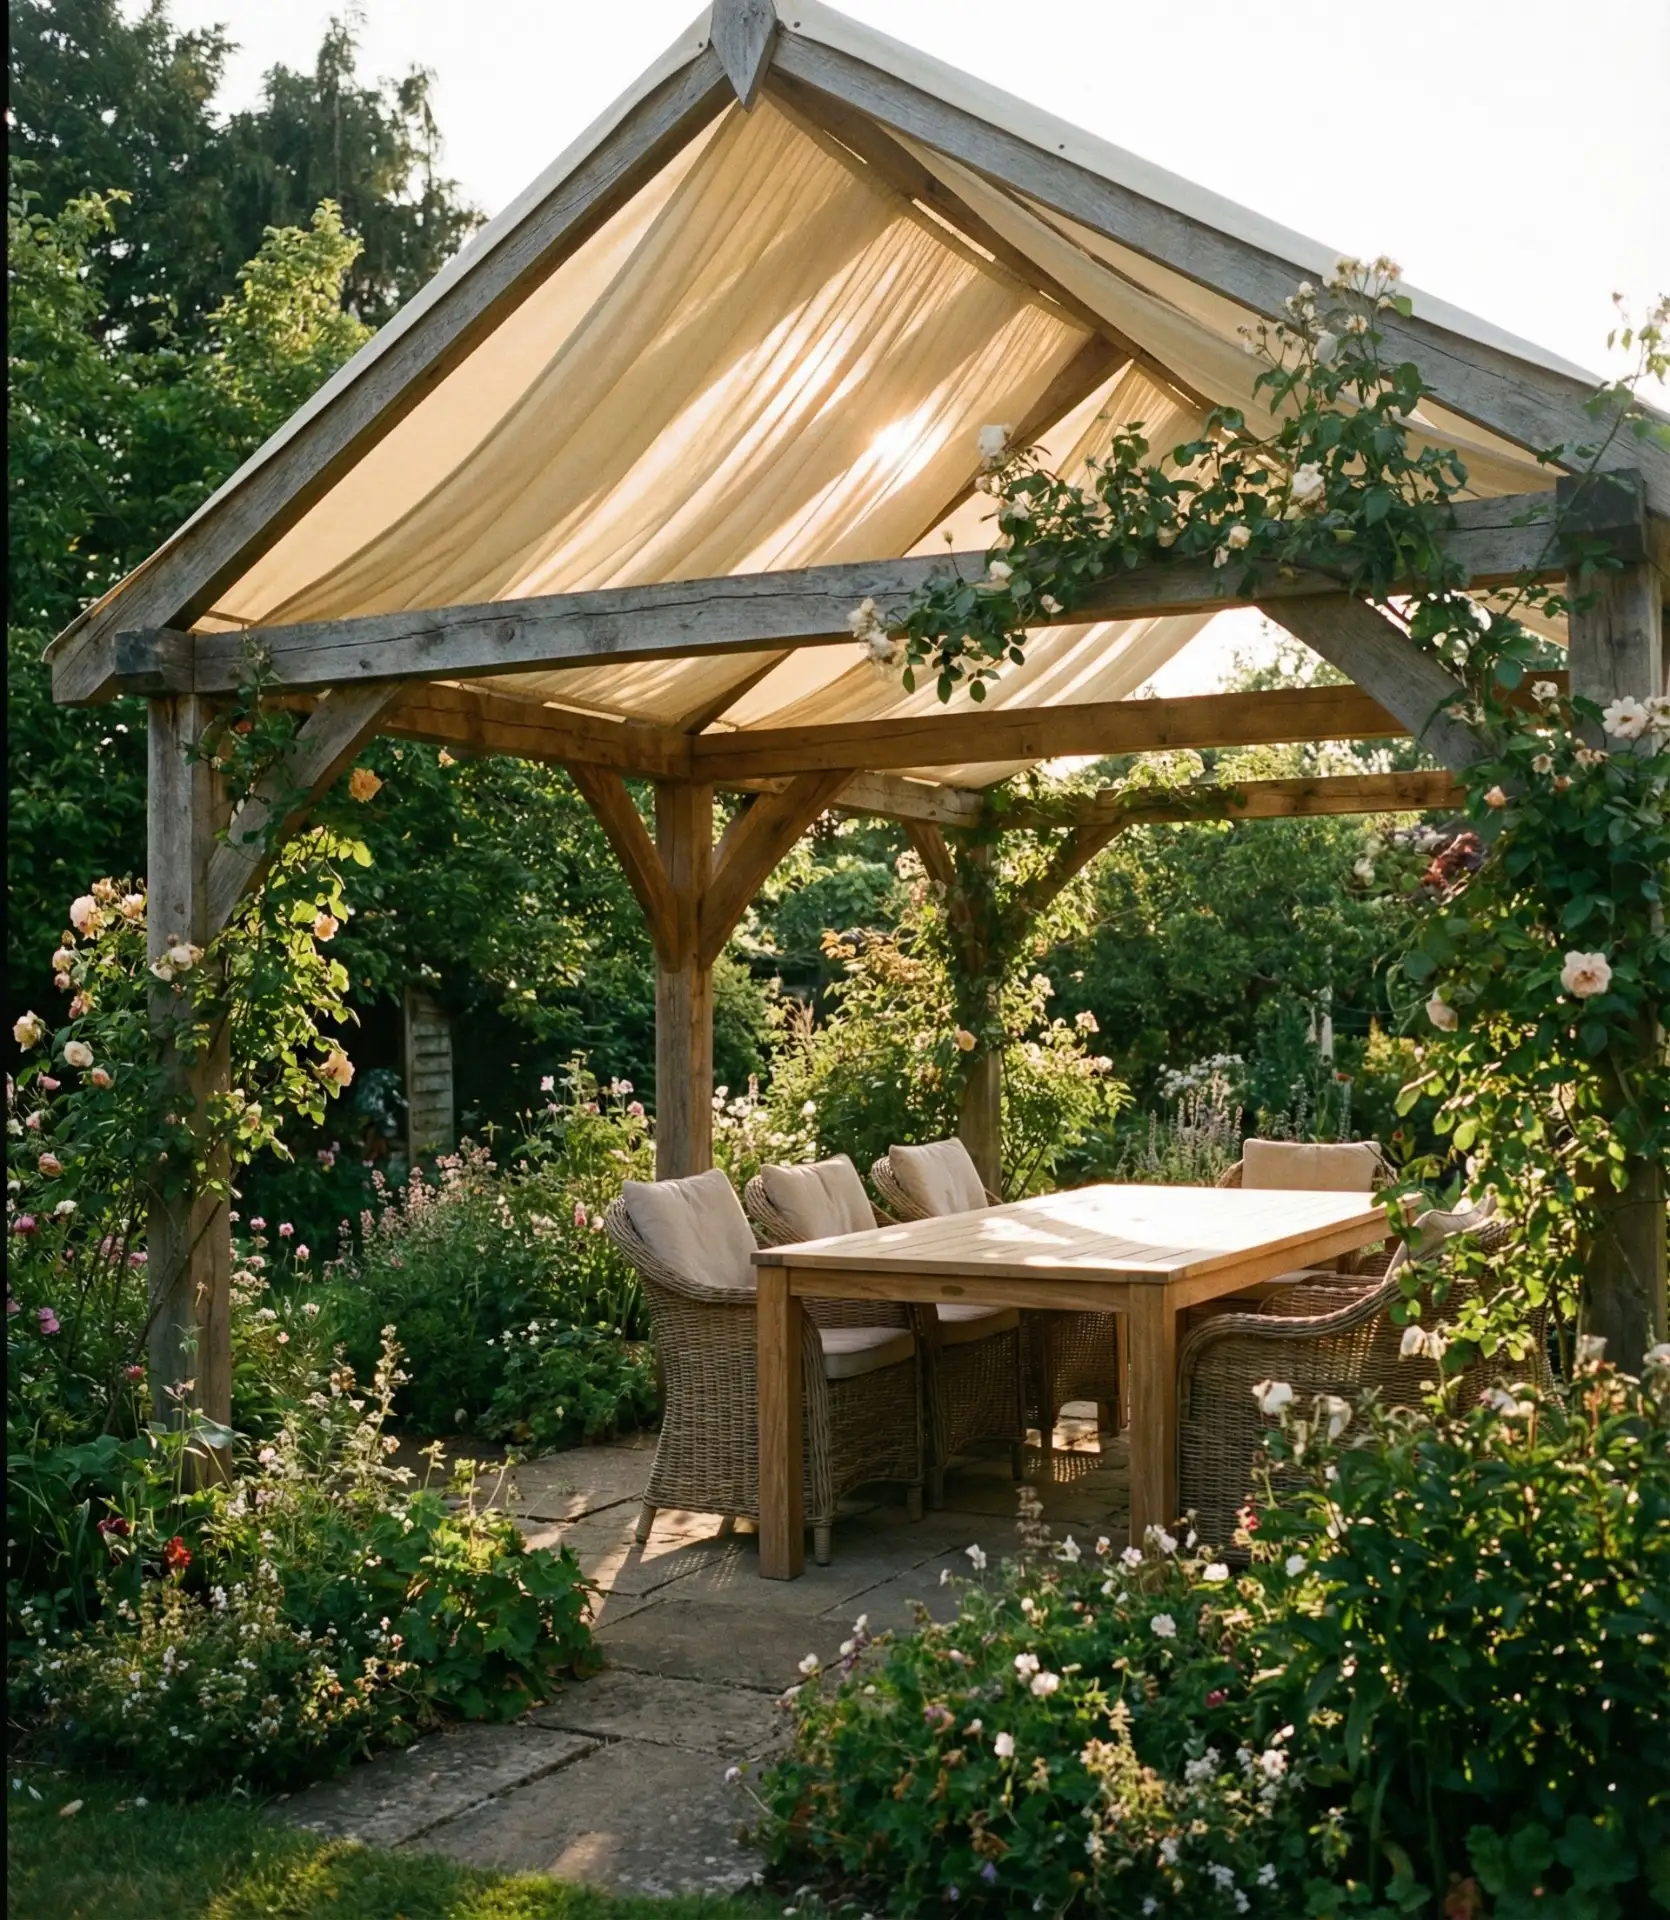
This structure works best in moderate climates. For places where permanent roofs feel excessive, but some overhead protection is desired, like in California, the Mid-Atlantic, or the Pacific Northwest in the summer. For good air circulation and headroom, build the posts 8–10 feet tall. Use weather-resistant fabric or removable canvas and shade cloth that can be removed seasonally or before storms. Most local codes consider fabric-topped structures temporary and don’t require permits, but it can be beneficial to check with your municipality. The open-sided structure is meant to offer a more open and airy feel.
22. Mulched Kids Play Zone
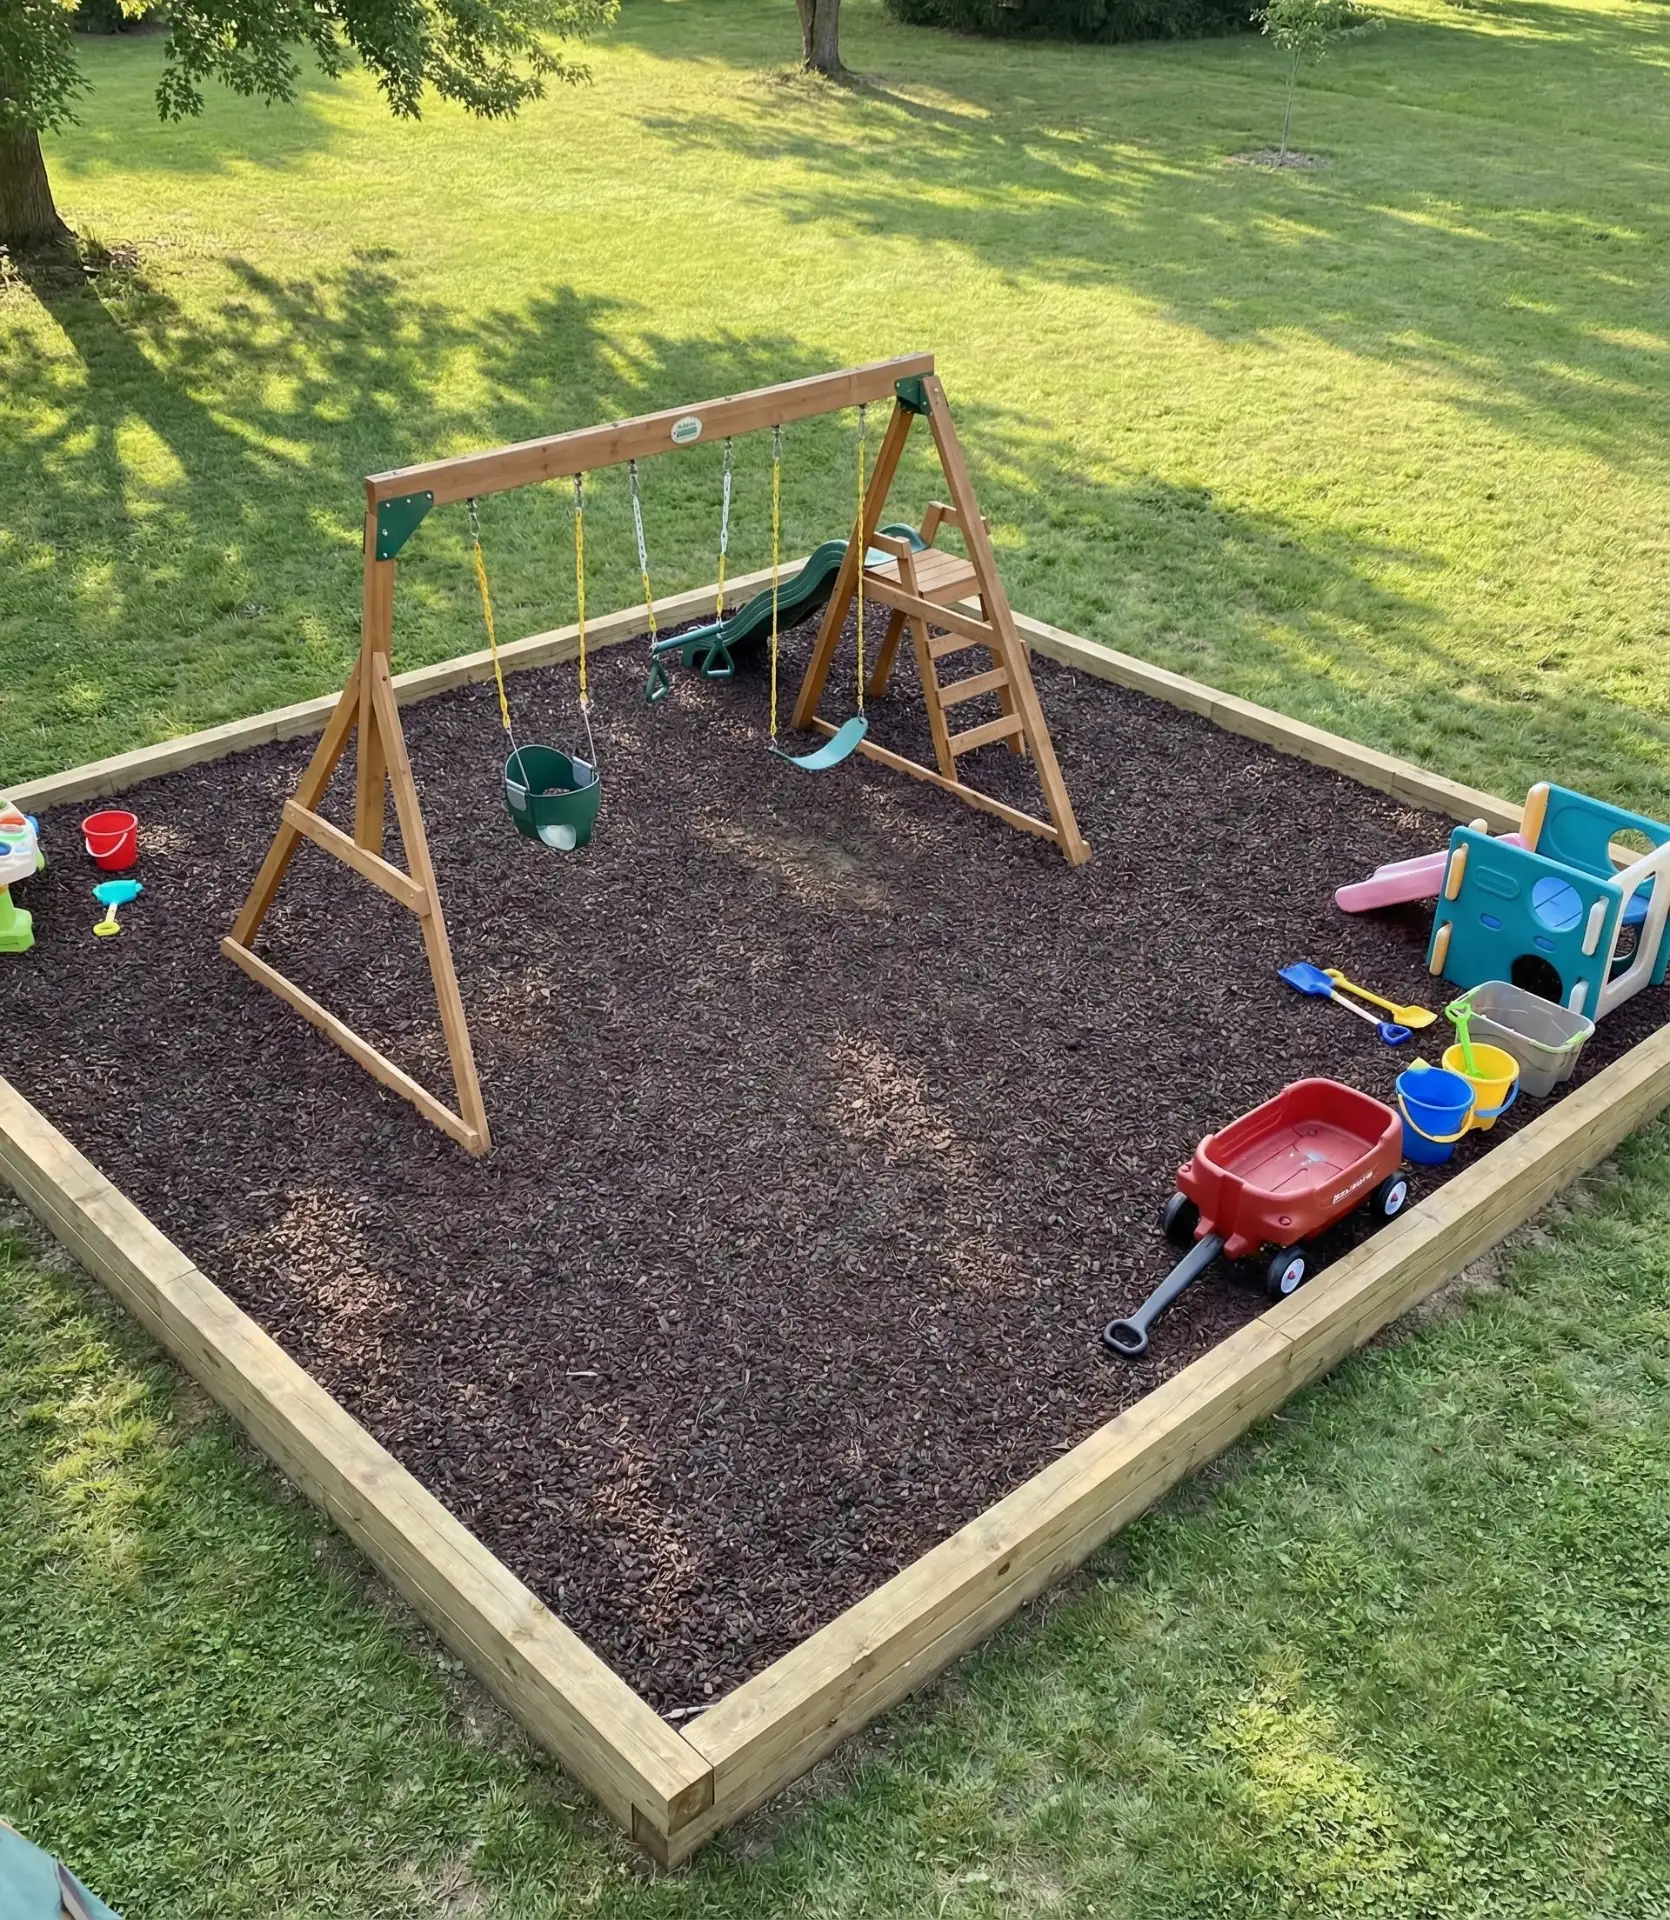
Create a designated area for children by placing boundaries with landscape edging and filling the enclosure with either playground-grade rubber mulch or wood chips. This will create a safe surface for active play.
The designated area of your lawn will remain unscathed from the damage that lawn swings, slides, and running feet cause. A play area made of mulch and playground border edging about 10×10 feet will cost around $100–$150 and will help avoid the muddy, dead patches of grass caused by frequent playing. 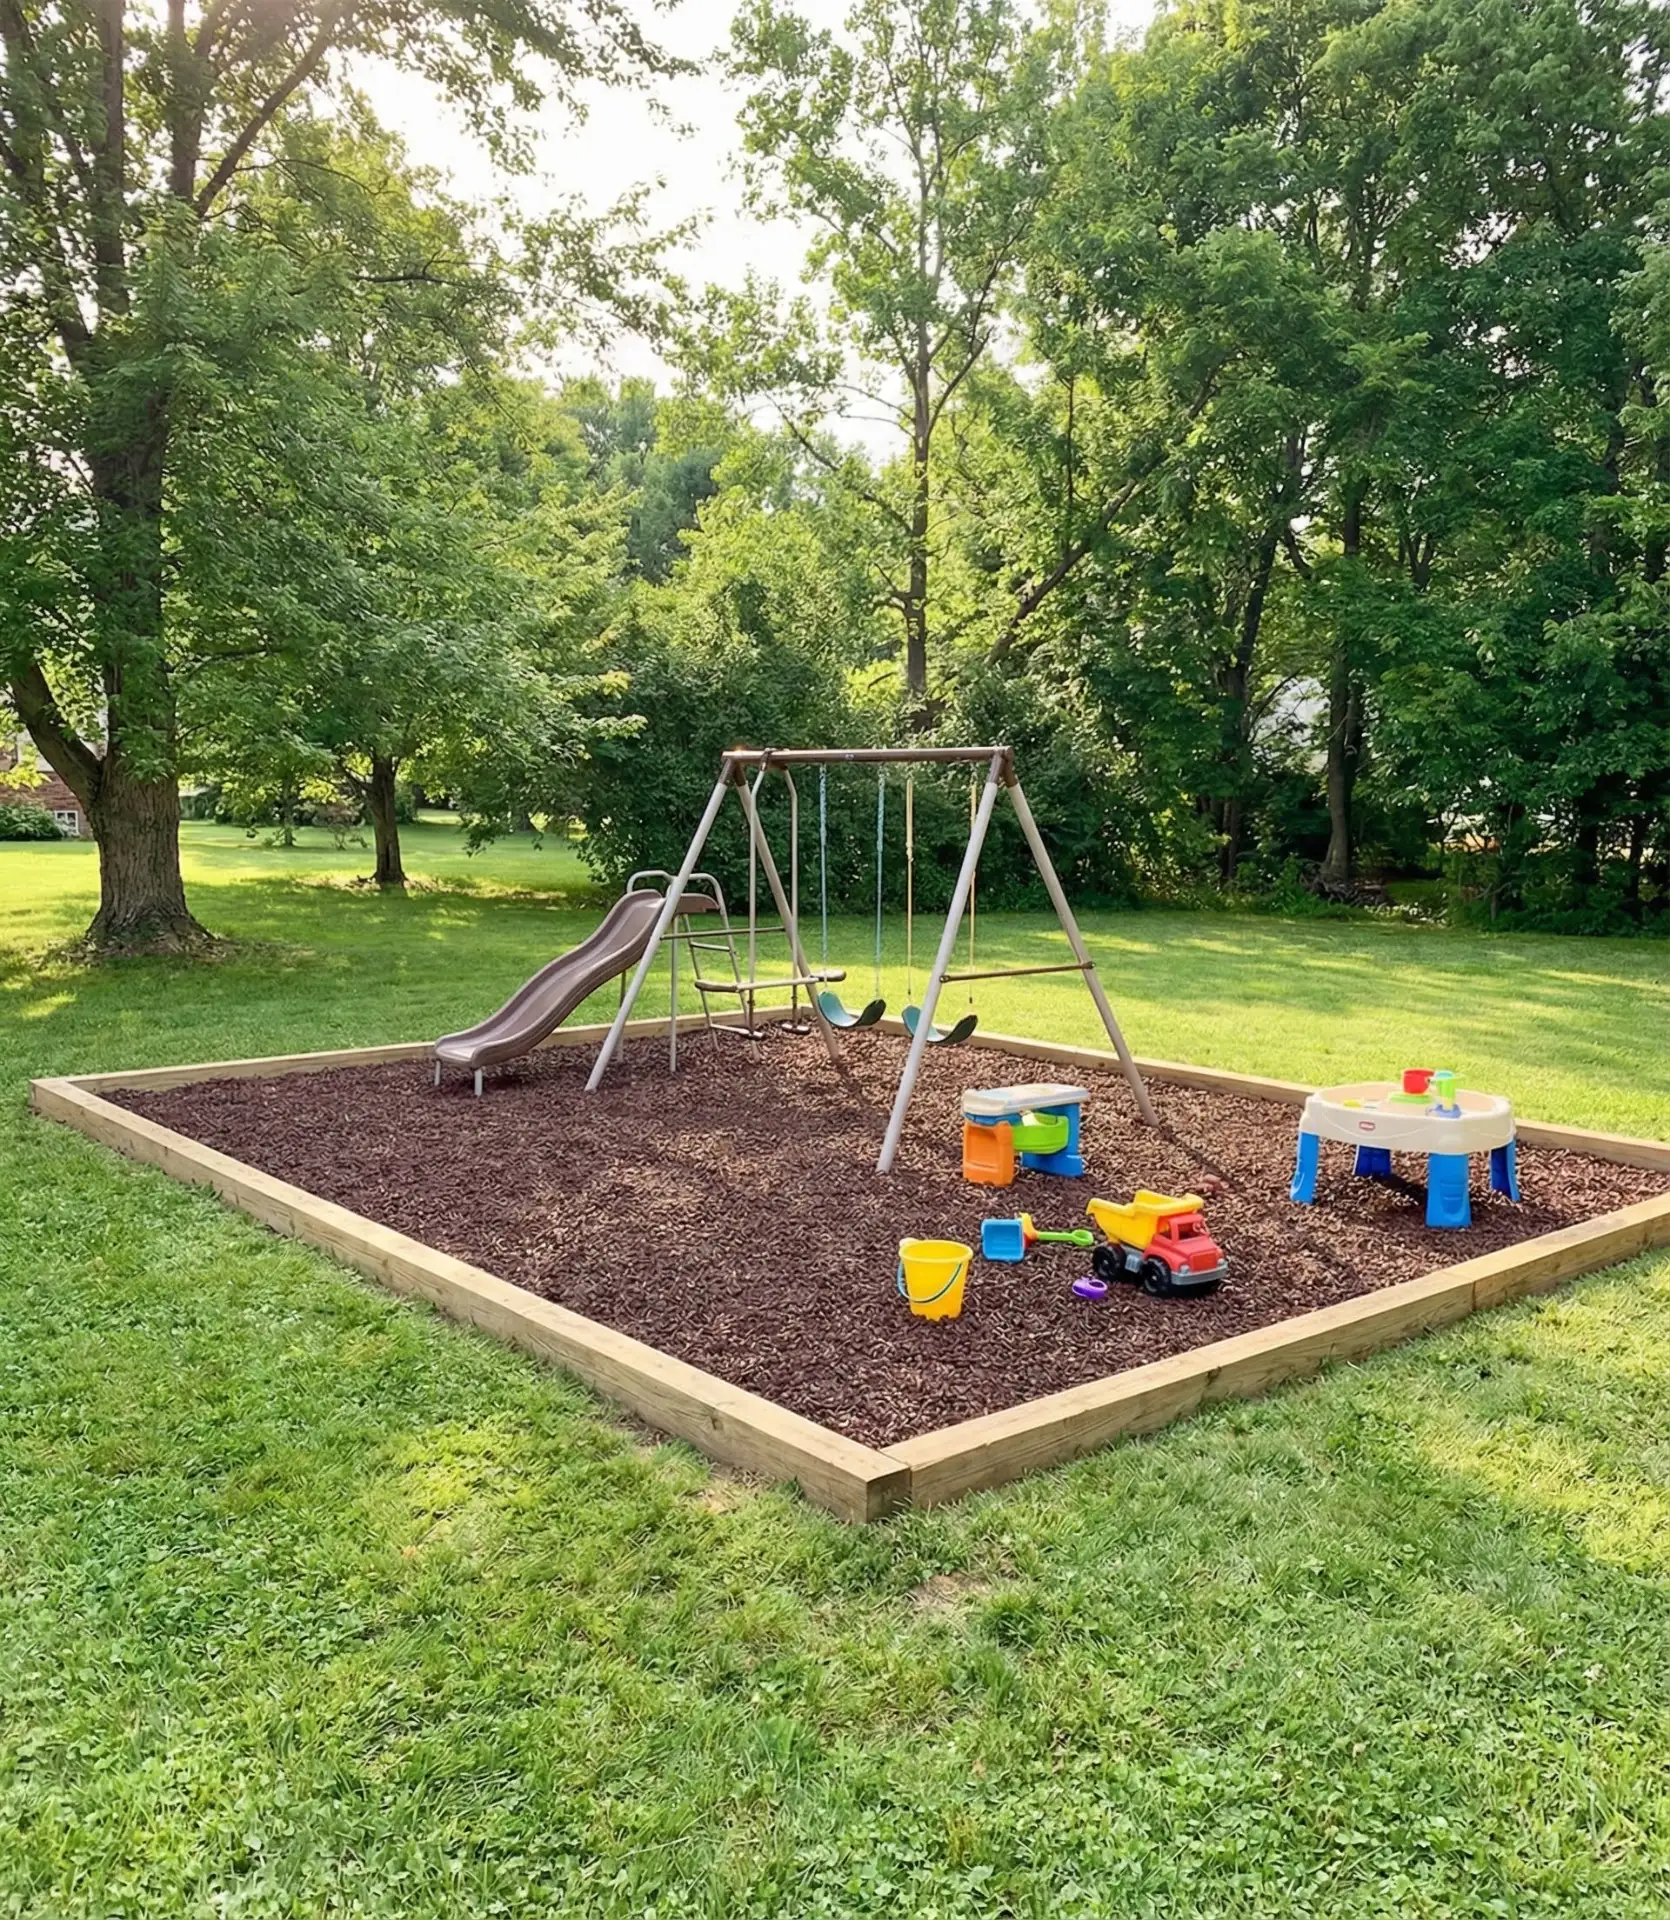
Rubber mulch has a longer lifespan of around 10 years and does not require topping off but will cost more than wood chips that need topping off each year but have a cheaper initial cost. Both wood chips and rubber mulch drain rainwater quickly and provide cushioning for falls. It will keep parents and their children contained and away from the grass. Make sure that the play area is a location that is visible from indoor living areas so watching the children is easy.
23. Painted Patio Furniture Makeover
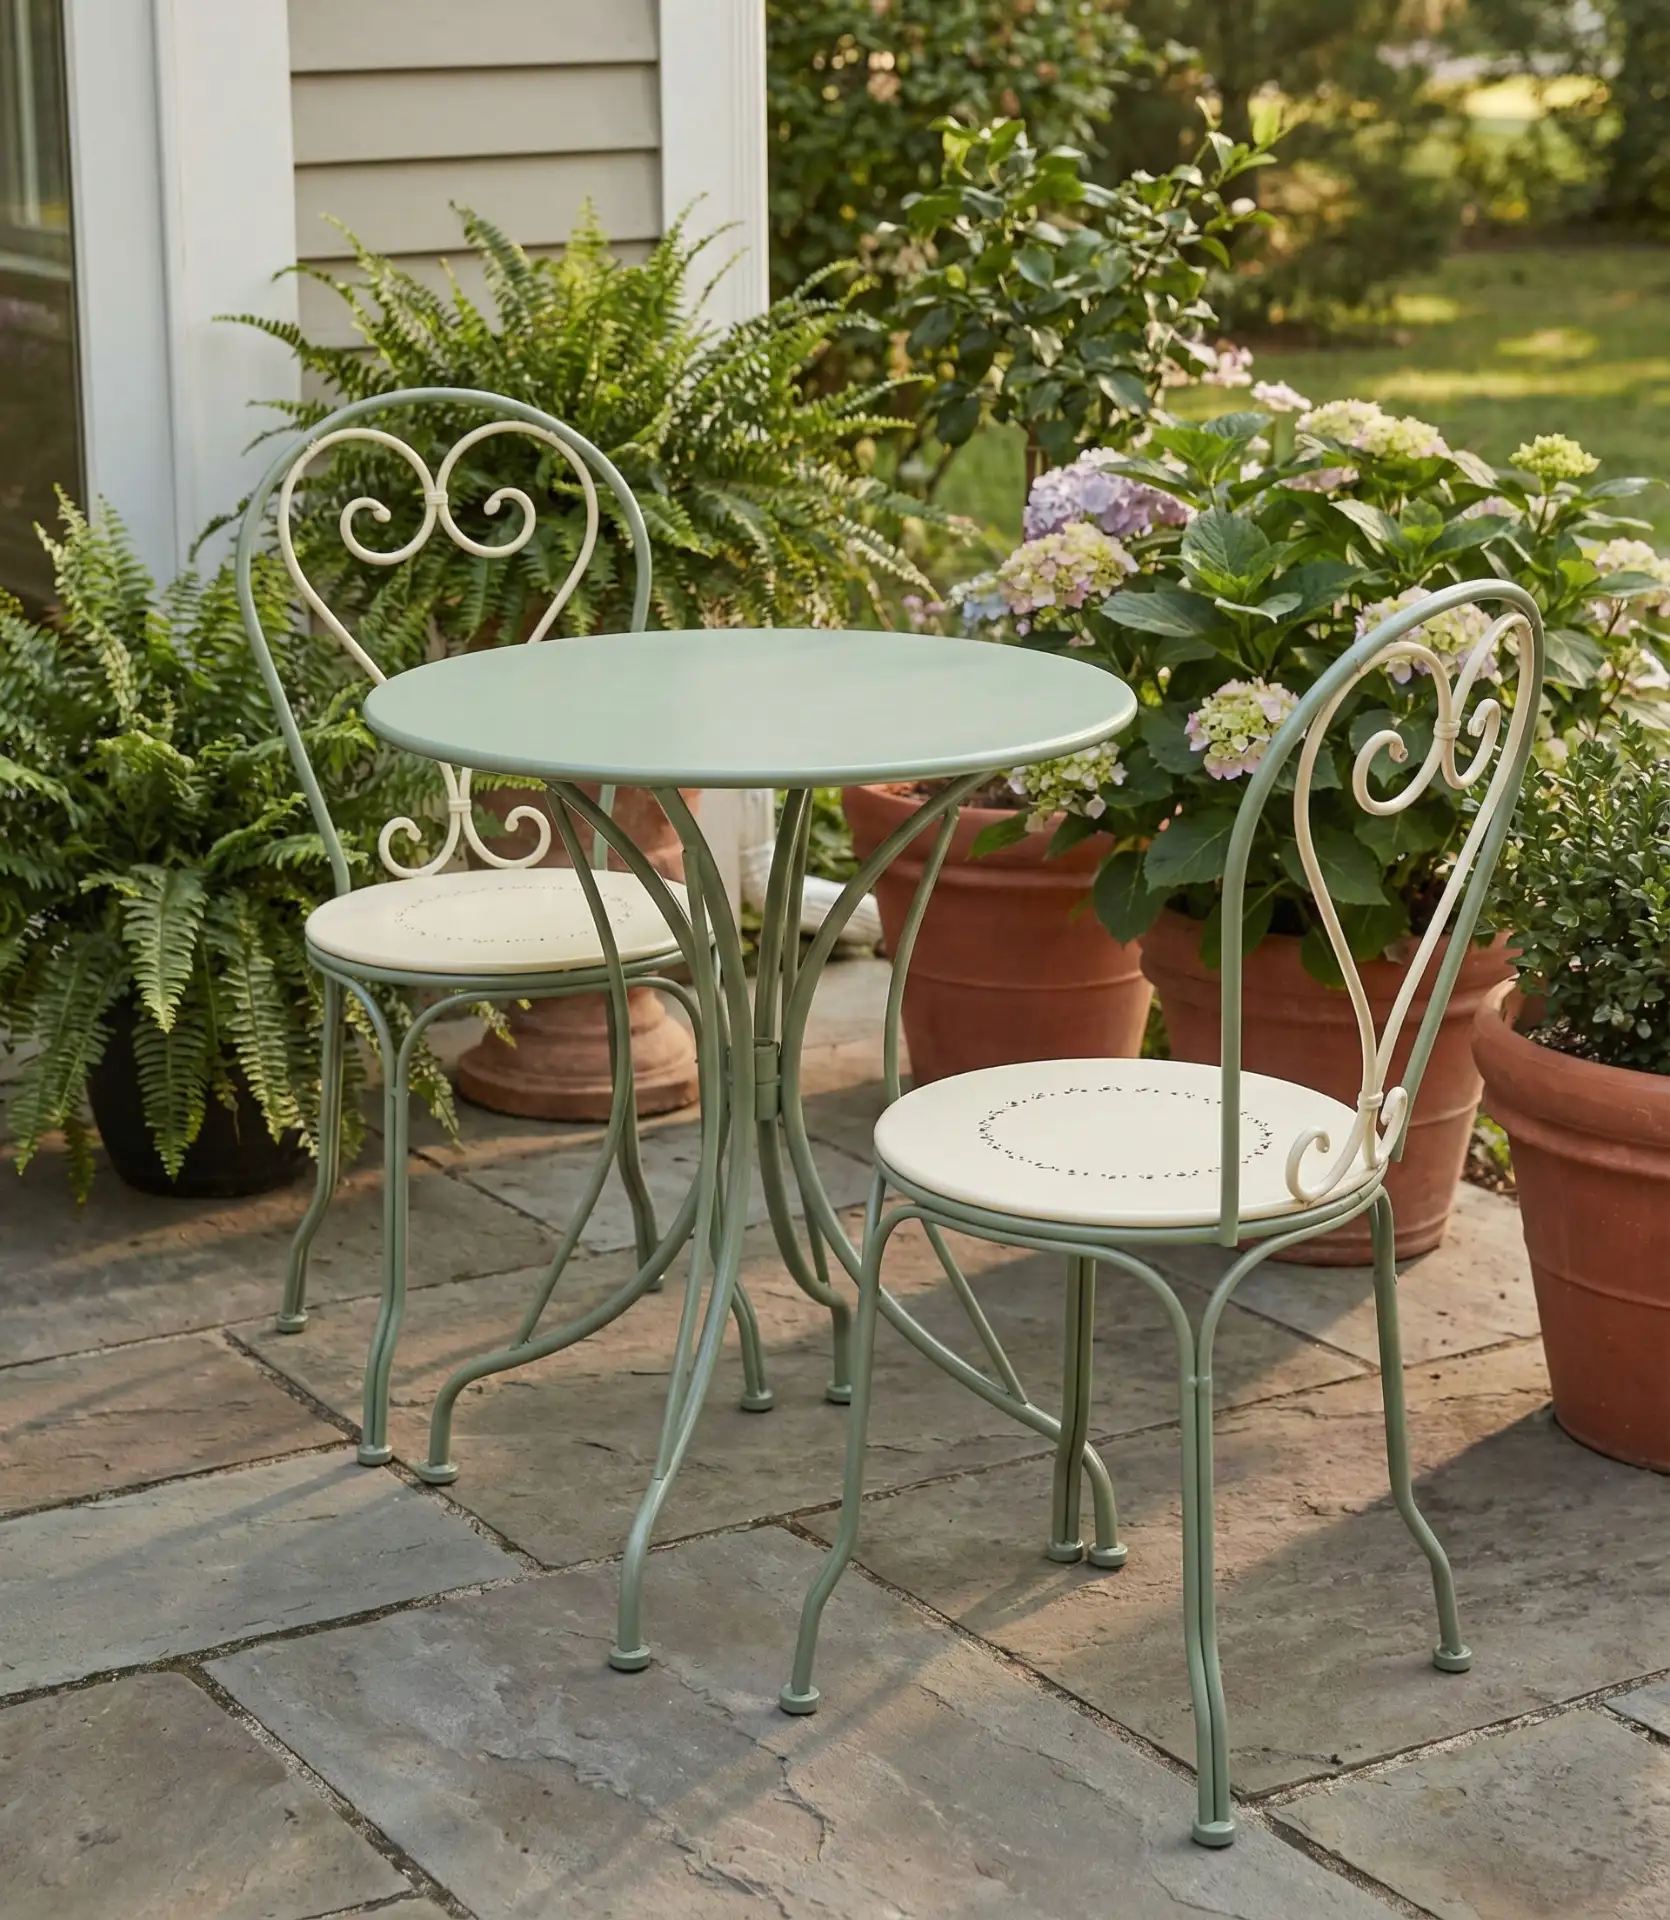
Make mismatched or outdated patio furniture more appealing by using exterior decorative spray or brush-on paint that is made for metal, wood, or plastic. Use a matte finish black or charcoal color for a more neutral look and to make the different pieces look unified, or choose a brighter color with a more playful tone for more fun.
Transforming your budget spaces costs about $20–40, takes a weekend, and instantly updates an entire seating area without purchasing new furniture. 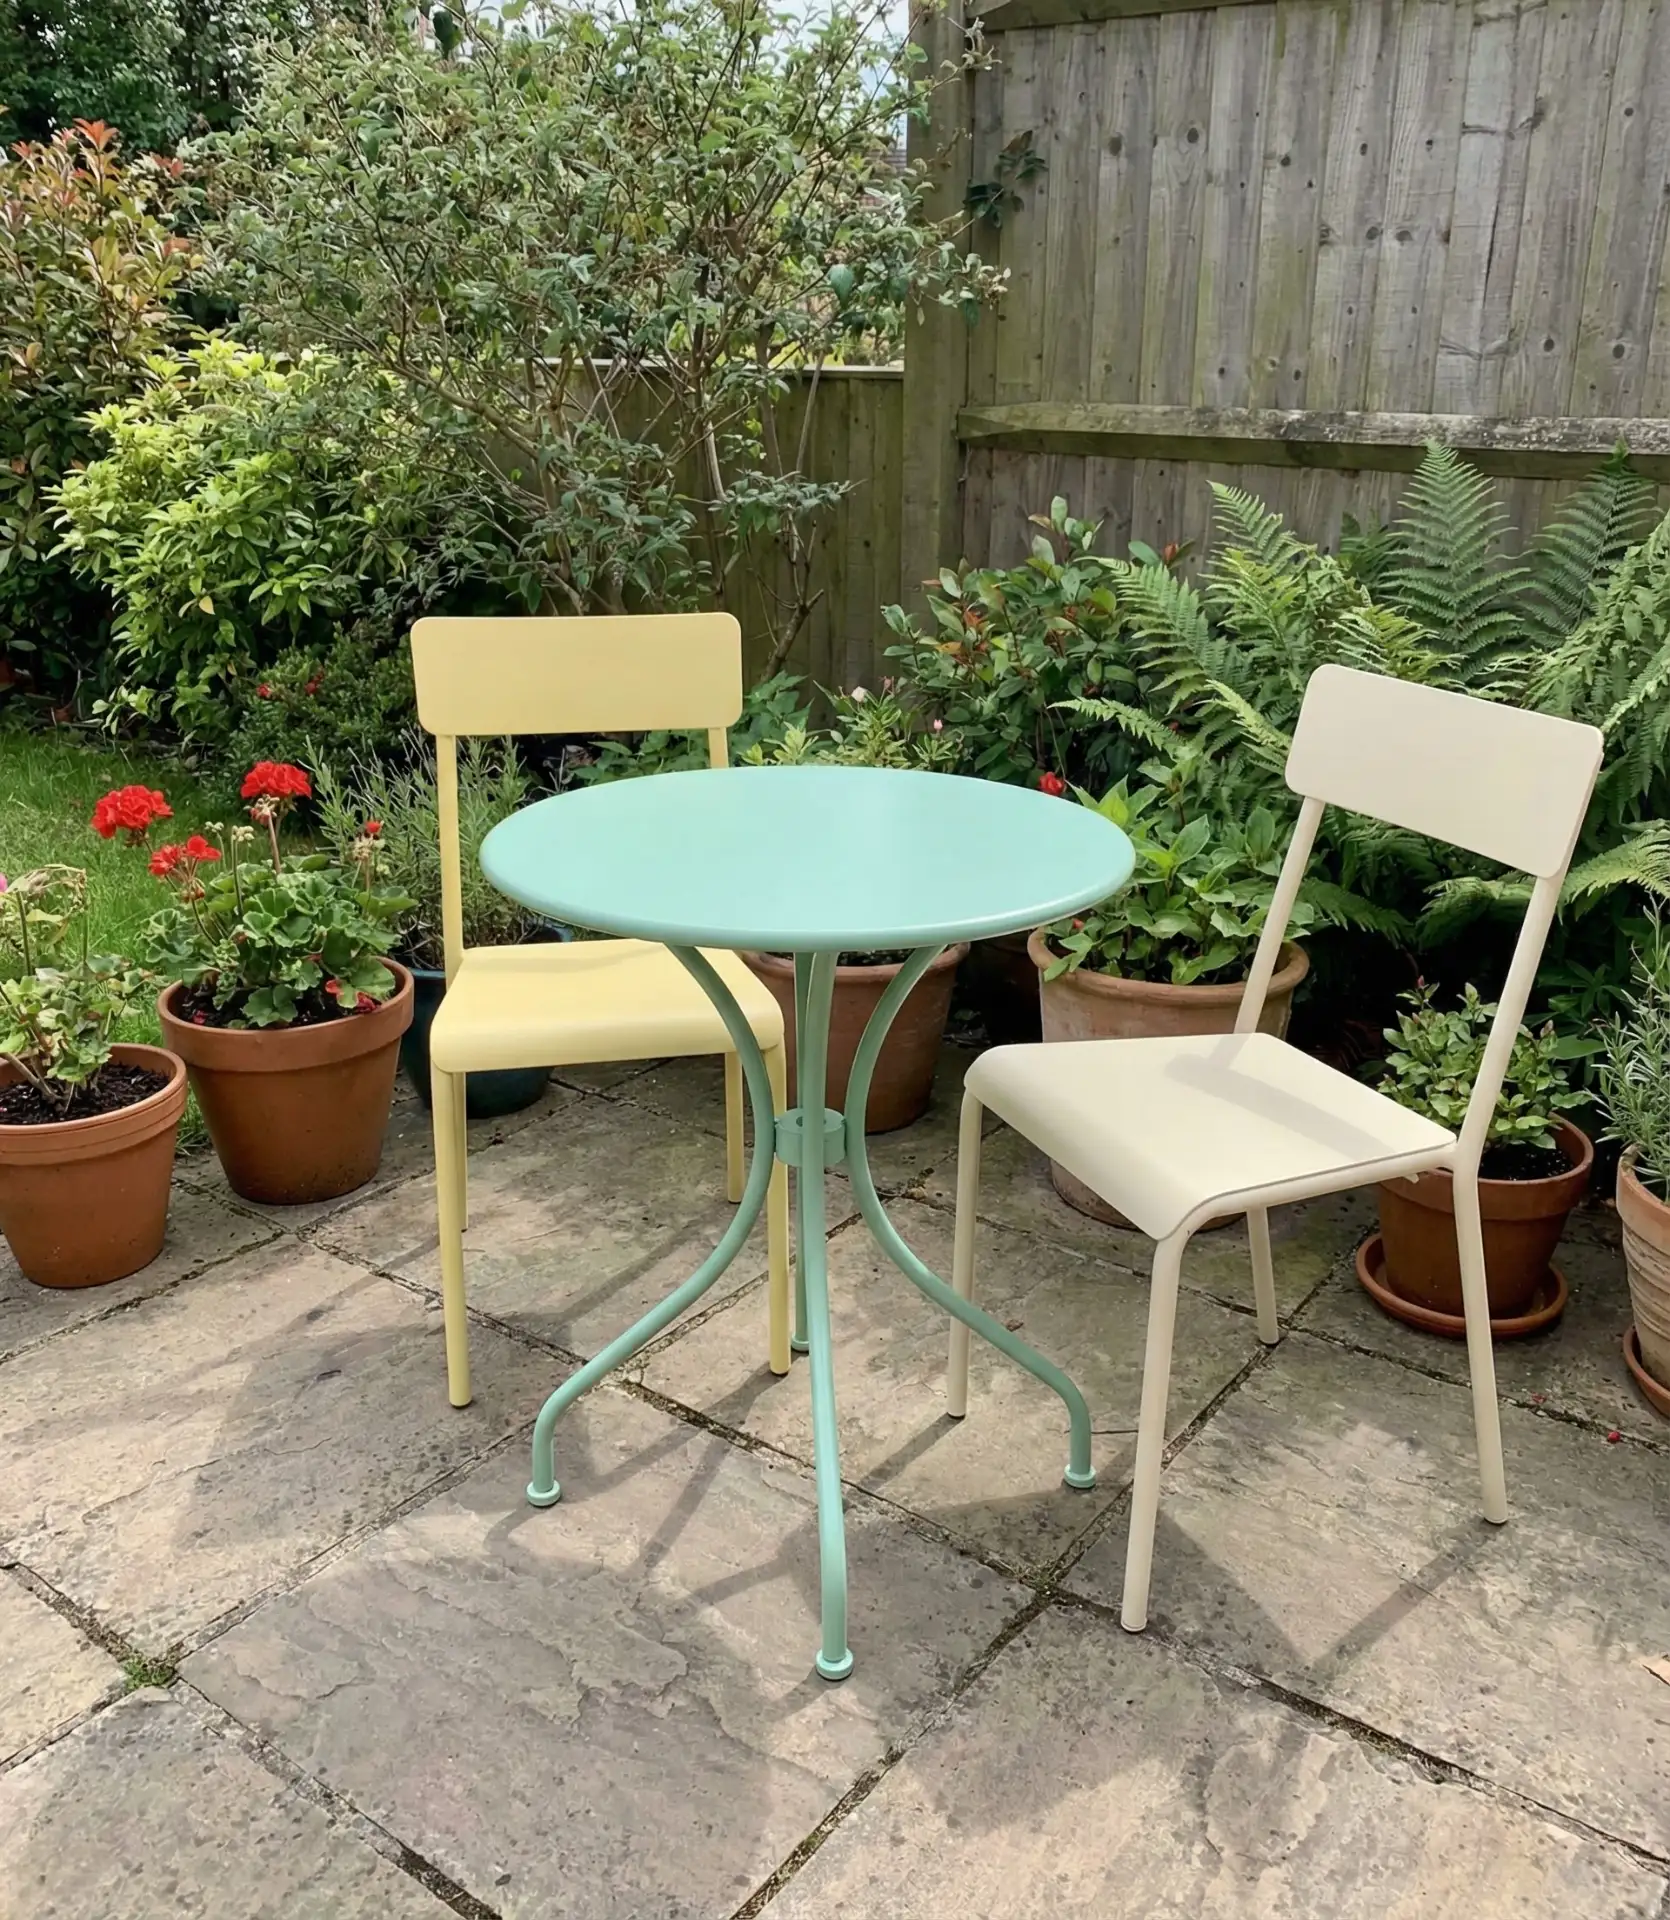
American lifestyle trends show that homeowners increasingly value personal expression over matching sets—which makes this approach perfectly timed. Clean furniture thoroughly with TSP or degreaser, sand glossy surfaces lightly for adhesion, apply metal or plastic primer if appropriate, then paint with multiple thin coats rather than one thick coat. Cure time matters—wait the full recommended period before using furniture to ensure durability. Add new cushions in weather-resistant outdoor fabric, and suddenly your 10-year-old furniture looks intentionally curated rather than simply old.
24. Bloxburg-Inspired Outdoor Design Space
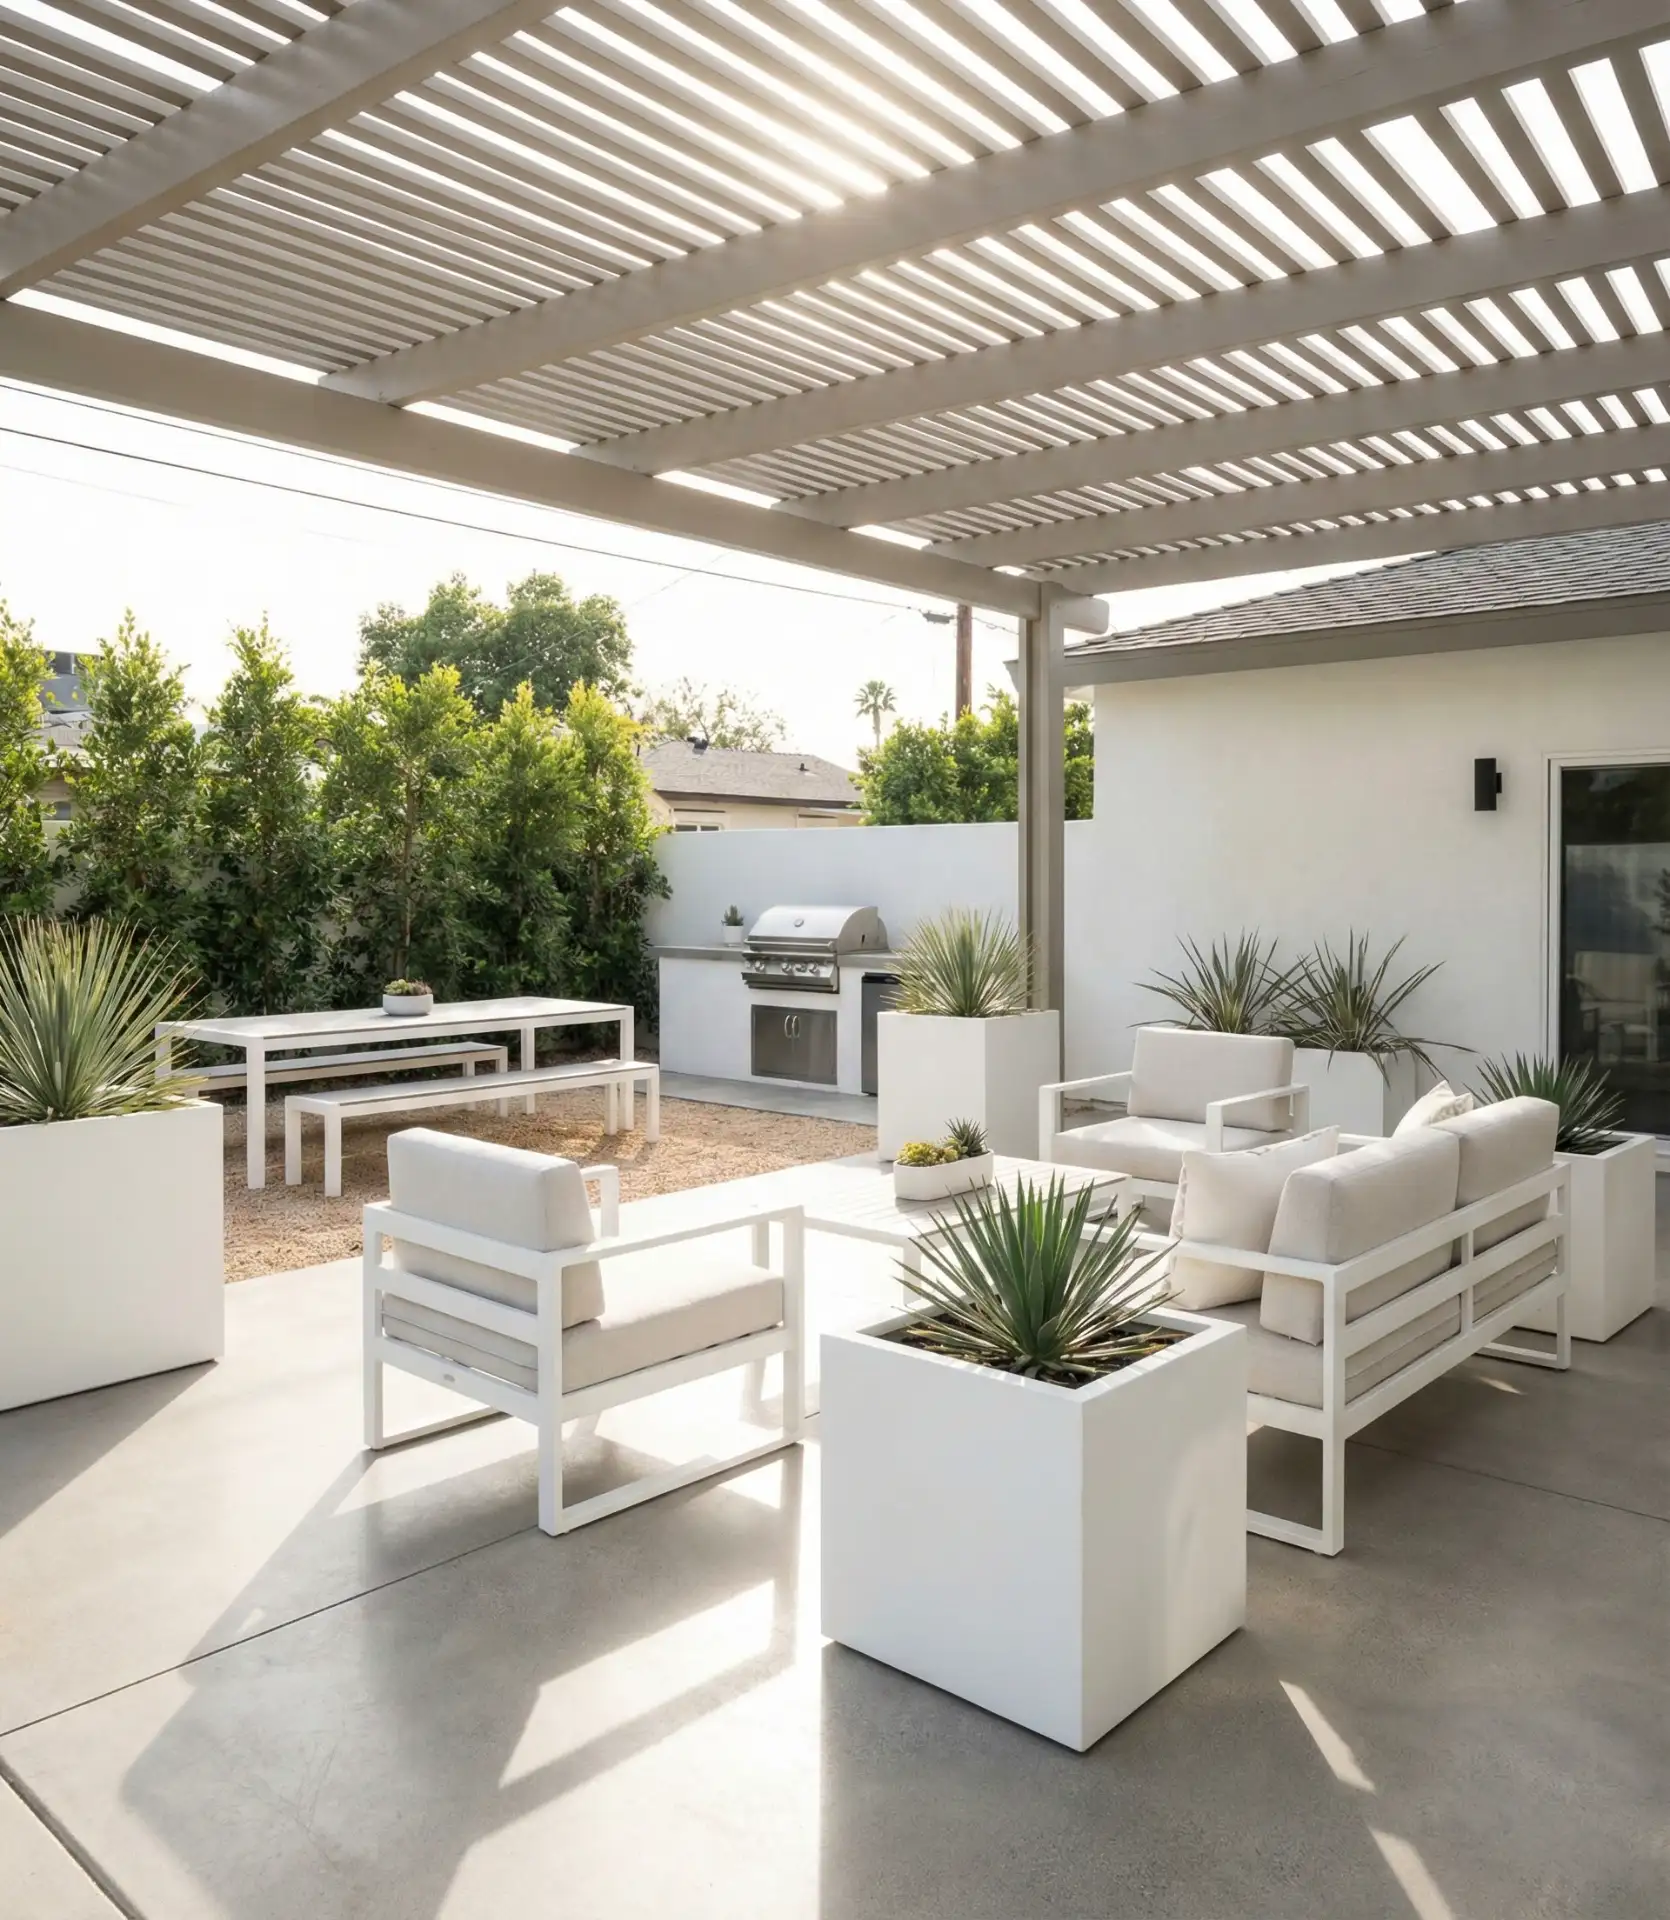
Take design inspiration from popular games like Bloxburg that feature clean, modern outdoor spaces with defined zones and symmetrical layouts. Apply these principles to your real yard by creating distinct areas—a seating zone, dining area, and garden section—each clearly defined but visually connected. To achieve this contemporary aesthetic on a modest budget, use white or light-colored outdoor furniture, geometric planters, and crisp lines by shopping sales and assembling DIY alternatives. 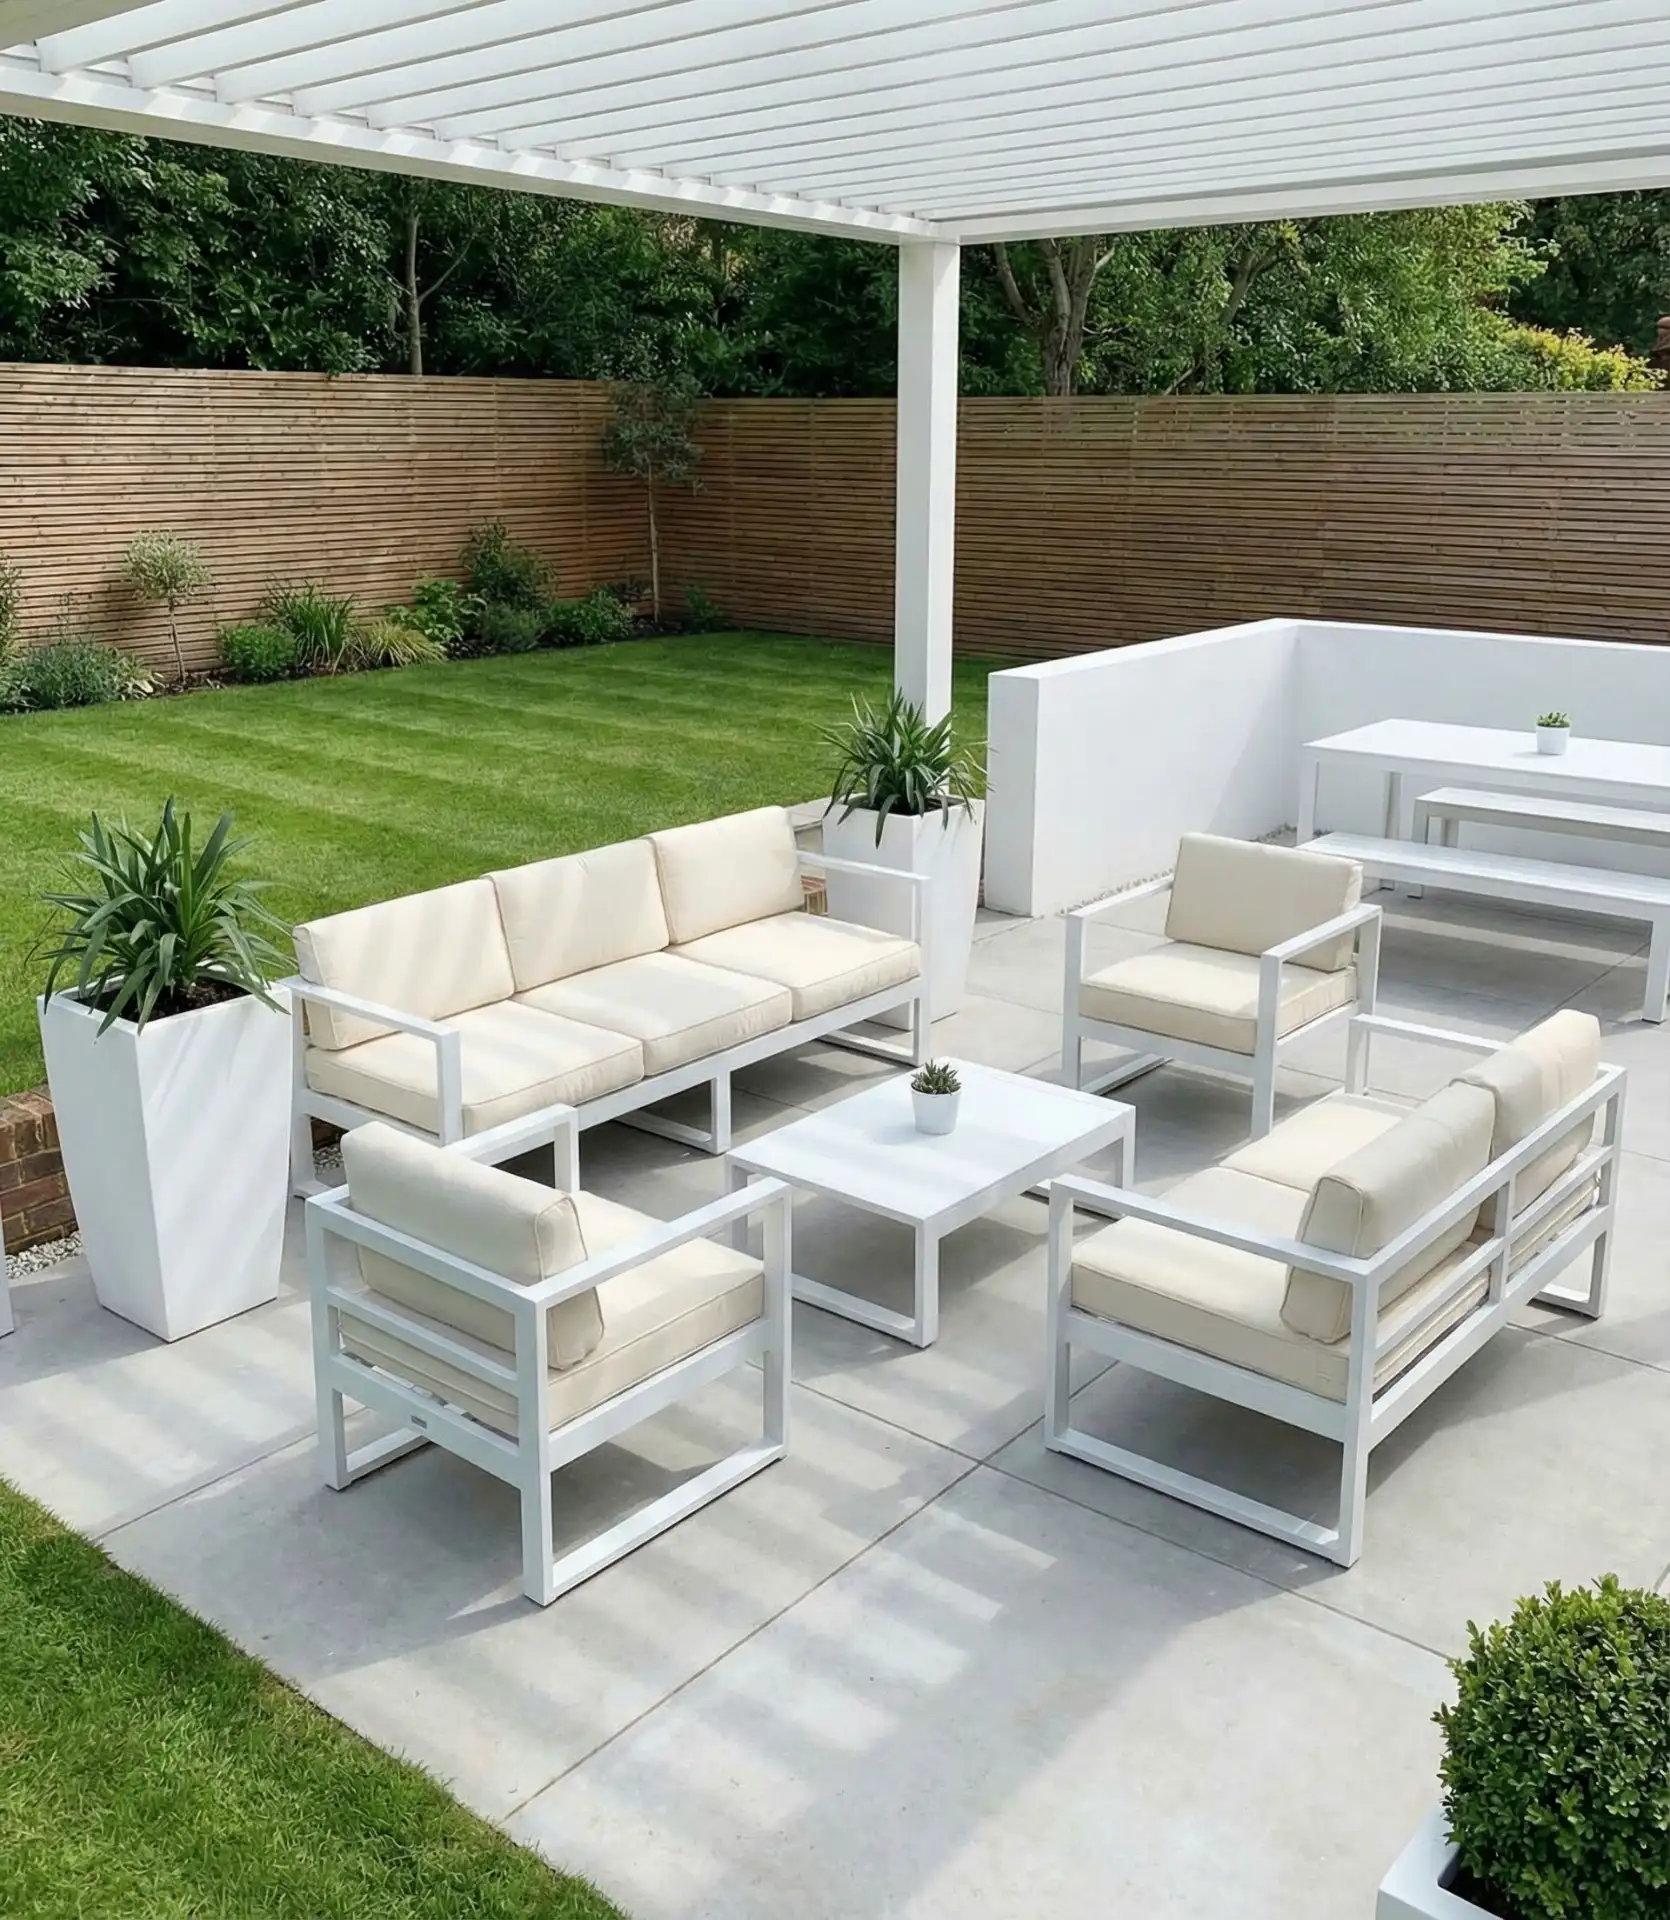
The influence of this particular gaming aesthetic on construction design in the real world, especially for younger customers, is especially interesting because many of them grew up building virtual worlds. The important factors are design, consistency, and repetition, where throughout the construction, the same color and style of the planters is used, and the sight lines are always kept clean. Edging string lights are installed on the light tones painted on the wide, untextured surfaces, and clutter is kept to a minimum. By starting with lower-cost items from the large retailers, younger customers in their twenties combine and arrange them in a thoughtful plan, using a strong color scheme to design in an intentional manner, and this approach is an example of curation rather than cost. The style of the construction reflects curation rather than expense, as evidenced by the criteria mentioned above: styled and intentional construction using inexpensive items.
These ideas demonstrate that it is possible to have a stylish, usable, and budget-friendly garden, with the only requirements being ingenuity and the determination to try new things. Watch the video. Each improvement will make the area better to spend time in. Which will you try first? Comment to share the best garden transformations.