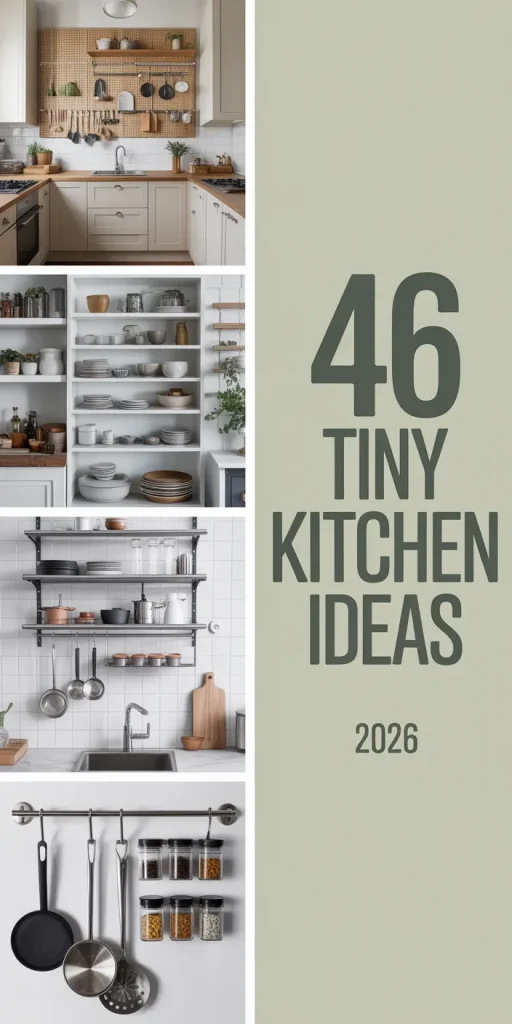
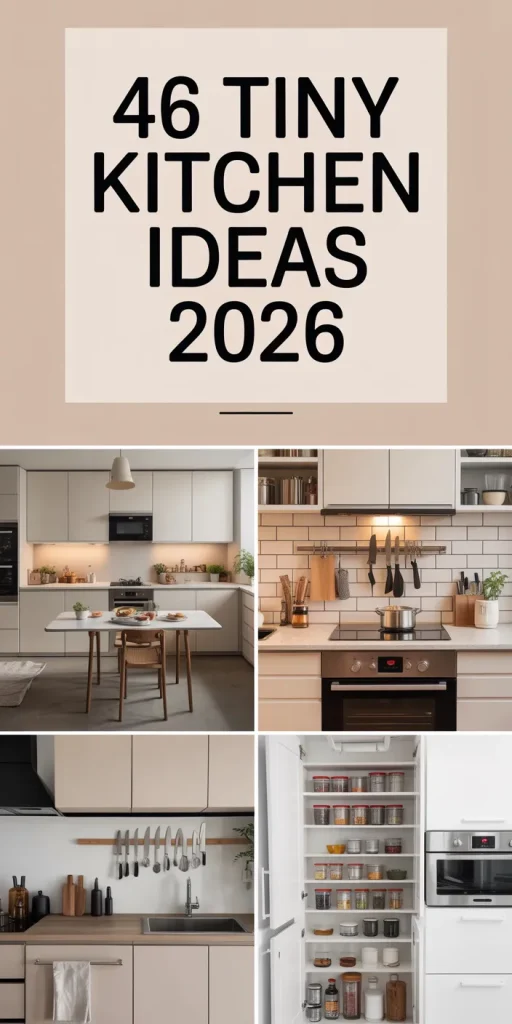
46 Tiny Kitchen Ideas 2026: Smart Layouts, Storage Hacks & Budget Designs for Any Space
In 2026, tiny kitchens have become a canvas for creativity rather than a compromise. As more Americans embrace urban living, downsizing, and intentional design, compact cooking spaces are no longer just functional—they’re stylish, efficient, and deeply personal. Pinterest users are flocking to search for innovative solutions that blend aesthetics with practicality, from clever storage hacks to layout strategies that maximize every inch. Whether you’re renovating a studio apartment, designing a small house, or simply craving a minimalist refresh, these ideas will help you reimagine what’s possible in a small footprint. Let’s explore how thoughtful design can turn even the tiniest kitchen into a space you’ll love spending time in.
1. Galley Layout with Vertical Storage
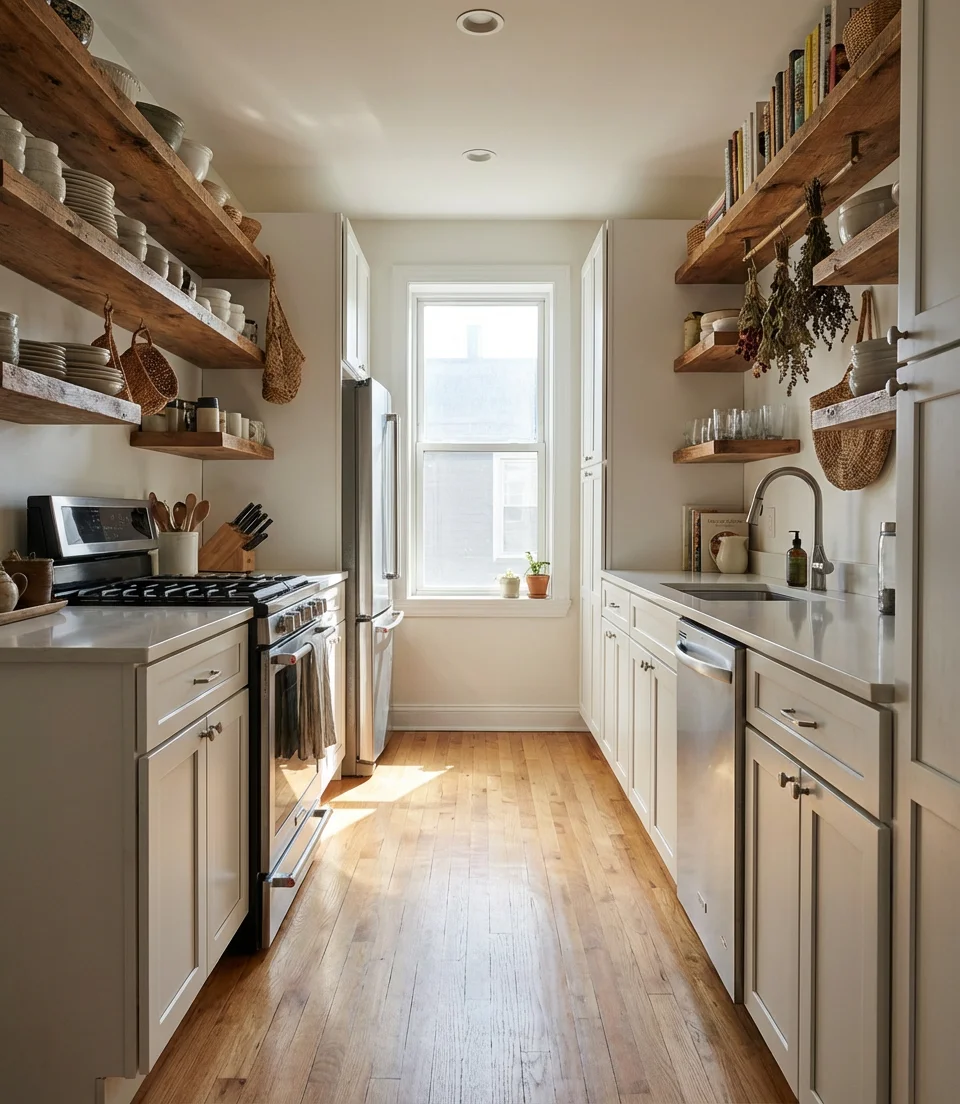
The classic galley layout works beautifully in small spaces, especially when you maximize vertical real estate. This configuration places counters and appliances along two parallel walls, creating an efficient workflow that professional chefs appreciate. Install open shelving or tall cabinets that reach the ceiling to store items you don’t use daily, while keeping frequently accessed tools within easy reach. The narrow corridor encourages organized movement and prevents wasted steps during meal prep.
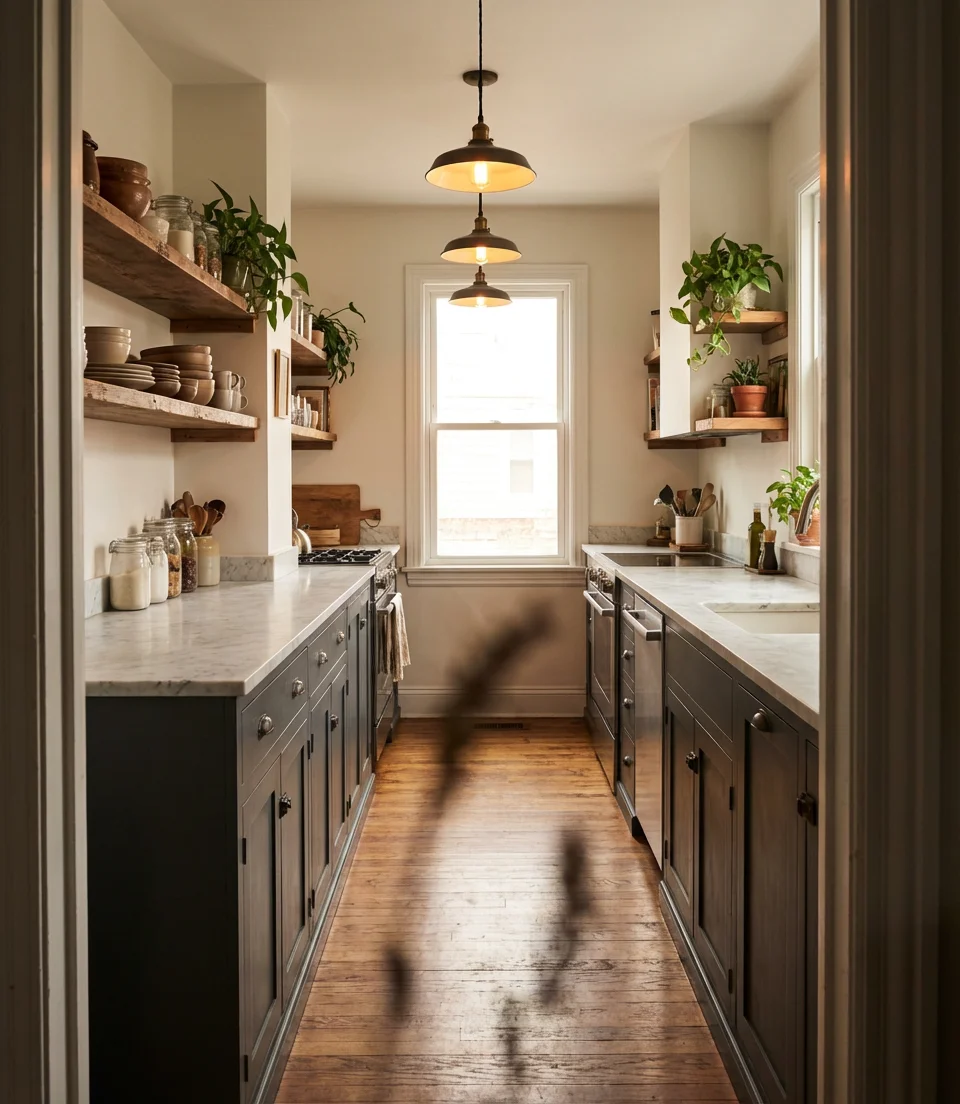
This layout works best in apartments where space is tight but ceiling height is generous. Consider installing a slim pull-out pantry between the refrigerator and wall—these hidden units can hold dozens of items without disrupting the visual flow. Soft-close drawers and cabinet organizers prevent the space from feeling cramped, while reflective surfaces like glossy backsplashes bounce light around to create an airier atmosphere.
2. Under-Stairs Kitchen Nook
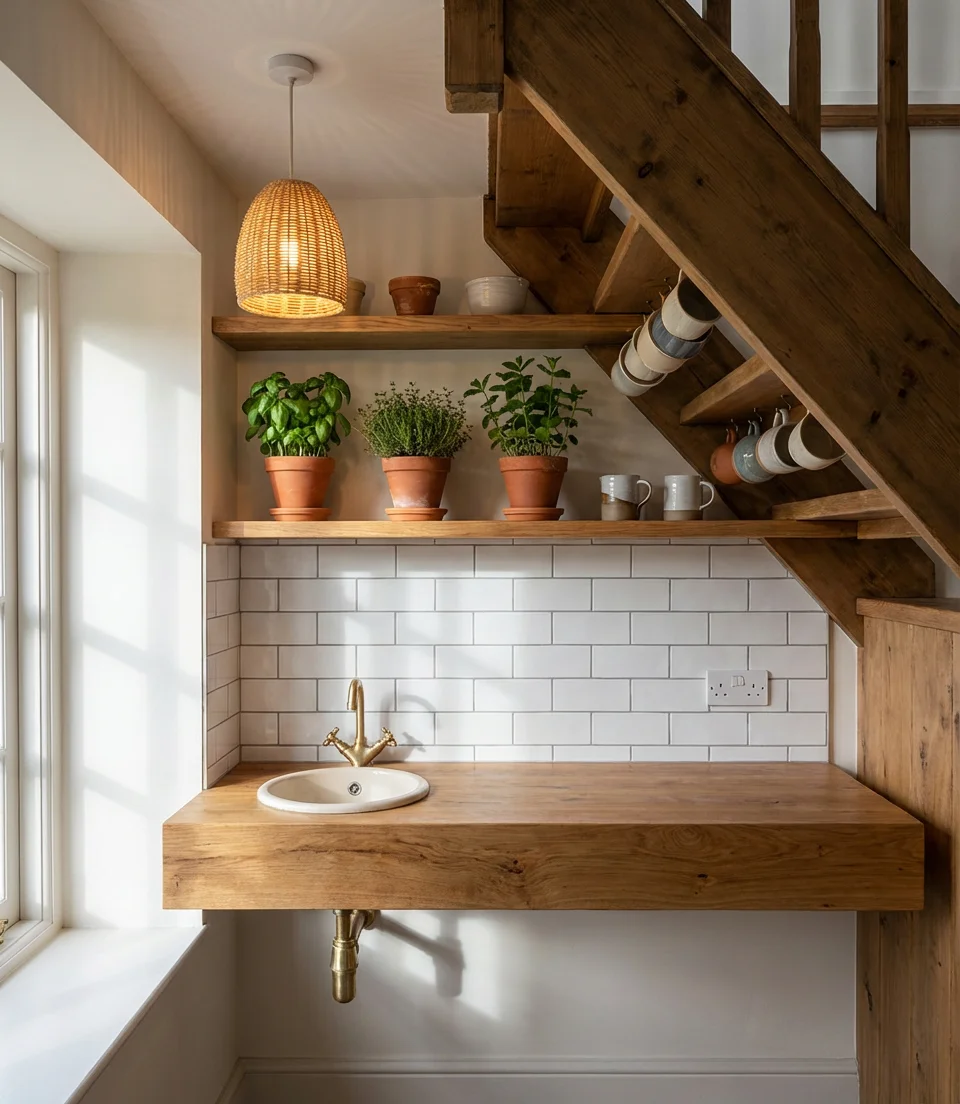
Transforming the area beneath a staircase into a functional kitchen is a brilliant solution for tiny homes and small houses where every corner counts. This unconventional approach capitalizes on often-wasted vertical space, fitting a compact sink, mini-fridge, and even a small cooktop into an angled footprint. The stairs above provide natural division from living areas, creating a defined cooking zone without requiring walls or partitions.
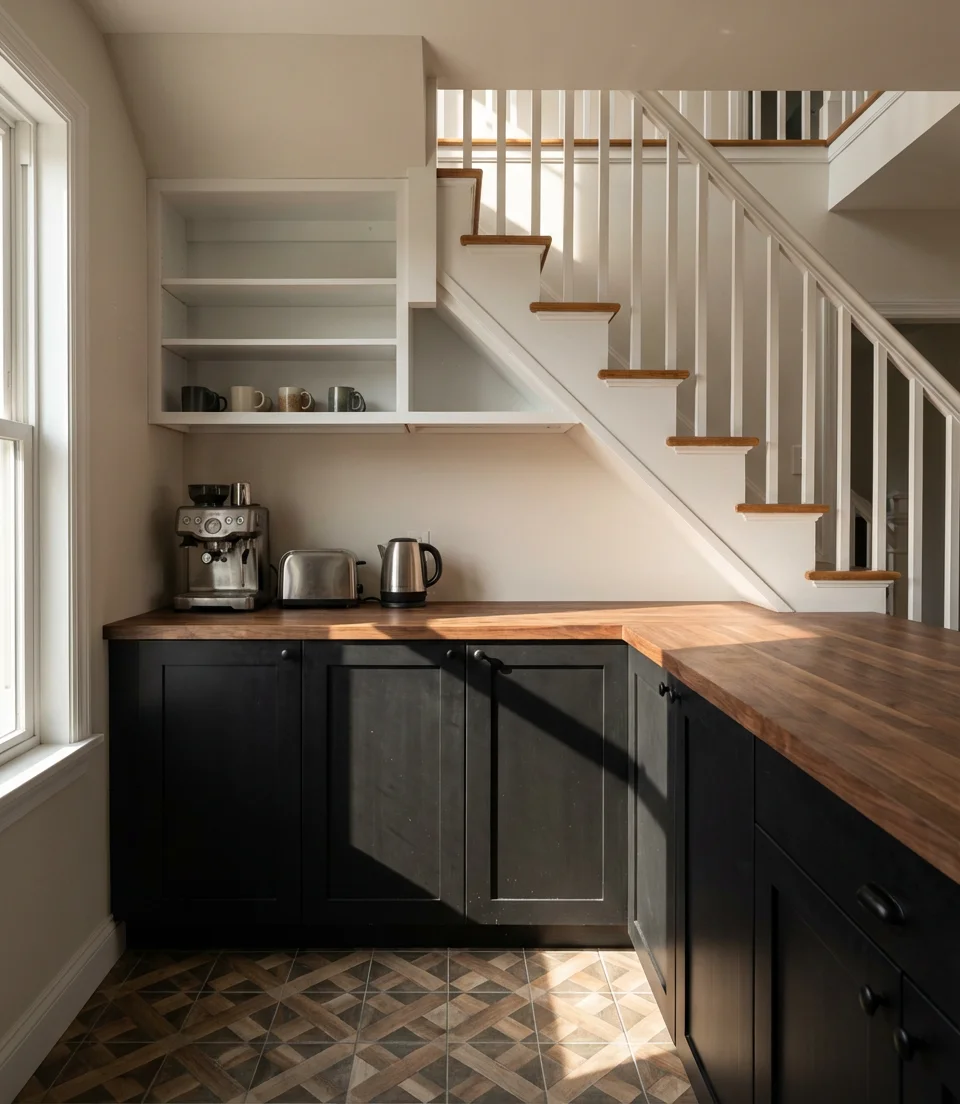
Where it works best: homes with straight staircases that have at least six feet of clearance underneath. You’ll need to work with the sloped ceiling, so choose appliances thoughtfully—compact models designed for RVs or boats often fit perfectly. A common mistake is trying to cram too much into the space; instead, focus on the essentials and use the area primarily for prep and quick meals rather than elaborate cooking sessions.
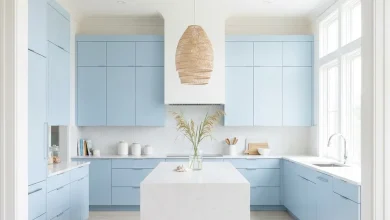
3. Minimalist One-Wall Kitchen
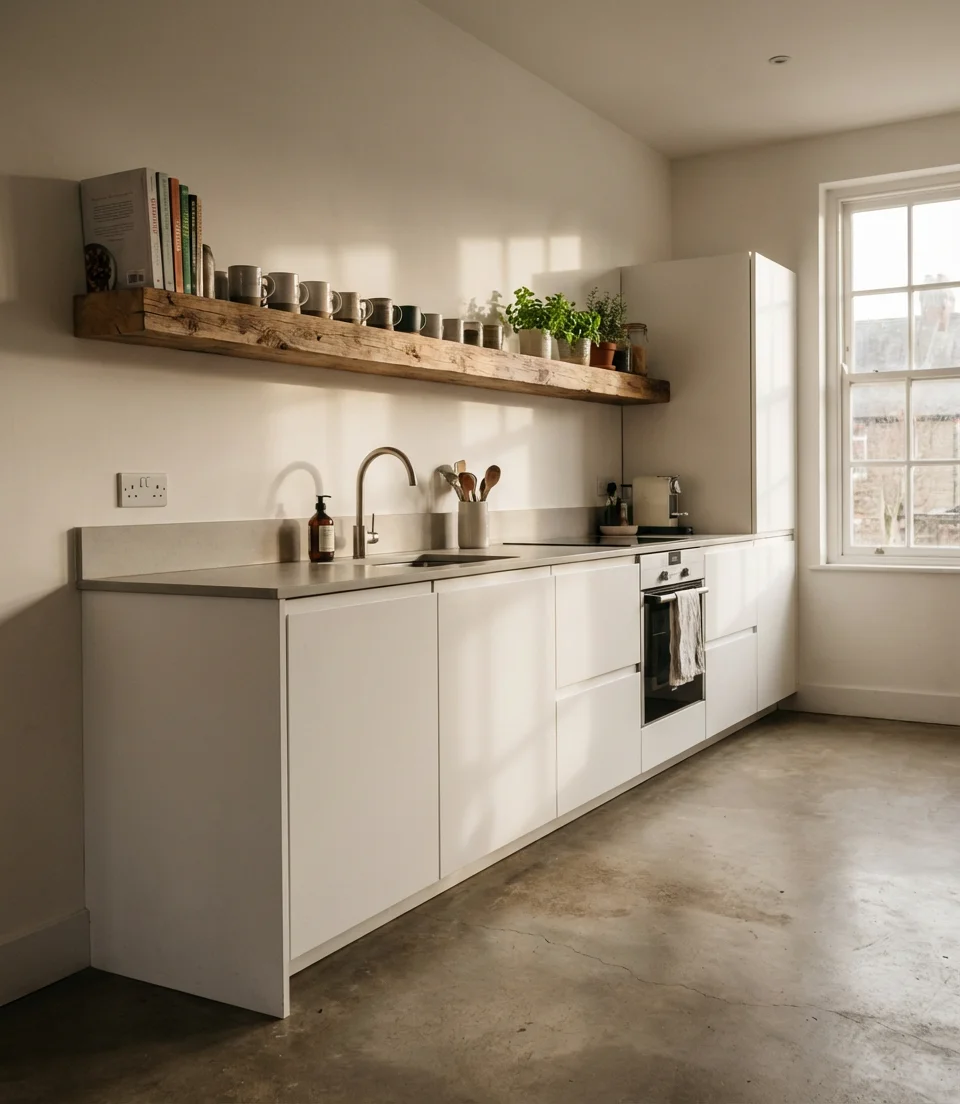
The one-wall layout strips away excess, placing all appliances, counter space, and storage along a single plane. This minimalist approach is ideal for studio apartments where the kitchen needs to blend seamlessly into the living area. By eliminating upper cabinets on one side, you maintain an open sightline that makes the entire space feel larger and more connected. Choose sleek, handleless cabinetry in neutral tones to reinforce the clean aesthetic.
Budget-conscious designers love this layout because it requires fewer cabinets and less countertop material than traditional configurations. Aim to keep frequently used items within a three-foot reach zone to avoid excessive movement during cooking. Hidden storage solutions like toe-kick drawers and magnetic knife strips keep the counter clear, maintaining that minimalist vibe while ensuring everything has its place.
4. IKEA Modular System Hack
IKEA’s modular kitchen systems have transformed affordable small-space design by providing components that can be mixed and matched to accommodate unique dimensions. The beauty lies in customization—you can combine drawer units, open shelving, and slim cabinets to create a configuration that fits your exact measurements. Pair their standard frames with custom fronts or DIY modifications to achieve a high-end look on a budget that doesn’t scream flat-pack furniture.
A designer once told me that the key to making IKEA kitchens look expensive is in the details: upgrade the hardware, add crown molding to upper cabinets, and install a quality countertop. Many American homeowners successfully integrate these systems into rental apartments because they’re simple to install and remove without damaging walls. The modular nature also means you can start small and expand as your budget allows, adding pieces over time.
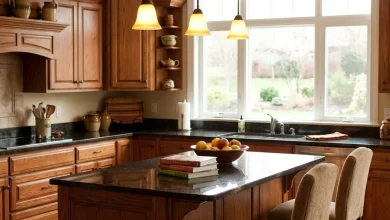
5. L-Shape with Corner Solutions
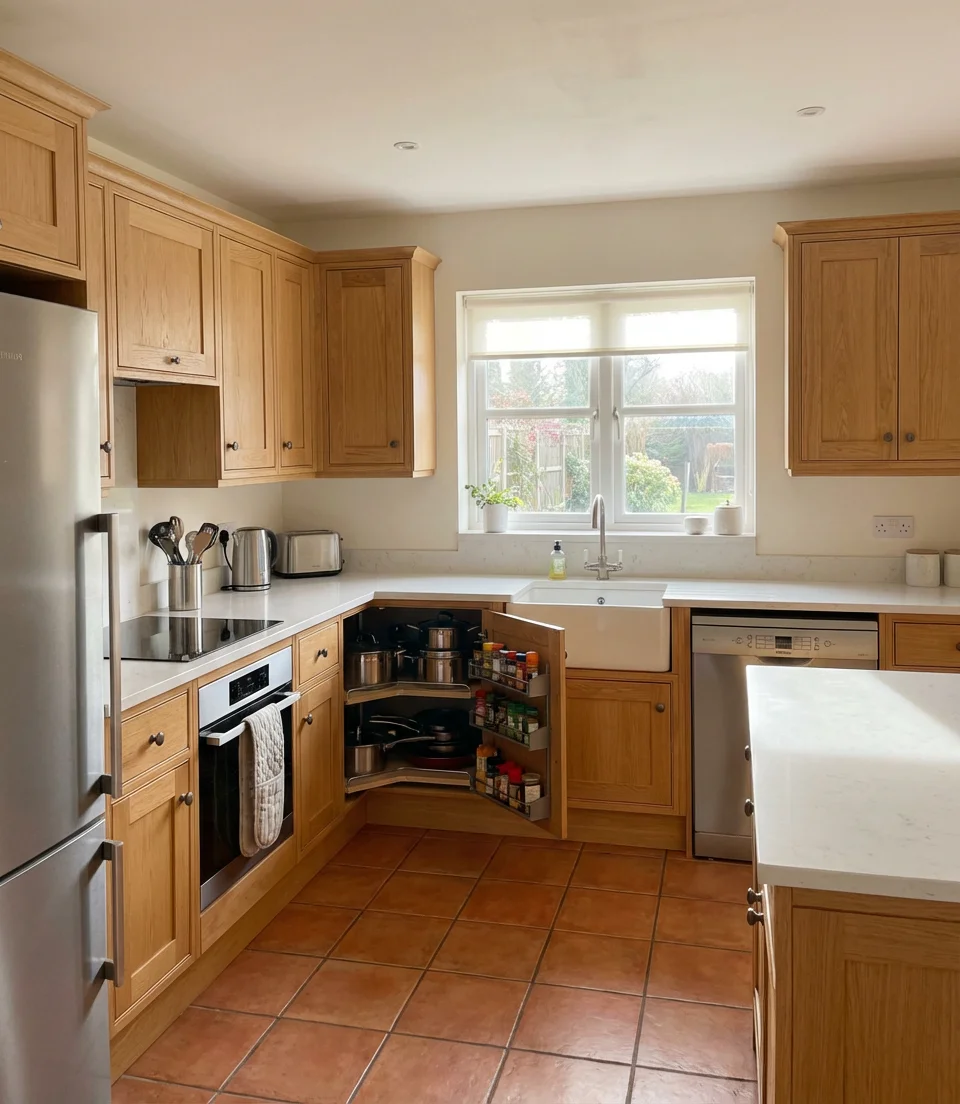
The L-shaped kitchen maximizes two adjacent walls while leaving the room open, creating a natural work triangle between the sink, stove, and refrigerator. Small kitchens often struggle with corner space, but clever solutions such as lazy Susans, pull-out corner drawers, or diagonal cabinets transform this awkward zone into highly functional storage. This configuration works exceptionally well in square or rectangular rooms where you need to preserve floor space for dining or movement.
Where it works best: apartments with at least 8×10 feet of available space. The corner is your opportunity to install a statement piece, like a corner sink with windows on both sides that floods the workspace with natural light. Avoid the common mistake of placing the stove in the corner—it’s difficult to access pots from both sides and limits your backsplash options for heat-resistant materials.
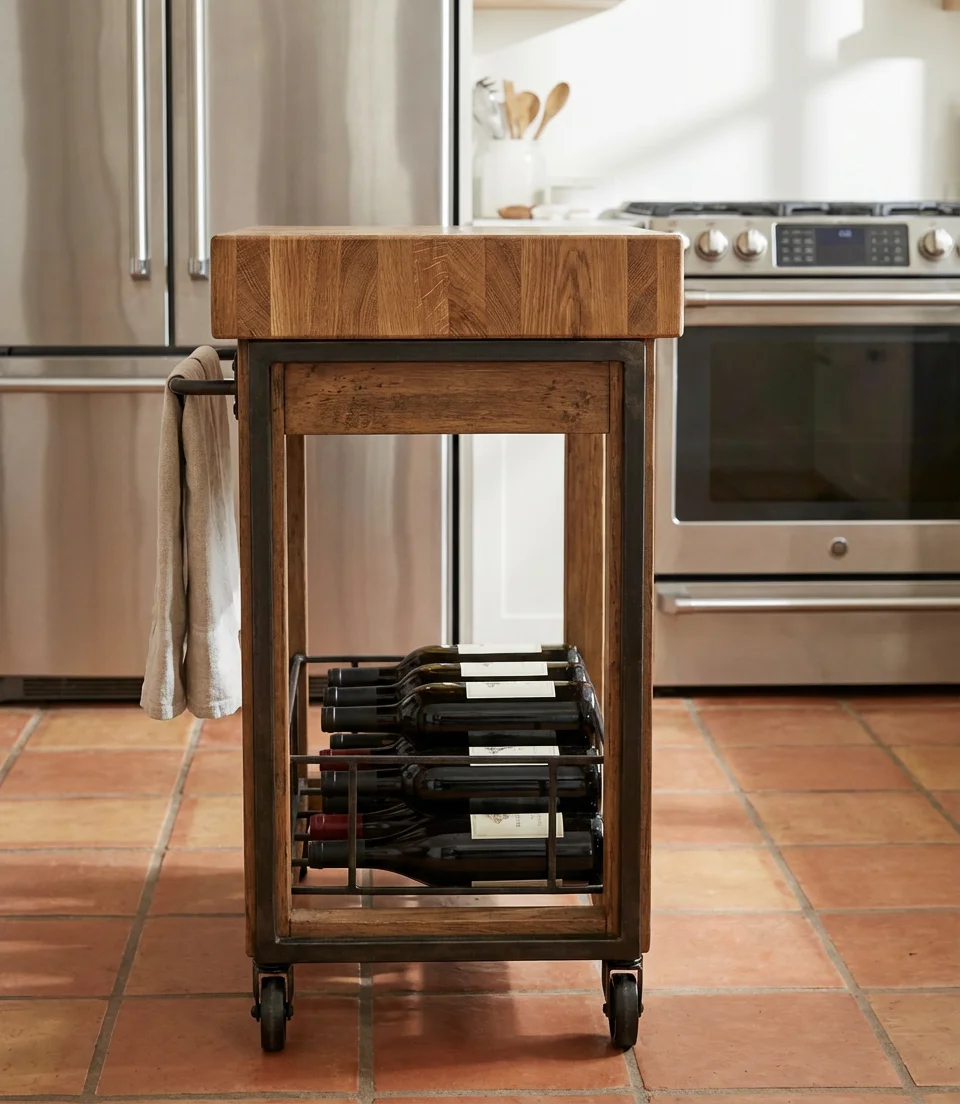
6. Industrial Cart as Mobile Island
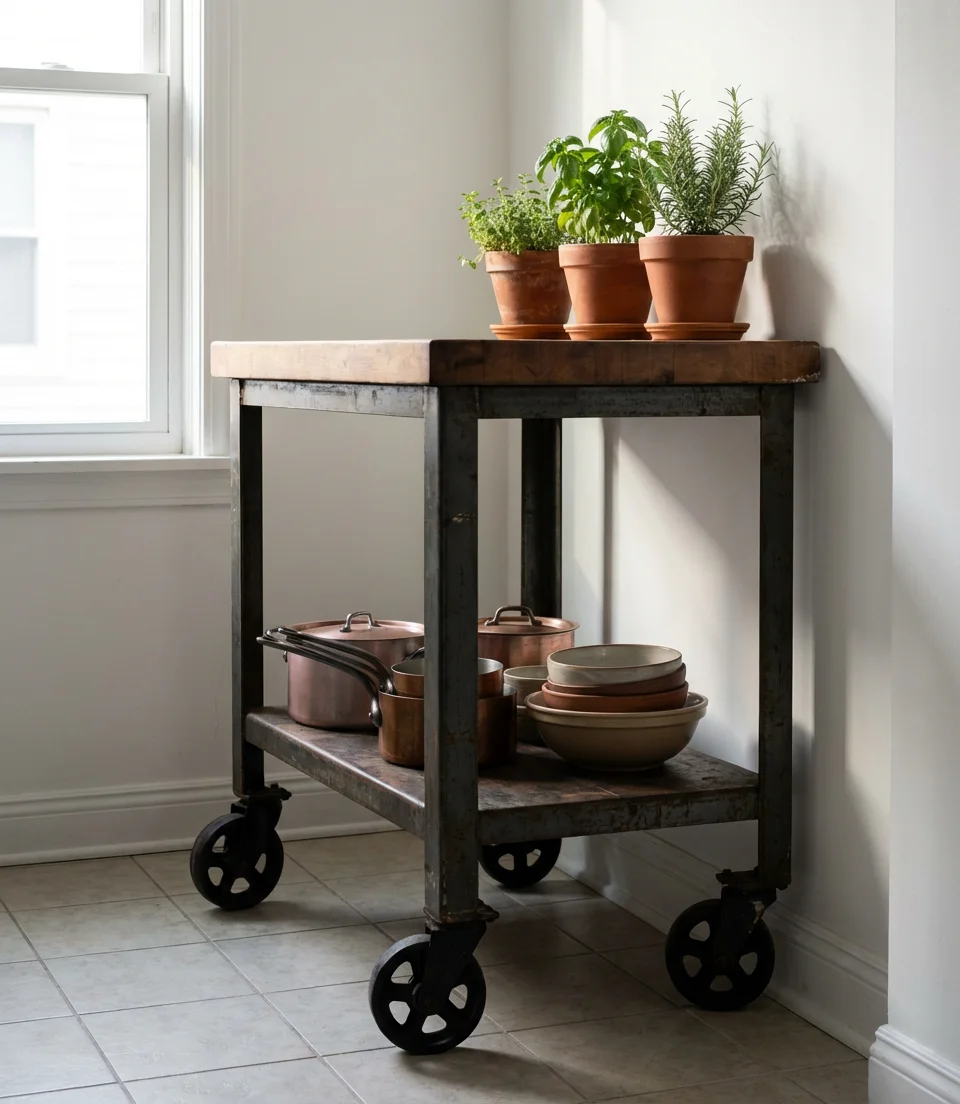
A rolling industrial cart serves as a flexible island that adapts to your needs throughout the day in apartments where permanent fixtures aren’t possible. These mobile units provide additional prep space and storage for cookware and can be wheeled out of the way when you need to open up the floor plan. Look for versions with butcher block tops, wine racks, or built-in towel bars that add functionality without bulk.
Budget-wise, you can find quality carts for $150 to $400, making this one of the most affordable ways to add counter space. Real homeowner behavior shows that people tend to use these carts as a landing zone for groceries, a coffee station, or even a bar cart when entertaining. Choose a style that complements your existing cabinetry—sleek metal for modern spaces, reclaimed wood for rustic vibes, or painted options for a pop of color.
7. Fold-Down Dining Table Extension
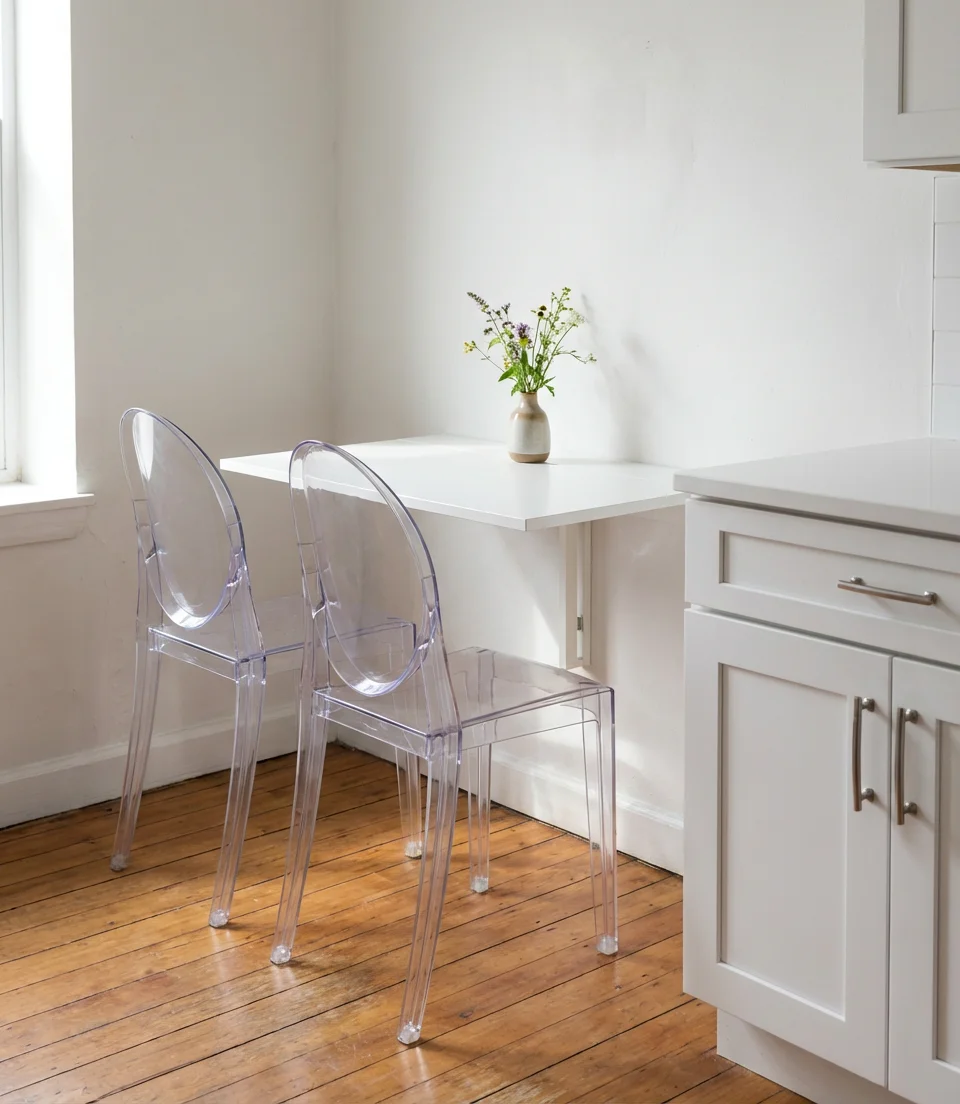
Wall-mounted fold-down tables extend your kitchen’s functionality without permanently claiming floor space, perfect for small apartments where every square foot matters. During meal prep, drop the table to create extra counter space; when dining, it becomes a proper eating surface for two to four people. Modern designs incorporate soft-close hinges and support brackets that disappear when the table is raised, maintaining clean lines in your layout.
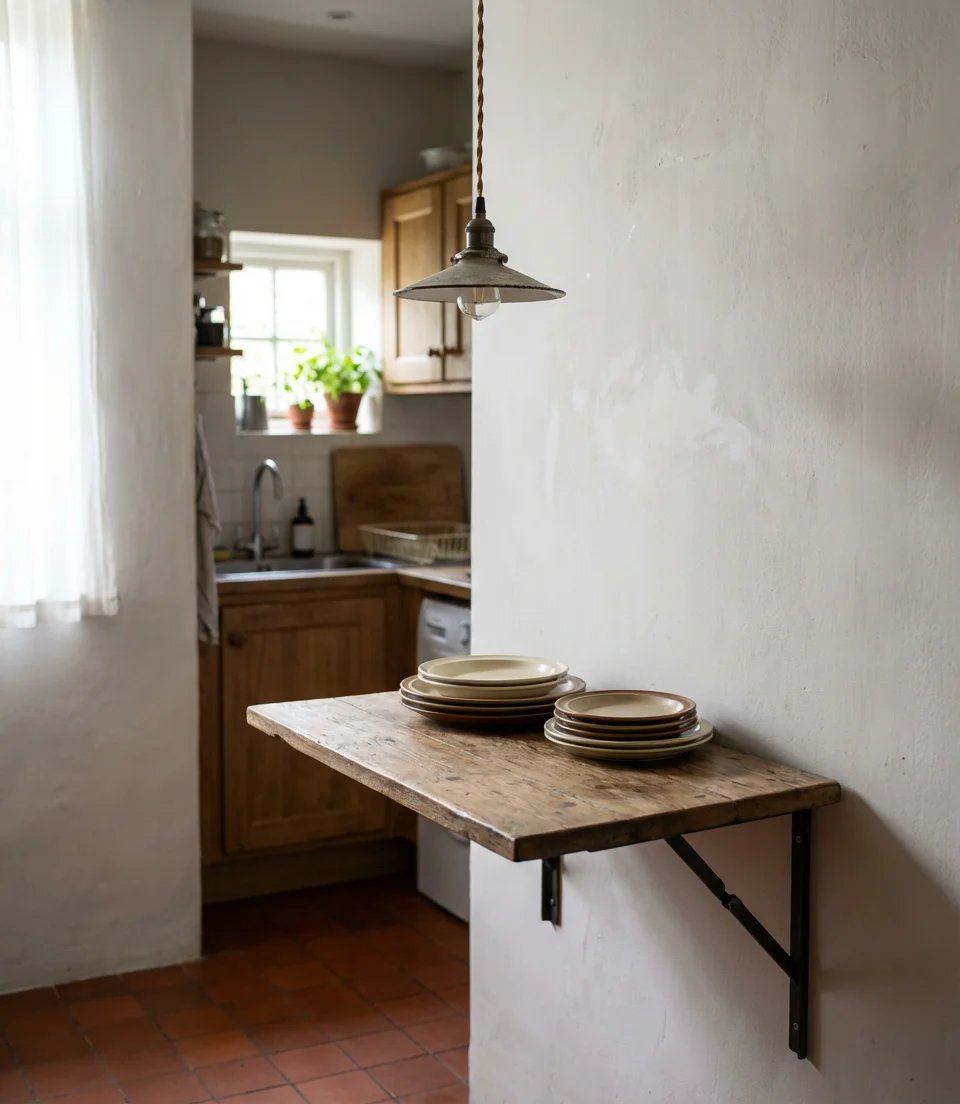
This solution is particularly popular in Southern cities where outdoor dining is common, and the kitchen table serves more as a prep station than a daily eating spot. Installation requires finding studs in the wall to ensure proper support—a table that can hold at least 50 pounds when extended. Many homeowners paint the underside of the table in an accent color that becomes wall art when folded up, adding visual interest to an otherwise functional piece.
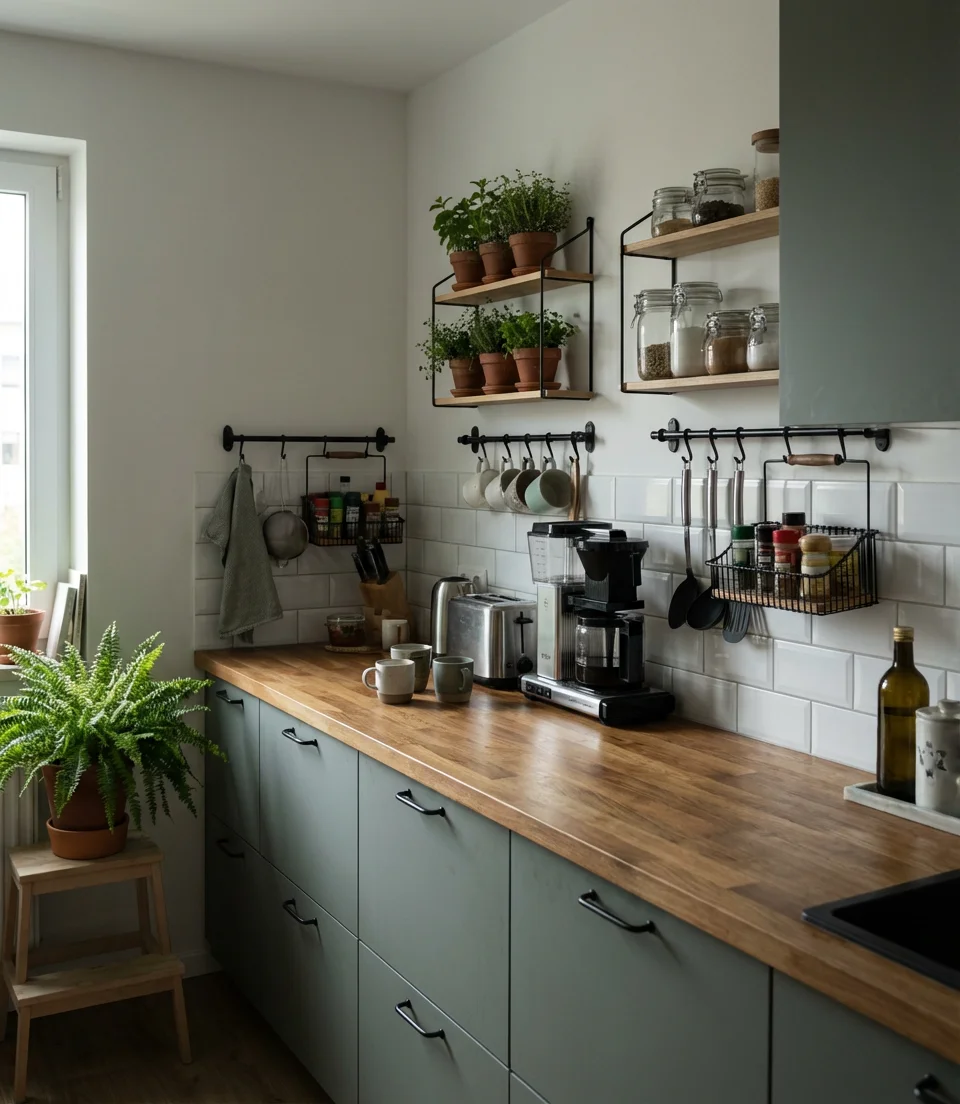
8. Pegboard Wall Organization
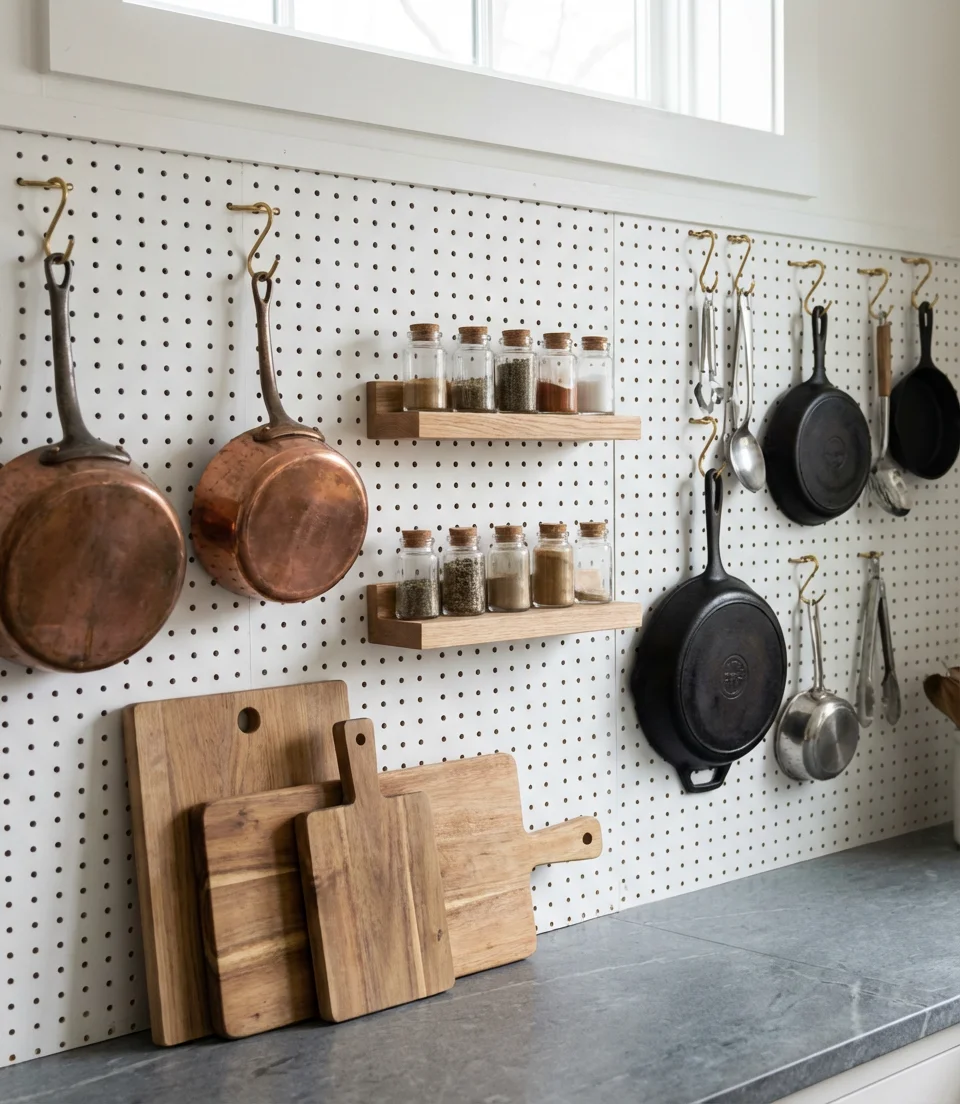
Pegboard transforms vertical wall space into customizable storage that adapts as your needs change, making it ideal for renters and homeowners alike. Paint it to match your decor, then arrange hooks, shelves, and baskets to hold everything from utensils to cutting boards. The visual accessibility means you’ll actually use the tools you own, and the grid pattern adds an intentional, designed look rather than appearing cluttered.
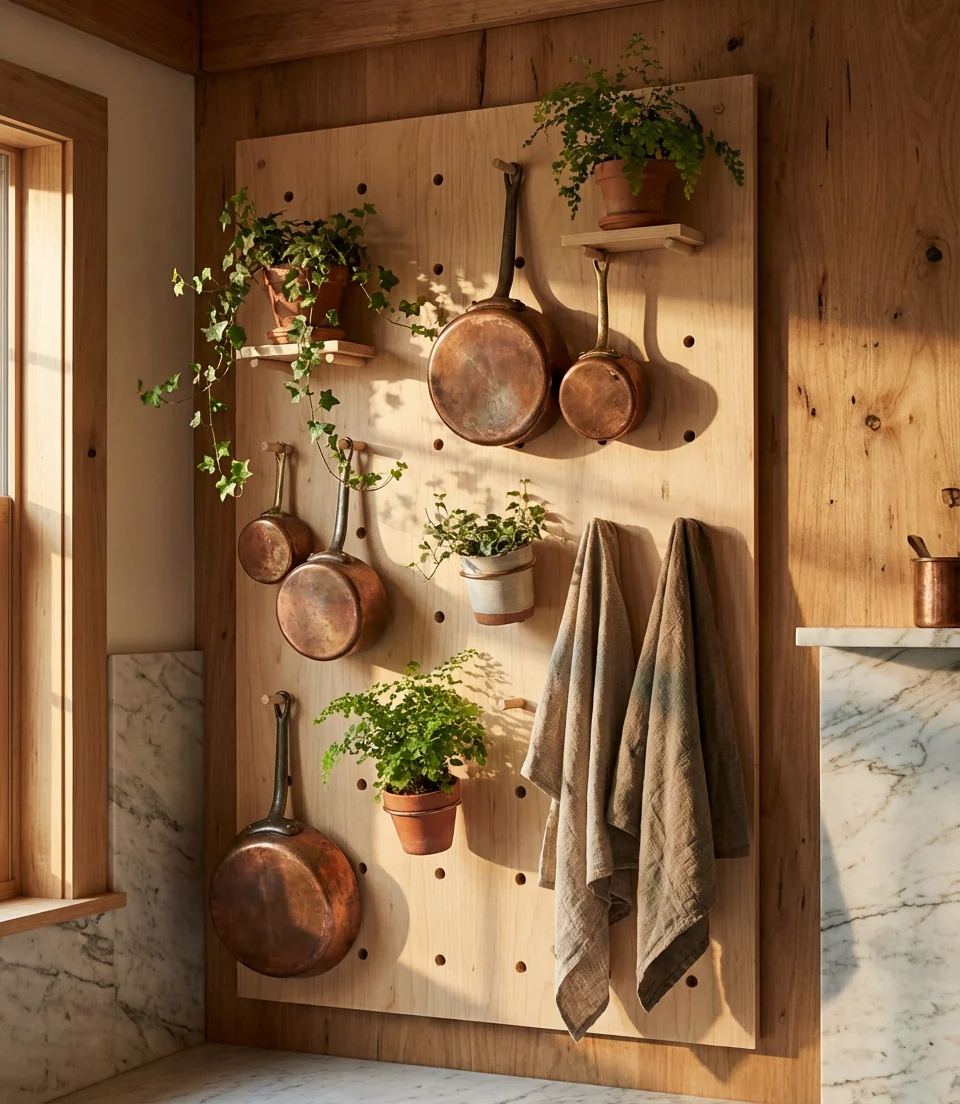
Expert designers recommend keeping the pegboard to one wall or a defined section to avoid overwhelming the space. The key is grouping items by use—create a coffee station zone, a cooking utensil area, and a prep tool section. A common mistake is overloading the board until it looks chaotic; instead, leave some holes empty and rotate items seasonally or as your cooking style evolves.
9. Compact Washer-Dryer Integration
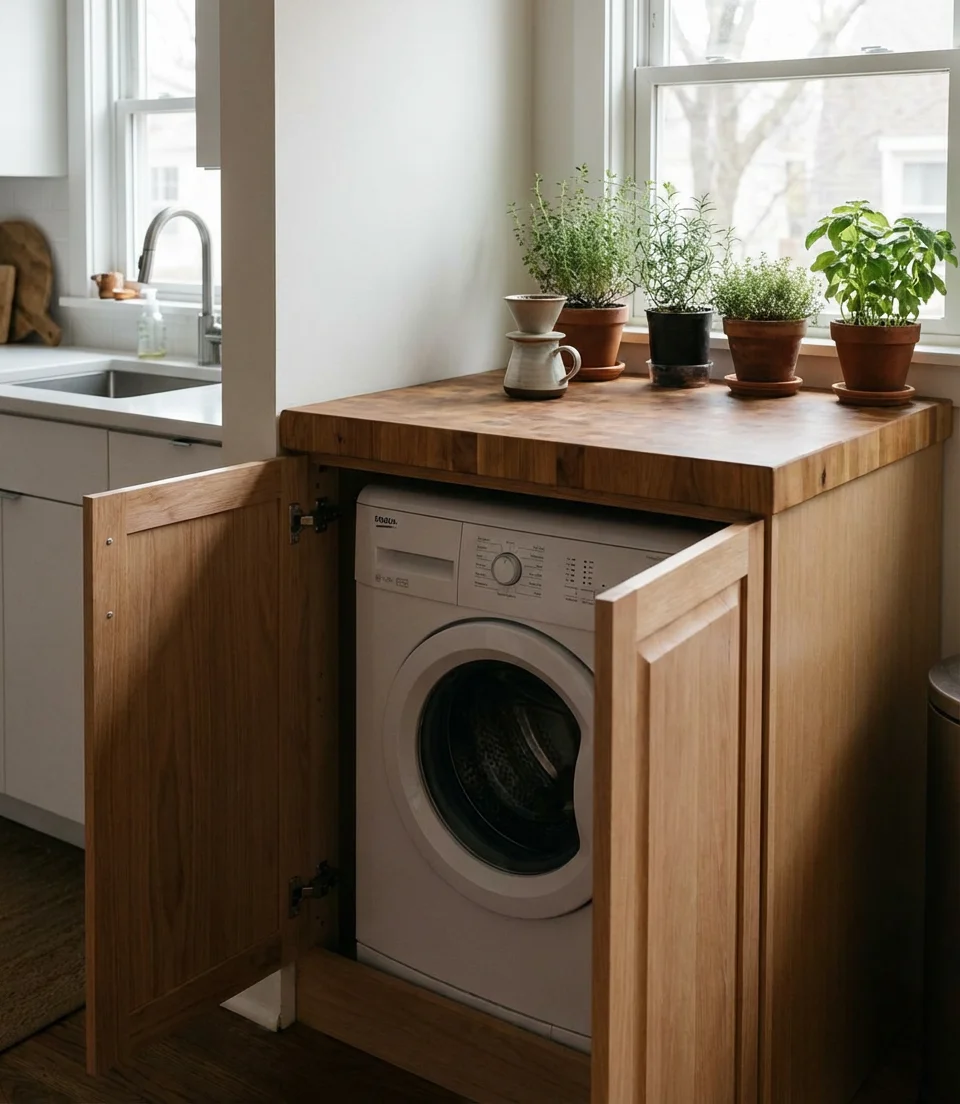
In apartments with limited laundry hookups, integrating a compact washing machine into your kitchen layout maximizes efficiency. European-style combo units fit under counters or in tall cabinets, operating quietly enough that they won’t disrupt cooking or conversation. Choose front-loading models with ventless drying technology to avoid complex exhaust requirements, and install them near plumbing lines to simplify connections.
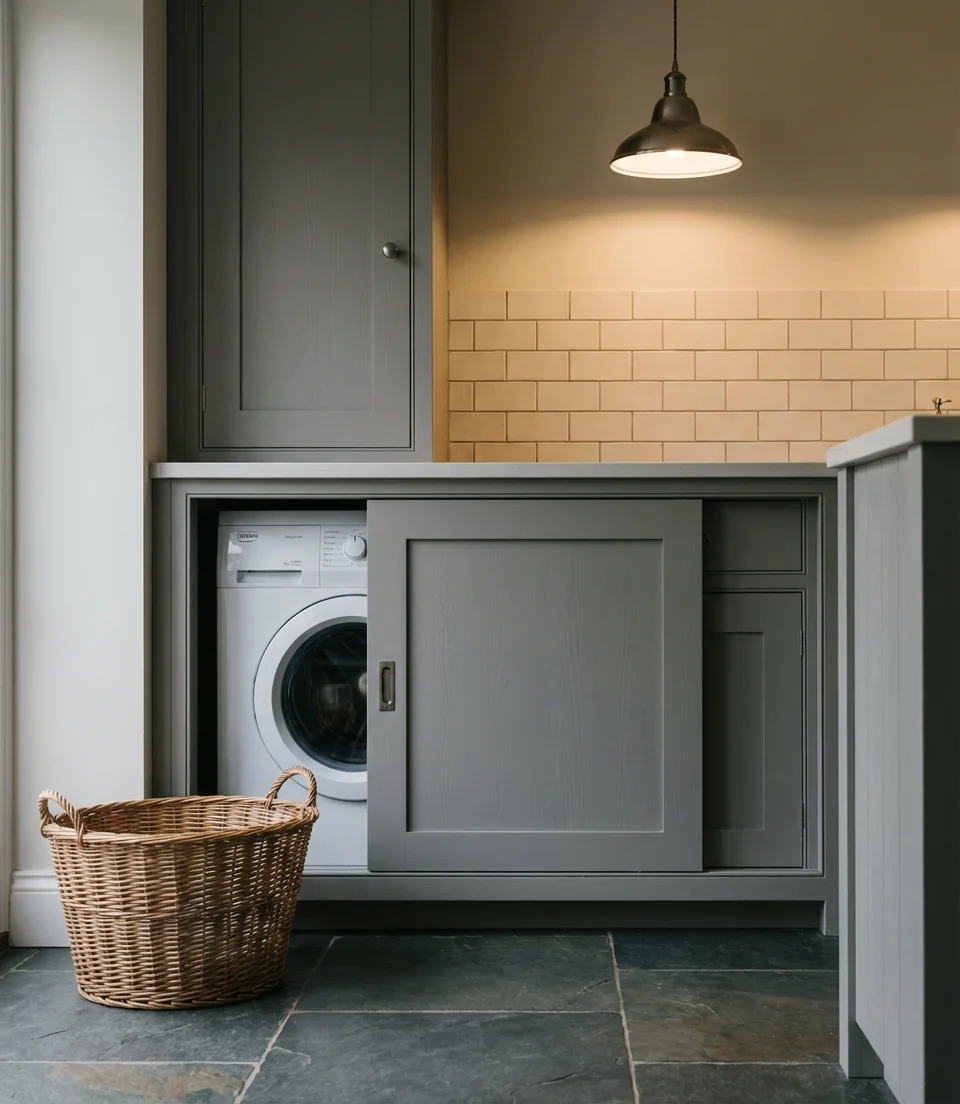
Where it works best: ground-floor apartments and condos where vibration isn’t a concern for neighbors below. You’ll want to add extra soundproofing beneath the unit and consider shock-absorbing pads. Real homeowner behavior shows that having laundry in the kitchen encourages more frequent, smaller loads rather than letting it pile up, and the convenience of multitasking while cooking is genuinely life-changing for busy professionals.
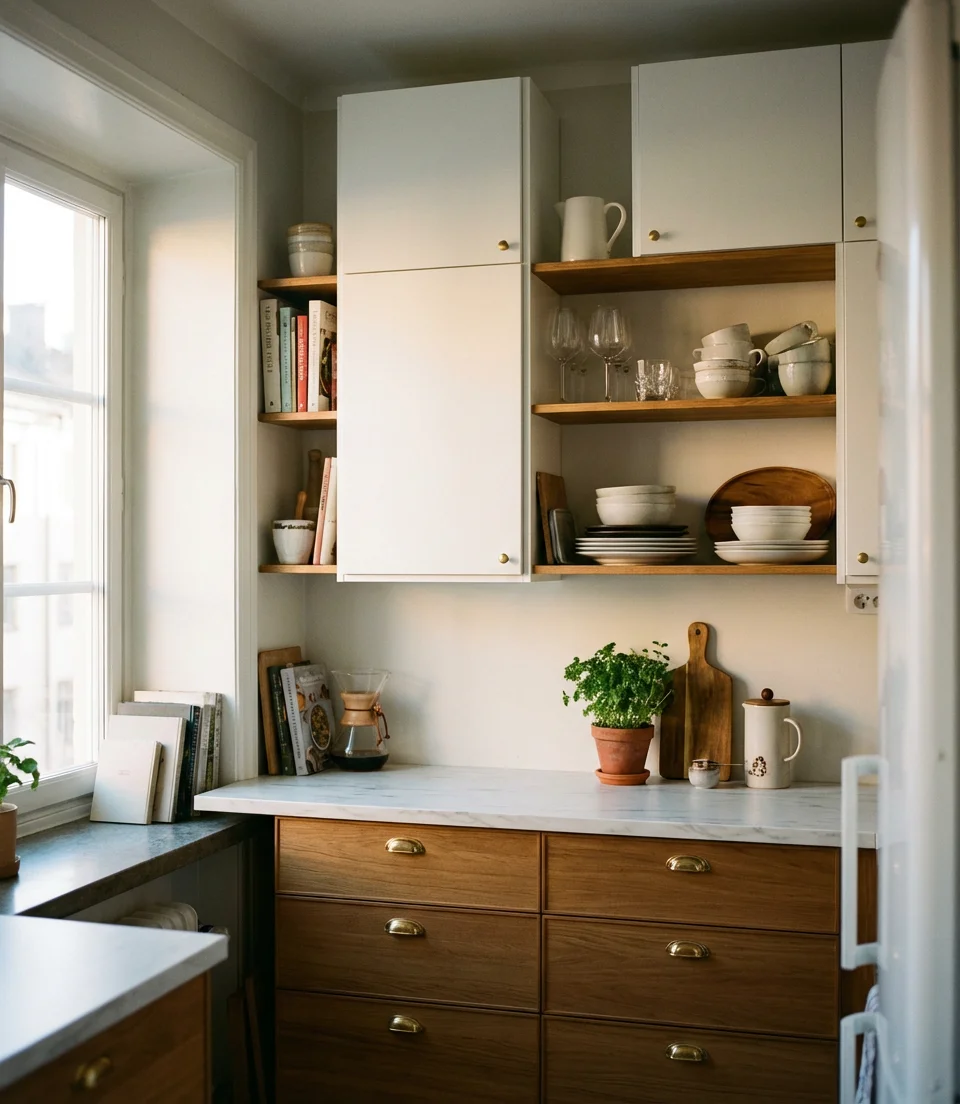
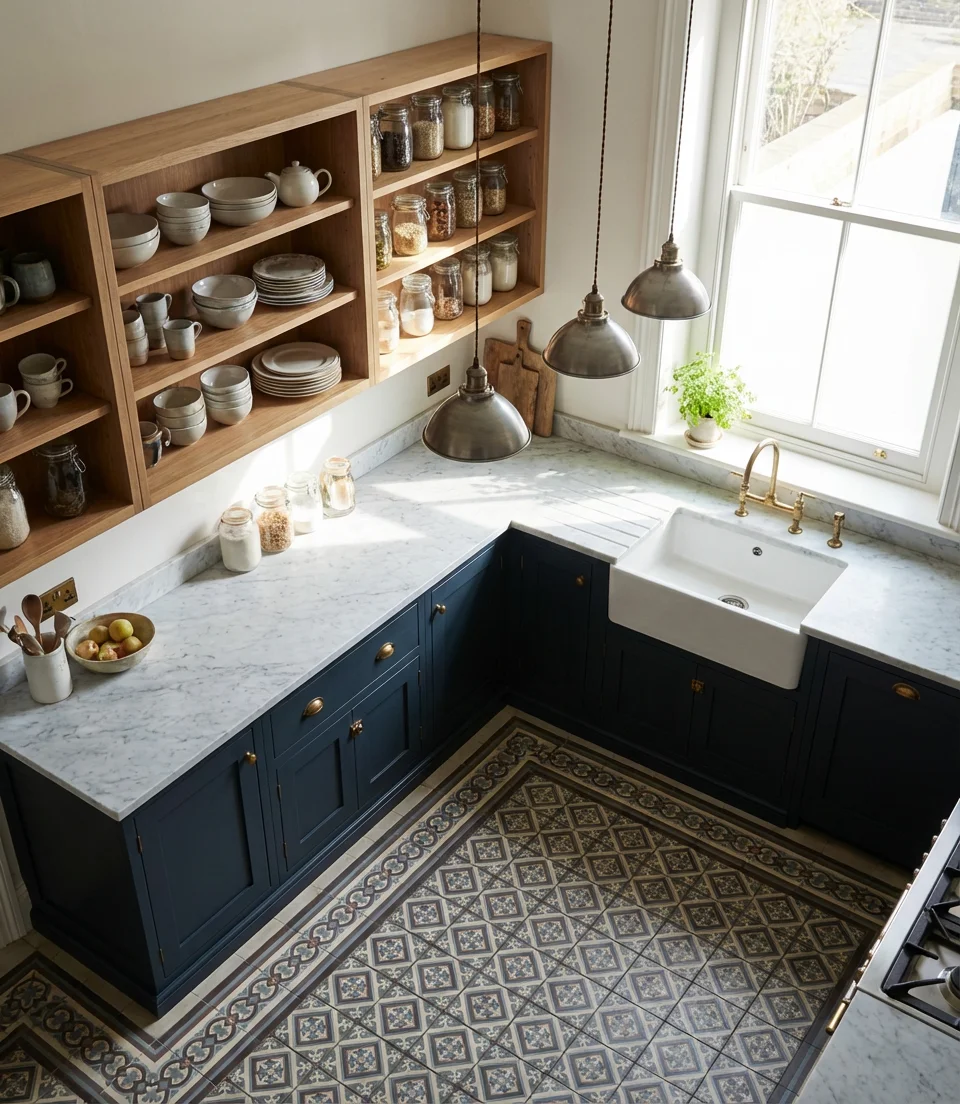
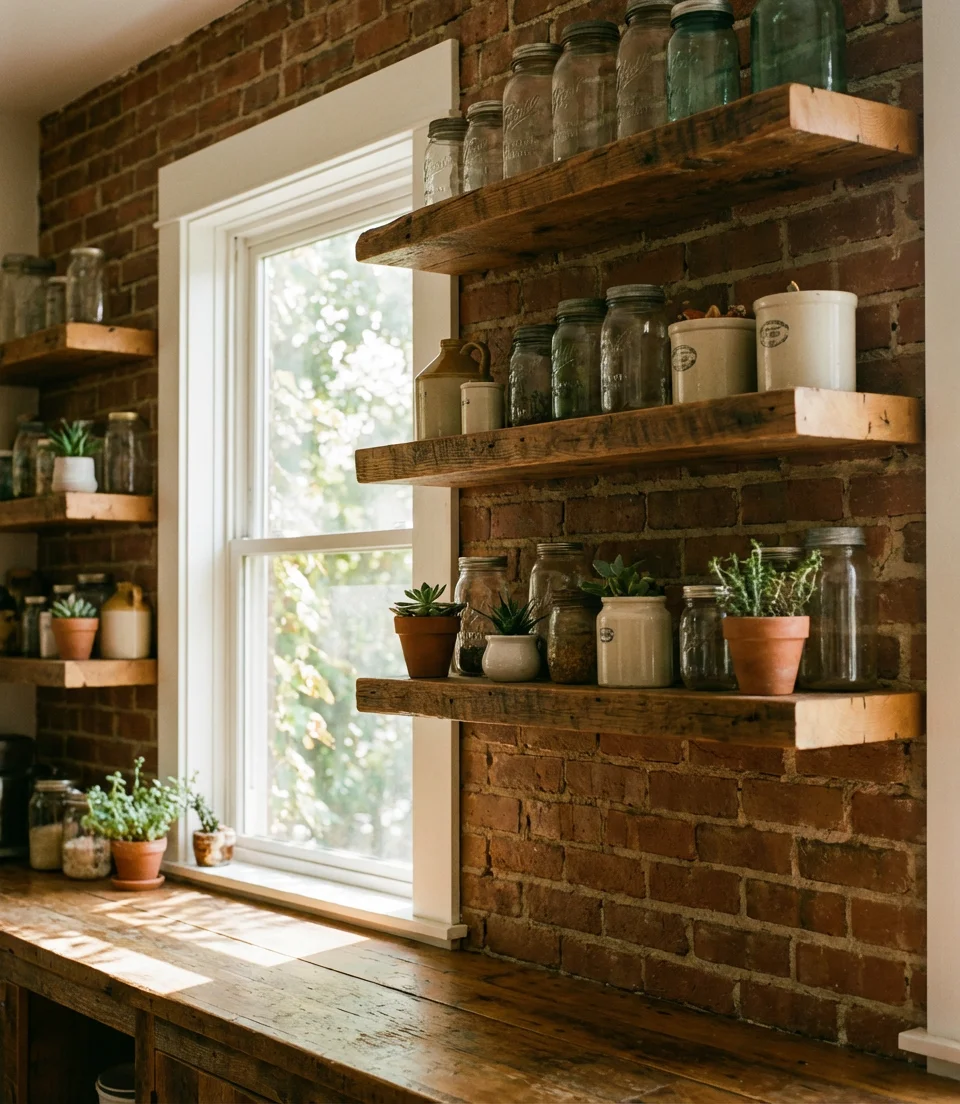
10. Open Shelving with Curated Display
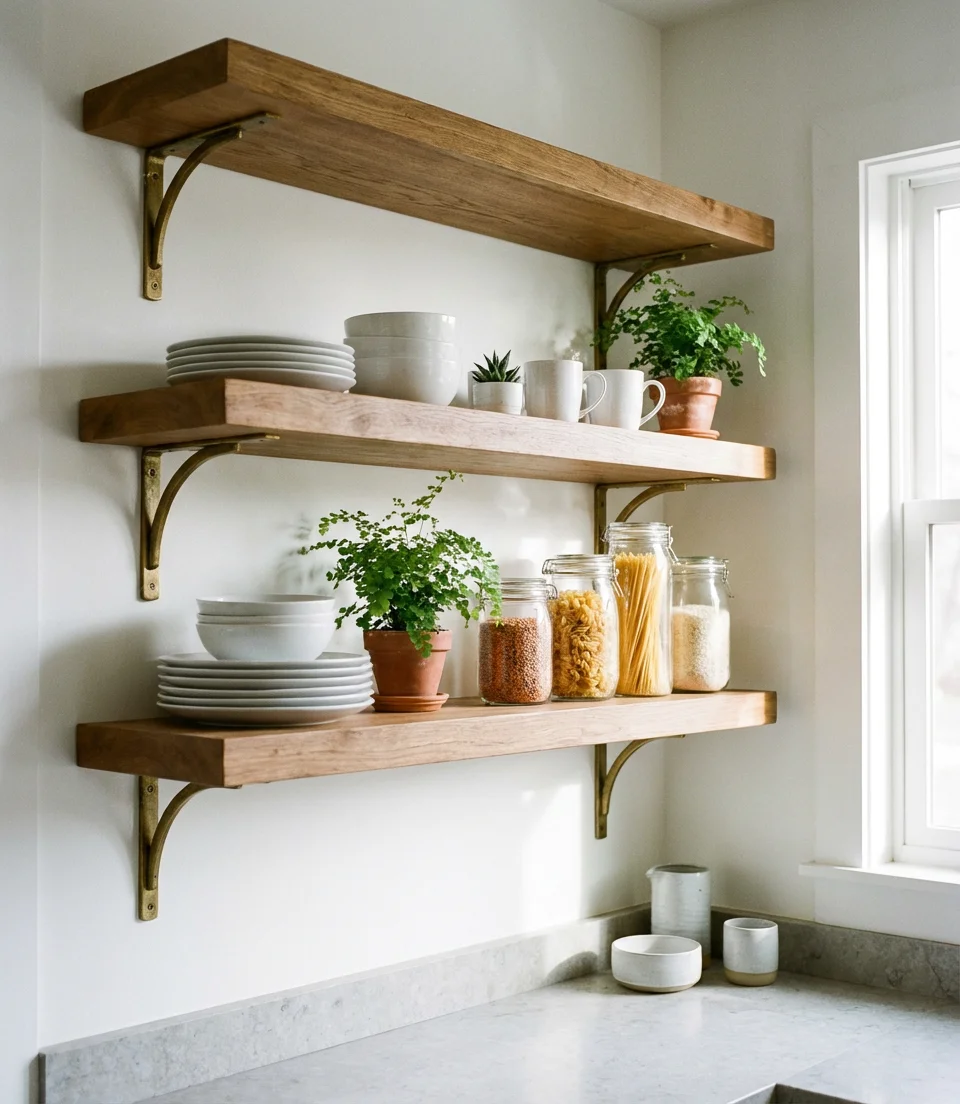
Open shelving creates visual breathing room in tight kitchens while forcing a curated, intentional approach to what you keep on display. This design choice works beautifully in modern and minimalist kitchens where clean lines and edited collections take center stage. Arrange dishes, glassware, and attractive pantry items by color or size to create a cohesive look that reads as design rather than clutter.
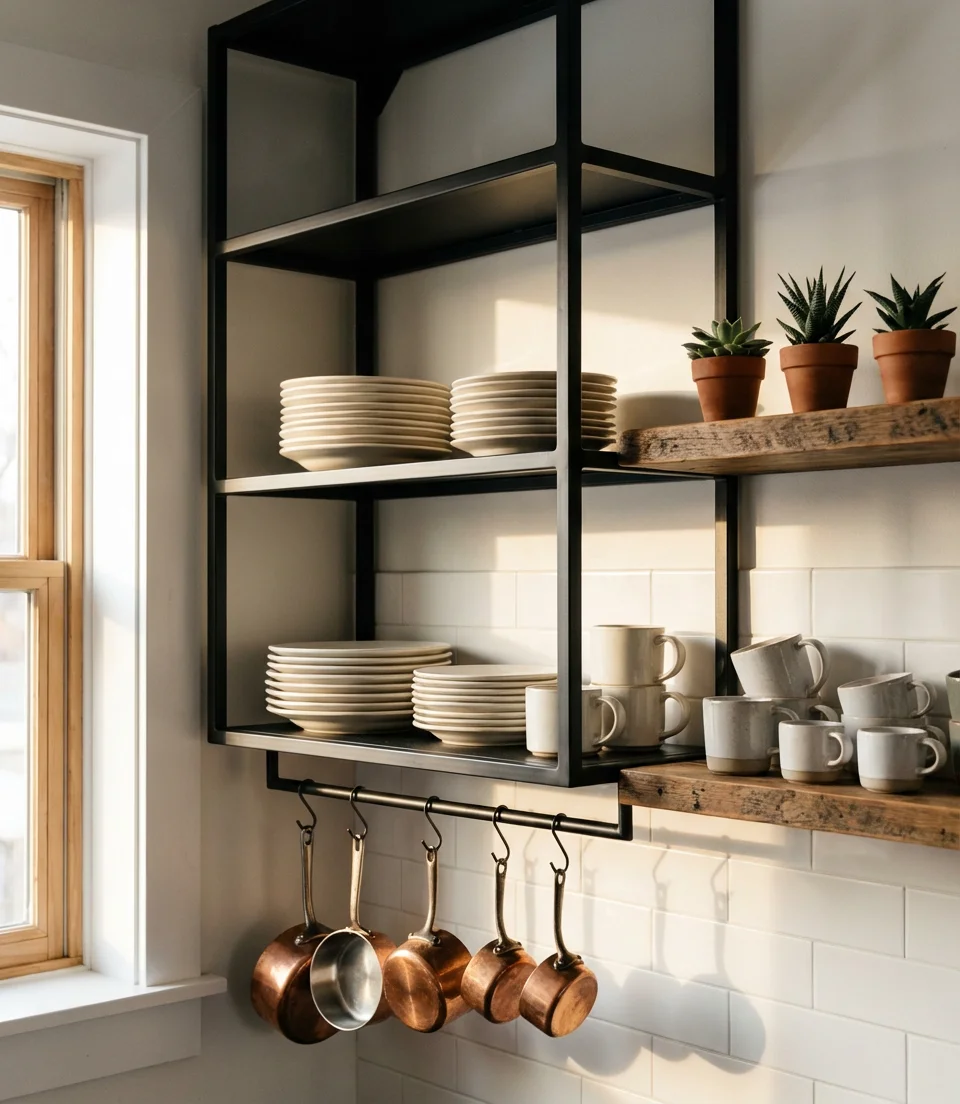
A practical insight: open shelving requires more maintenance than closed cabinets since everything collects dust and grease from cooking. Combat this by storing only items you use weekly and wiping down shelves during regular cleaning. Budget-conscious homeowners love this option because quality open shelves cost significantly less than custom cabinetry, and you can DIY the installation over a weekend with basic tools and bracketing from any hardware store.
11. Sliding Barn Door Pantry
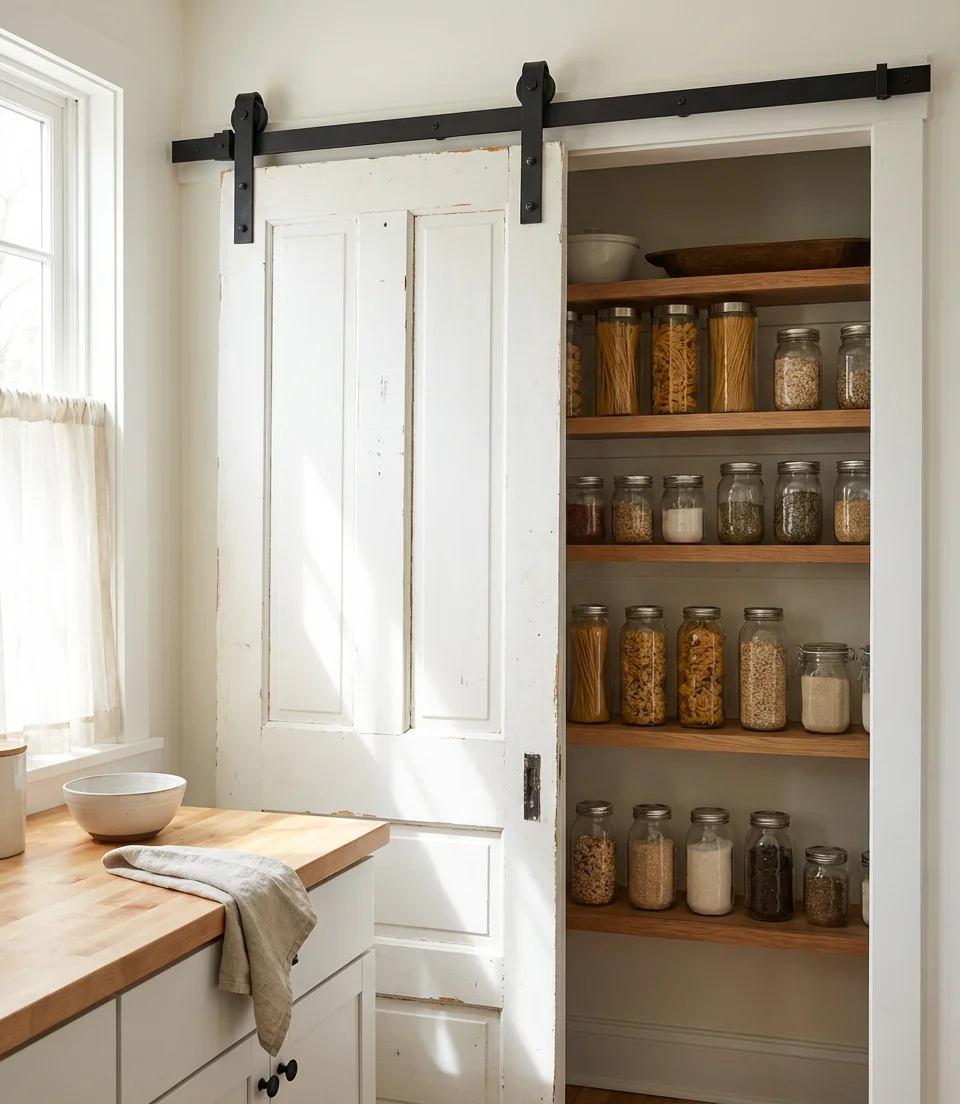
A sliding barn door conceals a shallow pantry or storage closet without requiring swing clearance, making it perfect for narrow kitchens in small houses. The door itself becomes a design element—choose reclaimed wood for rustic charm, sleek metal for industrial vibes, or painted finishes that complement your cabinets. Behind it, install adjustable shelving that extends from floor to ceiling, creating a surprisingly spacious pantry with only 12–18 inches of depth.

This solution is particularly popular in Midwestern homes where farmhouse style dominates, but it translates beautifully to urban lofts when executed with modern materials. The door must be properly mounted to wall studs to support its weight over time—cheap hardware will sag and stick. Consider adding a soft-close mechanism to prevent slamming, which is especially important in open-concept spaces where kitchen noise carries into living areas.
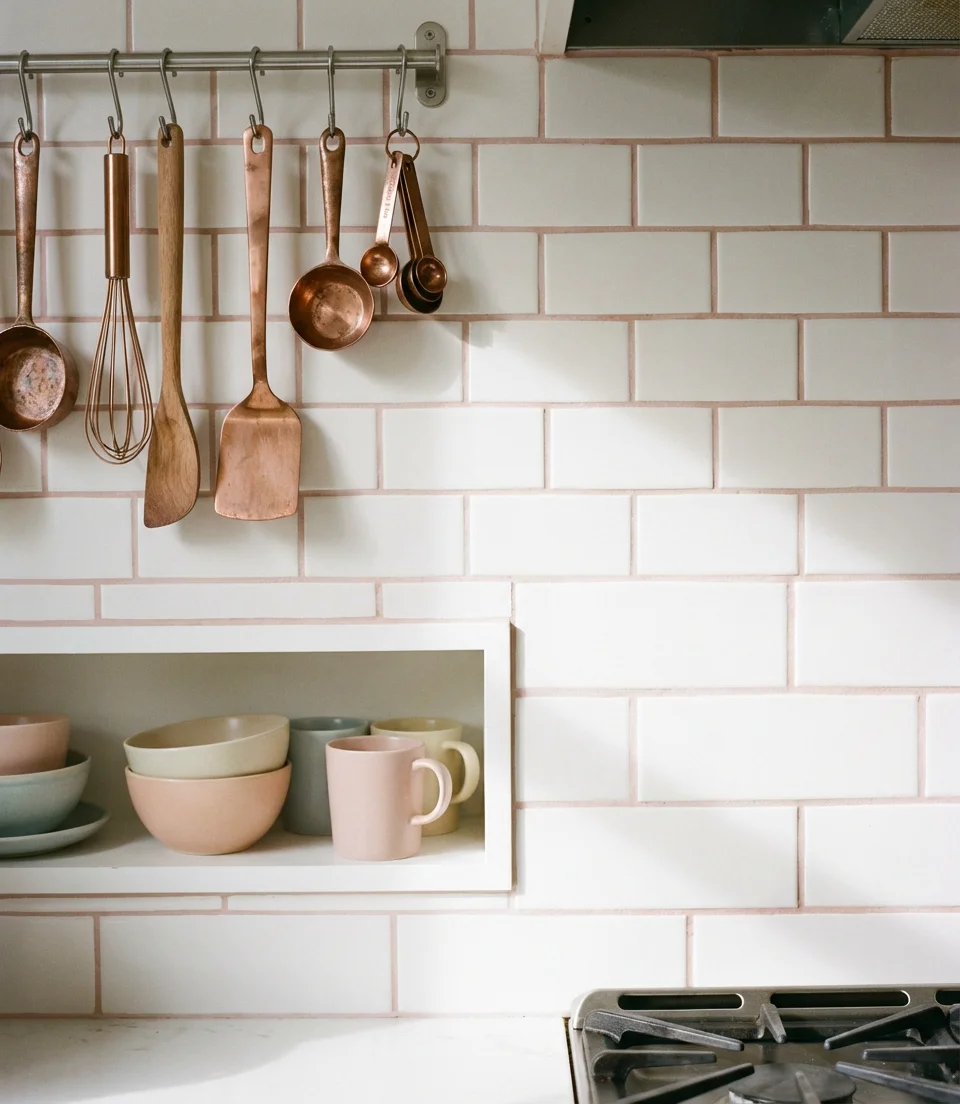
12. Magnetic Knife Strip and Spice Rack
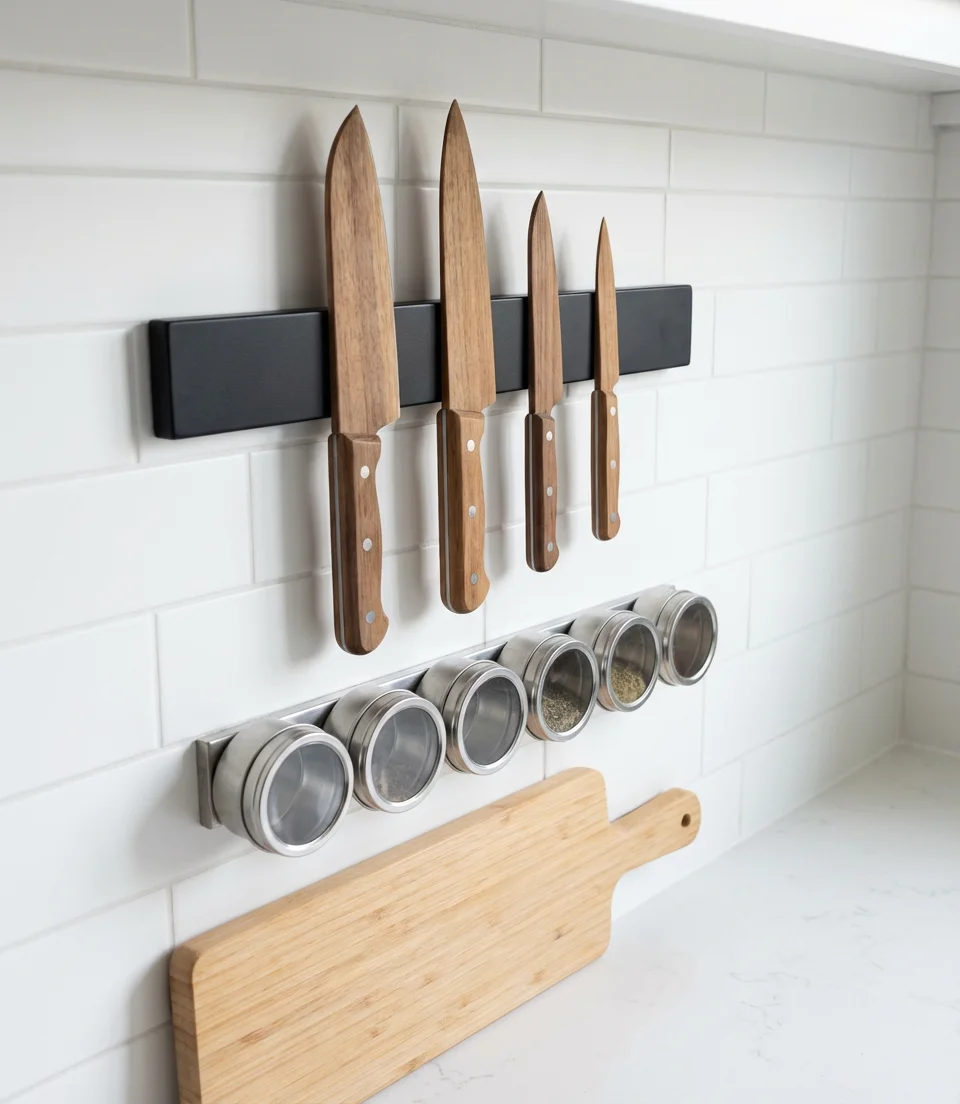
Magnetic strips mounted on walls or backsplashes keep knives and metal spice tins accessible while freeing up precious drawer storage. This wall-mounted solution works in the tiniest kitchens, adding zero footprint while improving workflow. Position the knife strip within arm’s reach of your main prep area, and group spice tins by use frequency—everyday seasonings at eye level, specialty items higher up.
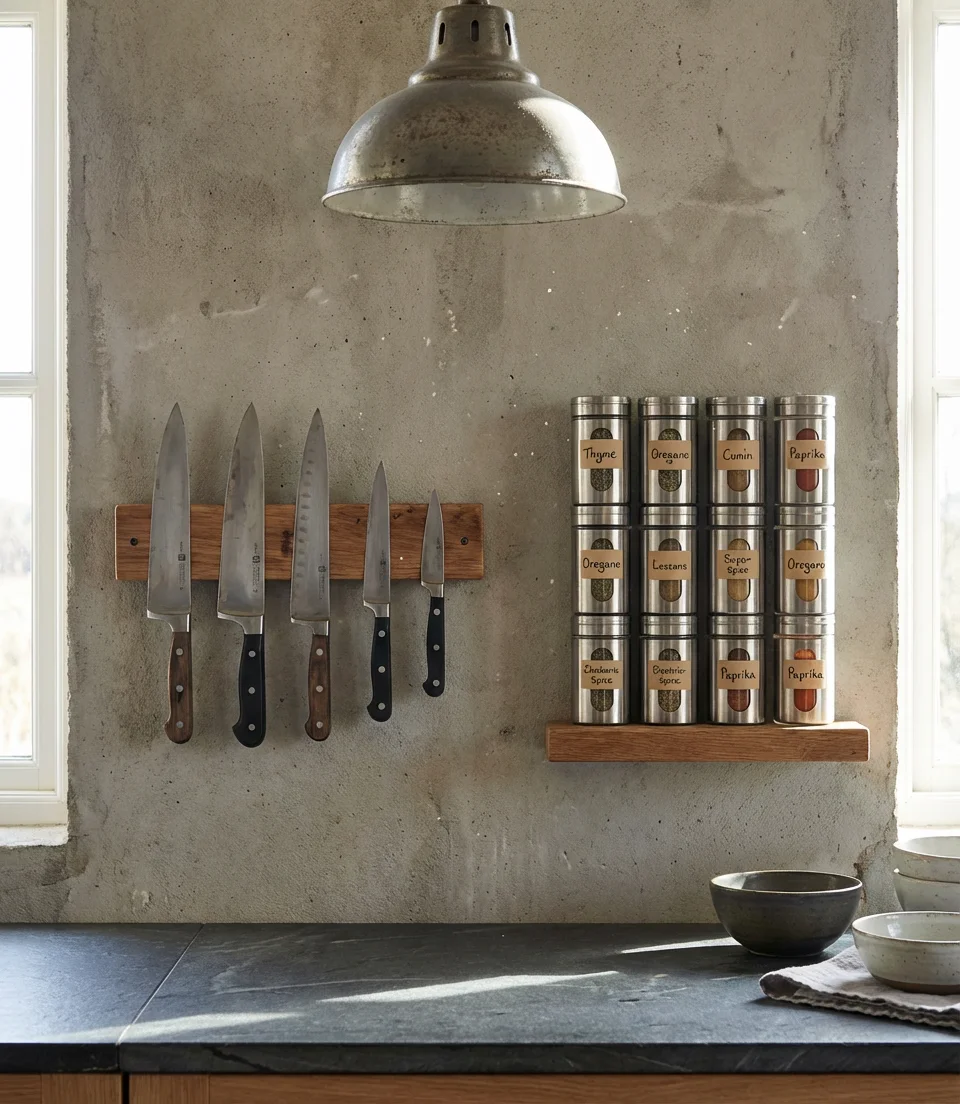
A common mistake is installing these strips too high or too low—they should sit at elbow height when you’re standing at the counter. Many apartment dwellers appreciate that magnetic strips install with just a few screws or even heavy-duty adhesive strips, making them renter-friendly. The visual impact of a well-organized knife collection adds a professional kitchen vibe, and keeping blades exposed actually encourages better maintenance since you’ll notice when they need sharpening.
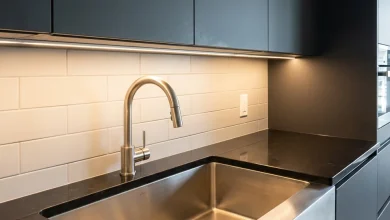
13. Corner Sink with Windows
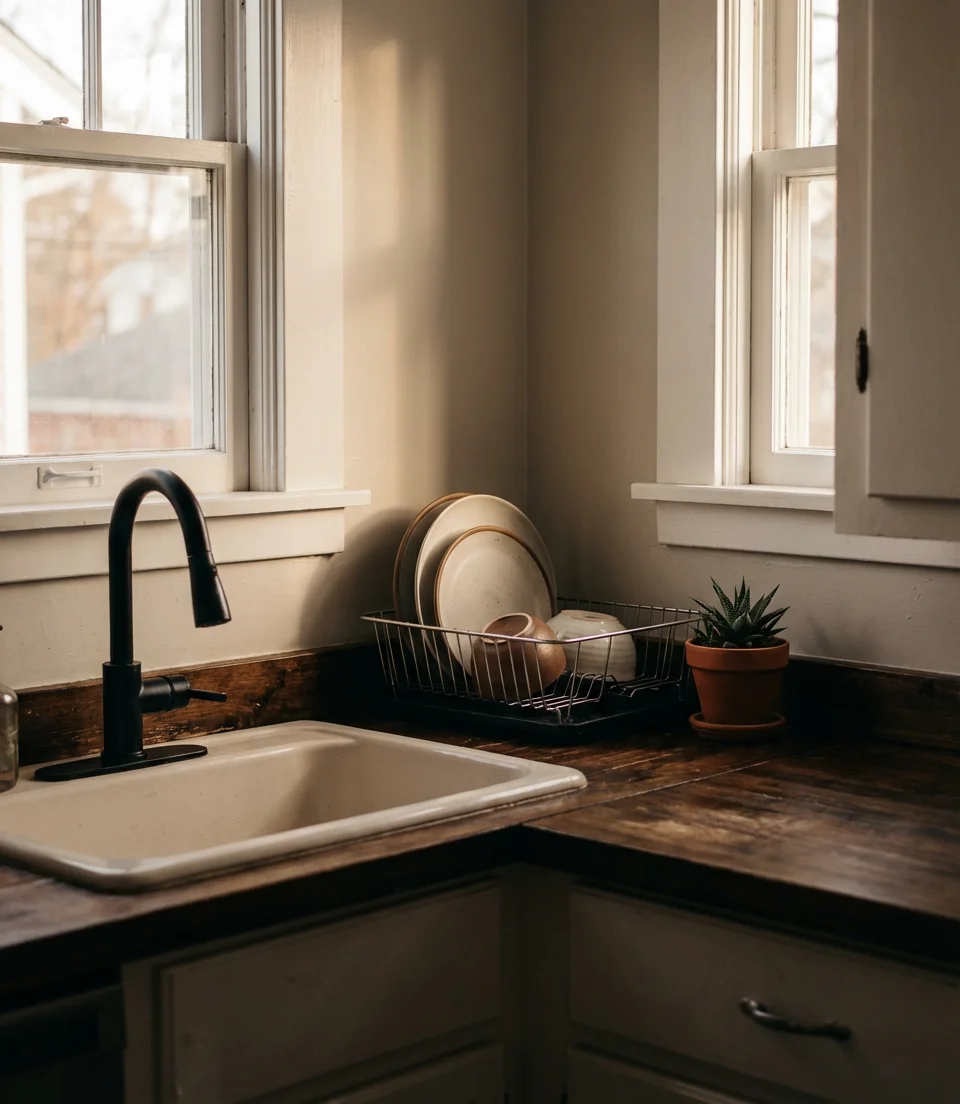 Positioning the sink in a corner with windows on two sides floods the workspace with natural light while capitalizing on otherwise awkward angles. This layout creates a pleasant washing-up experience and makes the kitchen feel more connected to the outdoors. Corner sinks come in specialized shapes that fit the 90-degree angle perfectly, maximizing basin space despite the unusual placement.
Where it works best: kitchens with exterior walls on two sides, common in houses with bay windows or corner placements. The challenge is plumbing—you’ll need a skilled installer to route water and drain lines properly through the corner. Budget-wise, expect to pay 20–30% more than a standard sink installation due to its custom nature, but the payoff in natural light and views makes it worthwhile for many homeowners who spend significant time at the sink.
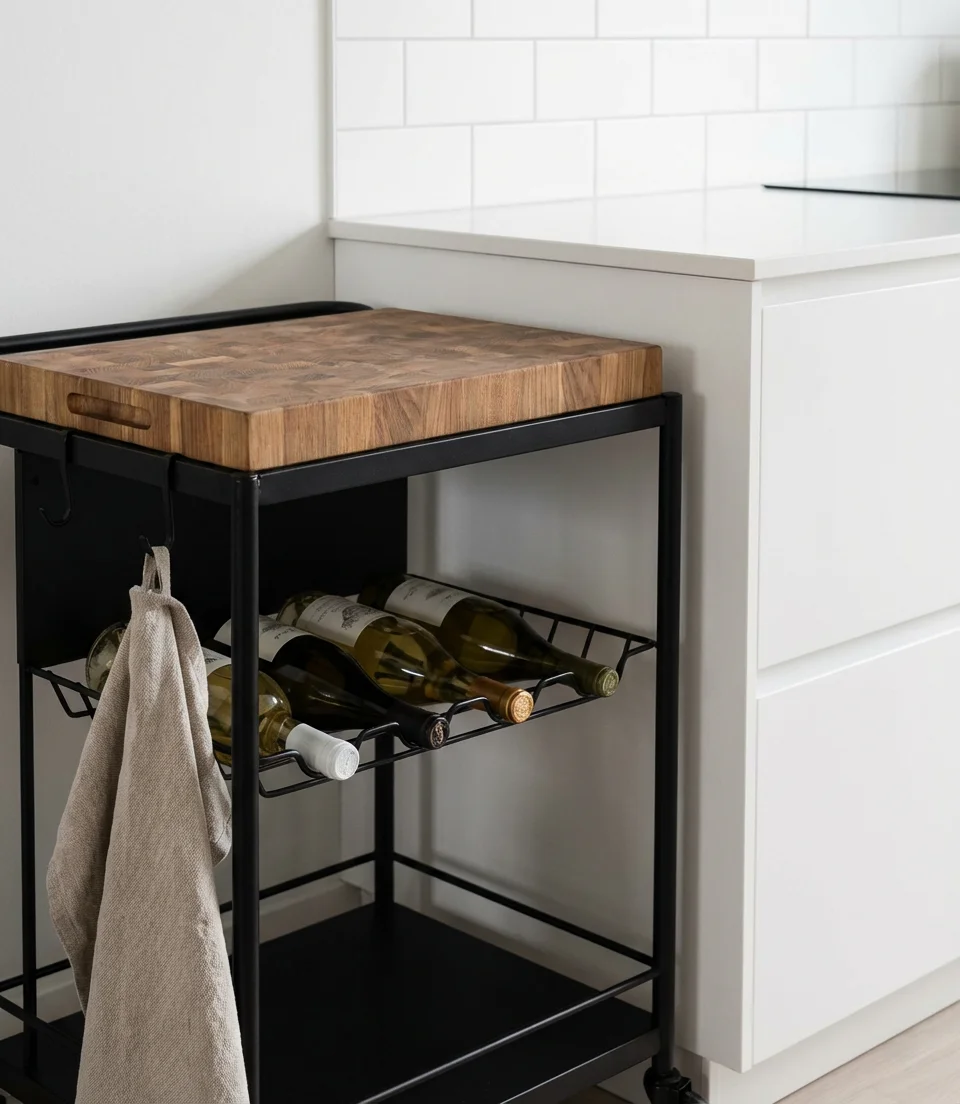
14. Butcher Block Rolling Cart
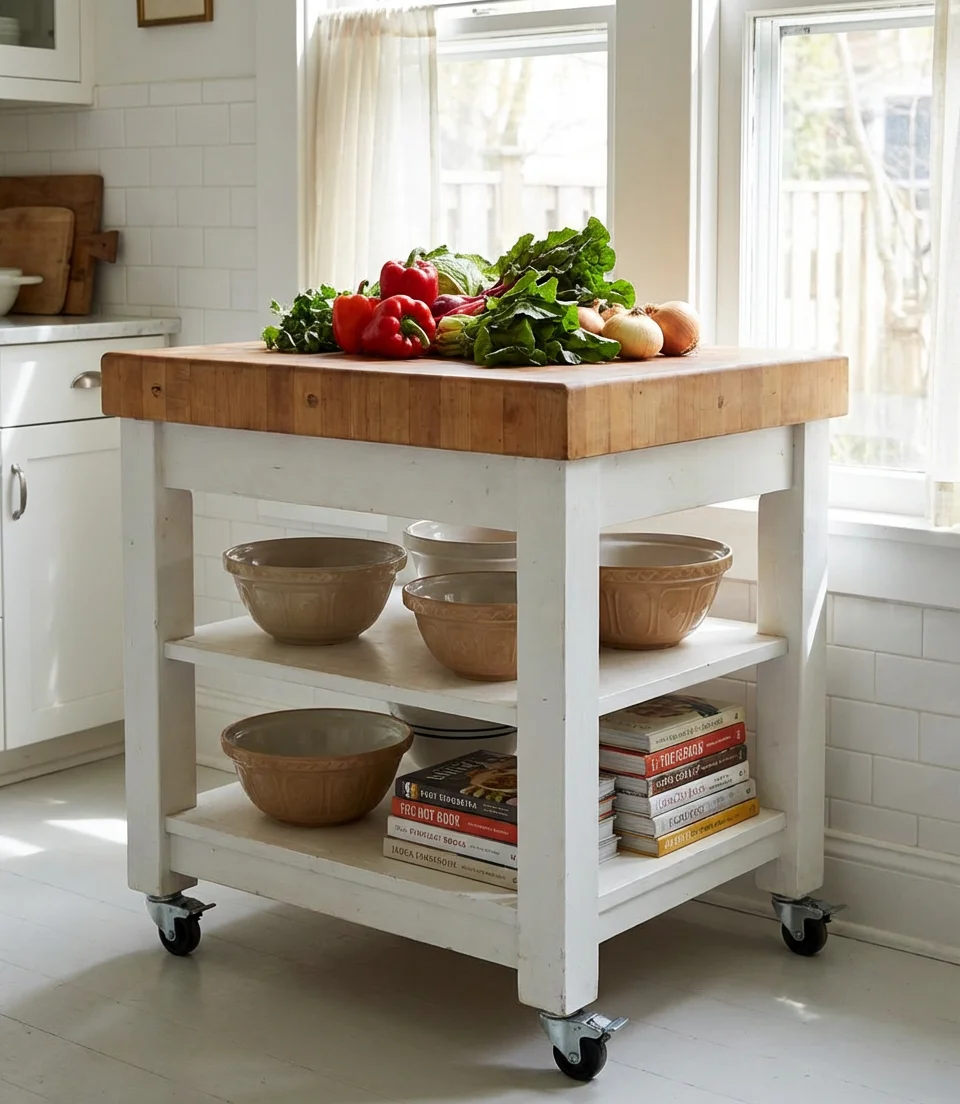
A rolling cart topped with butcher block adds warmth and functionality to modern kitchens while providing a mobile prep station. The natural wood surface is gentle on knife blades and can be sanded down if it gets damaged, unlike synthetic materials. Use the lower shelves for frequently accessed items like mixing bowls, baking sheets, or small appliances, keeping everything organized and mobile.
Real homeowner behavior reveals these carts often migrate around the house—serving as a bar cart during parties, a plant stand near windows, or extra counter space when baking. The butcher block requires monthly oiling to prevent drying and cracking, especially in climates with low humidity. Look for carts with locking wheels so they stay stable during heavy-duty chopping, and choose a height that matches your existing counters for seamless workflow.
15. Subway Tile Backsplash with Colored Grout
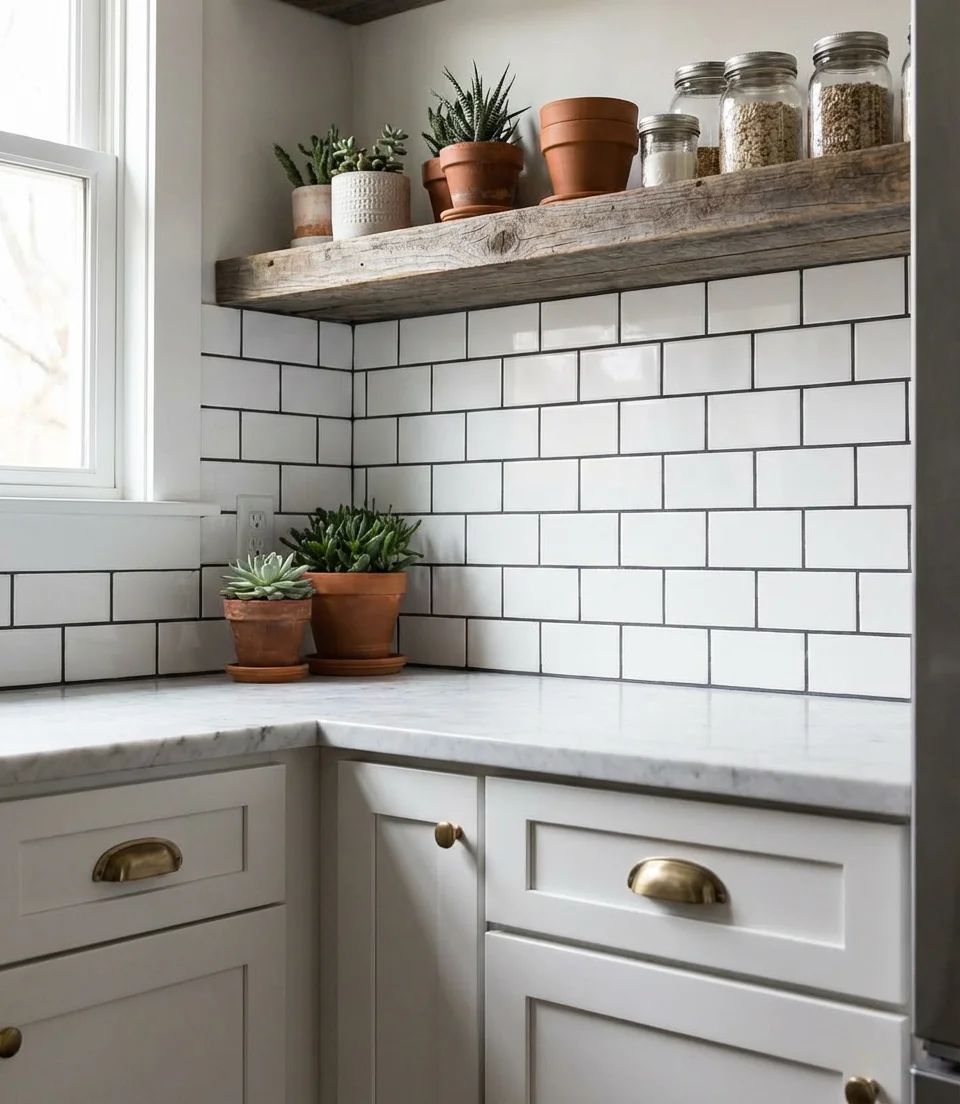
Classic subway tile gets a contemporary update when paired with colored grout, adding personality to even the smallest kitchen without overwhelming the space. This decor choice allows you to inject color and character while keeping the tile itself neutral and timeless. Dark grout against white tile creates bold contrast, while softer tones like gray or blush offer subtle sophistication that won’t feel dated in a few years.
This approach is surprisingly budget-friendly since subway tile remains one of the most affordable options on the market, typically running $5-15 per square foot, including installation. The colored grout adds maybe $20-50 to the total project cost but delivers significant visual impact. A common mistake is choosing grout that’s too light in high-traffic areas near the stove—it will show stains quickly. Opt for medium to dark tones in cooking zones and save lighter colors for areas that see less splatter.
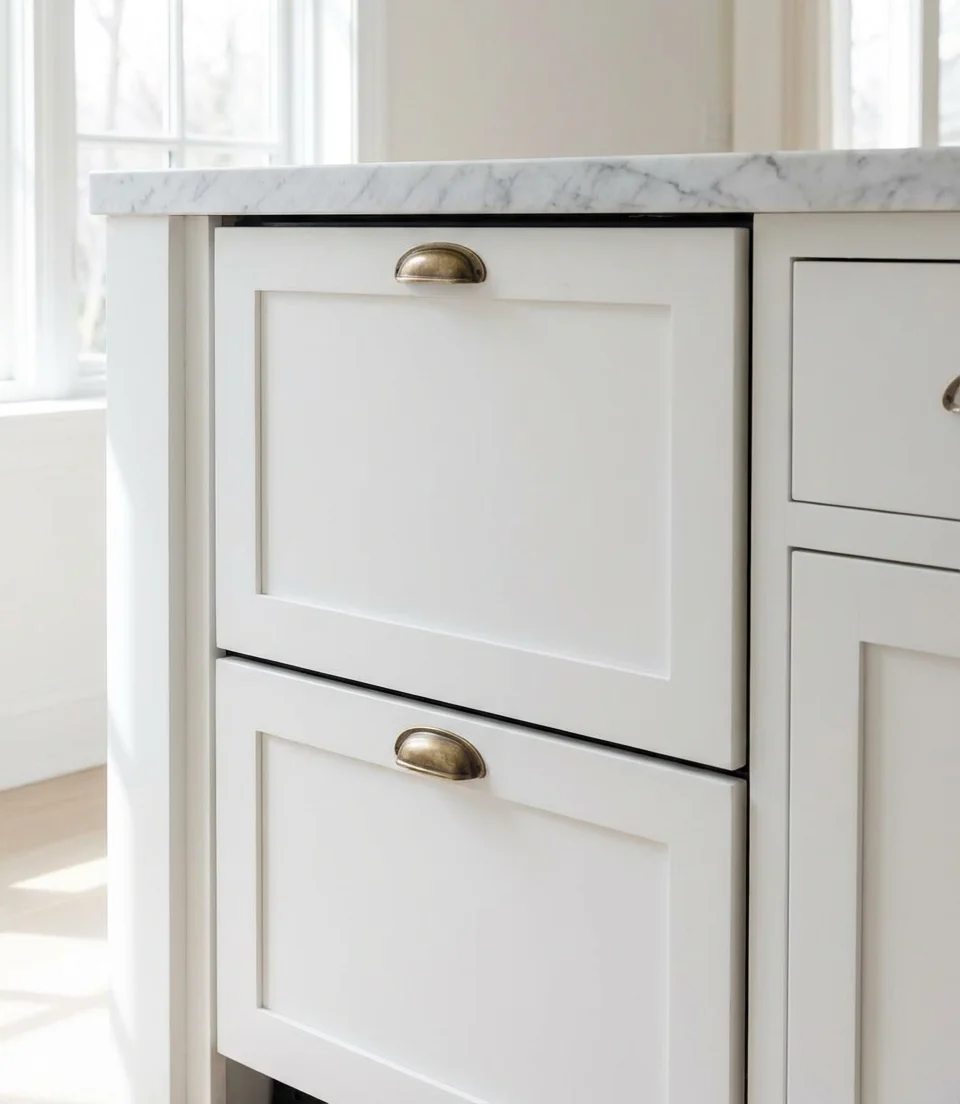
16. Pull-Out Pantry Cabinet
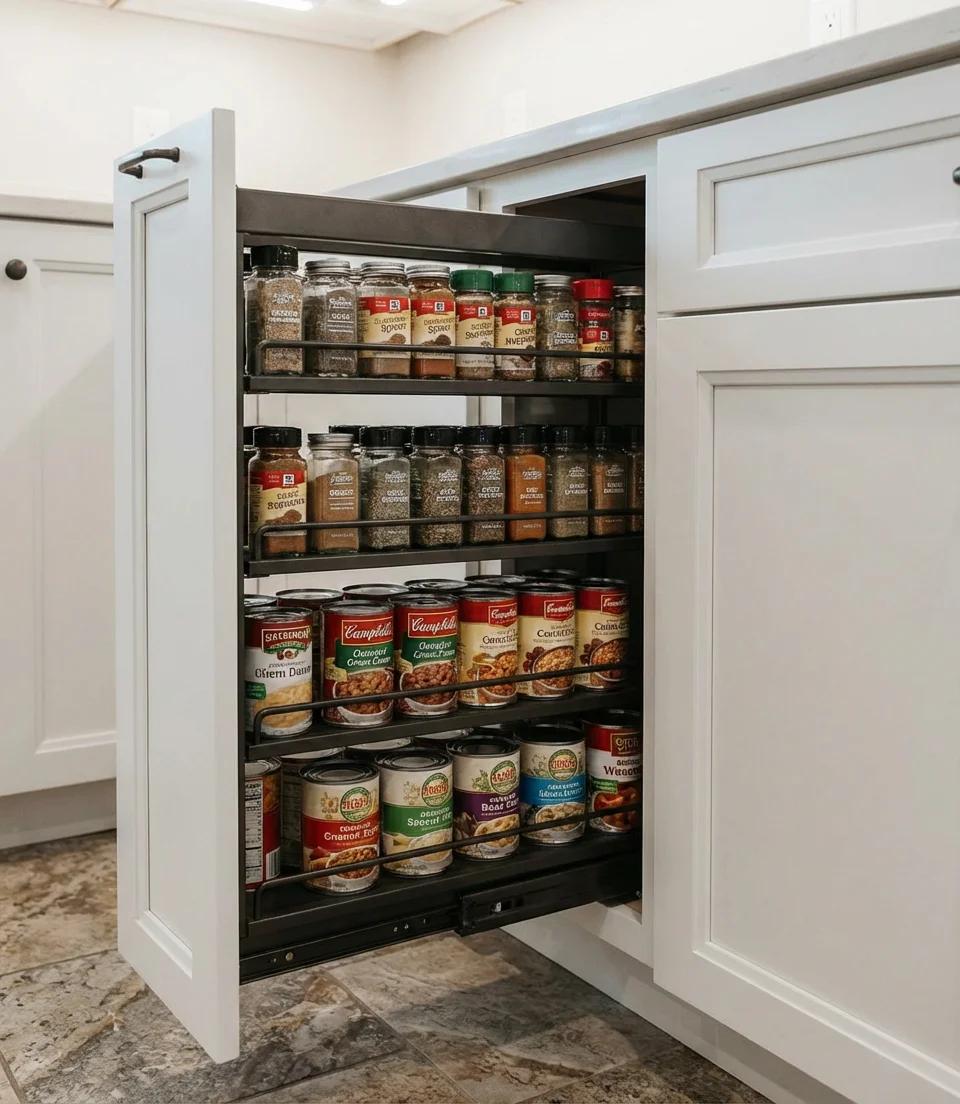
Slim pull-out pantry cabinets fit into gaps as narrow as six inches, transforming forgotten spaces beside refrigerators or at the end of counter runs into valuable storage. These vertical units slide out smoothly to reveal multiple shelves that hold spices, canned goods, or bottles. The space-saving design is brilliant for apartments where traditional pantry closets don’t exist, and the full extension means nothing gets lost in the back.
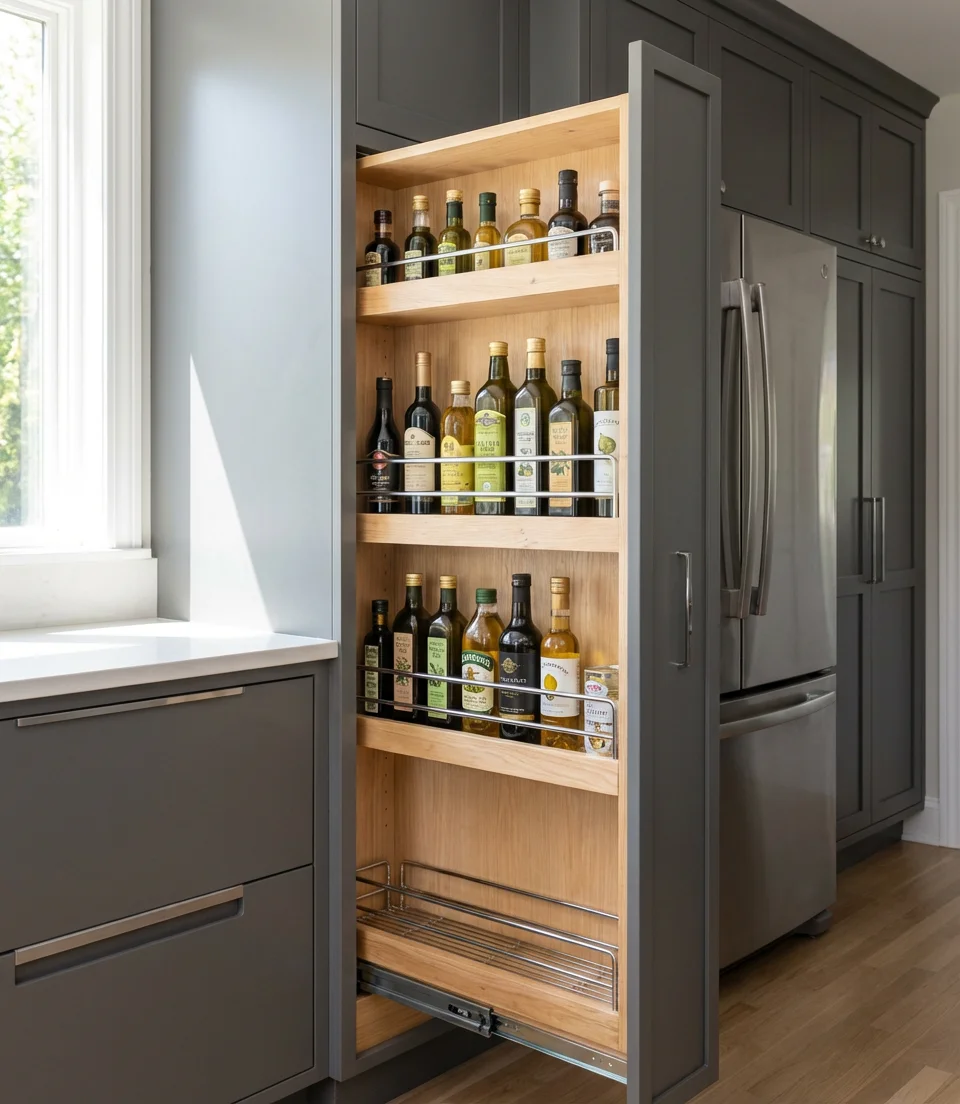
Expert designers emphasize the importance of quality hardware here—cheap slides will jam or fail under the weight of full shelves. Invest in soft-close ball-bearing slides rated for at least 100 pounds. This feature is particularly useful in American kitchens, where we tend to stock up on pantry staples rather than shopping daily. Position it near your prep area so you can grab ingredients without crossing the entire kitchen mid-recipe.
17. Floating Shelves Above Windows
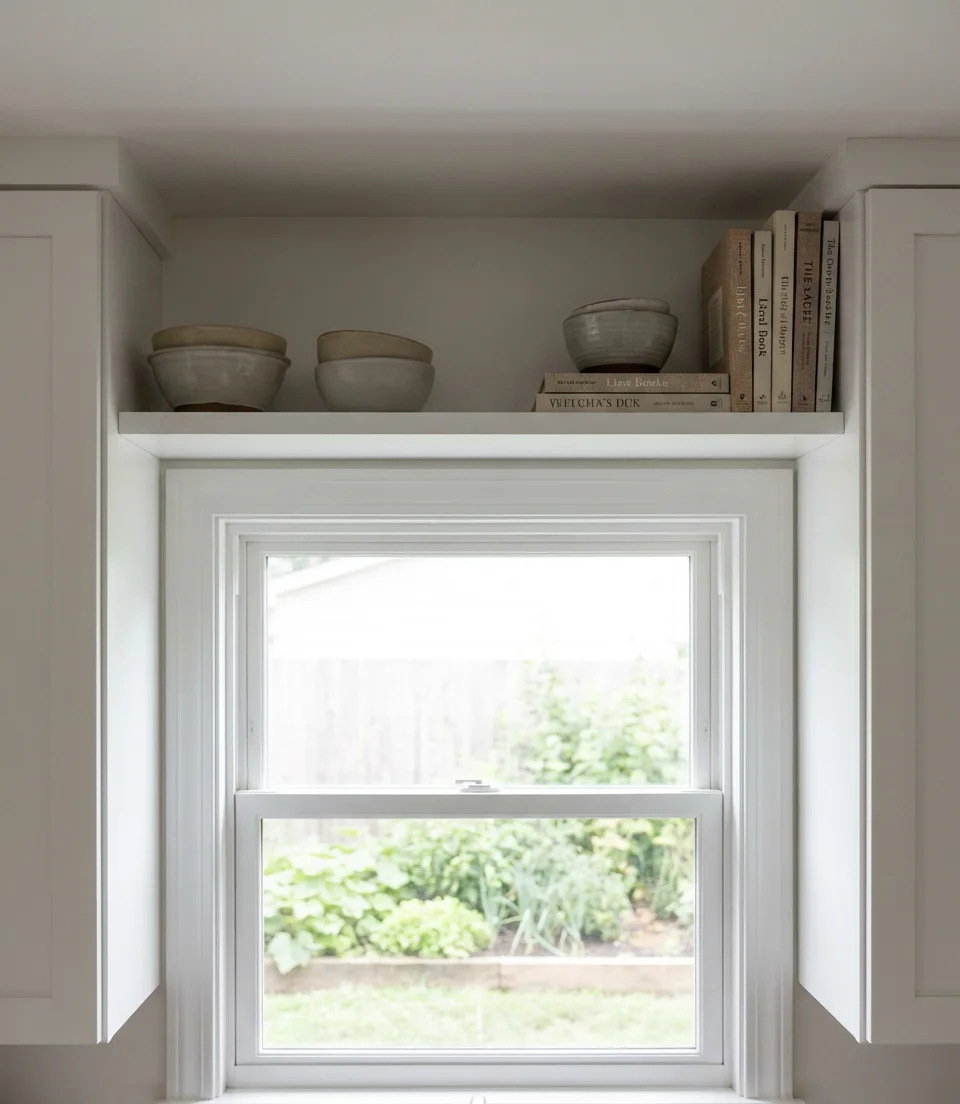
Installing floating shelves in the often-wasted space above windows maximizes vertical storage while maintaining the open feel of natural light below. This clever solution works especially well in small spaces where every wall offers potential. Use these high shelves for items you access less frequently—special occasion serving pieces, seasonal items, or decorative objects that add personality without creating clutter at eye level.
Where it works best: kitchens with standard or tall ceilings where you have at least 12 inches between the window trim and ceiling. The items stored here shouldn’t be heavy or used daily—think more decorative than functional. A common mistake is overcrowding these shelves, which blocks light from bouncing off the ceiling and makes the space feel smaller. Keep arrangements sparse and intentional, leaving negative space that allows the eye to rest.
18. Hidden Appliance Garage
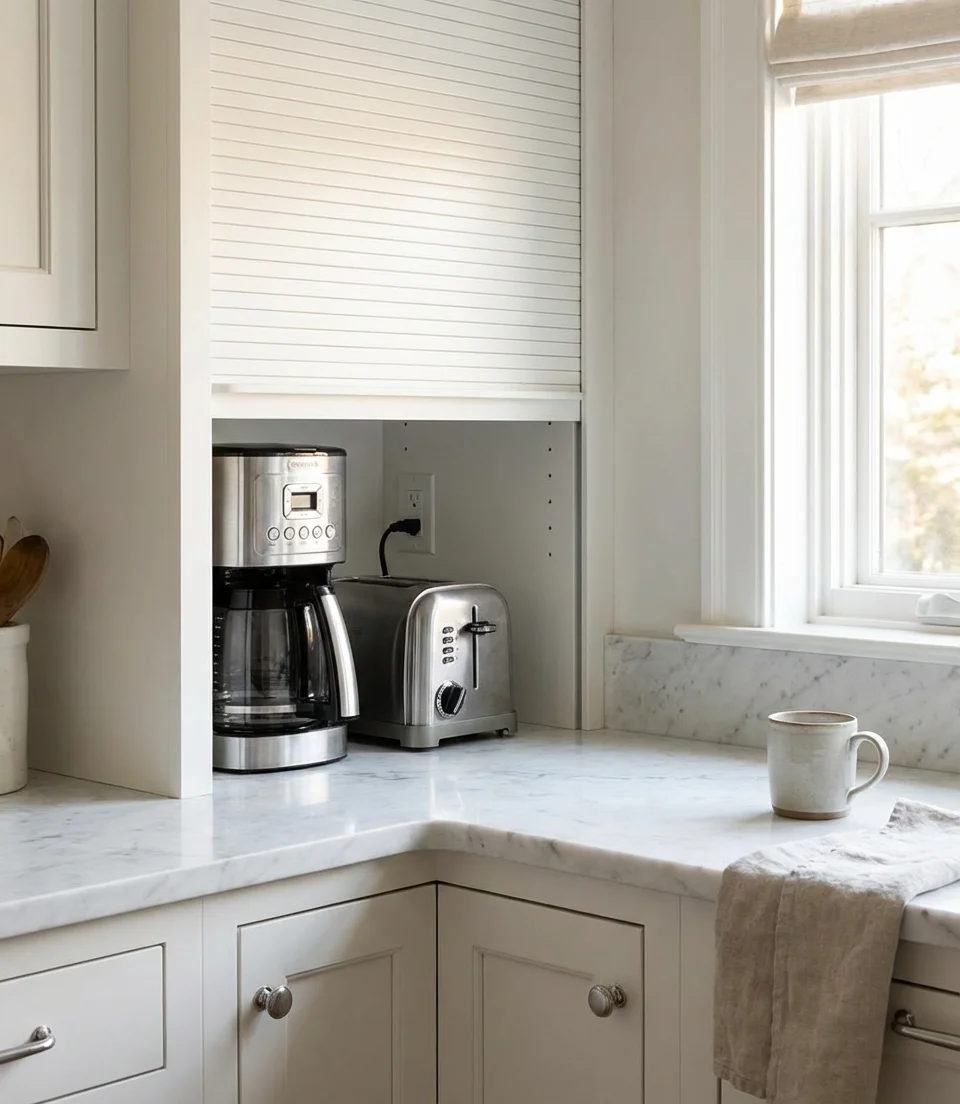
An appliance garage—a cabinet with a roll-up or fold-back door—conceals small appliances like toasters, coffee makers, and blenders when not in use, maintaining clean counters in minimalist kitchens. This feature typically occupies a back corner of the counter, with outlets installed inside so appliances can remain plugged in and ready to use. The door mechanism keeps dust off your devices while providing quick access during meal prep.
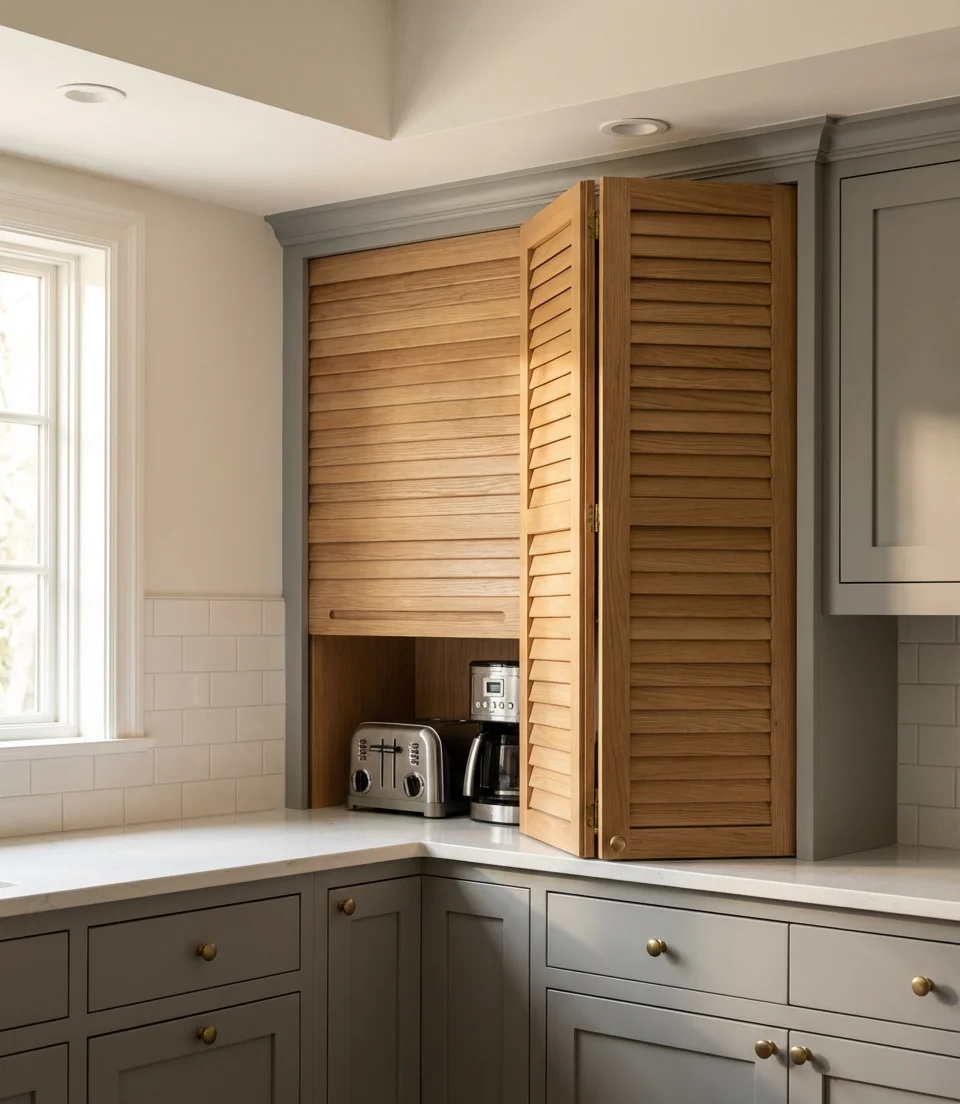
One designer shared that clients initially resist the appliance garage, thinking it’s unnecessary, but within weeks they can’t imagine living without it. The psychology of clear counters reduces visual stress and makes the kitchen feel larger and more organized. Budget for $300-800 depending on size and door style—tambour doors cost more but have a sleek appearance, while hinged or folding doors are more economical and easier to repair if mechanisms fail.
19. Compact Dishwasher Drawer
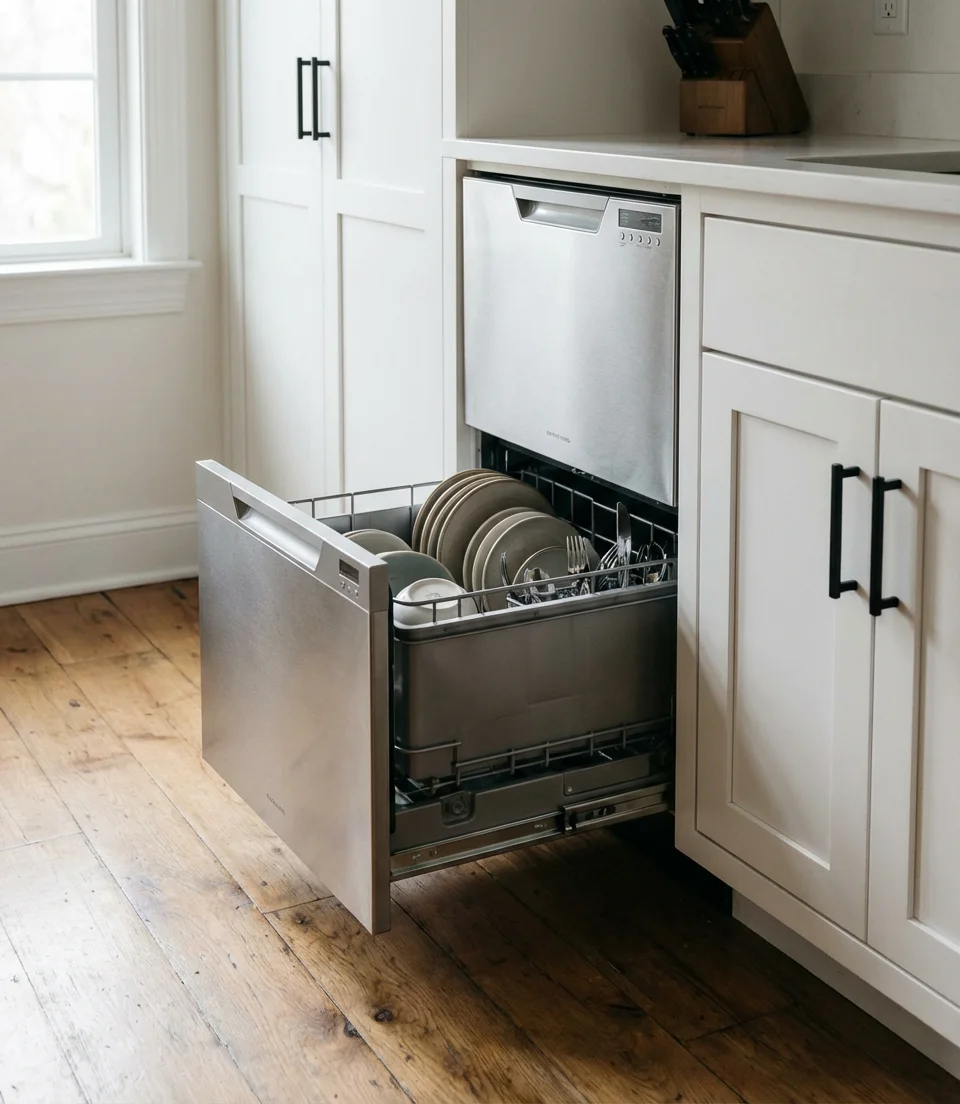
Single or double dishwasher drawers fit into tight spaces where traditional dishwashers won’t, perfect for studio apartments or small kitchens on a budget. These units install under counters like drawers, pulling out for easy loading from above. They’re more water and energy efficient for small households since you can run just one drawer when you don’t have a full load, and they operate quietly enough for open-concept living.
Where it works best: households of one to three people who don’t generate massive amounts of dishes. The capacity is significantly smaller than standard dishwashers—about six place settings per drawer versus twelve in traditional units. Real homeowner behavior shows that people love being able to wash delicates in one drawer while running a heavy cycle in the other or dedicating one to glassware exclusively. They’re pricier than conventional dishwashers, typically $800-1,500, but the space-saving benefits often justify the investment.
20. Narrow Rolling Gap Filler
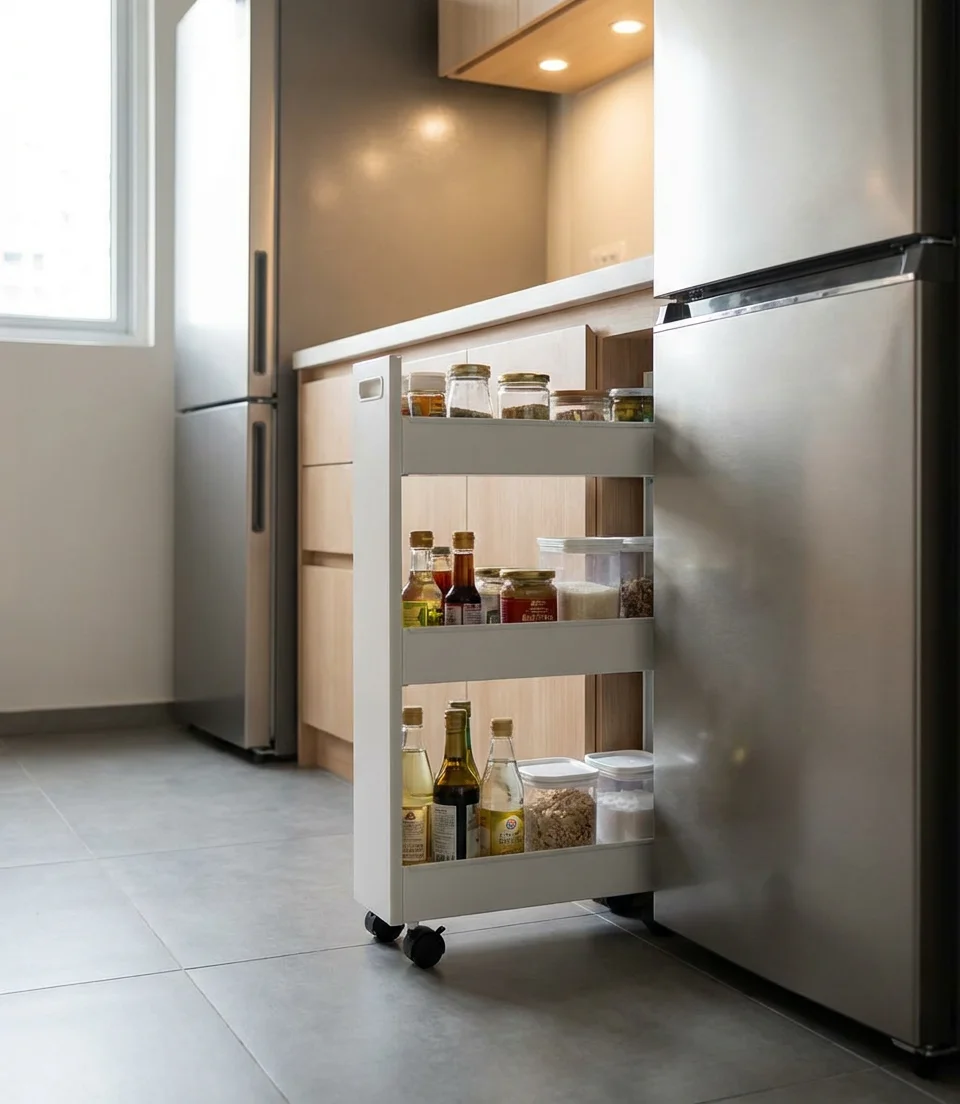
Those awkward 3-4 inch gaps beside appliances can accommodate narrow rolling storage units designed specifically for tight spaces. These slim carts hold cleaning supplies, spices, or canned goods, making use of every possible inch in super tight kitchens. The rolling mechanism allows them to slide out completely for access, then tuck away invisibly when not needed, maintaining clean sight lines in your layout.
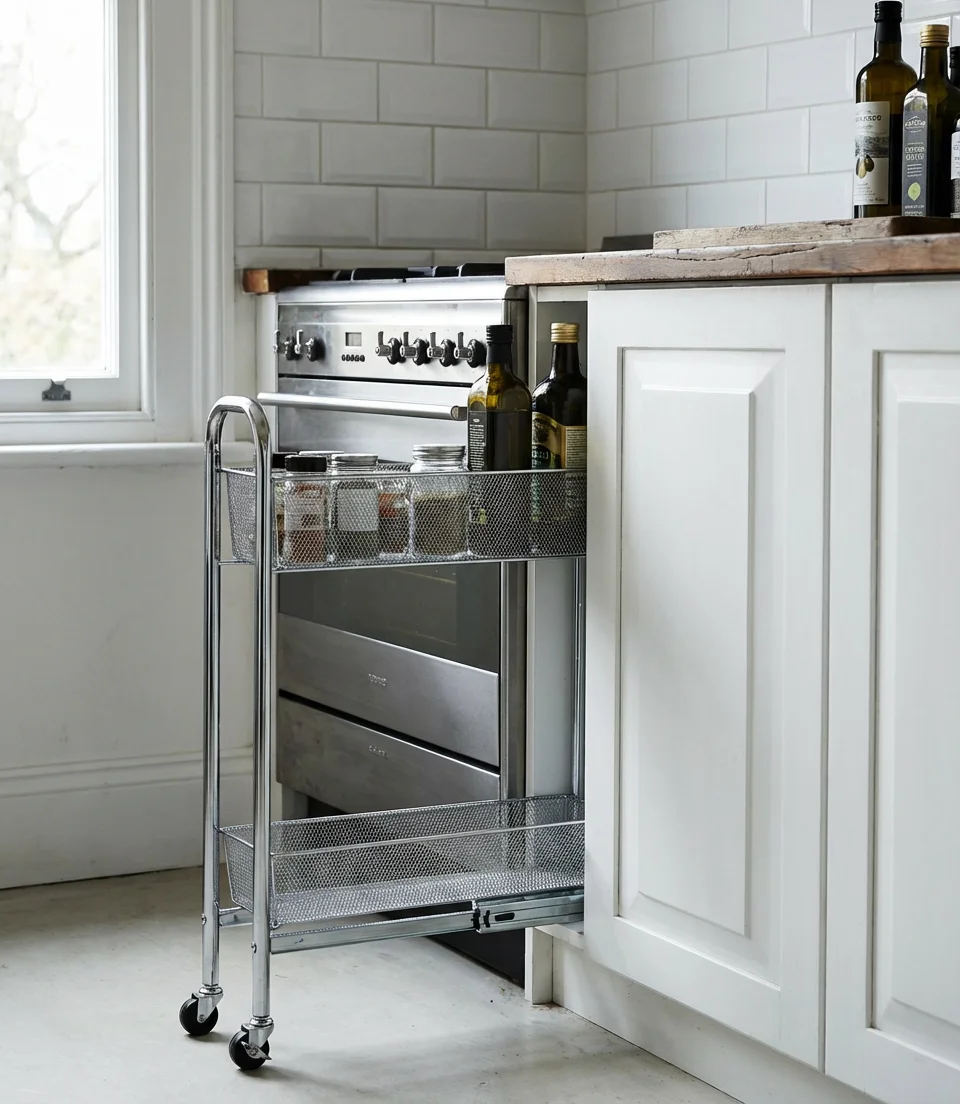
A practical insight from professional organizers: measure your gap precisely before ordering, as even half an inch matters with these units. They typically come in 3, 4, or 5-inch widths and range from $30 to $100 depending on material quality. The inexpensive plastic versions work fine for light items, but invest in metal construction if you’re storing cans or bottles. Many users report that these carts prevent items from falling into the void between appliances, solving an age-old kitchen frustration.
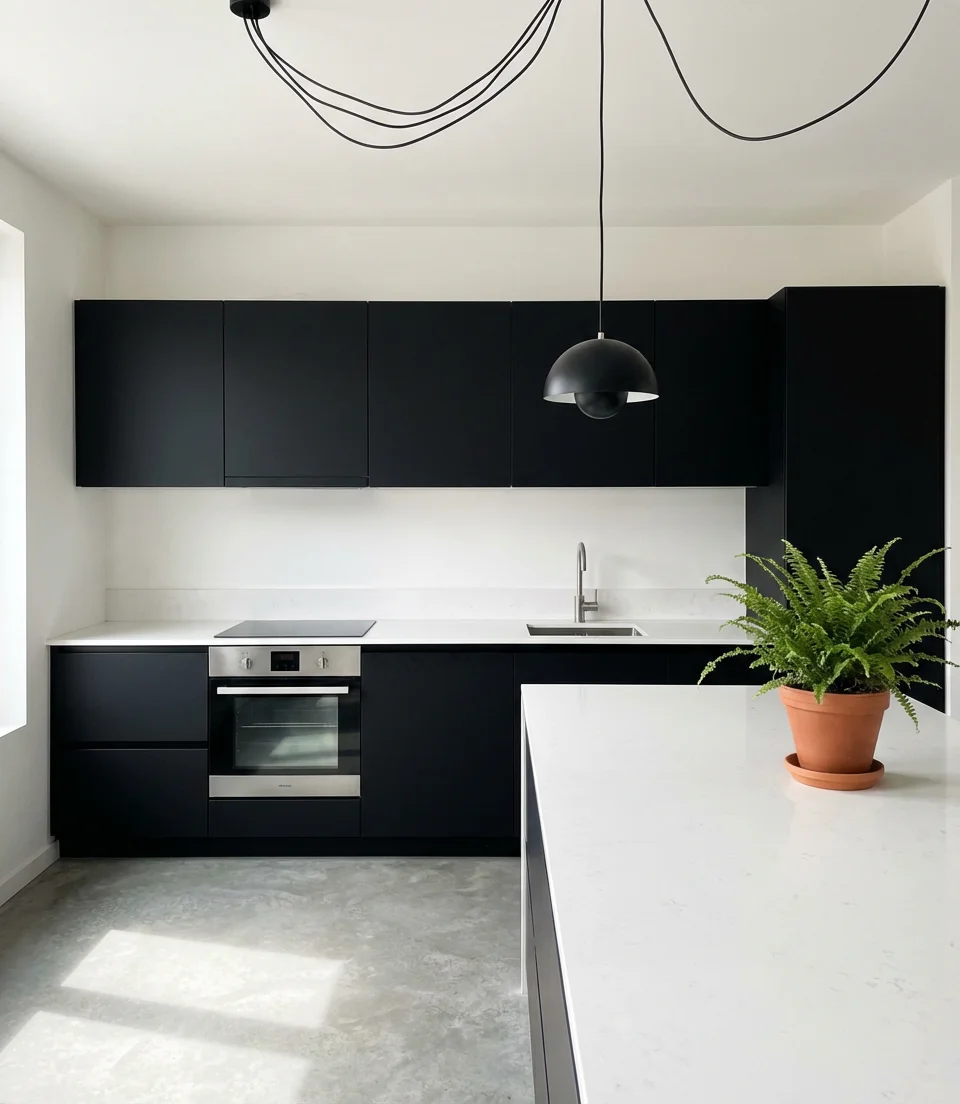
21. Two-Tone Cabinet Color Blocking
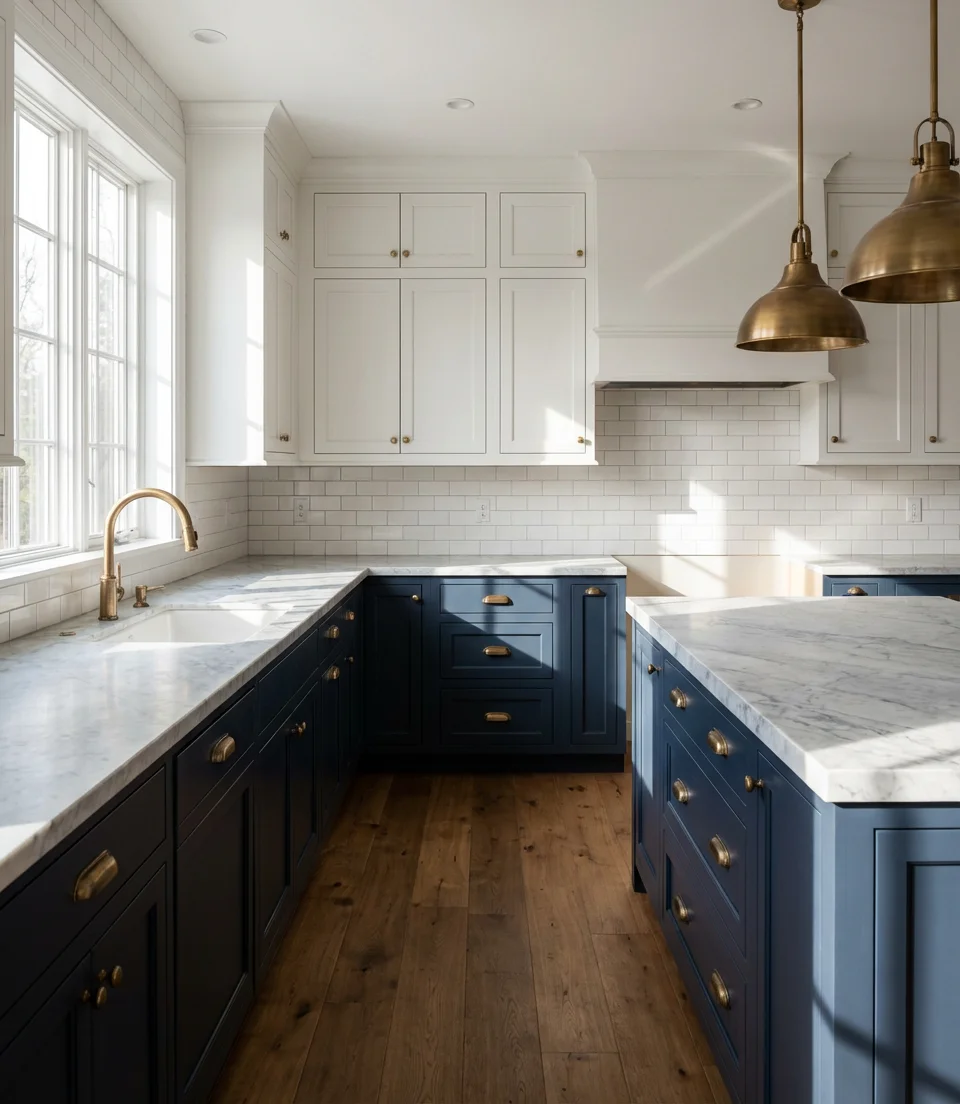
Painting upper and lower cabinets in contrasting colors adds visual interest and can make ceilings appear higher in small spaces. This modern decor trend allows you to embrace bold color without overwhelming the room—try dark lowers with light uppers, or vice versa. The color break creates horizontal lines that expand the perceived width of narrow kitchens, and you can tie the palette together through hardware, backsplash, or countertop choices.

Budget-wise, painting cabinets yourself costs $200–$400 for materials, including quality paint, primer, and new hardware. Professional painting costs $2,000–4,000 but ensures factory-finish durability. A common mistake is choosing colors that are too close in value—you need sufficient contrast for the effect to register. Test paint samples on large poster boards and live with them for several days under different lighting conditions before committing to the full project.
22. Tension Rod Under-Sink Organization
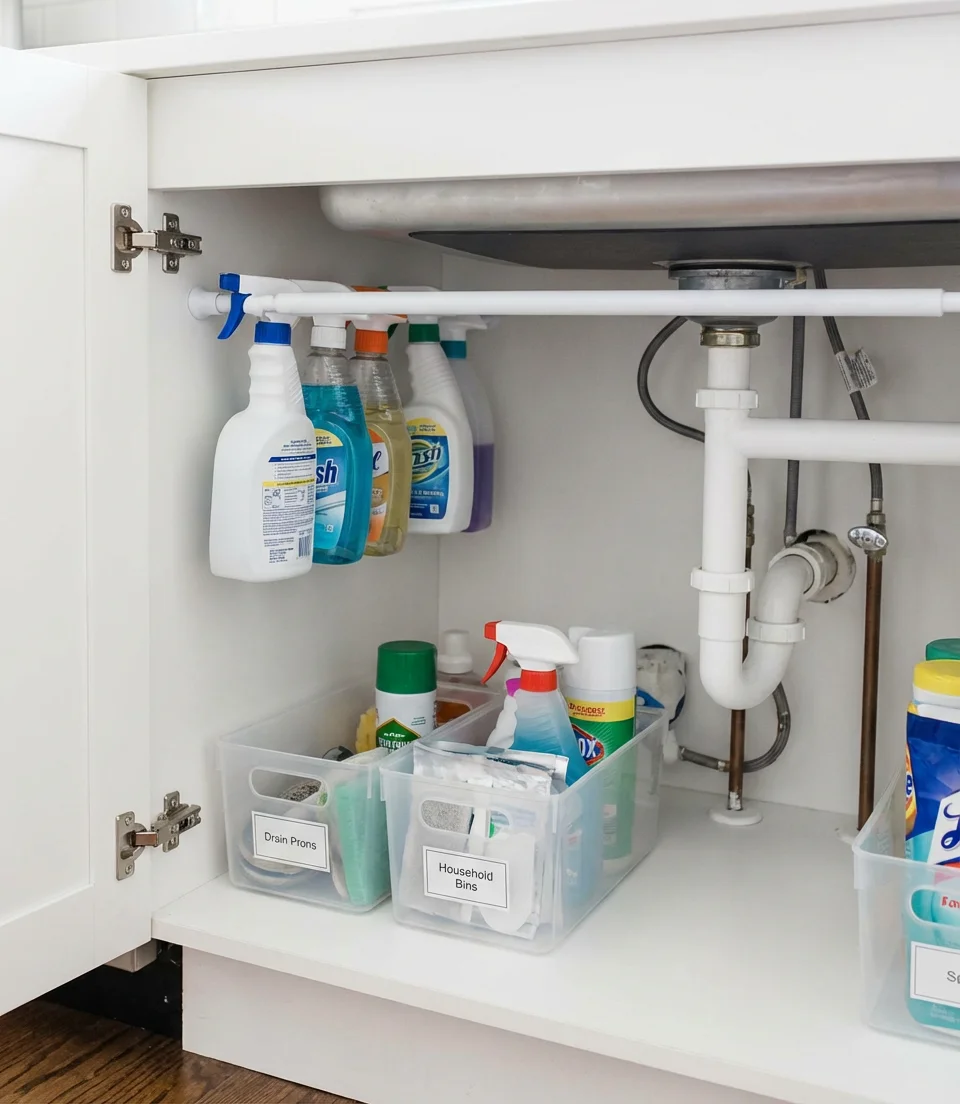
A simple tension rod installed under the sink creates hanging storage for spray bottles, freeing up floor space for bins and larger items. This genius DIY hack costs under $10 but dramatically improves organization in the notoriously chaotic under-sink area. The rod can hold multiple bottles by their trigger sprayers, keeping them upright and accessible without taking up valuable real estate on the cabinet floor.
Real homeowner behavior shows this trick gets replicated throughout the house once people discover how well it works—bathroom vanities, laundry rooms, and garage cabinets all benefit from the same principle. Choose a tension rod rated for at least 10 pounds to prevent sagging, and install it in the front third of the cabinet where you can easily reach bottles without contorting around plumbing. This technique is one of those solutions that seems almost too simple to work, but it’s transformative for maintaining order in a high-traffic storage zone.
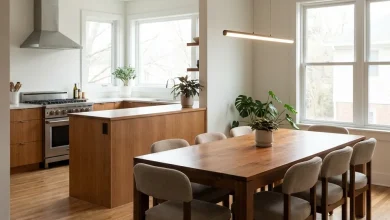
23. Banquette Seating with Storage
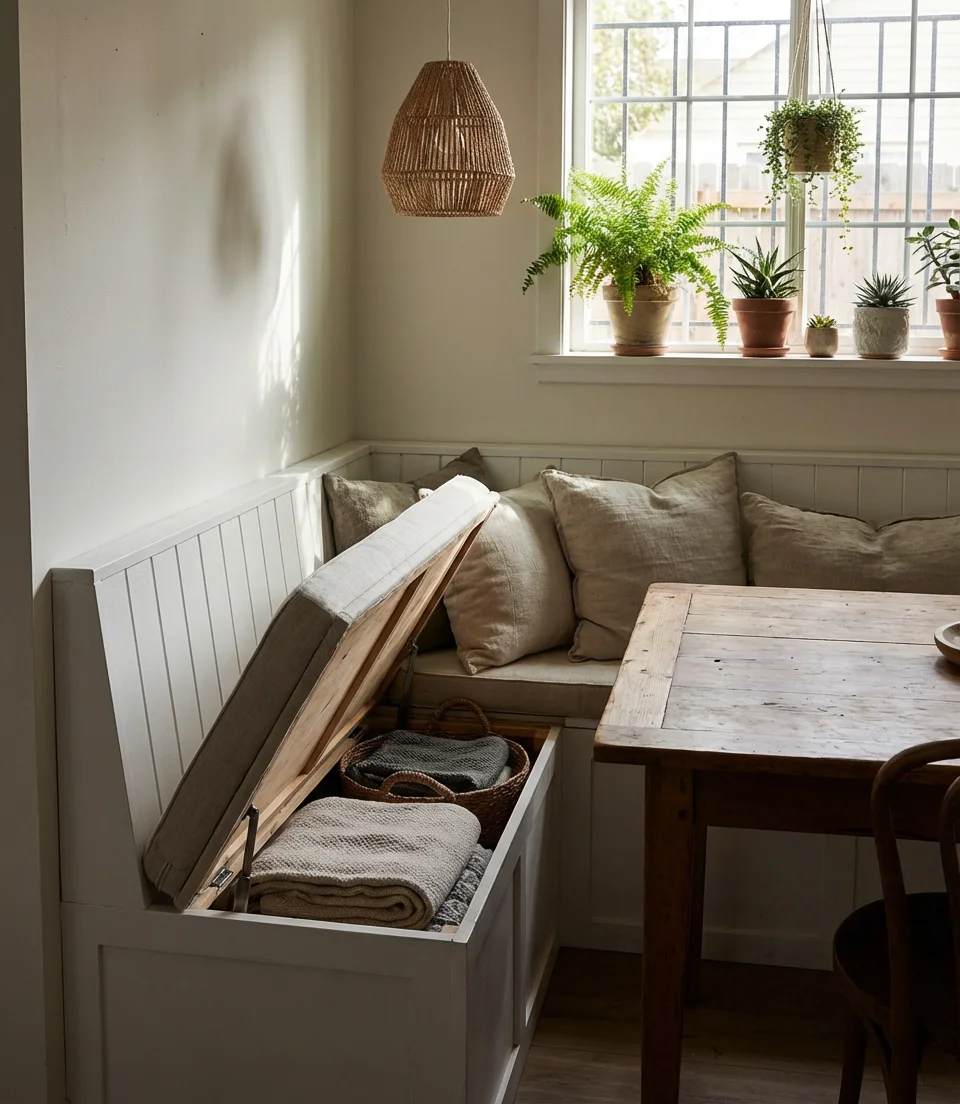
Built-in banquette seating along one wall combines dining space with hidden storage underneath, eliminating the need for a separate table and chairs in tiny kitchens. The benches can be designed with lift-up seats or pull-out drawers, housing everything from extra linens to small appliances. This configuration works particularly well in corner nooks where a standard table would leave awkward gaps, creating an efficient and cozy eating area that feels intentionally designed rather than cramped.

Where it works best: kitchens with at least one straight wall measuring 5–6 feet where you can anchor the banquette. Custom-built versions cost $1,500-4,000 depending on materials and complexity, while IKEA-hack versions using base cabinets topped with cushions run $400-800. A common mistake is making the bench too shallow—aim for at least 18 inches of depth for comfortable seating. The storage underneath is ideal for bulky items like serving platters, seasonal decor, or small appliances you only use occasionally, keeping them accessible but out of sight.
24. Ceiling-Mounted Pot Rack
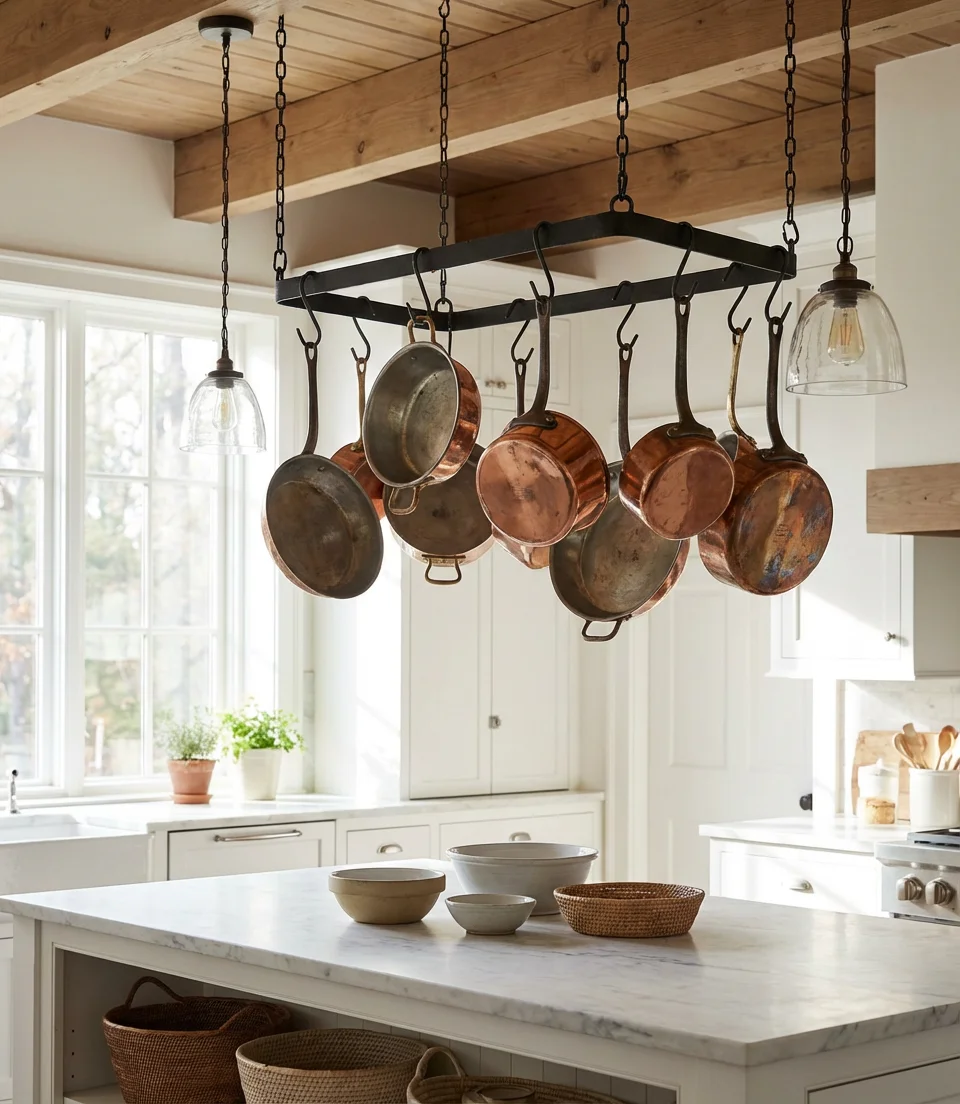
A ceiling-mounted pot rack transforms cookware into functional decor while freeing up cabinet space for other items. Suspended above an island or peninsula, these racks keep your most-used pots and pans within easy reach while adding a professional kitchen vibe to apartments. Choose styles that complement your aesthetic—industrial metal grids for modern spaces, wooden racks for rustic charm, or sleek bars for minimalist kitchens.

Expert designers caution that pot racks require proper ceiling support—they must be anchored into joists, not just drywall, to safely hold the weight of cast iron and heavy cookware. Installation typically costs $100-200 if you’re comfortable with power tools, or $300-500 if hiring a professional. The visual impact is significant, so curate what you hang carefully; mismatched or damaged cookware will detract from the look. Many homeowners find that having pots visible encourages them to use a wider variety rather than reaching for the same two or three pieces repeatedly, making the switch both a functional and behavior-changing upgrade.
These tiny kitchen ideas prove that limited square footage doesn’t mean limited style or function. Whether you’re working with a studio apartment, a compact house, or simply want to maximize efficiency in your space, there’s a solution here that can transform how you cook, eat, and experience your kitchen. We’d love to hear which ideas resonated with you most—drop a comment below sharing your favorite or telling us about your small kitchen wins. What clever solutions have you discovered in your space?