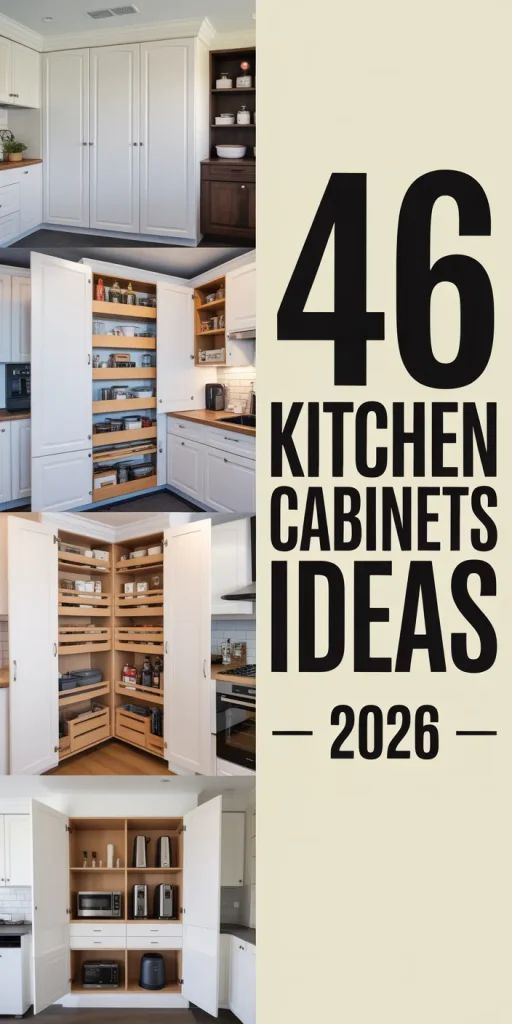
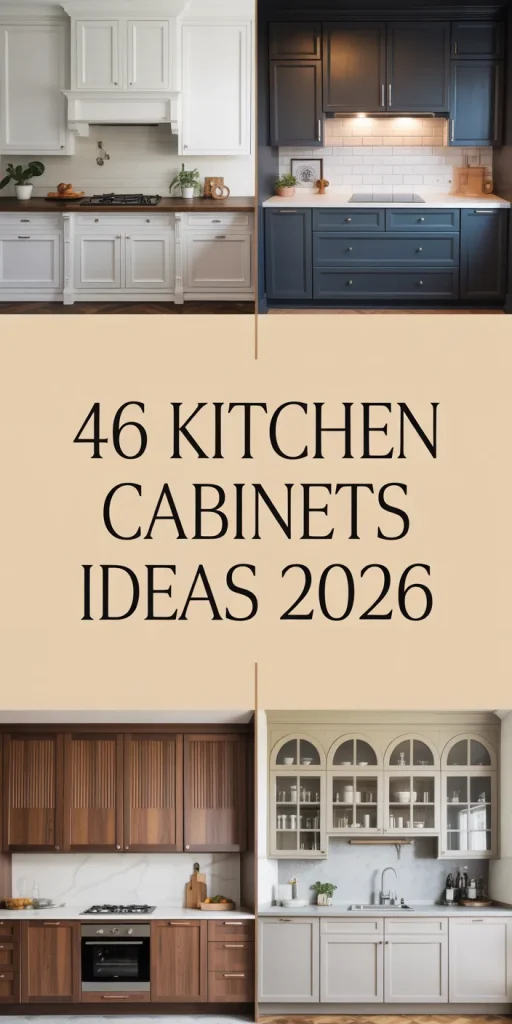
46 Kitchen Cabinets Ideas 2026: Fresh Designs That Transform Your Cooking Space
Kitchen cabinets remain one of the most transformative elements in home design, shaping not only functionality but also the entire atmosphere of your cooking space. As we move through 2026, American homeowners are searching Pinterest for fresh, adaptable ideas that balance timeless appeal with contemporary innovation. Whether you’re planning a full remodel or a strategic refresh, the cabinet choices you make define your kitchen’s personality and performance. This guide walks you through inspiring approaches that reflect real-life priorities—from maximizing small spaces to embracing bold color or integrating clever storage in unexpected areas. Each concept here is designed to help you visualize possibilities and spark decisions that fit your home and lifestyle.
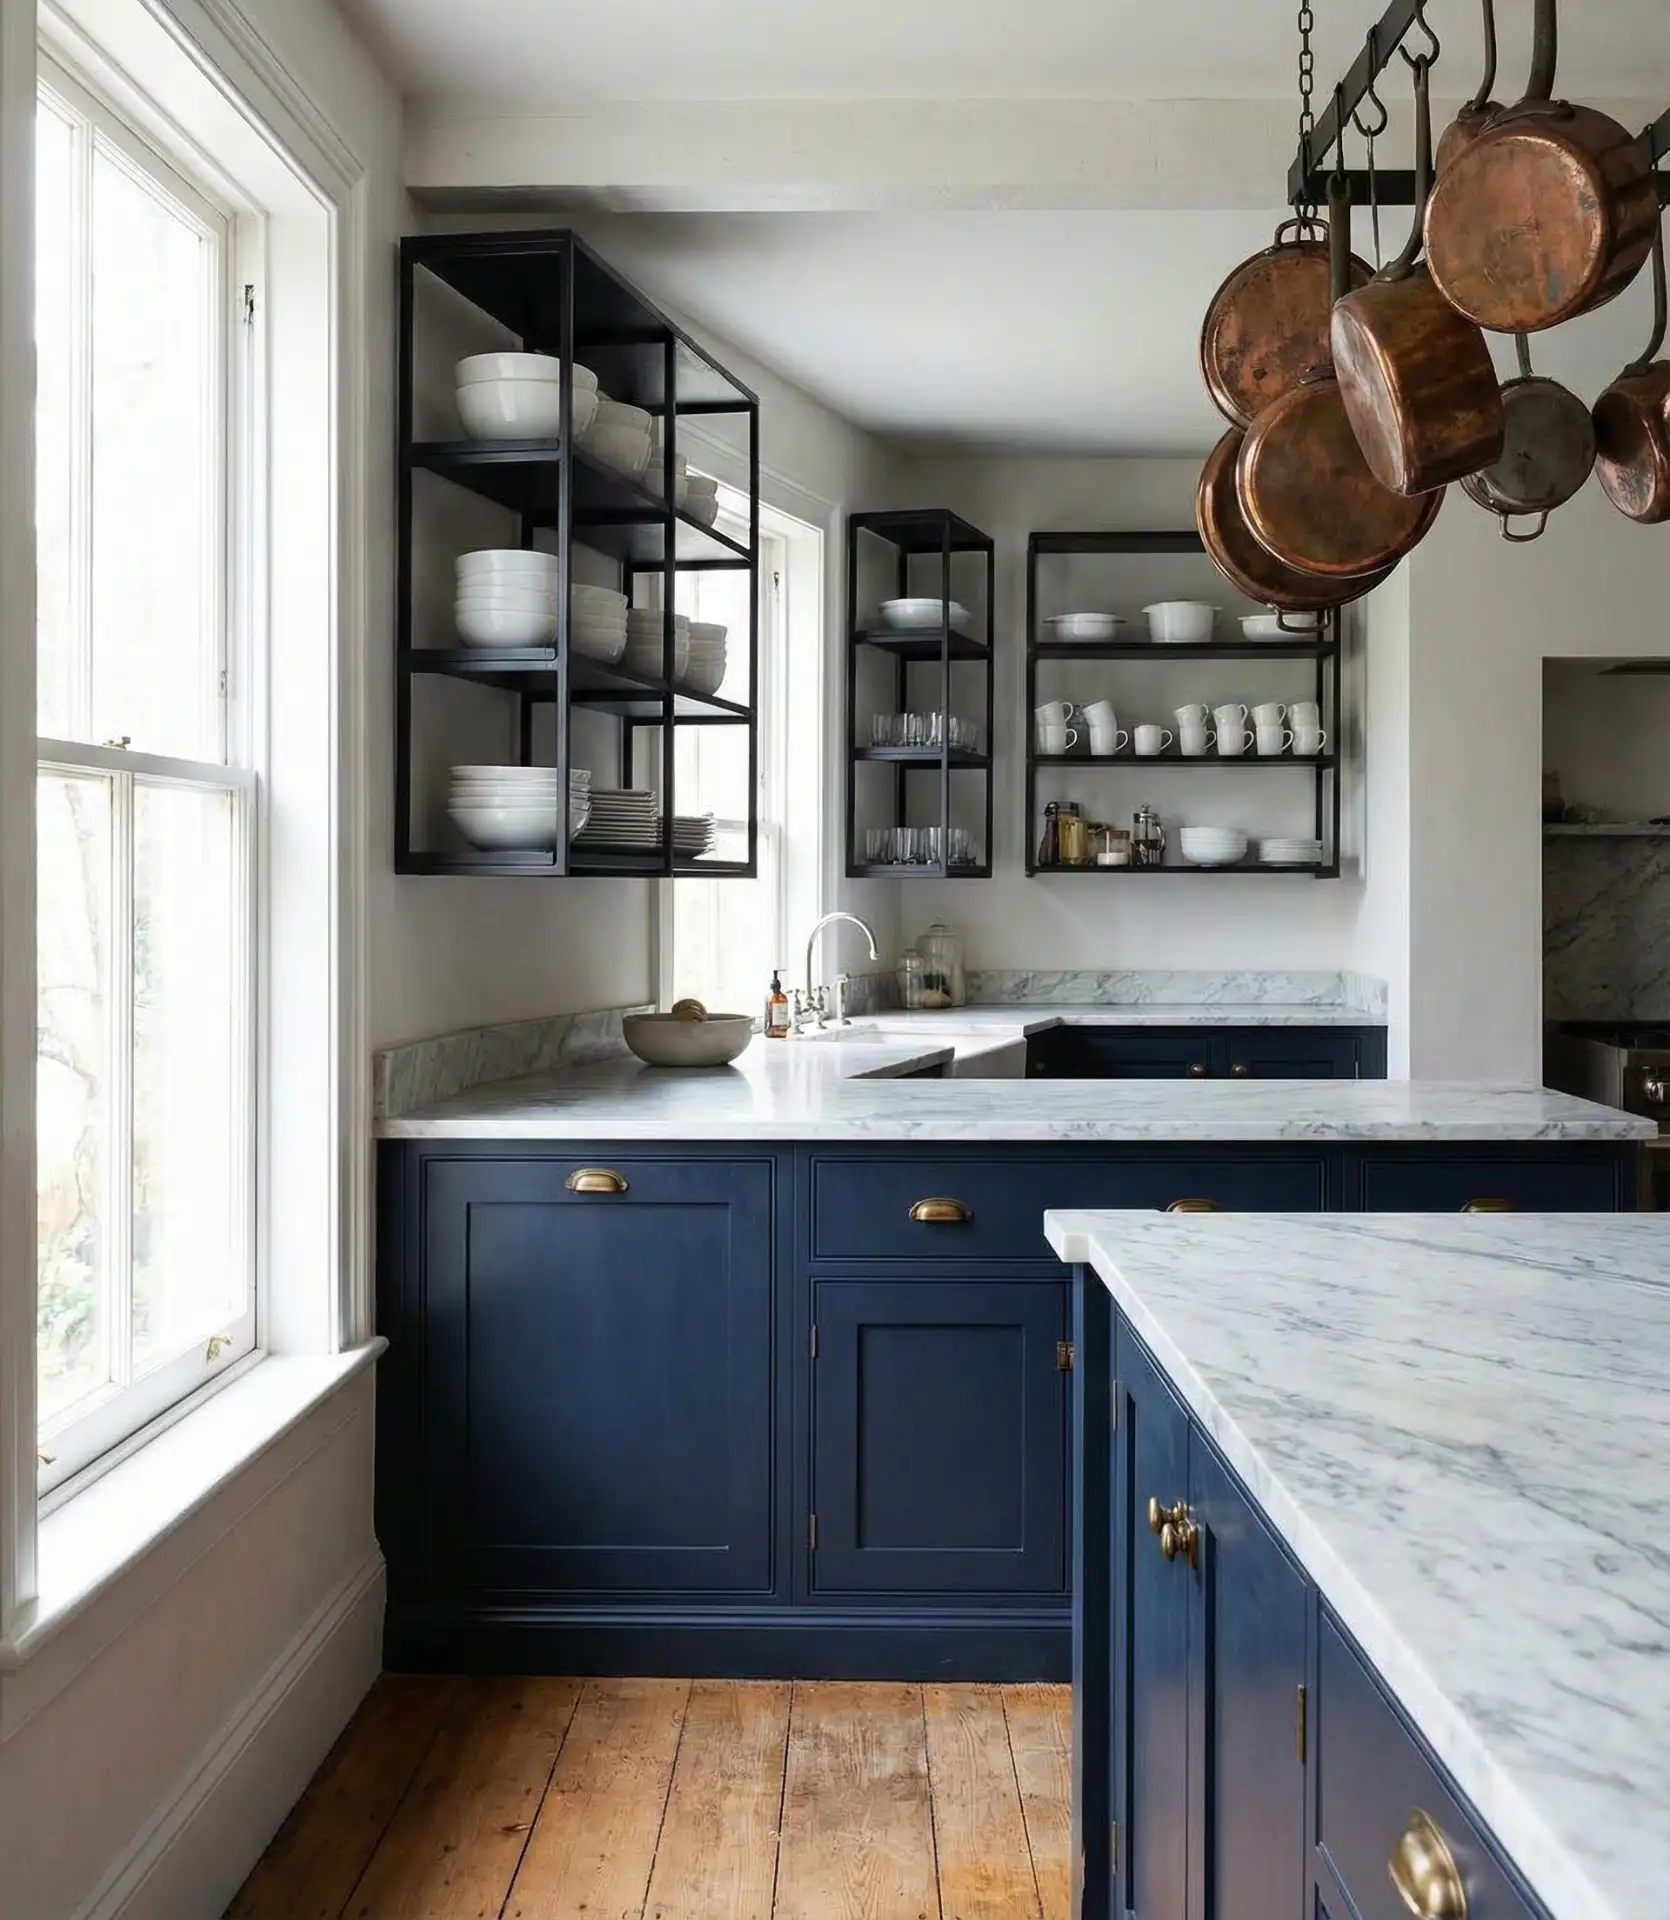
1. Two-Tone Upper and Lower Cabinet Contrast
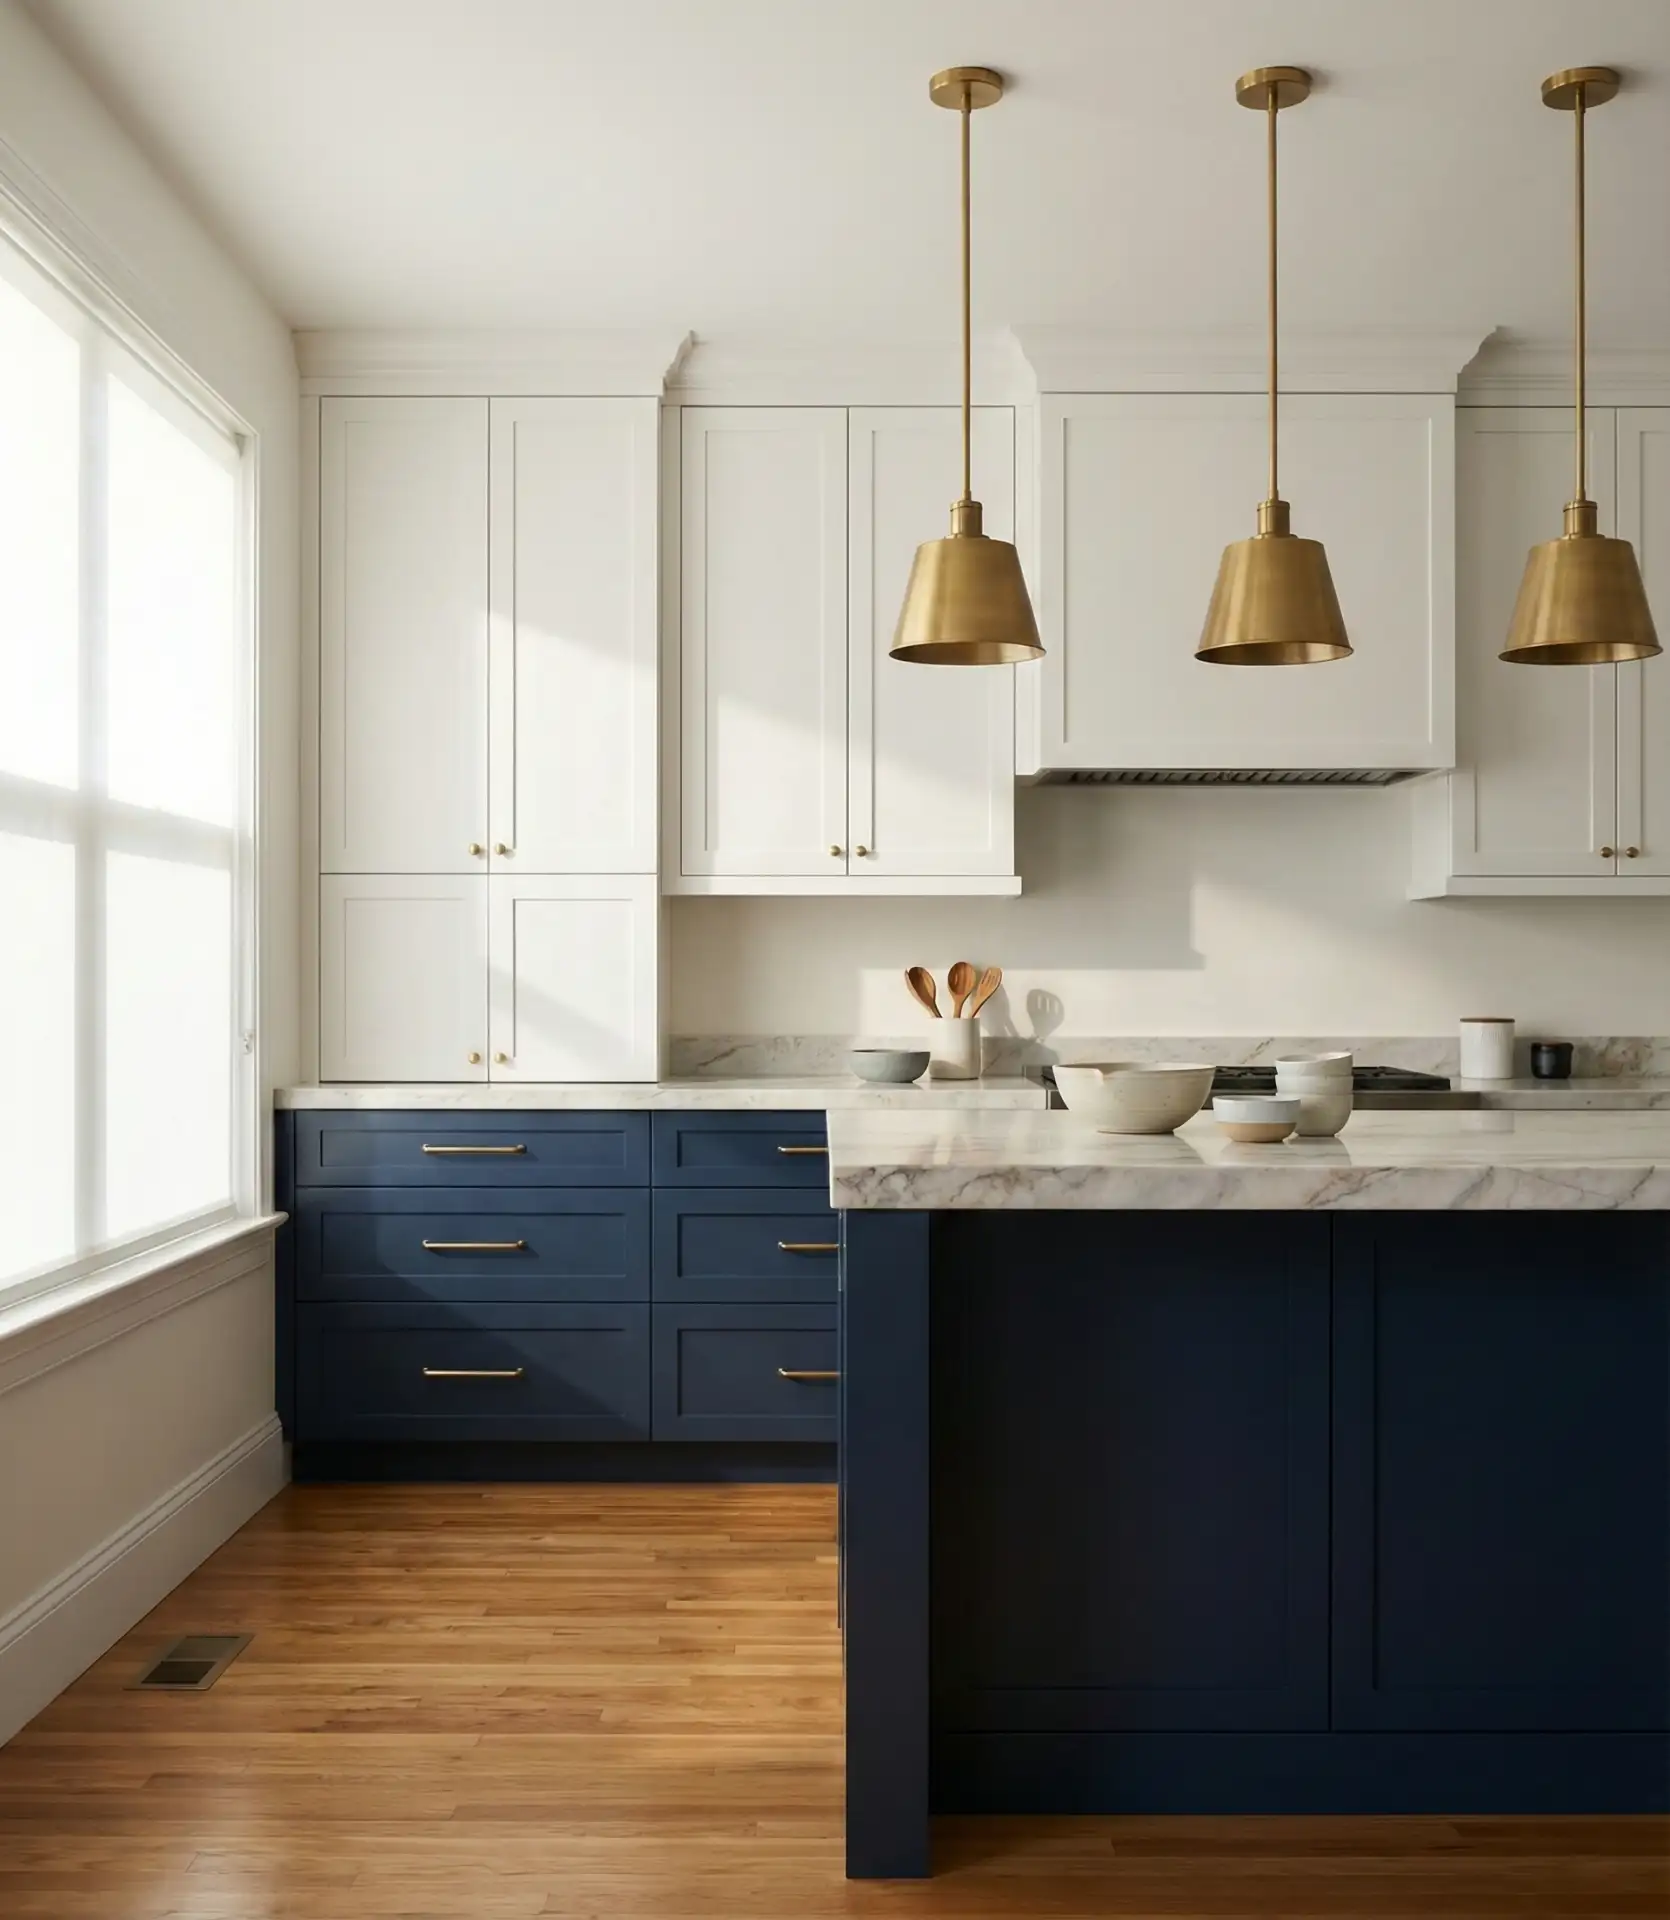
Splitting your cabinetry palette between upper and lower zones creates instant depth and visual interest without overwhelming the room. Many homeowners choose a white or soft neutral for uppers to preserve an airy feel, then anchor the space with navy blue, charcoal, or even forest green below. This strategy works beautifully in open-plan homes where the kitchen flows into living areas, offering definition without walls. The contrast also lets you experiment with bolder hues on lower cabinets while keeping the overall mood balanced and inviting.
This approach works best in kitchens with ample natural light, where the darker lower tier won’t make the room feel closed in. If you’re worried about commitment, test paint samples on foam board and prop them against your existing cabinets for a few days—morning and evening light will reveal undertones you might miss in the store. Pairing the two-tone look with uniform hardware ties everything together, and choosing a countertop that bridges both colors ensures a cohesive finish rather than a jarring split.
2. Floor-to-Ceiling Tall Pantry Cabinets
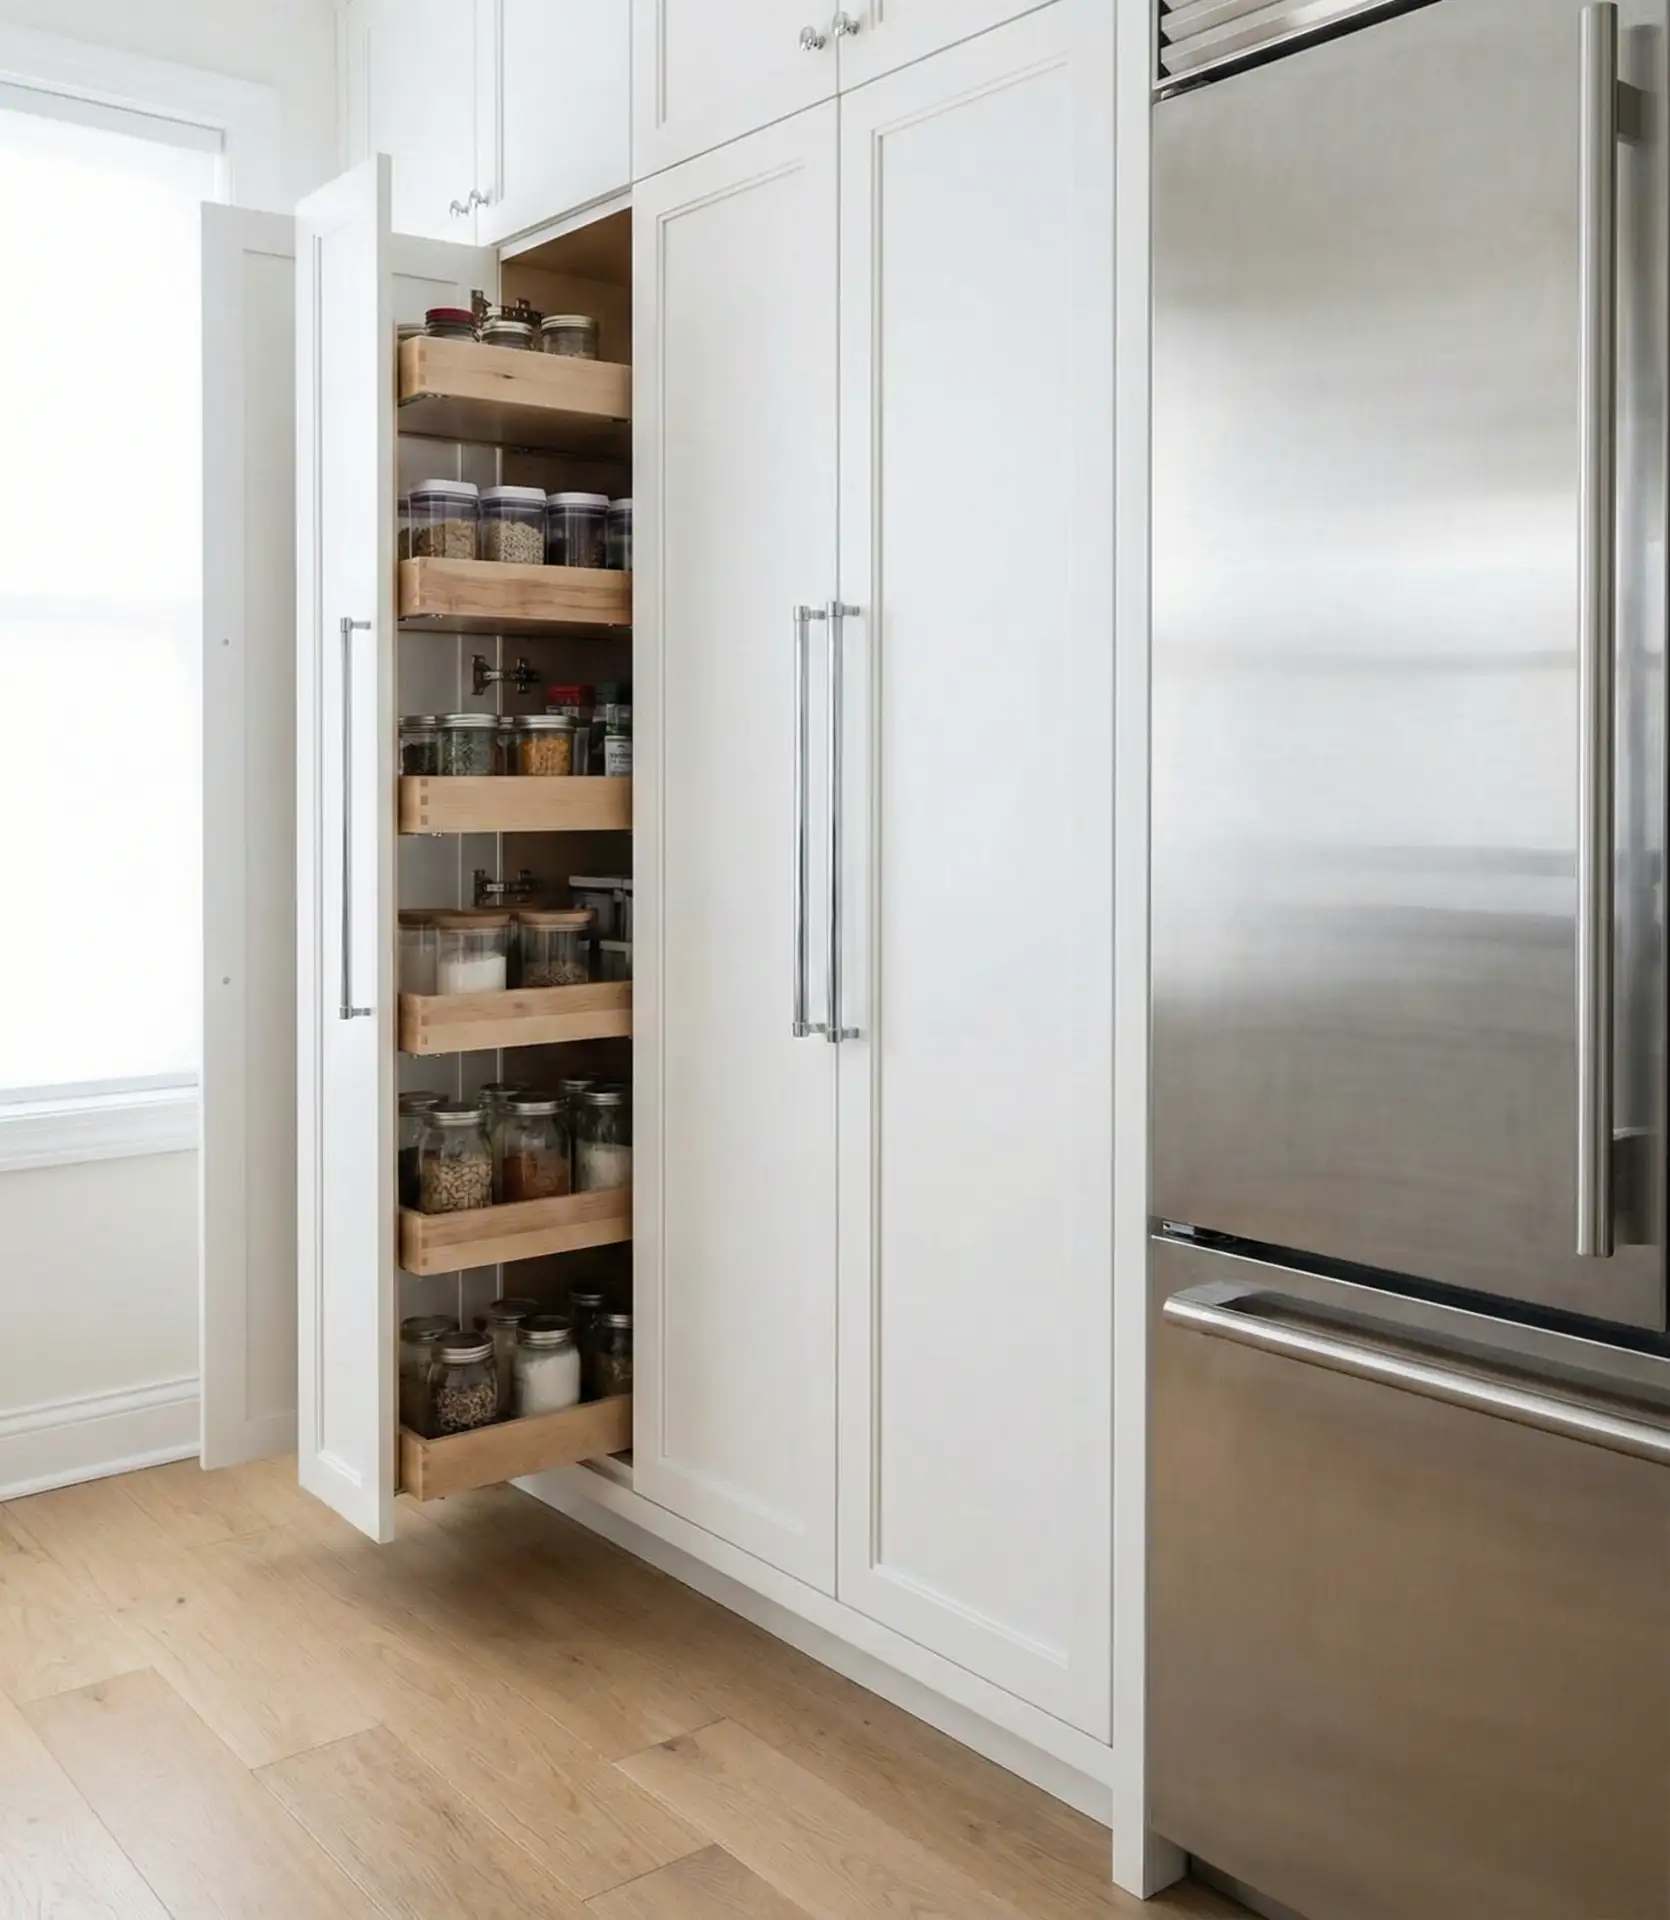
In homes where square footage is precious, tall pantry cabinets that stretch all the way to the ceiling unlock vertical storage potential without claiming extra floor space. These narrow towers are particularly effective in galley or L-shaped layouts, tucked into corners or flanking a refrigerator to create a streamlined, built-in look. Modern iterations often include pull-out shelves, soft-close doors, and interior lighting, turning awkward vertical inches into highly organized zones for dry goods, small appliances, and cleaning supplies. The uninterrupted line from floor to ceiling also lends a sense of grandeur, making even modest kitchens feel more intentional and finished.
A design professional once noted that Americans consistently underestimate how much they’ll use a tall pantry until they have one—then it becomes the most-opened door in the house. If your ceilings are eight feet or lower, consider a single full-height unit rather than stacking shorter cabinets, which can create a visual break that shrinks the room. For higher ceilings, crown molding at the top helps the pantry feel like original architecture rather than an afterthought, and painting it the same color as the walls can make it recede if you prefer a less prominent look.
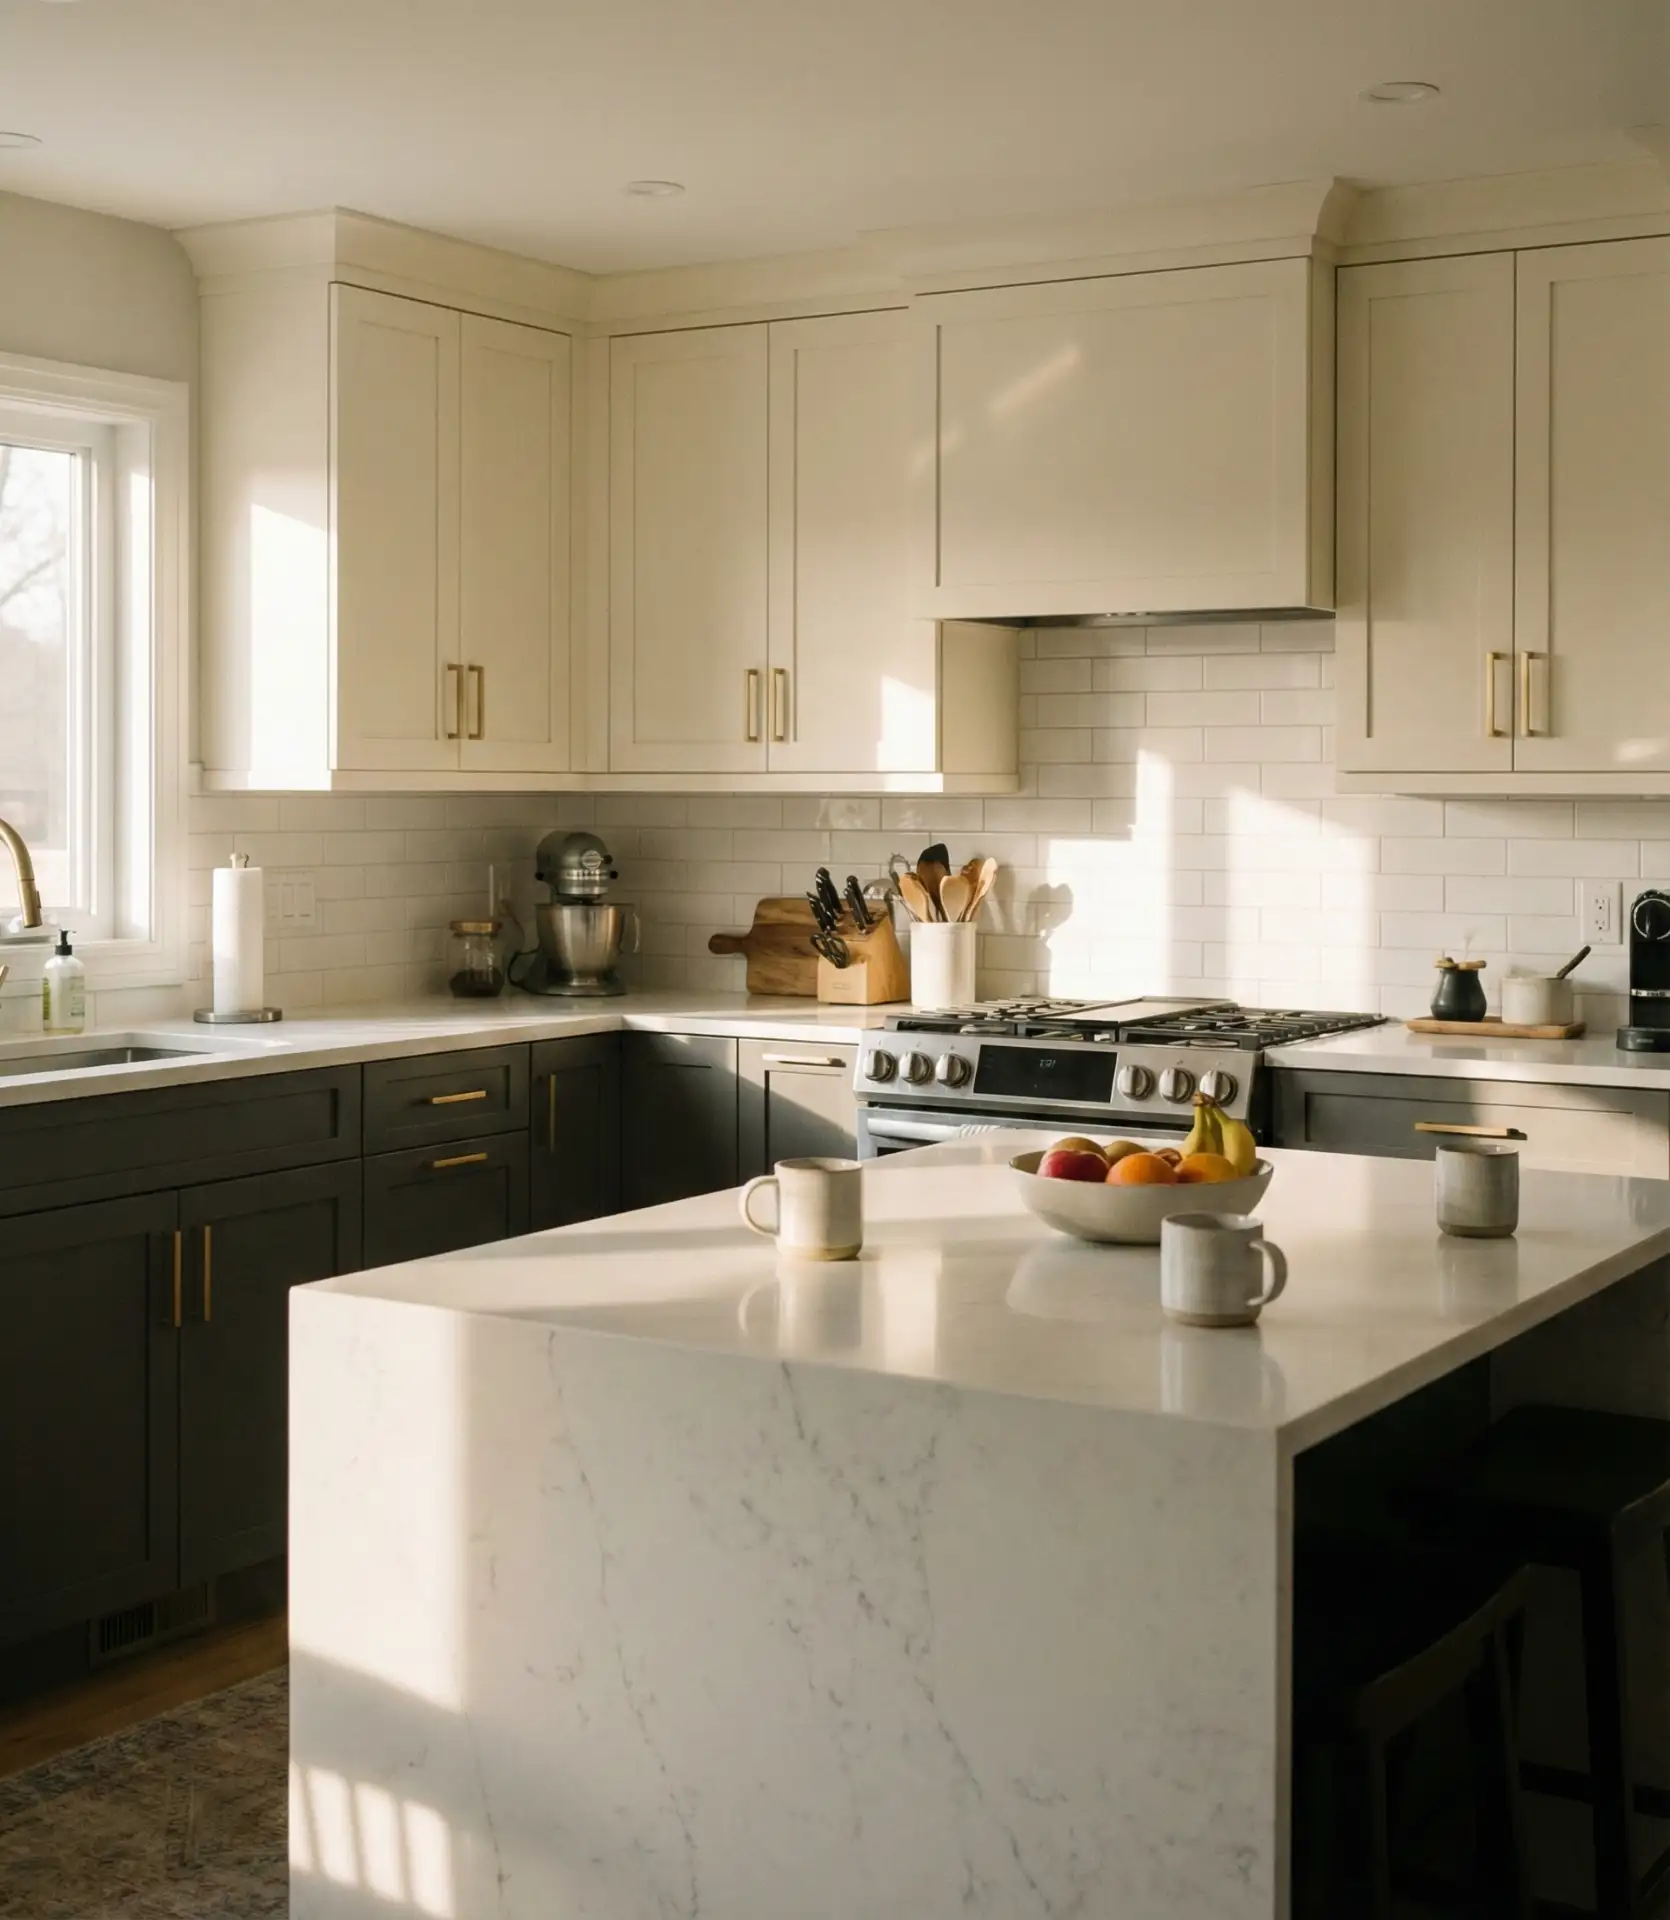
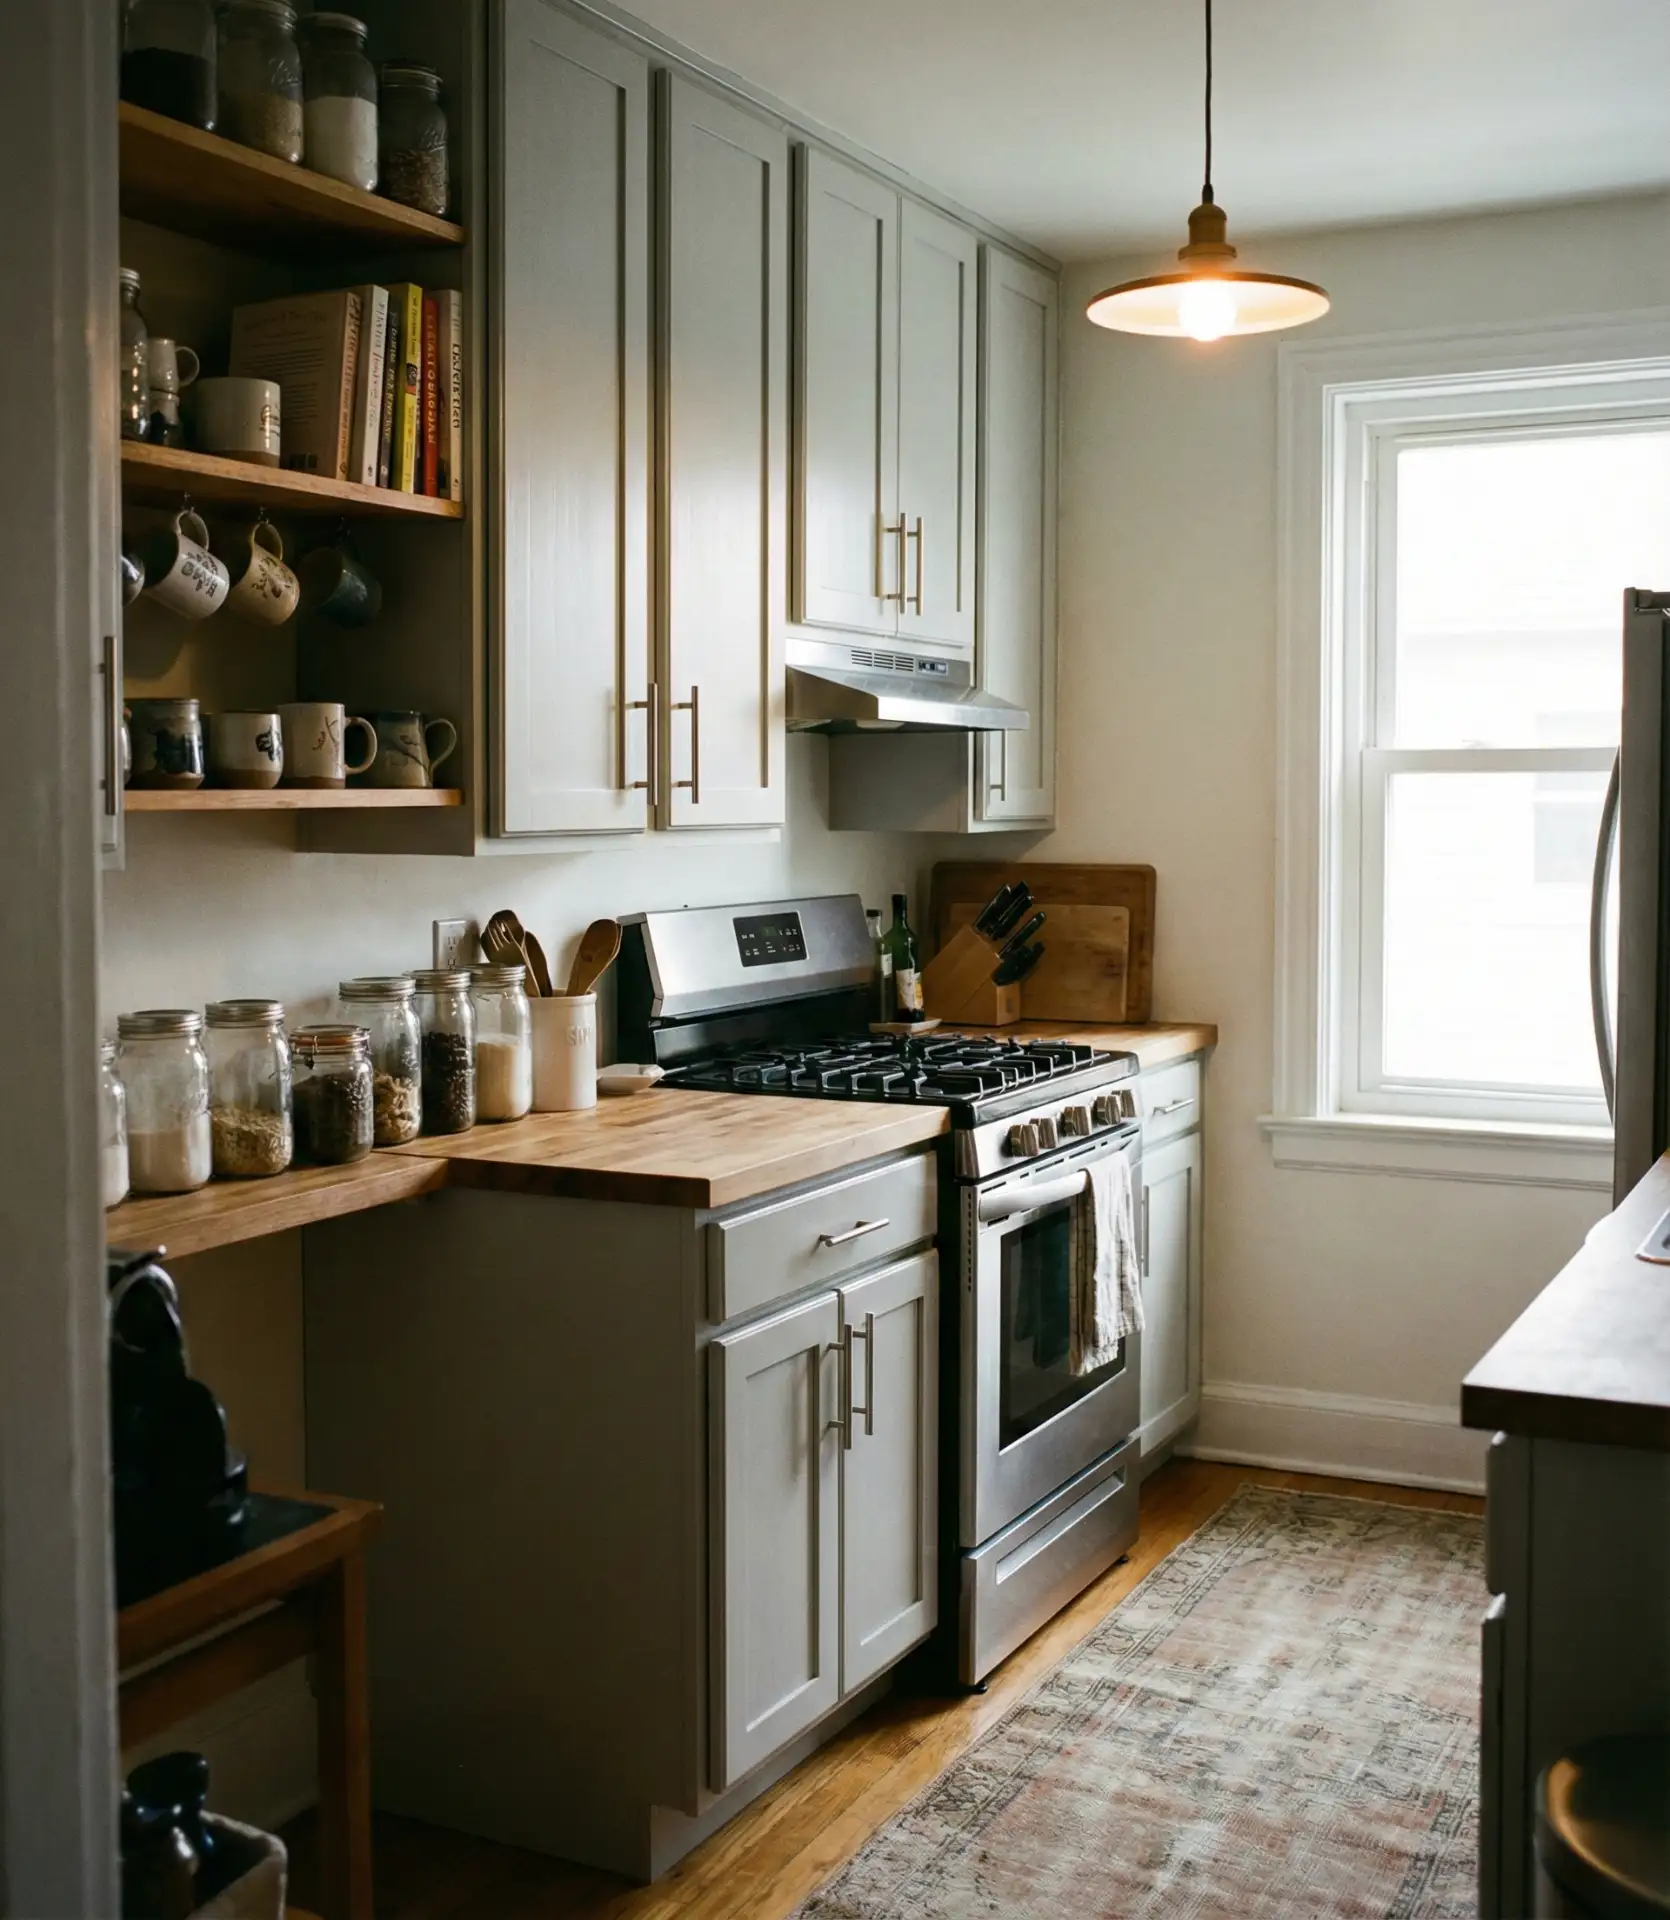
3. Shaker-Style Cabinets in Soft Gray
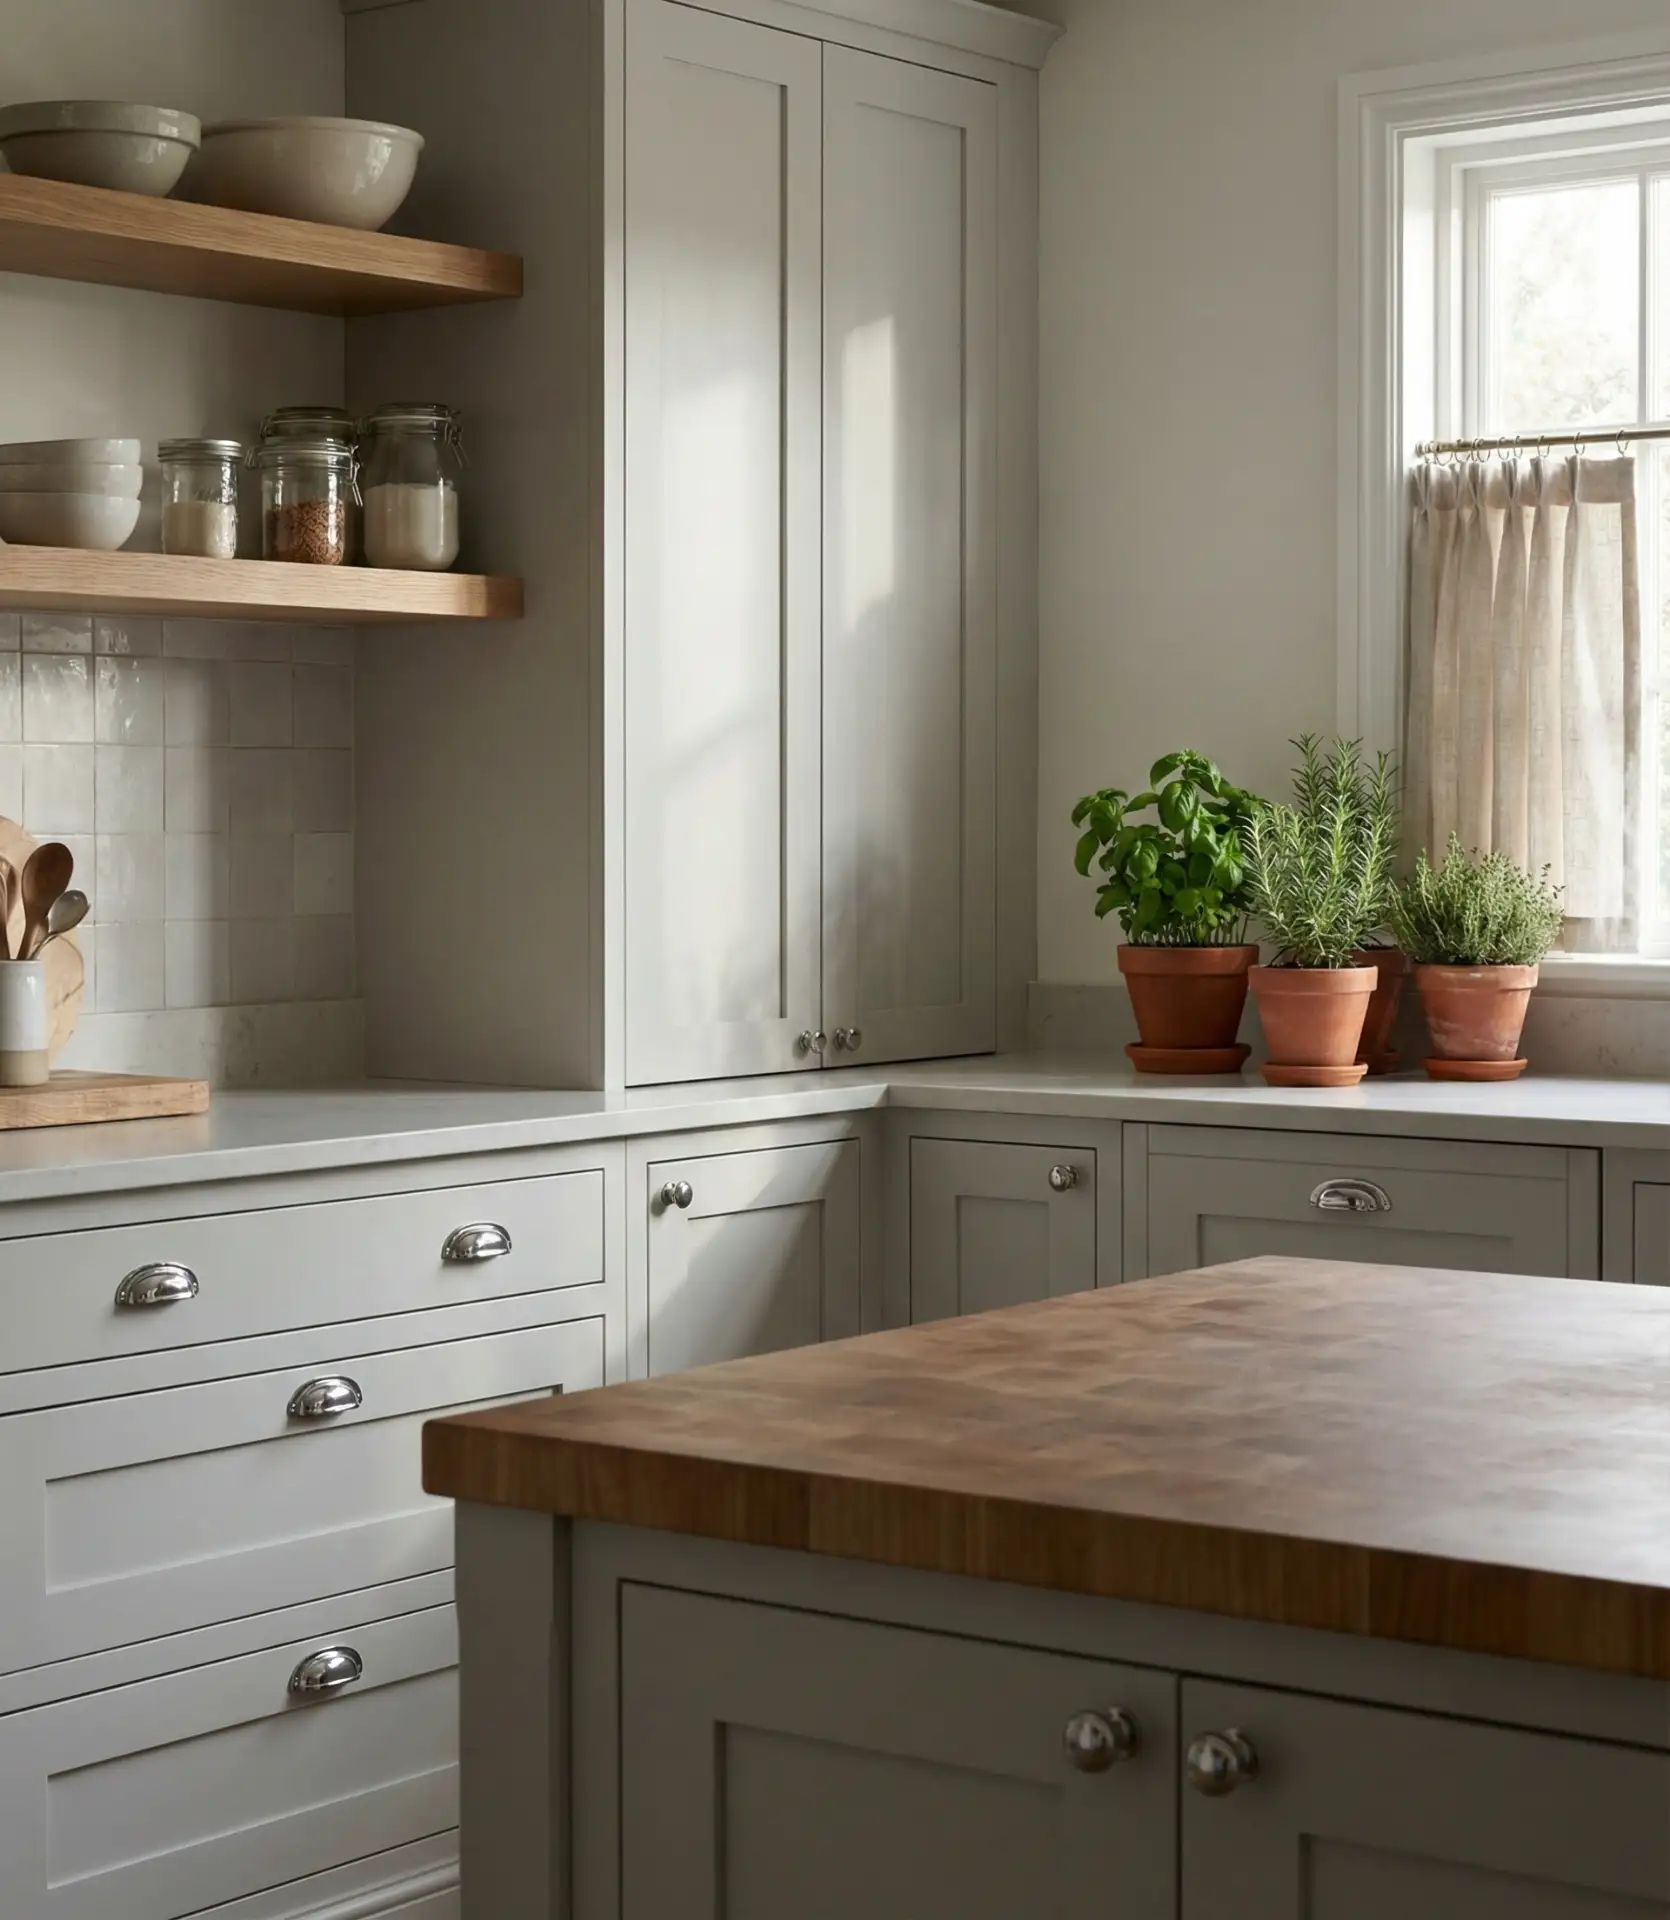
Shaker doors continue to be a popular choice in American kitchens, with gray variations providing an ideal balance between stark white and dramatic dark tones. The five-piece construction—four rails around a flat center panel—offers just enough detail to feel classic without tipping into ornate territory, making it compatible with both farmhouse and modern aesthetics. Subtle shifts in soft gray tones, appearing cooler in the morning sun and warmer under the evening pendants, giving the kitchen a living, breathing quality. This adaptability makes gray shaker cabinets a smart choice for open-plan homes where the kitchen is visible from multiple angles throughout the day.
Gray shaker cabinets work best in kitchens with good natural light or layered artificial lighting—insufficient light can make softer grays look muddy or flat. To avoid a builder-grade feel, invest in quality hardware with a bit of visual weight; delicate pulls can disappear against the door’s recessed panel, while chunkier options in brass, bronze, or matte black provide the necessary contrast. Many homeowners report that gray ages more gracefully than pure white, showing fewer scuffs and fingerprints over time, which is a practical bonus in busy family kitchens.
4. Deep Green Cabinets with Brass Accents
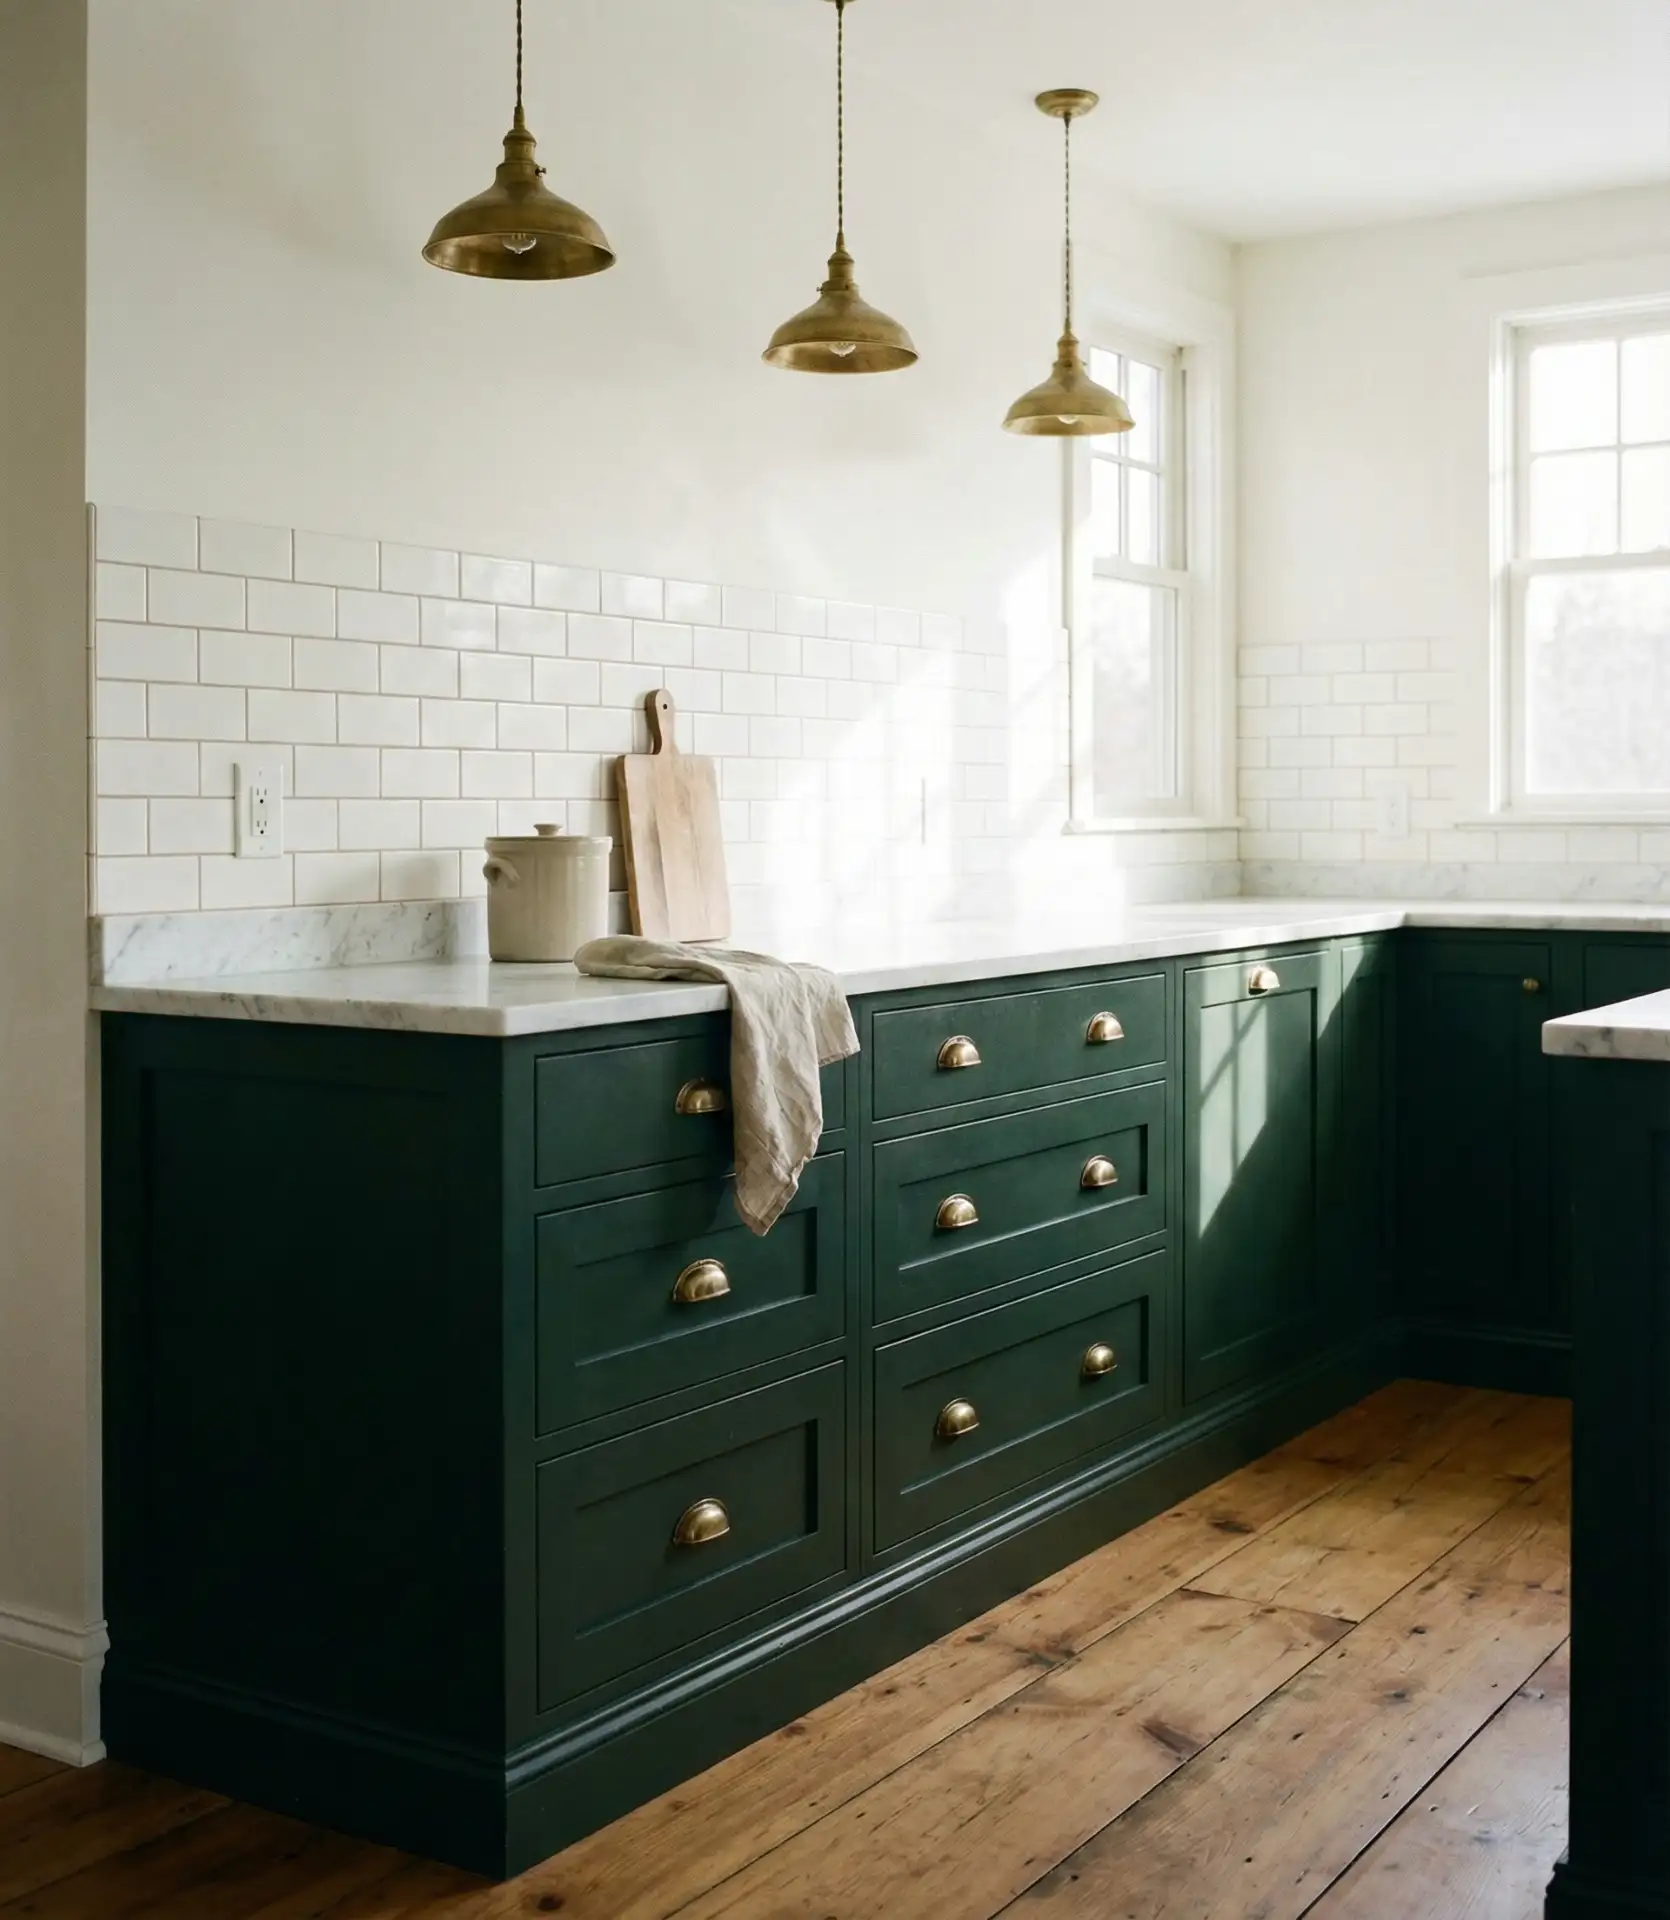
Rich green cabinetry—think hunter, emerald, or sage—has surged in popularity as homeowners seek alternatives to the gray-and-white palette that dominated the past decade. When paired with warm brass or gold hardware, these colors evoke both traditional English kitchens and fresh botanical vibes, depending on how you style the surrounding elements. Green cabinets anchor a space with natural warmth, making them especially effective in north-facing kitchens that might otherwise feel cold. The color also provides a forgiving backdrop for open shelving, where dishes and glassware can pop without competing for attention.
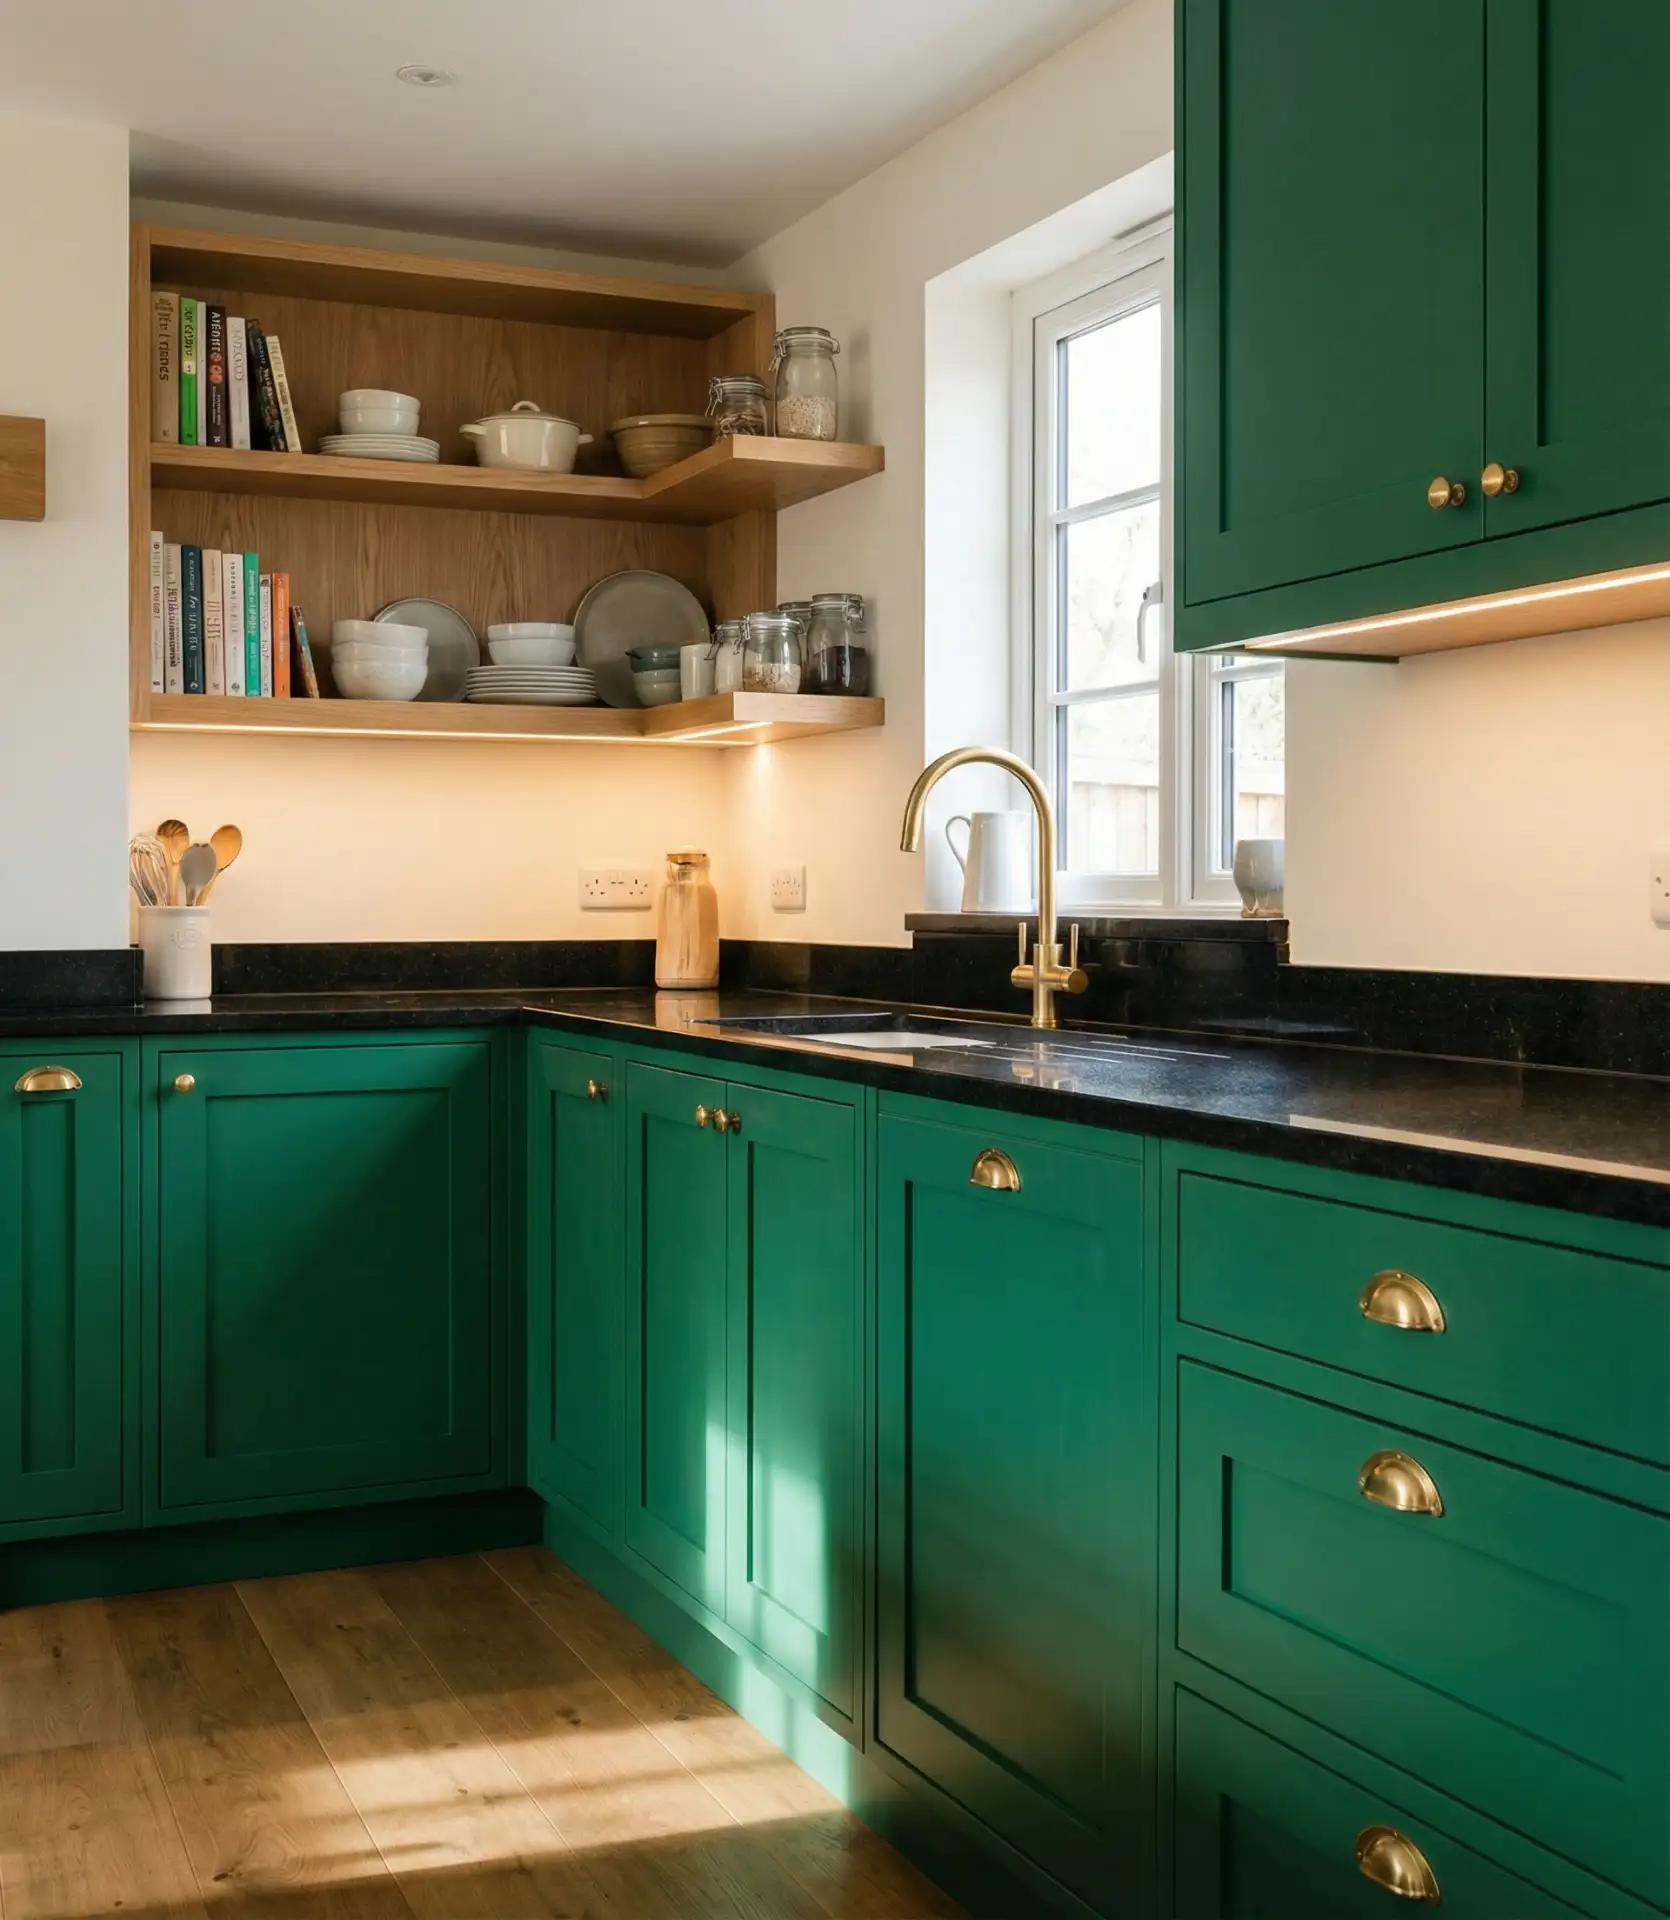
One common mistake is choosing a green that’s too dark for the room’s size and light levels, which can make the kitchen feel cramped. If you’re working with limited square footage, consider using deep green only on a single wall or island, then balance it with lighter tones elsewhere. Another tip: green reads differently depending on your countertop—pair it with warm whites, creams, or light wood to keep the space from skewing too cool, and avoid stark white counters unless you want a very modern, high-contrast look.
5. Open Shelving Above Lower Cabinets
Replacing some or all upper cabinets with open shelving creates an airier, more approachable kitchen, especially in small spaces where closed cabinetry can make walls feel heavy and oppressive. This trend has staying power because it forces a certain discipline—displayed items need to be both functional and attractive—which naturally leads to a more curated, intentional look. Homeowners often install floating shelves in natural wood, black metal brackets, or minimalist white supports, then arrange everyday dishes, glassware, and a few decorative objects to add personality. The openness also prompts you to reconsider your kitchen’s contents, blurring the distinction between storage and display.
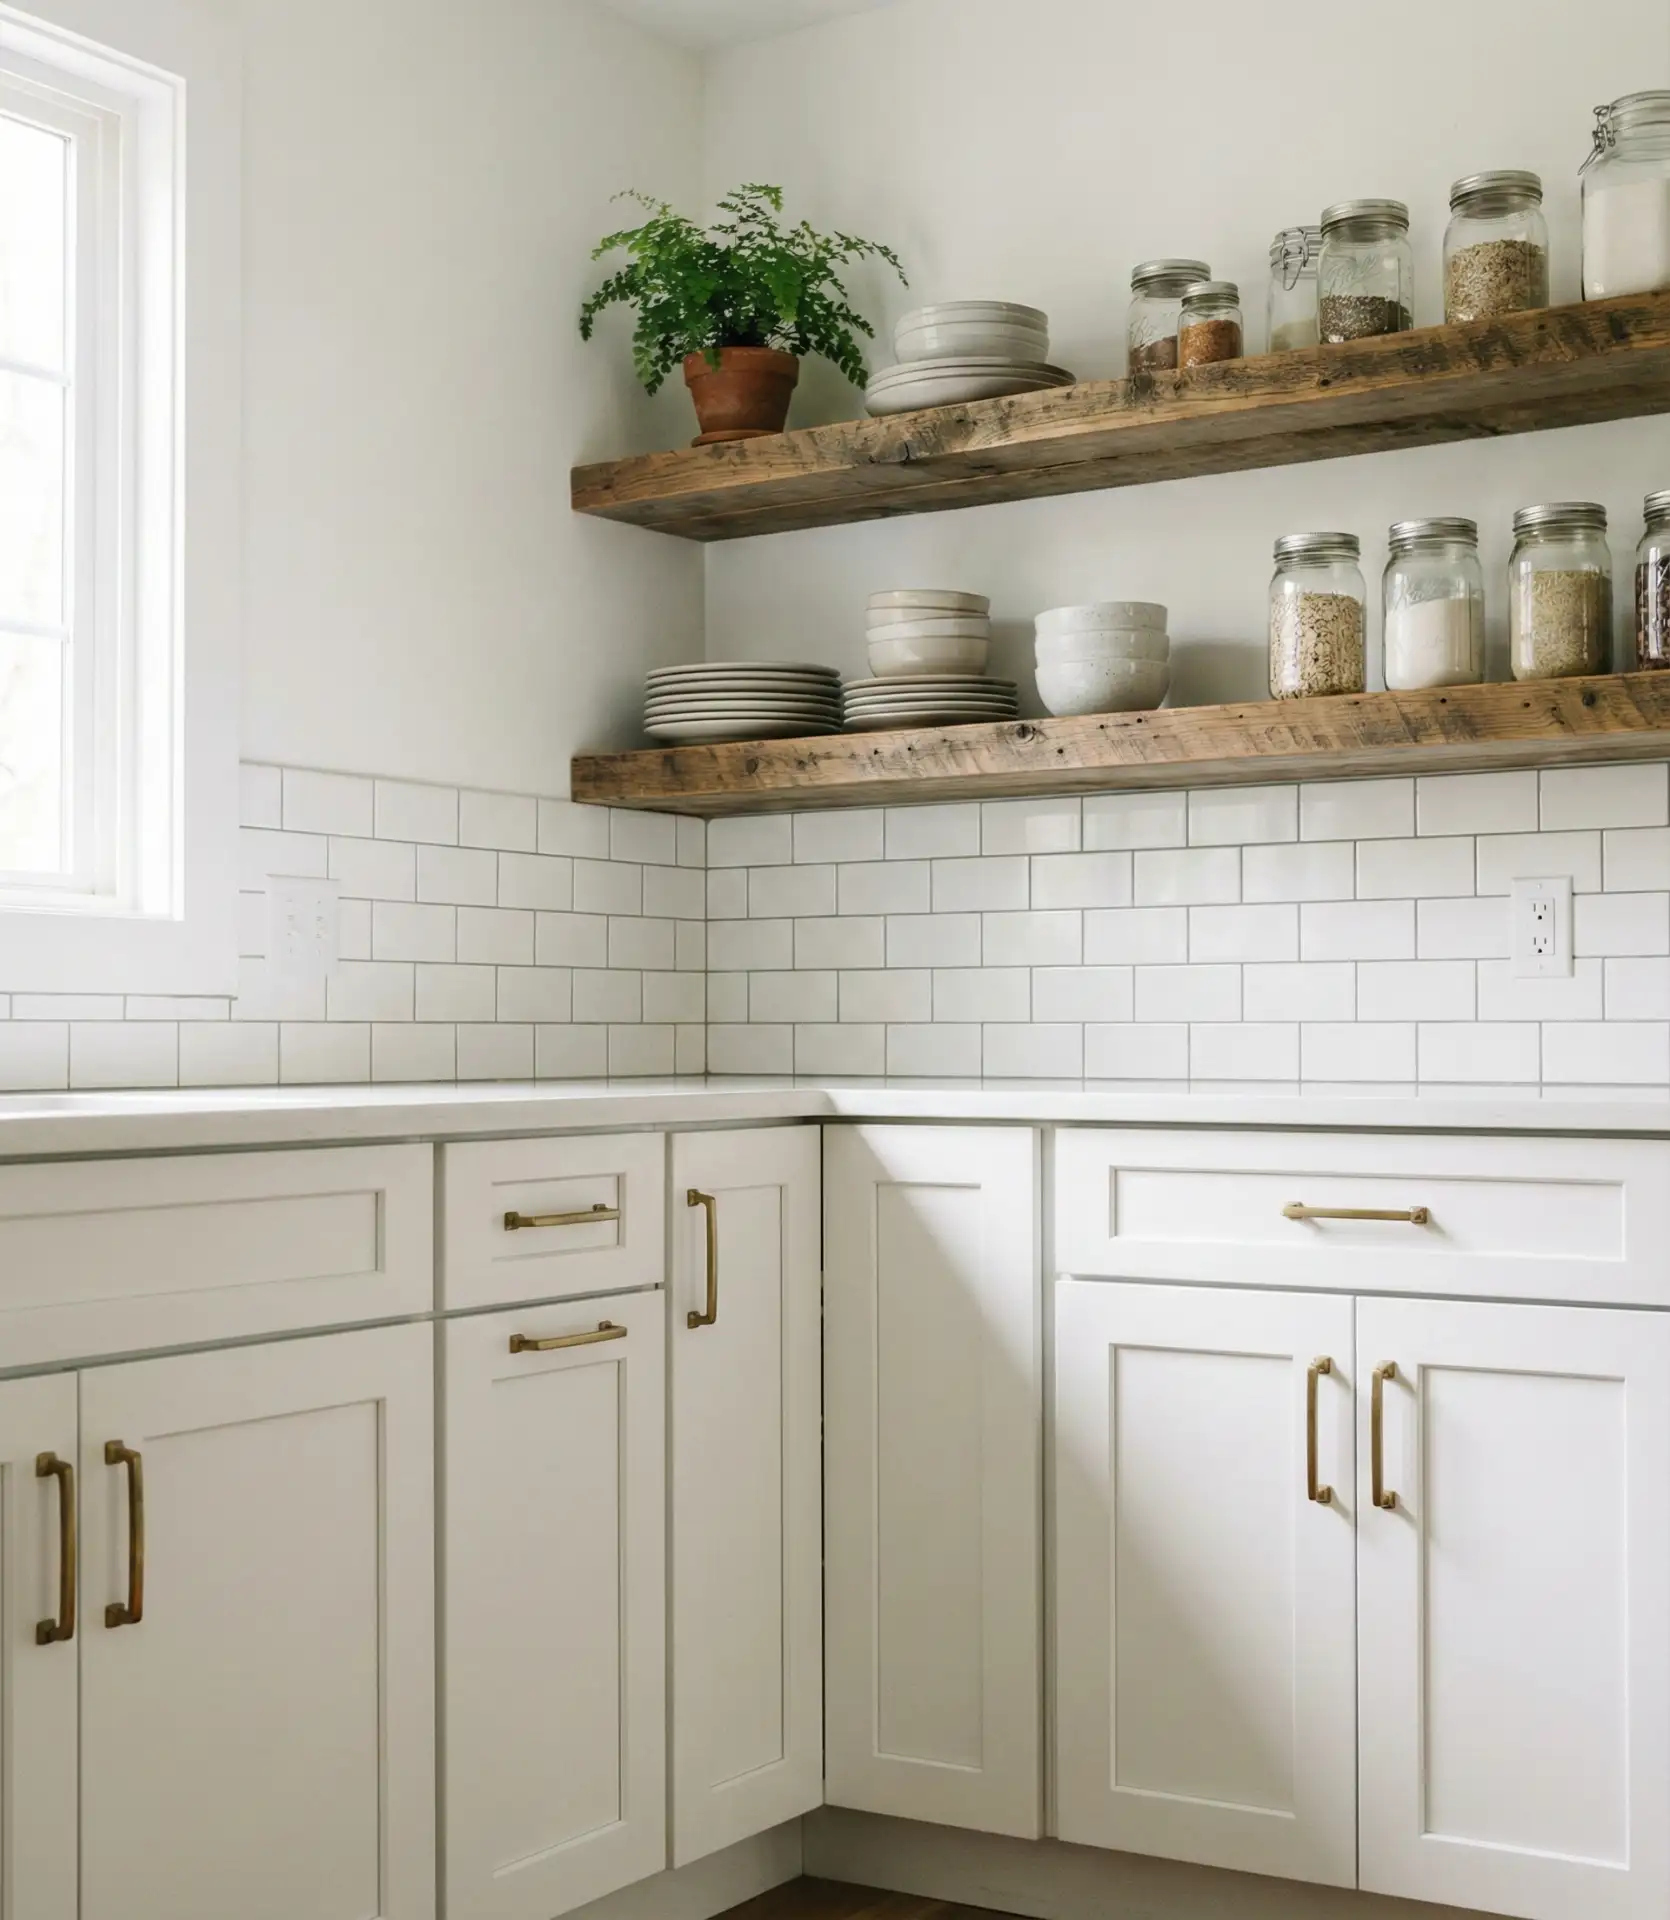
In regions with high humidity or near the coast, open shelves require more frequent dusting and occasional rearranging to prevent a cluttered look, so they’re best suited to homeowners who enjoy light maintenance as part of their routine. If you cook frequently and generate a lot of grease or steam, consider limiting open shelving to areas away from the range. A practical middle ground is to install open shelves on one wall—often the one with the sink—while keeping closed uppers elsewhere, giving you the visual break without sacrificing enclosed storage for less photogenic items.
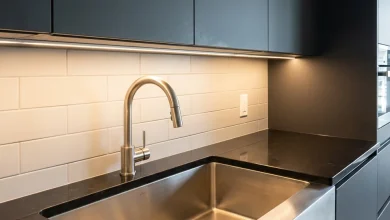
6. Matte Black Cabinets for Dramatic Impact
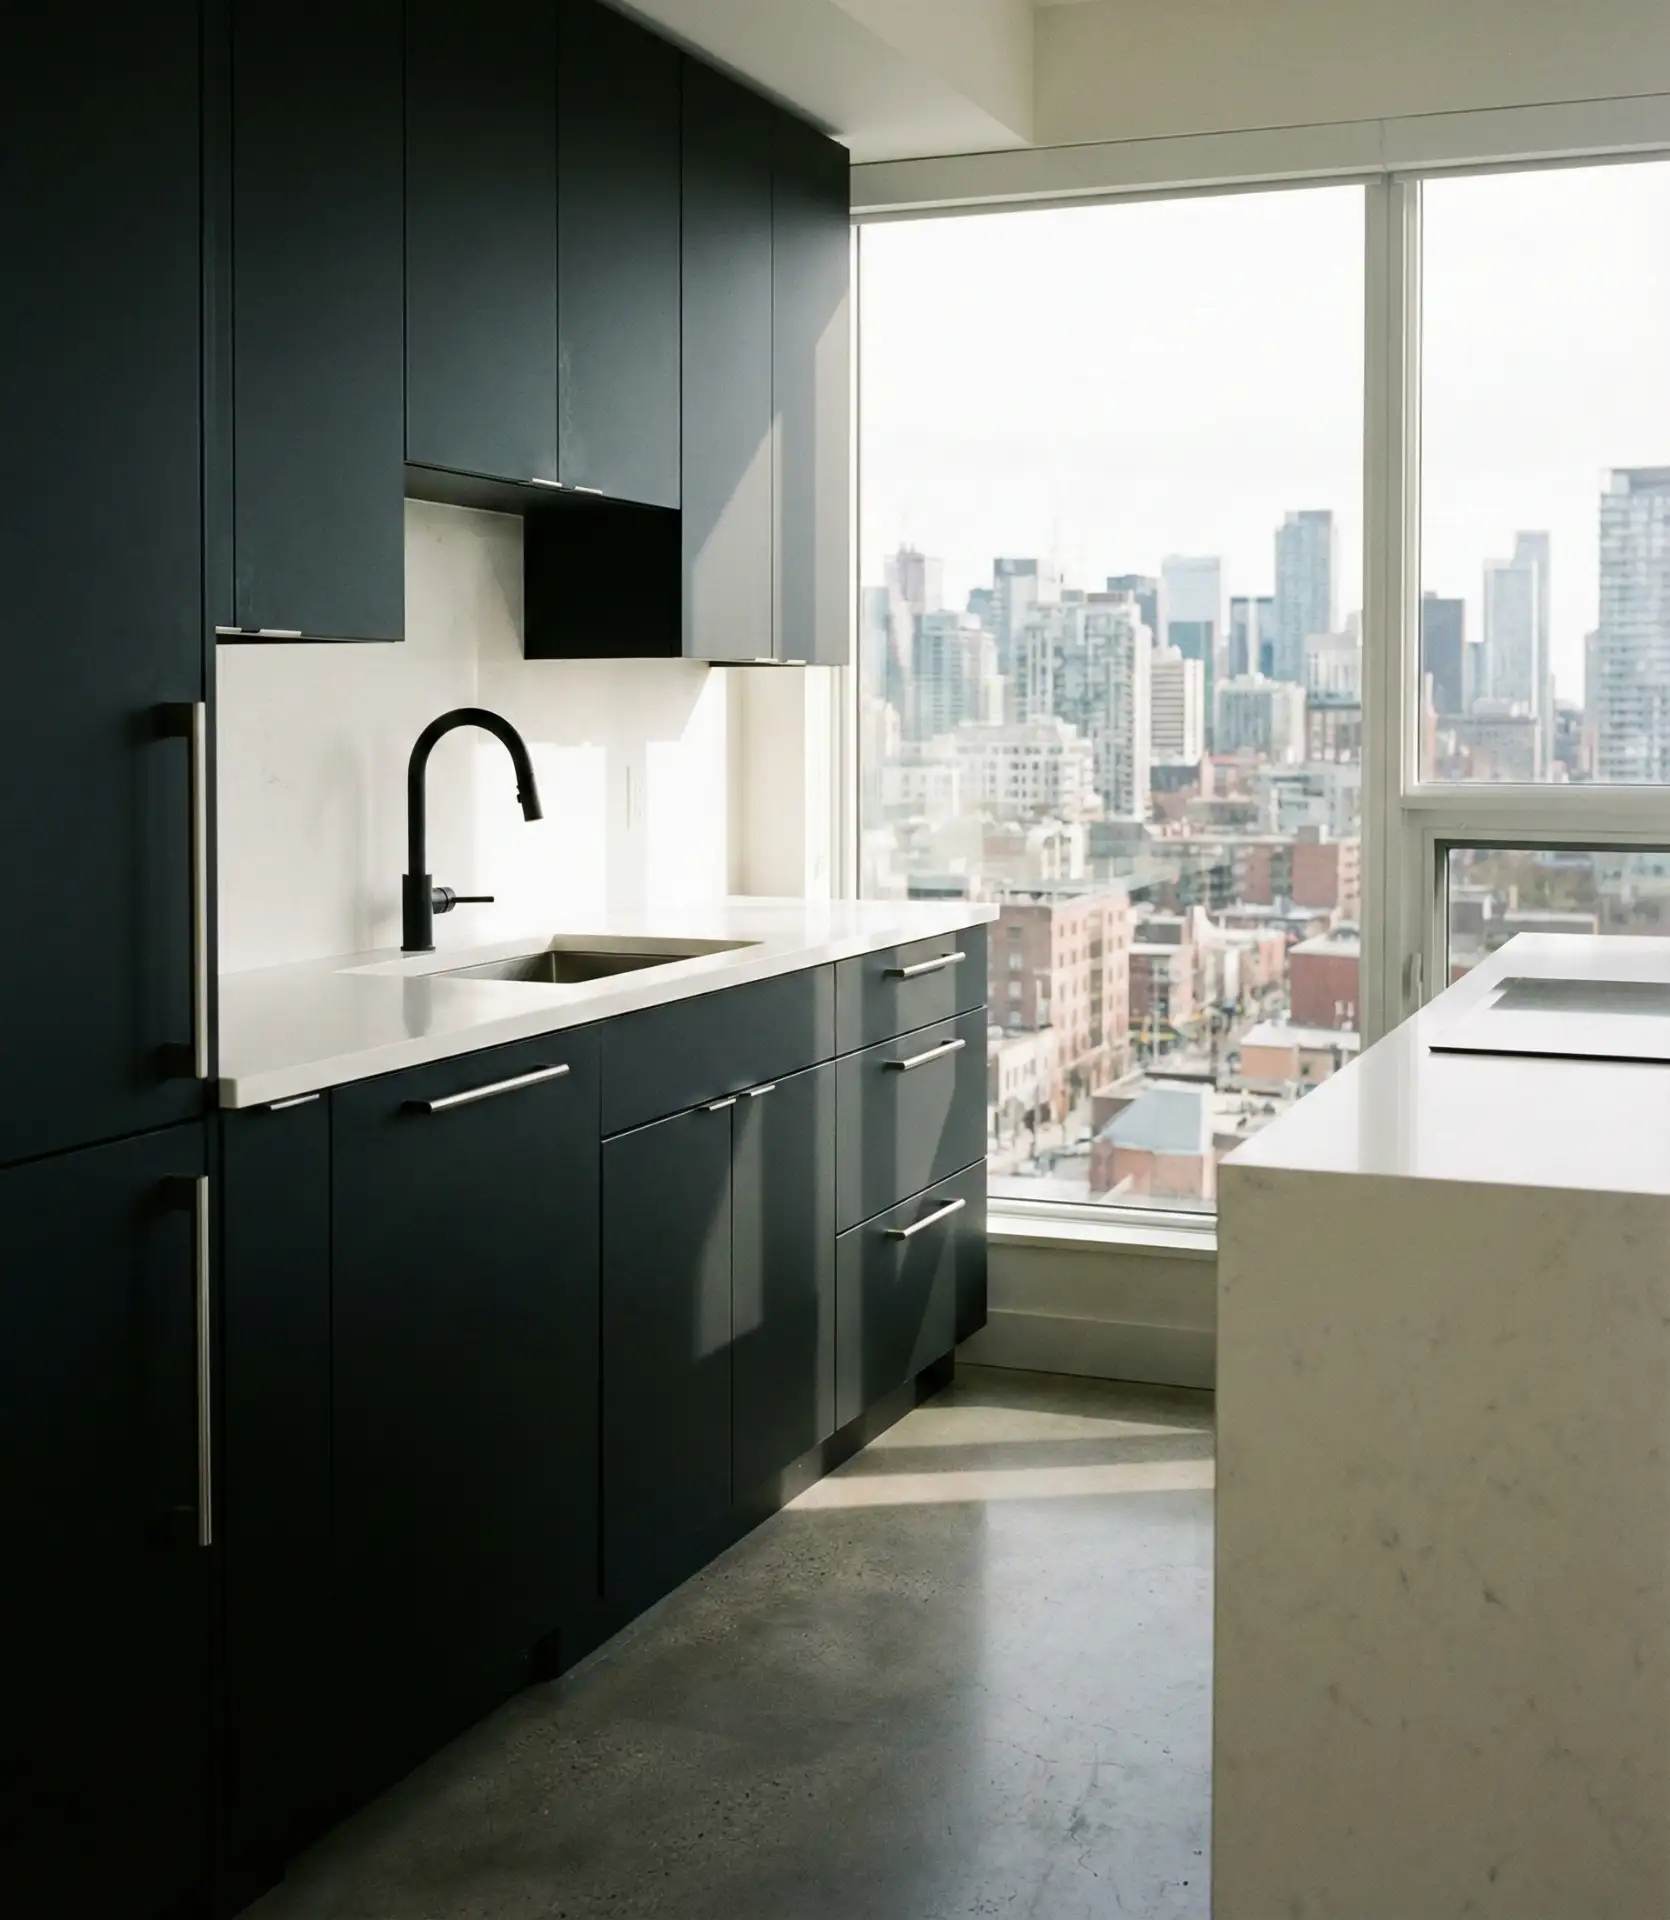
When you want to make a bold statement, black cabinets deliver instant sophistication and a gallery-like backdrop for everything from colorful dishware to high-end appliances. Matte finishes are particularly effective because they absorb light rather than reflecting it, creating a velvety, understated luxury that glossy black can’t quite match. This choice works especially well in modern or industrial-style kitchens, where clean lines and minimal ornamentation let the color take center stage. Black also has the practical advantage of hiding minor scuffs and smudges better than lighter tones, though it does show dust, so a quick wipe-down becomes part of the routine.
Black cabinetry demands excellent lighting to avoid a cave-like atmosphere, so budget for layered illumination—under-cabinet strips, pendant fixtures, and recessed cans all working together. In smaller kitchens, consider using black only on lower cabinets or a single accent wall, pairing it with lighter uppers or open shelving to maintain a sense of spaciousness. Countertop choice is critical here: white marble or light quartz provides the necessary contrast, while dark granite or soapstone can make the room feel too heavy unless you have soaring ceilings and abundant natural light to balance the palette.
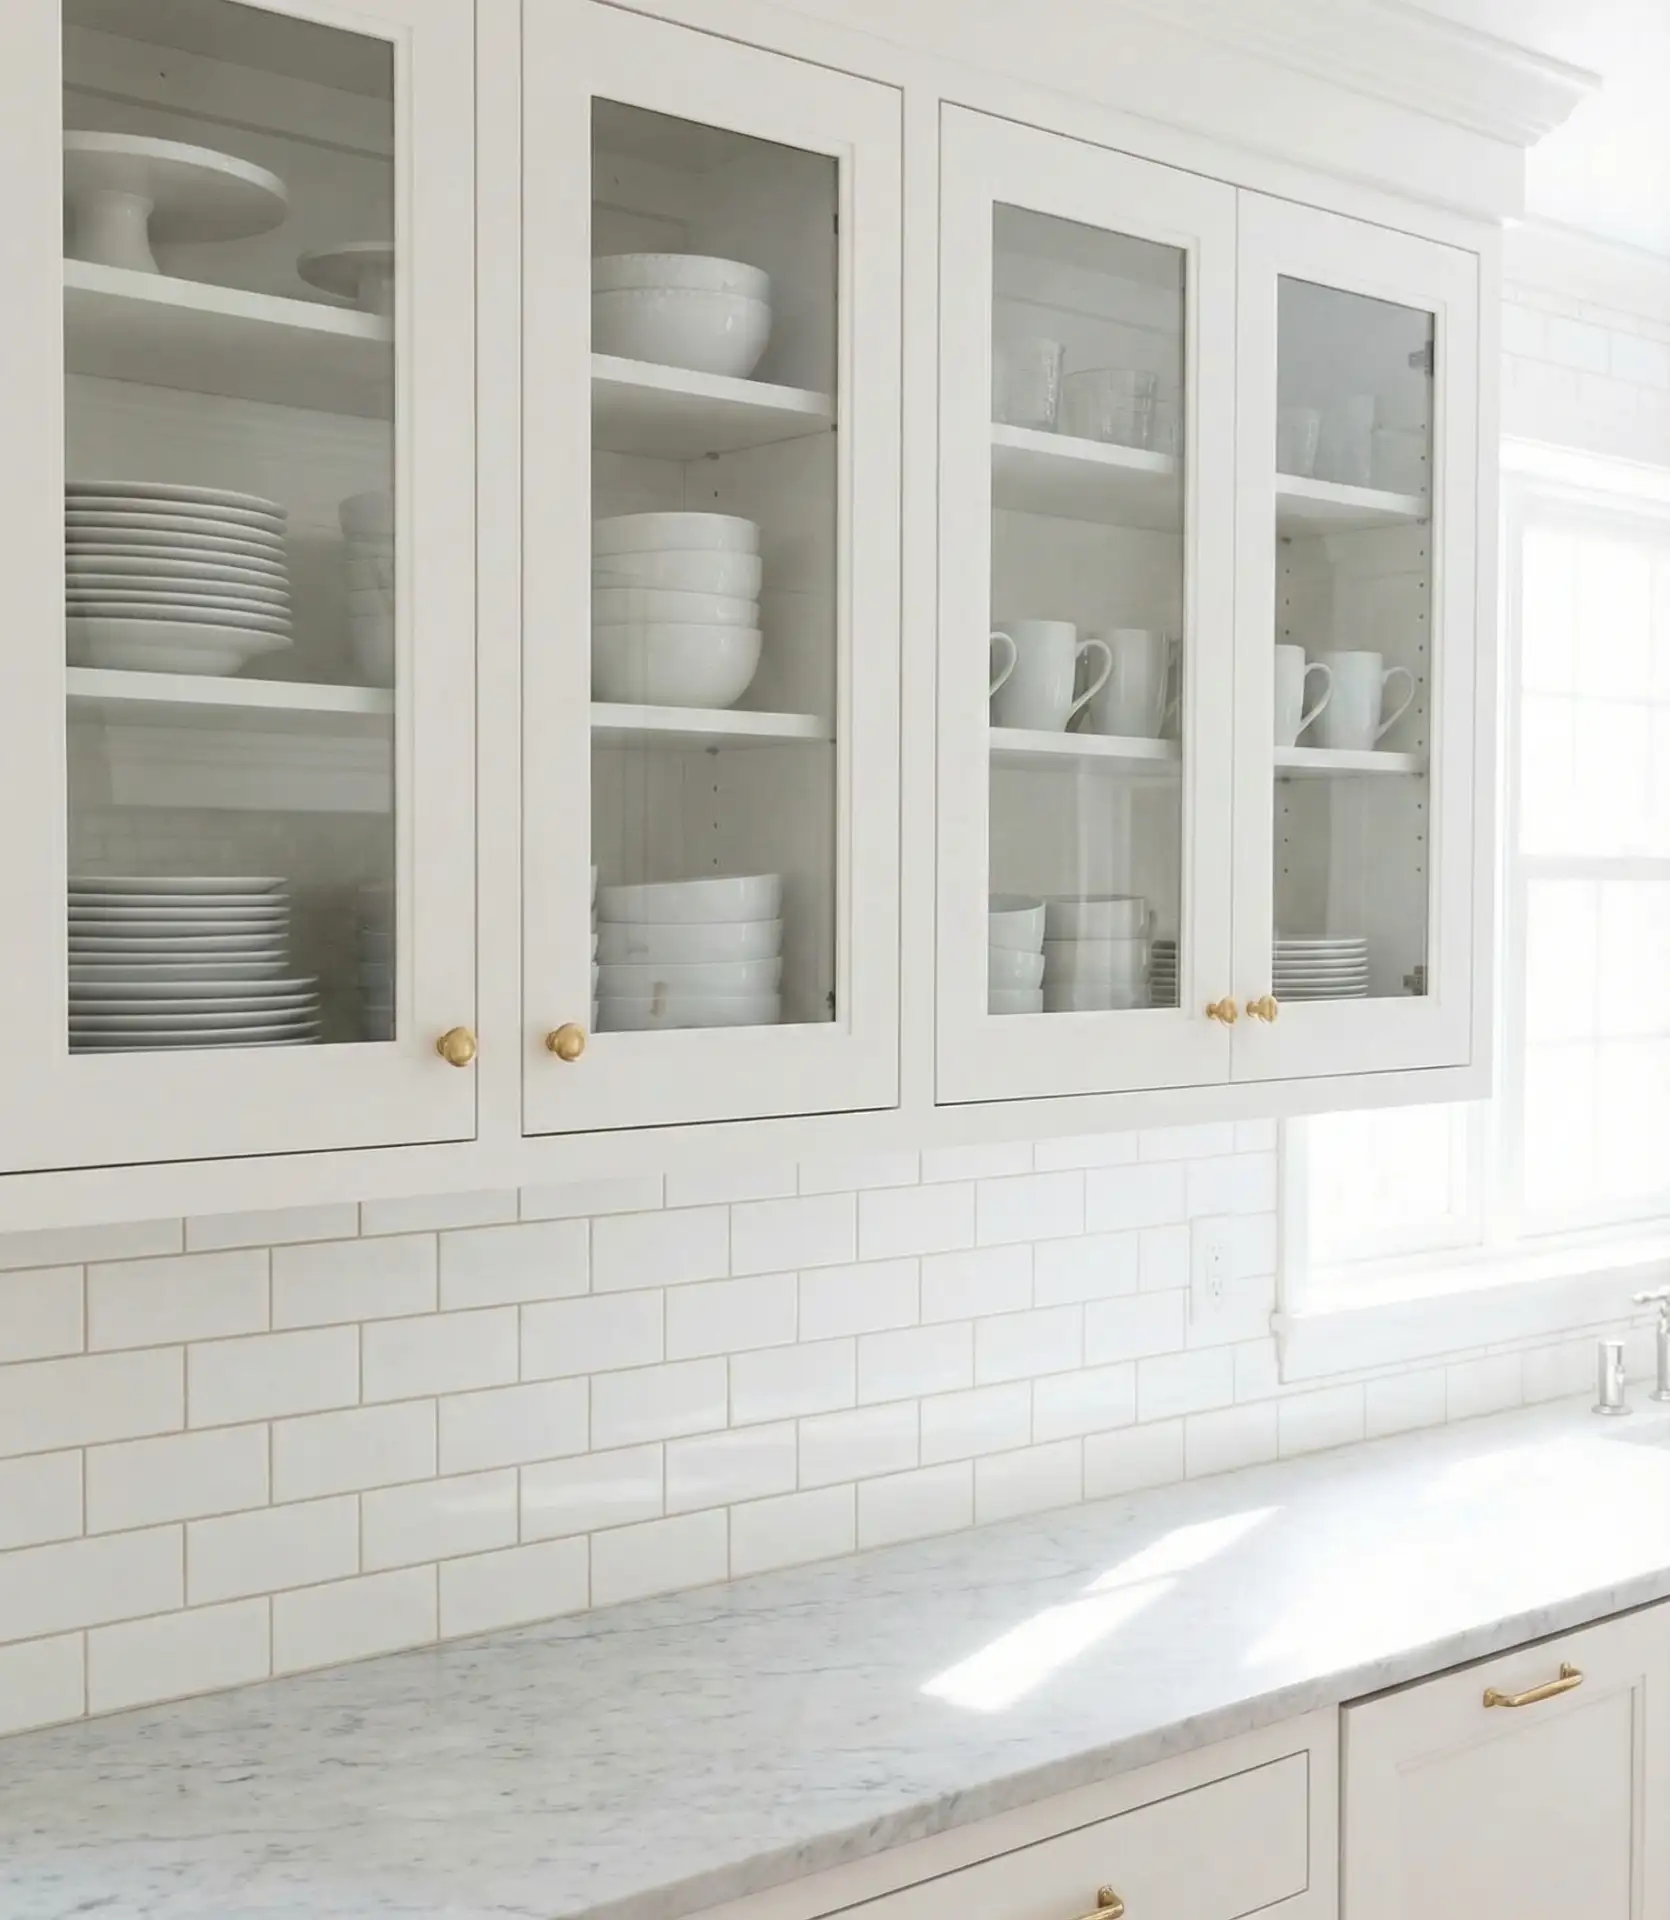
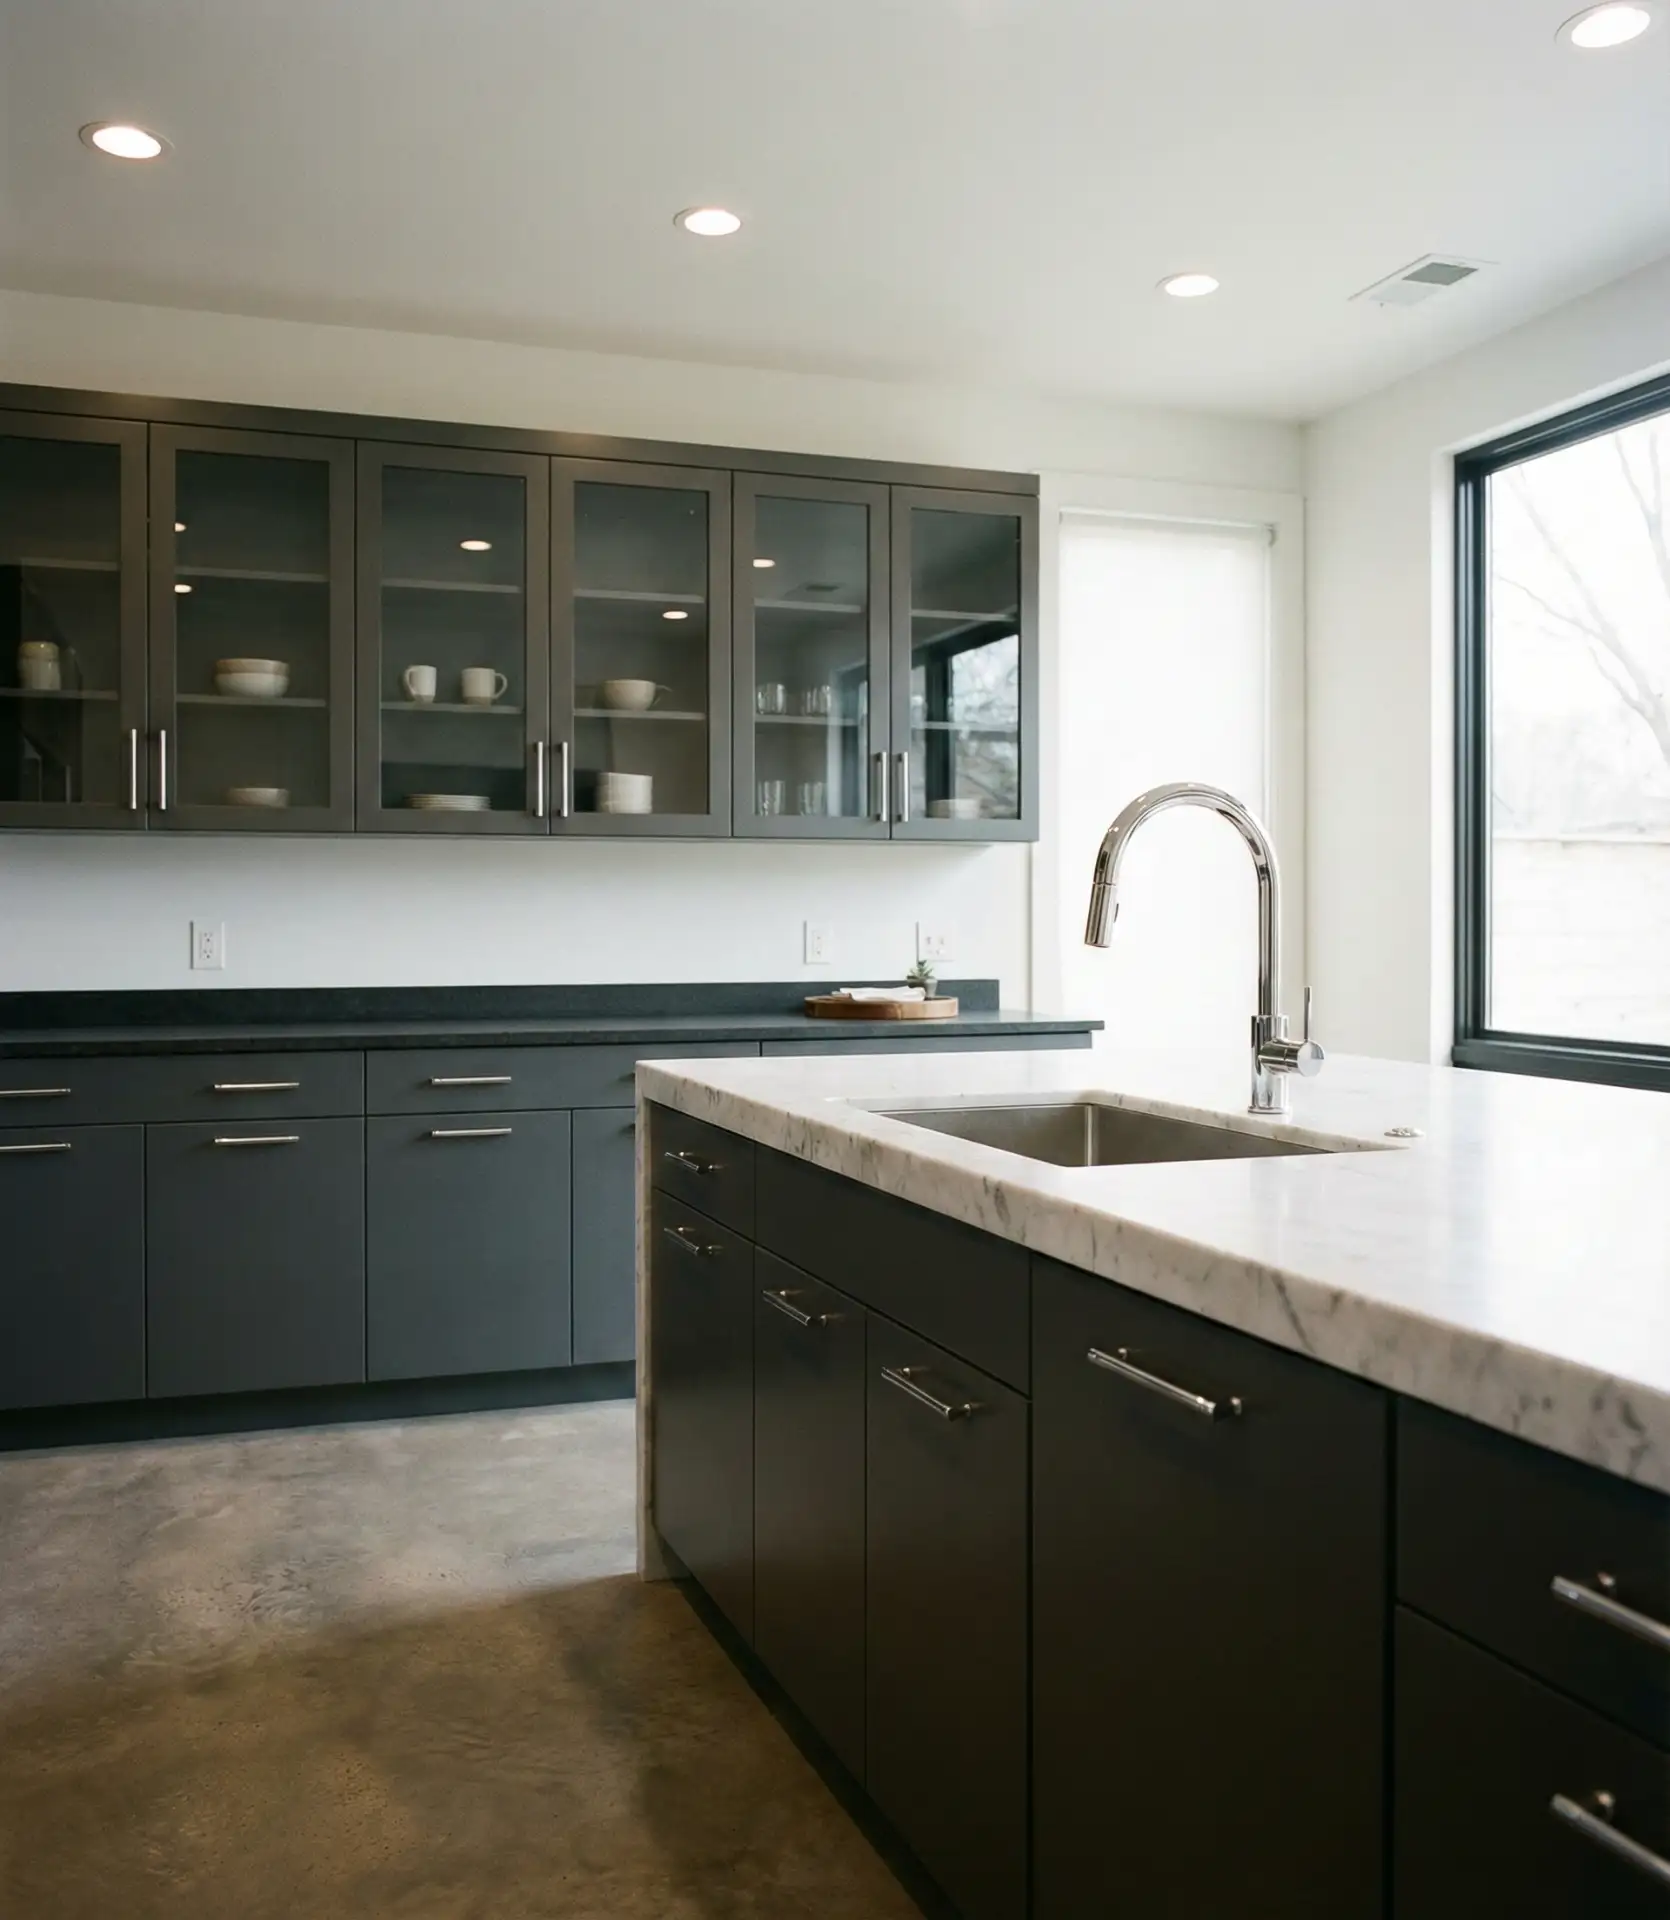
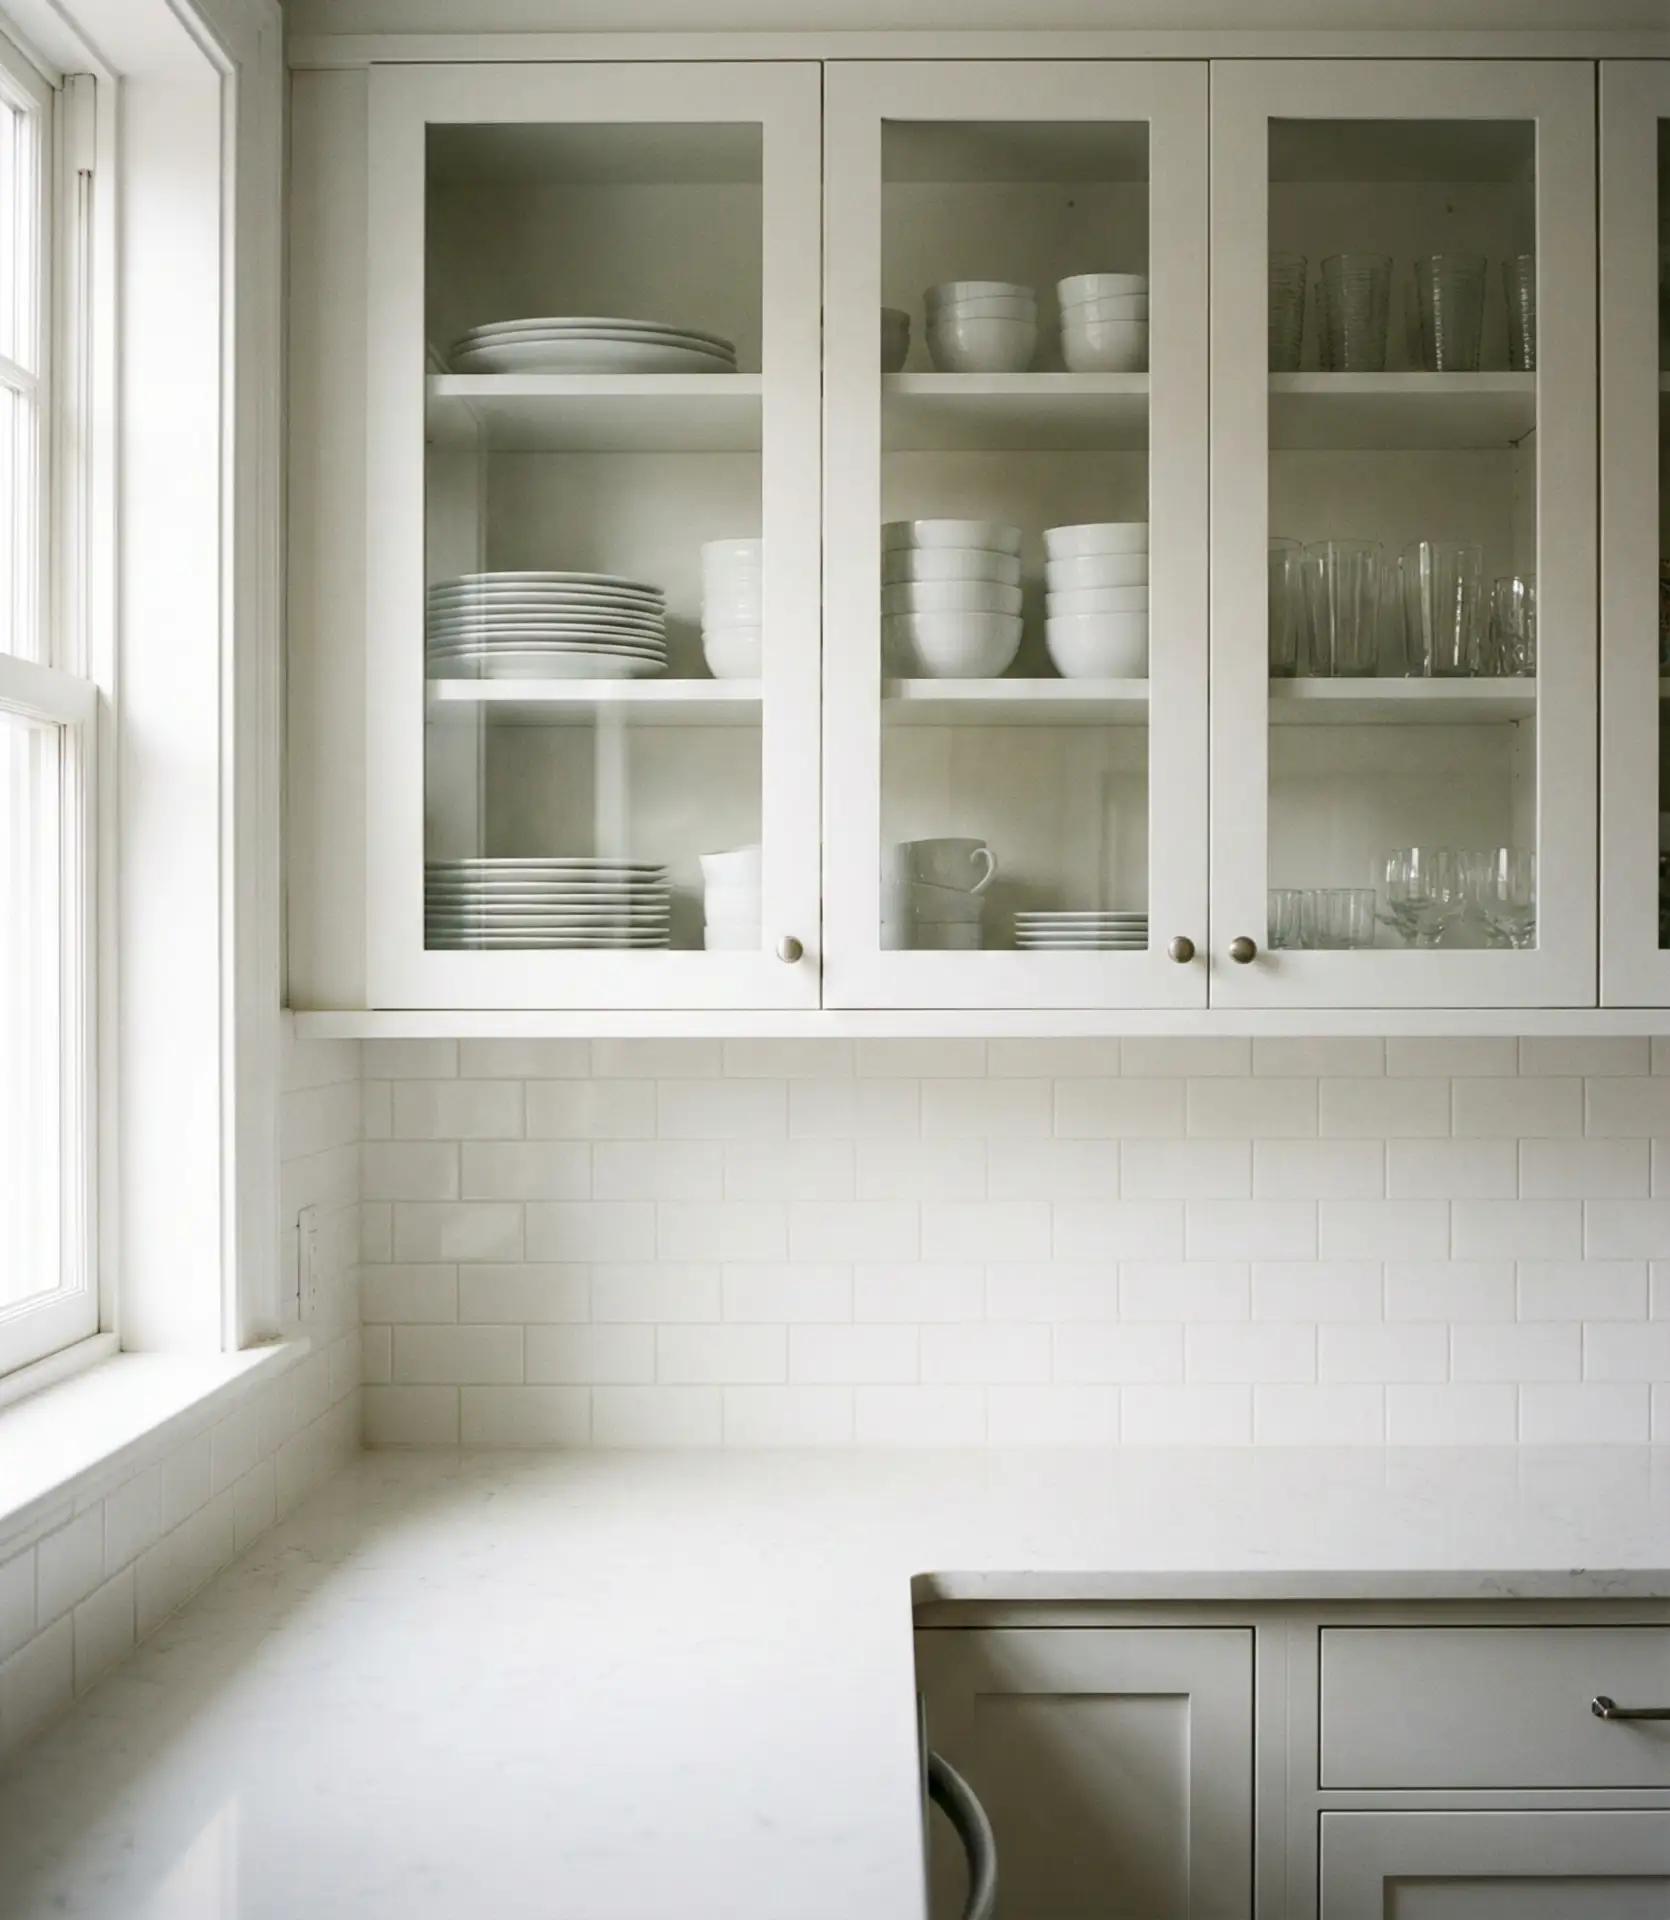
7. Glass-Front Upper Cabinets
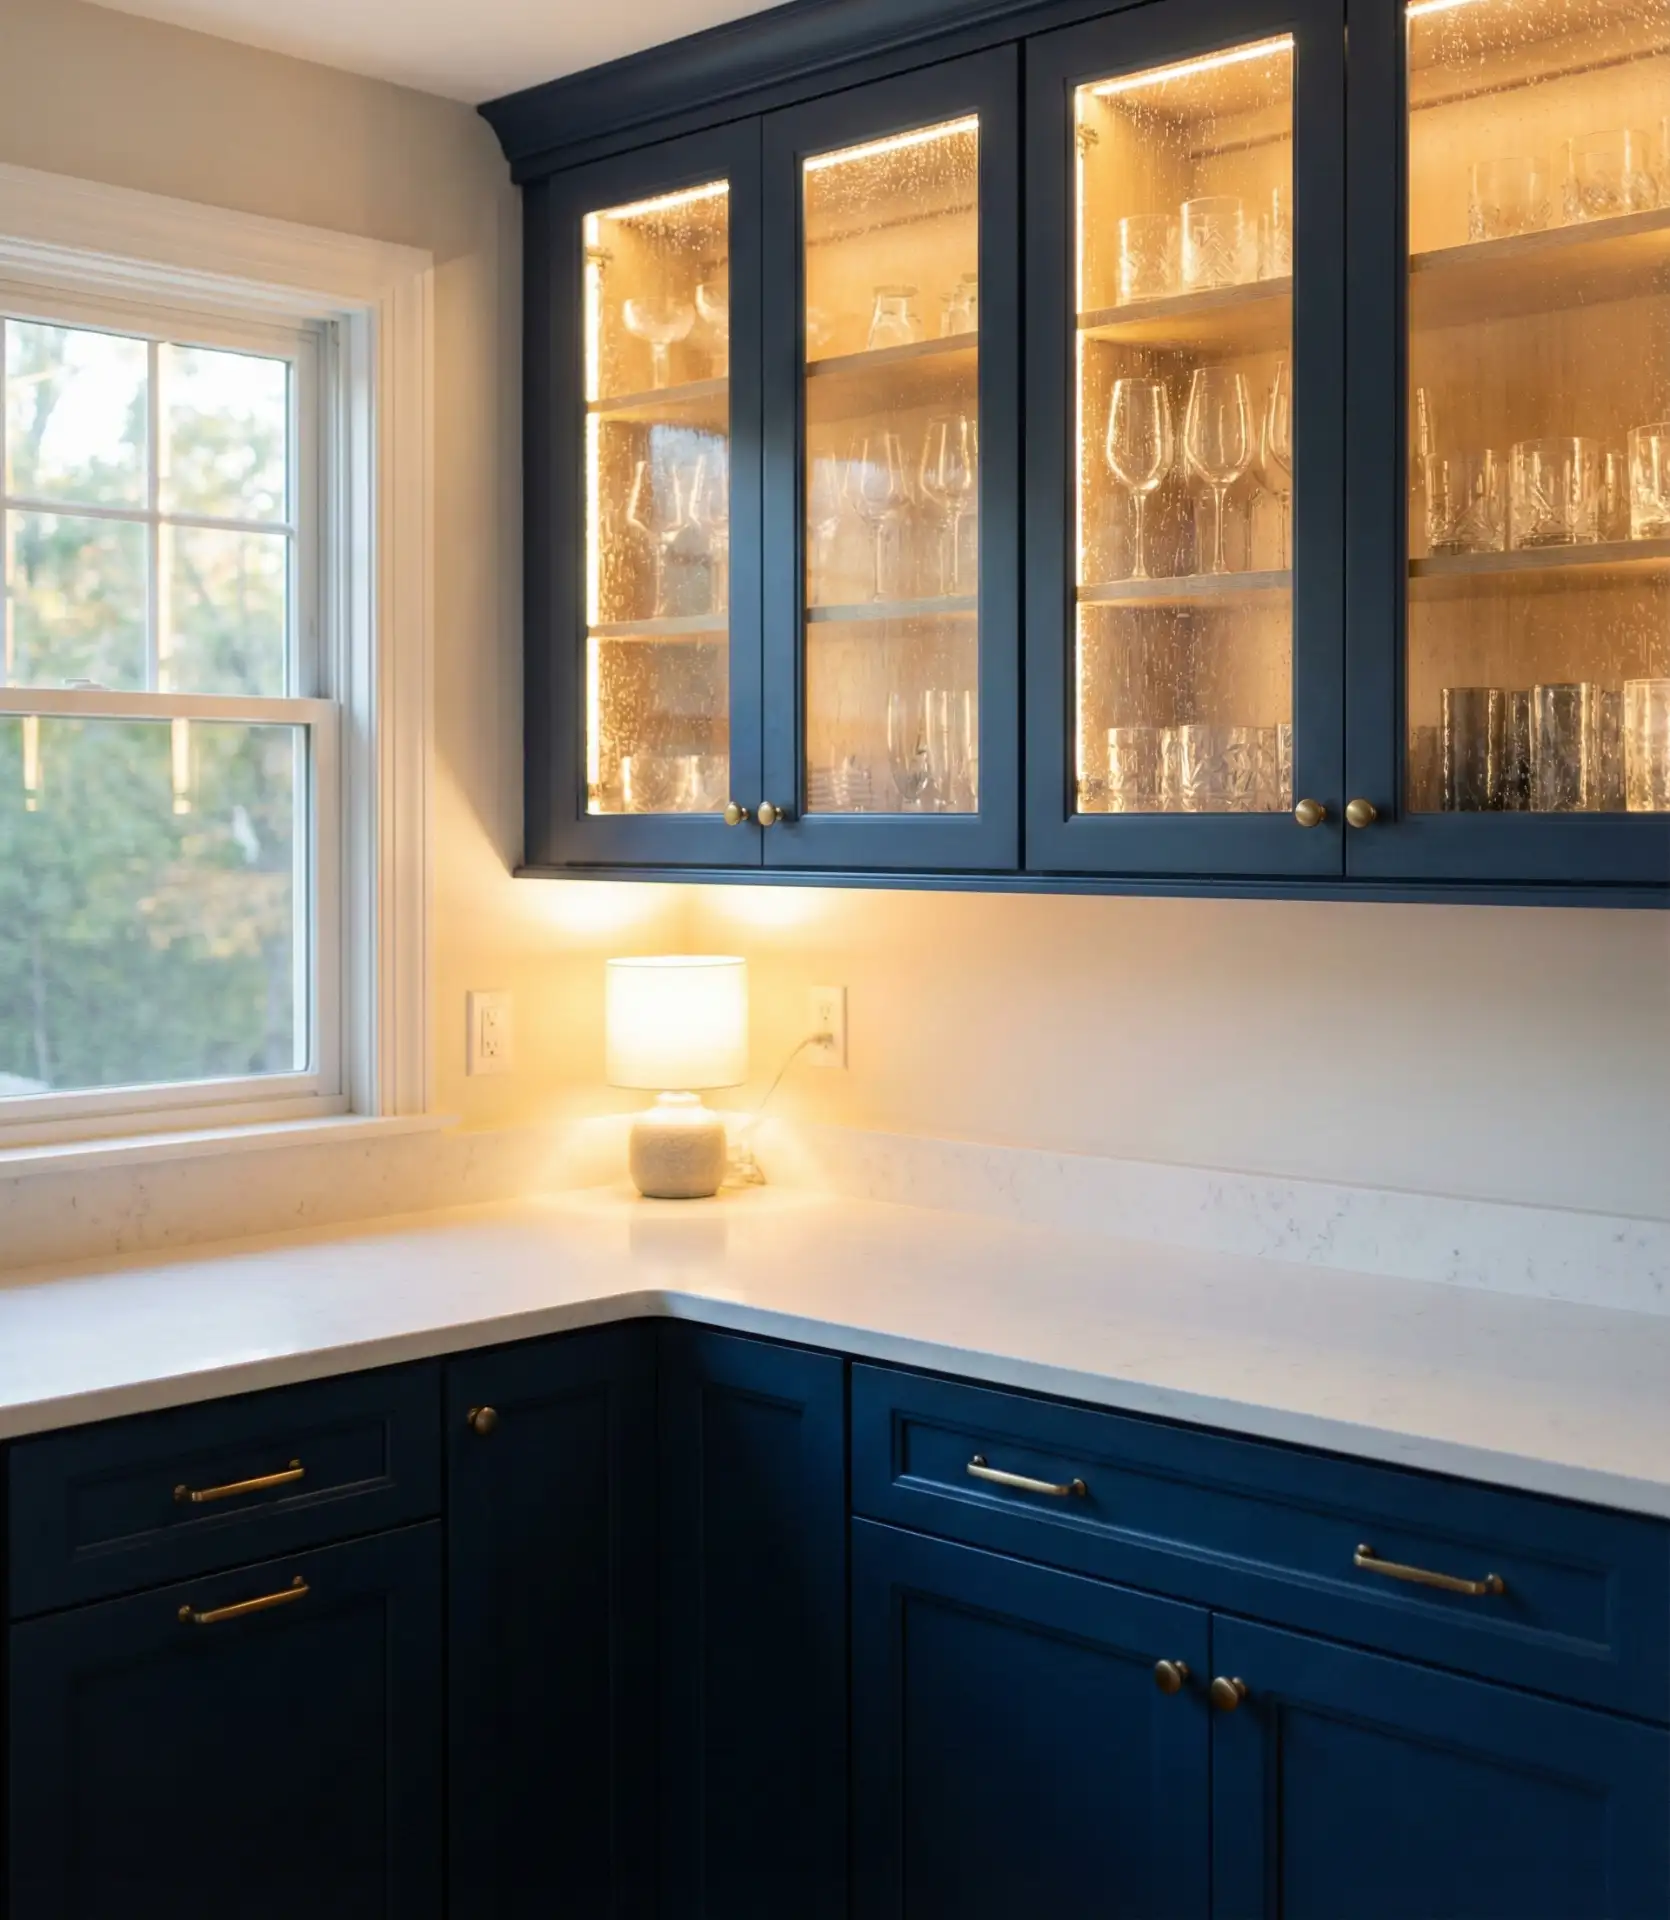
Inserting glass panels into some or all upper cabinet doors offers a middle path between fully closed storage and open shelving, letting you showcase favorite dishes or collectibles while still containing dust and cooking splatter. Clear glass creates an airy, transparent effect that visually expands the room, while seeded, frosted, or ribbed glass adds texture and obscures less-than-perfect stacks. Many homeowners use glass-front cabinets flanking a range hood or above a sink, where the contents are naturally more curated, and reserve solid doors for areas that house everyday clutter. Interior cabinet lighting amplifies the effect, turning the cabinets into softly glowing focal points in the evening.
Typical pricing for retrofitting solid doors with glass runs between two hundred and four hundred dollars per door, depending on whether you hire a cabinet maker or opt for DIY kits available at home improvement stores. If you’re concerned about the upkeep, remember that glass-front cabinets inherently encourage organization—most people find they naturally keep these cabinets neater than hidden ones. For a cohesive look, match the cabinet frame color to your other cabinetry and choose glass that complements your backsplash texture, whether that’s smooth and modern or something with more visual grain.
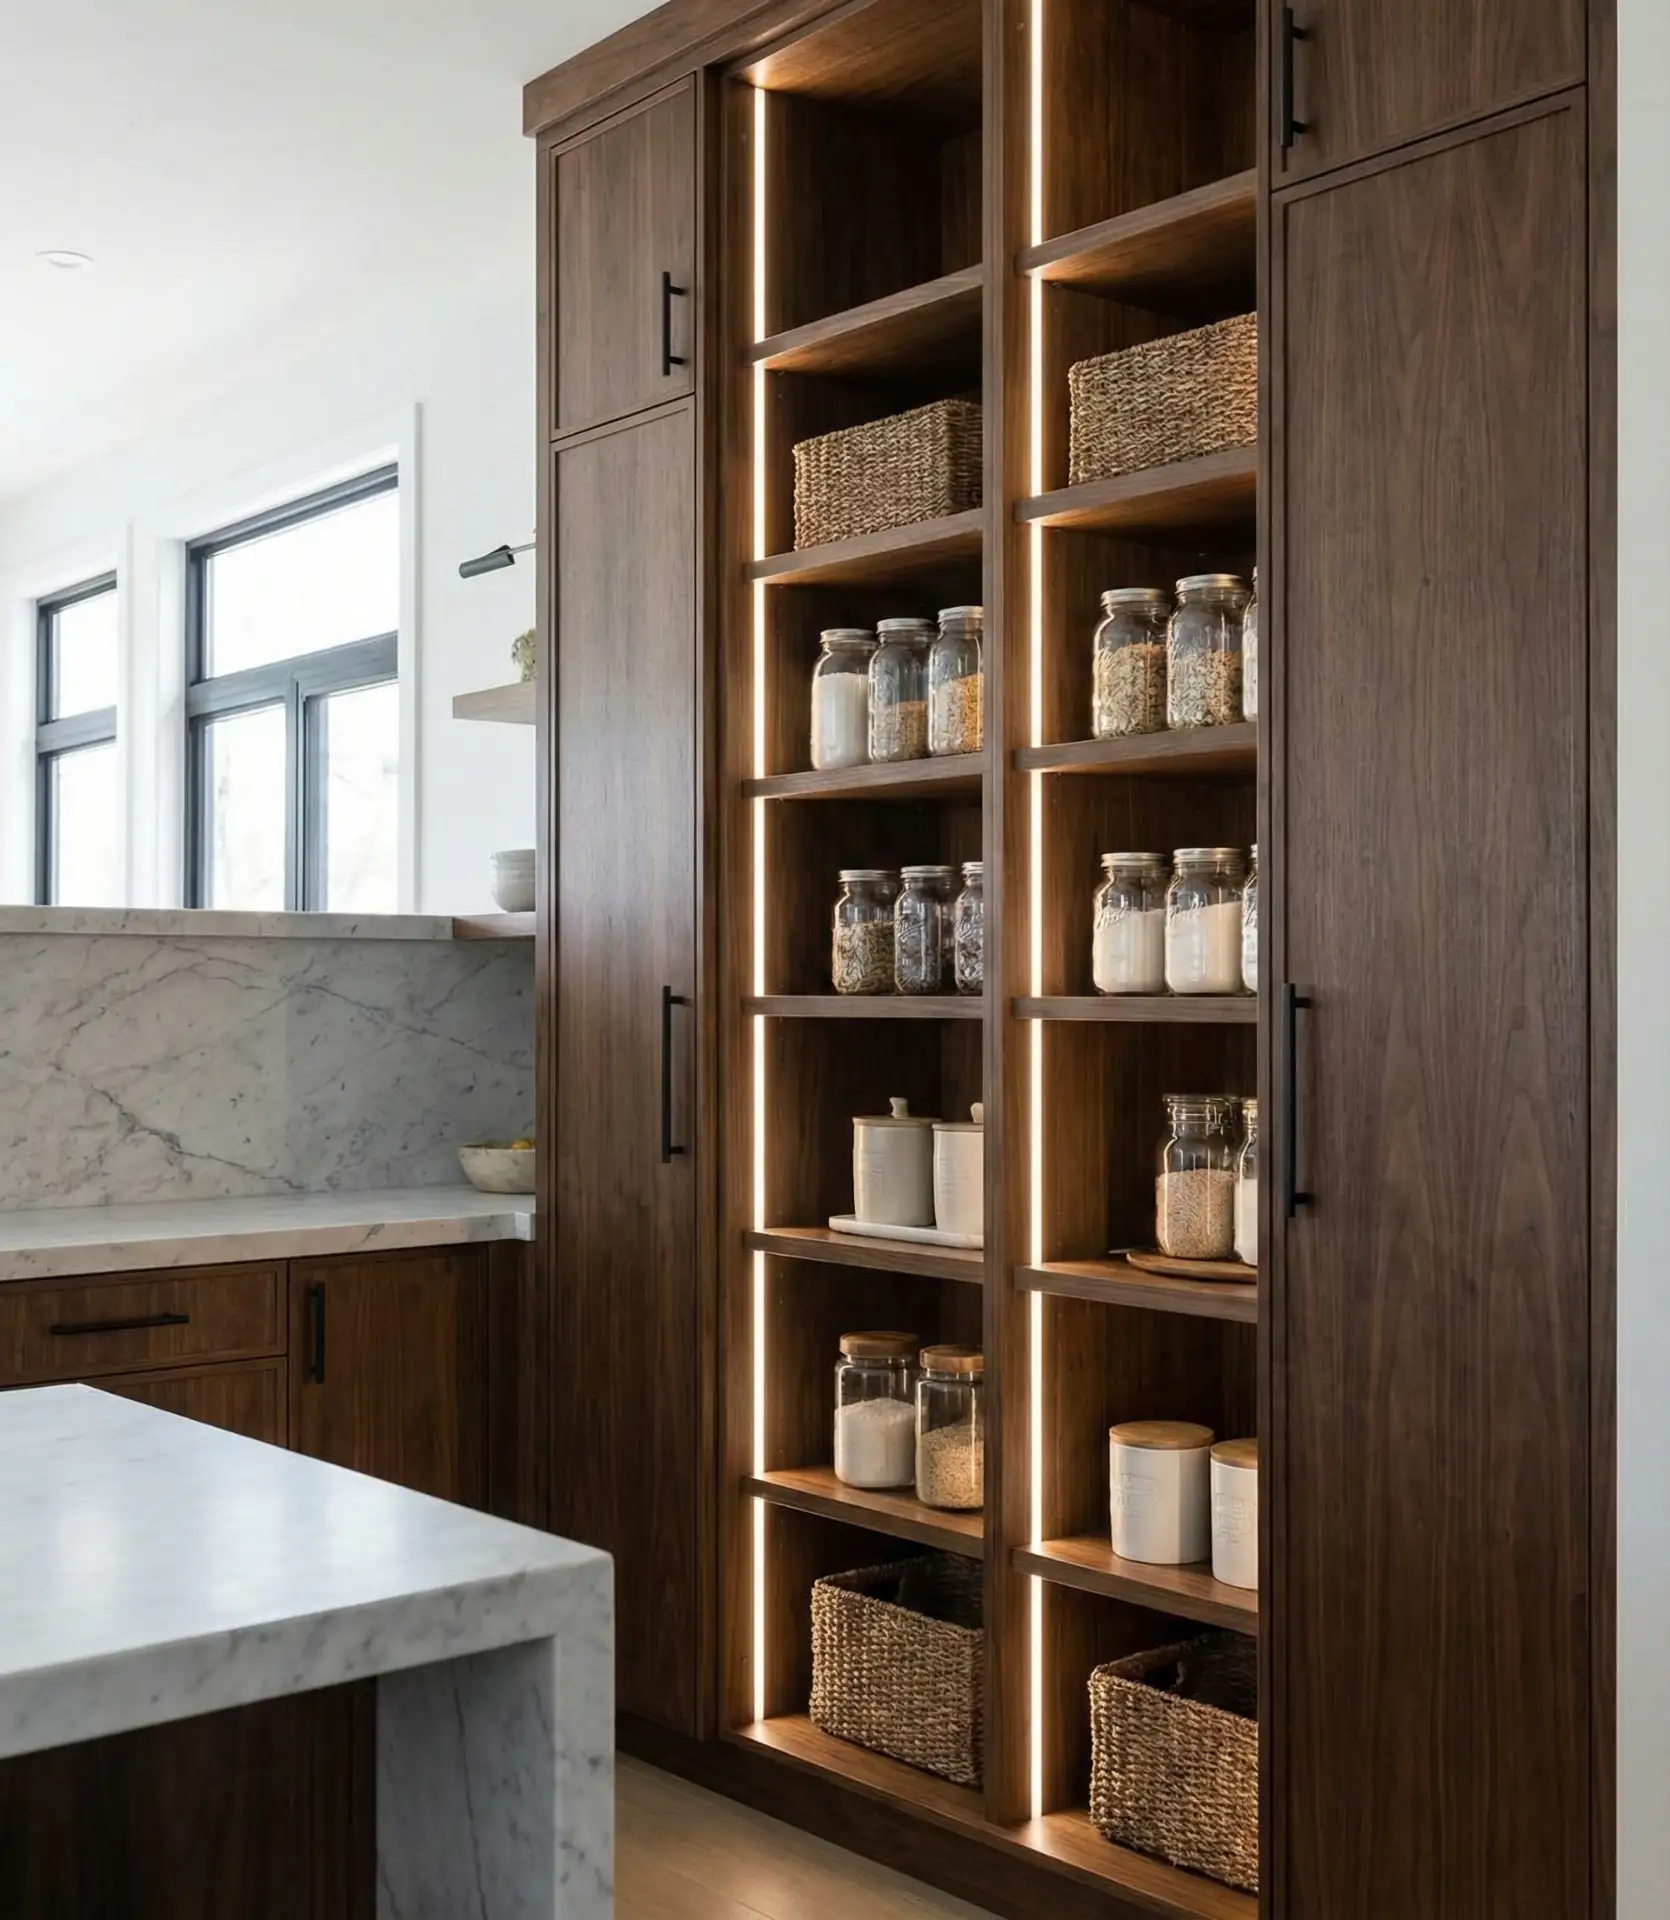
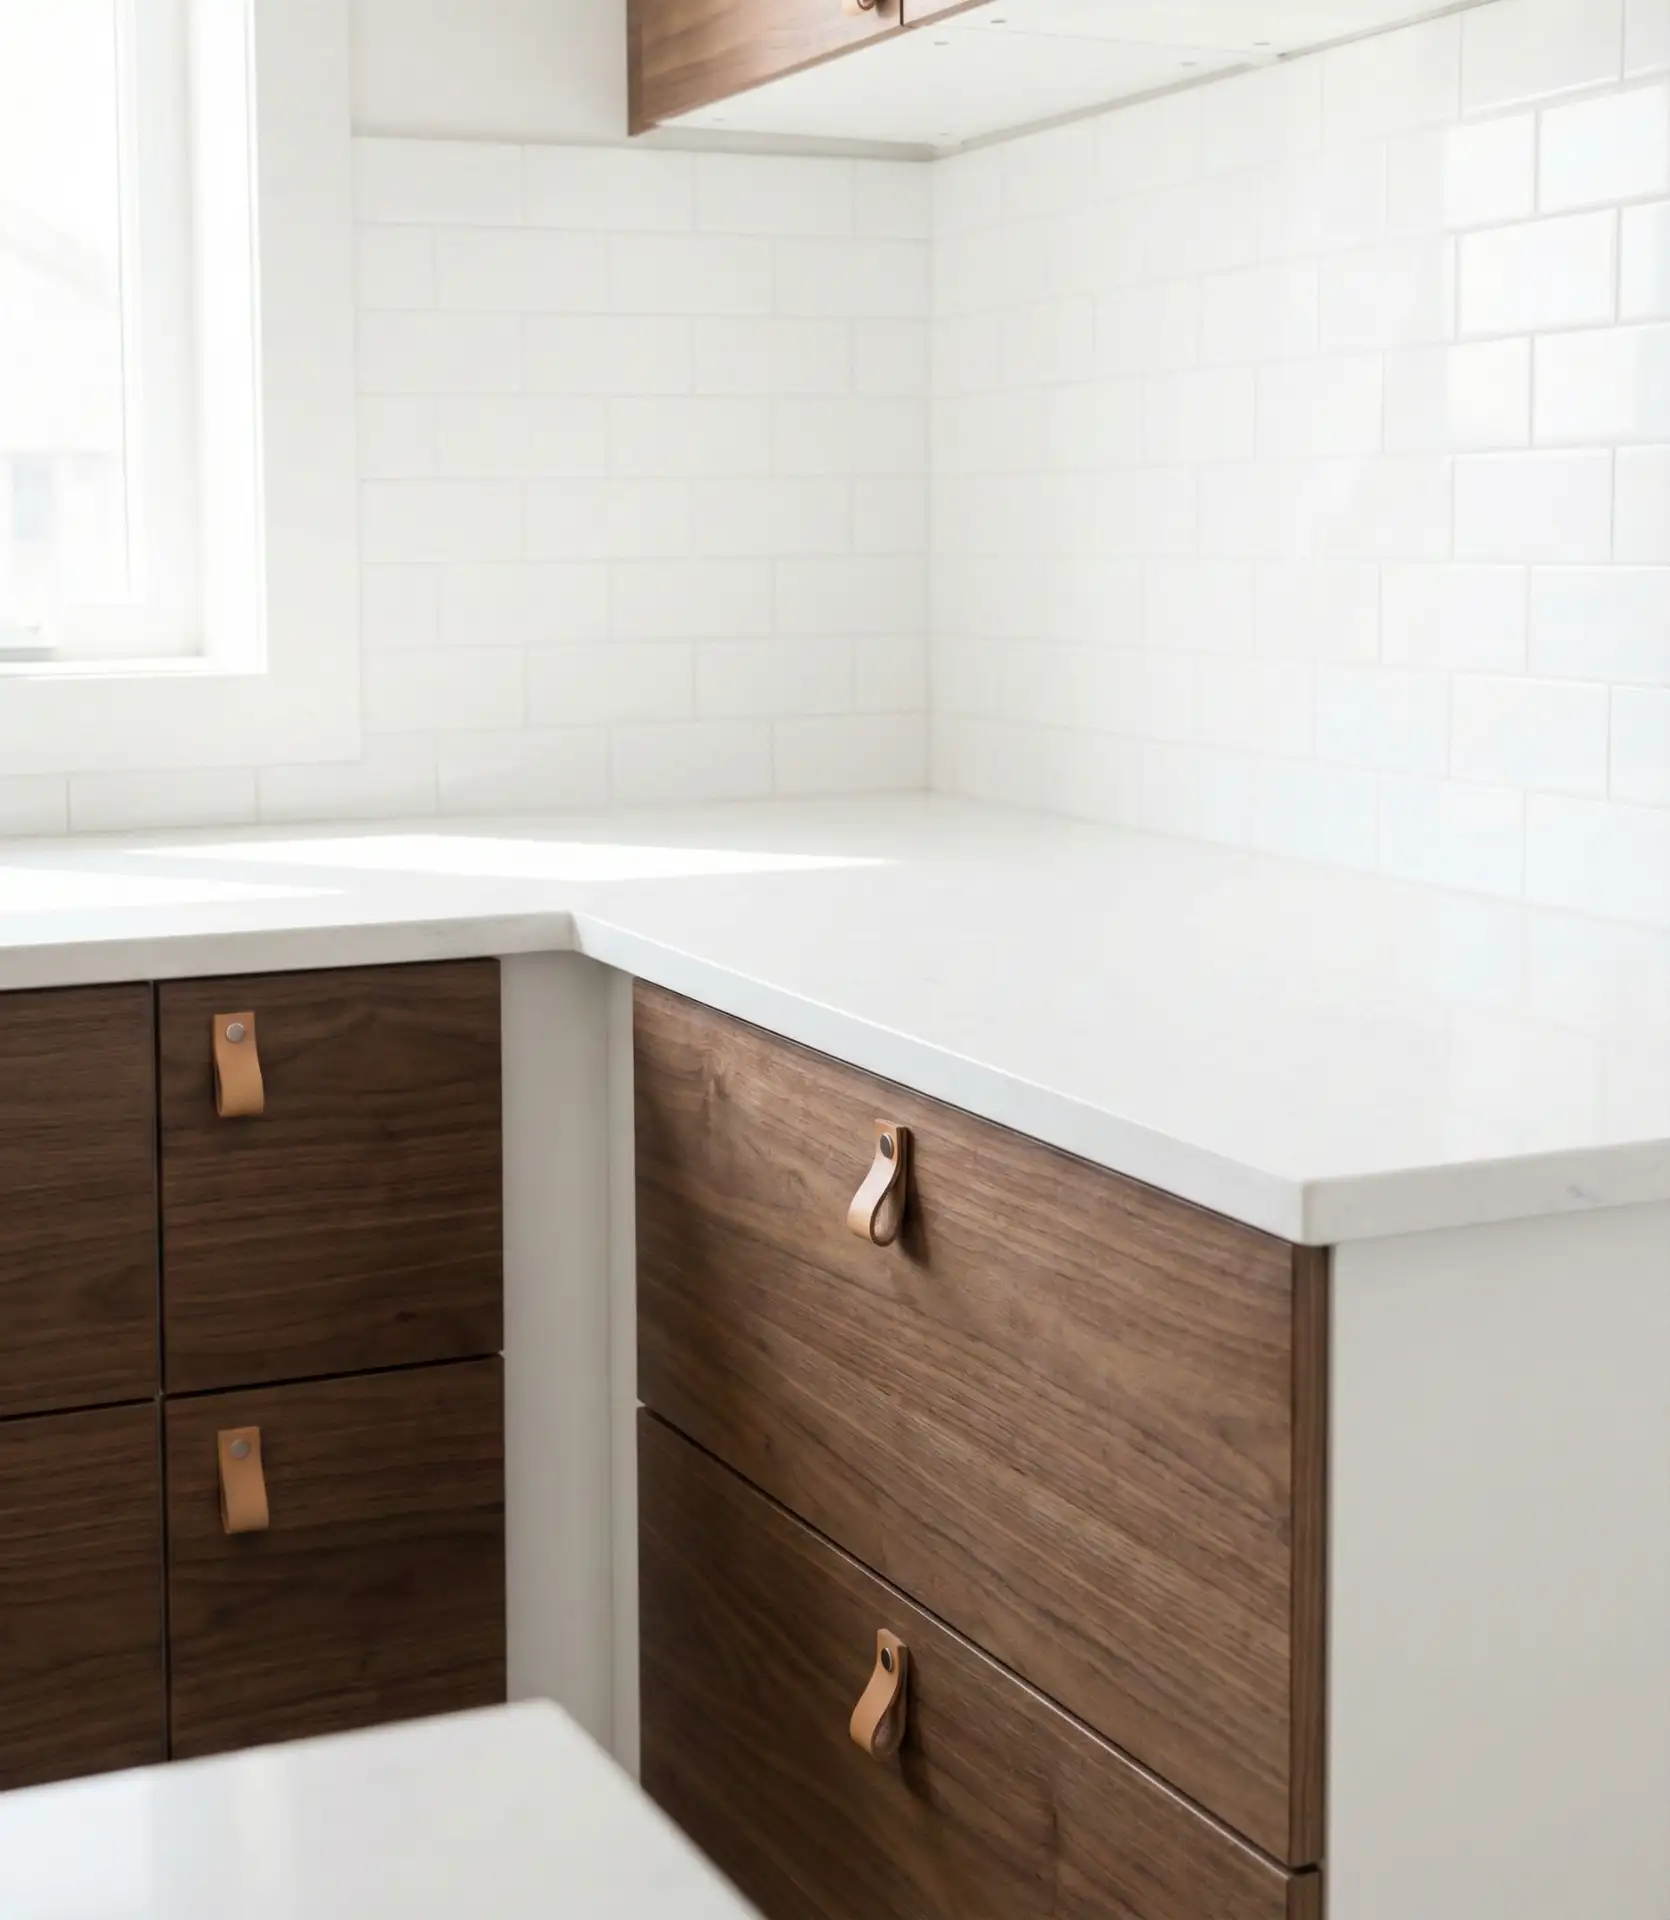
8. Walnut Wood Cabinets with Natural Grain
Nothing quite matches the warmth and character of real wood cabinets, and walnut’s deep brown tones with chocolate and amber undertones bring richness that painted finishes can’t replicate. Each kitchen becomes truly unique as the grain patterns range from straight and uniform to swirling and dramatic. Walnut works beautifully in mid-century modern settings but also adapts to contemporary and transitional styles when paired with the right hardware and countertops. Its natural depth means you can often skip upper cabinets entirely or use open shelving, since the lower cabinets provide enough visual weight to anchor the room.
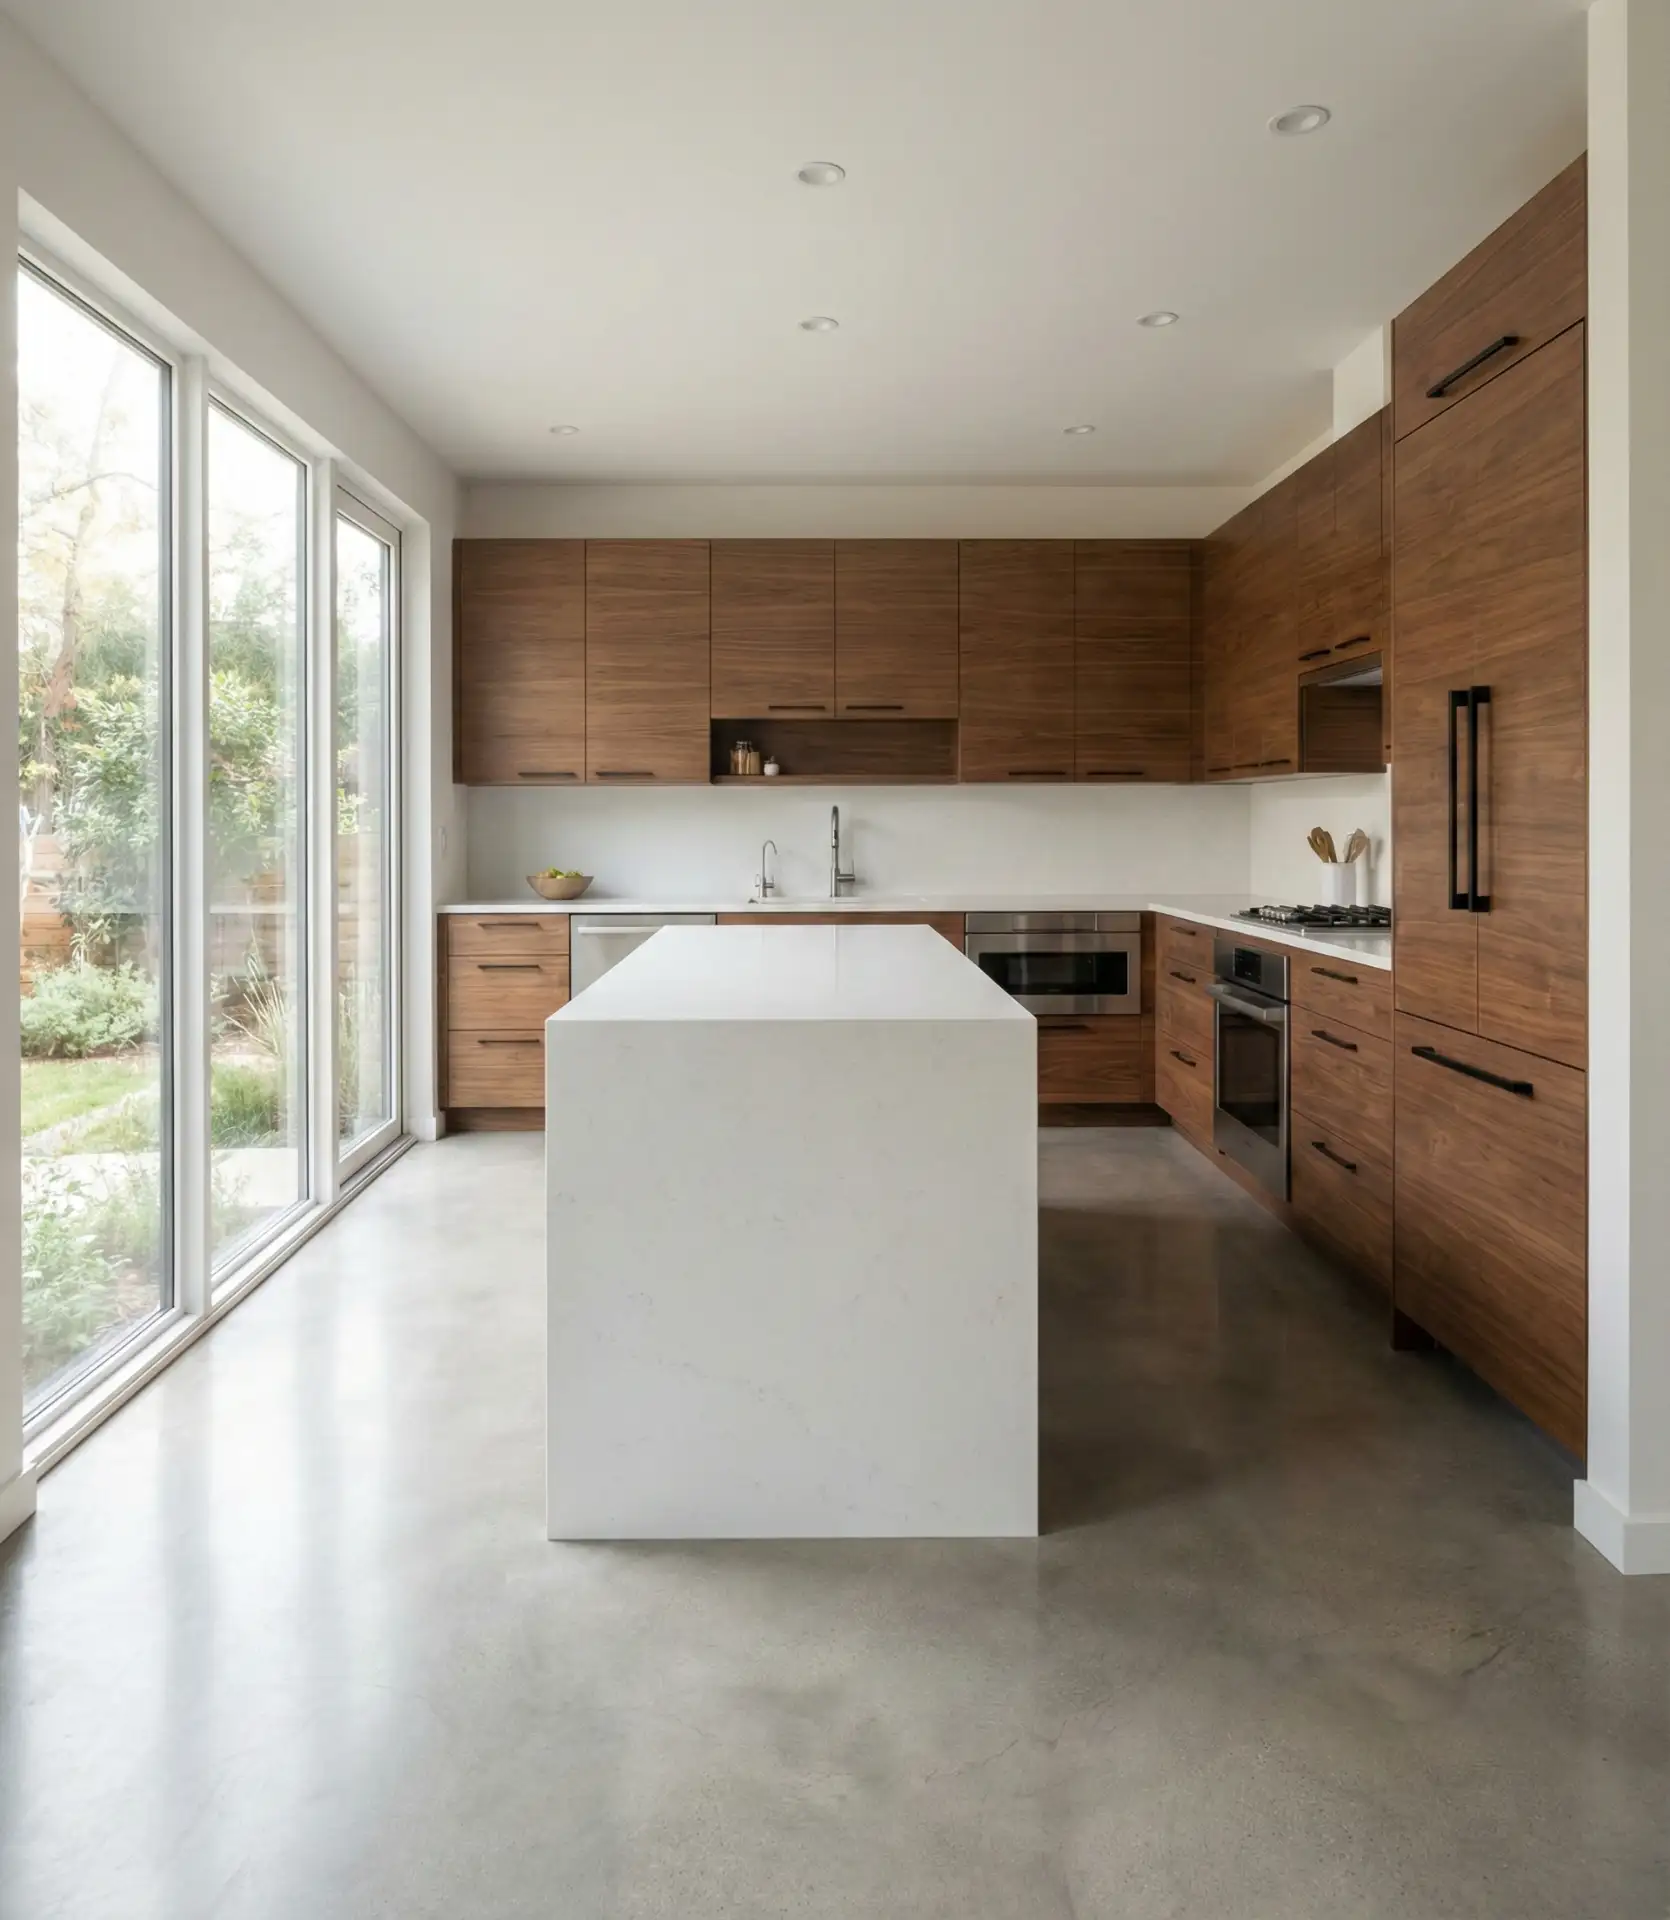
Where walnut cabinets work best is in kitchens with ample natural light or strong artificial lighting—insufficient illumination can make the dark wood feel oppressive. To keep the space from reading too heavy, balance walnut lowers with lighter uppers, a bright backsplash, or white countertops. Maintenance is straightforward: a damp cloth and occasional application of wood conditioner keep the finish looking fresh. One insider tip is to request quarter-sawn walnut if your budget allows; the tighter grain is more stable and less prone to warping in humid climates, a real consideration in Southern and coastal states.
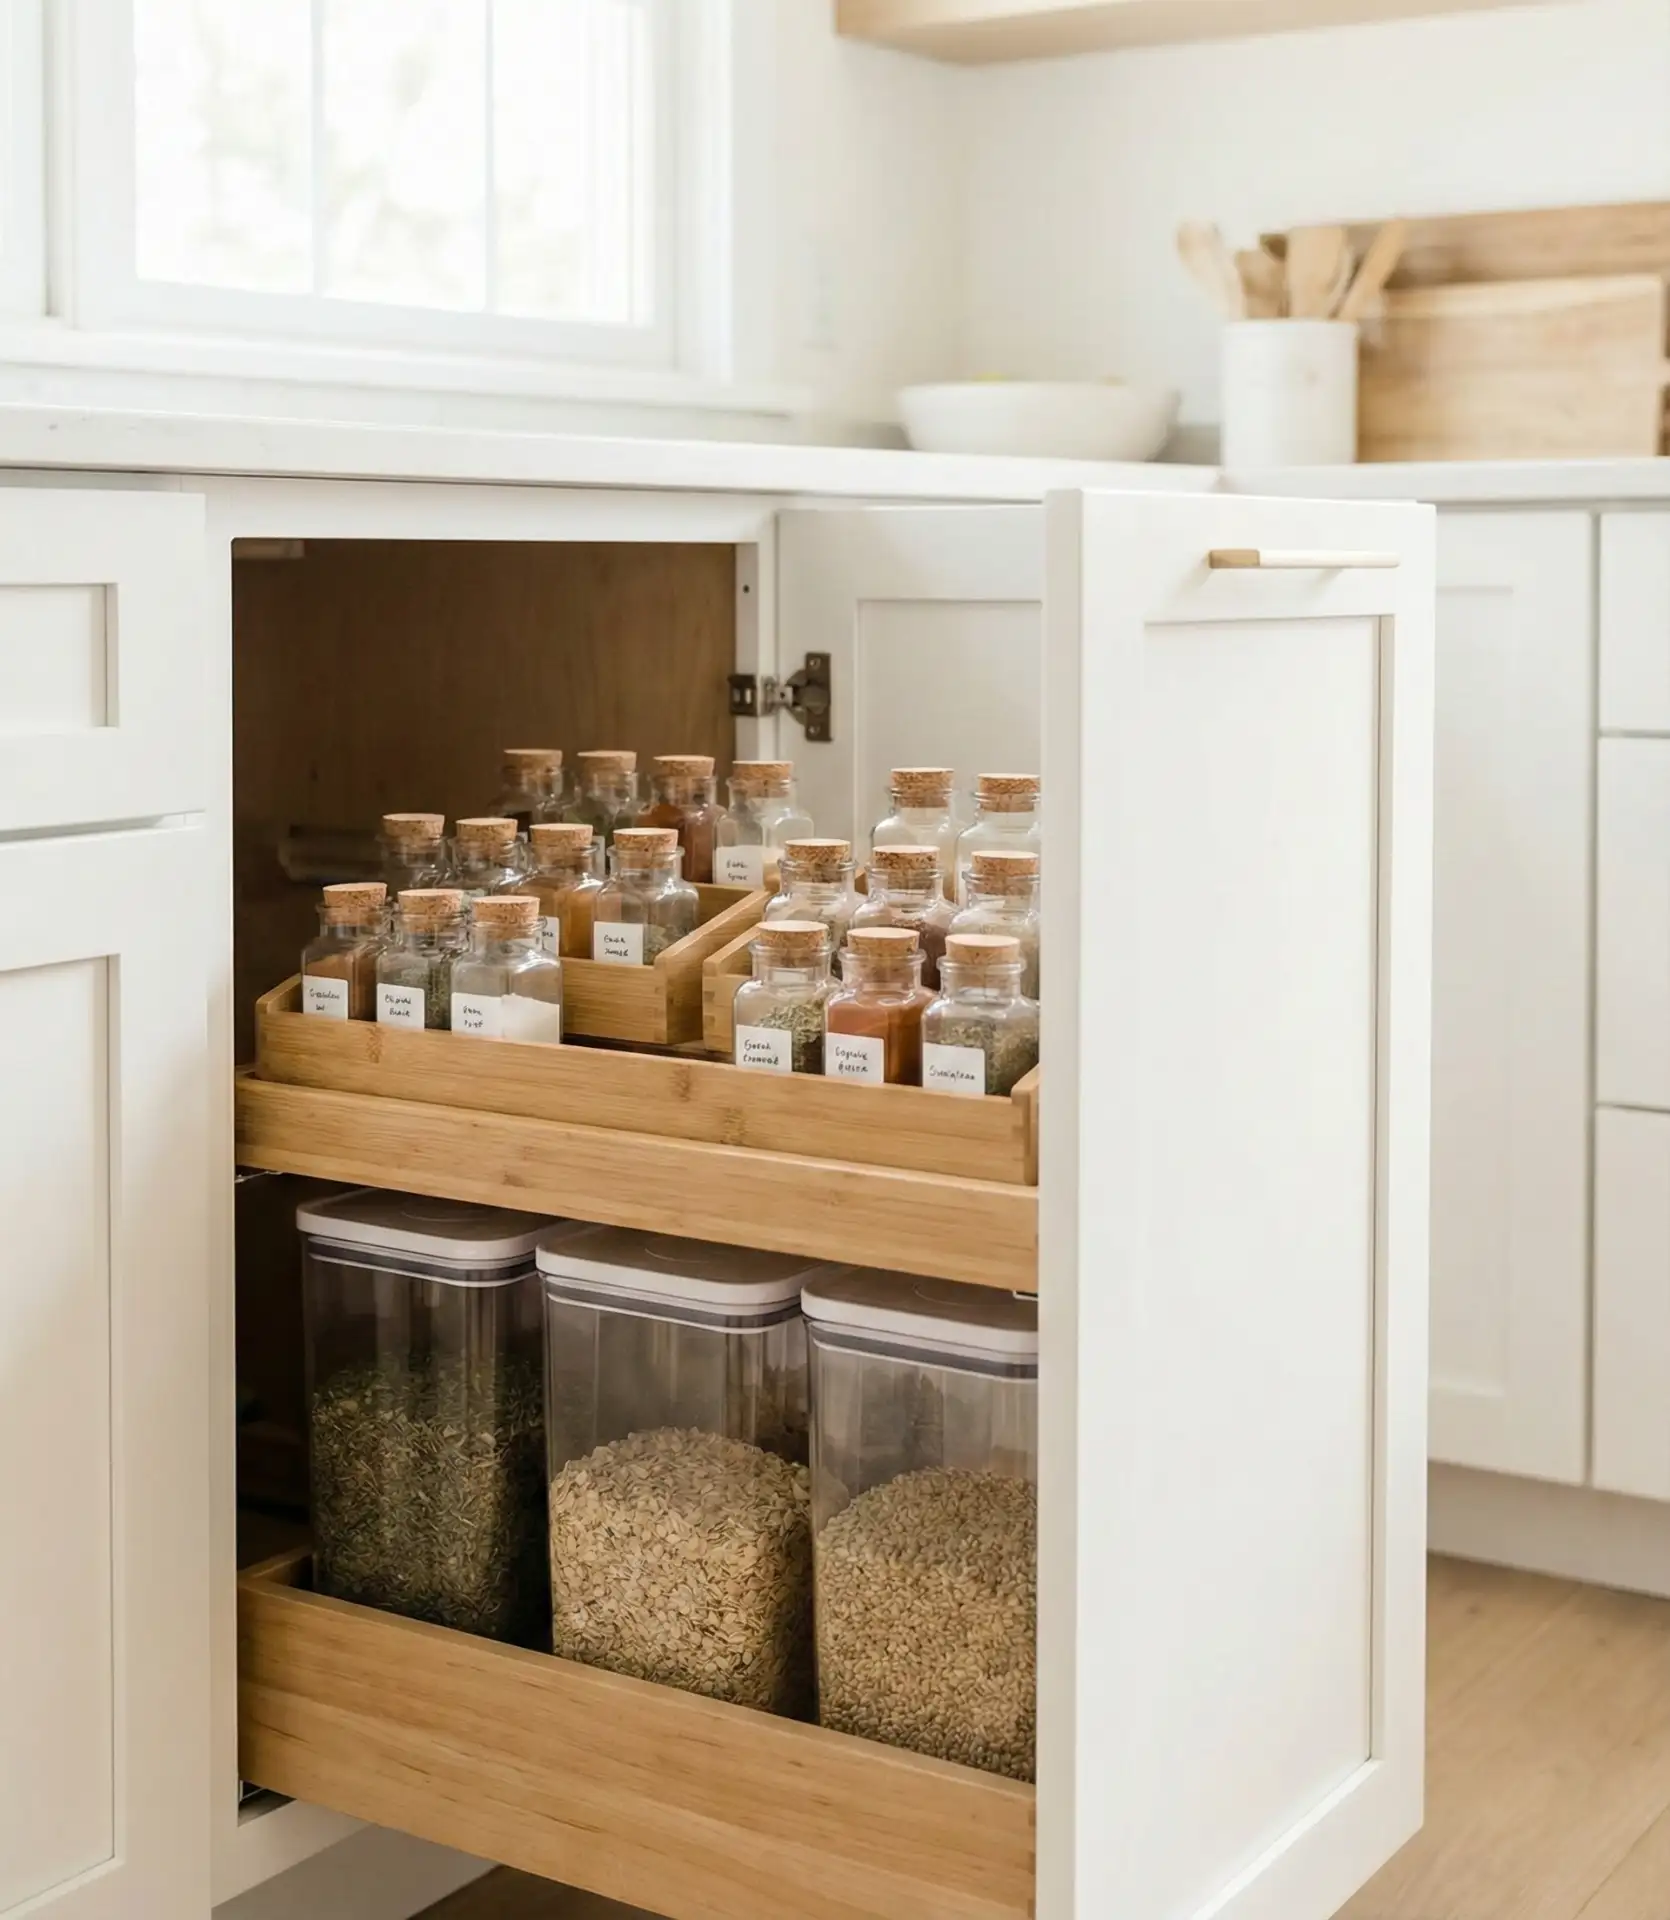
9. Narrow Pull-Out Spice Cabinets
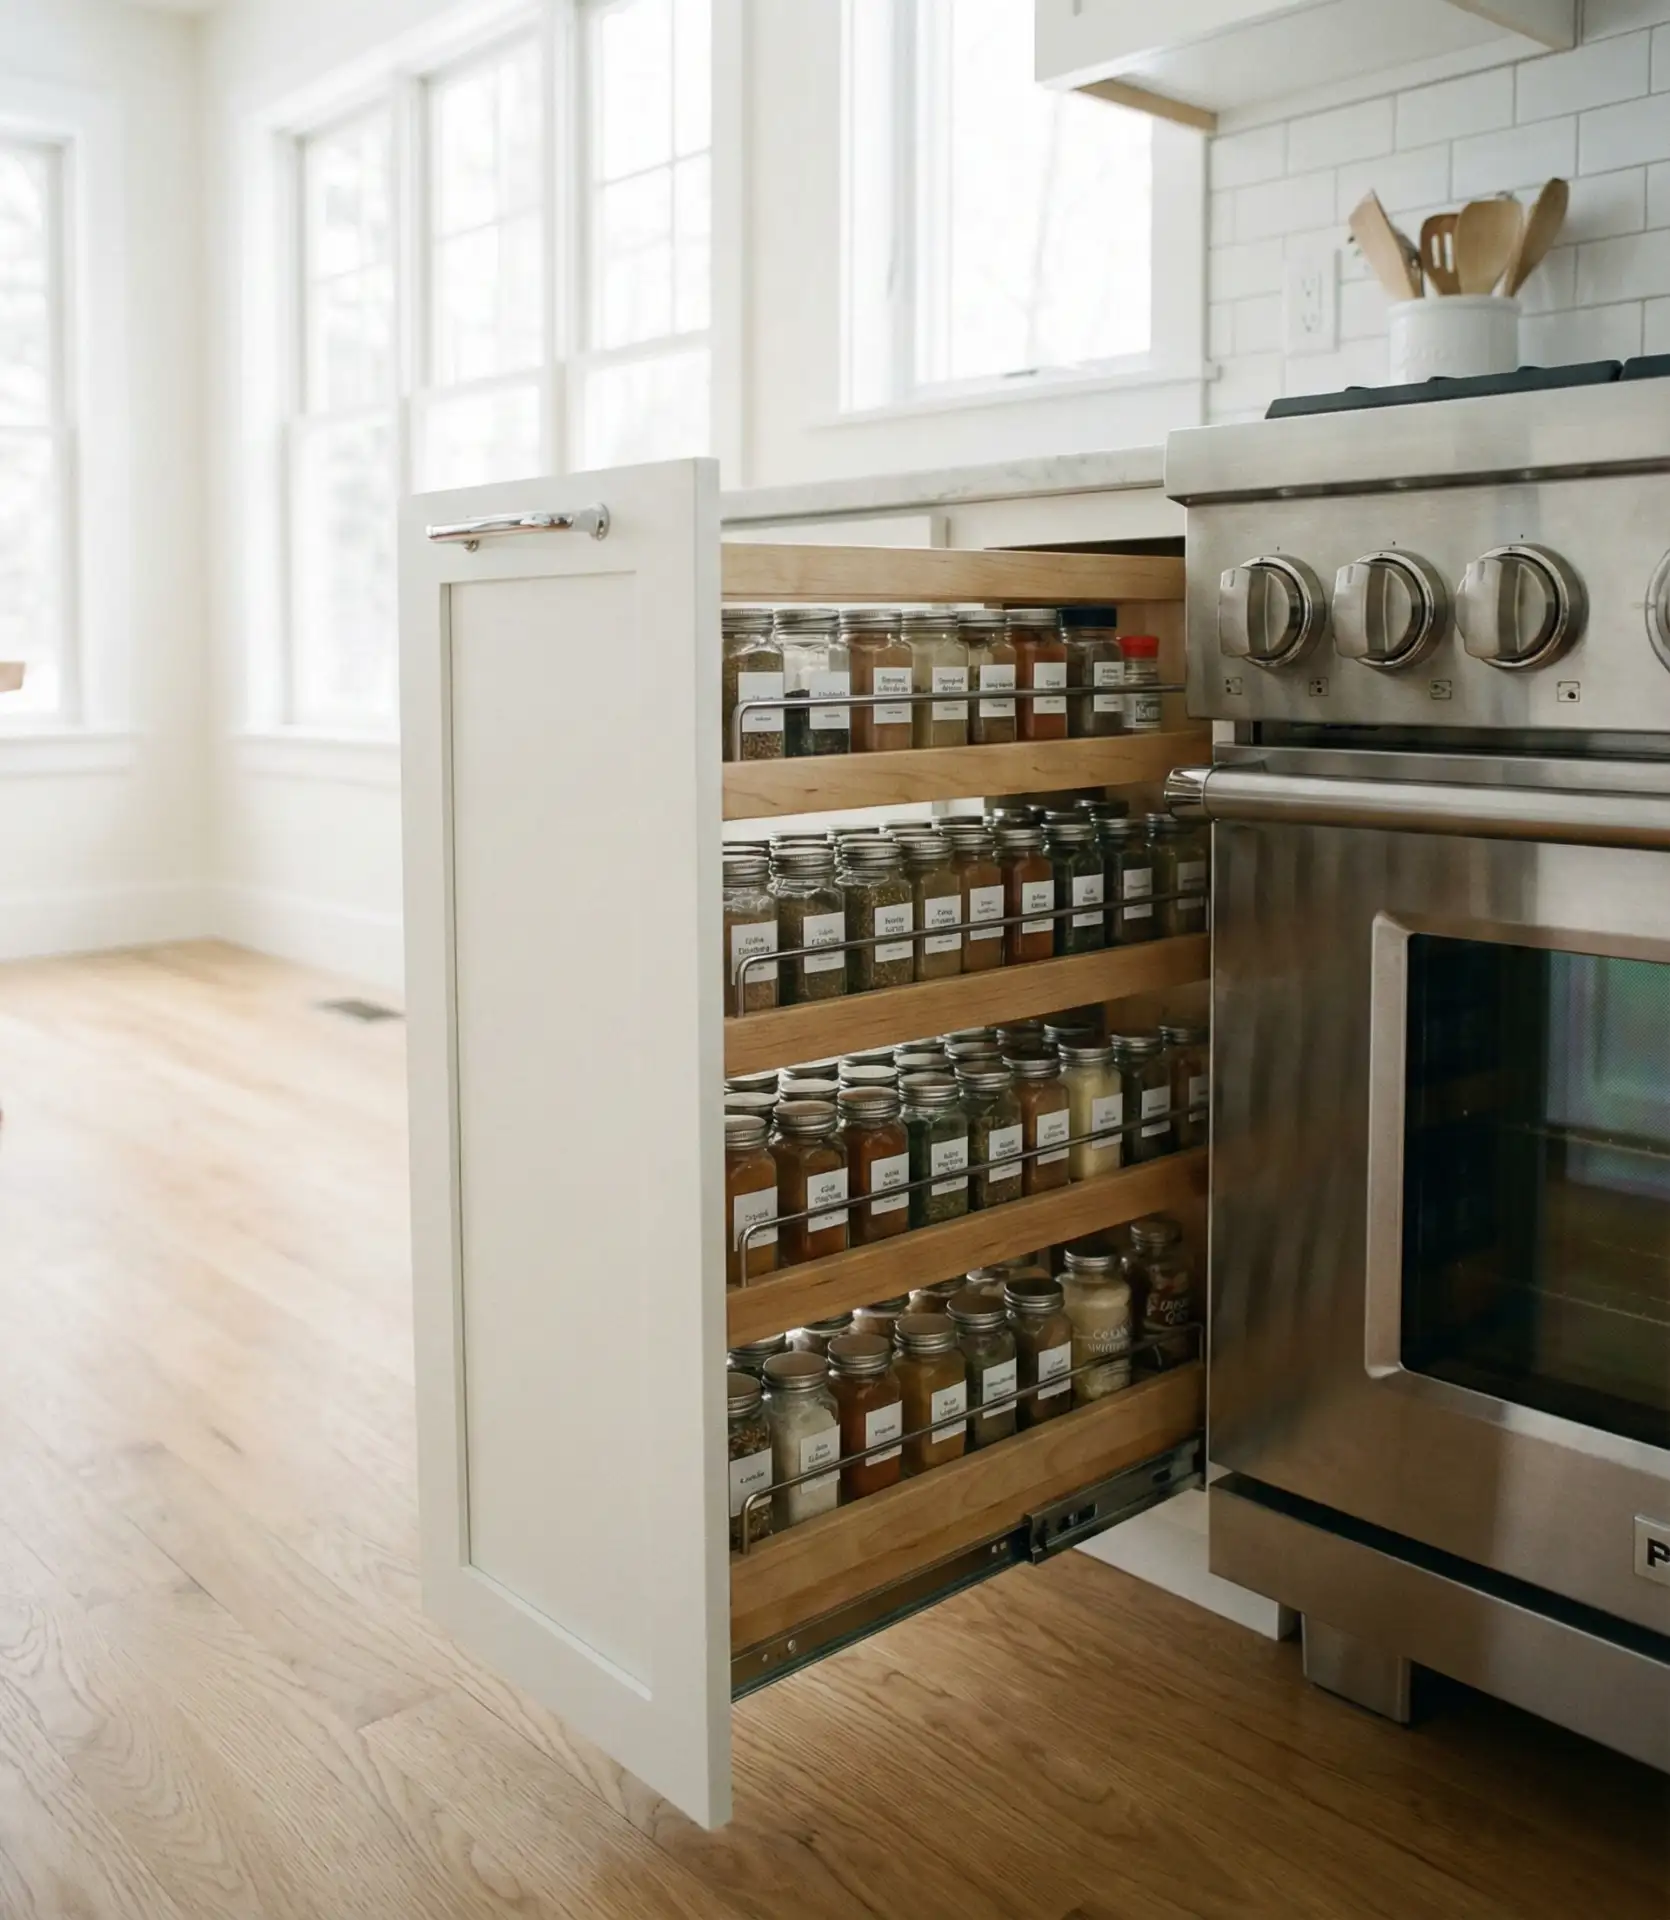
A narrow pull-out spice cabinet transforms the awkward six- to nine-inch gaps beside a stove or refrigerator into highly functional storage. These tall, slim units glide out on full-extension slides, revealing multiple tiers of spices, oils, and condiments at eye level—no more digging through dark corners or knocking over bottles. The vertical orientation makes it easy to scan your inventory at a glance, and many models include adjustable shelves to accommodate everything from squat spice jars to tall vinegar bottles. It’s a small upgrade that delivers outsized convenience, especially for home cooks who keep a well-stocked pantry.
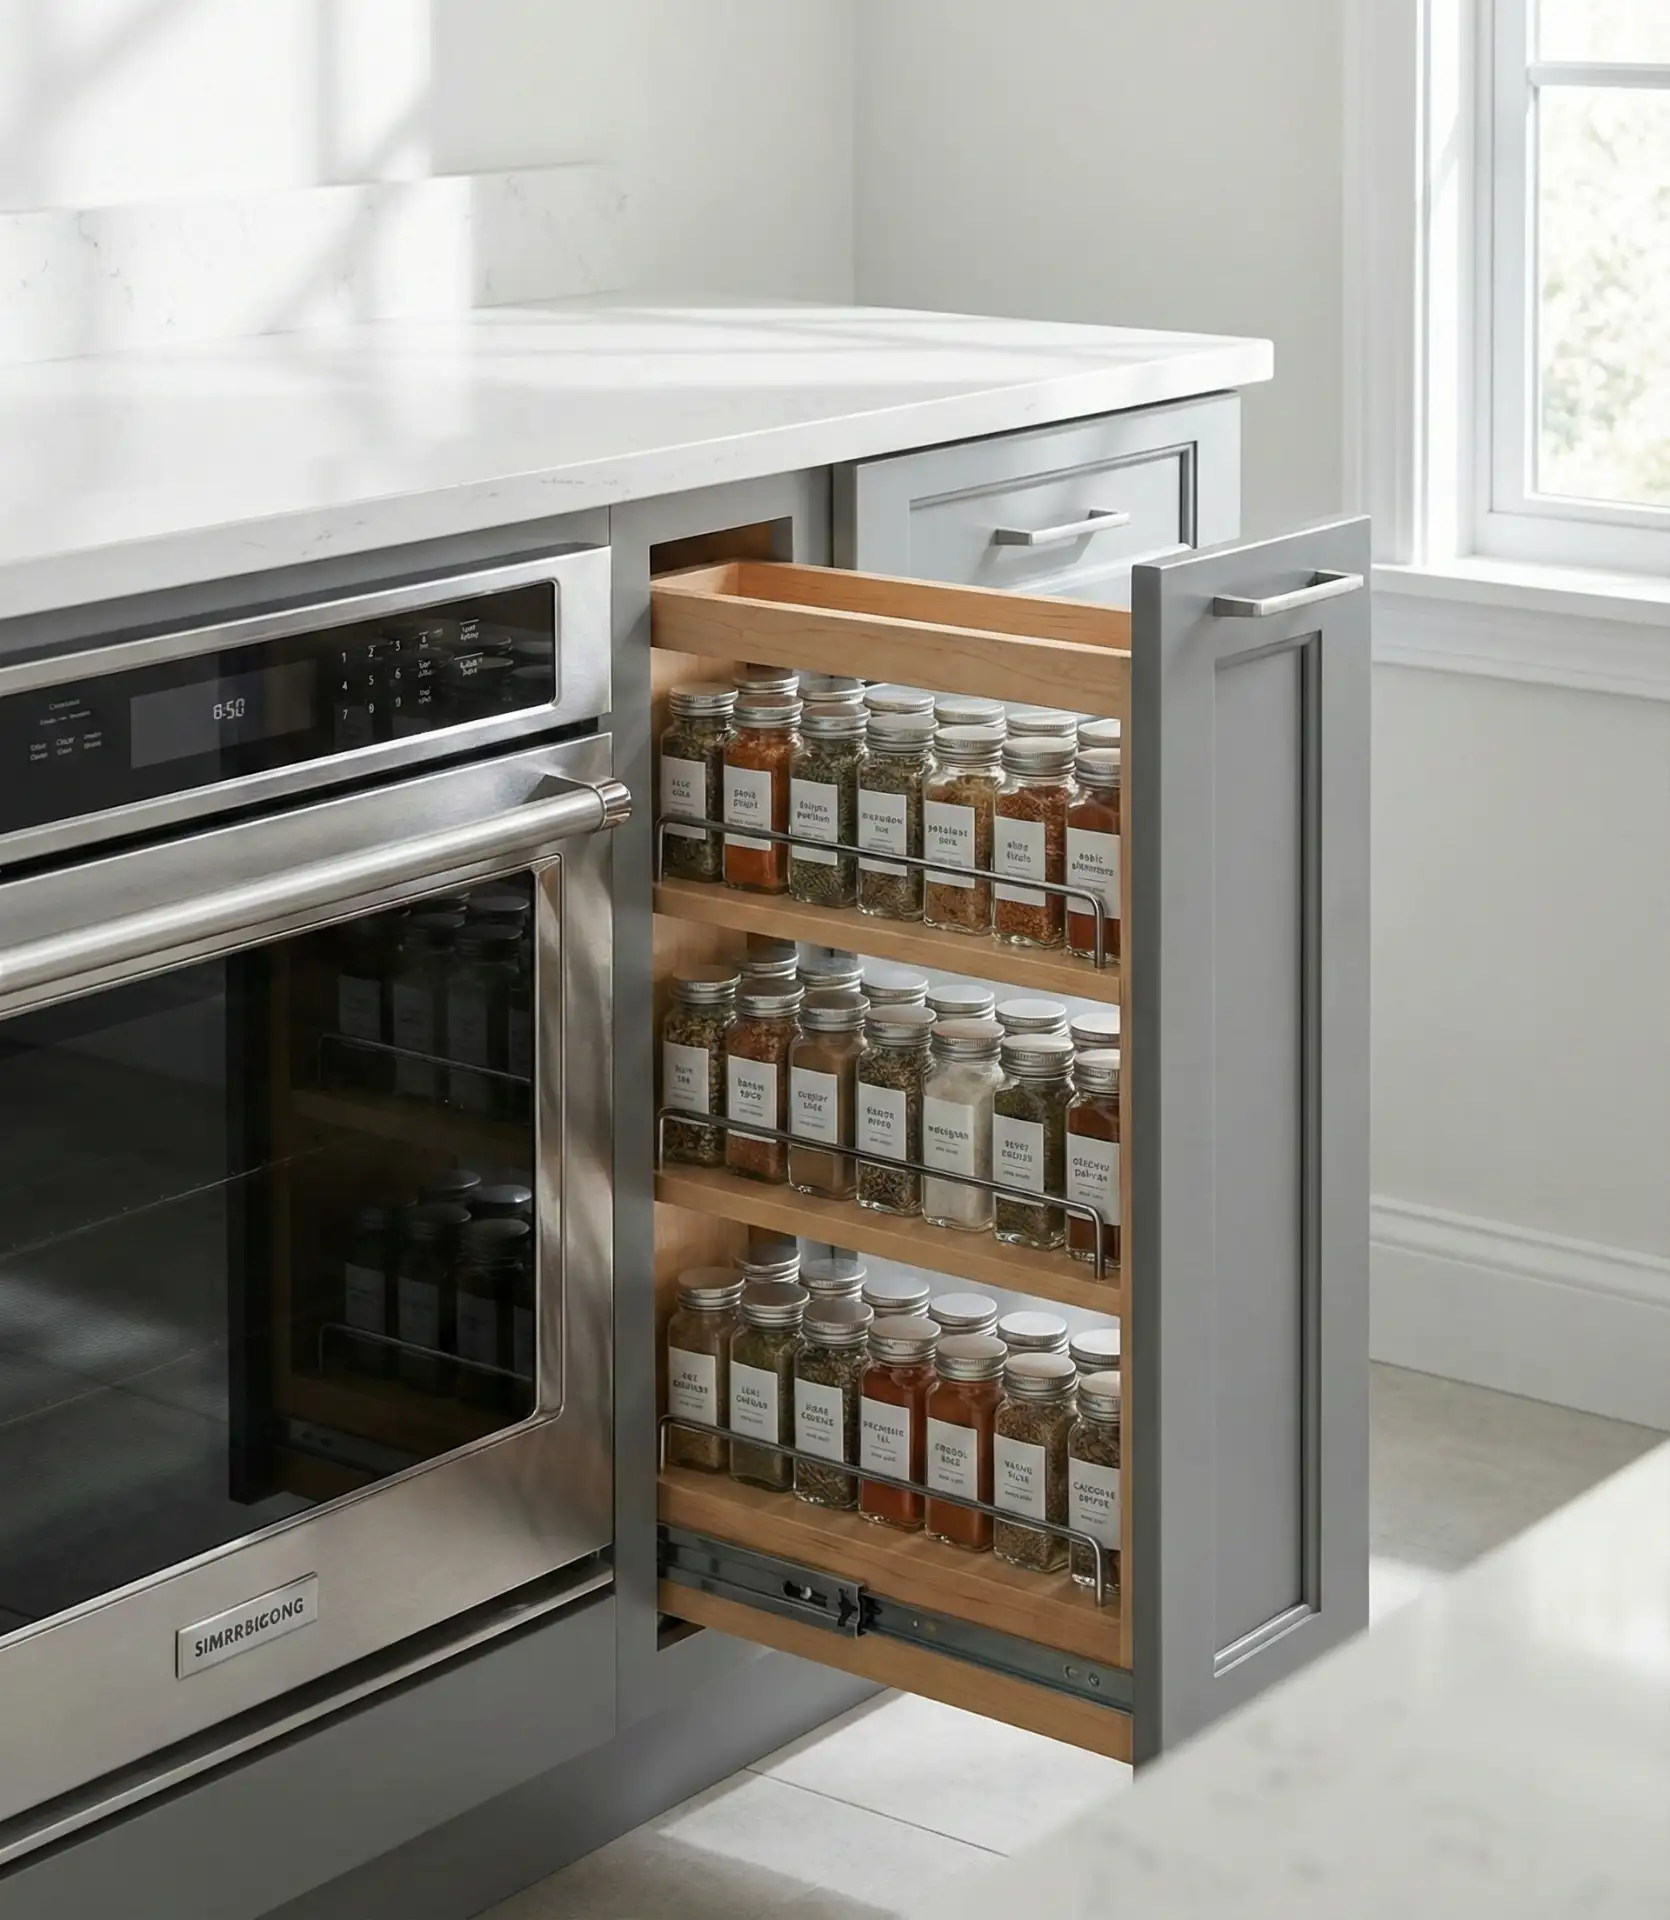
A neighbor mentioned that after adding one of these during a modest remodel, she uses it a dozen times a day and wishes she had done it sooner—this pull-out unit has become her favorite feature in the entire kitchen. Installation is relatively straightforward if you’re handy with a drill and level, and pre-made units run from around one hundred fifty to three hundred dollars depending on height and finish. If you’re planning a full renovation, ask your designer to identify every narrow gap and consider whether a pull-out unit makes sense there; even a four-inch filler can be converted into a cutting board or tray storage slot.
10. IKEA Cabinets with Custom Fronts
Savvy homeowners have discovered that pairing IKEA cabinet boxes with custom or semi-custom door fronts offers a budget-friendly path to a high-end look without the full custom price tag. IKEA’s SEKTION system provides sturdy, standardized boxes with reliable hardware, while third-party suppliers offer hundreds of door styles, colors, and materials that snap right onto those frames. This approach lets you achieve a truly personalized design at a fraction of the cost of fully custom cabinetry, and the modular nature means you can start with a basic layout and upgrade fronts room by room if your budget is tight. Urban markets, where space is limited and every dollar counts, have found traction in this clever middle ground.
One practical insight: IKEA’s cabinet dimensions are slightly different from standard American sizing, so if you’re mixing IKEA boxes with other brands or trying to fit them into an existing space, measure everything twice and consult the online planning tools. Many people report that the most time-consuming part is the assembly, so factor in a weekend or two if you’re doing it yourself, or budget for professional installation to avoid frustration. The beauty of this system is its flexibility—you can start with stock IKEA fronts and upgrade to custom doors later when funds allow, making it a genuinely scalable solution for growing families or evolving tastes.
11. Corner Cabinets with Lazy Susan Inserts
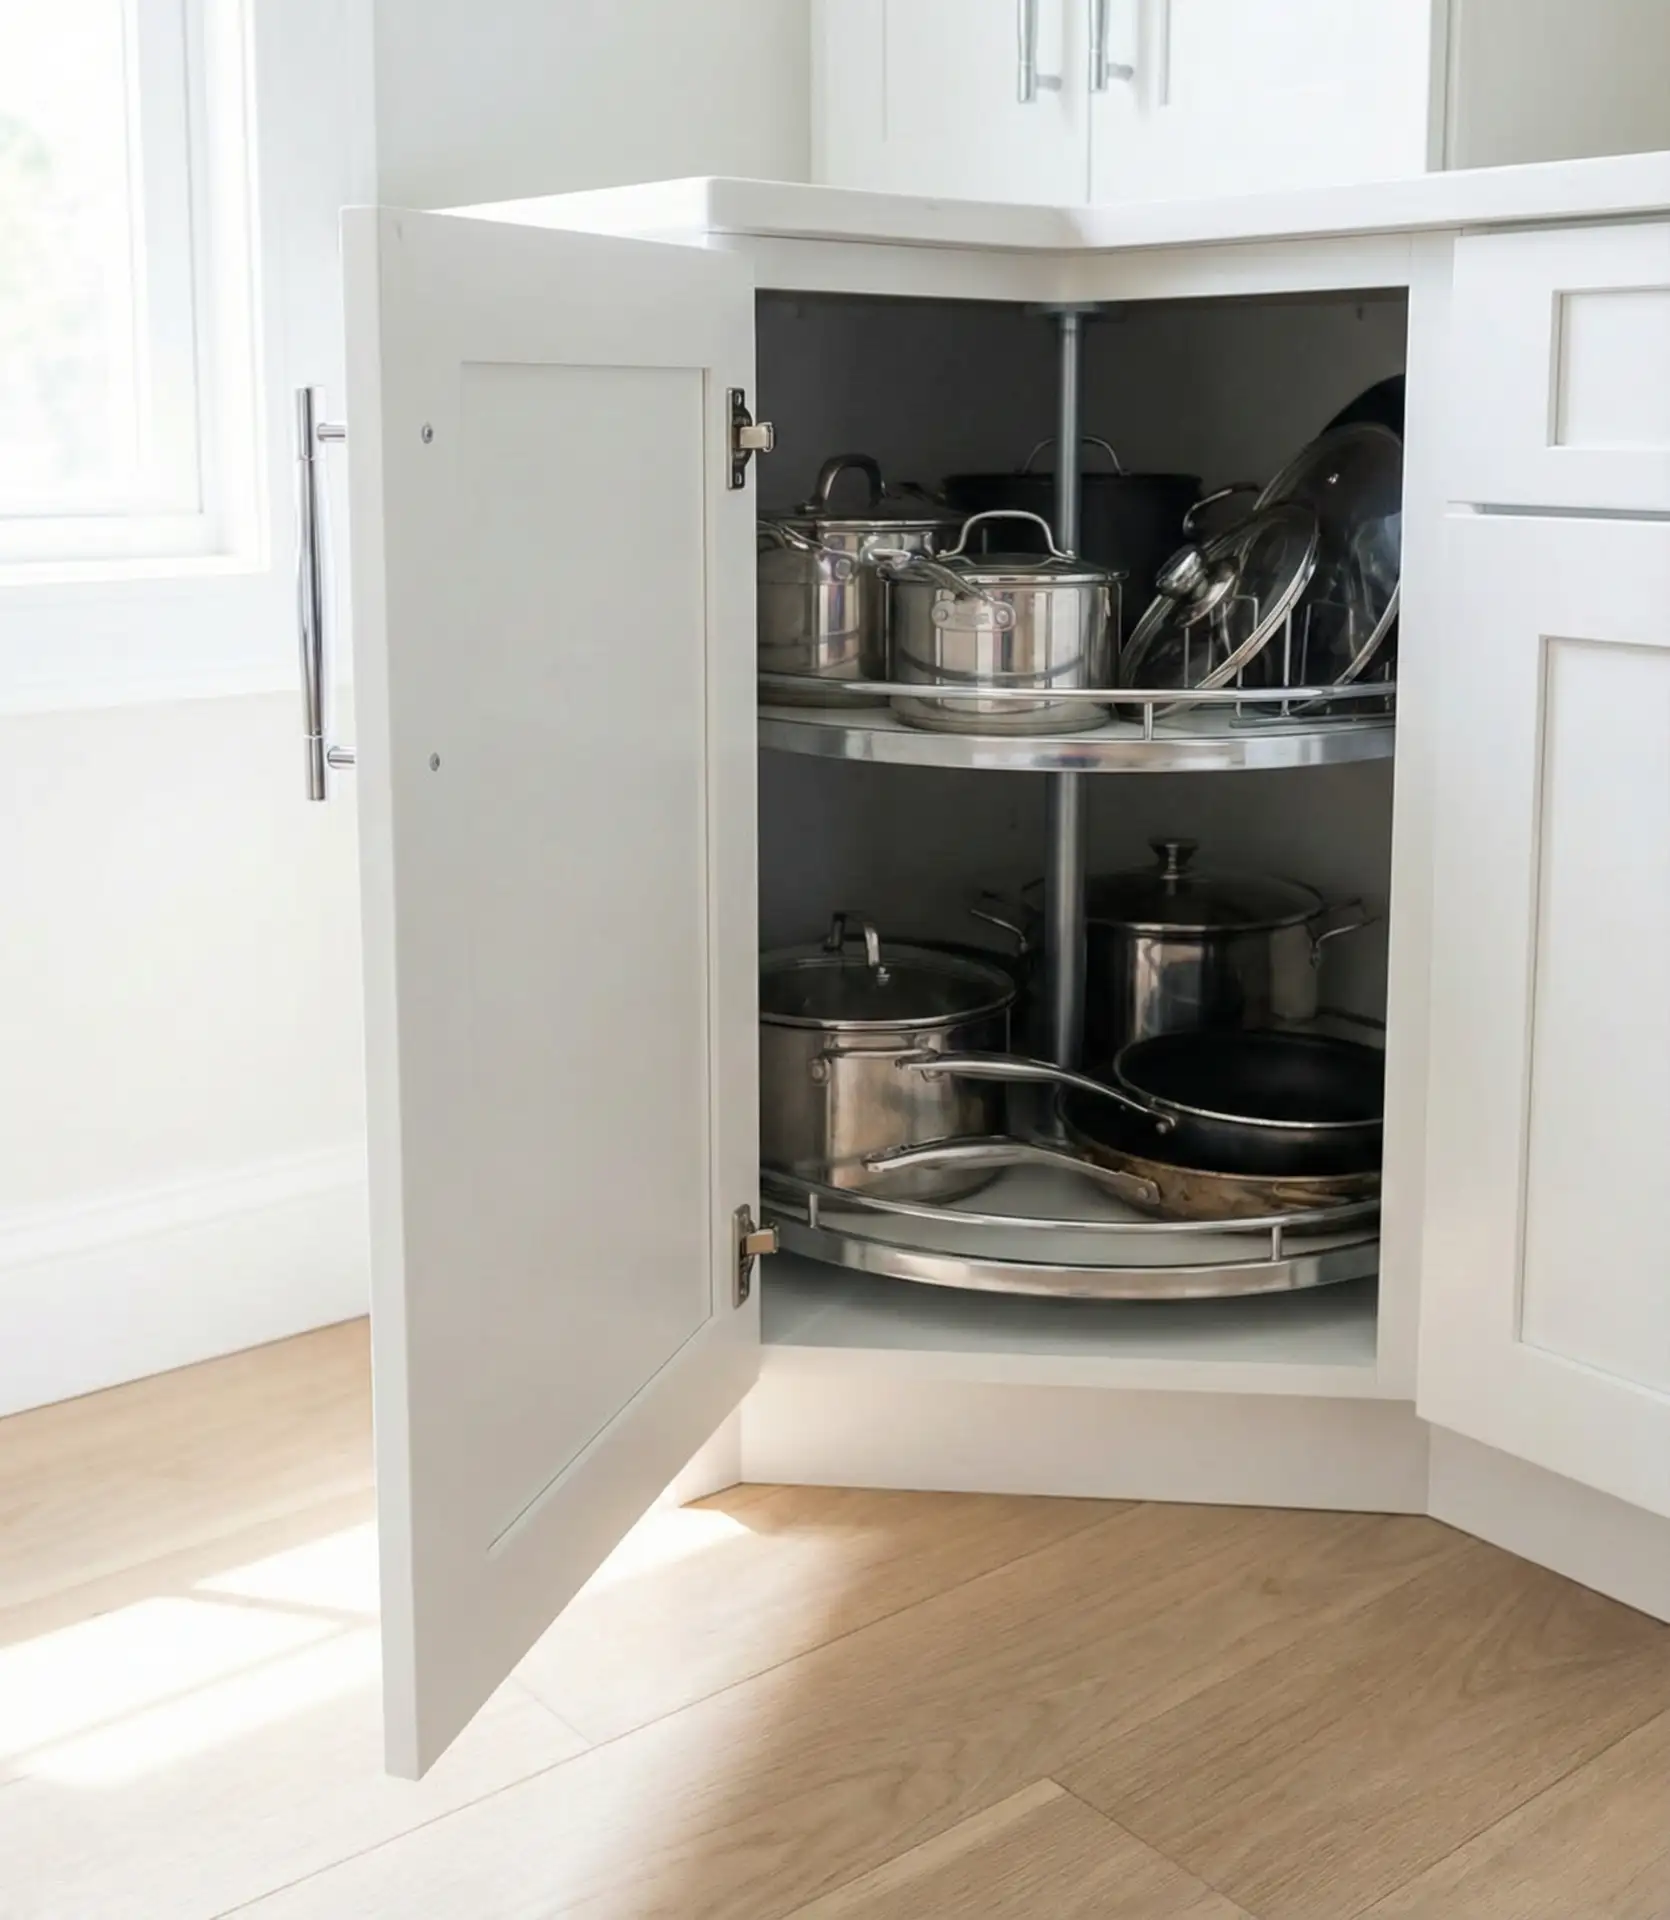
The dreaded bottom corner cabinet—where pots vanish into darkness and you have to crawl halfway inside to retrieve a colander—gets a functional makeover with a lazy Susan or swing-out organizer. These rotating shelves bring everything within easy reach, turning previously wasted space into surprisingly usable storage. Lazy Susans come in full-circle and kidney-shaped configurations, with the latter designed specifically for corner cabinets to maximize clearance around the door hinge. For small kitchen layouts where every inch counts, this upgrade can effectively double your usable cabinet space without adding a single square foot to the room’s footprint.
Retrofitting an existing corner cabinet with a lazy Susan typically costs between one hundred and two hundred fifty dollars, including hardware and installation if you hire a handyperson. The most common mistake is choosing a unit that’s too large for the cabinet opening, which prevents the doors from closing properly—always measure the interior diameter and door clearance before ordering. For deep corners, consider a two-tier lazy Susan so you’re not stacking items too high, which can make the top tier unstable. Some homeowners prefer pull-out drawer systems instead, which offer better visibility but require more clearance and a slightly higher budget.
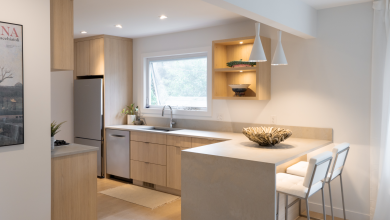
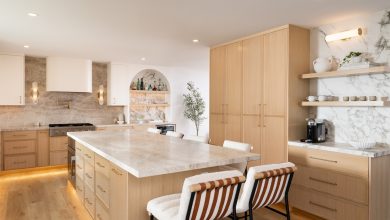
12. Light Oak Cabinets with Minimalist Hardware
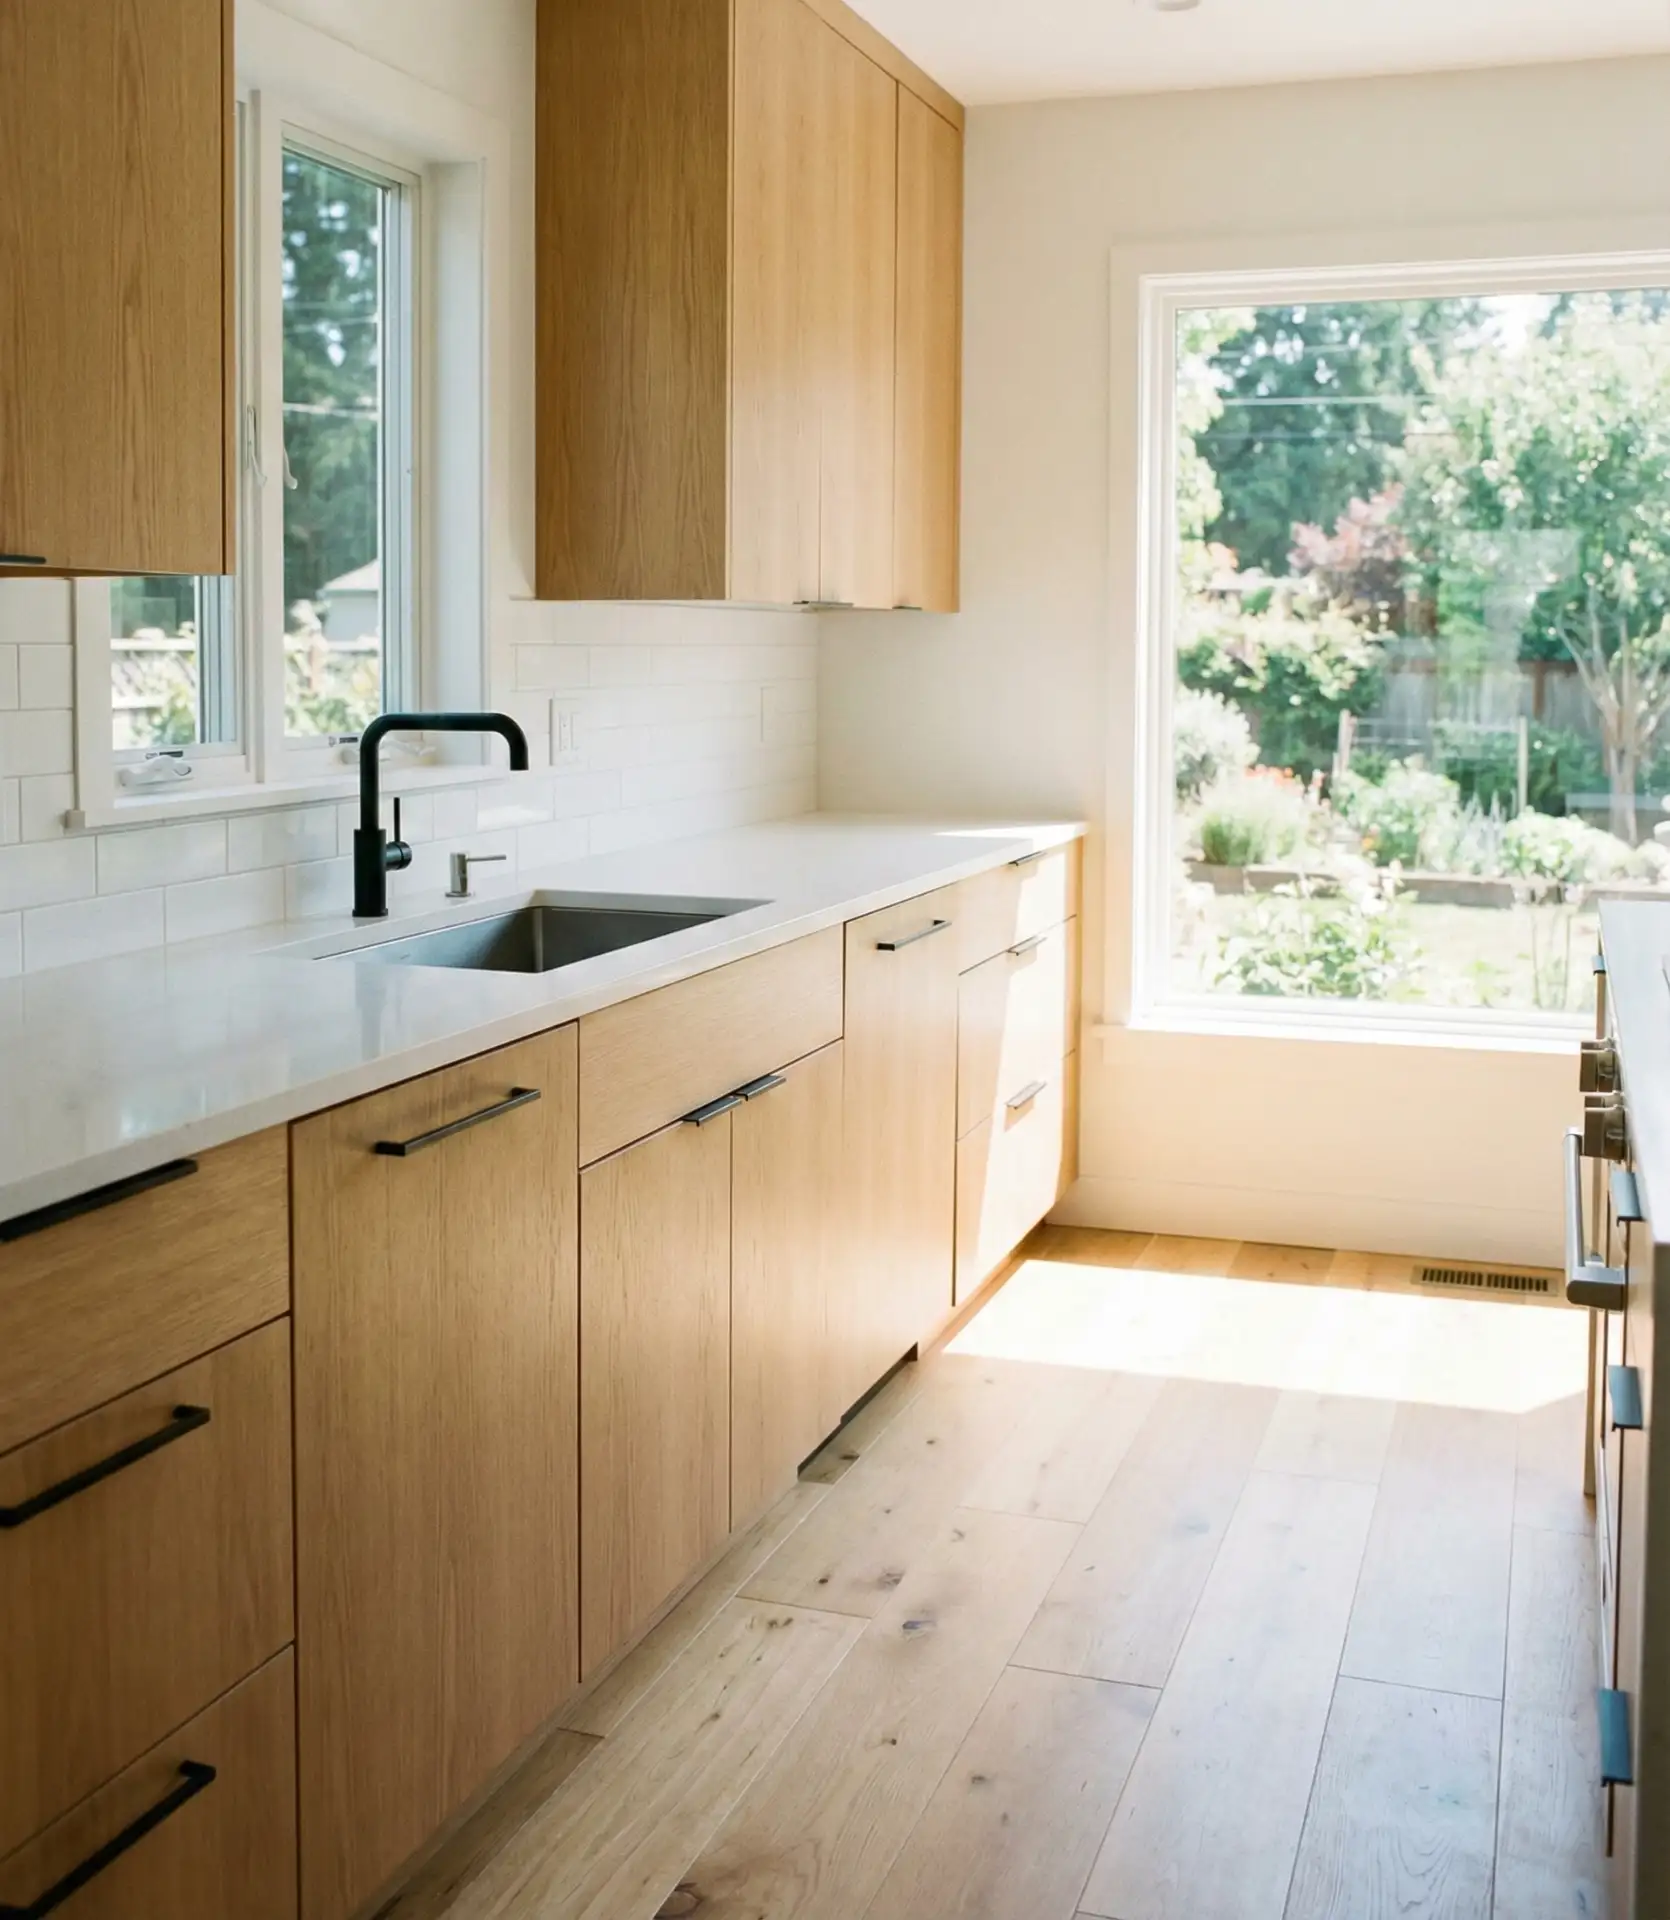
Light oak brings a Scandinavian-inspired warmth to kitchens, offering the beauty of natural wood grain without the heaviness of darker stains. Its pale honey tones complement almost any color palette and pair effortlessly with white countertops, subway tiles, and stainless appliances for a fresh, timeless look. When you add minimalist hardware—think slim bar pulls or discreet edge pulls—the focus stays on the wood’s texture and the overall simplicity of the design. This approach works especially well in open-plan homes where the kitchen is part of a larger living space, creating a cohesive, uncluttered aesthetic that flows from room to room.
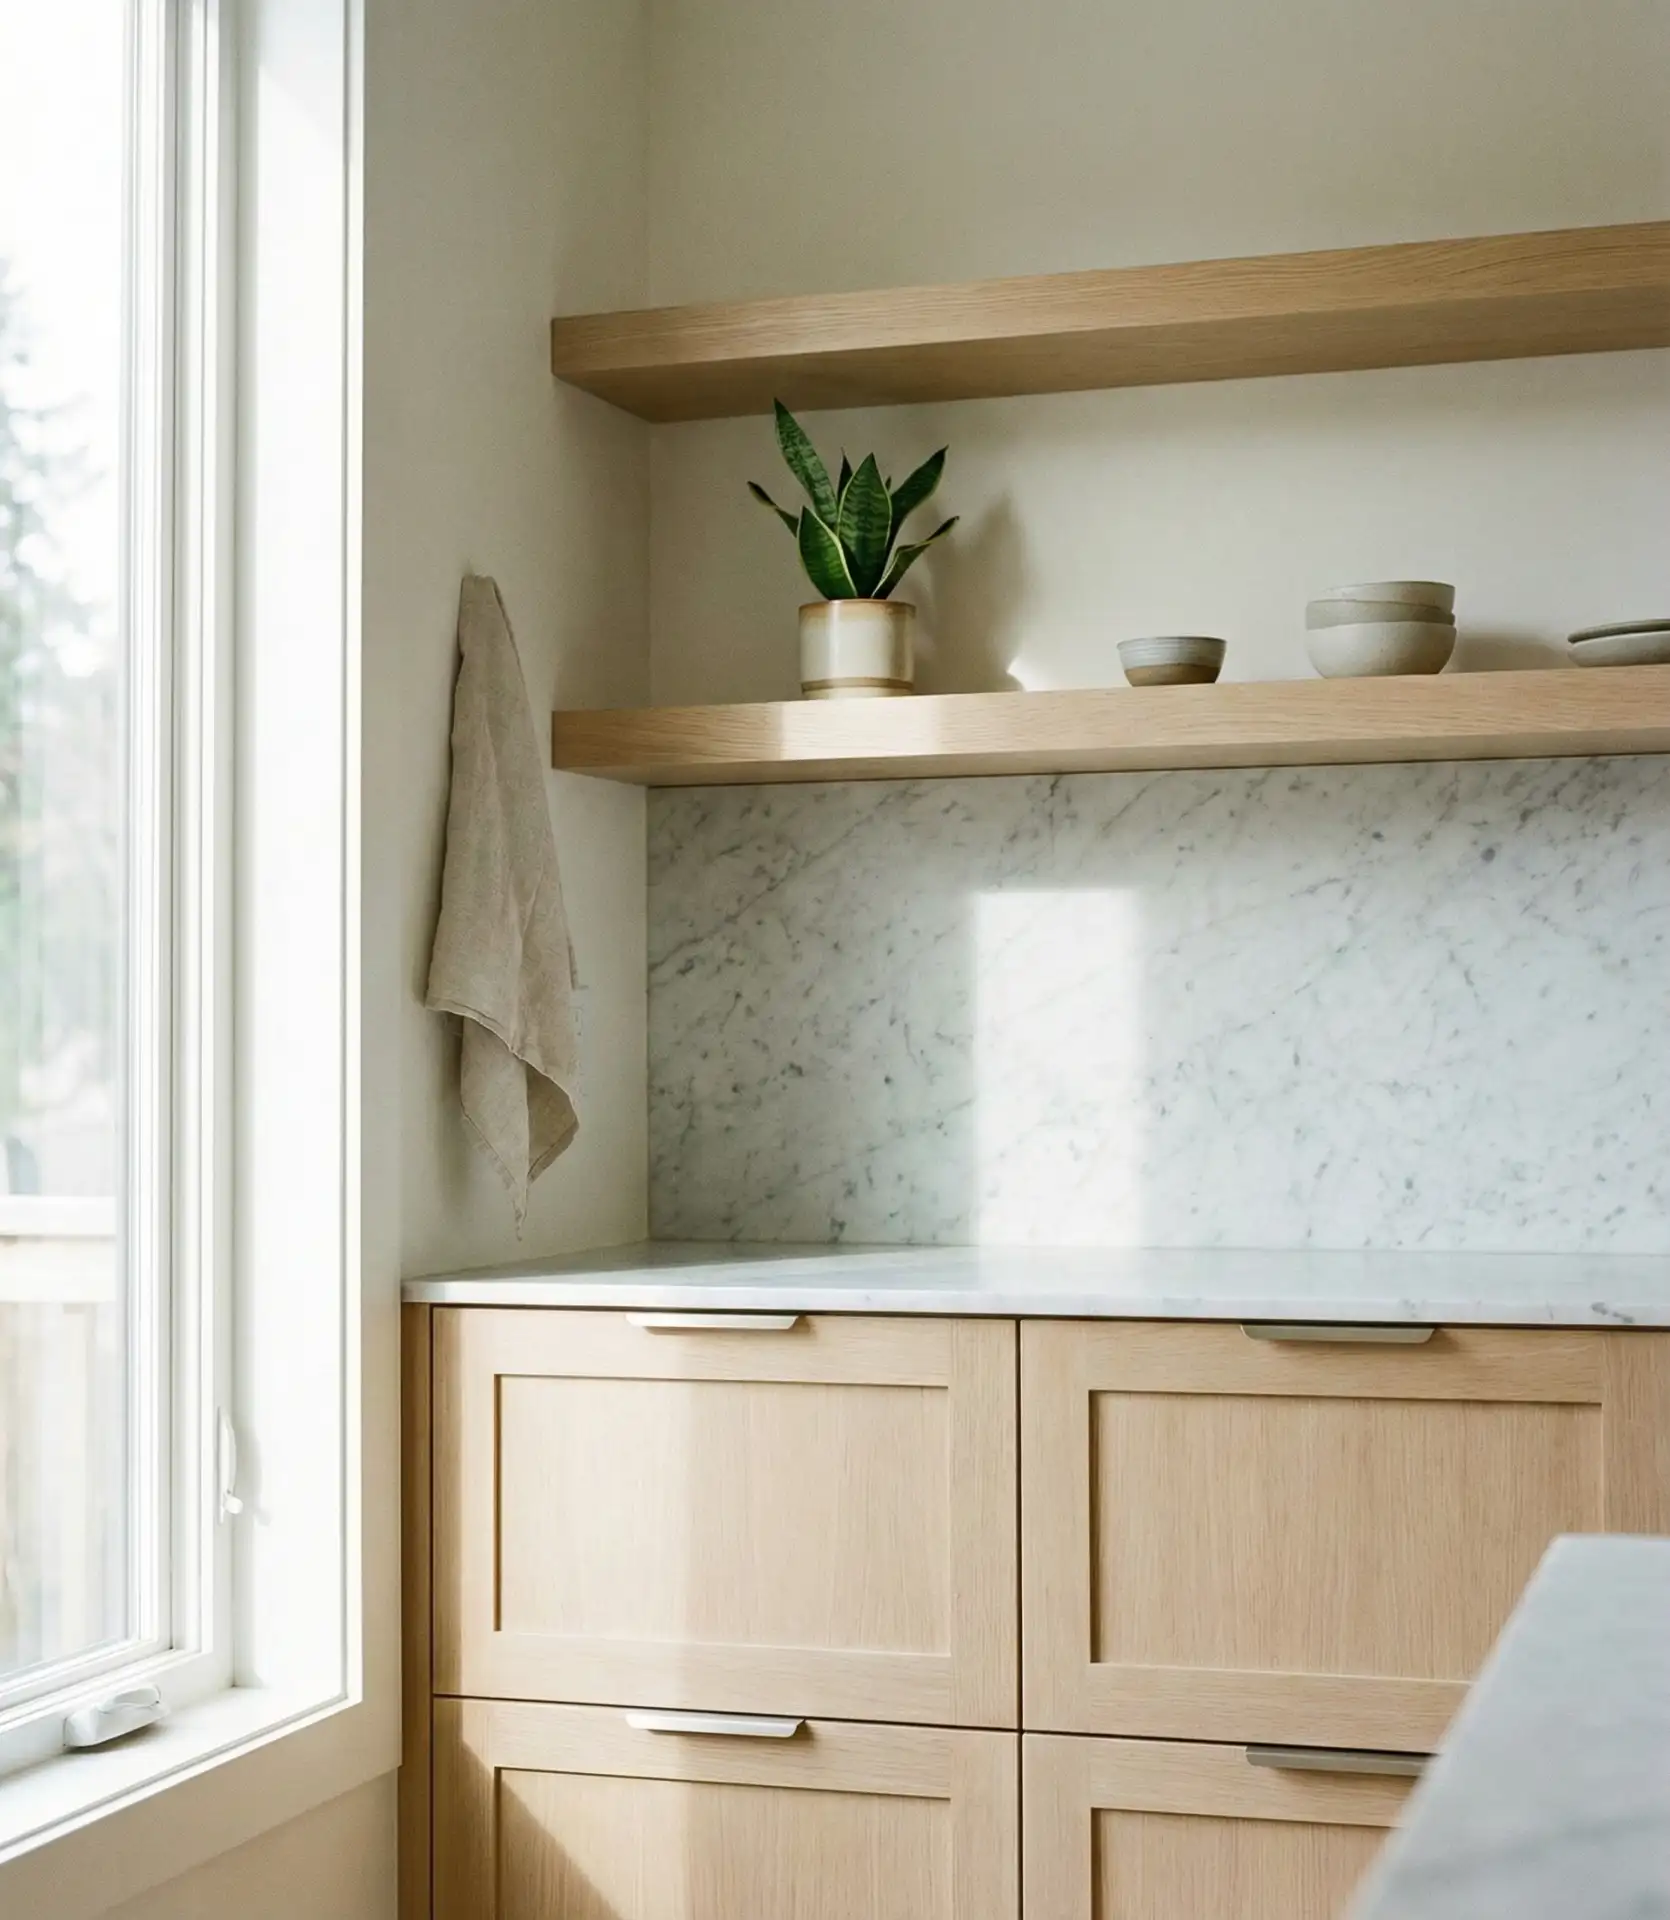
Real homeowner behavior shows that light wood cabinets tend to age gracefully, developing a subtle patina that adds character rather than looking worn. If you’re worried about the wood appearing too yellow or orange over time, ask for a sample finished with a clear or white-tinted sealer, which keeps the tone cooler. Pair light oak with matte or satin hardware finishes rather than high-gloss chrome, which can feel too stark against the wood’s soft texture. And because oak has a prominent grain, it’s forgiving of minor dings and scratches—small imperfections blend into the pattern rather than standing out like they would on a painted surface.
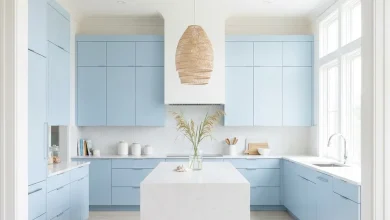
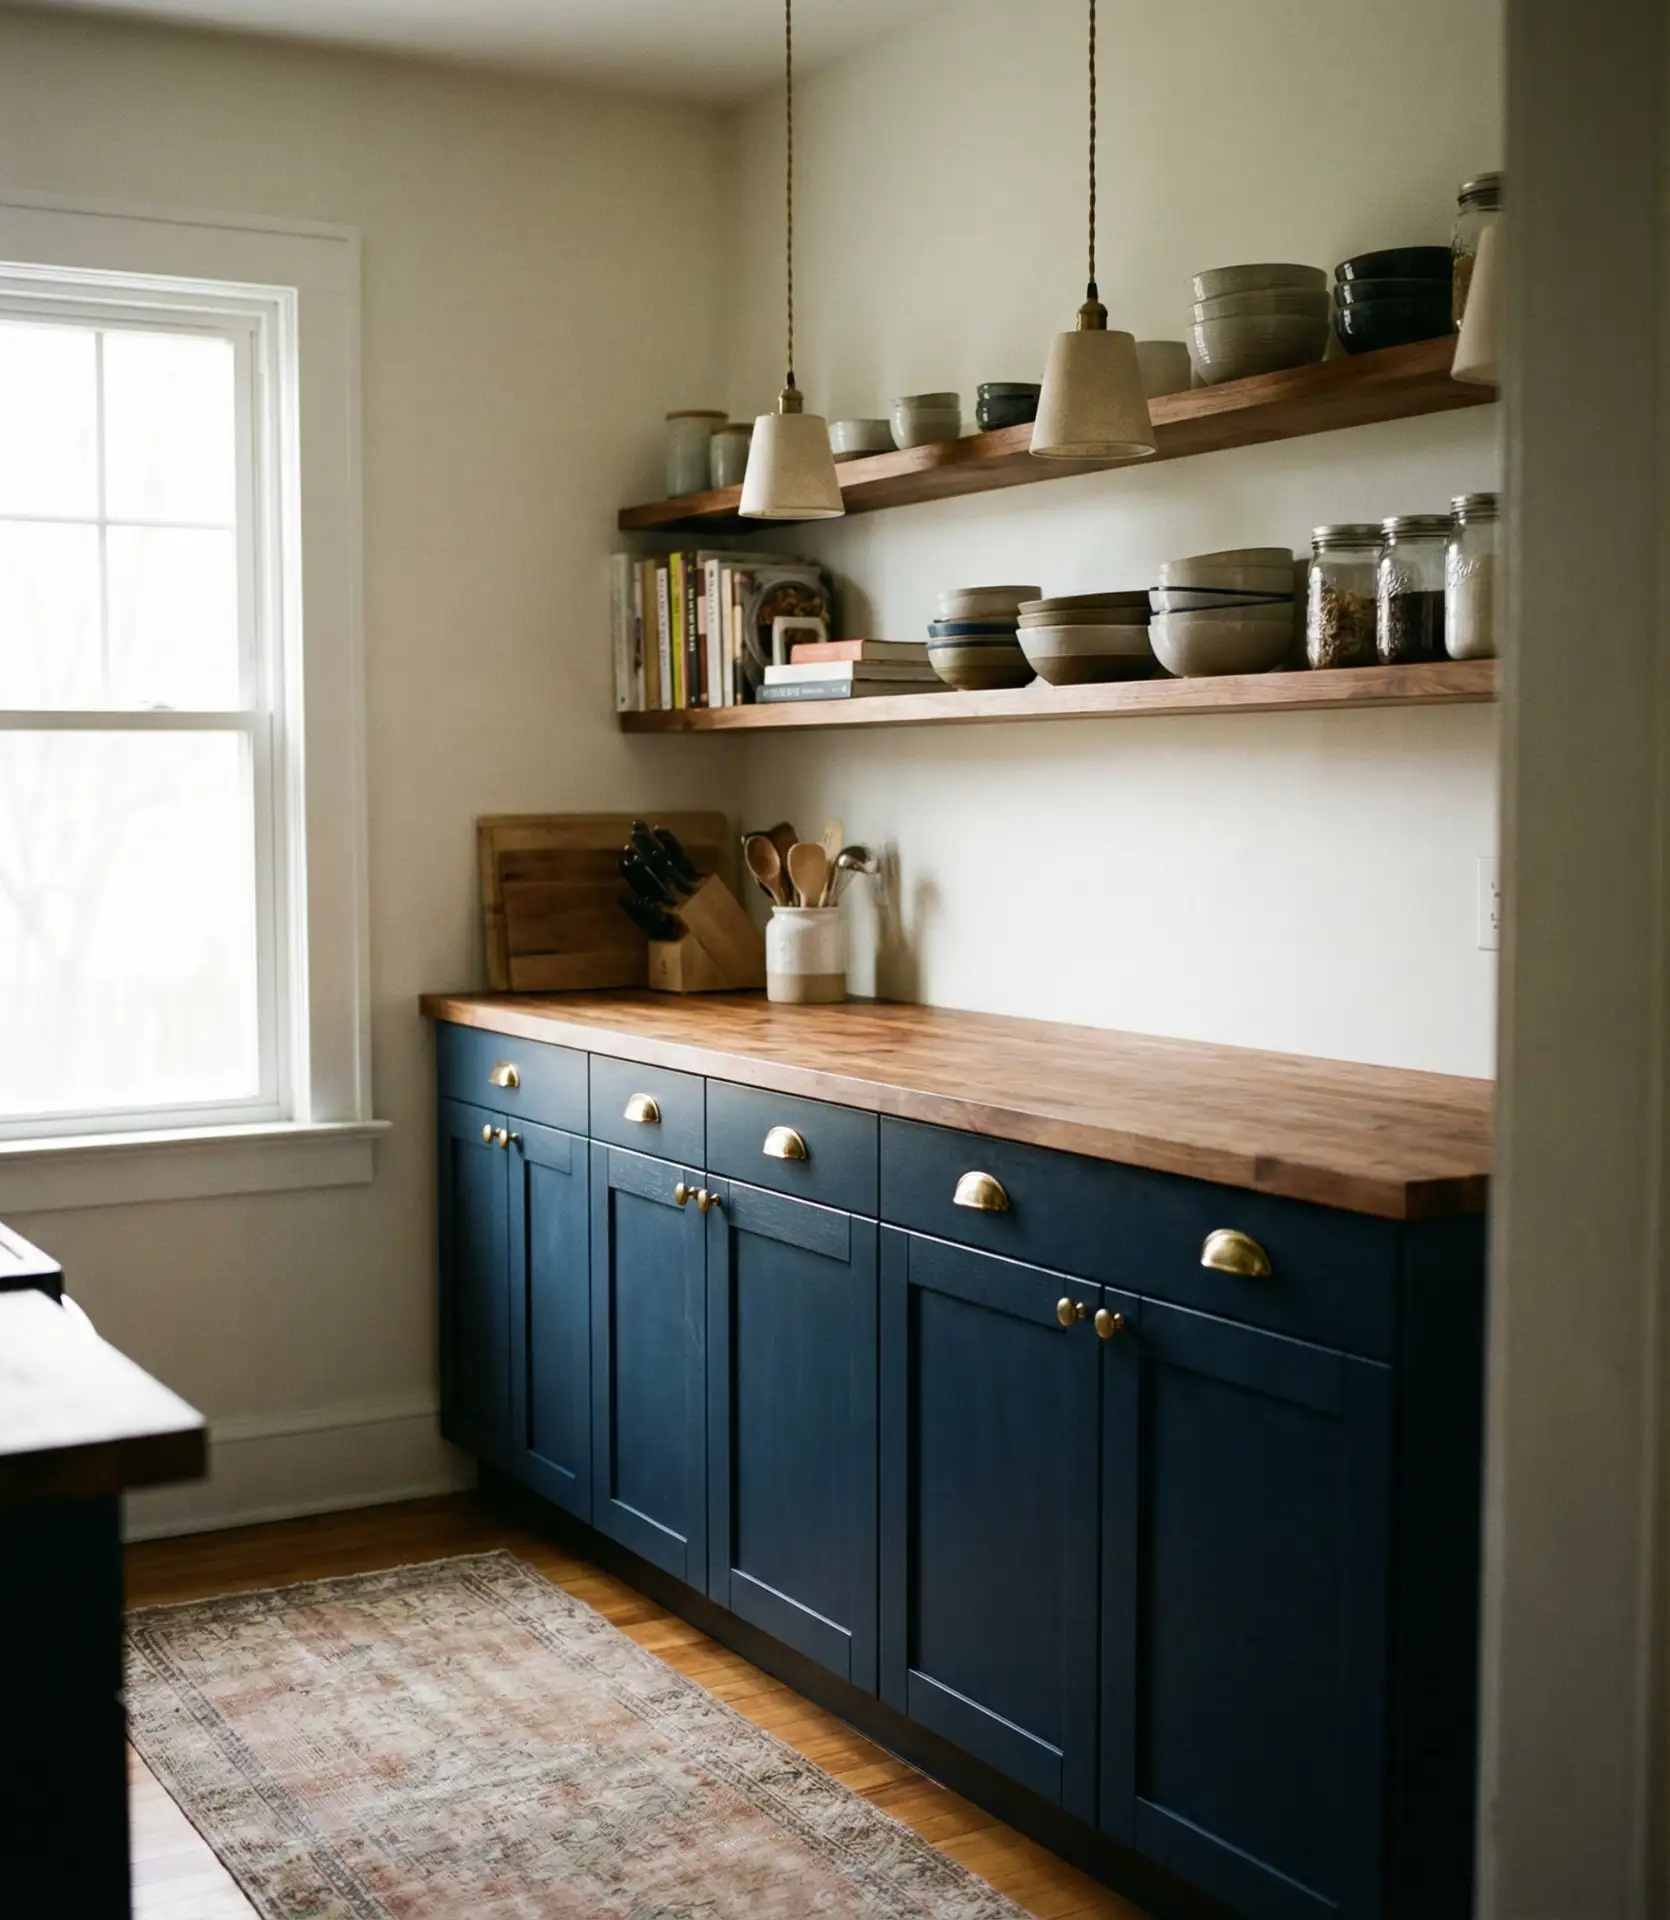
13. Dark Blue Island with Contrasting Perimeter

Using a bold blue on your island while keeping perimeter cabinets in white, gray, or natural wood creates a focal point that grounds the kitchen without overwhelming it. The island often becomes the social and functional heart of the space—where kids do homework, guests gather with wine, and meal prep happens—so giving it a distinct identity makes practical and aesthetic sense. Navy, cobalt, and slate blue are particularly popular choices that feel both classic and current, and they pair beautifully with brass, copper, or matte black hardware. This strategy also allows you to test a bolder color in a smaller dose before committing to it throughout the entire room.
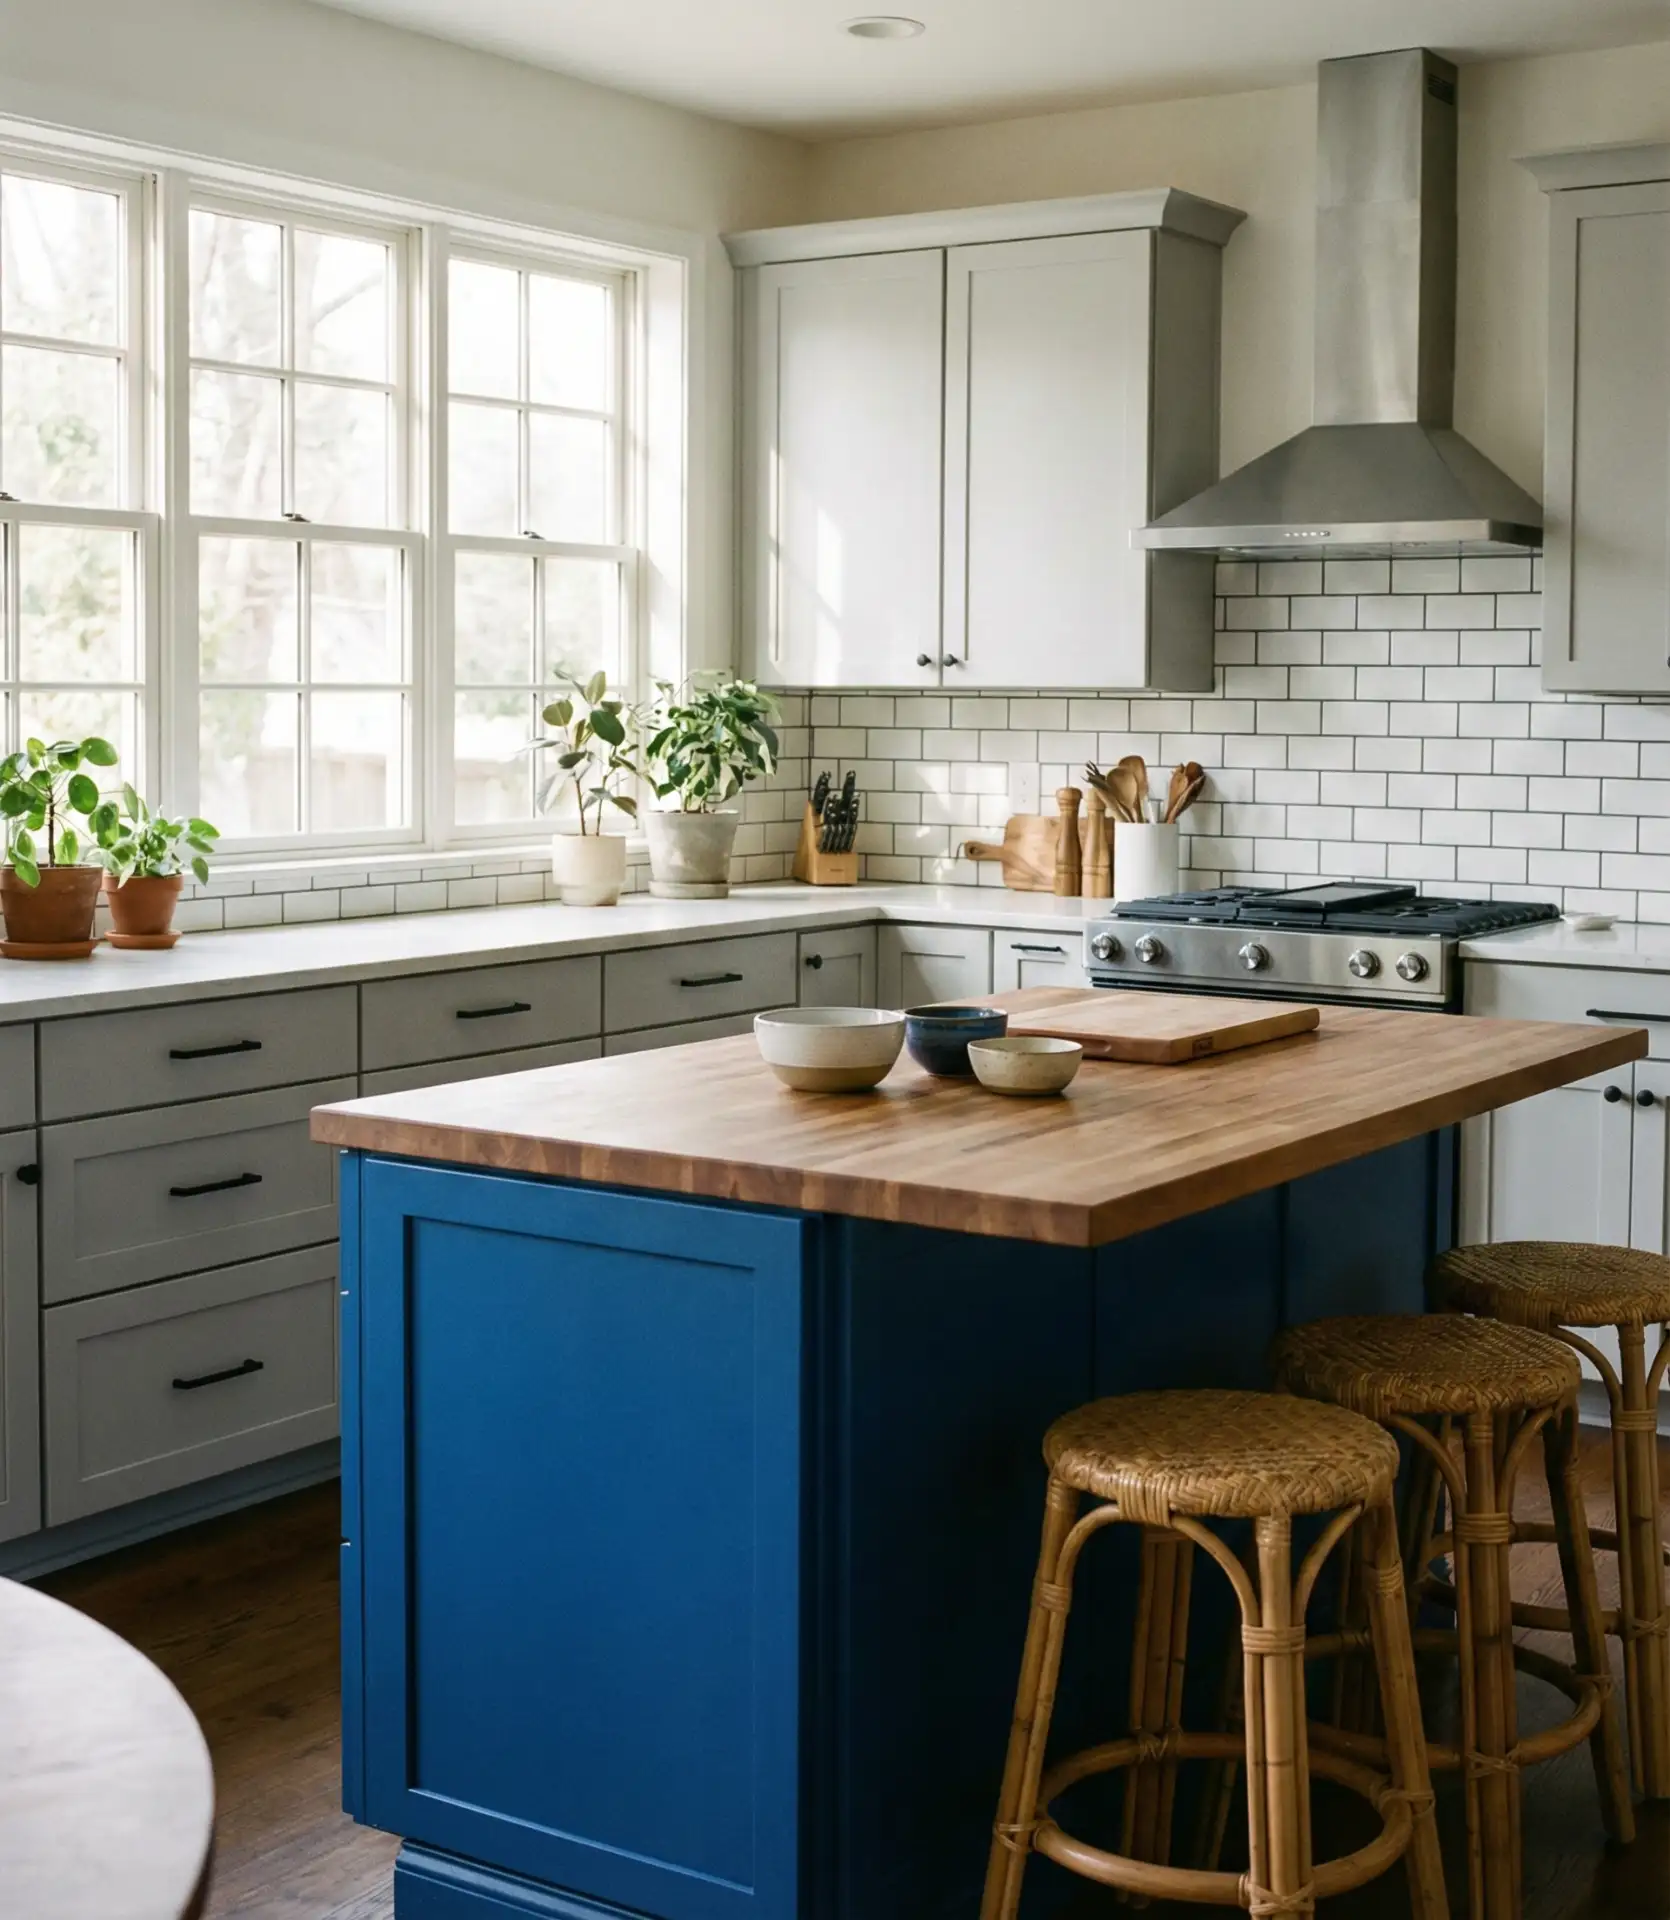
This approach is particularly effective in kitchens with strong natural light, where the blue reads as rich and saturated rather than murky. If your space is on the darker side, consider a lighter blue or limit the color to the island base while keeping the waterfall countertop or top cabinets neutral. Budget-wise, painting just the island is far more affordable than a full kitchen repaint, and it’s a project many homeowners tackle themselves over a long weekend. To ensure the blue doesn’t clash with your backsplash or counters, bring paint chips to the tile shop or fabricator and view them together under different lighting conditions before making final selections.
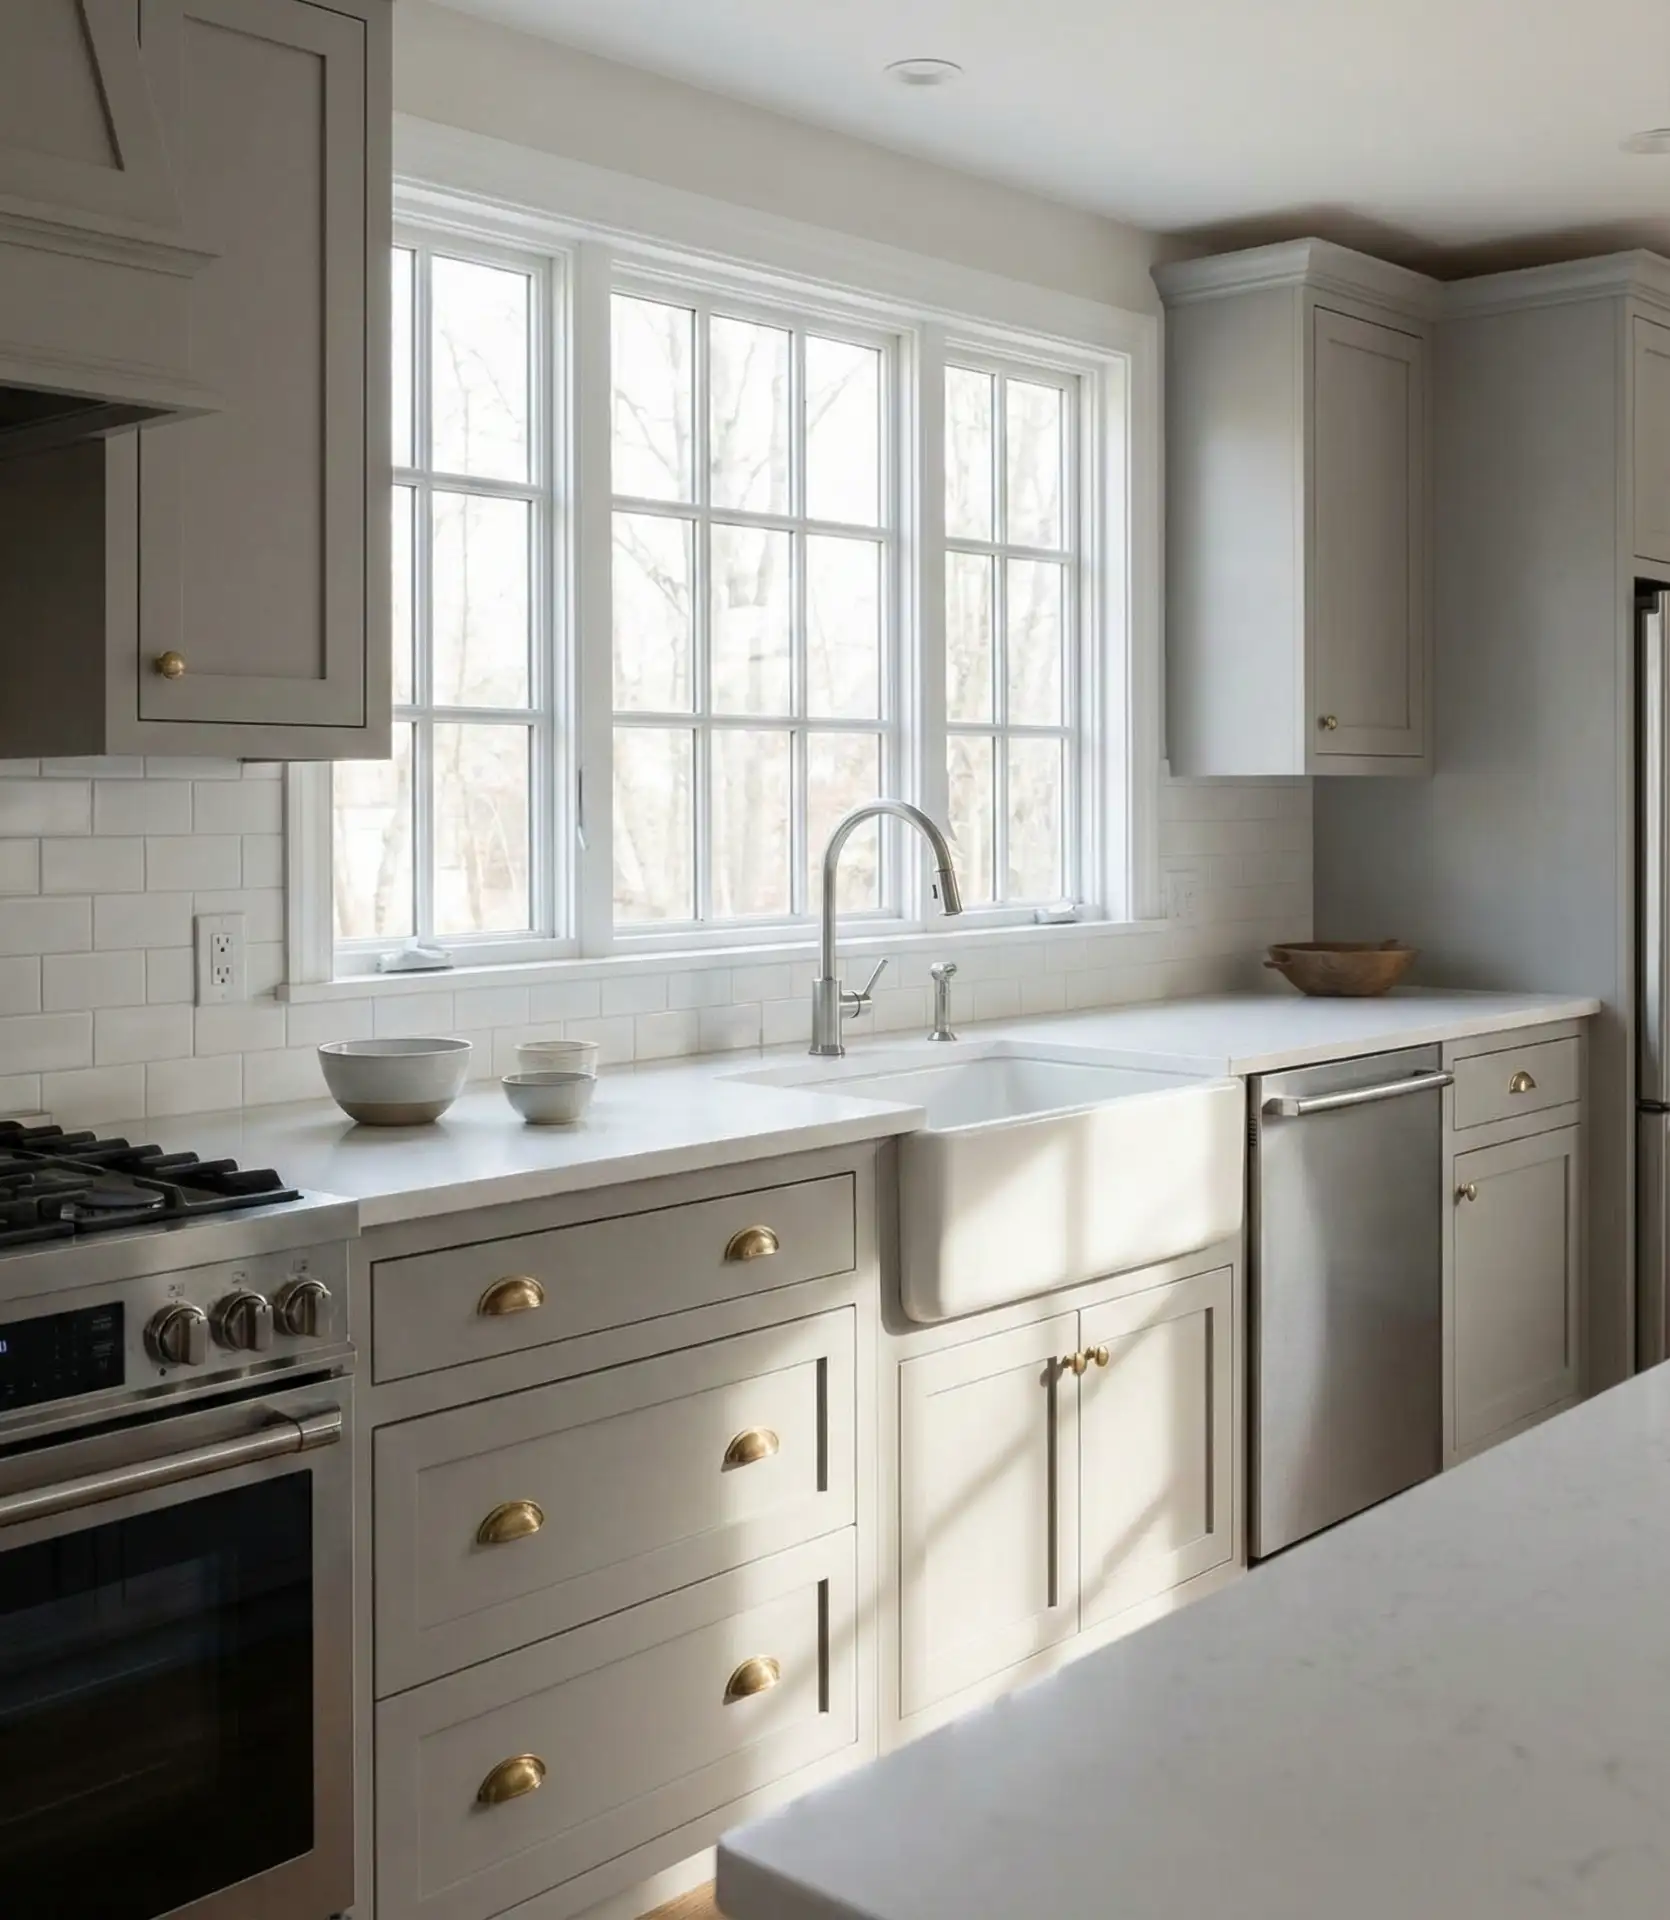
14. White Farmhouse Cabinets with Beadboard Detailing
If you’re drawn to cottage or farmhouse style, white cabinets with beadboard panel inserts deliver that relaxed, lived-in charm without feeling overly rustic. The vertical grooves add texture and visual interest while remaining subtle enough to work in both traditional and transitional kitchens. Beadboard can appear on cabinet doors, island ends, or even as a backsplash, creating continuity throughout the space. This detail pairs naturally with apron-front sinks, open shelving, and vintage-inspired hardware, but it also adapts well to more contemporary settings when combined with sleek countertops and modern lighting fixtures.
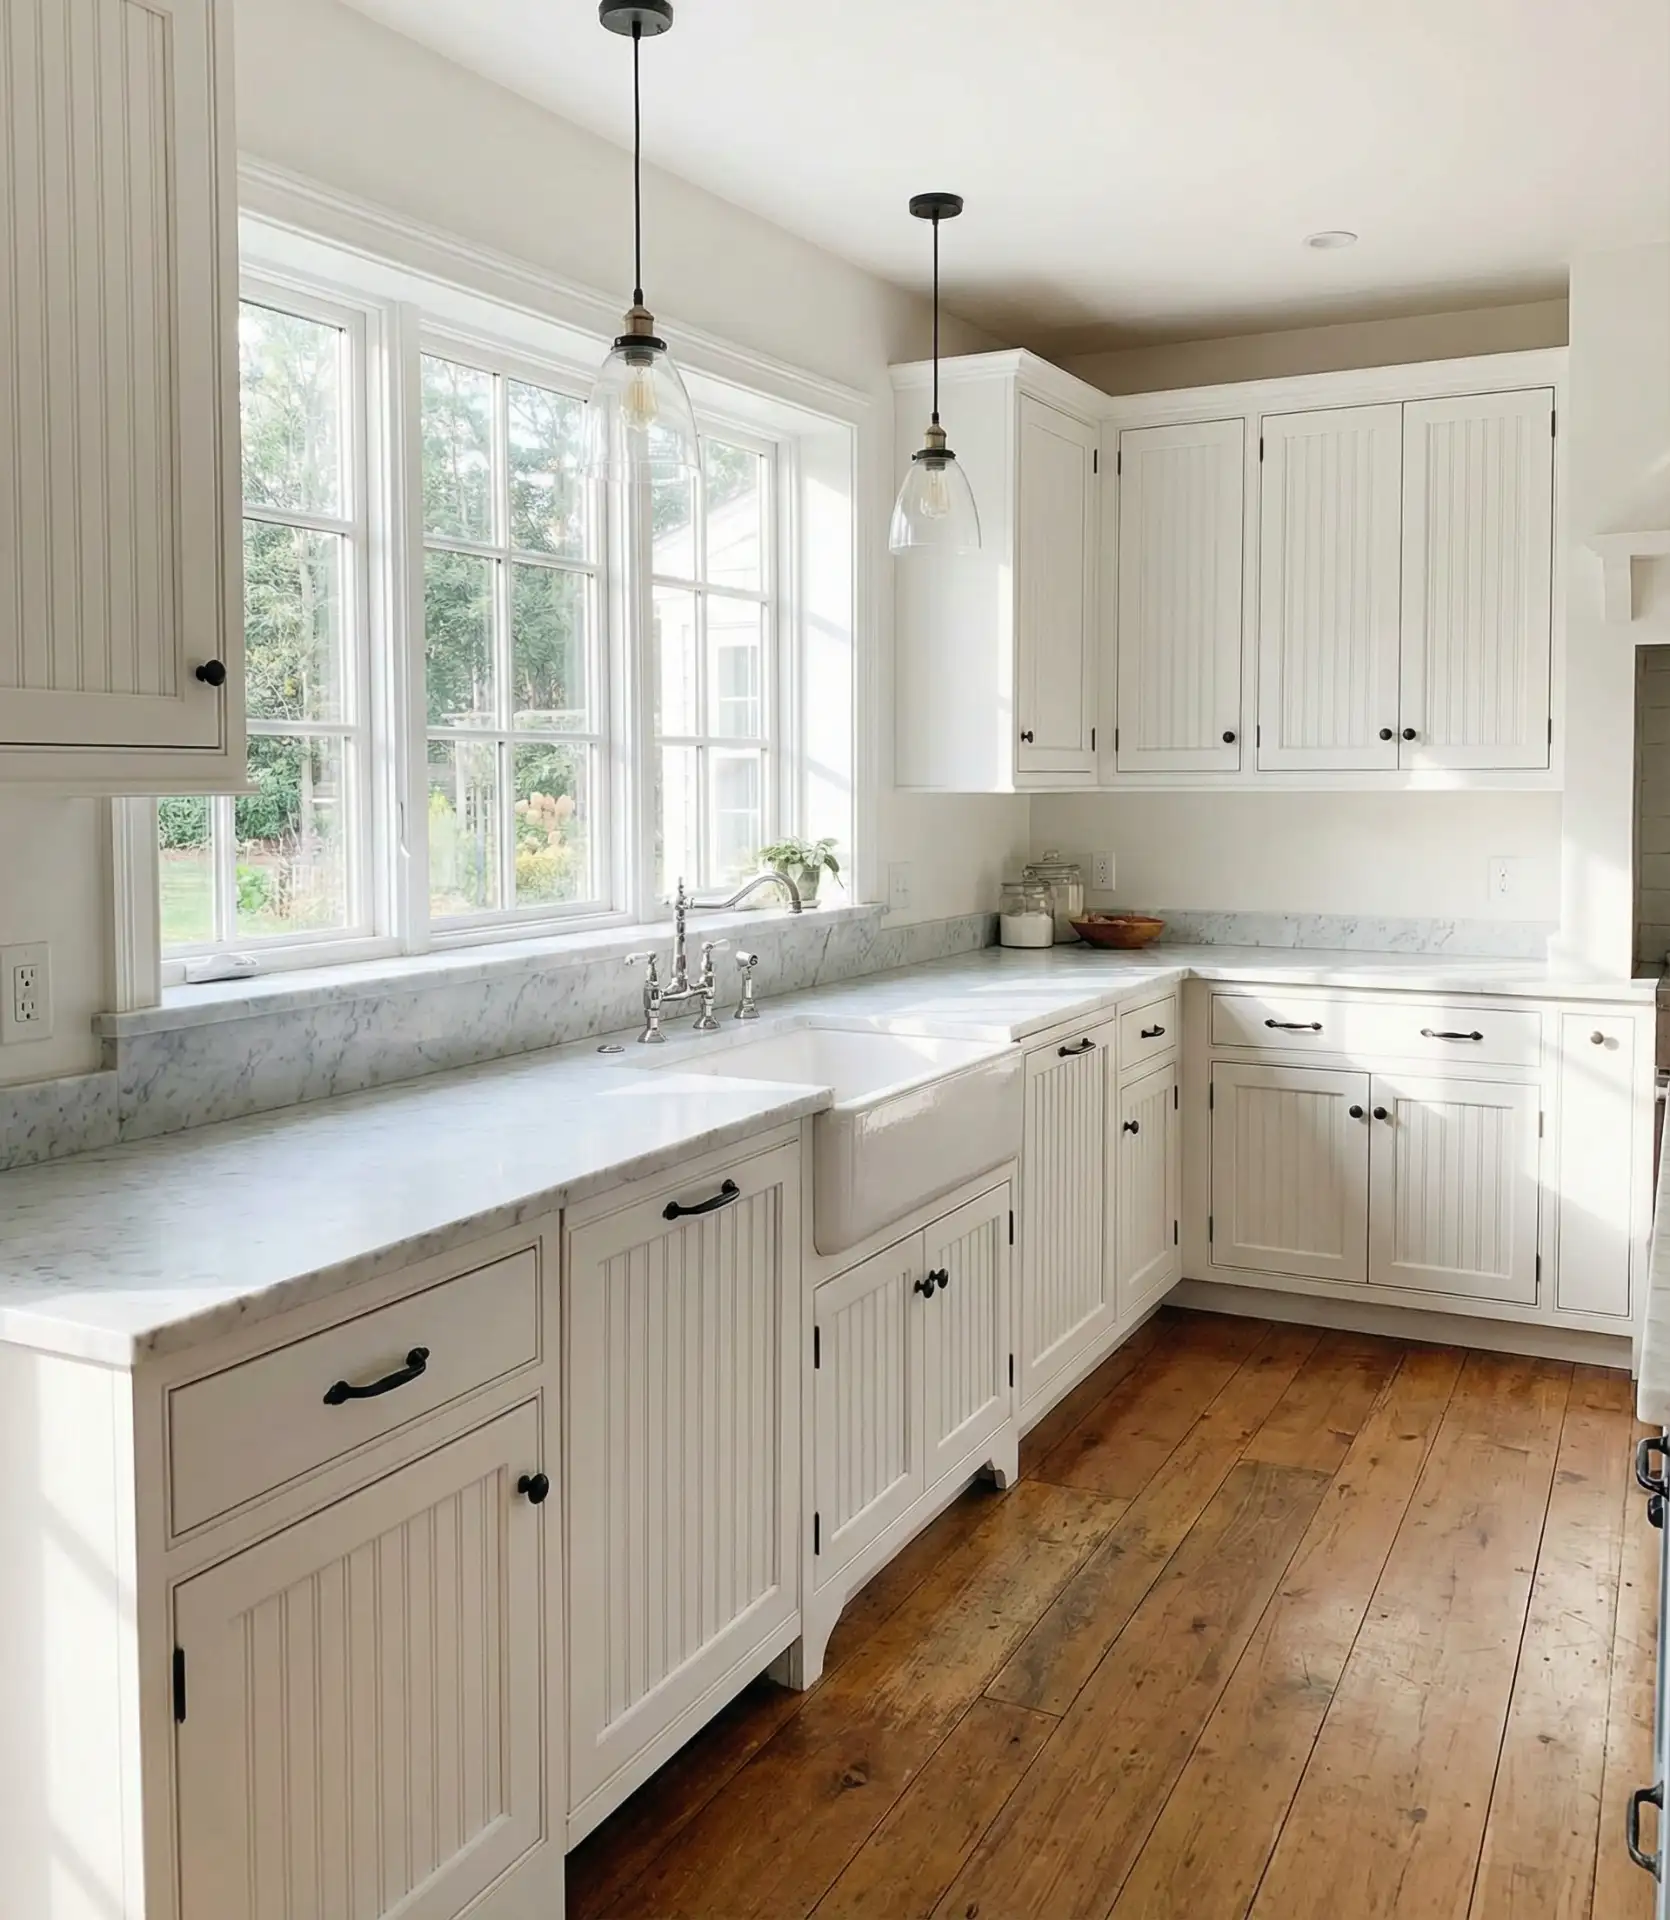
Expert commentary suggests that beadboard detailing works best when it’s not overdone—choose either beadboard doors or a beadboard backsplash, but not both, to avoid a theme-park effect. Cleaning the grooves requires more attention due to the potential for dust and grease to settle in the crevices, so it’s beneficial to use a soft brush or toothbrush during deep cleans. For a less maintenance-intensive option, consider beadboard panels only on the island or lower cabinets, where they’re less exposed to cooking splatter. Pairing beadboard with simple shaker uppers creates a pleasing balance of texture and simplicity.
15. Glossy White Cabinets with Chrome Details
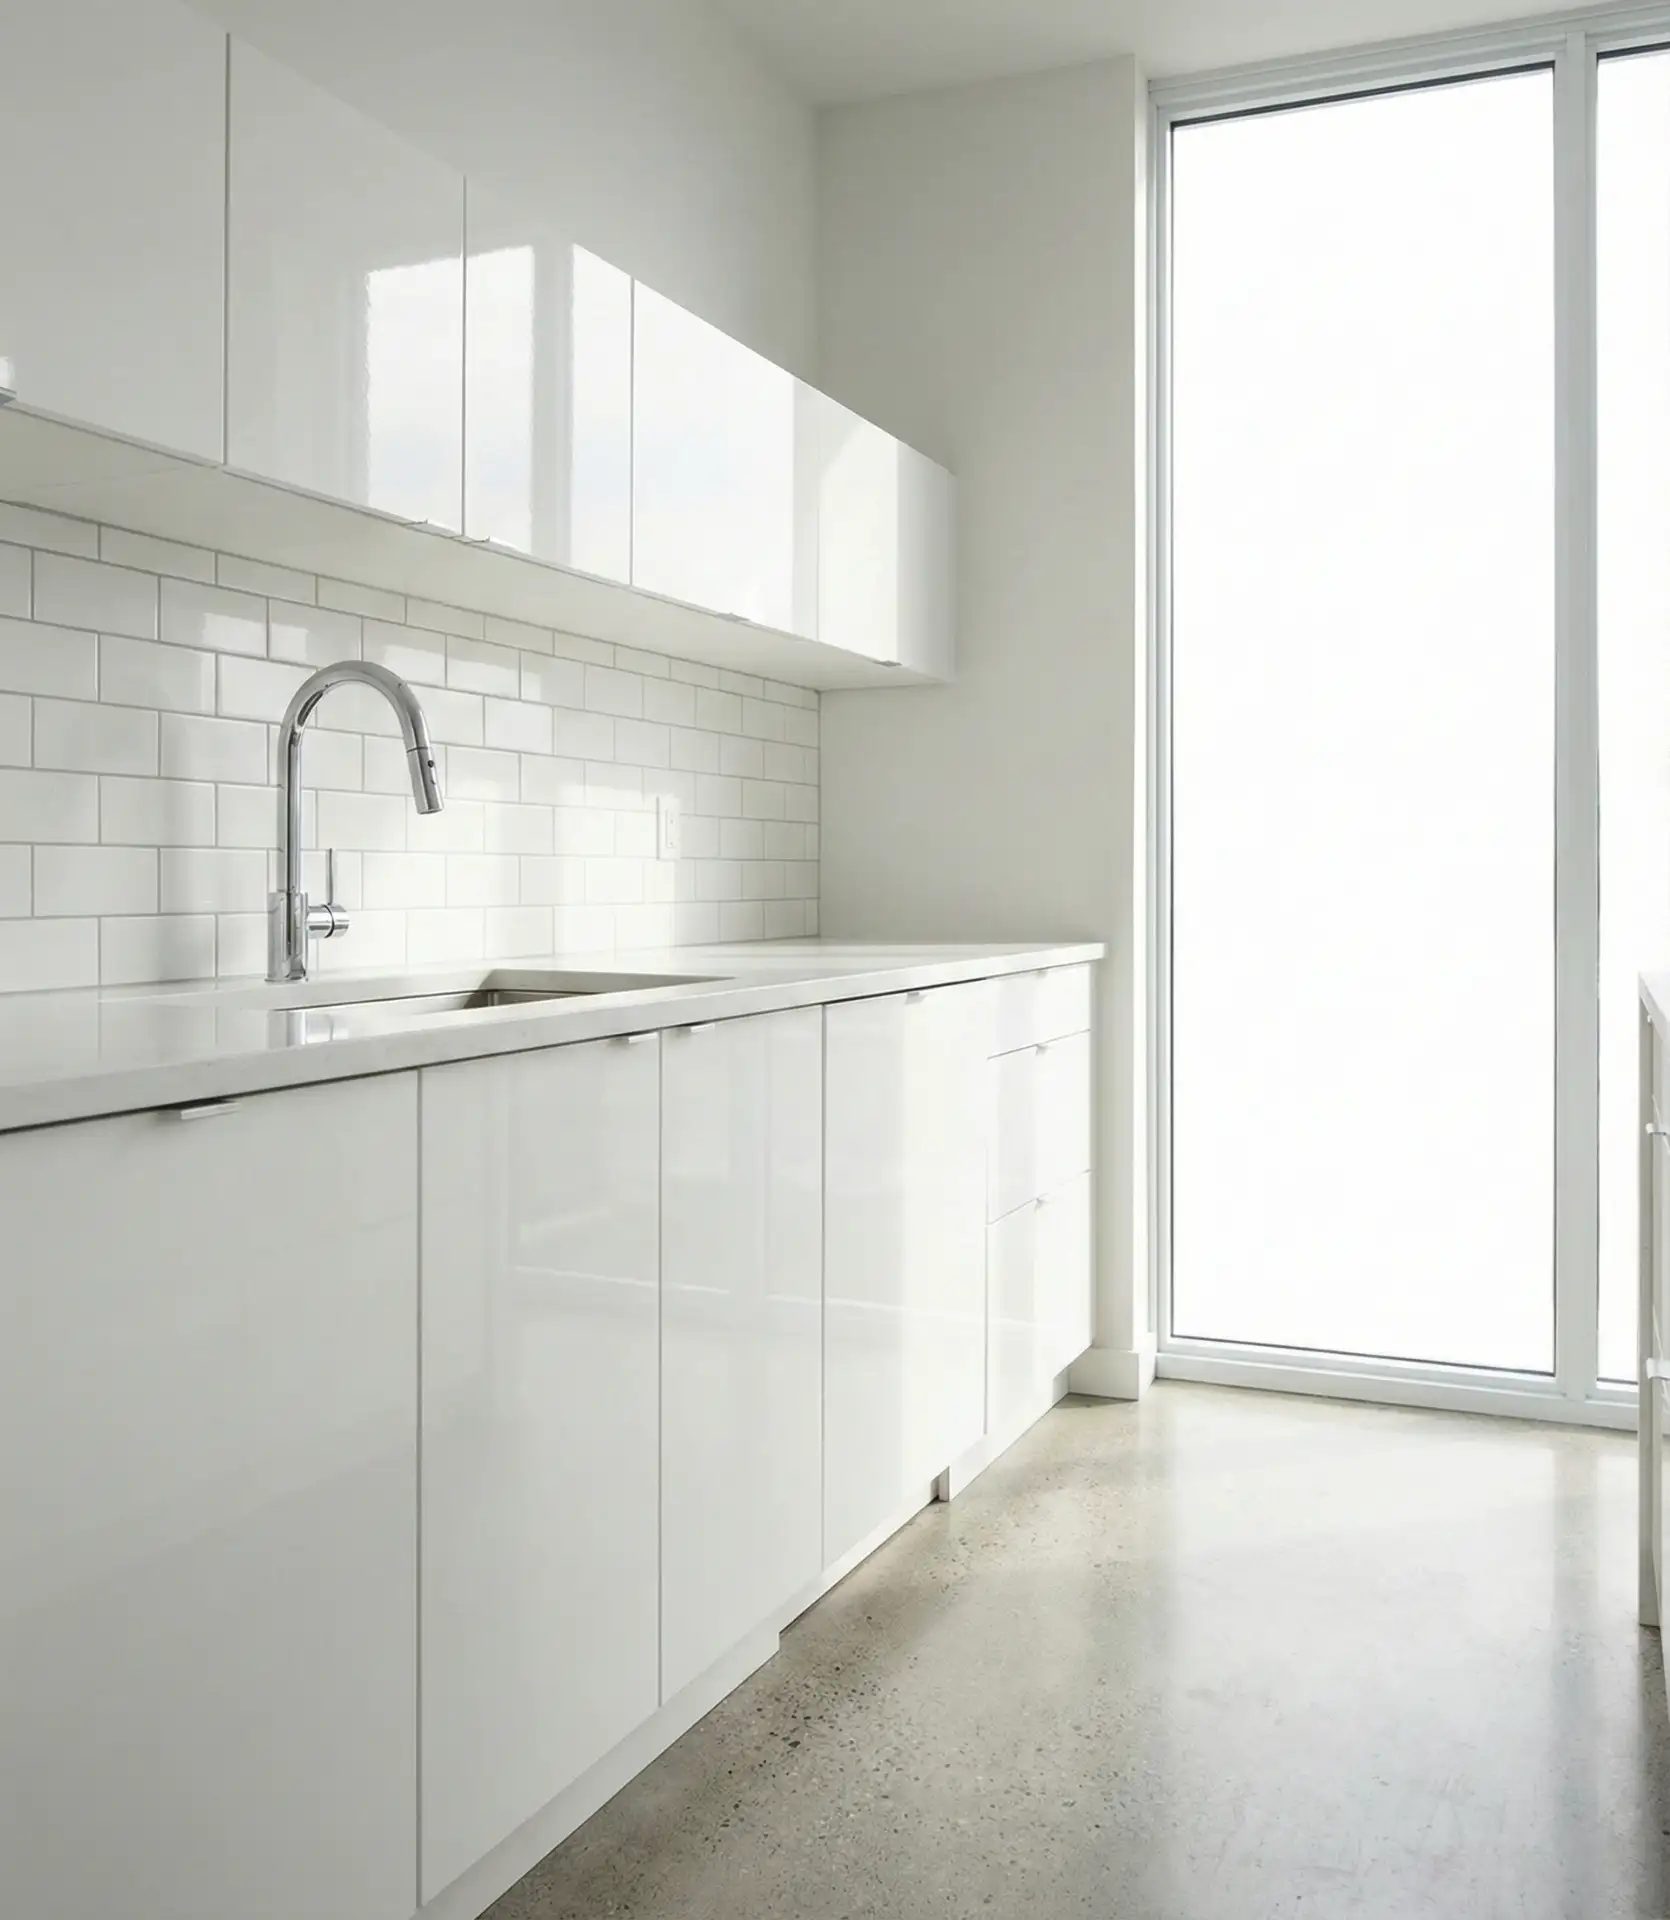
High-gloss white cabinets reflect light beautifully, making them a smart choice for small spaces or kitchens with limited natural light—they essentially act as mirrors, bouncing illumination around the room and amplifying any available brightness. When paired with chrome or polished nickel hardware and fixtures, the result is a sleek, almost futuristic aesthetic that feels clean and uncluttered. This finish is especially popular in contemporary and ultra-modern kitchens, where the emphasis is on smooth surfaces and minimal ornamentation. The reflective quality also means the cabinets change throughout the day, picking up hints of color from walls, backsplashes, and even the sky visible through windows.
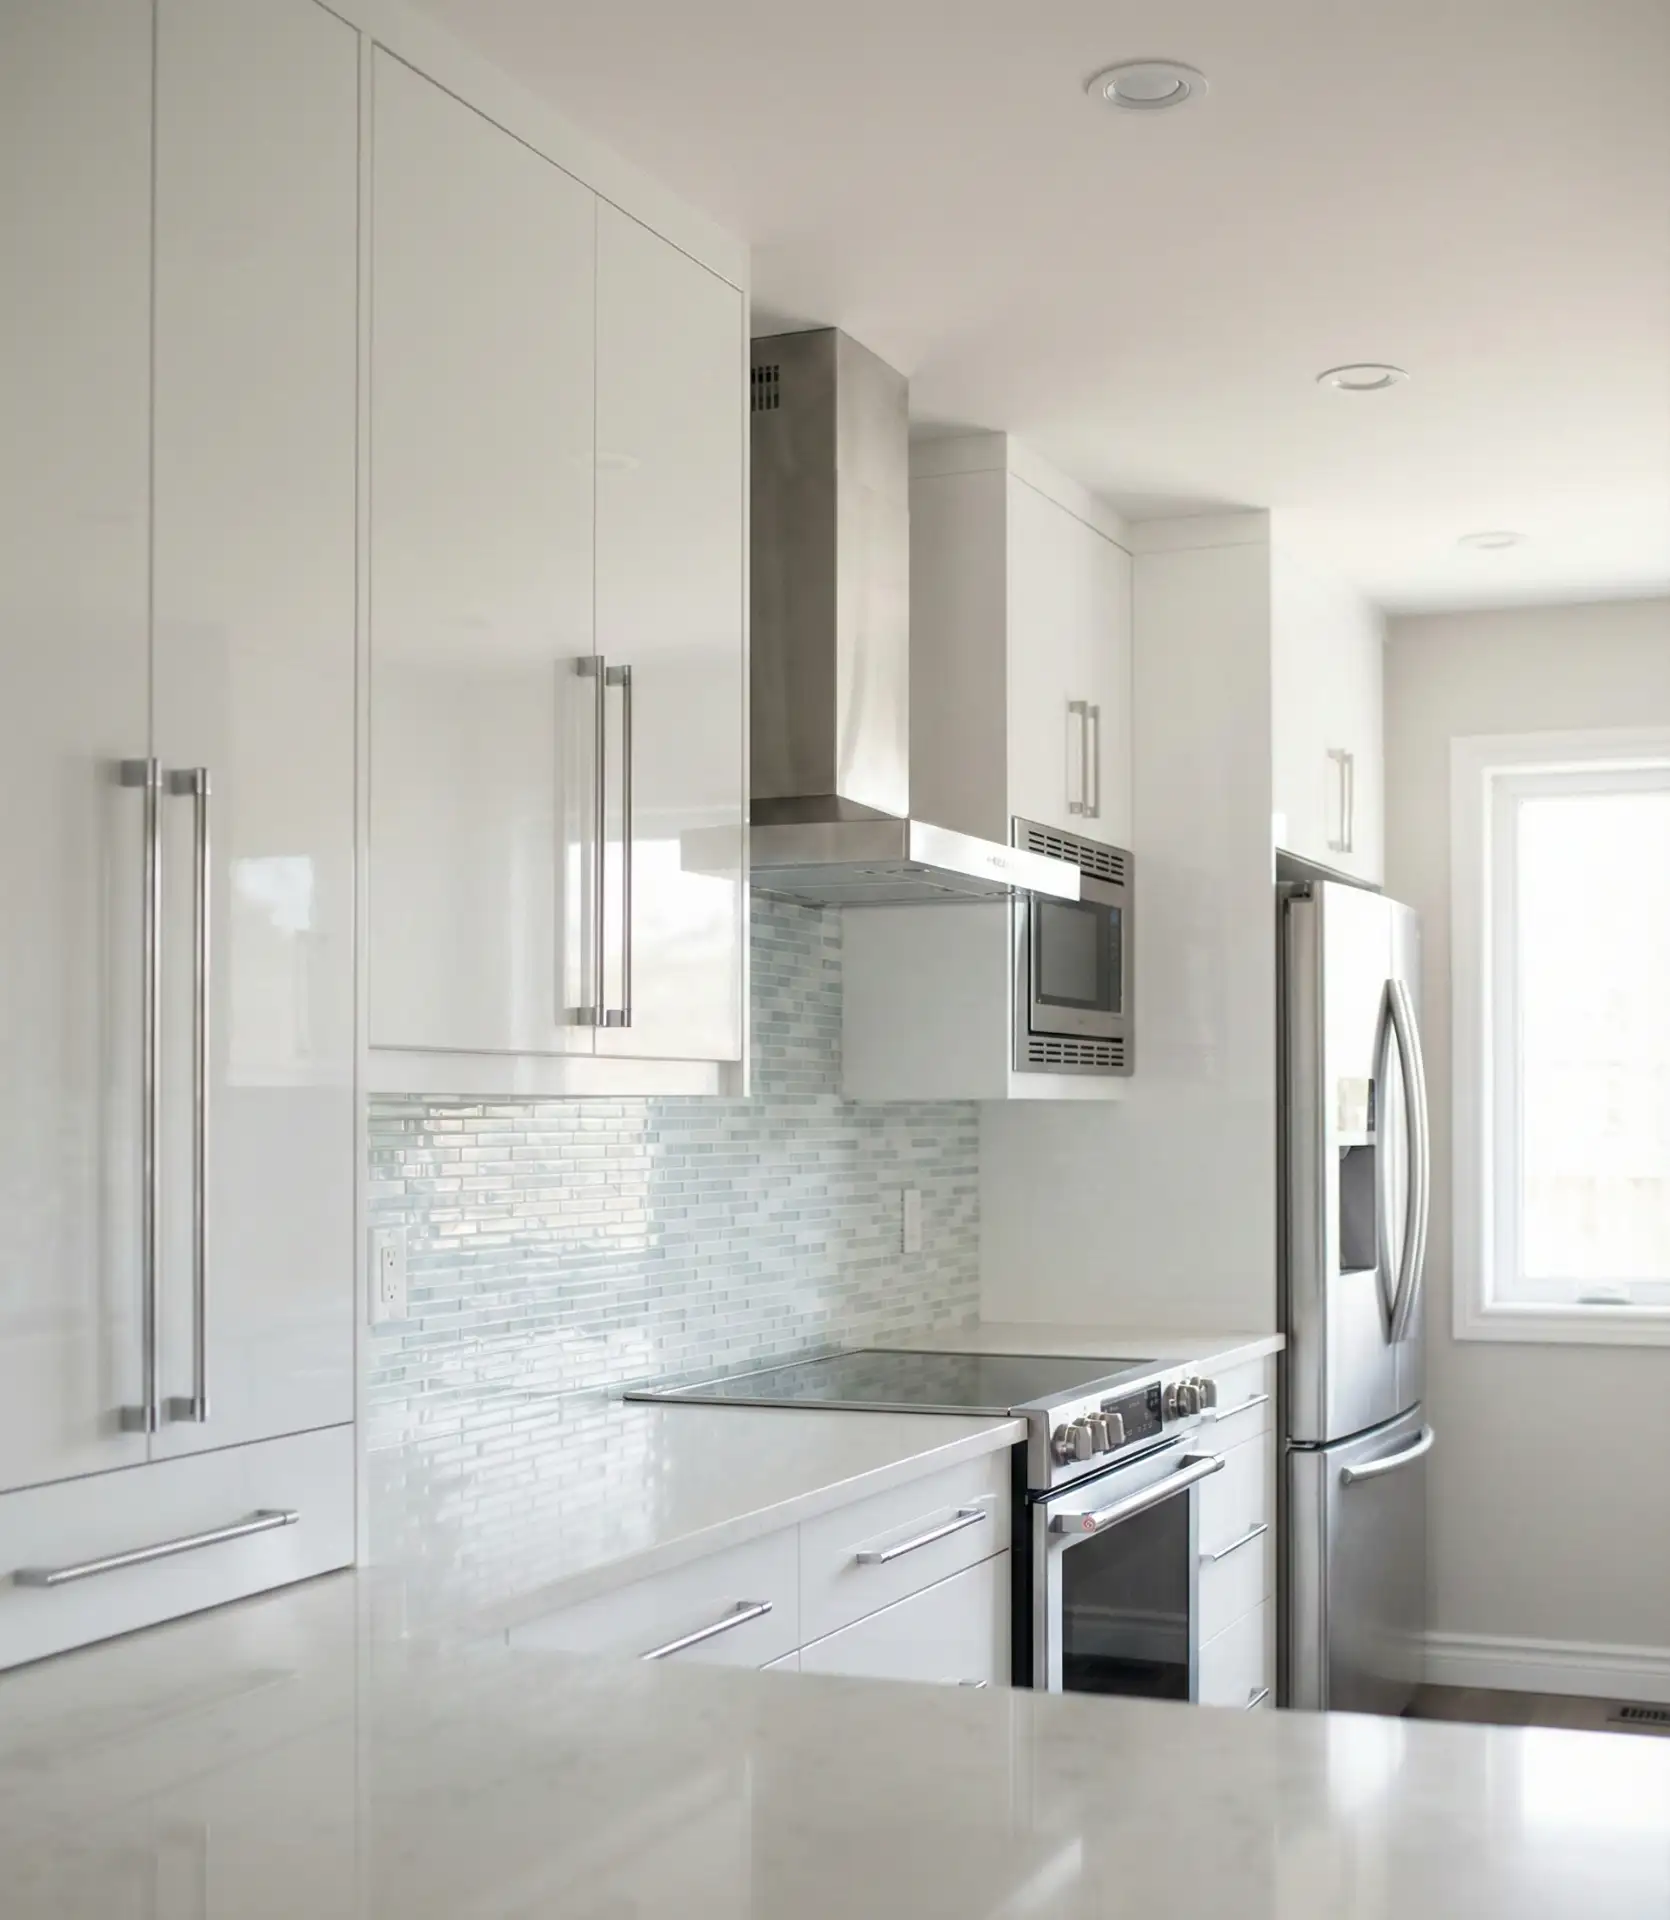
The trade-off with glossy finishes is that they show fingerprints, smudges, and water spots more readily than matte or satin options, so they’re best suited to households that don’t mind frequent wiping or where the kitchen isn’t the main hub of constant activity. Microfiber cloths and a simple glass cleaner become your go-to tools for keeping the surface pristine. If you love the reflective look but worry about upkeep, consider glossy uppers and matte lowers, which give you the brightness above while hiding the inevitable marks around the most-used base cabinets. Chrome fixtures tie everything together and enhance the modern vibe, but make sure your appliances are also stainless or white to maintain visual cohesion.
16. Sage Green Cabinets with Natural Textures
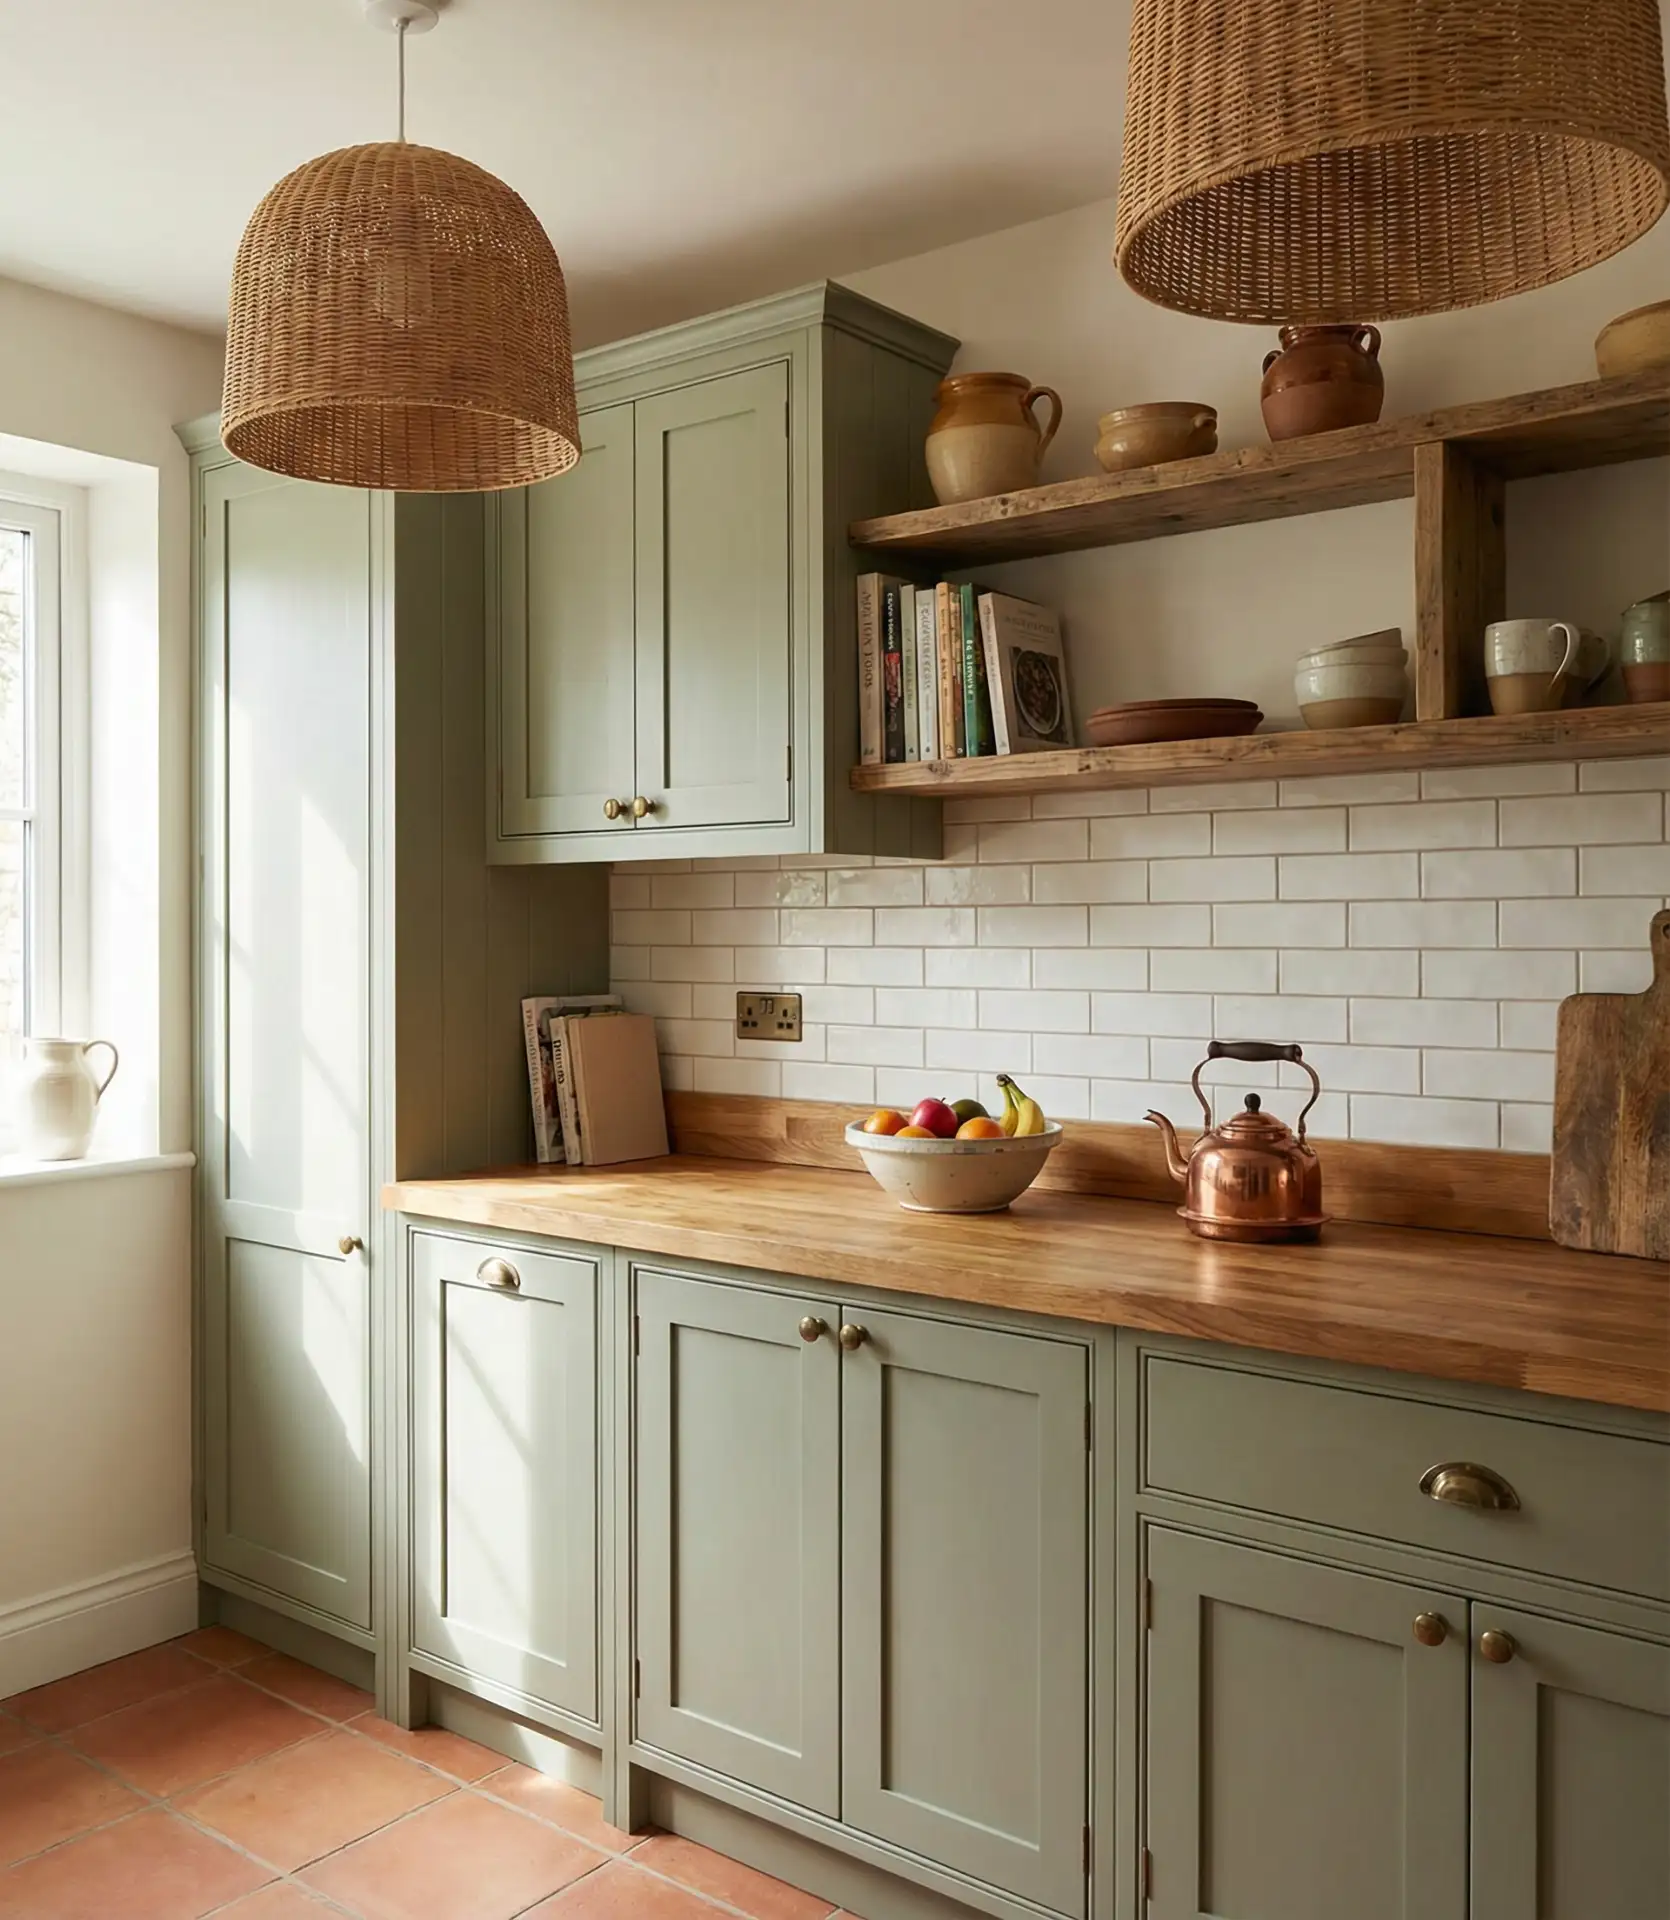
Softer than hunter green and more sophisticated than mint, sage brings a muted, earthy quality that feels both calming and grounded. This particular shade of green works beautifully with natural materials like wood countertops, woven baskets, and linen textiles, creating a kitchen that feels connected to the outdoors. It’s a versatile color that reads differently depending on the light—cooler and more gray in northern exposure, warmer and more olive in southern sun—which gives the space a dynamic quality throughout the day. Sage pairs effortlessly with brass, black, or even leather hardware, and it’s forgiving enough to work in both traditional and contemporary settings.
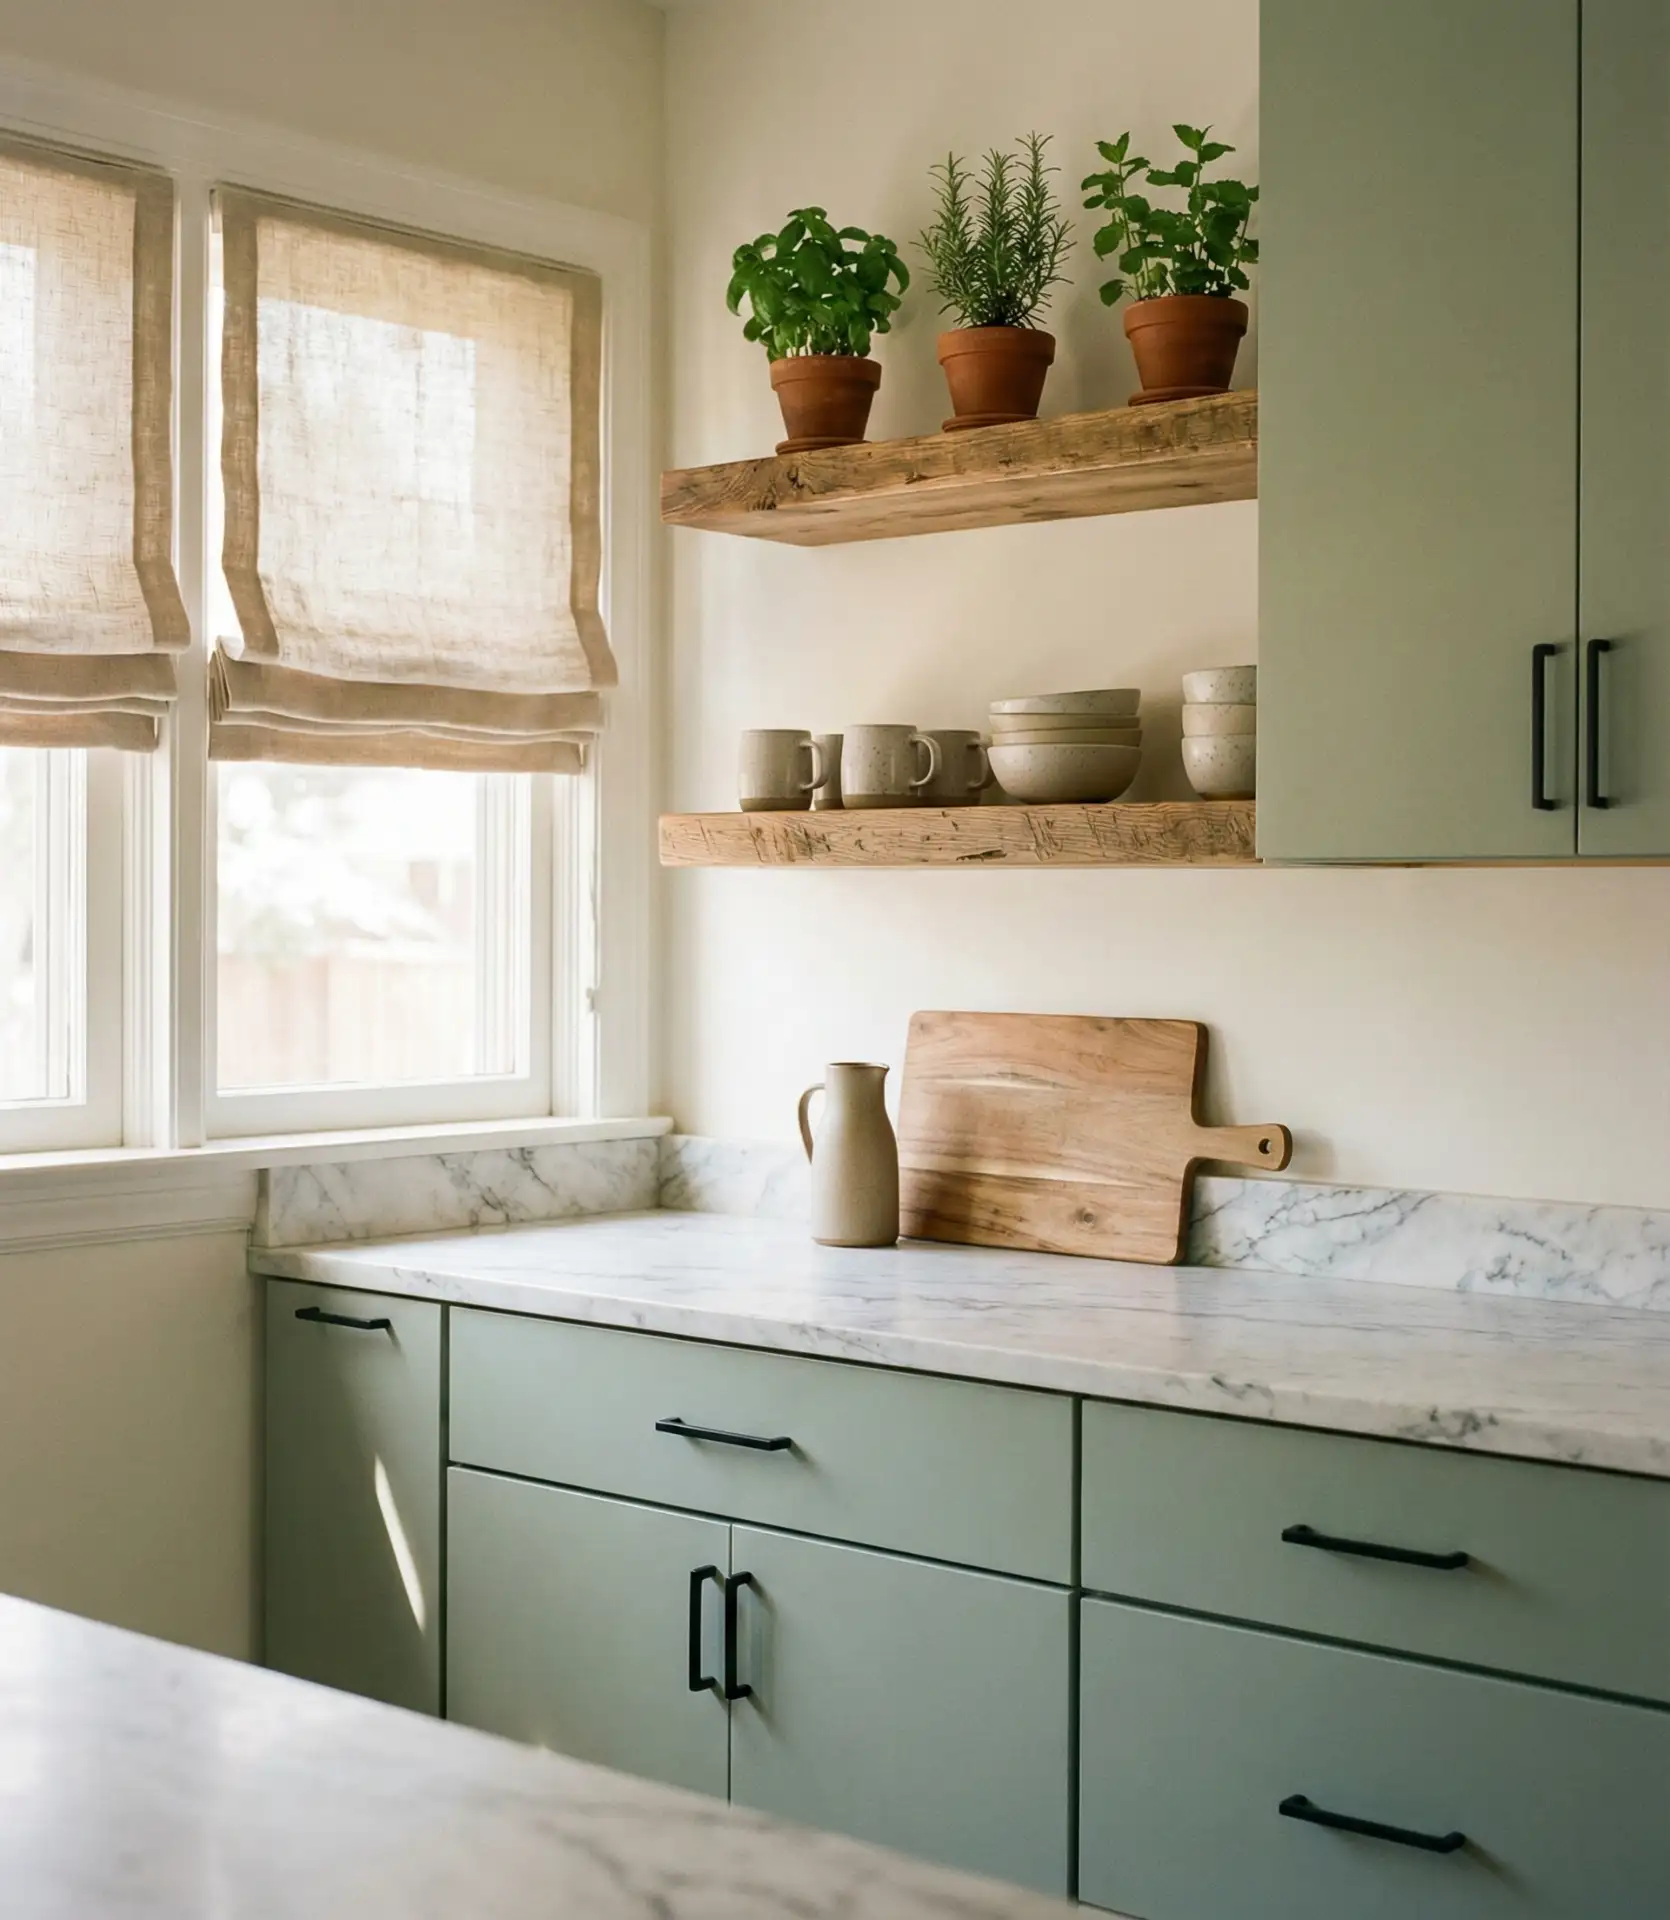
Where sage green cabinets work best is in kitchens that receive ample light but aren’t overly bright—too much direct sun can wash out the color, while too little makes it look muddy. To enhance the organic vibe, incorporate natural textures in your backsplash, flooring, and decor: think handmade tile, reclaimed wood, or stone. Opt for warmer neutrals such as cream, tan, or soft greige to enhance the vibrancy of the sage color. One common mistake is choosing a sage that’s too yellow, which can feel dated—look for versions with gray or blue undertones for a more contemporary edge.
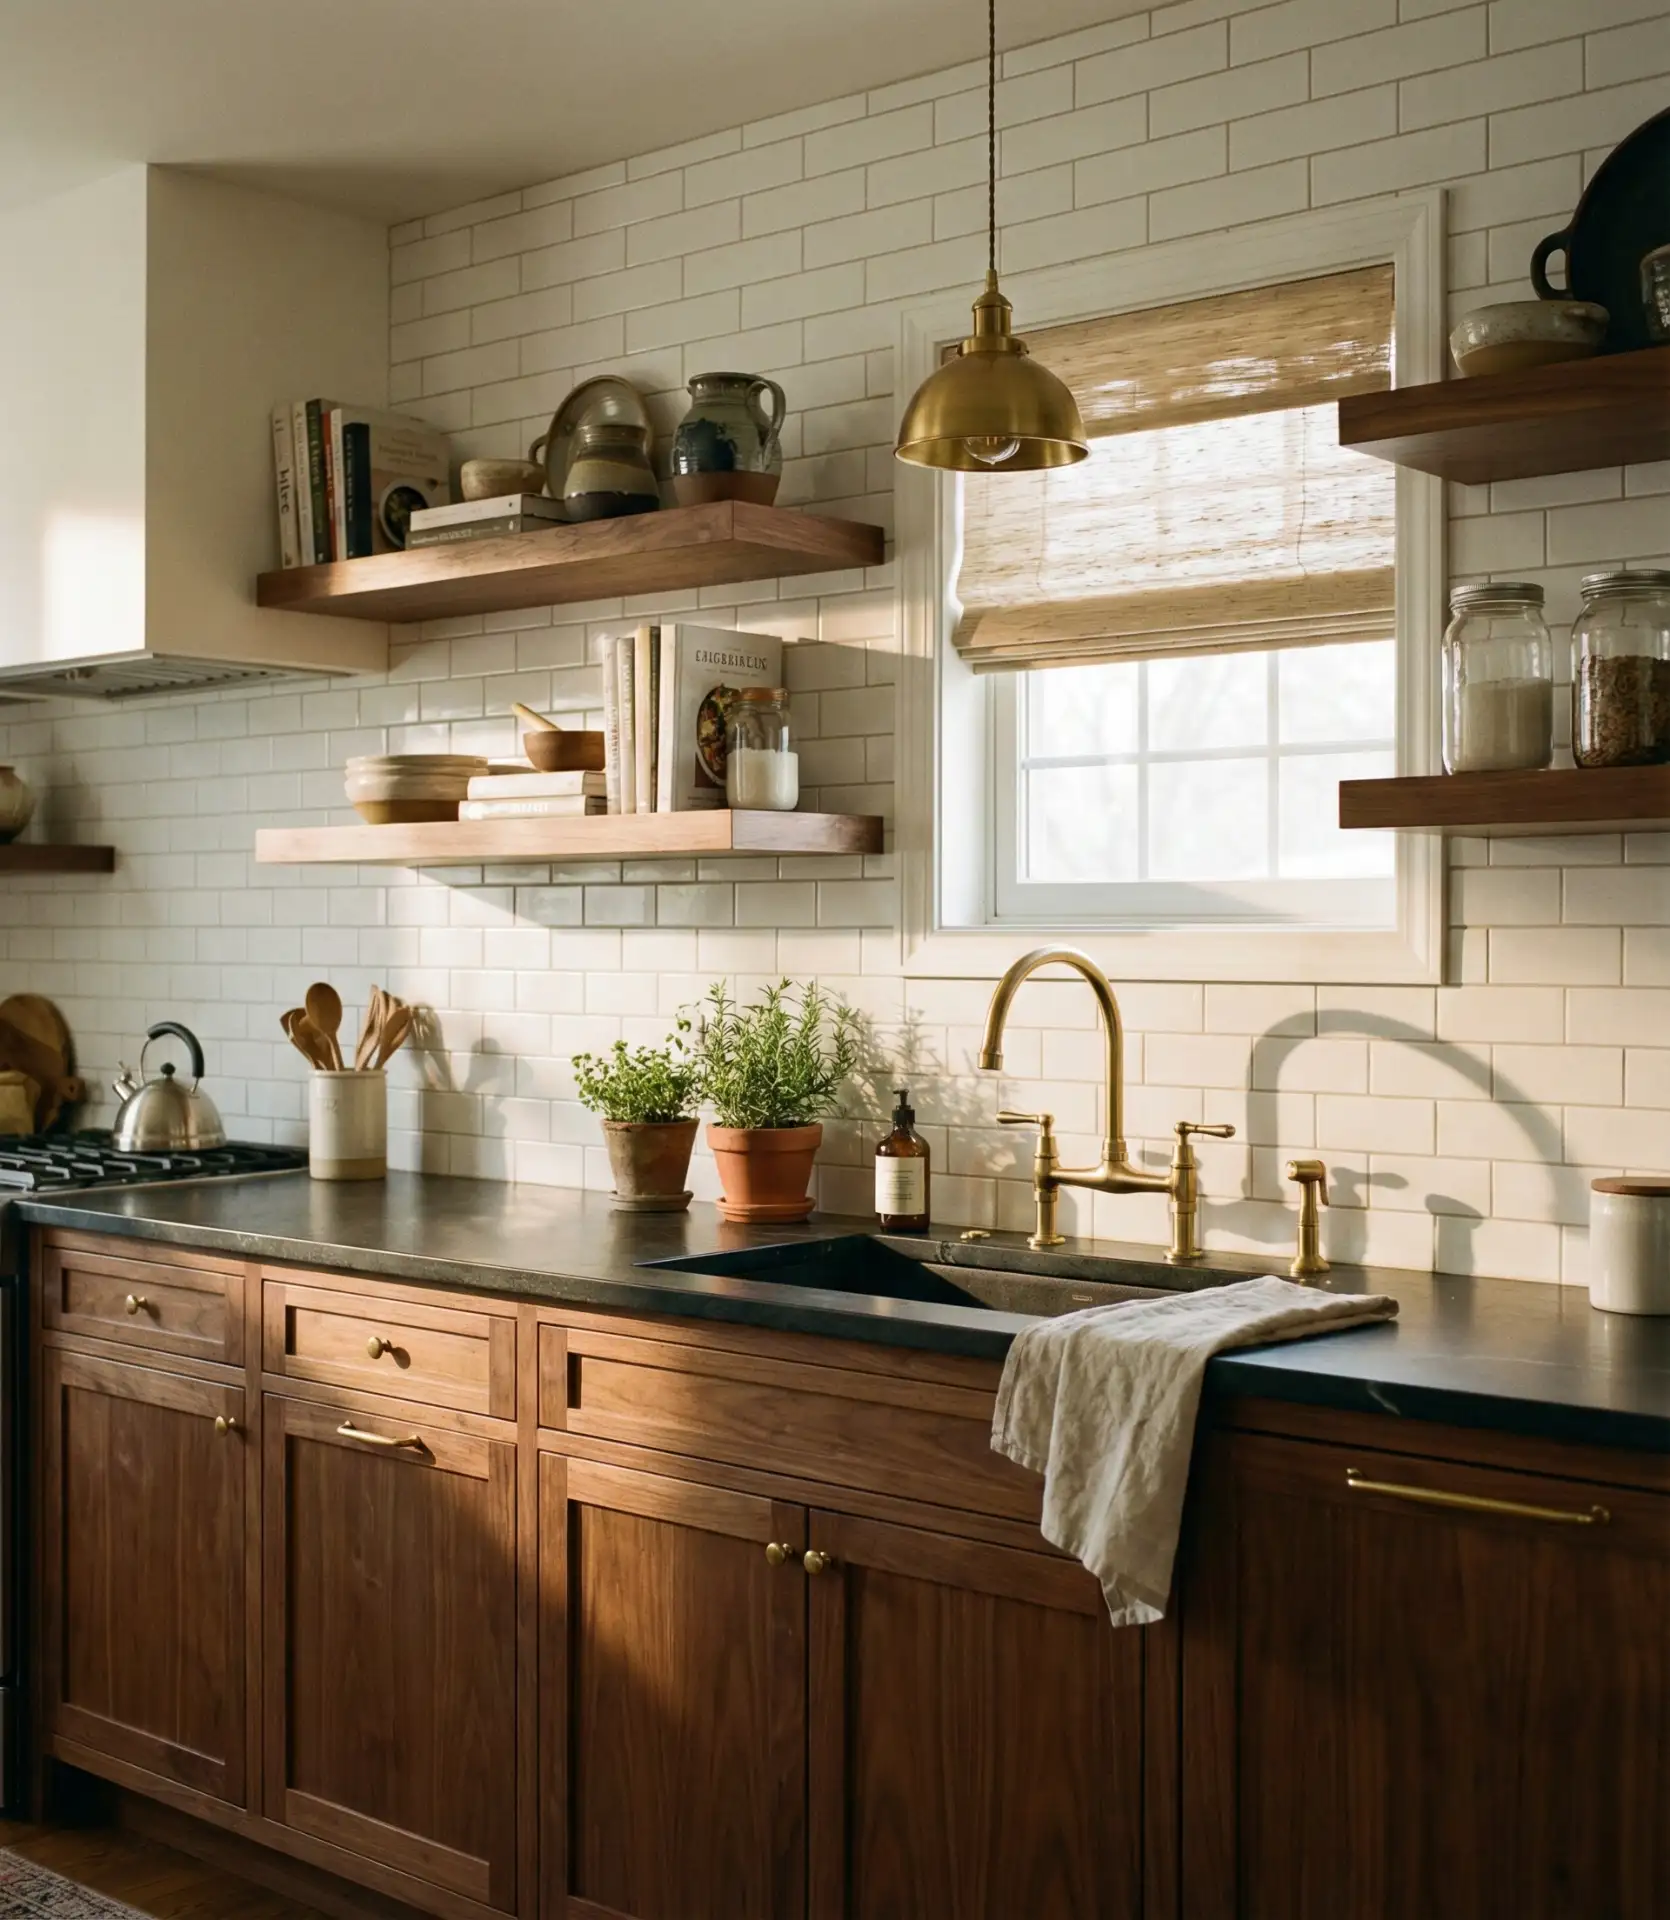
17. Under-Cabinet Lighting with Floating Shelves
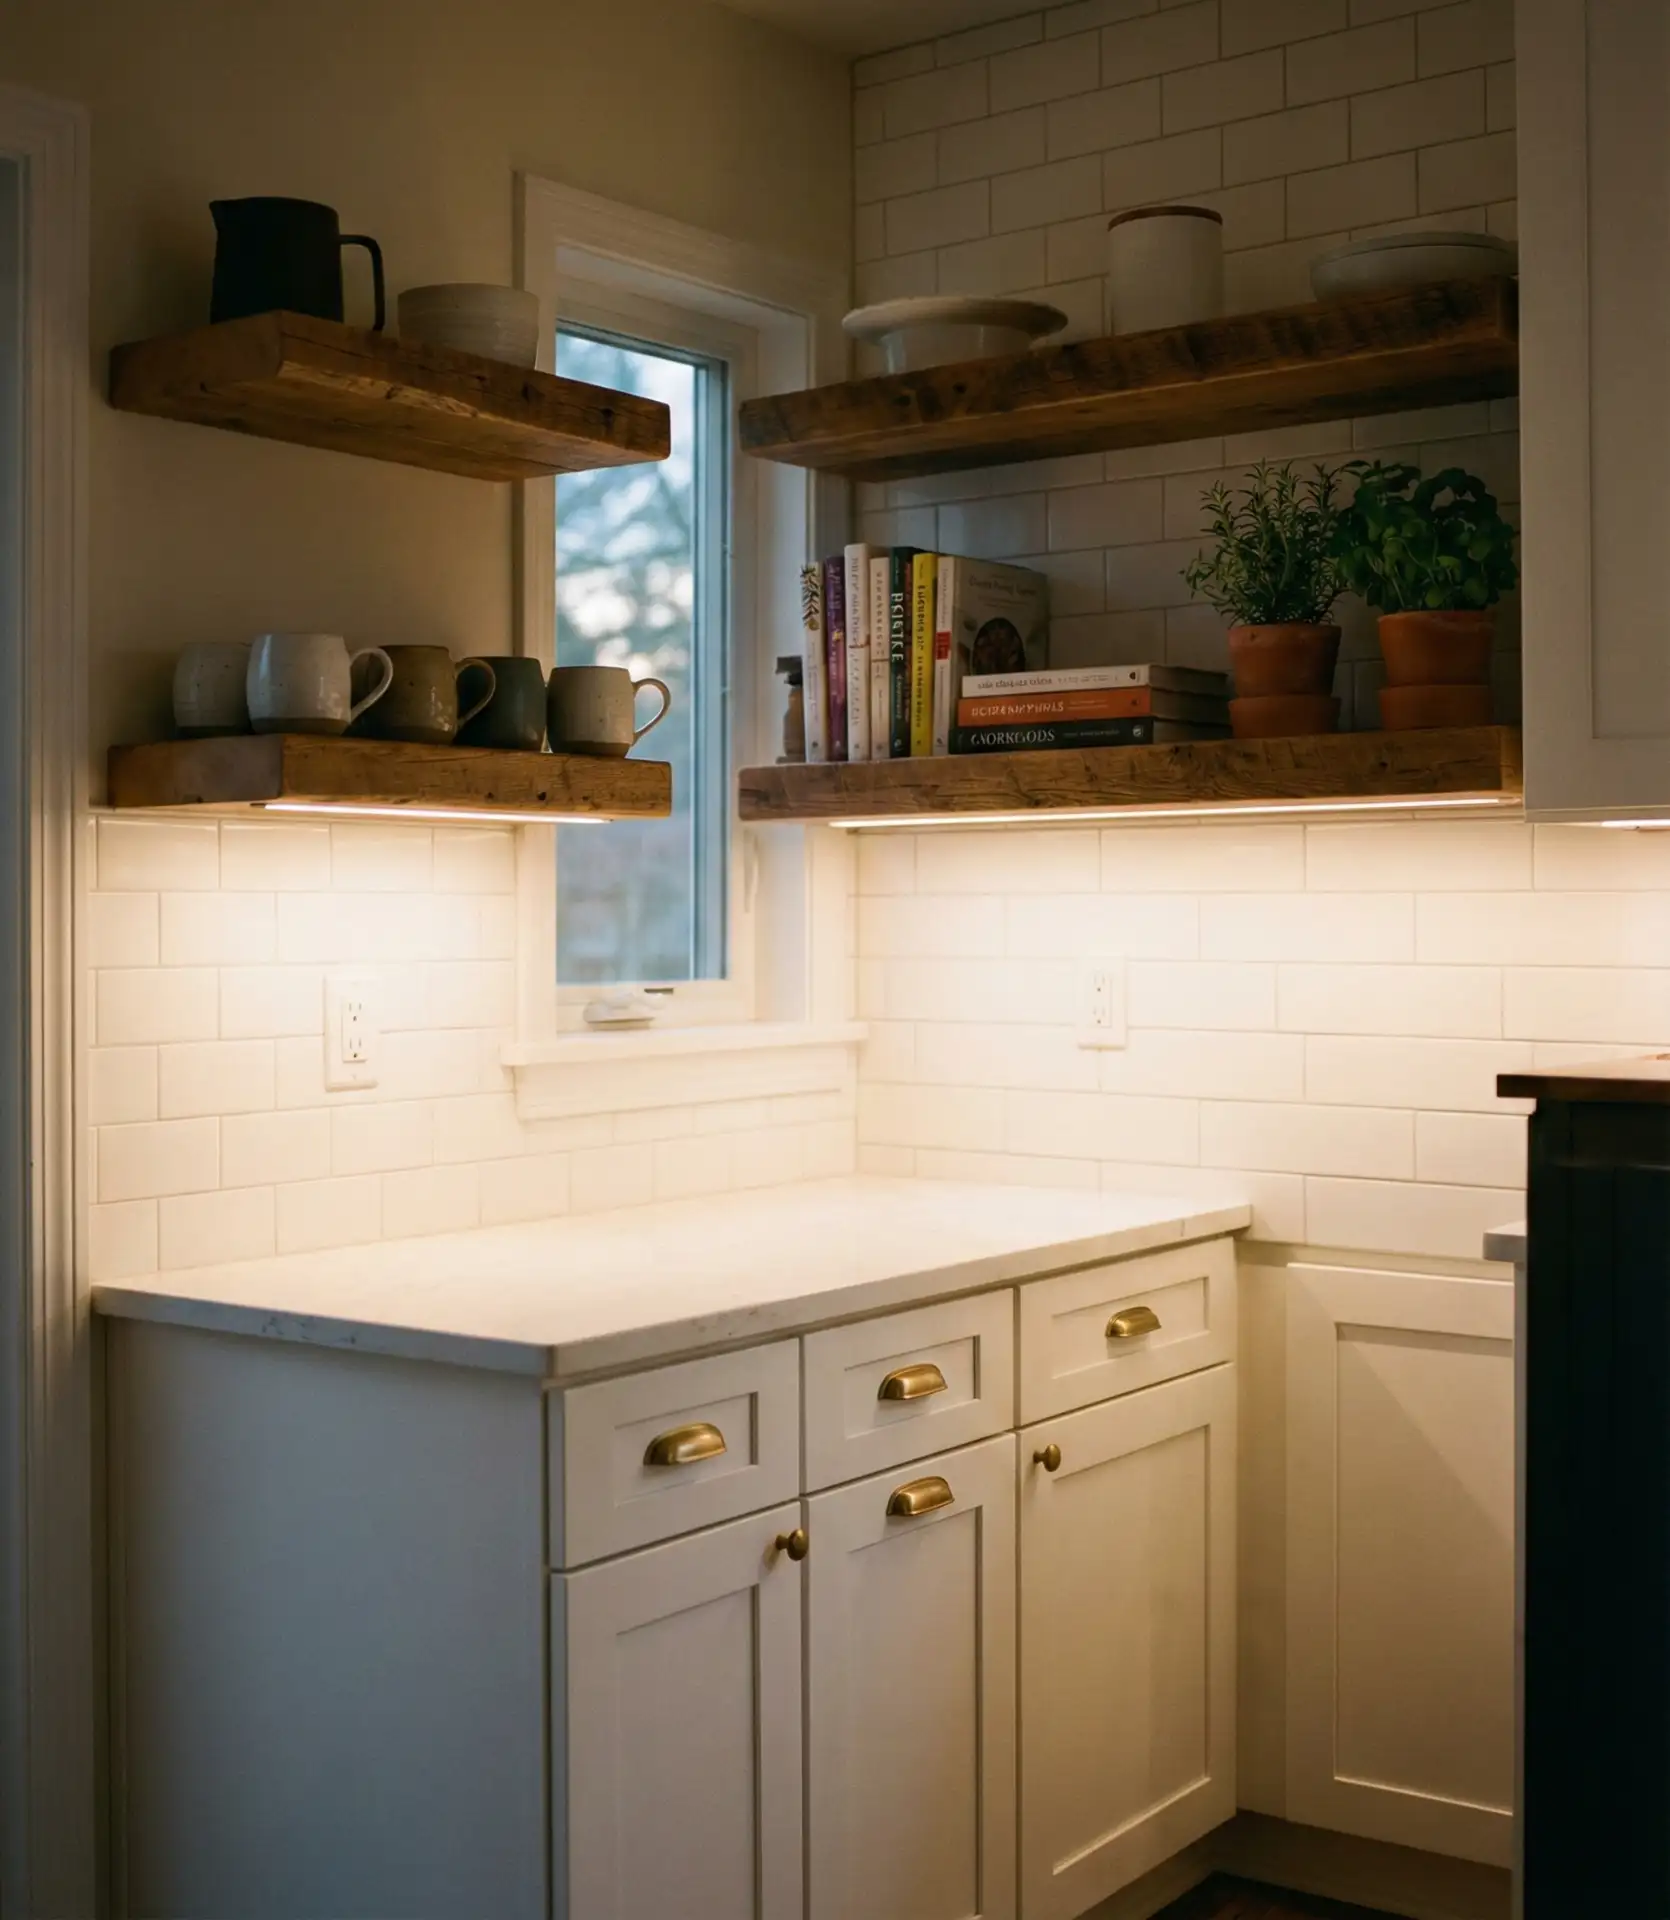
Installing LED strips under floating shelves or base cabinets transforms your kitchen’s functionality and ambiance, providing task lighting exactly where you need it for food prep while also creating a warm, layered glow in the evenings. This upgrade is especially valuable in kitchens where overhead lighting alone leaves counters in shadow, making chopping, measuring, and reading recipes more difficult than necessary. Modern LED strips are thin, energy-efficient, and often dimmable, letting you adjust the brightness to suit the time of day or mood. When combined with open upper shelves, under-cabinet lighting also highlights your displayed items, turning everyday dishware into a softly illuminated focal point.
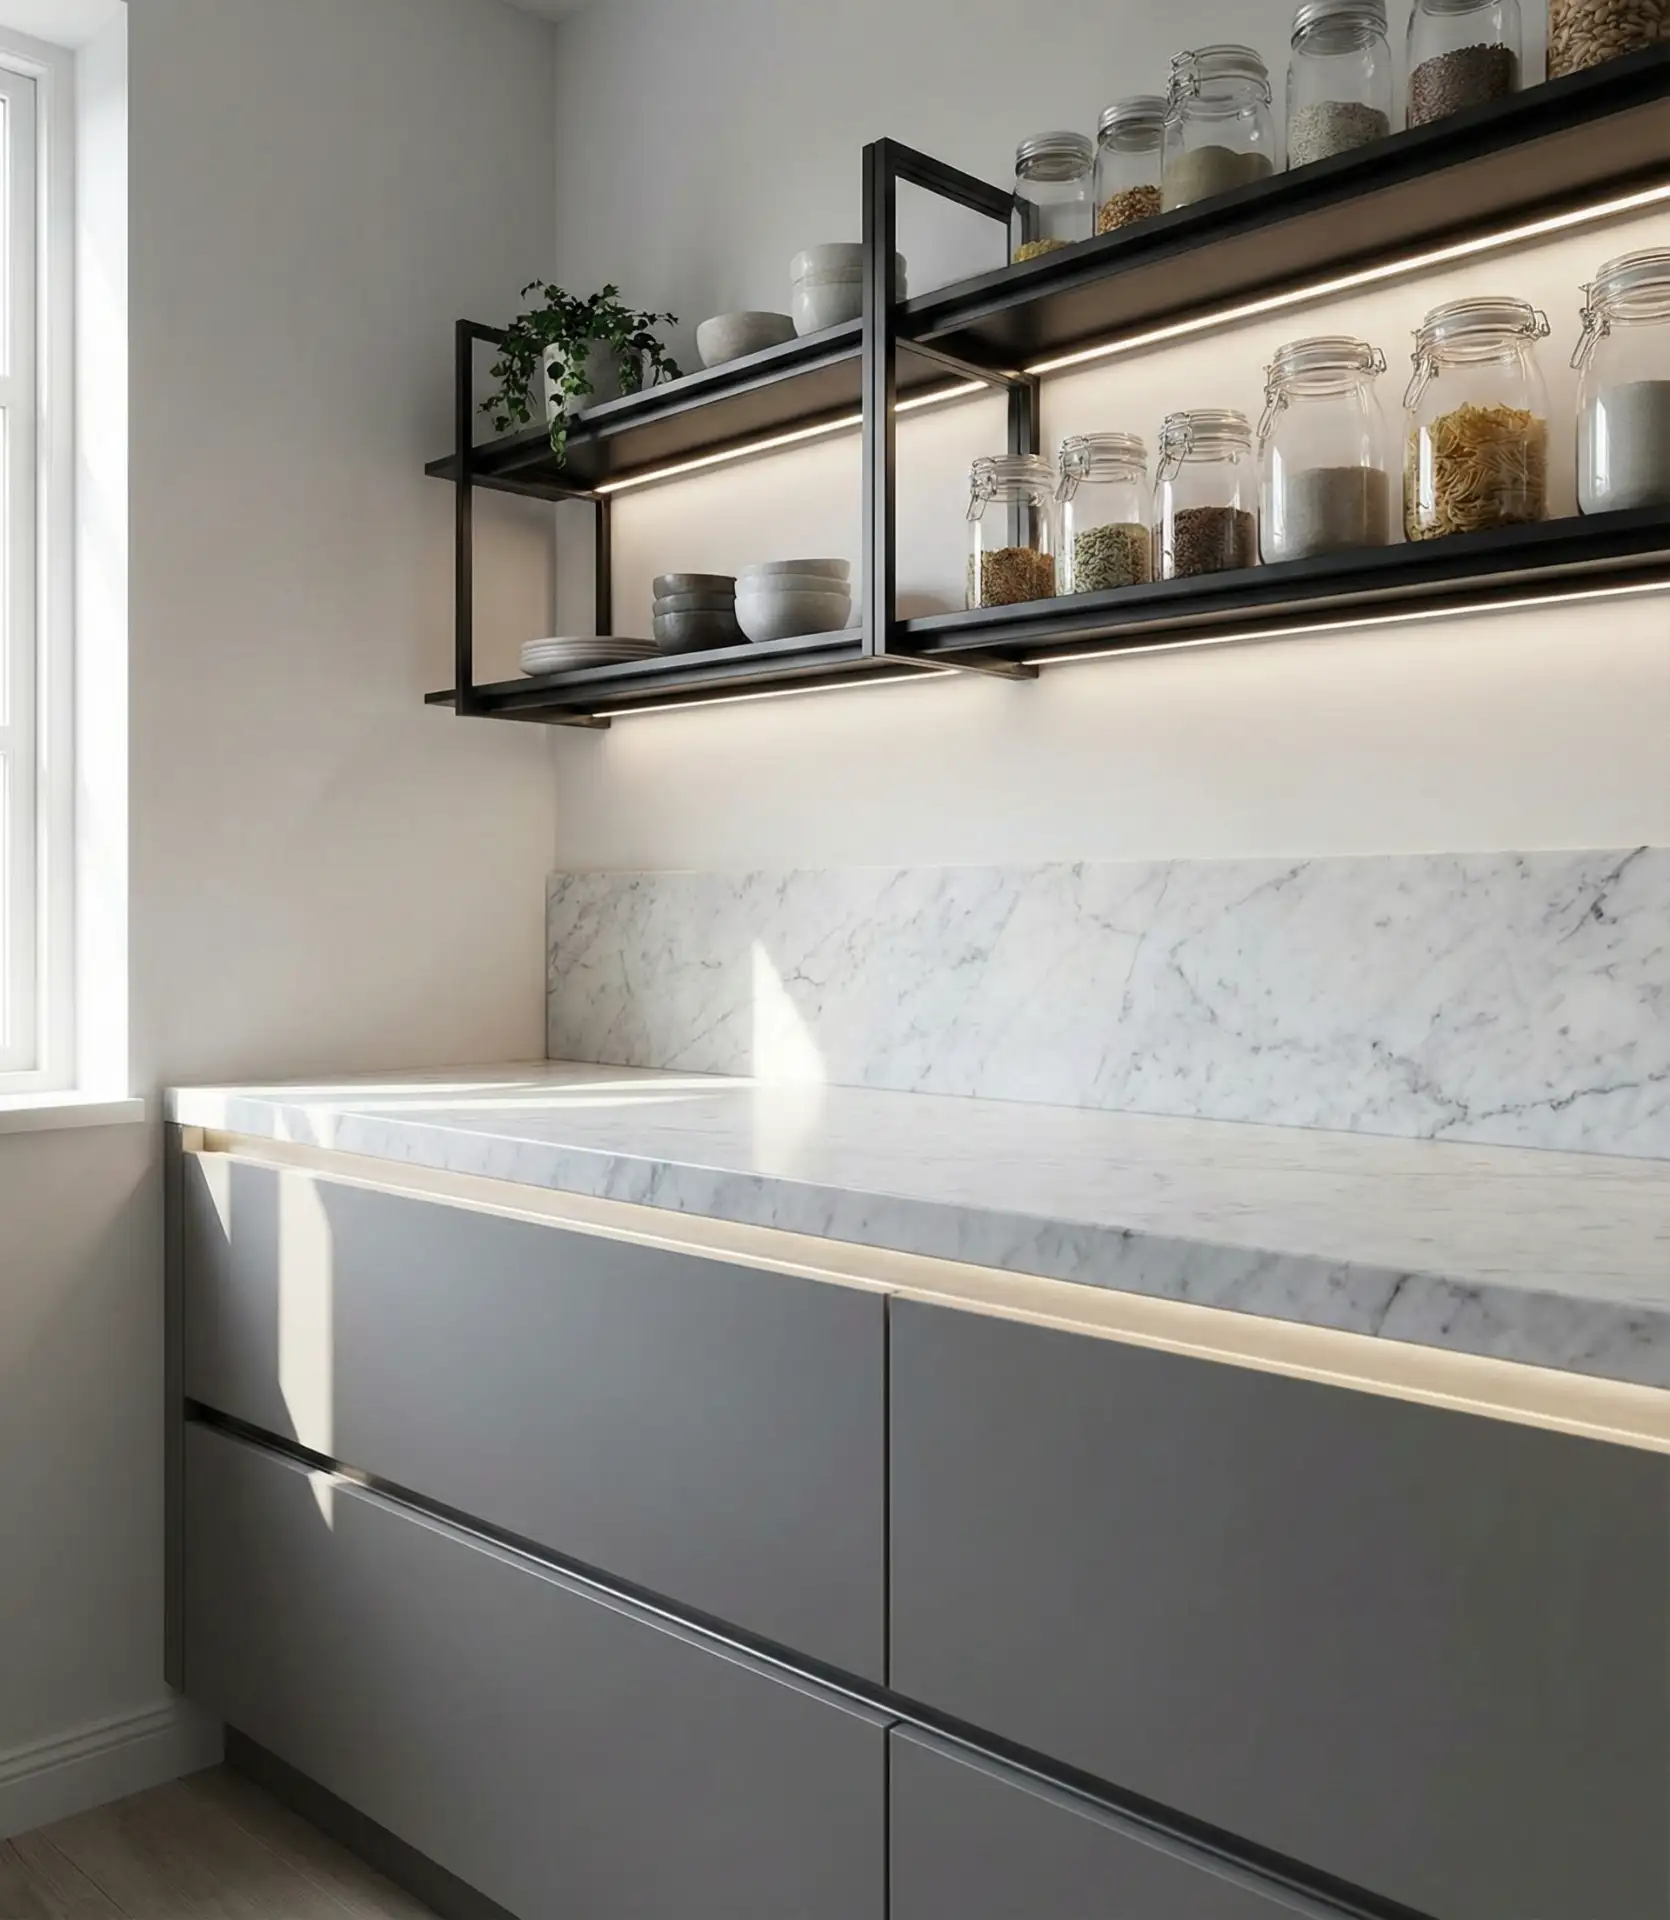
A design professional once mentioned that under-cabinet lighting is one of the most impactful yet underutilized upgrades in American kitchens—it’s relatively inexpensive, straightforward to install, and delivers immediate visual and functional benefits. Hardwired systems offer the cleanest look but require electrical work, while plug-in options are DIY-friendly and work well if you have an outlet nearby. When choosing LED color temperature, aim for 2700K to 3000K for a warm, inviting glow that complements most kitchen palettes; cooler temperatures can feel clinical. And if you’re using open shelving, consider mounting the strips toward the back edge of the shelf to minimize glare and create a more diffused, sophisticated effect.
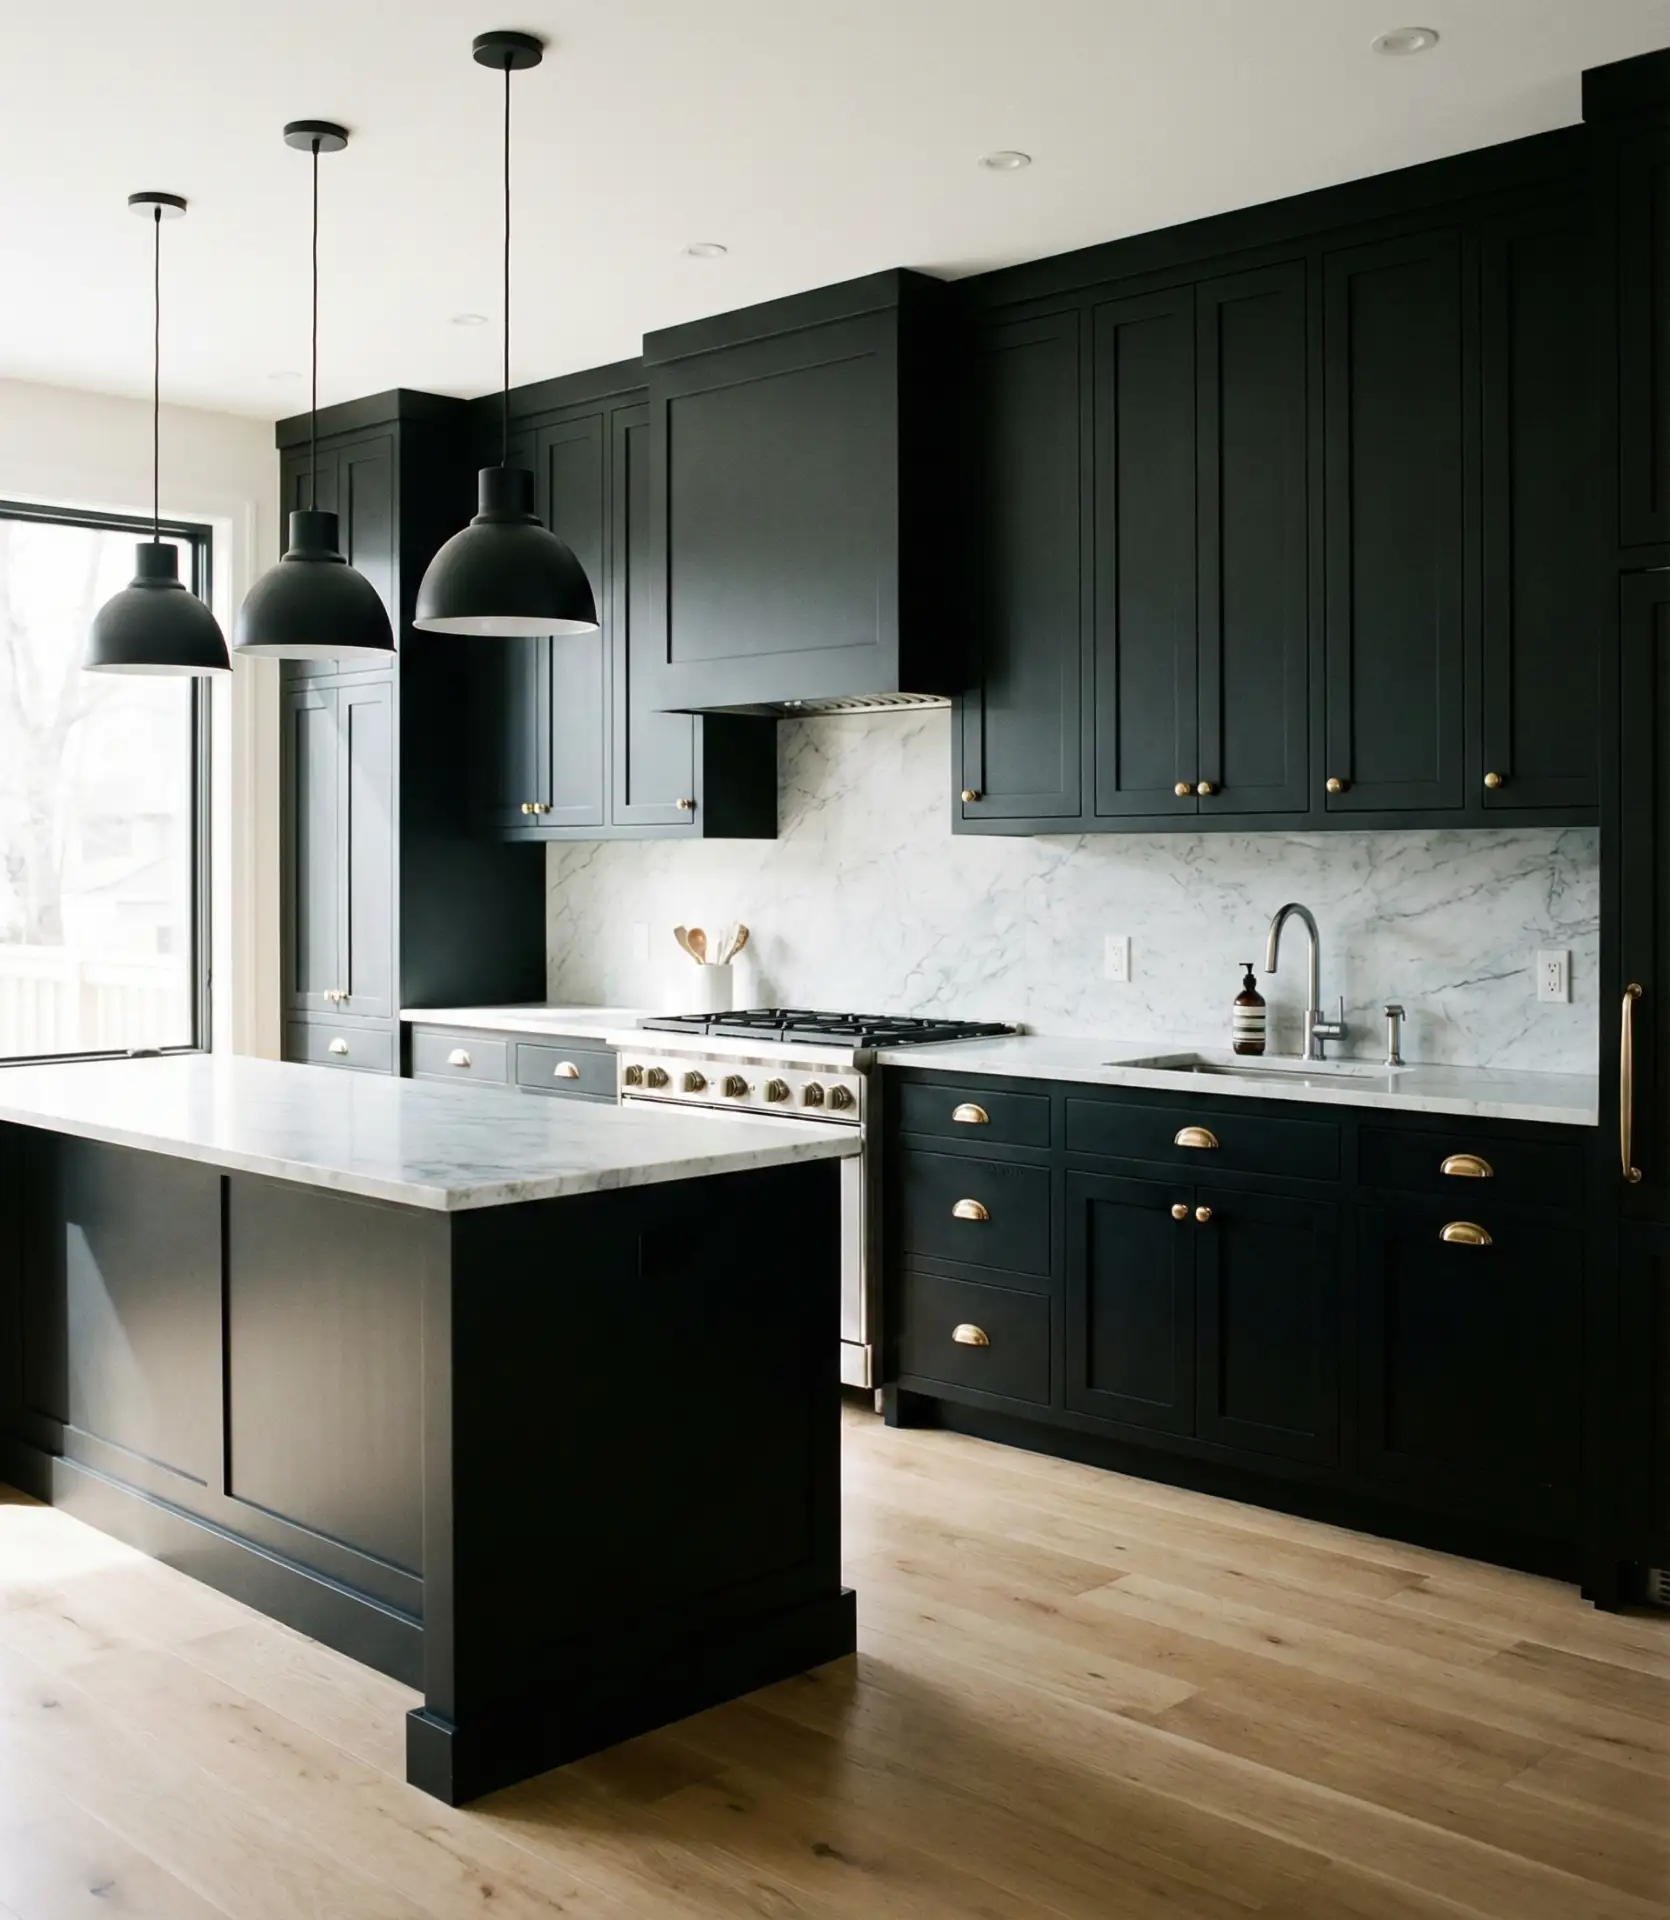
18. Charcoal Gray Cabinets with Marble Countertops

Deep charcoal or graphite cabinets offer a sophisticated alternative to pure black, providing drama without the stark contrast that can feel too intense in certain spaces. When paired with white or gray-veined marble countertops, the result is a timeless, high-end aesthetic that works equally well in traditional brownstones and sleek urban lofts. The gray tones absorb light and create a moody, intimate atmosphere, making the kitchen feel like a retreat rather than a purely functional workspace. This combination also gives you flexibility with metal finishes—gold, brass, chrome, or black all work beautifully against charcoal and marble, so you can easily adjust the vibe with hardware and fixtures.
This palette demands good lighting to prevent the kitchen from feeling cave-like, so budget for layered illumination—pendants over the island, under-cabinet strips, and recessed cans in the ceiling all working together. In smaller kitchens, consider using charcoal only on lower cabinets and a lighter tone above to maintain a sense of airiness. Marble is porous and requires sealing every six to twelve months, and it will develop a patina over time—some homeowners love this lived-in quality, while others prefer quartz alternatives that mimic marble’s look without the maintenance. Either way, the charcoal-and-marble combination delivers a level of visual sophistication that feels both current and enduring.
19. Custom Cabinetry for Outdoor Kitchens
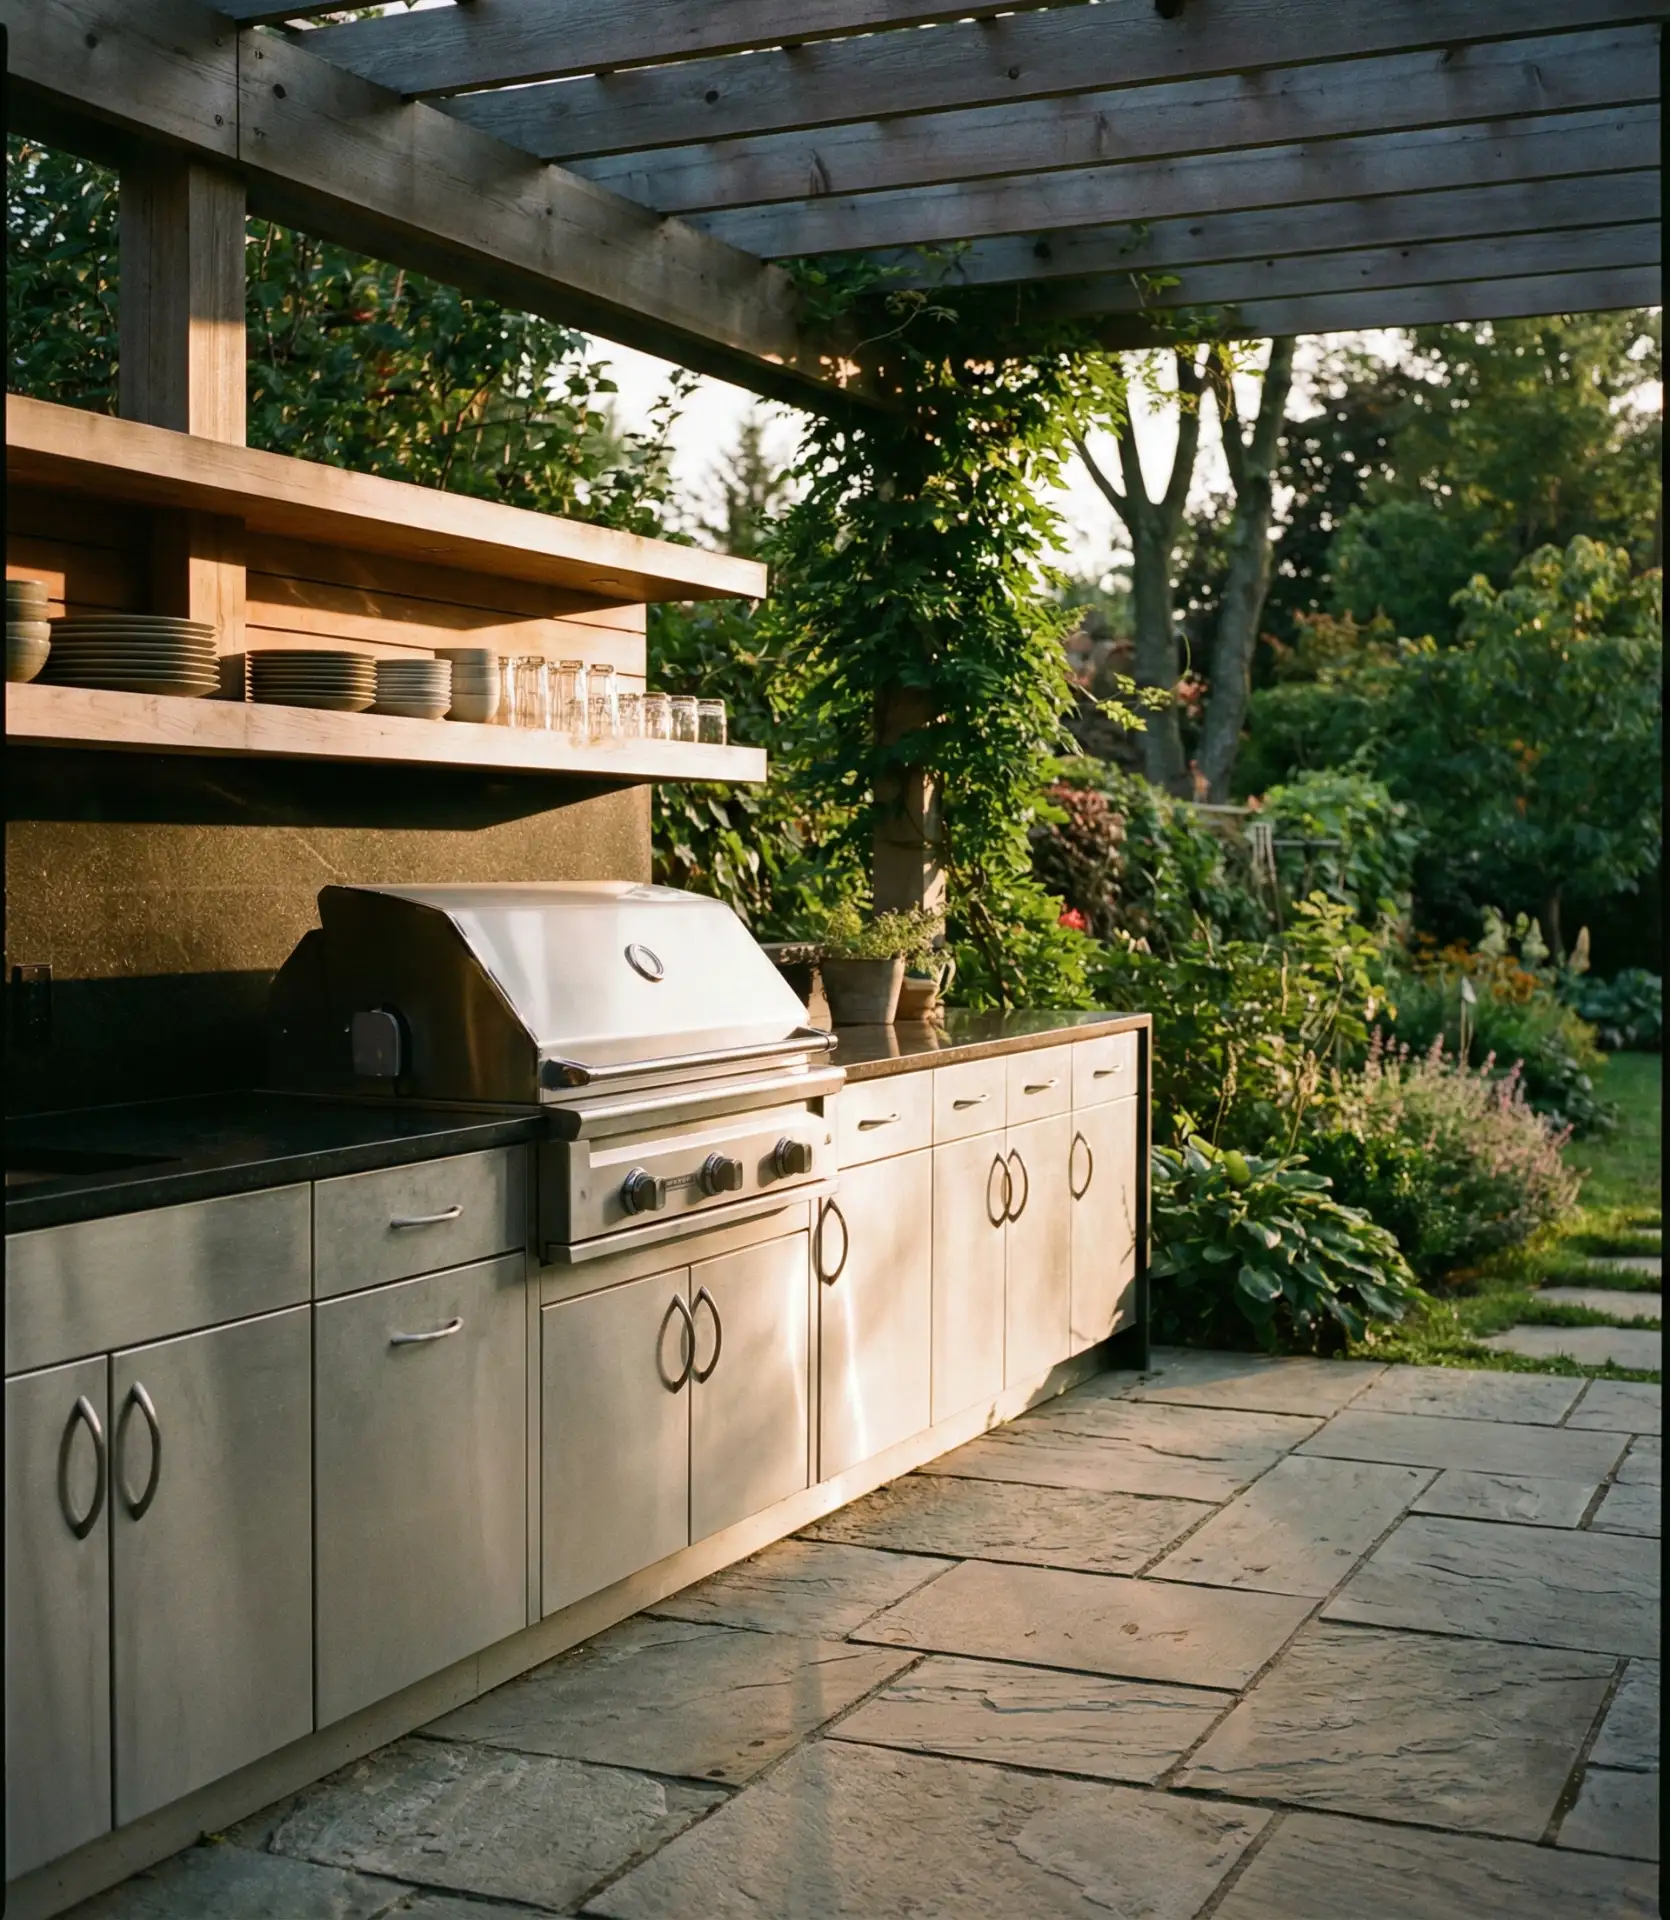
As outdoor living spaces become extensions of the home, weather-resistant cabinetry designed specifically for backyard kitchens has evolved from basic storage to fully realized design statements. Marine-grade polymers, stainless steel, and powder-coated aluminum all withstand rain, sun, and temperature swings without warping, rusting, or fading, making them ideal for climates from humid Florida to arid Arizona. These cabinets often incorporate features like drainage holes, ventilated backs, and raised toe kicks to prevent water accumulation and promote airflow. The layout typically mirrors indoor kitchens—base cabinets flanking a grill or sink, overhead storage, or pergola-mounted shelves—but with materials chosen for durability and a more relaxed, open aesthetic.

Outdoor cabinetry pricing varies widely—modular units start around fifteen hundred dollars for a basic setup, while fully custom built-ins can run five to ten thousand or more depending on size and materials. If you live in an area with harsh winters, removable drawer inserts and weatherproof covers extend the life of your investment. Many Americans in Southern and Southwestern states use their outdoor kitchens year-round, so the durability and functionality justify the expense. A practical tip: choose cabinets with lockable doors if you’re storing grilling tools, spices, or barware outside, and consider adding a small prep sink to minimize trips indoors during gatherings.
20. Slim Upper Cabinets for Small Kitchens
In a small kitchen, standard-depth upper cabinets can loom over the counters and make the space feel cramped, but shallow uppers—typically nine or ten inches deep instead of the usual twelve—preserve visual breathing room while still providing valuable storage. These slimmer cabinets are perfect for dishes, glassware, spices, and canned goods, freeing up lower cabinets for heavier pots, pans, and small appliances. The reduced depth also makes it easier to see and reach items without digging, which can actually improve functionality. Paired with a narrow profile and lighter colors like white or pale gray, slim uppers help small spaces feel larger and less cluttered.
Common mistakes include pairing slim uppers with overly deep lowers, which can create an unbalanced look—if you’re going shallow on top, consider slightly shallower base cabinets as well, or at least ensure the countertop overhang is minimal. Slim uppers also work well in kitchens where you want to emphasize a beautiful backsplash, as the reduced depth exposes more of the tile or stone. If you’re retrofitting an existing kitchen, swapping standard uppers for shallow ones is less invasive than a full remodel and can be done in a weekend, making it a popular project for DIY-minded homeowners looking to refresh a cramped space without major construction.
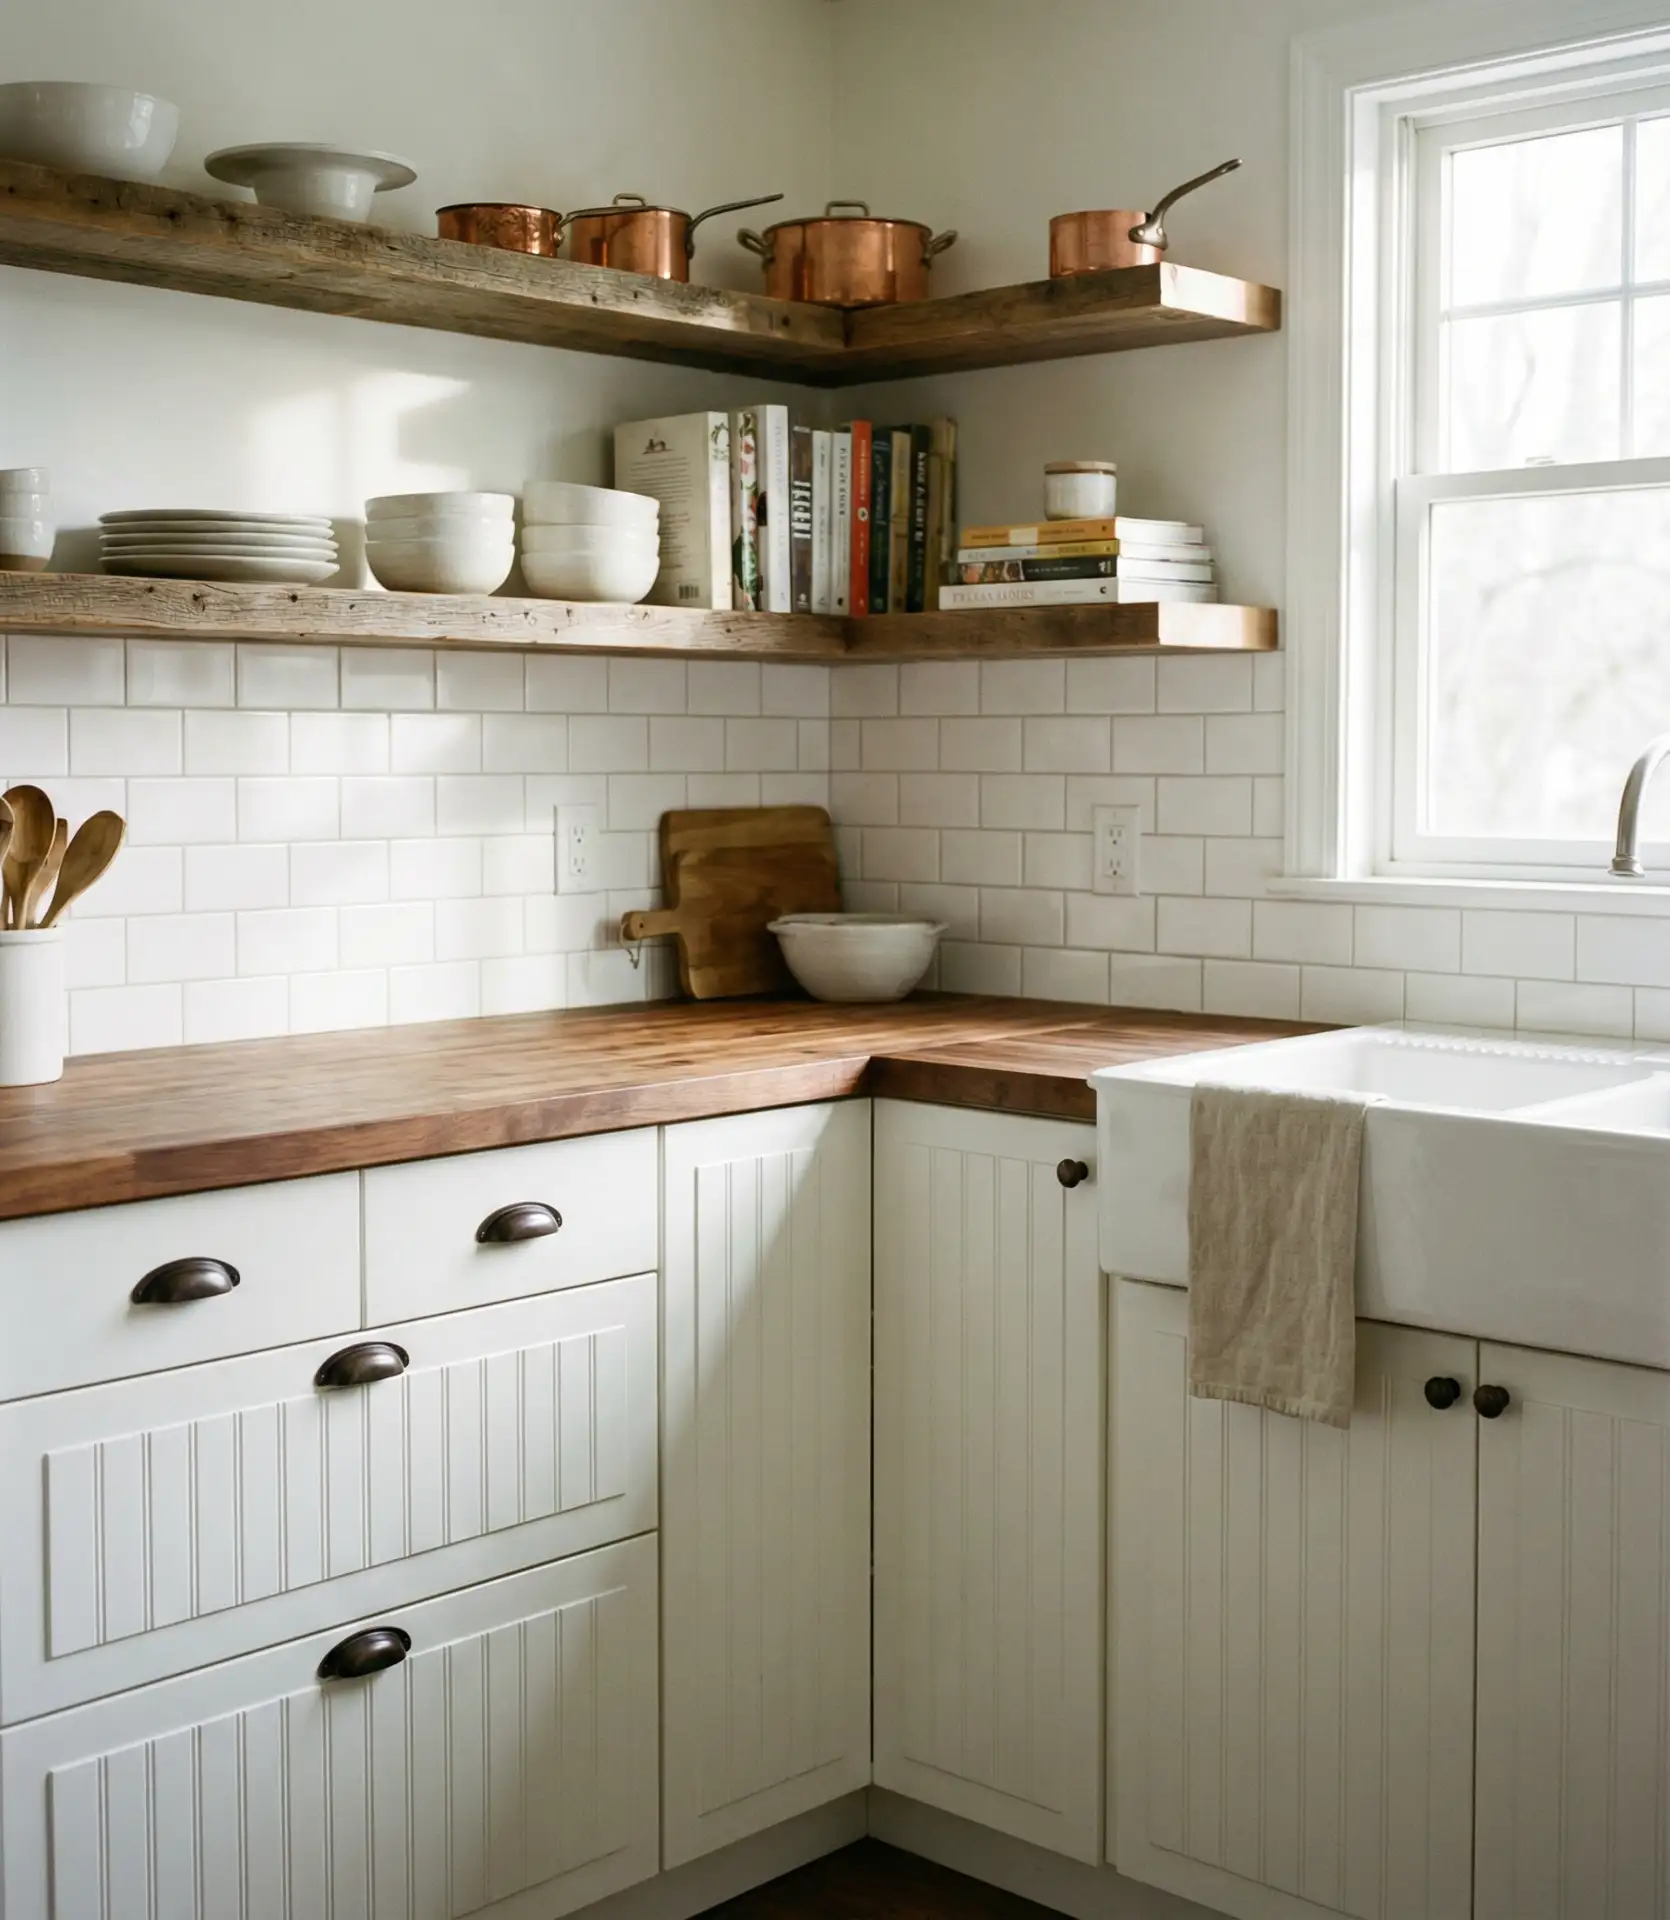
21. Mix of Open and Closed Cabinets
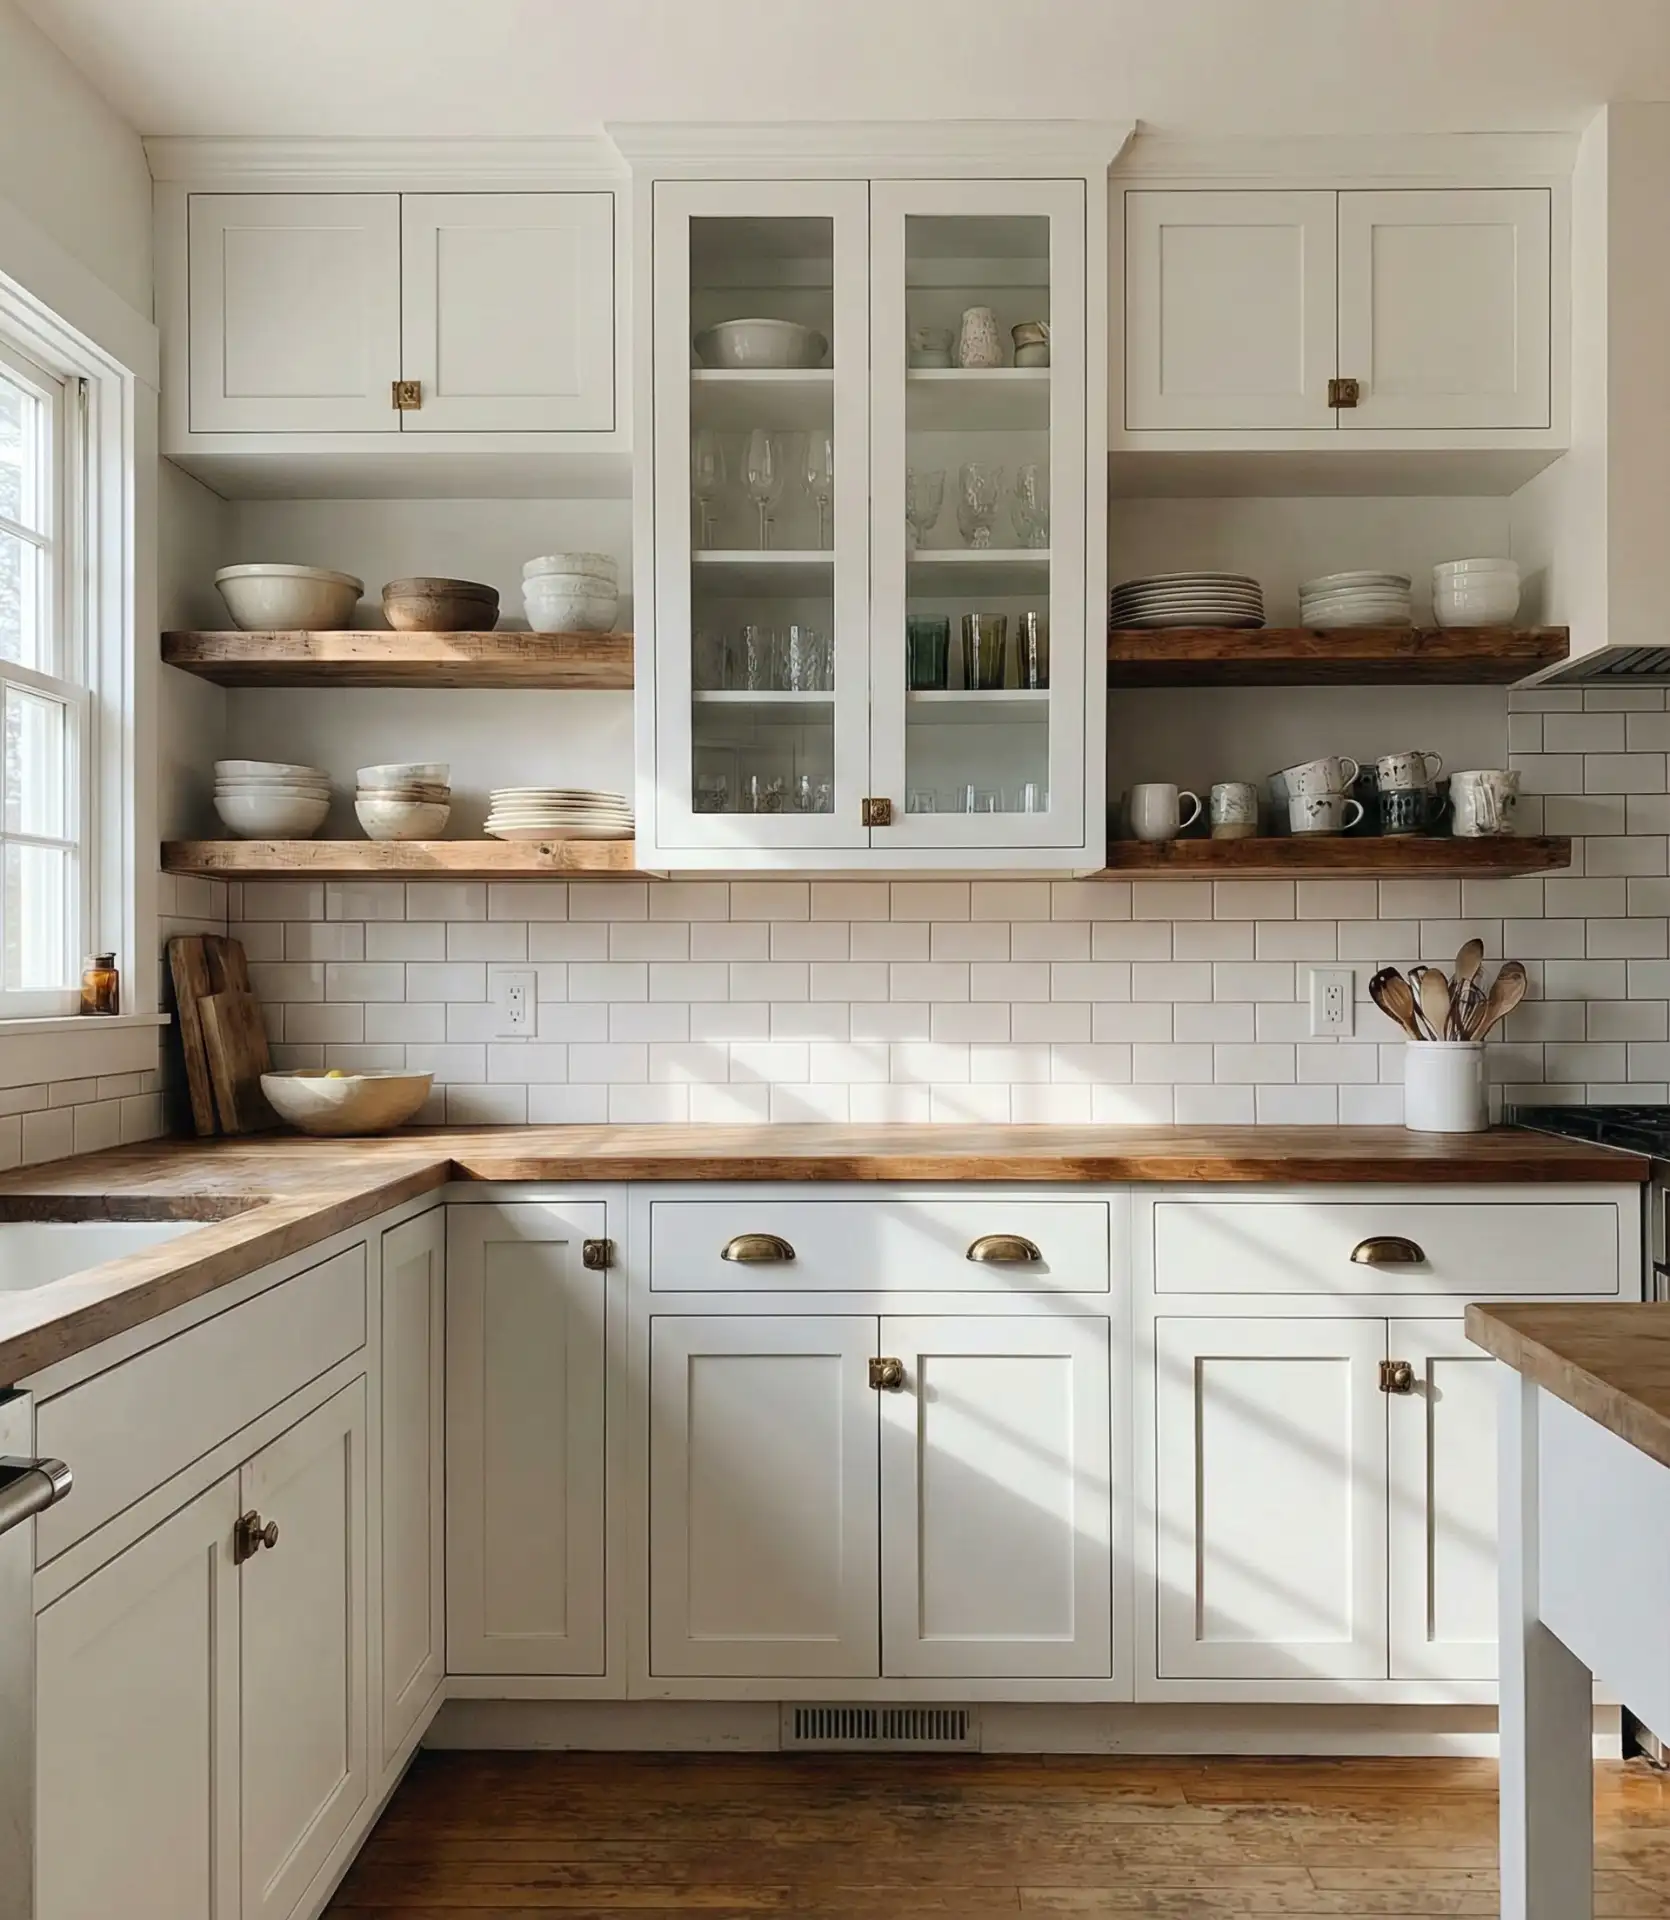
Blending closed cabinets with open shelving or glass-front sections creates a dynamic, layered look that feels more collected and personal than a wall of uniform doors. This approach lets you hide everyday clutter behind solid fronts while showcasing favorite dishes, cookbooks, or decorative objects on open shelves, giving the kitchen a lived-in quality that pure minimalism can’t replicate. The mix also adds visual rhythm—your eye moves from solid to transparent to open, which breaks up the monotony and makes the room feel more intriguing. It’s a strategy that works across styles, from farmhouse kitchens with floating wood shelves to sleek modern spaces with metal-and-glass hybrids.
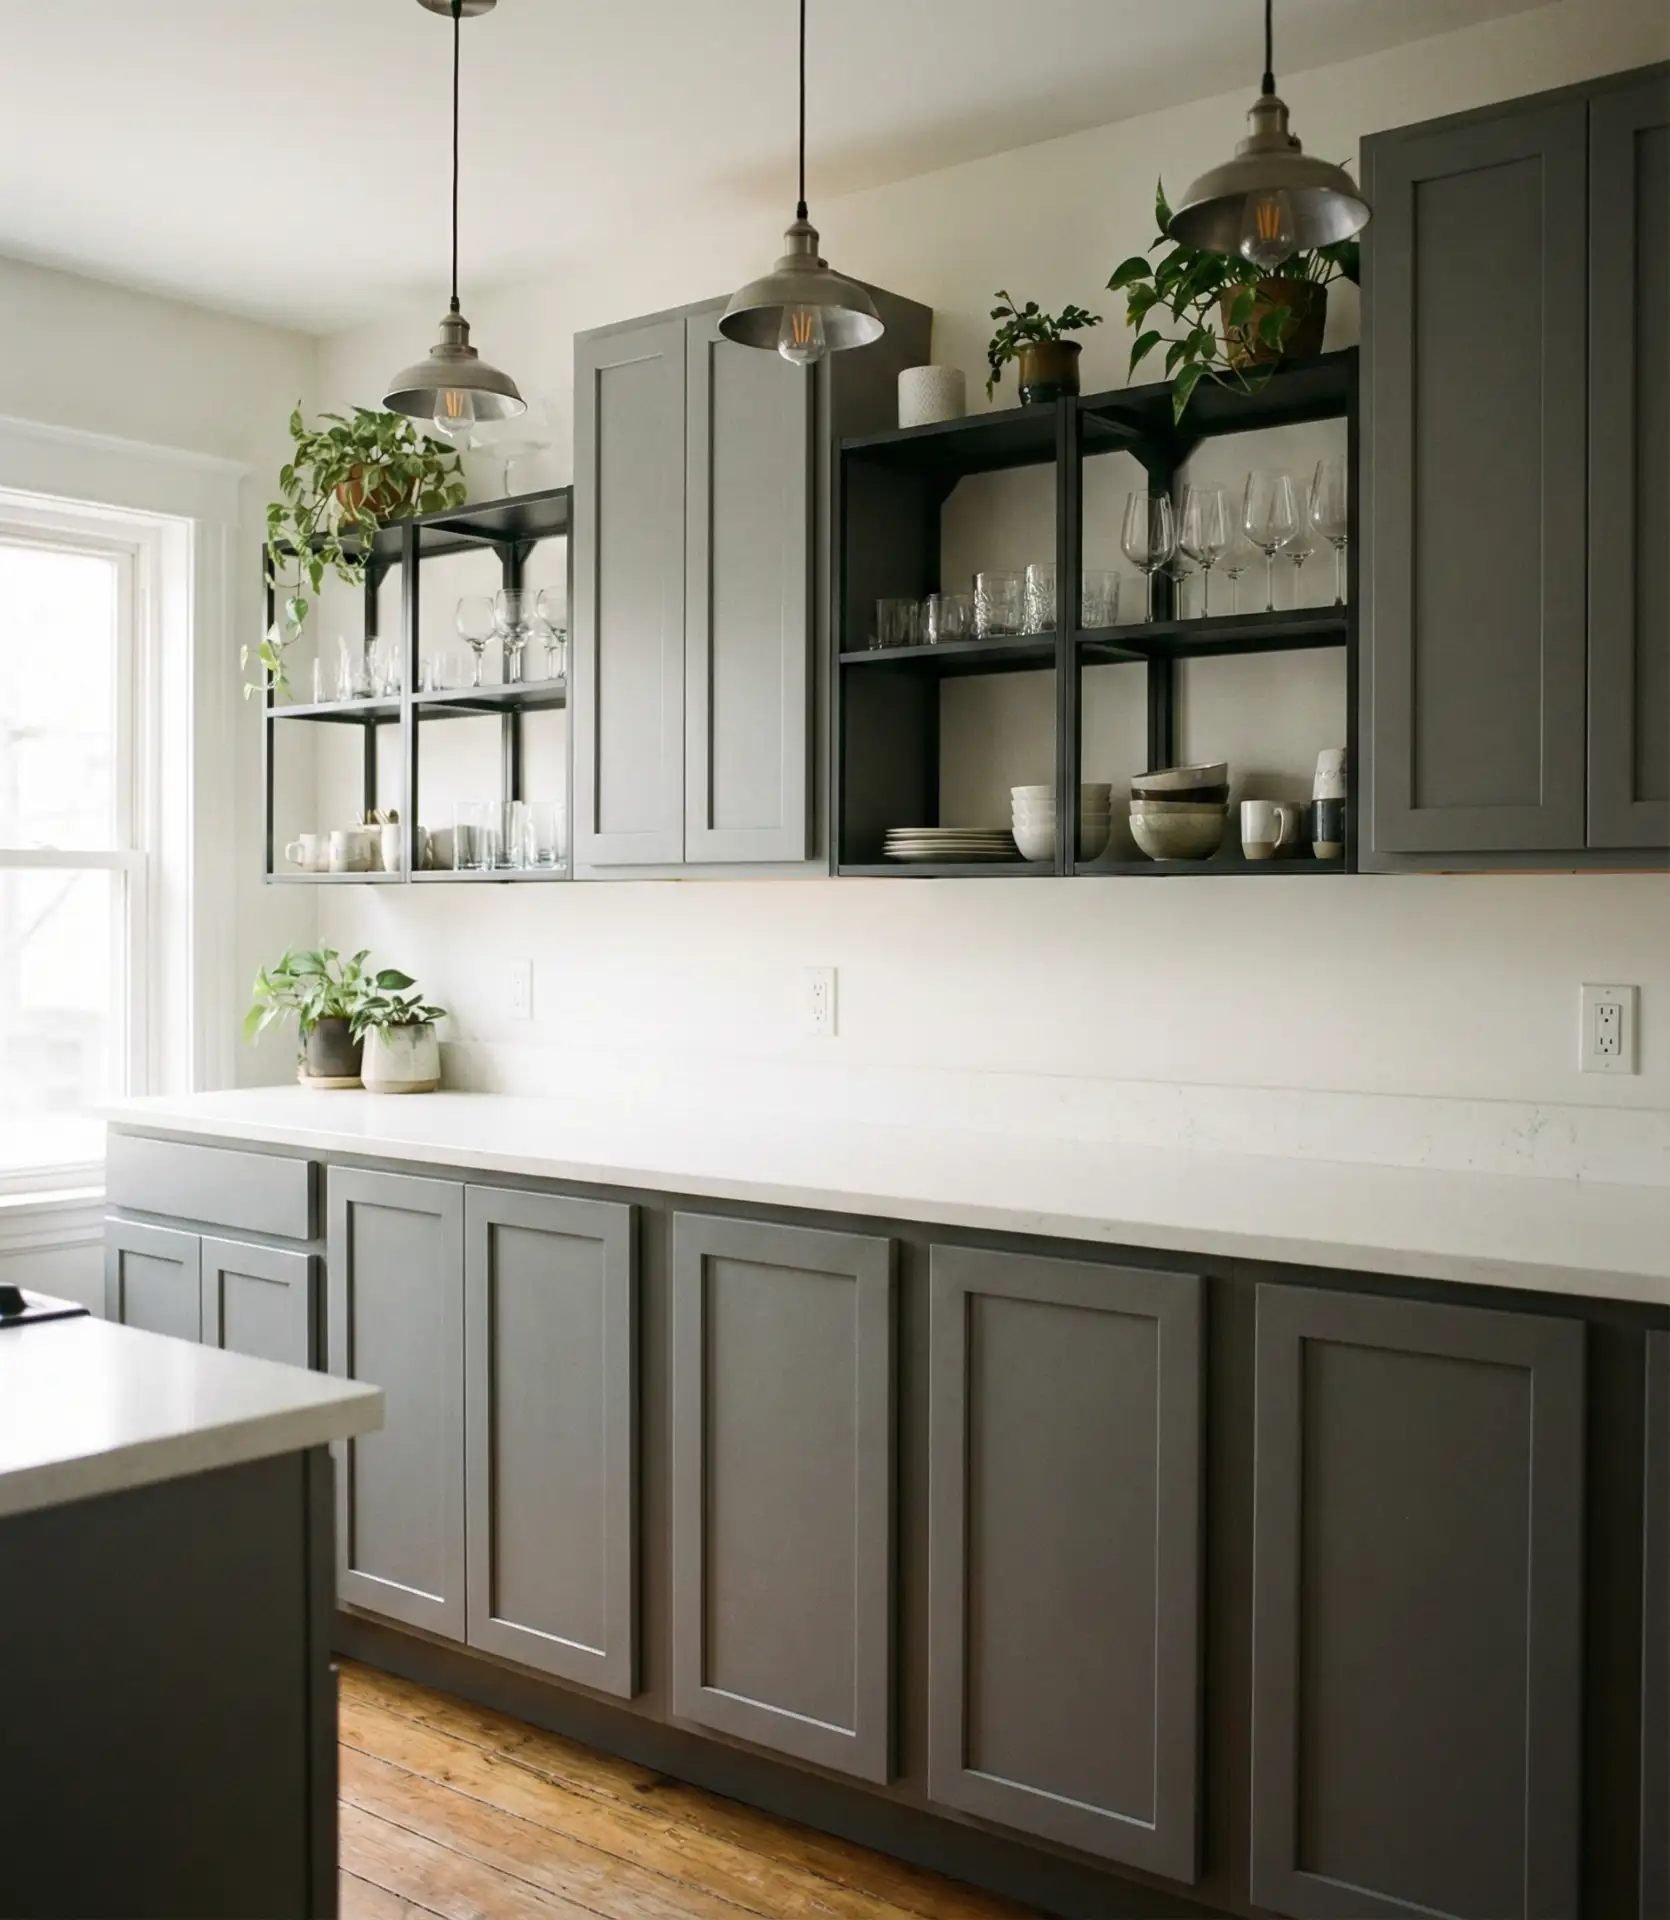
Real homeowner behavior shows that kitchens with this mixed approach tend to stay more organized because the open sections create accountability—you’re less likely to let dishes pile up when they’re on display. To make the mix feel intentional rather than random, establish a pattern: for example, flank the range with open shelves and use closed cabinets everywhere else, or alternate open and closed uppers across one wall. Keep the open sections curated and relatively sparse—three to five items per shelf—to avoid a cluttered look. And if you’re concerned about dust, place open shelves away from the stove or invest in a sturdy range hood to minimize airborne grease.
22. Decorating Above Cabinets with Greenery
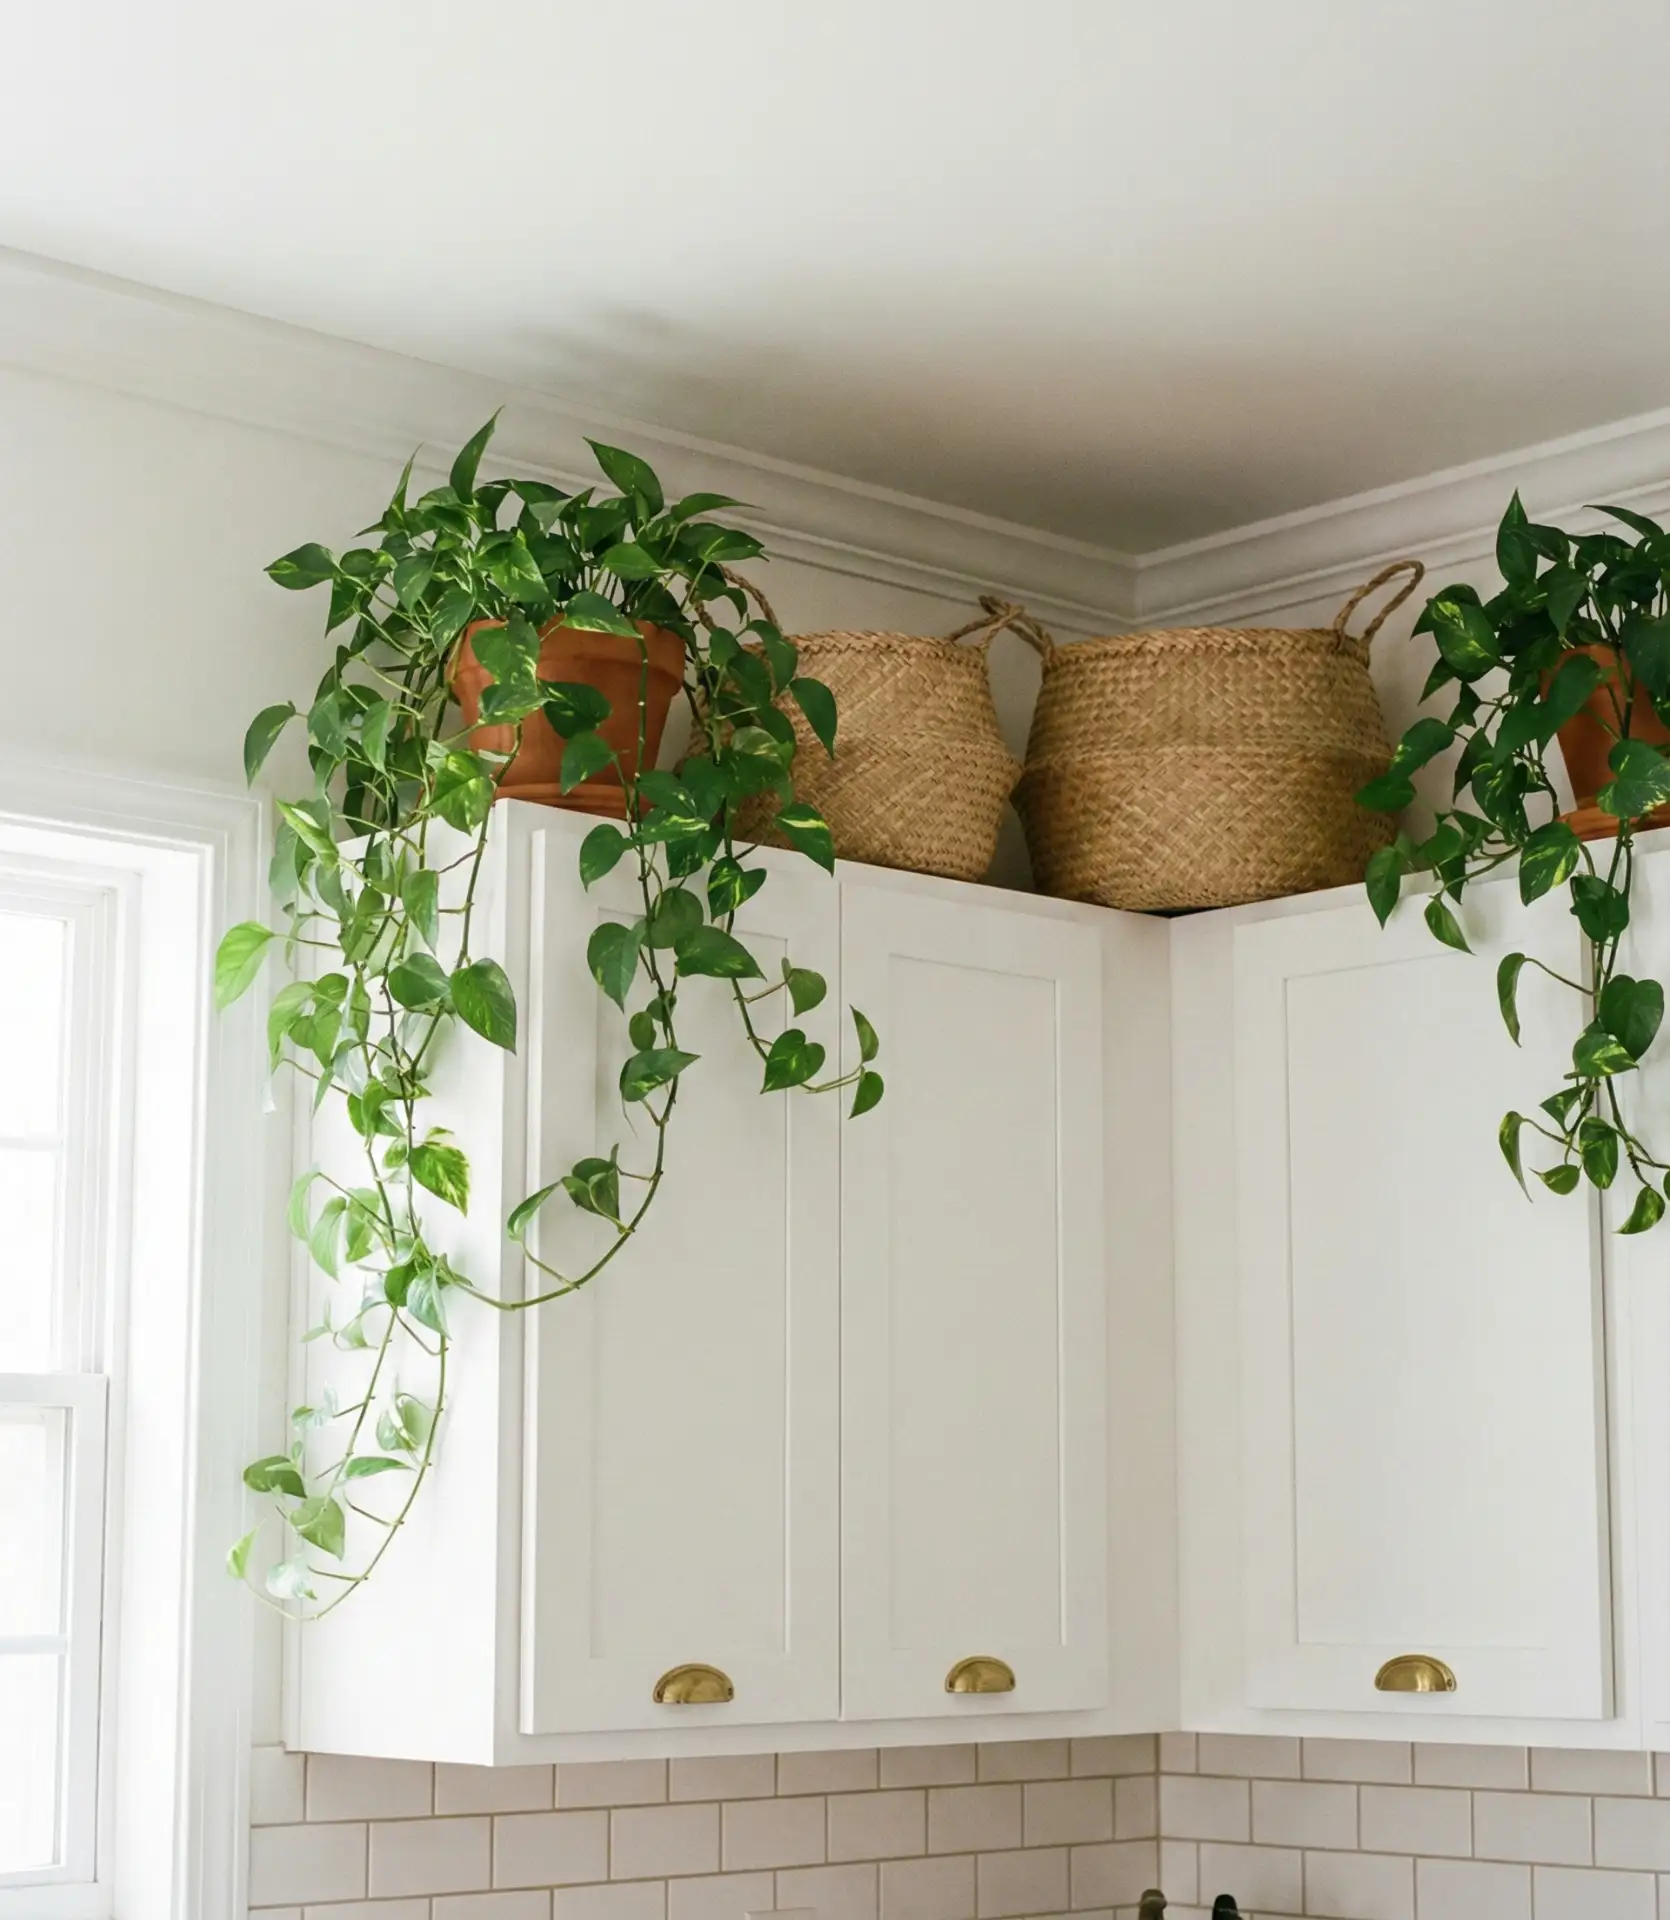
That awkward gap between the tops of your cabinets and the ceiling doesn’t have to collect dust or sit empty—decorating above with trailing plants, baskets, or sculptural objects transforms it into an intentional design feature. Faux or real greenery works especially well, softening the hard edges of cabinetry and bringing a touch of organic life into the kitchen without claiming precious counter space. Pothos, ivy, and eucalyptus garlands are popular choices for their cascading habit and low-light tolerance, though high-quality faux versions eliminate watering worries altogether. This approach works best when the ceiling is eight to ten feet high—too low and the decor feels crowded, too high and it becomes invisible from typical sightlines.
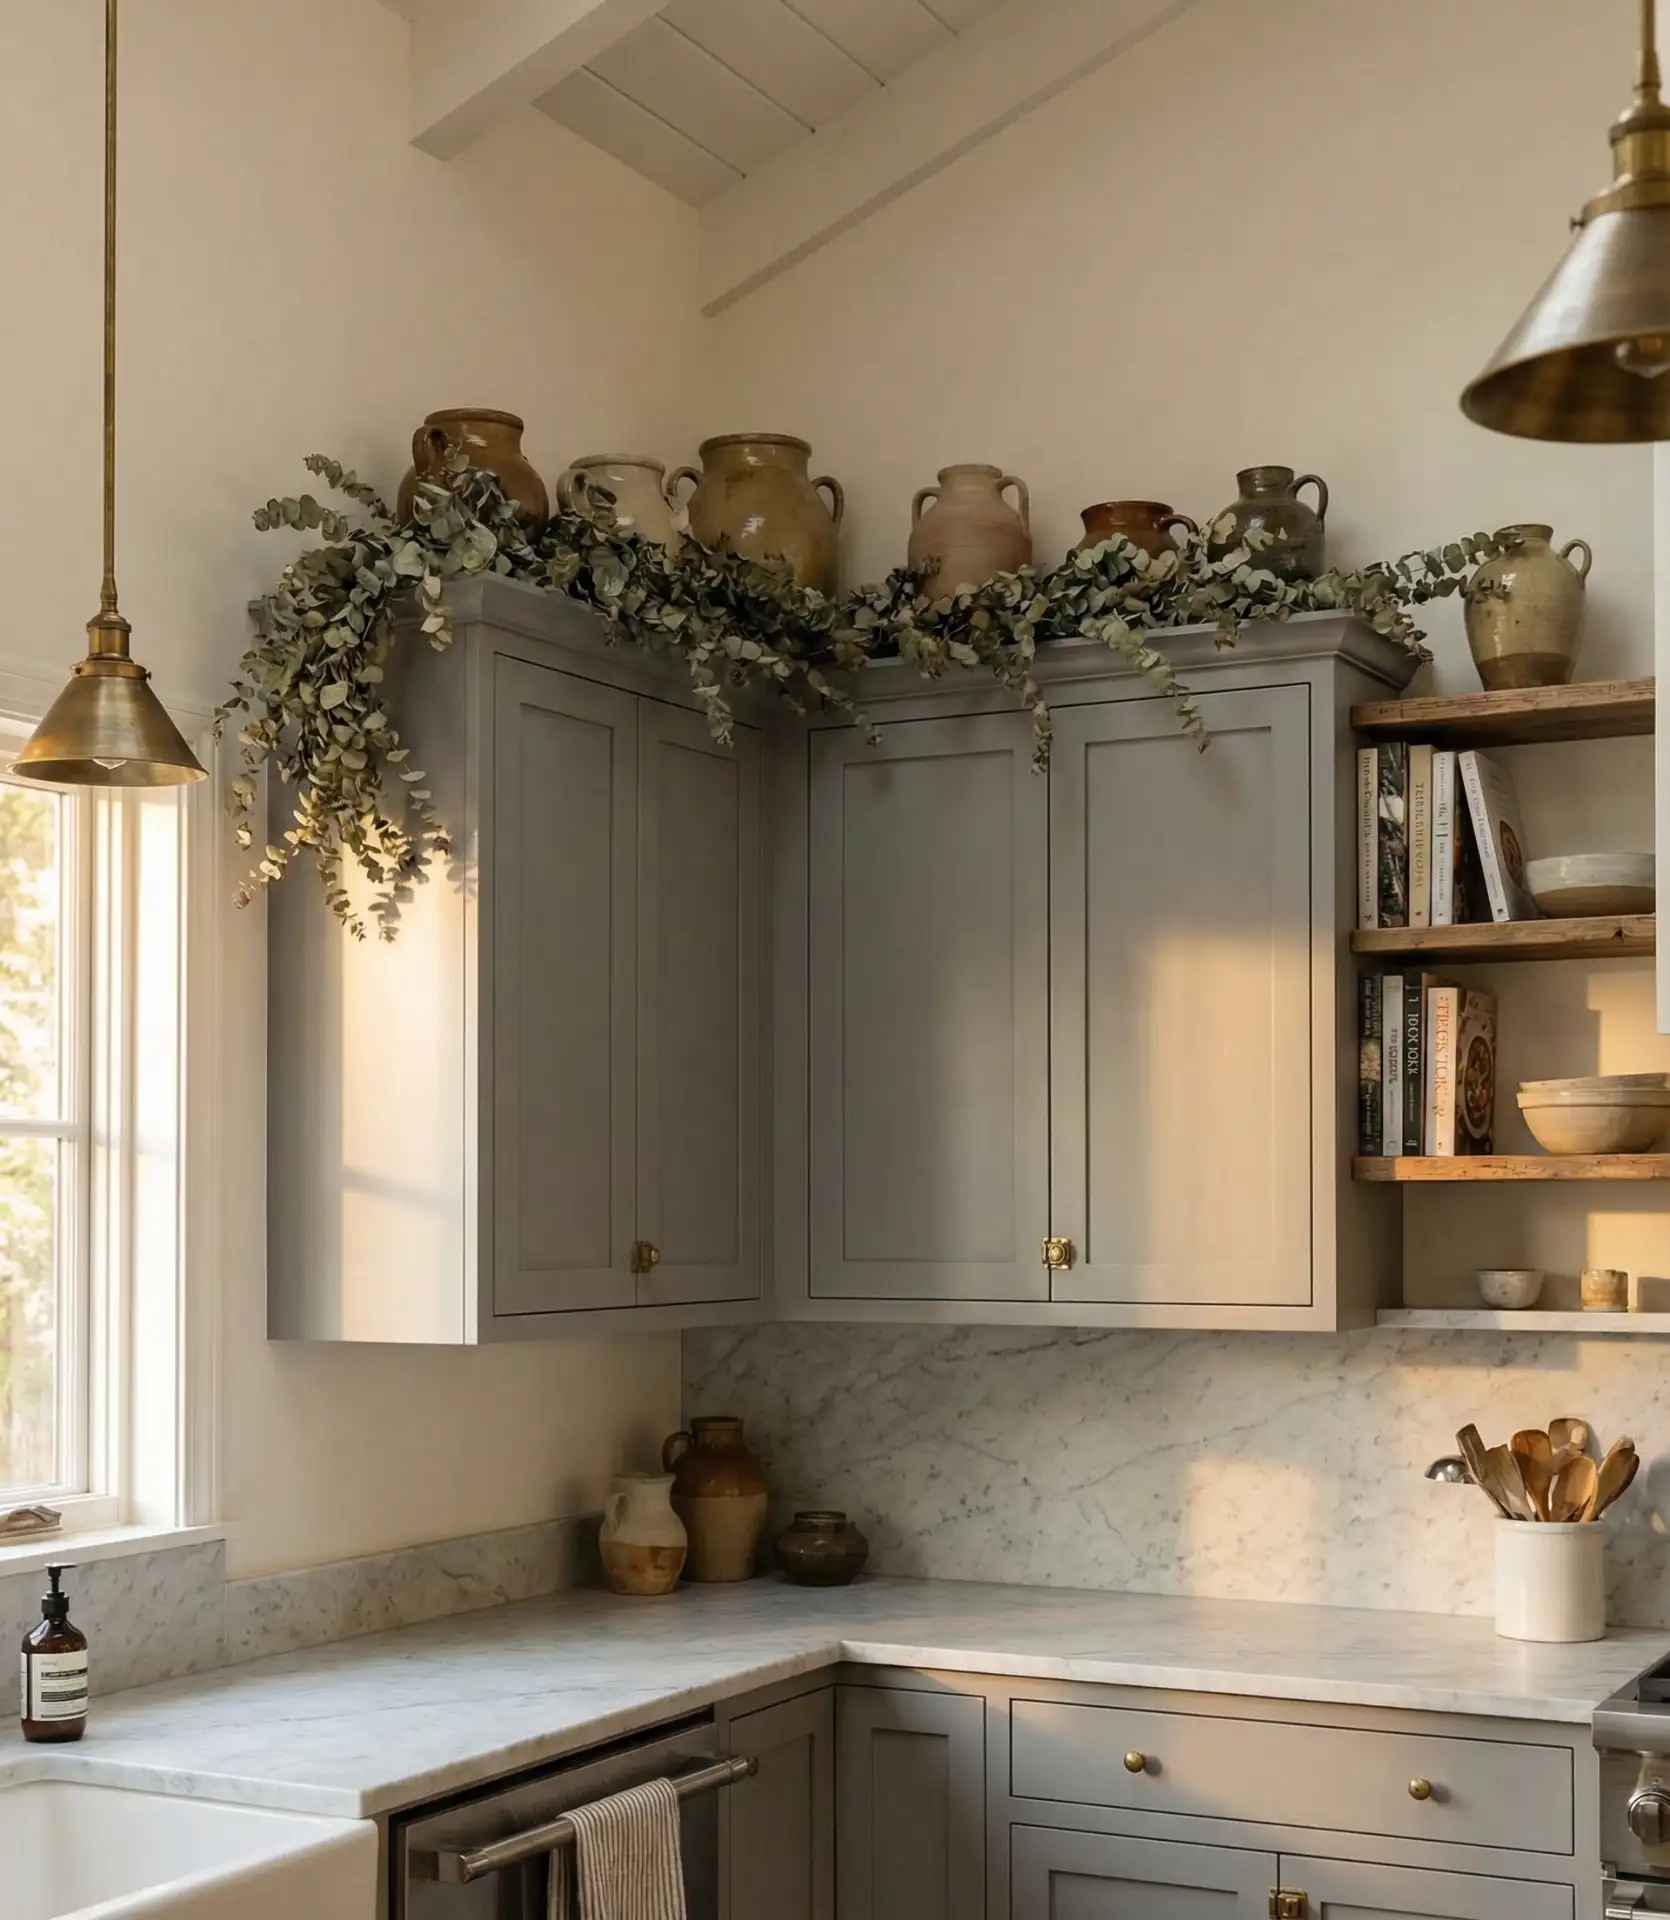
This styling trick works best in kitchens with ample natural light, as plants—real or not—need to be visible to make an impact, and shadows can make the space above cabinets look cluttered. Keep the arrangement asymmetrical rather than overly styled; a few well-placed pieces look more effortless than a crowded lineup. If you’re using real plants, be prepared to water them with a step stool or invest in varieties that tolerate neglect. And if you’re in a rental or plan to sell soon, faux greenery offers the same visual effect with zero commitment, and it’s easy to swap out seasonally or when your tastes change.
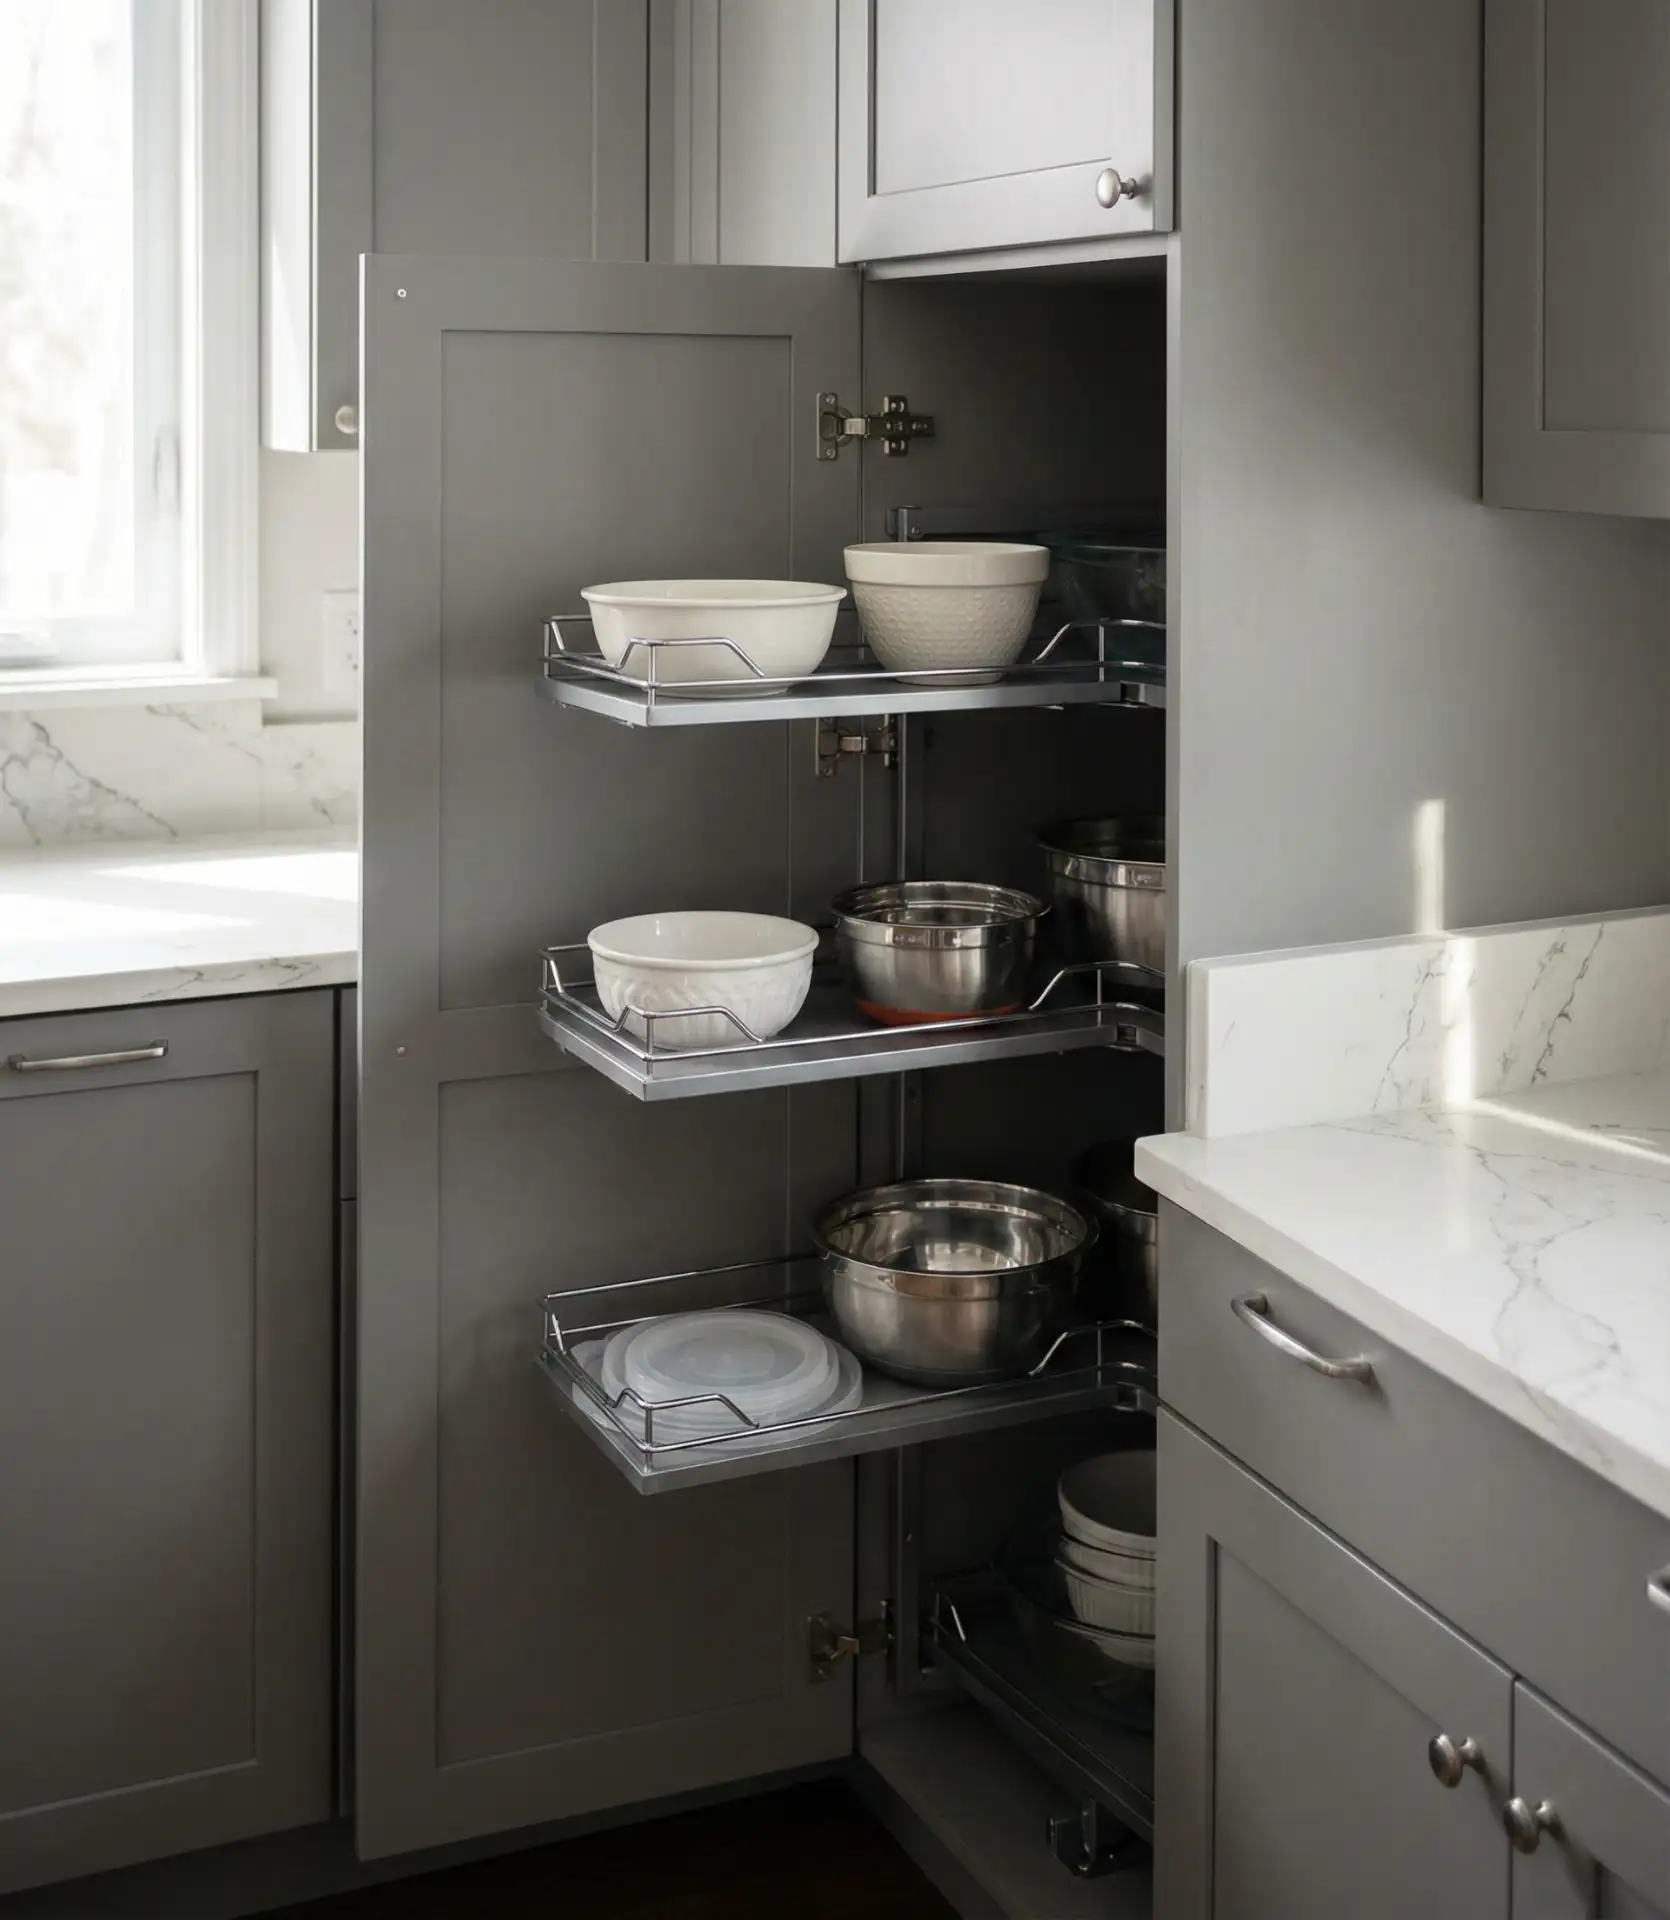
23. Inside Cabinet Organization Systems
Beautiful cabinet exteriors mean little if the inside is a chaotic jumble, so integrating organization systems—pull-out trays, dividers, pegboard inserts, and tiered racks—ensures every inch works as hard as it looks appealing. These upgrades transform generic cabinet boxes into highly functional zones tailored to your specific needs, whether that’s a spice rack that pulls out beside the stove or a vertical tray divider that keeps baking sheets from toppling. Many systems are modular and adjustable, letting you reconfigure as your storage needs evolve, and they’re available in materials ranging from budget-friendly wire to premium bamboo and acrylic. The result is a kitchen that looks polished from the outside and functions smoothly in daily use.
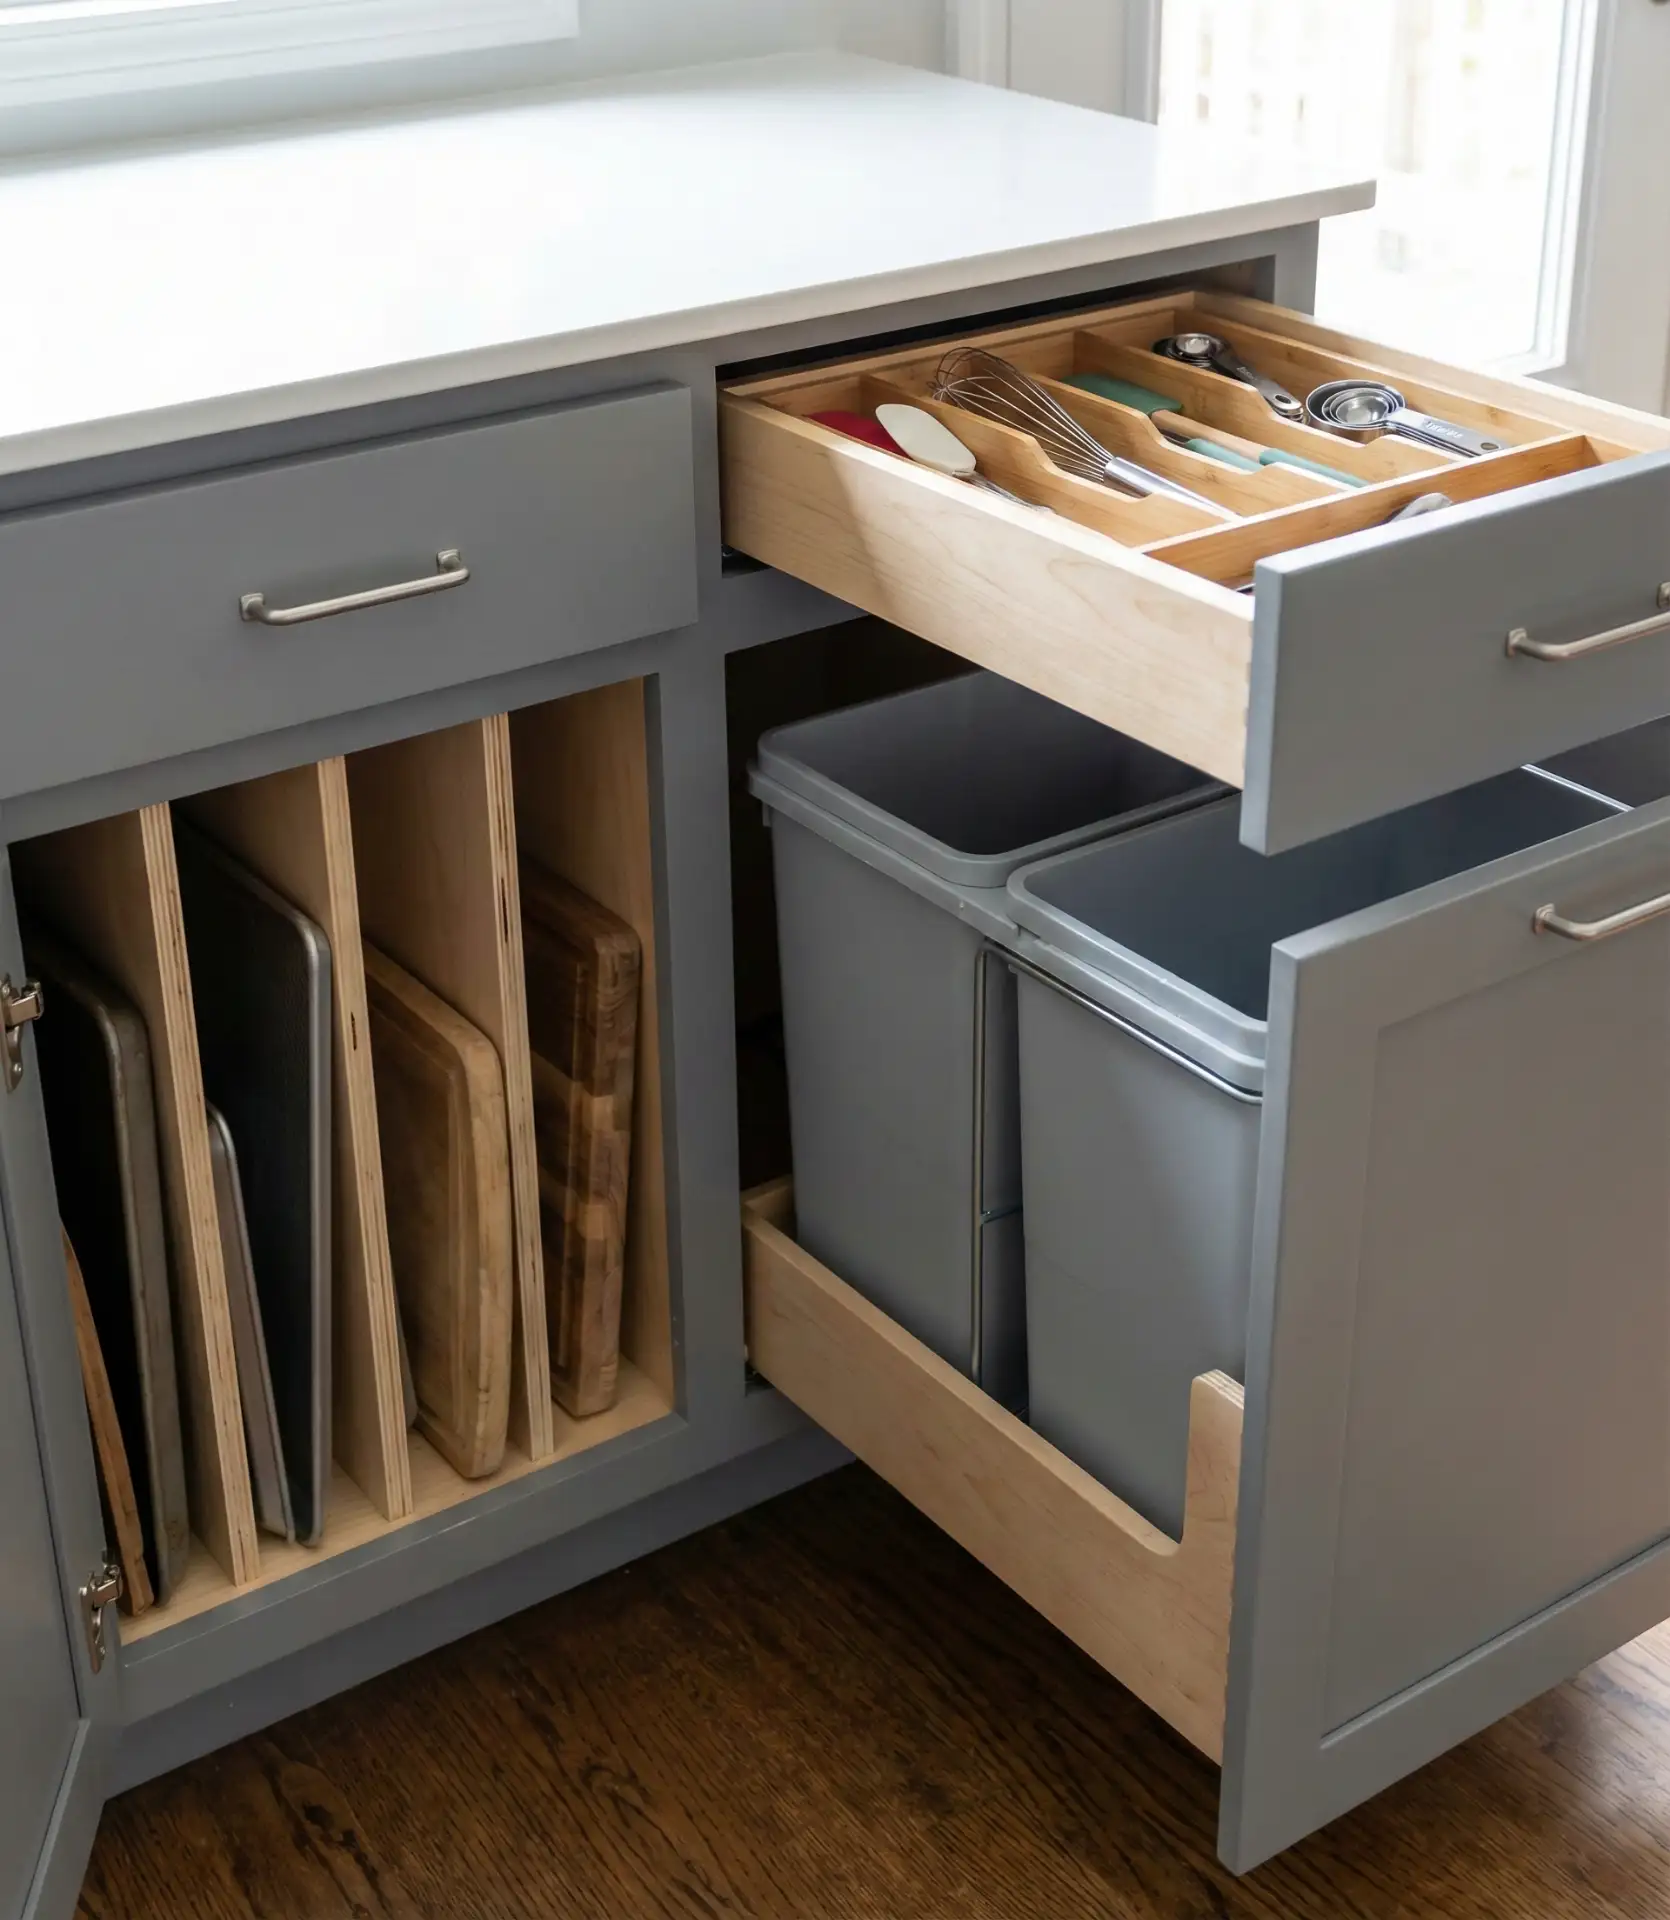
A practical insight: measure your cabinet interiors carefully before buying organizers, as even a quarter-inch miscalculation can mean a system won’t fit or slide properly. Many hardware stores and specialty retailers offer in-store consultations or online planning tools to help you design the perfect layout. Start by identifying your biggest pain points—maybe it’s a tangle of pot lids or a jumble of food storage containers—and address those first rather than trying to organize every cabinet at once. Real homeowners consistently report that even small organizational upgrades, like a pull-out spice rack or a pot-lid holder, deliver outsized satisfaction, making cooking and cleanup feel less chaotic and more enjoyable.
Your kitchen cabinets set the tone for how the entire space functions and feels, shaping everything from morning coffee routines to holiday meal prep. Whether you’re drawn to bold color statements, clever storage solutions, or the timeless appeal of natural materials, the ideas here offer starting points to spark your vision. Take your time exploring what resonates—pin favorites to your boards, share them in the comments, and start imagining which approach will make your kitchen truly yours.